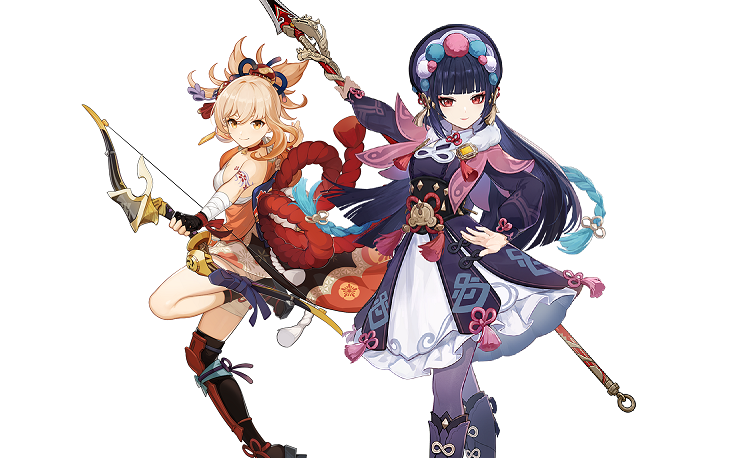
Yoimiya x Yun jin Guide | ||
Credits | |||
Yoimiya Mains Theorycrafting Team | Yun Jin Mains Theorycrafting Team | ||
Intro | ||
Amidst a Liyue renaissance, a mysterious light in the sky appears for a girl named Yoimiya in the nation of Inazuma. Enter Yun Jin, director of the acclaimed Yun-Han Opera Troupe of Liyue Harbor. Though not tied by the script of lore, their unique kits synergize harmoniously together to create a performance brilliant enough to appease the gods (*cough* Bennett *cough*).
In this guide, we hope to provide some valuable information for future owners of the duo or those currently seeking to understand why they function well together. Yun Jin enthusiasts can hopefully find a great home for her to best show off her supportive capabilities, and Yoimiya lovers will see that Yun Jin is practically a support made just for her.
Why play Yoimiya + Yun jin? | ||
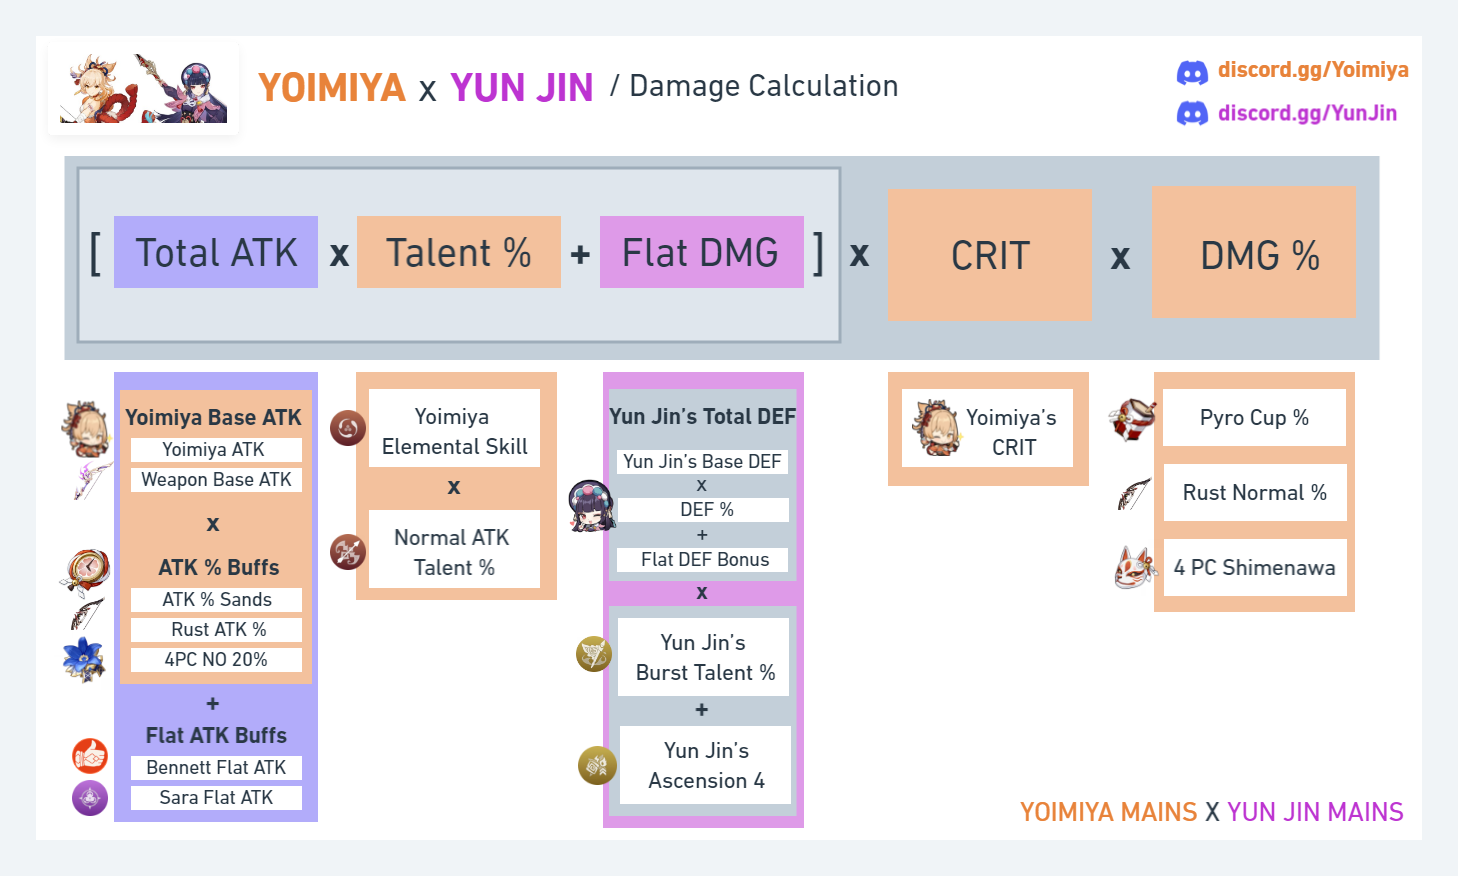
Yun Jin is a character released alongside Shenhe, both of whom boast a unique modification to the Genshin Impact damage formula. Whereas Shenhe adjusts this formula for Cryo characters, Yun Jin does so with Normal Attacks. The image above summarizes how Yun Jin’s Bonus DMG is applied towards the final damage number.
While seemingly complicated, the gist is that Yun Jin’s Bonus DMG is not related to your character’s Normal Attack scaling as well as total Attack stat, and simply multiplies itself by the rest of your character’s bonuses as well as enemy debuffs (EM, Crit Rate and Crit Damage, DMG% Bonus, Reaction DMG Bonus, and enemy RES and DEF).
Once understood, one may then think: a character with great Crit stats, DMG%, and access to supports who provide RES shred and boost other stat values while ALSO having most of their damage coming from multiple Normal Attack instances would be great for Yun Jin!
Enter Yoimiya, a character with exactly all of the above.
Aside from this fundamental synergy with Yun Jin, other benefits include:
|
Yoimiya |
Weapons |
Rankings are ordered from top to bottom | |
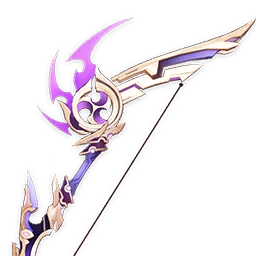
Thundering PulseThe go-to signature weapon for Yoimiya, designed and released for her banner. Best weapon for main DPS Yoimiya, no question. | |
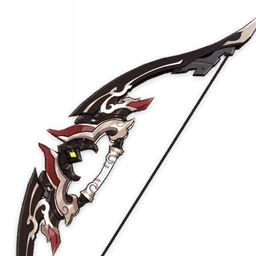
Rust R5At high refines, Rust pulls ahead of the pack with its absurd Normal Attack boosting capabilities. A great option if you cannot afford Thundering Pulse. | |
Other 5* Bow Options, RustFollowing close behind are other 5* offensive bows as well as lower refines of Rust. We don’t recommend specifically pulling for any particular option in this category if you already own a bow within it, as the differences between each bow are not significant. | |
Other 4* Bow OptionsMany other 4* offensive bow options exist that can work just fine as placeholders such as Hamayumi and Blackcliff Warbow. *Another incredibly budget friendly option is a 3-star R5 Slingshot, but we don’t recommend this due to its conditions despite having quite the favorable effect. | |


Artifacts |
Role: Main DPS Desired Substats: Crit Rate/Crit Dmg > ATK% > ER%/EM Desired Main stats: Sands: ATK% Goblet: Pyro DMG% Circlet: Crit DMG% or Crit Rate% | |
Recommended (Use These!) | |
18% ATK + Crimson WitchYoimiya’s most versatile set, allowing her rotations to be flexible while also winning out over the course of several rotations. This is our recommended set due to ease of building and versatility. | |
Shimenawa’s ReminiscenceA controversial set due to its anti-Burst functionality, it becomes stronger the more your Normal Attacks make up the damage spread. This set is considerably better when used with Yun Jin, and is recommended if Yun Jin is a constant factor in your team comp. | |
Other Options (Niche Options!) | |
Retracing BolideOddly fitting aesthetics-wise despite being available almost a year before her, this set technically wins out but has the condition of having to maintain a shield, thus restricting what comps are viable. | |
Crimson Witch of FlamesOn par with the rest of the artifact options, this set has the condition that you’re using her in a Vaporize team. | |

Constellations |
C1 | Agate Ryuukin | |
A small 4 second boost to Yoimiya’s Burst. It’ll have the best value if you consistently are able to Burst. | |
C2 | A Procession of Bonfires | |
25% Pyro DMG Bonus on any crit. A great Constellation that’s also very consistent. Often a recommended stopping point. | |
C3 | Tricker’s Flare | |
+3 Elemental Skill A weak Constellation on its own, and unfortunately since the multiplicative DMG% Bonus from Yoimiya’s Skill doesn’t apply to Yunjin’s Bonus DMG , it doesn’t offer much. | |
C4 | Pyrotechnic Professional | |
Reduces Skill CD. Sounds great on paper but a team that rotates through its supports will always do more damage, so this bonus has very little value outside of QoL. | |
C5 | A Summer Festival’s Eve | |
+3 Elemental Burst Yoimiya’s Burst is not her strong suit so naturally this Constellation offers very little. | |
C6 | Naganohara Meteor Swarm | |
A very interesting Constellation that consists of RnG bonus arrows. While this can mess up Vaporize reactions, you will still average greater DPS returns in general with this Constellation. The big thing here is that these weakened arrows do not penalize Yun Jin’s Bonus DMG, so not only are you able to hit the 30 Normal Attacks trigger quota with ease, but also fire disproportionately strong bonus arrows. |


How-to-Play |
R-R Cancel | |
On firing the final desired arrow, quickly hit Aimed shot mode twice (R) to skip the end lag and immediately begin another Normal Attack string.
| |
Dash Cancel | |
On firing the final desired arrow, quickly dash and immediately begin another Normal Attack string.
|


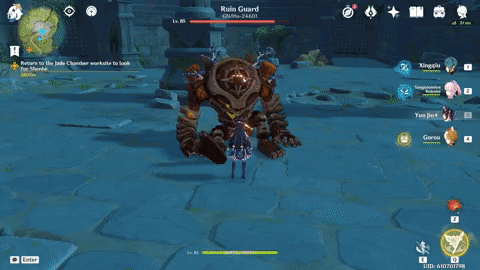
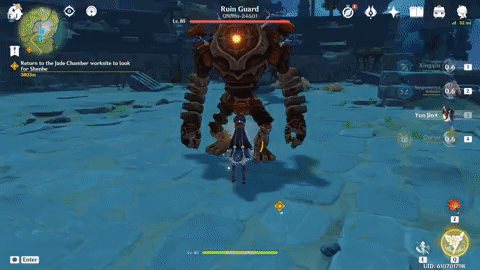
For better or worse, Yoimiya’s playstyle is not complicated. Her Burst is best used before her Skill (if using non-Shimenawa), and her Normal Attacks are essentially automated. This does not exempt Yoimiya from some cool mechanics that all bow users can take advantage of to better optimize her Normal Attack strings.
Alternatively, one can just continue to mash Normal Attack which has no margin for error but is a tad bit risky when the enemy is constantly attacking. Another important note is to Burst before any of your supports to maximize the amount of time you spend in Yoimiya’s Skill with buffs and Yun Jin’s Burst active.
Yun jin |
Weapons |
Engulfing LightningThis weapon is Yun Jin’s “best-in-slot” in a Yoimiya team. The ER that this weapon provides is so high that it can practically fulfill all the needs by itself, but the big caveat is that this weapon is highly contested. There are far better users of it than Yun Jin, since she does not utilize the bonus ATK provided by the weapon. It is recommended to consider the other weapons in this list and save your resources. | |
Favonius LanceCurrently Yun Jin’s best general-use weapon, but not recommended for Yoimiya teams. This is because Fav Lance’s value is found mostly in the clear particles its passive generates. However, in teams such as Yoimiya’s where these particles are not much of a necessity, Favonius Lance requiring Yun Jin to exchange DEF% for Crit Rate% means it can quickly fall off. | |
Other Energy Recharge PolearmsAny ER% Polearm will work on Yun Jin as a stat stick; the more ER% the weapon provides, the better, with none of the existing weapon passives in the game having much of an effect on each weapon’s relative performance. These weapons can be better or worse than Favonius depending on the situation and the team. In particular, Prototype Starglitter works as a cheap option that provides plenty of ER. | |
DeathmatchAt the time of writing this guide, this is the only DEF% increasing polearm in the game. However, even at R5, this weapon provides less stats than any of the weapons listed above. Furthermore, the DEF% is not available in single target scenarios. Not recommended unless you absolutely know what you’re doing. |


Artifacts |
Role: Buff Support Desired Substats: ER% (until necessary) = Crit Rate% (ONLY for Favonius Lance) = DEF% > Flat DEF Desired Main stats: Sands: DEF% or ER% (see the ER needs section) Goblet: DEF% Circlet: DEF% or Crit Rate% (ONLY if lacking in Crit Rate% subs for favonius) | |
Recommended (Use These!) | |
4 Husk of Opulent Dreams | |
One of Yun Jin’s best artifact sets. Receiving 54% DEF and 24% Geo DMG bonus simply by staying off-field allows her to maximize her normal attack buff, especially in Yoimiya teams. | |
Emblem + Husk of Opulent Dreams | |
This flexible artifact combination is best used for balancing DEF% and ER% substats on Yun Jin. Overall a great option, especially if mixing sets allows for better substats. The difference between this set and 4HoOD is minimal (~1% in Yoimiya’s personal damage) and better substats can result in more damage. | |
Noblesse Oblige | |
While Yun Jin can use this set pretty well, there are usually better holders of Noblesse on Yoimiya teams, allowing Yun Jin to use the other sets mentioned in this section. Otherwise, this set is equivalent to 4pc Husk in its buffing potential.. | |
Budget Options/Honorable Mentions (Try not to use!) | |
Husk of Opulent Dreams + Archaic Petra | |
Not quite as good as a full Husk set. One could use this as a placeholder. | |
Husk of Opulent Dreams + Defender’s Will | |
Seemingly a great budget option, the 4-star scaling of the Defender’s pieces are what keep this a budget option and lower potential than any other possibility. | |
Rainbow | |
Believe it or not, not every character requires set bonuses to function. Yes, the best version of Yun Jin uses set bonuses but if you’re busy working on your other characters such as Yoimiya, there’s no harm in giving Yun Jin some spare 5-star artifacts mix and matched together. | |
Archaic Petra | |
Though incredibly powerful and can result as the best in slot when fully utilized, managing the buff is a minigame in itself and is not easy in many scenarios, and said buff only lasts 10s. Use this only if you know what you are doing and have experience, since this could still be a viable option. | |

A very common misconception about Yun Jin is the idea that she needs to build HP%. This is FALSE. Though Yun Jin does grant a shield when using her Skill, it is only temporary as it lasts only as long as you are able to hold her Skill (works exactly like Beidou's Skill shield). This means that granting Yun Jin HP% will not improve her damage output in any sort of capacity, nor will it even have a marginal effect on her very ephemeral shielding capabilities. -Yun Jin Mains FAQ |
Energy recharge |
Energy Recharge is difficult to calculate as it is dependent on many factors such as teammates, situations, and equipped weapons. A great example would be equipping Favonius on Yun Jin, which significantly changes ER thresholds due to the clear particles from its passive.
Yoimiya Yun Jin is a very strong comp for single target situations while being easy to play against bosses, and since Boss type enemies generally drop low quantities of clear particles, we must assume a “worst case scenario” for Yun Jin, which makes her ER requirements far greater than normal.
Fortunately Yun Jin’s ascension stat is ER% and running an ER weapon makes up a good amount of ER%. Favonius has a value of around 20-30% ER in the build (based on clear particles), but requires around 40% crit rate for its passive to be consistent.
The ER total in a general scenario can be calculated by the following table.
Assumes a general Yoimiya - Yun Jin comp. In “()”, we will see the ER needed excluding the weapon (calculated by using Starglitter) and a Lv. 80/90 Yun Jin.
ER% needs for Clear Particles caught | |
2 | 334% (160%) |
3 | 322% (140%) |
4 | 290% (110%) |
5 | 275% (95%) |
6 | 260% (80%) [Most common] |
7 | 256% (75%) |
8 | 240% (60%) |
The ER threshold for this table is a bit on the higher hands, it is suggested to calculate the ER needs for each situation if you are able to.
As you can see, equipping an ER weapon + an ER sands is generally enough for a level 80/90 Yun Jin to reach said ER threshold with either a few (2-3) ER substat rolls, or equipping the 2-pc Emblem set bonus.
Constellations |
C1 - Thespian Gallop | |
-18% CD Elemental Skill Not the most relevant Constellation in Yoimiya comps as it typically doesn’t change the rotation. It can, however allow for lower ER requirements in other teams. | |
C2 - Myriad Mise-En-Scene | |
Party Normal Attack DMG +15% for 12s after Burst A great boost to many Yoimiya comps, as this buff aligns perfectly with Yun Jin’s Burst. With or without an ATK% buff in team, this Constellation sits around a 5% buff for Yoi damage. Definitely the best pick up. | |
C3 - Seafaring General | |
+3 Elemental Burst A great buff as her Burst is the bulk of her supportive capabilities, with great scaling. A solid upgrade for Yoimiya, and the best stopping point at low Constellation. | |
C4 - Flower and a Fighter | |
On Crystallize, +20% DEF for 12s Since this Constellation activates on triggering Crystallize and doesn’t require picking up the shard, it is a small yet consistent DEF increase. The gain of this Constellation is small enough that it should not be forced, but overall it is a decent buff. | |
C5 - Famed Throughout the Land | |
+3 Elemental Skill A boost to Yun Jin’s personal damage, which in a Yoimiya team, translates to an essentially nonexistent gain. | |
C6 - Decorous Harmony | |
+12% Normal Attack Speed during Burst Yun Jin’s best Constellation for Yoimiya due to how well Yoimiya utilizes it, with significant damage gains. |


How-to-Play |
EQ Combo | E -> QThis is Yun Jin’s go-to combo as it is very simple and straightforward:
|
Charge Level 1 ReleaseCharge Level 2 Release | Skill Charge VariationsLike many units that can charge up their skills, Yun Jin can release her skill at the exact moment she reaches the specific charge. You may want to do this in certain situations to gain more energy particles. |
Perfect ParryJust like Beidou, she can perform a parry with her elemental skill if you activate it at the exact moment when an enemy is about to hit you. |


Overall, Yun Jin is a straightforward character just like Yoimiya. Her only tech is knowing the right variation of her Elemental Skill to use in different situations.
One important thing to note is to immediately switch to Yoimiya after activating Yun Jin’s Burst and collecting energy. The only exception is if you have Viridescent Venerer debuff on your team, in which case you would Yun Jin > Anemo > Yoimiya. Their durations line up well with each other when their skills are used consecutively.
Shimenawa - Favonius | ||
TL;DR: Favonius on Yun Jin is much more important if you choose to use Yoimiya Burst every rotation, and not so much if you don’t. Yoimiya using Shimenawa’s Reminiscence is an example where you might skip her Burst every other rotation.
Shimenawa has a glaring problem in Yoimiya team comps, especially if using her BiS, the Thundering Pulse. This is due to the fact that Yoimiya Burst still has a big importance in her overall damage and gains, yet Shimenawa works against its best form of usage as a rotation opener (The Shimenawa Conflict).
But at the same time in Yoimiya - Yun Jin team comps, there are less gains in using Yoimiya’s Burst, this results in Shimenawa gains being much higher with Yun Jin.
Since the Burst makes the rotation 2s slower (assuming the potential 18s base rotation of Yoimiya), it is generally either skipped or used every other rotation.
This highly depends on the team and it creates a bit of duality with Favonius Lance Yun Jin, whose extra clear particles may not be needed if Yoimiya’s Burst is being skipped frequently.
For example, in a comp where the rotation is slower than 18s (Xingqiu in the comp being an example with a 20s Burst CD), the Burst is preferable to be used since it is also used as a source of Pyro aura if a Viridescent user is in party to apply a Pyro RES debuff. In these situations using Favonius can make the ER needs for Yoimiya lower, and overall makes the 15 flat Energy needs of Shimenawa less daunting.
Meanwhile in a comp where there is a faster rotation and it is either not needed or it is easier to Swirl Pyro (an example is having Kazuha in a mono-Pyro comp), dropping Yoimiya Burst for a faster rotation is suggested. Since Prototype Starglitter on Yun Jin results in more damage, we can drop Crit Rate% artifacts in favor of more DEF% or ER with not much difficulty. This is in fact even suggested if the player is in the super late game or aiming to “speedrun”.
Depending on the situation we can maximize the damage by fixing a few artifacts and weapon, which is not very difficult. As said, Favonius is rarely the BiS on Yun Jin in Yoimiya parties, and much of this is due to the Shimenawa Conflict. If you are not running Shimenawa, dropping Favonius Lance can lead to greater overall damage
Team Comps | ||
Listed below are some sample team compositions you can run with Yoimiya and Yun Jin in no particular order.
Yoimiya Hypercarry | |||
Yoimiya | Yun Jin | Support | Support |
These teams focus on buffing Yoimiya and do not usually run Sub DPS units, choosing instead to focus on increasing Yoimiya’s personal DMG output. These can overlap with Vaporize teams, but reactions are typically not the focus. Some Support options are outlined below. | |||
Bennett | The go-to support for hypercarries, Bennett buffs Yoimiya’s damage by a large amount, however, he is a highly contested unit that your other team may want. Yun Jin and Bennett buffs provide different things, making them have various pros and cons. | ||
Kazuha | Kazuha is a VV and buffer unit, whilst also providing his own personal damage. His Pyro DMG% Bonus and the VV benefits both Yoimiya and Yun Jin, making him a strong pick for Yoimiya teams, but is another unit highly valued and contested by many teams. | ||
Jean | A versatile healer with Sub DPS capabilities, Jean can also provide VV to the team whilst keeping the team alive. She is recommended if you do not have VV on the team already and you need a healer. If she is C2 the Attack Speed buff is overall as much of a gain as Kazuha. | ||
Zhongli | A strong shield that also provides resistance shred, Zhongli is an easily slotted in team member in Yoimiya Yun Jin comps, as he will also provide Geo resonance and resistance shred in situations where using VV is difficult. While not providing much personal damage, his shield increases the ease of use for many players that want more comfort having already reached the DPS threshold. | ||
Xingqiu | Xingqiu can apply Hydro for Yoimiya to Vaporize off of while providing personal damage. It is recommended to run a shielder with him so as to ensure Yoimiya Vaporizes the right attacks.. See Vaporize Team section for more information on why. | ||
Diona | Diona provides a shield and healing, and at C6 also provides an EM bonus within her healing field. However, she does not do much more than this and her buffing capabilities can prove lacking, so she is best off in the support/healer slot. | ||


Example:
Monopyro Bennett - Yun Jin | |||
Yoimiya | Yun Jin | Bennett | Kazuha |
The above team is of the combination highlighted previously. Potentially having one of the highest ST damage outputs in the game with a large ease of use and adaptability, especially vs bosses where this comp shines. This team is comfortable to play, but it's not completely brain dead due to the lack of shielding, which requires you to position yourself correctly or be good at dodging. Bennett or Kazuha are highly contested units, which is the main con of this team. | |||


Sub DPS + Yun Jin | |||
Yoimiya | Yun Jin | Sub DPS | Sub DPS / Support |
This team composition is a mixed bag, and includes buffs for Yoimiya whilst also including a strong off-field damage dealer. The final unit in the team is usually a healer or shielder, preferably one who can benefit Yoimiya and the Sub DPS unit. Examples of this include Bennett, Jean and Zhongli. These teams might prefer to have units of different elements to work with Yun Jin's A4, but should not go out of their way to lose dmg to enforce this. Some Sub DPS options are outlined below. | |||
Albedo | Albedo is very easy to slot into Yoimiya Yun Jin comps. With a new artifact set and weapon, his damage capabilities have greatly increased and he brings Geo resonance along with him. Albedo is a strong Sub DPS with very low field time and therefore a fast rotation, and allows the final slot to be a support for Yoimiya. | ||
Fischl | Fischl is strong in single target, but often overshadowed by Beidou and relegated mainly to being a battery for Beidou. Removing Beidou for a support/buffer unit and keeping Fischl allows for Yoimiya and Fischl to each do more damage than before. Though not having the best synergy with Yun Jin, due to Yun Jin being unable to provide an ATK buff to snapshot onto Oz, she is still a very cheap and strong option. | ||
Beidou | Beidou is a very strong multi-target off-field DPS, but often has Energy issues without a second Electro. She can cover for Yoimiya in multi-target, but her damage suffers greatly in single target. She is not recommended with Yun Jin, since both cover 2 different niches, and it is better to run either 1 of the 2, not both. Beidou would also benefit more from Bennett’s ATK buff than Yun Jin. It is highly recommended to run Beidou alongside Fischl, as Fischl can provide Electro particles for Beidou whilst covering her single-target weakness. | ||
Xiangling + Bennett | This team is often called mono-pyro, and relies on Xiangling and Yoimiya’s reactionless Pyro damage. Bennett is almost a must here, as Xiangling has severe Energy issues even with Yoimiya. | ||
Examples:
Double Geo | |||
Yoimiya | Yun Jin | Geo Flex | Fischl |
A team that utilizes Geo resonance to boost damage output. Zhongli is the safer option with his big shield that can provide a good survivability, but depending on the situation other options can be used too. This comp is also cheap even if not having a huge synergy with the last member, making this a solid option. | |||


Rainbow | |||
Yoimiya | Yun Jin | Xingqiu | Fischl |
As included before this is an attempt to run a very strong rainbow team (four different elements) for the maximization of YJ A4. This team is overall very strong in single target for the amount of investment required. Random reactions will occur during the combo, but we are not focusing on them, they are more “extra flavors” added to the recipe. Due to the lack of shield or a healer - only having XQ damage mitigation, this team is neither brain dead nor difficult to play | |||

Vaporize | |||
Yoimiya | Yun Jin | Xingqiu | Support/Buffer |
When paired with Yun Jin, Yoimiya will do more damage thanwithout Vaporizing her Normal Attacks, however,, Yoimiya wants even more to finish her full attack string without interruption to Vaporize the largest hits. This usually means running a shield in the fourth slot for the ease of use, which can prove a problem for people wanting to run Bennett, although he is always an option. Shield options include Zhongli, Thoma, and Diona. Overall, Yoimiya Vaporize can be difficult to pull off without a relatively specific set up, and thus is not recommended for everyone. | |||