FAQs - Digital Learning Hub
Useful Links
Contents
How do I add courses and content to an existing group?
How do I view student progress?
How do I edit my account details?
How do I reset a password for a user?
How do I add the correct courses to my group?
How do I add a student to a group?
How do I add a student independently from a group?
How do I add courses and content to an existing group?
How do I edit my account details?
How do I reset a password for a user?
How do I change a student’s email address?
Journey 2 Basic Skills (A0/A1)
Who is Journey 2 Basic Skills for?
How does the online course Journey 2 Basic Skills work?
Can A1 students go straight to that section of the course?
Can I see an overview of Journey 2 English course content?
I am a previous customer coming from Journey 2 English, how do things change now I’ve switched to the Hub?
I want to give students a trial before they commit to the learning hours, how do I go about this?
Sharing the Digital Learning Hub screen as part of a lesson plan for your students
How do I play audio whilst sharing my screen in a Zoom call?
How do I play audio whilst sharing my screen in Microsoft Teams?
How do I play audio whilst sharing my screen in a Google Meeting?
Adding a web app shortcut to a smartphone
How to add a website bookmark (shortcut) to my home screen on an iPhone or iPad?
How to add a website bookmark (shortcut) to my home screen on an android device?
How do I create a new group chat?
How do I create a new personal chat?
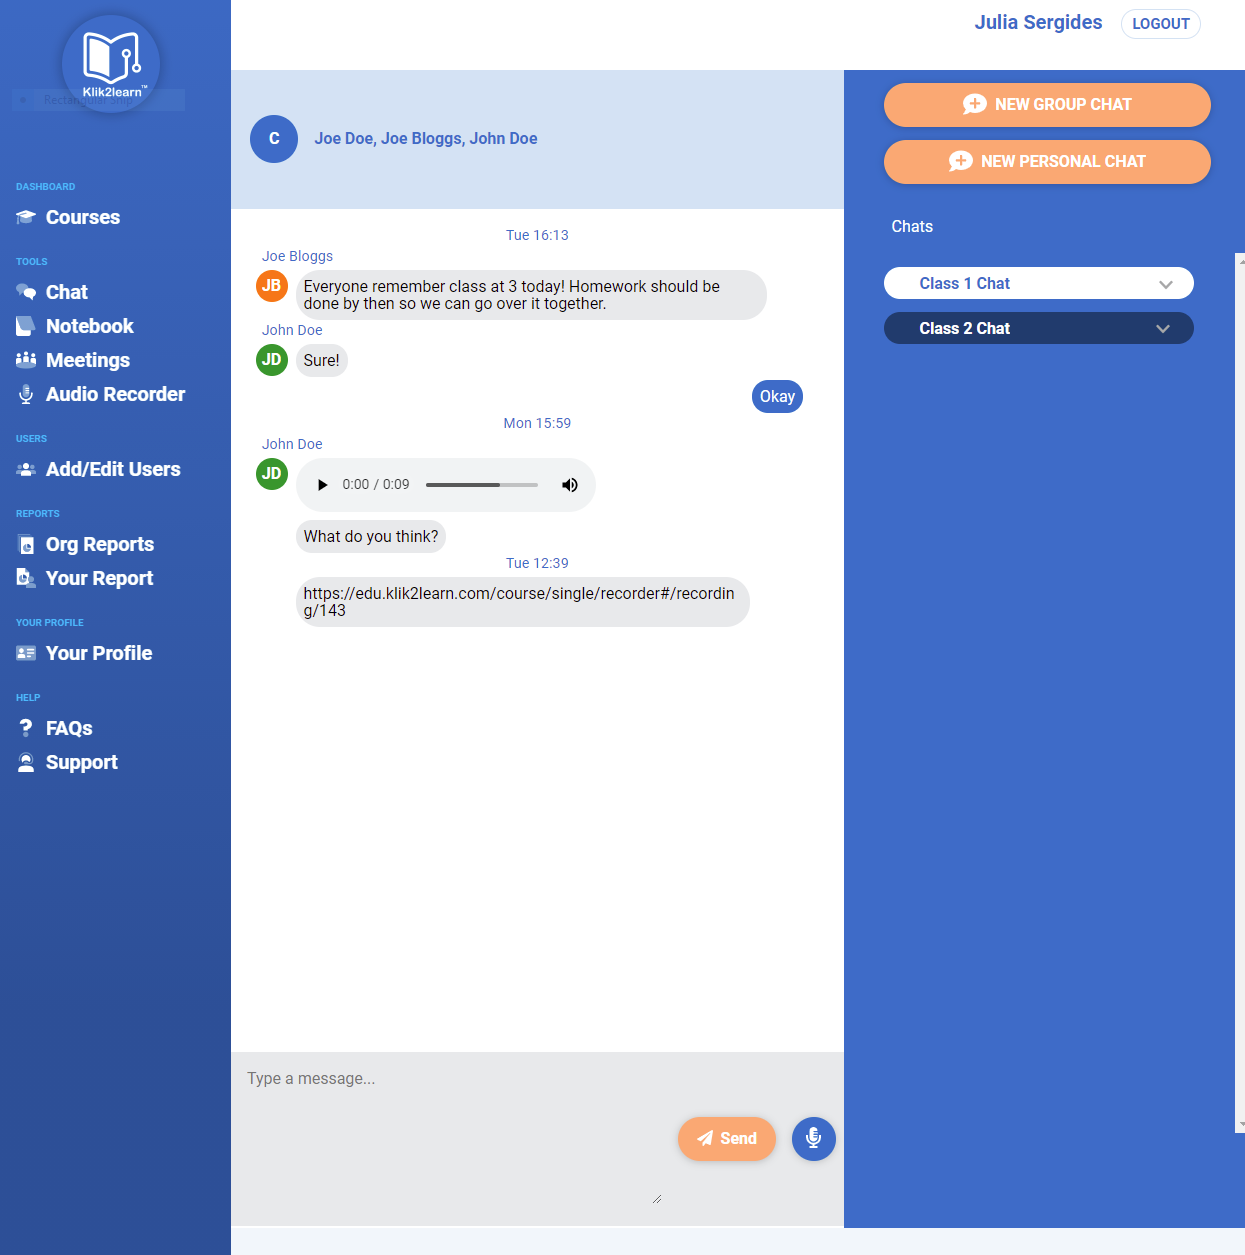
How do I send text and audio messages?
What is the Audio Recorder tool?
How do I record and save audio?
How do I share audio recordings?
How do I listen to student’s recordings?
How do I leave comments on student's recordings?
How do I create and save a new note?
How do I access and edit previous notes?
How do I leave a comment on a student’s note?
How do I create a new meeting?
How do I send text and audio messages?
New to Klik2learn?
Klik2learn works with further education colleges, private organisations, local governmental organisations, language schools and training centres to support tutors in delivering online and blended learning courses.
Learn about Klik2learn’s Digital Learning Hub and courses below.
- Read the following presentation for an overview:
Introducing the Digital Learning Hub - Learn more about ESOL delivery in the community:
Glasgow Life Case Study - ESOL Remote Learning Solution.pdf - Review structure, syllabus and recommended duration for each course:
- Beginner - Beginner Course - Journey 2 Basic Skills
- Intermediate - Intermediate Course - Journey 2 English
- OET Course - Occupational English Test (OET) Course
- English Skills Test - English Skills Test Overview
- Blended Learning Tools - Blended Learning Tools
Next steps:
I want to request a quote for licences
- That’s great. Tell us how many licences you need in this form?
I want a short demonstration and free trial?
- Request a free 7-day trial of the Digital Learning Hub here.
- Receive your welcome email.
I want to speak to a customer advisor?
- Book your 1-2-1 call for a quick tour of the platform.
- Prepare a list of your questions for your 1-2-1 call and send to info@klik2learn.com
Account Set Up
Access roles by account type
Each organisation has a moderator who can create tutors and select courses for their organisation. Once tutor accounts are created, tutors can create their own class groups and student users. Access details (username and password) can be sent via email to each type of user directly from the system during setup.
The table below highlights access roles by account type.
Customer | |||
Billing Information | Moderator | Tutor | Student |
View & Amend | ✔ | ||
Add Users | |||
Add, Edit & Delete Organisation | |||
Add, Edit & Delete Tutors | ✔ | ||
Add, Edit & Delete Groups | ✔ | ✔ | |
Add, Edit & Delete Users | ✔ | ✔ | |
Select & Install Courses | |||
Add & Install Organisational Courses | ✔ | ||
Add & Install Group Courses | ✔ | ✔ | |
Add & Install Student Courses | ✔ | ✔ | |
Take Course | |||
Progress & Complete Course | ✔ | ✔ | ✔ |
Reporting | |||
Organisation Reports | ✔ | ||
Group Reports | ✔ | ✔ | |
User Reports | ✔ | ✔ | |
View Personal Progress Dashboard | ✔ | ✔ | ✔ |
Moderator
I am a moderator.
As a moderator, I can:
- Create, edit and delete tutor and student accounts.
- Select the correct courses and contents for my organisation.
- Create, edit and delete groups.
How do I login?
Step 1. Access the Digital Learning Hub by entering edu.klik2learn.com into your browser. |
Step 2. Login using the email address and password sent to you by email. If you can’t see it, check in your junk folder for an email from noreply@klik2learn.com. |


How do I add a tutor?
When you create a tutor account you can automatically send your tutors an email with their user account login details via the system. Tutors are then able to create groups (classes) and add student users to each class group. Tutors can create student accounts, assign to groups and automatically provide student users with access to their account via email.
Step 1. Click on Add/Edit Users in the left hand navigation menu. |
Step 2. Scroll down past the charts to see all Users in a table. |
Step 3. Click on Add.
|
Step 4. View the user add/edit popup form. . |
Step 5. Add new user details in the pop up form.
Important: Tutors will only receive their access details if you tick the box and click ‘Save’. |


How do I create a group?
You may decide to create groups at the moderator level or ask each tutor to set up their own group.
When you create a group account you can set the default courses and content for each of your groups (classes). This will help save time when it comes to selecting courses for each individual student account.
Step 1. Click on Add/Edit Users in the left hand navigation menu. |
Step 2. Scroll down past the charts to see Groups in a table. Step 3. Click on Add if you are adding a new group or class. |
Step 4. View the Group pop up form. Step 5.
|


How many groups can I create?
You can create as many groups as you deem necessary. You won’t be charged by the number of groups you have, only the number of accounts you have under your organisation.
Groups are simply a way to make it easier for you to keep track of students and tutors, and assign different courses to different users depending on their stage of learning.
Groups can be added and removed without affecting the users in them, and users can be moved between groups if needed.
How do I add courses and content to an existing group?
You may decide to add or remove content from an already existing group based on the group’s progression.
Step 1.
Navigate to the Groups table and locate the group you wish to add to.

Step 2.
Click the edit icon on the far right of the row

Step 3.
Notice the popup menu is similar to when we created the group initially. You’ll see the already added courses are highlighted, as well as the courses that are available to you.

Click on the course you wish to add so that it appears highlighted.

Step 4.
Click the exit button in the top right corner of the popup to confirm the addition.

You have now successfully added new content.

Tip: If you hit Save changes instead of the closing button any previously selected courses will be removed, and the newly added course will be the only one there. If that happens, don’t panic! You can hold down the Ctrl button and select the ones you had previously, just remember to exit using the close button to ensure it doesn’t happen again.
You can also use the Ctrl+Click to highlight and add multiple courses in one go!
How do I view student progress?
Step 1. Click on Add/Edit Users in the left hand navigation menu. |

Step 2.
- Scroll down to users.
- Use the search bar to find a user.
- Click on the view button to the right of the edit symbol.

Step 3.
You can then view the student’s progress with each of the courses you have assigned to them.

How do I edit my account details?
Any personal information associated with your account can be changed and updated at any time.
Step 1.
Click on Account in the left hand menu

Step 2.
Change any fields that need to be changed and click the Update button.


Note: If the updated name doesn’t appear in the welcome screen or the tag in the corner, you may need to log out then back in for the change to take effect.
How do I reset a password for a user?
Step 1.
- Click on ‘Add/Edit User’ in the left hand menu.
- Scroll down to users.
- Use the search bar to find a user.
- Click on the edit button to the right of the view symbol.

Step 2.
- When the user popup form appears create a new password.
- Set a password length of 7 characters or more.
- Tip: Create a new password using a tool like stronger password generator: https://strongpasswordgenerator.com/

Step 3.
- Check the create new password and email user box.
- Click the save button to update the user password and send it to the user.
Tutor
I am a tutor.
As a tutor, I can:
- Create, edit and delete student accounts.
- Create groups for my groups of students (classes).
- Select the correct courses for groups.
How do I login?
Step 1. Access the Digital Learning Hub by entering edu.klik2learn.com into your browser. |
Step 2. Login using the email address and password sent to you by email. If you can’t see it, check in your junk folder for an email from noreply@klik2learn.com. |
How do I create a group?
Your organisation may decide to set groups at the moderator level or ask each tutor to set up their own group.
When you create a group account you can set the default courses and content for each of your groups (classes). This will help save time as you won’t have to select courses for each individual student account.
Step 1. Click on Add/Edit Users in the left hand navigation menu. |
Step 2. Scroll down past the charts to see all Groups in a table. Step 3. Click on Add if you are adding a new group or class. |
Step 4. View the Group pop up form. Step 5.
How do I add the correct courses to my group?The courses are optional and may have been selected at an organisational level by your moderator. If you don't see a course, in the Default Courses field, please ask your moderator to select it for you. |


How do I add a student to a group?
When you set up a new student user, you can automatically send your student an email with their user account login details via the system.
Step 1. Click on Add/Edit Users in the left hand navigation menu. Step 2. Scroll down to ‘Users’. It is underneath ‘Groups’ Click on ‘add’ user. |
Step 3.
Important: Students will only receive their access details if you tick the box and click Save. |


How do I add a student independently from a group?
Follow the steps in How do I add a student to a group until you come to adding a group in step 4, then:
- Leave the ‘Organisational Group’ box empty.
- In the Courses field, select the correct courses for that individual student user.
How do I add courses and content to an existing group?
You may decide to add or remove content from an already existing group based on the group’s progression.
Step 1.
Navigate to the Groups table and locate the group you wish to add to.
Step 2.
Click the edit icon on the far right of the row

Step 3.
Notice the popup menu is similar to when we created the group initially. You’ll see the already added courses are highlighted, as well as the courses that are available to you.
Click on the course you wish to add so that it appears highlighted.
Step 4.
Click the exit button in the top right corner of the popup to confirm the addition.

You have now successfully added new content.
Tip: If you hit Save changes instead of the closing button any previously selected courses will be removed, and the newly added course will be the only one there. If that happens, don’t panic! You can hold down the Ctrl button and select the ones you had previously, just remember to exit using the close button to ensure it doesn’t happen again.
You can also use the Ctrl+Click to highlight and add multiple courses in one go!
How do I edit my account details?
Any personal information associated with your account can be changed and updated at any time.
Step 1.
Click on Account in the left hand menu

Step 2.
Change any fields that need to be changed and click the Update button.

Note: If the updated name doesn’t appear in the welcome screen or the tag in the corner, you may need to log out then back in for the change to take effect.
How do I reset a password for a user?
Step 1.
- Click on ‘Add/Edit User’ in the left hand menu.
- Scroll down to users.
- Use the search bar to find a user.
- Click on the edit button to the right of the view symbol.
Step 2.
- When the user popup form appears create a new password.
- Create a new password using a tool like password generator: https://strongpasswordgenerator.com/
A password length of 7 is appropriate.
Step 3.
- Check the create new password and email user box.
- Click the save button to update the user password and send it to the user.
How do I change a student’s email address?
Journey 2 English Students
Changing email addresses may impact the tracking of your student’s course progress on Journey 2 English.
If your student is enrolled in Journey 2 English (Intermediate) then request a user email change by emailing julia@klik2learn.com with the details.
Email us with the name of your organisation in the subject line, e.g. Super College - User Email Change Request
In the body of your email please include;
- Name of organisation
- User’s old email address
- User’s new email address they want to change it to
Journey 2 Basic Skills Students
You can change the email address of Journey 2 Basic Skills students/users directly using the Add/Edit button on the Digital Learning Hub.
- Click on ‘Add/Edit User’ in the left hand menu.
- Scroll down to users.
- Use the search bar to find a user.
- Click on the edit button to the right of the view symbol.
- Change the email address in the form.
Please inform/ email the user (student or tutor) that you have changed their email address and they can now access the system.
Student
Journey 2 Basic Skills (A0/A1)
Who is Journey 2 Basic Skills for?
Pre-beginner learners of the English language.
Journey 2 Basic Skills tackles the challenge of teaching non-native speakers who have no prior knowledge of English and enables them to function at an elementary level - A1 on the CEFR framework.
How does the online course Journey 2 Basic Skills work?
Your students are taken on a journey round the English speaking world. They will experience the sights and sounds of other countries where English is spoken. Listen to international as well as British accents.
Students collect coins to buy the items they need for their suitcase. Once they take off, they can spend their money touring the highlights of each country.
Can A1 students go straight to that section of the course?
Yes.
At the start, learners with some prior knowledge are automatically routed to the A1 level.
There is an activity right at the beginning which scores students on their knowledge of English sounds and letters. If they have the ability to complete a short form with personal information, they automatically bypass the A0 section and go straight to A1( Australia.)

The screenshot below shows an example activity right at the beginning of the course.

Journey 2 English (B1/B2)
A more comprehensive guide to Journey 2 English can be found inside the course at journey2english.com. The most frequently asked questions are answered below.
Who is Journey 2 English for?
Intermediate learners of the English language.
Journey 2 English is for intermediate learners. The course is aligned to level B1/B2 of the CEFR framework. It provides English tutors with an interactive course and tools to deliver the highest standard of blended learning.
Can I see an overview of Journey 2 English course content?
Yes.
When you login to Journey2English.com you can access the overview here. It details the:
- Grammar points
- Topics
- Modules
As a tutor you can jump to specific activities within each module.

I am a previous customer coming from Journey 2 English, how do things change now I’ve switched to the Hub?
The Hub is a resource for you and your students and tutors to make it easier to keep track of their progress and interact with each other. It also gives you access to additional resources, as well as the standard English learning courses Journey 2 English and Journey 2 Basic Skills.
Your existing user accounts should be transferred over from Journey 2 English to the Hub, and you will be able to log in to the Hub with that same login you used before, as will all other users associated with your organisation.
From now on, you should encourage tutors and students to access Journey 2 English via the Hub, and continue the course through there.
Adding new users no longer requires the previously issued codes as before, now you are simply invoiced at the end of the month according to the amount of users you have in your organisation.
You add new users to your organisation as detailed here.
I want to give students a trial before they commit to the learning hours, how do I go about this?
To give students a trial to test out the courses they would be learning with, we suggest a seven day trial.
To do this, you can liaise with us by contacting us here. Simply let us know you’re trialling students, then create the student accounts as you would normally.
At the end of the seven days, we will contact you to ask how the trial went and if you have any feedback for us. We will then ask you to deactivate the users who do not wish to continue. You won’t be charged for deactivated users, but if you decide to reactivate them at a later date their progress will be retained.
This means that the students who do wish to continue will be charged as normal at the end of the month, and they won’t lose any progress they have made in the courses during the trial.
Teaching support
Sharing the Digital Learning Hub screen as part of a lesson plan for your students
How do I play audio whilst sharing my screen in a Zoom call?
To share computer audio from the Digital Learning Hub during Zoom screen sharing.
1. Open your Zoom meeting
2. Ensure that you are logged in as the Host
3. Click on the green "Share Screen" icon
5. Click the check box in the lower left that says "Share computer sound"
6. Now when you are in screenshare mode it will play all computer sounds to the audience.
How do I play audio whilst sharing my screen in Microsoft Teams?
To share computer audio from the Digital Learning Hub during Teams screen sharing.
1. Open your Teams meeting
2. Ensure that you are logged in as the Host
3. Click on the "Share Screen" icon in your meeting controls
5. Click the “Include computer sound” on the top left of your sharing options.
6. Now when you are in screenshare mode it will play all computer sounds to the audience.
How do I play audio whilst sharing my screen in a Google Meeting?
To share computer audio from the Digital Learning Hub during Google Meet screen sharing.
1. Open your Google Meet meeting
2. Click on the "Present now" icon in the bottom-right corner
3. You will see a pop asking you to share either; your entire screen, a window or chrome tab
4. Click on present a ‘Chrome tab’ to play the tab’s audio by default
5. Now when you are in screenshare mode it will play all computer sounds to the audience.
Adding a web app shortcut to a smartphone
How to add a website bookmark (shortcut) to my home screen on an iPhone or iPad?
To add a shortcut to an iPhone or iPad (Apple device) you need to use the Safari browser.
|
|
|
|
|
|


How to add a website bookmark (shortcut) to my home screen on an android device?
|
|
|
|
ToolsModeratorsWhat is the Chat tool?What is the Audio Recorder?What is the Notebook?What is the Meetings tool?TutorsWhat is the Chat tool?Chat is the main way for you to communicate and share things with others. You can send both written and audio messages through it, and reply to others. It is real time communication with students in your group, and can be used to arrange meetings, set assignments, and collaborate. How do I create a new group chat?To create a new group chat, click the New Group Chat. Give the new group chat a name and select the users you want to add to it in the group chat form, then click the “Add” button to create the chat group. How do I create a new personal chat?Personal chats are one to one messages between users. To create a new personal chat, click the New Personal Chat. Search and select the user you want to chat with, then click the “Add": How do I send text and audio messages?To send a message, type the message you wish to send in the dialogue box, then click the send button. You can also send audio messages in the same way by clicking the microphone button to record and send your message: Others in the chat will be able to play this recording back and respond. What is the Audio Recorder tool?The voice recorder tool is a useful way for you and students to record and share audio, it’s great for practicing speaking or pronounciation. As a tutor you can also provide audio and text feedback as comments on other saved audios. Note: To use the audio recorder you must have a working microphone and allow your browser to access this, otherwise it will be unable to record your audio. How do I record and save audio?To record audio simply navigate to the Audio Recorder, click the microphone button and speak. To stop recording, click the large stop button. Review the audio by playing it back and either give it a name and save, or delete the recording. How do I share audio recordings?Audio recordings can be shared via sharing link and sent via any kind of messenger. Navigate to “My Recordings” to view a list of previously recorded audio: Open the audio you wish to share and click the “share” button: Then copy the link url to paste it so others can access it: How do I listen to students recordings?You can find students recordings under the student recording tab: How do I leave comments on student’s recordings?Navigate to the Students recordings tab and click to open the recording you want to comment on: Navigate to the Students recordings tab and click to open the recording you want to comment on: You can leave either an audio or text comment: How do I delete comments?Delete comments using the delete button next to the comment you wish to delete: What is the Notebook tool?The notebook is a tool to allow for longer form text assignments and examples that can be shared with tutors for students to receive feedback on their work. How do I create and save a new note?Navigate to the New tab in the Notebook. You can then use the text box to type and format your note, give it a title, and then save it: How do I share a note?Notes can be shared via sharing link and sent via any kind of messenger. Navigate to “My Notes” to view a list of previously saved notes, and open the note you wish to share by clicking the title. Opening the note, you will see the button to “Share” you can click to generate a link: Then copy the link url to paste it so others can access it: How do I access and edit previous notes?You can find previously saved notes under the “My notes” tab. To open the note you wish to edit, click the title of the note. This will open the note, displaying the different options. To edit the note, click the “Edit” button: Then click the “Save” button once you have made the desired changes: How do I leave a comment on a student’s note?You can access the student notes under the “Students” tab, then click the title of the note you wish to leave the comment on: Clicking on the note will open this page, and you can then add either a text comment or record an audio comment: What is the Meetings tool?The Meetings tool is a way for you to schedule meetings, and can be used with any platform that uses link sharing for meetings. How do I create a new meeting?To create a new meeting, click the + on the right hand side of the meeting scheduler. This will bring up the following side menu, which must be filled in to completion to create the meeting: The new meeting will appear on the meeting schedule of all users who have been added as participants: StudentsChatThe chat is the main way for you to communicate and share things with others. You can send both written and audio messages through it, and reply to others. It is real time communication with your tutors and others in your group. How do I send text and audio messages?To send a message, type the message you wish to send in the dialogue box, then click the send button. You can also send audio messages in the same way by clicking the microphone button to record and send your message: Others in the chat will be able to play this recording back and respond. Voice RecorderThe voice recorder tool is a way for you to record and share audio, as well as receive feedback on the audio you post from your peers and tutors. It can be shared via link within your organisation . How do I record audio?Note: To use the audio recorder you must have a working microphone and allow your browser to access this, otherwise it will be unable to record your audio. To record audio simply click the microphone button and speak. Review the audio by playing it back and either save or delete the recording. How do I share my recordings?Find the recording you want to share in the “My recordings” tab Copy and paste the link to share it. NotebookThe notebook is a word processing tool for writing and sharing larger pieces of text you have written that can be formatted to suit your needs. You can receive feedback on what you have posted from your peers and tutors. How do I create a new note?Navigate to the New tab in the Notebook. You can then use the text box to type and format your note, give it a title, and then save it: How do I share a note?Notes can be shared via sharing link and sent via any kind of messenger. Navigate to “My Notes” to view a list of previously saved notes, and open the note you wish to share by clicking the title. Opening the note, you will see the button to “Share” you can click to generate a link: Then copy the link url to paste it so others can access it: MeetingsHow do I join a meeting?Meetings will be scheduled by your tutor, and you can view a list of upcoming meetings in the Meetings page: To join a meeting, copy the meeting link and paste it into a new tab: |