Howdy everyone!!
I’m @PurplePotatOwO and recently a ton of people have been asking me about Royale High faces and how to make them so in this doc I’ll show you a step by step tutorial with some tips and everything you need to know!
DISCLAIMER:
Following all steps won’t guarantee your faces being added into the game.
Even some of the more popular face artists have made many faces that didn’t come to use.
It is solely the developers choice which faces they want to add but keep in mind that following the necessary steps will grant chances.
Table of contents:
- Drawing faces
- Compressing files
- Uploading
- Submitting
STEP 1
You will need a drawing app.
It doesn’t matter which one as long as it features different layers.
If you draw on your iPad, Phone, Computer or whatever other electronic device you use doesn’t matter.
If you’ve done art before drawing faces will be a lot easier, if you haven’t and you’re just starting out it might get a bit tricky but it’s not impossible!
Making art takes time and practice.
I personally use Krita. It’s a drawing program that doesn’t work on mobile devices.
However “ibis paint x” or “ProCreate” are often being used, you can also ask other artists or your friends for advice.

The canvas size you use doesn’t matter but you have to scale it down to 300x300 before compressing
I personally like to work with 500x500 for unpixelated results.

The difference is small so it doesn’t matter too much, a canvas size close to 300x300 is just recommended but not mandatory (You will have to resize it to 300x300 anyway)
Once you have your empty canvas make sure to add a new layer, this will be your sketch layer.

Now just draw lol
Don’t trace over any other artists' faces, you will get caught.
……………………………………………………………………………………………………………
PRO TIP:
(Checking Proportions, if you don’t have a PC/ Laptop or if you don’t need/want to see what your face would look like in game just skip this step)

If you aren’t sure if the proportions of your face are right you can check by changing some files IF you use a computer/ laptop
To do that open your File Explorer.
Type “Roblox Player” into the search bar, right click and “open file location”
When you open the file location you should see the Roblox player icon once again, right click it and open the file location again. If you’ve done it right you should see a “textures” folder, open it.
In the textures folder is a default face called “face” change the name of that file or delete it. You will replace it with your sketch.
To do that save your sketched face as a png file, copy it with ctrl+c and paste it into the textures folder with ctrl+v, then rename it to “face”.
Now open the roblox avatar editor (https://www.roblox.com/my/avatar) unequip the face you’re wearing/ wear the default face.
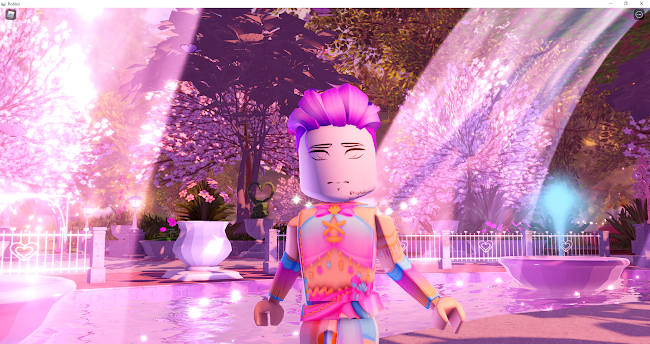
Join Royale High (or any other game, but since you’re trying to make Royale High faces it makes sense to see what the face looks like there)
Remove the RH face you’re wearing by resetting your avatar or the “Remove Face” button in the Dress up menu. If you’ve done everything right you should be wearing the sketched face.
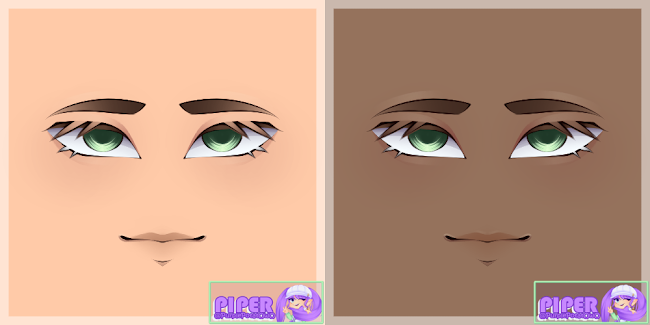
Blush
Rather use dark red colours on lower opacity than light pink colours.

While light pink colours compliment light skin tones they will look odd on dark skin tones, Darker red blush on low opacity just works a lot better for blush.
……………………………………………………………………………………………………………

Once you’re done drawing your face, delete OR hide your background layer to make your face transparent.
You need to do this so your face will be shown on all skin colors once it is in the game.
Now you can save the image with the transparent background to your files/ gallery.
STEP 2
Use THIS website to compress the files: https://imagecompressor.com/
You HAVE to follow this step because it’s mandatory. As Face artist (and clothing designer) you will need to compress the image files BEFORE uploading them to ROBLOX.
It helps prevent lag.

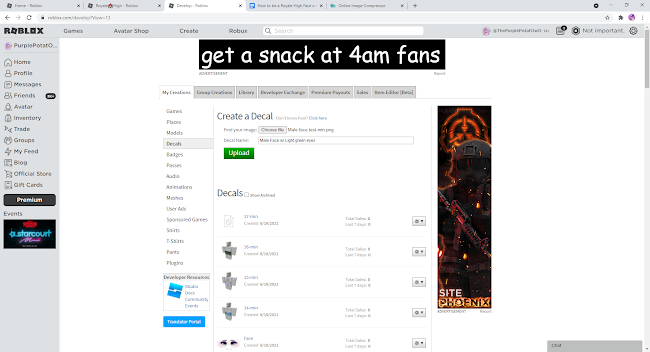
This is what the website should look like. Simply click on “upload files” then select all the face files you want to compress, after that you should be able to click on the “download all” button. After that just extract the files and you’re done.
(For people that are NOT using mobile devices: IF you’ve done everything right the file should have “-min” at the end of the name)
STEP 3
Open your browser.
This could be Safari, Firefox, Chrome or something else depending on the device you use. Important is that you do NOT use the Roblox app on your mobile device for this. Go to the website https://www.roblox.com/home
At the top of your screen with the games and Avatar Shop you should see “Create” click on that. It should lead you to the develop page.
Under “My creations” click on “Decals”, to create a decal just choose the compressed file and upload it.
You can name it however you want, the name you choose will be what it appears as in game
STEP 4
You will need submit through a google form. The hashtag (#KateRhFaces) on Twitter is no longer usable as submission option.
The link to the form: https://docs.google.com/forms/d/e/1FAIpQLSe3LJPZyh3DAzRiNy4-gAPe35K4_SGK6QH3F6j_SpStexIUJA/closedform
It’s not always taking responses but it should be opening monthly? I’m not quite sure how exactly that works either (Updating this part once I figure it out)
If the form is open you should be greeted with instructions on how to submit.
I hope this helped! Good luck :)
Bonus:
Might be submitting this face later, as for now I’m a little busy but again I hope I could help out a bit
(Last updated 11/25/21: Submitted that face lol)
Here’s some shameless self promotion:
https://twitter.com/PurplePotatOwO/status/1397575904587653125?s=20
https://twitter.com/PurplePotatOwO/status/1397185823632678919?s=20
https://twitter.com/PurplePotatOwO/status/1395083103106912261?s=20