DIY DynaVap Induction Heater
by u/beasthoss
Tools
[Required] Small Screwdriver
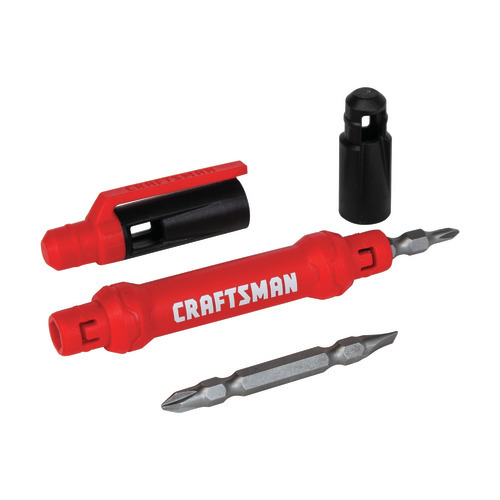
- Some of the heater modules use phillips screws and others use flathead. The screws you’ll be working with are small, but bigger than eyeglass size. I’ve also found that longer shanks help a lot.
[Required] Wire Stripping Device (Wire Cutters / Wire Strippers / Razor Blade / Scissors)

- You will need to strip a few wires. If you don’t know how to do this, look it up on YouTube or Google images. It’s not very hard at all and if you use a button with a wire harness you only have to strip a couple wire ends.
[Recommended] Hot Glue Gun, Epoxy or both
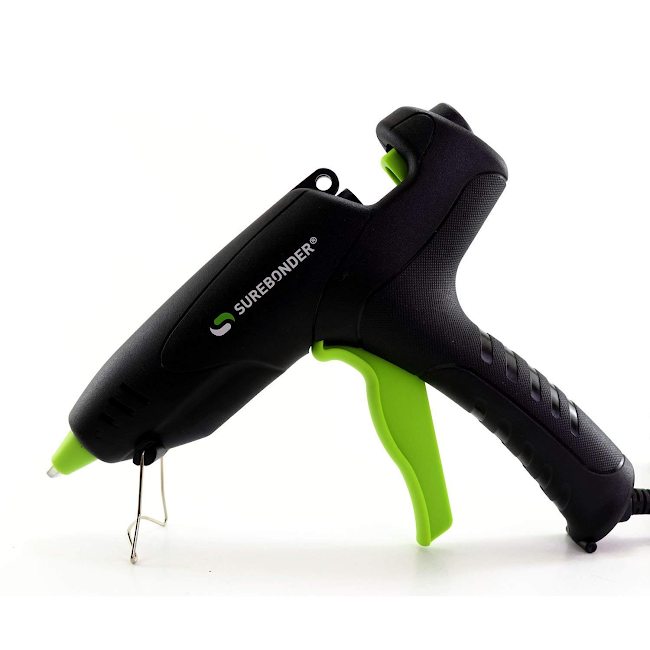
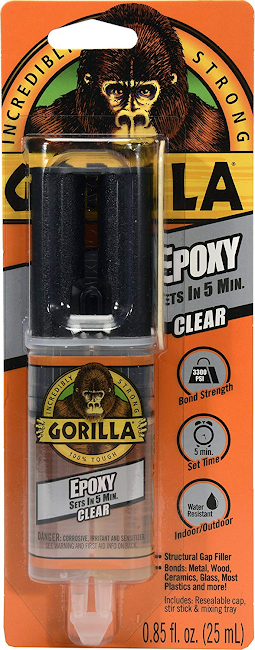
- To mount everything into a case securely. Hot glue works, but epoxy holds better and lasts longer. You can get both from a hobby store or Amazon.
[Optional] Soldering Iron
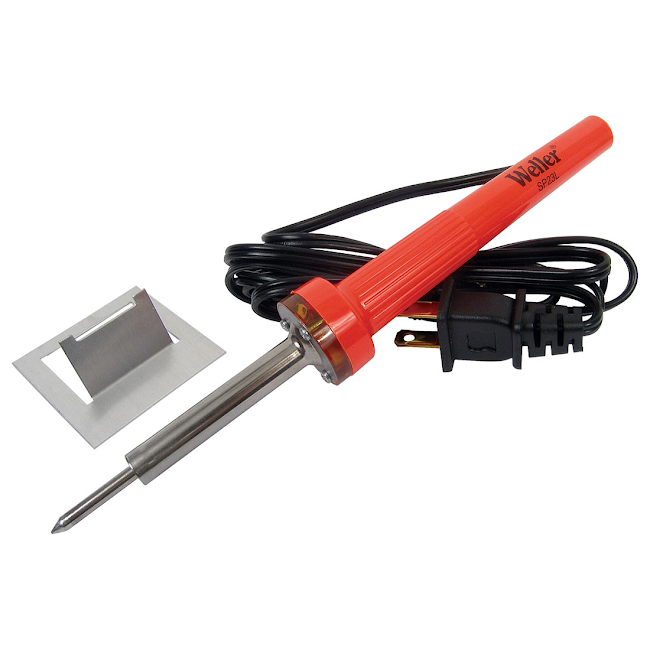
- You can solder the coil to the module and it will increase the longevity a bit. (recommended by the manufacturers because the screw terminals can get hot and melt if used for long periods of time) Soldering is ideal, but if it’s your first build, I recommend just screwing the coil in, NOT soldering. You can always solder it on later.
[Optional] Electrical Tape
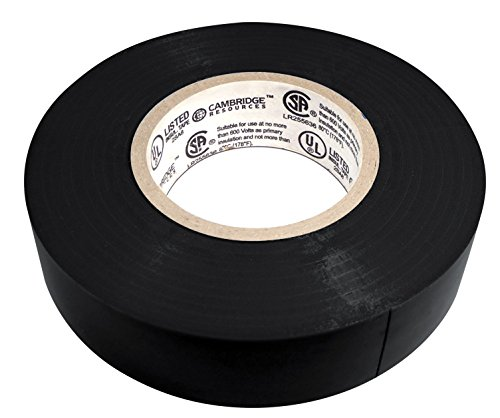
- If you have a soldering iron or t-taps you can use those to connect the wires you will be splicing, otherwise you will want a roll of electrical tape to help keep your splices secured.
Parts
[Required] 12v Induction Heater Module
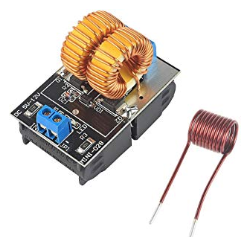
- This does the Induction Heating. There are a bunch of different brands for these but they’re pretty much all the same. Get one that’s cheap and has good reviews. Some units have coils that are more spread out than others, like this one. Avoid these, as the tighter the coil is, the better the end result.
[Required] 12v5a Power Adapter

- This thing is what provides power to all your components.12v4a-12v6a works great for most builds. You can use other power supplies for different results. See the FAQ for more information.
- For most of my builds I use the VENTECH 12v4a Power Supply.
- A lot of people have notified me that they are having trouble with some of the 12v4a-12v5a Power Adapters not supplying enough power. You can almost always avoid this issue by using less turns in your coil (5-7 is plenty, but by default they come with 9-10). If you want to avoid modifying the original coil too much and bypass potential power problems from the start, you can use a higher wattage power supply, such as the Kastar 12v6a 72 Watt Power Adapter.
- Order one with the screw-in connector. This is the part you wire into your circuitry. Some adapters don’t come with it, you want one that does.

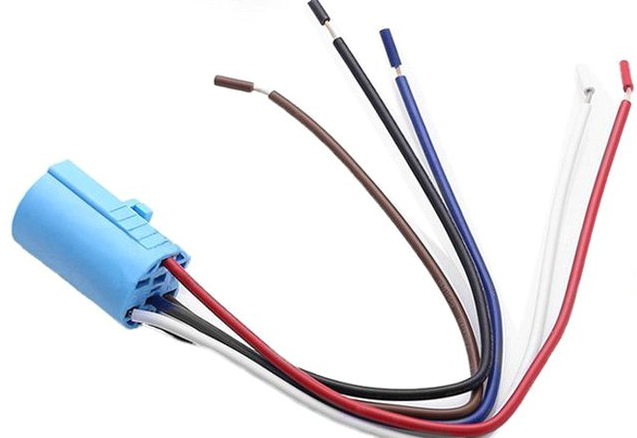
[Required] 12v5a Momentary Button
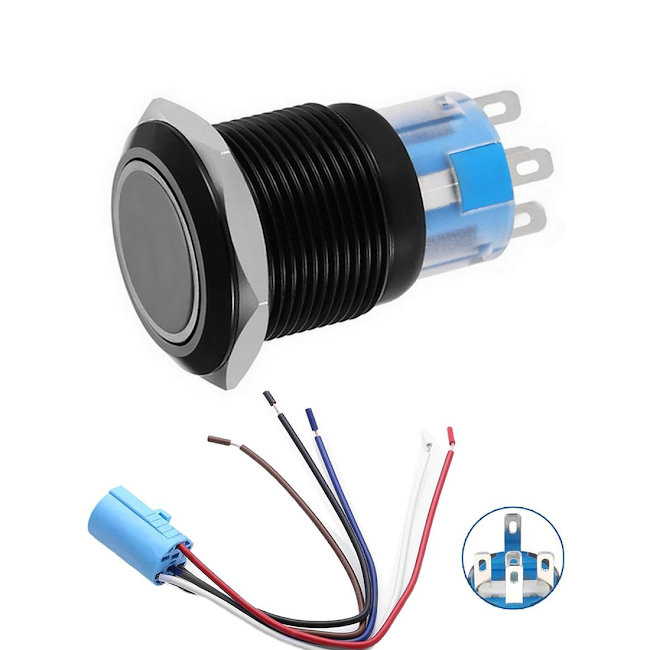
- If you don’t use a button, your only way of turning the heater off and on is by unplugging it - and nobody wants this. Anyways, here’s what you want to look for.
- MOMENTARY BUTTON - this means hold down = on, let go = off. The other type is LATCHING, meaning press once = on, press again = off. 99.9% of the time you are going to want a MOMENTARY button.
- RATED FOR AT LEAST 12V5A - this means the button can stand up to your power supply without potentially burning out.
- WIRE HARNESS - Unless you think soldering is really fun AND you have a bunch of extra wiring lying around, get a button that comes with a wire harness. This will save you a lot of time.
[Highly Recommended] Glass Adapter
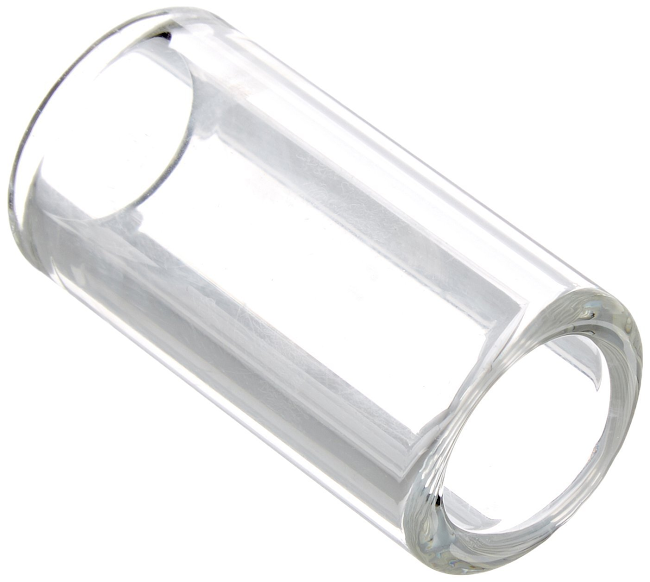
- This helps keep your hot DynaVap tip from radiating heat to the electrical components in the enclosure. At the bottom of most of the glass adapters, you will need something to position the DynaVap at the right height. For this, you can use a piece of cork, or a food grade silicone drinking straw and cut it to length (make sure to get one rated 450-500 degrees - which most are).
- My Tested & Viable Options
- If it’s your first build, I recommend these.
- These are my favorite, but the sizing isn’t perfect from the manufacturer. Sometimes the DynaVap will rest nicely inside the adapter, allowing it to work as a perfect-sized glass barrier AND holder, but other times the DynaVap will fit all the way through the center hole and you will need a stopper like the other options above.
[Highly Recommended] Project Enclosure

- If you don’t see anything you like on Amazon, take a trip to your local Hobby Lobby or other craft store.
- I’ve had success with wood (looks really nice) and ABS (really easy to drill).
- You will be much happier in the end if you build your heater into a case!!
[Optional] MOSFET Driver Module

- This device goes between the button and power supply so that a continuous high load doesn’t go to the button and burn it out.
- This isn’t a huge concern with a homemade induction heater, as long as you get a button rated for 5 amps, and don’t get a power supply higher than 6 amps since it’s only powered on for short periods of time. I have never had a 5a button burn out, even when using no MOSFET and a 6a power supply.
- If you are super serious and concerned about going for 100% electrical safety and soundness, stick to a power supply <= 5 amps or use a MOSFET.
Building
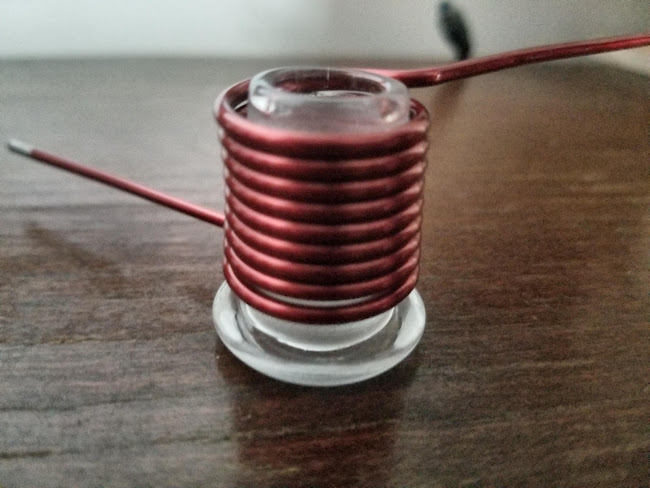
Coil Bending
- Take the coil and re-wrap it around the glass adapter you’re using. You want to keep your coil as tight as possible. If you are using the 14-18mm glass adapter, you can wiggle it into the coil sort of like a corkscrew to stretch it out without messing up the coil. You want 6-9 coils or so, enough to cover about ½-¾ of the whole tip of the DynaVap. Leave about 2 ½ - 3 inches on each side of the coil to reattach to the module.
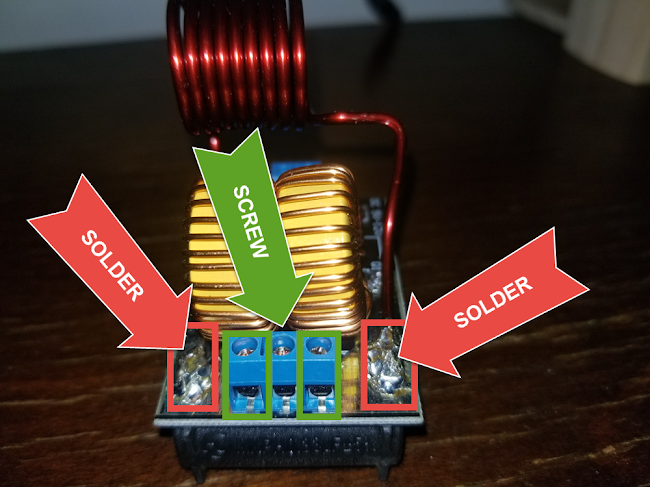
Coil Mounting
- Insert the coil into the screw terminals and tighten it up. If you’re soldering it, you want to solder the ends around the screw terminal area.
Wiring Harness Buildout
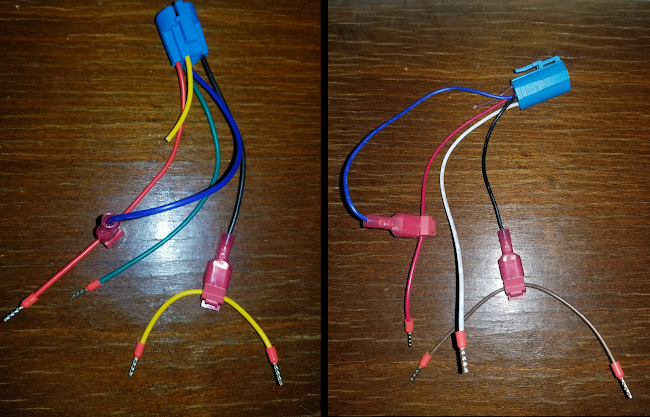
If you want to use a MOSFET with your setup, ignore the next steps, and check out the second picture in this diagram by u/Elmosdarkside, otherwise, continue following the steps below.
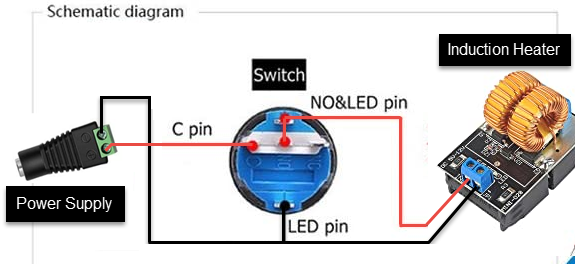
- This is the general wiring layout that we’re shooting for, so we’re going to have to connect some of the wires on the switch to each other, and also get them ready to connect to the power supply and induction heater.
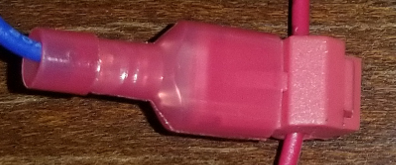
- Step 1 -- Attach the (LED) wire to the (Module + / NO) wire. (this makes the Button LED turn on when the unit is receiving power). I use a specific connector called a t-tap to do this but you can strip the wire and secure it with Electrical Tape or solder.
- Step 2 -- Splice an extra piece of wire into the (Negative -) wire. (this is so we can connect this wire to both the induction heater and the power supply).
- Personally, I like to clip the unused wire (one of the wires in the harness will not be used at all) and attach the clipped piece to the (Negative -) wire. You can use another piece of wire if you have it available.
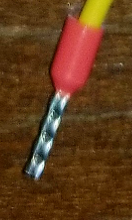
- Step 3 -- Strip the ends of all the wires except the shortened unused length of wire. If you have ferrules (totally optional) then clip those on the ends of the wires.
- The final harness build should look something like this (your wire colors may differ! Make sure to double check the wiring diagram that came with your button and the diagram up top!):
Circuitry Assembly
- Screw the (Power + / C) wire from the Button to the + terminal of the Power Supply Connector.
- Screw the (Module + / NO) wire from the Button to the + terminal of the Induction Heater.
- Screw the (Negative -) wire from the Button to both the - terminal of the Power Supply and the - terminal of the Induction Heater.
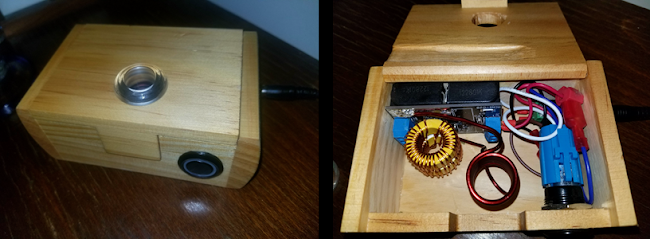
- When you’re done, it should look something like this:
- Give it a test. Make sure to test only AFTER you’ve connected all the parts, including the coil. Plug it in and press the button. If the LED on the Induction Heater AND the LED on the button light up, then it worked! If it didn’t work, check to make sure the coil screws or soldering is secure, and that the button wires are secured and screwed into the correct terminals.

Case Fitting & Installation
- Figure out where you want everything in your case and how it will all fit together. Once you have the layout in mind, drill the required holes.
- The 19MM / Recommended Buttons fits a ¾” mounting hole
- The Guitar Slides usually fit a 1” mounting hole
- The 18MM Glass Adapter also fits a ¾” mounting hole
- The Power connectors usually fit a ½” mounting hole
- If your case is really tight, it’s probably a good idea to just leave everything screwed together and put it in the enclosure as one piece. Otherwise, if you can work around in your case easily, you can unscrew everything and mount it individually.
- Mount the button into the mounting hole.
- Place the power connector into the mounting hole and secure it with hot glue.
- Place the induction heater module in its final location and secure it with hot glue (on the black plastic side)
- Screw everything back together (if it’s not already)
- Insert your glass adapter and if necessary adjust the dynavap height with a glass bead / marble / cork / silicone straw at the bottom.
DONE
- At this point, you should have the coil bent and mounted. The wire harness should be built and connected. Everything should be in the case and secured. All you have to do now is plug it in and enjoy your new Induction Heater!
Current Parts List
This section contains links to my current hardware list.
- 12v Induction Heater Module (SAINSMART)
- 19mm Momentary Button (APIELE)
- 18mm-14mm Glass Adapter (JIANUO)
- 12v4a Power Supply (VENTECH)
- it’s a tight squeeze, you may want to order a larger one for your first heater.
FAQ
Do I need a MOSFET?
- The quick answer is “probably not”, but it’s a bit more complicated than that.
- To be 100% electrically sound, you should use a MOSFET when your power supply amperage is greater than your button rated amperage. (In this build we use a 12v5a button, so if you are using a 12v6a or higher power supply, you should use a MOSFET to prevent your button from burning out).
- Many people have success with a 12v6a power supply and a 12v5a button with no MOSFET. Just know that this could cause some extra wear on your button, and potentially cause it to burn out.
My unit works when I turn it on, but flickers or turns off when I insert the DynaVap
- Your unit is likely not getting enough power. You can usually resolve this by:
- Removing some coils from your induction heater coil so there aren’t as many turns in it.
- OR upgrading to a power supply with a higher amperage (such as a 12v6a power supply instead of a 12v5a power supply)
What is the optimal power adapter wattage?
- Most induction heaters on the market use a 12v4a - 12v6a power adapter (48-72 watts). I have done a lot of testing and this range (12v4a - 12v6a) is ideal. This is all going by an “average” coil size. Bigger coils do require higher wattage for similar effects.
- 12v1a - 12v3a (12 - 36 watts)
- At this low of wattage, the module can appear to work fine, but when you insert the DynaVap, the module LED starts flickering because it is not getting enough power. If it does work and doesn’t flicker, you are likely going to get very weak hits and it will take forever to click.
- 12v4a - 12v6a (48 - 72 watts)
- This range produced the best results from my testing. At 12v6a I was starting to see combustion occur occasionally and a bit of uneven heating.
- 12v7a - 12v10a (84 - 120 watts)
- The module can take this much power, but I suspect heating will be extremely uneven and combustion may occur. If you have any results with these or know of any heaters on the market that use this range, I’d love to hear about it.
You forgot step XXX or what about YYY?
- If you want me to include more information about some aspect of building induction heaters, I’d love to hear it!! Send me a message on reddit (u/beasthoss).
Thanks for reading my guide!! I hope it helped explain any questions you might have while building your first induction heater.
Obligatory Disclaimer: Please be safe out there when working with electricity. Many of you are novices, and I’m no expert myself. I’m just a guy trying to share his knowledge with the internet. We aren’t building rocket ships, but there is a risk of injury when working with soldering irons, power tools, etc. By using this guide, you agree that I am in no way accountable for any damages or harm that may occur from building or using induction heaters.