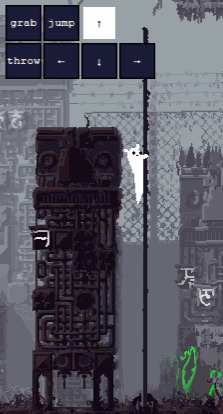
Rain World Movement Guide
This is a comprehensive guide to movement in Rain World, covering everything from beginner moves to advanced speedrunning techniques and combat.
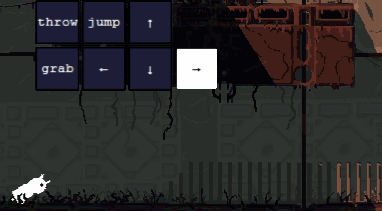
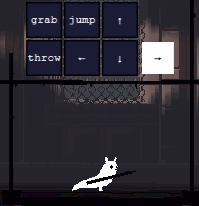
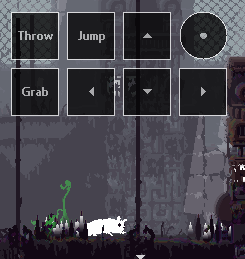
Please note that this guide was primarily written with keyboard controls in mind. The inputs shown here are still applicable for controllers, but a few moves which require very rapid directional input changes might be a lot more difficult / less reliable. Using D-pad might be easier for some of these moves, but all moves are still possible with analog stick!
“Warehouse” and “Nest” are great sandbox maps for movement practice. To discuss and share tech, or get further advice and help, check out the #movement channel in the Rain World Discord!
This guide is written for vanilla Rain World and does not cover the Downpour DLC, which is a fan-made expansion.
This guide was last updated on March 31st 2022.
Recently added:
Wallpouncing! (Cut content)
Ease of use tips
Use ctrl + f to search for moves!
We also recommend that you turn off print layout to remove page breaks and shorten the guide.
Check out recommendations if you’re looking for some useful moves to start with, at any level!
A changelog and future sections list can be seen below the index.
This guide prioritises naming consistency. Use the glossary to find alternate tech names.
Middle click hyperlinks to open in a new tab and avoid losing your place!
Mild spoiler warnings towards the end of the combat section (IC spoilers) and preceding section (SL spoilers).
Difficulty Guide
* - Beginner - Useful in a first playthrough, simple execution (Rubble/Spear)
** - Intermediate - Useful for players who feel confident with basic movement (Slide pounce)
*** - Adept - Worth learning for a second playthrough or hunter run (Down throw)
**** - Advanced - For speedrunning and advanced play (Slide flip pin)
^^^^^ - Academic - Niche tech for those interested in experimentation. (Den boosted slide pounce)
External Links
ICED's Rain World Exploits and Glitches Guide (Major spoilers!)
Contents
Horizontal pole movement *** 42
Turn stored slide pouncing *** 53
Turn stored slide flipping **** 54
Turn stored Extended Sliding ^^^^^ 57
Downwards/upwards throwing ** 76
Creature strategy (minor spoilers) * 78
Recommendations
Here are a few basic essential moves for players of all skill levels unsure where to start:.
Beginner *
Pulling up onto ledge - Taught in the tutorial, really important for climbing!
Wall jumping - Essential for mid game areas.
Swapping hands - Choose what to throw first!
Throw boosting - Effectively gives you a better jump.
Basic tunnel mobility - Escape from lizards in tunnels!
Rubble/Spear combo - Simple and effective defence strategy!
Intermediate **
Optimal throw boosting - Cross large gaps with ease!
Slides - Important to start practising. Key to unlocking faster movement over time.
Rolls - Survive falls and keep moving.
Landing from pounces - Jump to keep moving!
Adept ***
Fast pole climbing - Go up poles quickly! Invaluable tech.
Crouch mouth spear / Slide spearing - Take on lizards with a single spear!
Extended Sliding - Go really fast on flat surfaces.
Slide flipping - Once consistent, try this.
Advanced ****
Crawl turn jump - Gain extra height from jump!
Backflip pole jump - Saves time in some parts of the game - Extra height from poles!
Downthrowing from slide flips - Essential offensive move for getting the drop on lizards.
Basic Moves:
Jumping *
Pulling up onto ledge *
When hitting a wall just below a ledge, holding forwards and pressing jump allows Slugcat to climb up.

Note that pressing against walls gives Slugcat friction, and so jumping towards the ledge is best to gain maximum height.

Wall jumping *
Slugcat will slide down walls when holding into the wall.
Wall jumping is performed by pressing jump while sliding down a wall (holding into the wall), immediately switching holding direction to the other wall and tapping jump as soon as Slugcat comes into contact with that wall.
Note: It’s important to switch holding direction as soon as possible after jumping. The aim is to jump as soon as possible while holding into the wall, to minimise height lost to sliding, then immediately hold away from the wall to minimise negative aerial drift.

Coyote jump *
It is still possible to jump a few frames after running off an edge. This can be used to maximise horizontal jump distance, or safeguard against tight jumps.
Coyote jump definition

Pole coyote jump **
This can also be done off of poles.

Extended coyote jump ****
Extending coyote jumps off ledges is possible by crouching while running off, then tapping up and jump simultaneously.

Grounded wall hop ***
Hugging a wall then simultaneously tapping outwards + double tapping jump allows Slugcat to jump twice. Jump needs to be double tapped quickly as the window is quite short.

Aerial wall hop ***
While sliding down a wall, holding out then pressing jump allows Slugcat to hop midair for a short window of time. This only works when holding away from the wall.
Note: This is likely a leniency/coyote mechanic for pressing outwards before pressing jump while wall jumping.
This works even when only a small part of Slugcat’s body brushes against a wall, as this counts as being in the sliding state.

Application for wall jumping ***
This allows for wall jumping up shafts where Slugcat’s head initially only brushes against the opposite wall.

Item management *
Right hand usage *
If holding items in both hands, Slugcat will always throw or use the item in its right hand.

Swapping hands *
Double tapping grab causes Slugcat to swap the items in its hands.

Dropping items *
Tapping grab while holding down will drop a held item.

Storing items *
Holding grab when holding a small inedible item in Slugcat's main hand causes it to store the item in its stomach. Doing the same again will recover the item.
Charge hopping *
Charge hopping *
Entering the crouching position and holding jump until Slugcat’s back is arched, then releasing, allows for a charge-hop. For almost all jumps Slugcat is subject to aerial drift, and so holding forwards allows the player to maximise Slugcat's horizontal range whenever hopping or pouncing.
Note: In this gif, forward is held immediately after Slugcat’s back is arched. This is useful to avoid accidentally pressing forward too soon, and running off the edge.

Crouching to safely position on edges *
This gif shows the farthest Slugcat can extend over a ledge while crouched, useful for maximising charge pounce distance.
Landing upright out of charge pounce *
Tapping up immediately after charge pouncing puts Slugcat in an upright position, giving it more height. This can help grab ledges upon landing.
Ceiling pounce ^^^^^
When holding forwards and pouncing into a sloped ceiling, Slugcat will slide down until up is pressed. This tech has no application in the base game.

Throw boosting *
Throwing rocks or spears during a jump or pounce increases horizontal velocity, allowing Slugcat to travel further than normal jumps and pounces. This is most effective when done at the start of a jump.
Note: Throw boosting can be used at the start of any aerial move to increase speed / range.

Optimal throw boosting **
This can be done with two objects to further increase speed, optimally either out of a charge pounce or max length roll pounce (Explained later in guide).

Turning around *
Backflipping *
Backflips are performed by jumping immediately after turning around. Note that the rightwards press near the end of the move is only to prevent Slugcat from falling off the platform.
Turn hopping **
Turn hopping involves repeatedly jumping after turning to conserve turn momentum and cover ground quickly. Momentum conserved this way only depletes when in contact with the ground, so will last longer with more precise and better timed jumps.

Tunnels:
Mobility in tunnels *
Turning around *
It is possible to turn around inside tunnels by holding in the opposite direction and pressing jump. This is possible in vertical tunnels as well, but only turning upwards, due to free falling.

Free falling *
It is possible to fall vertically inside tunnels by holding down and pressing jump. This works whether Slugcat is facing forwards or backwards.

Tunnel boosting *
Boost end lag *
Boosts inside tunnels can be performed by pressing jump. This gives a short burst of speed with ending lag. This ending lag makes the boost slow Slugcat down overall, unless this lag is cancelled.

Cancelling boost end lag
Boost ending lag is cancelled by boosting into a room pipe, a shortcut, or into open space. This can be combined with jumps to exit tunnels at running speed.

Boosting out of shortcuts/room pipes **
Pressing jump when exiting tunnels & pipes gives a burst of speed, which represents Slugcat kicking off the wall behind it. This can be combined with jumps to exit tunnels at running speed.
Boosting out of shortcuts/room pipes in tunnels **
The same can be done in tunnels.

Boosting around tunnel corners *
Pressing jump and holding forwards when rounding a corner also gives a boost. As with boosting out of shortcuts and room pipes, this is like kicking off a wall behind you. This can also be done around T junctions, as long as there is ground behind Slugcat’s feet.
Slides:
Basic slide **
Slides can be performed by pressing down and jump together while moving. A specific sound can be heard when performing a slide.

Pressing jump too late will cancel the slide and cause a stumble.

Not holding forward long enough results in a shorter slide which cannot be jumped or flipped out of.

Sliding into a pipe **
This is a more efficient way to enter ground level pipes. This can also be done with regular tunnels..

Sliding into a tunnel ***
Tapping down directly over a tunnel mid slide allows for quickly entering said tunnel. This also works with shortcuts and room pipes in the ground.

Slide into tunnel boost ***
Sliding into a tunnel can be combined with a tunnel boost to gain extra speed on exit.

Slide parkour ***
Pressing jump while sliding into a short wall allows Slugcat to slide up and over the ledge while in a crouched state. This can be used in conjunction with jumping to traverse rough terrain.

Slide pouncing **
Basic slide pounce **
Jumping mid slide results in a long pounce. This is called a rocket jump in the code.
Pressing the second jump too early or late results in a smaller pounce.

Landing upright from pounce **
It is not possible to change to an upright state mid pounce, and so unless able to roll, Slugcat will always land in a crouched state, which slows the player down.
This can be avoided by pressing jump on landing, to enter a temporary upright state, and then pressing up to switch to standing.
This also conserves momentum, which is extremely useful for exiting all pounces and roll chains.

Instant slide pounce ****
Normally only useful/applicable with tool assisted inputs (macros or keybinds), Slugcat can pounce in the first frame of a slide.
This can be done with the following inputs. Each line below represents one frame, and Down, Forward and Jump are abbreviated.
🡲
🡶 J
🡶
🡶 J
This is practically achievable in game by slowing down time, e.g. with mushrooms, as shown in the gif below. It can also be done without slowdown, which is less practical due to the difficulty in pressing a key twice in 3 frames.
Note: This is specifically useful for speedruns in game here, as shown here (Major ending spoilers)
Additionally, the cleanest input sequence for this move is J, 🡶, J. The extra forwards and down inputs are included for ease of learning; releasing down on the third frame isn’t necessary, and with perfect inputs the move can be done from standing.


Instant slide pounce height can be increased with prior horizontal momentum from either turning or jumping.
Slide flipping ***
Basic slide flip ***
Pressing jump while holding backwards mid slide results in a long backflip. This is called whiplash in the code.
Note:
To slide flip correctly, forward must be released, and backwards held, before jump is pressed.
The jump window is the same as for slide pouncing.
Pressing jump and back too early results in a regular failed slide pounce due to the shorter slide. Forward must be held long enough for a regular slide, to slide flip.

Slide flip pickup ***
Slide flipping at the same point as an item will auto pickup that item.
Instant slide flip ****
Normally only useful/applicable with tool assisted inputs (macros or keybinds), Slugcat can perform a slide flip on the first frame of a slide.
This can be done with the following inputs. Each line below represents one frame of action, and Down, Forward, Jump, and Backwards are all abbreviated.
🡲
🡷 J
🡷
🡷 J
🡶
This is practically achievable in game by slowing down time, e.g. with mushrooms, as shown in the gif below, or without any slowdown. The inputs are more demanding than instant pouncing, which makes this less practical overall but still achievable.
Note: The cleanest input sequence for this move is J, 🡷, J, 🡲. The extra forward, down and backwards inputs are included for ease of learning; holding 🡷 for one frame only isn’t necessary, and with perfect inputs the move can be done from standing.

Extended Sliding ***
This can be done by throwing an item backwards mid slide, and greatly increases distance travelled. As with regular slides, holding forward is needed to get a full length slide.

Extended slide hopping ****
By holding forwards and repeatedly hopping after an extended slide, momentum can be conserved for a long distance, similarly to turn hopping (Explained later in guide). This is unique to extended slides, as they eject the Slugcat into a standing position unlike regular slides.

Extended slide backflip ****
Backflipping out of an extended slide can be done by holding back and pressing jump at the end of the slide. As with extended slide hopping, this works because the extended slide ejects Slugcat into the upright state. This only works if the slide was entered into after running for some time, due to run storage.

Extended slide pounce ****
It is possible to pounce out of an extended slide. This requires holding forward significantly longer than normal, as the extended slide needs to also be extended to full length.

Extended slide flipping ****
It is also possible to slide flip out of extended slides. Like extended slide pouncing, this requires holding forward significantly longer, as the extended slide needs to also be extended to full length.
Remember that you can land upright from pounces, and conserve momentum, by tapping jump on landing, then up!

Extended instant hop ****
An extremely useful tool for quickly travelling horizontal distance and crossing wide gaps, this move is performed by starting an extended slide, pressing jump 1 frame later and then holding forwards. For optimal speed, forwards must be pressed and held within a few frames of the jump input. This move can be performed during any frame in which slide extension is possible.

Extended instant pounce ****
A similarly performed variant of the extended instant pounce, this move is performed by starting an extended slide and pressing jump on the same frame, then pressing forward exactly one frame later.The forward input must be within one frame of the jump input, otherwise a slide-flip will be performed instead. This move can only be performed when started on one of the last 2 possible frames of a slide in which slide extension is possible.
This move can be rolled out of like any other pounce and travels further than regular slide pouncing.

Extended instant crouch hop ****
The fastest known horizontal move to date, performed by starting an extended slide, pressing jump and holding forwards 1 frame later and then pressing down 1 frame after that. For optimal distance, forwards must be pressed and held on the same frame as the jump input. This move can be performed during any frame in which slide extension is possible.

Den boost ****
Holding down and pressing jump over a den mid slide launches Slugcat upwards.
In the example below, the wall directly next to the den makes entering it via slide reliable. This move is a lot less reliable when attempting to enter dens without a wall next to them. Smaller boosts out of dens can also be applicable for gaining height in combat, on a case to case basis.

Rolls:
Rolling from falling *
Holding down and left/right when falling from a height greater than a normal jump (a height of about 4 tiles) will send Slugcat into a roll. This will negate landing stun when falling long distances.
Fast rolling ***
Exclusively possible with analog sticks. Faster roll speed can be achieved by angling the analog stick more closely to the horizontal axis above 🡶 / 🡷. Fast rolls can only be chained into normal rolls, and moving back to the full 🡶 / 🡷 angle mid roll slows the roll to normal speed.
This can also be done with a virtual controller program on PC.
Note that when using input display, the 🡳 input will not be visible during a fast roll. Additionally, this allows Slugcat to pick items up during the roll rather than dropping them (down + grab).

Fast roll angle ***
It is possible to fast roll after a full jump from a single tile height by angling the analog stick slightly sub horizontally midair. This is only possible with a controller/virtual analog stick.

Chaining from moves **
It is possible to roll in either direction upon landing from flips, pounces and bounces (Explained later in guide) by holding left/right and down.
Rolls can be entered from:
Rolling from backflips **

Rolling from slide pounces **
Rolling from slide flips ***

Roll pouncing **
Roll pouncing **
Pouncing can be done by jumping out of a roll.
Rolls can be chained together indefinitely on flat ground by pouncing as late as possible.

This can be done regardless of which way Slugcat is landing, as long as the pounce was initiated late enough.
The longer the roll, the higher the pounce arc. Tapping jump while holding down and left/right will pounce instantly without rolling at all.
A rapid series of beats can be heard when rolling. (1 initial on beginning the roll, then 4 more in total) These can be used to time pounces.
Remember that you can land upright from pounces, and conserve momentum, by tapping jump on landing, then up!

Flat ground movement
A speed comparison of different forms of movement across flat ground.
From top to bottom: Running, backflip to roll chaining, turn hopping, slide pounce to roll chaining, extended slide hopping, extended slide pounce.
It’s worth noting that both turn hopping and backflip roll chaining require setup before moving forwards, which has been included here.
Turn hopping is most effective when turning to move in the opposite direction as the setup is then very small. Backflip roll chaining is most effective when using the pounce to cross gaps without space for a slide pounce.

Sliding out of rolls ***
It is possible to slide immediately after a roll by holding forwards and down, and timing jump at the very end of the roll when Slugcat is in the upright position.

Rolling up single tile heights **
Rolls are not interrupted by single tile blocks, allowing for rolling over more uneven terrain.
Fast fall rolling ***
Dropping off ledges ^^^^^
Pressing down while running off ledges causes Slugcat to enter a fast fall state. This state allows for rolls from any height.
Rapidly turning back then forwards before dropping off the ledge extends this drop window.

Dropping down a tile ^^^^^
While running forwards towards a single tile drop, holding down with correct timing causes Slugcat to enter a roll. This is due to the aforementioned fast fall mechanic where pressing down while dropping off ledges gives a boost of acceleration.
The same can be done with the turning method shown above for slightly more reliable timing.


Ledge hang and fast falling ***
Releasing all controls for a short frame window while pulling up on ledges leaves Slugcat in an indefinite hanging state. Achieving this paused state is not necessary for fast falling, and the hanging state itself currently has little use and no reliable setup.
While pulling up ledges, pressing in the opposite direction causes Slugcat to fall down at an accelerated rate. Fast falling causes landing stun and (for longer falls) death, at much shorter heights. Entering the fast fall state guarantees that a roll can be performed on landing.
Fast falling can be done from any height, including 1 tile high drops. This allows any tile high block to be used for initiating rolls.
Tumble rolling ***
By positioning to hit the ground head first, tumbling, a roll state can be achieved through minimal setup.
Storing up input
By holding upwards, Slugcat leans forwards while running, causing midair rotation when correctly interrupted with a jump. This allows for a roll on landing.

Storing down input
This leaning angle can also be achieved by holding down (such that poles don’t interrupt the move), so long as that input doesn’t result in a crouch. This can be done in the following ways:
• Holding down during a backflip.
• Holding down while jumping off a vertical pole.
• Sliding down a vertical pole onto the ground while holding down.
• Ending an extended slide holding down.
• Holding down while wall jumping.
Rolling from crouching ***
Slugcat can roll from crouch by turning in one direction then another, while holding down from immediately after the second turn onwards.
Note: The most consistent strategy for this move is to begin to press down half way through the second flop, as seen in the next two gifs.

It is also possible to roll from crouch by first running in one direction and quickly tapping crouch, then holding down the opposite direction, and holding down crouch again.
Note: This method can be easier to learn initially, but requires accounting for the necessary setup movement pre roll.
Immediate roll pounce ***
By initiating a roll from crouch but jumping immediately after holding down, Slugcat can pounce immediately before the roll takes place.

Stumble roll ^^^^^
It is also possible to start a roll by tapping jump multiple times while running and holding down. A minimum of 2 jump taps are needed but more can be used. Limited application as more consistent options exist for roll starting.

Poles:
Vertical pole movement **
Boost end lag *
Pressing up + jump while on a pole gives a short upward boost, the ending lag of which can be cancelled by entering room pipes, shortcuts, or jumping off the pole.
Boosting to top *
Boosting to the top of a pole cancels boost end lag and switches Slugcat to the balancing position immediately.

Landing on pole tip ^^^^^
Pressing up when coming into contact with the tip of a vertical pole will cause Slugcat to instantly perch on it. This only works for reasonably small vertical speeds.

Balancing on pole tips ^^^^^
When midair, tapping up at the tip of a pole allows Slugcat to instantly balance there. This can also be done further down from the tip, likely as an unintended result of pole collision.

Cancelling with jump **
It is also possible to cancel boost end lag by holding outwards and jumping off the pole mid boost.

Pole wall jumping **
Wall jumping while holding up allows for climbing tall poles in shafts far quicker than regular climbing.

Hybrid boost jumping ***
Boost ending lag can be cancelled by either reaching the start of a tunnel or pipe, or by jumping off the pole. Both this and pole wall jumping are only applicable in narrow shafts.

Pole regrab ***
Switching to the other side of a pole while also tapping jump causes Slugcat to let go of and instantly regrab the pole in a couple of frames. While not useful on its own, this can be used to cancel boost end lag as described below.
Fast pole climbing ***
Boosting up a pole then immediately re grabbing resets boost lag and immediately allows for another boost. This can be done repeatedly in a rhythm to quickly climb up poles, alternating sides each boost. Pressing jump too early will cause a laggy boost, and switching sides too early will cause Slugcat to jump off the pole.
Unlike other pole climbing methods, this is applicable on all poles and vastly increases climbing speed, allowing Slugcat to outrun fast pole climbing lizards.
Note: This can be done in a slower sequence or as a single instance for practice! The “end” of this move is the pole re grab (the boost end lag cancel).

Dropping down poles *
Pressing jump while holding down (instead of jump in isolation) allows for falling directly downwards from vertical poles instead of drifting to one side.
Vertical pole movement
A speed comparison of different forms of movement up poles.
From left to right: Regular climbing, pole wall jumping, hybrid wall jumping and fast pole climbing..
It’s worth noting that pole wall jumping and hybrid wall jumping are only effective in tall shafts.
Note: The speed, universality and relative simplicity of fast pole climbing makes it invaluable as part of any advanced player’s toolset.
Pole momentum ****
Backflip pole momentum ***
Backflipping onto poles gives an upward boost, which can be paired with a pole boost (jump + up while on pole) to gain height quickly from the ground.

Backflip pole jump ***
This is done first by holding back, and then tapping jump and holding up to initiate a backflip. Once Slugcat has grabbed the pole, tapping jump again while still holding up adds the momentum of a pole boost to the existing momentum of the backflip, causing Slugcat to slide off the top of the pole.
Jump can then be tapped again to perform a regular jump midair.
For practical application, jump is quickly tapped three times in succession while holding up. The initial turn (to initiate a backflip) must be done before jump and up are simultaneously pressed. For ease of use, jump can effectively be tapped more than three times with no effect (as in the gif below)
Note: See Crawl turn backflip pole jump for a 10 tile high version.

Slide pole jump ****
Sufficient pole momentum for a midair jump can also be gained via a slide, most effectively on 2 tile high poles. This can be performed by holding up mid slide to transition to the pole, tapping jump once to boost upwards and then tapping jump midair.
Note: See Slide pole backflip for an additional variant which currently has no known benefit over this version..
Pole momentum height comparison
As shown here, slide pole jumps are effective gaining height from 2 tile high poles, regular backflip pole jumps for gaining height from 3 and 4 tile high poles, and crawl turn backflip pole jumps for 5 tile high poles.

Horizontal pole movement ***
Jump pullups along a pole **
Pressing jump + forward mid pullup propels Slugcat forward, which is useful for long stretches of pole.
Jump pole hopping ***
Pole hopping is done by jumping, holding forward, and tapping jump while hitting the pole.
Note: The timing can be tricky, remember not to press jump too early. This will also not work if holding any other button except forward when pressing jump. It is also possible to pole hop while rising up through a pole from below.

Pounce pole hopping ****
To pole hop from pounce, release and enter the upright position in mid air by immediately pressing up, then let go of up and jump in time to hop. This is significantly faster than jump pole hopping.

Note: Throw boosting can be used for longer pole hops.
Fast pole crawling ****
While hanging on a horizontal pole and moving forwards, quickly alternating down and up causes Slugcat to drop from the pole and immediately regrab, giving a burst of speed. This can be chained to move quickly across horizontal poles while hanging.
Horizontal pole movement
A speed comparison of different forms of movement along poles.
From top to bottom: Walking on pole, jump pull ups, jump pole hopping and pounce pole hopping.
Jump pole hopping and especially pounce pole hopping have tight input windows, so using them over death pits or large falls isn’t advised without a lot of practice.
Note: Jump pole hops can be attempted mid jump pull up with less risk, as long as you’re pressing up immediately after tapping jump to grab in case of failure!

Turns:
Dash turns *
Turning around *
Turns can be performed by reversing movement direction while running at full speed.
A successful turn can be identified by a sound cue, the small “droplets” seen above, and a short burst of speed in the turning direction.

Backflipping *
Backflips are possible as a result of dash turns, and can be done without droplets showing.

Turn hopping **
Turn hopping involves repeatedly jumping after turning, to conserve dash turn speed. Momentum conserved this way only depletes when in contact with the ground, so will last longer with more precise and better timed jumps.
Storing turns **
A dash turn depletes over time for 10 frames. The functionality of a dash turn can be stored by interrupting the turn with other moves during these frames. Most applicable turn storage derives from crouching or sliding.
Crouching **
The first method of storing a dash turn is to start a turn, then immediately interrupt it by crouching. This momentum is then released when Slugcat once again enters the upright position, which can be seen by the small droplets and burst of speed gained when standing up.

Crouching pole grab **
Another simple way to demonstrate dash turn storage is to jump while standing on a horizontal pole, or the tip of a vertical one. This results in a backflip.
Note that simply grabbing a vertical pole from crouch often depletes all available frames of turn storage due to the temporary standing state. This can be avoided by crouch jumping onto the pole.

Crouch backflip **
Backflipping from a turn stored crouch is done by pressing up and jump simultaneously while holding in the direction of the turn.
Note that the original turn direction must be held in order to backflip, even after changing crouching direction.

Turn storage is only ever lost by being in a standing state, or initiating a backflip.
Consequently, stored turns are maintained through:
• Jumping between vertical poles, or dropping down from horizontal ones.
• Pulling up on a ledge (holding down to remain crouched)
• Entering/exiting tunnels (as long as always crouching)
• Entering room pipes / shortcuts (as long as always crouching)
• Jumping while crouched (performing a small crouching hop)
• Slide parkour up walls.
• Turning over while crouched (Original turn direction is immutable and important to keep in mind for several moves)
• Stun, including explosions!
Sliding ***
As sliding involves crouching, turns can also be stored by sliding immediately after turning around. As before, the burst of speed and droplets on standing upright indicate successful turn storage.
Sliding pole grab ***
Note that sliding pole grab does not have the same frame depletion issue as crouching pole grab.

Turning pole grab **
The second method of turn storage is done with poles exclusively, by pressing up to grab the pole immediately after turning. The window for this is very narrow, before the turn appears to have started. Unlike crouching, this does not have any further applications.

Turning ledge fall ***
The third method of turn storage is done by turning when running off a ledge, which interrupts the turn. Holding outwards isn’t necessary to store the turn, but slightly extends the window.

Basic applications ***
Turn hopping **
The speed burst from releasing turn storage by standing from crouch can be prolonged by jumping, as with a normal turn.

Backflip pole coyote jump **
When backflipping off of poles, coyote jumping gives greater horizontal distance.

Turn directionality ****
Note that turn directionality affects backflip rotation. As shown here, backflipping in the direction of the turn gives a lot more horizontal distance.

Turn stored ledge climb ***
It is possible to easily scale 5 tile high ledges by backflipping while pressed against them. Turn storage can be used to easily achieve this from an embedded spear.
Note that for this method, forward turning backflips do not always require a jump to pull up onto the ledge, while backwards turning jumps do. The end result is the same either way.

Slide pole backflip ****
Performed identically to slide pole jumping with a turn stored slide beforehand.

This can at maximum be used to reach a vertical pole 8 tiles in the air.
Slide backflipping ***
The same inputs apply for backflipping from a slide as they do for crouching.

Failed slides can be backflipped out of as well, which insures against failure.

Hanging backflip ^^^^^
With turn storage, tap up and jump at the same time while hanging from the pole base. Tight timing and as of yet limited applications.

Turn stored slide pouncing ***
Turn stored slide pounce to pole ***
Turn storage is conserved through pouncing, and so backflips off poles, both vertical and horizontal, are possible after turnaround slide pounces.
Turnaround slide > slide pounce.
Turn stored slide pounce backflip ***
Turnaround slide > slide pounce > turn stored backflip.
Turn stored slide pounce backflip roll pounce ***
Turnaround slide > slide pounce > turn stored backflip > roll > pounce.

Turn stored slide pounce roll pounce backflip roll pounce ***
Turnaround slide > slide pounce > roll > pounce > turn stored backflip > roll > pounce.
Note:
You can roll from all backflips, regular and turn stored!
Remember that you can infinitely chain roll pounces together!
Backflip out of slide pounce roll ***
It is possible to backflip out of a turn stored roll by holding in the original turn direction and pressing up + jump simultaneously.


Turn stored slide flipping ****
Turn stored slide flip to pole ****
Slide flipping can also store turns, although this is harder to determine as Slugcat lands standing up.
Landing on a pole, horizontal or vertical, after turnaround slide flipping allows for a backflip.
Turnaround slide > slide flip.

Turn stored slide flip bounce ****
This can be done by holding inwards and pressing jump when hitting the ground.
Turnaround slide > slide flip > turn stored bounce.
Note:
This has a set trajectory, unlike pounces and backflips.
Turn stored slide flip backflip ****
This can also be done by holding up and pressing jump when hitting the ground.
Turnaround slide > slide flip > turn stored backflip.
Turn stored slide flip bounce roll pounce ****
As with most advanced moves, these can be chained together into much longer sequences.
Turnaround slide > slide flip > turn stored bounce > roll > pounce.
Turn stored slide flip backflip roll pounce ****
Turnaround slide > slide flip > turn stored backflip > roll > pounce.

Remember that for any pounce out of roll where another roll isn’t desired, you can land in the upright position (instead of crouching) and maintain forward momentum by tapping jump and then up immediately afterwards! (See the slide pouncing section for more details + gif)
Backflip out of slide flip roll ***
Note that the original turn direction still needs to be held in order to backflip. This is worth bearing in mind for slide flips due to their built in directional change.


Turn stored extended sliding ^^^^^
Turn storage is also possible with extended slides. (For these gifs, combos with slide pounces have been omitted because of the essential similarity.
Turn stored extended slide hopping ****
As hopping after a regular extended slide provides as much speed as turn stored hopping, it currently appears that turn stored extended slide hopping has no additional impact on speed.
Turn stored extended slide flip bounce ^^^^^
Turnaround slide > extended slide > slide flip > turn stored bounce.

Turn stored extended slide flip backflip ^^^^^
Turnaround slide > extended slide > slide flip > turn stored backflip.

Turn stored extended slide flip bounce roll pounce ^^^^^
Turnaround slide > extended slide > slide flip > turn stored bounce > roll > pounce.
Turn stored extended slide flip backflip roll pounce ^^^^^
Turnaround slide > extended slide > slide flip > turn stored backflip > roll > pounce.
Crawl turns ****
Crawl turn *
In game motion debug, Default CrawlTurn is part of a series of states that occur when Slugcat is crouching and turns around.
This state has properties allowing it to be used for several moves. Some of these moves have already been shown and explained in the Fast fall Rolling section, but are explored in more detail here.

Crawl turn roll ****
By executing two crawl turns consecutively, then holding down and forward, Slugcat can roll from crouching position. This is possible because the first crawl turn raises Slugcat in the air slightly, giving it enough height to roll after the second crawl turn.

Crawl turn cancel/hop****
While in the middle of a crawl turn, pressing up interrupts the turn by propelling Slugcat into the air while in the Default CrawlTurn state. This is the first part of a crawl turn jump.
Crawl turn jump ****
Pressing jump immediately after a crawl turn cancel causes Slugcat to perform a jump while 1 tile off the ground. This gives 5 tiles of vertical height and exclusively allows for reaching poles at this height.

Climbing 5 tile high ledges & poles ****


Turn stored crawl turn backflip ****
By turn store crouching before beginning the crawl turn jump, Slugcat can backflip from the raised tile height. This does not give enough additional height over the crawl turn jump to be beneficial for reaching poles or ledges.

Climbing 6 tile high ledges ****
This can be used to climb 6 tile high ledges. Note that backflipping in the opposite direction to the initial turn is necessary for Slugcat to reach the ledge in the upright position. Backflipping in the same direction as the initial turn causes Slugcat to reach the ledge upside down.

Crawl turn backflip pole jump ^^^^^
The highest reaching known variant of backflip pole jumping. In order to perform this move both the backflip and crawl turn must be performed in the direction of the original turn and towards the pole, hence the turnaround while crouching. This example covers a height of 10 tiles.
Note: See Backflip pole jump for the basic variant of this move.

Compressed turn crawl turn backflip ****
Backflipping from a crawl turn can also be achieved by initiating a “compressed turn” during an automatically initiated crawl turn. This is done by moving in one direction, initiating a crouch and quickly pressing inwards. This causes Slugcat to attempt to turn while crouching down, which allows for turn storage use. A crawl turn jump will use this turn as a backflip.

Compressed turn crawl turn roll ****
Slugcat can store this otherwise temporary turn by rolling mid crawl turn rather than jumping. This works because the compressed turn crawl turn raises Slugcat into the air, landing in a rollable state.
Crawl turn ledge drop ****
Slugcat enters a crouched/crawl state while pulling up onto ledges. Consequently, holding backwards causes Slugcat to turn. Timing this correctly causes Slugcat to fall away from the ledge while still in the CrawlTurn state, leading to an accelerated rate of fall, and the ability to roll on landing. This is possible with 1 tile high ledges for a similar reason.

Holding back then tapping jump while climbing up a ledge in the Default CrawlTurn state allows for a simpler crawl turn jump setup. This is useful for quickly reaching a ledge after climbing up the opposite side. With turn storage, this becomes a backflip similarly to other crawl turn backflips.
Note: Holding back too early initiates a fast fall, so make sure the input is relatively late in the climb up! As shown in the gif below, Slugcat should mostly be on the ledge before pressing back.

Quick crawl turns ****
https://discord.com/channels/291184728944410624/804488985505955912/906603192790437939
(Temporary discord explanation)
Jump Boost:
jumpBoost is a value in the game’s code which allows the player control over Slugcat’s vertical air momentum by holding the jump button midair during some moves.
Some moves set jumpBoost to zero:
• Wall jumping
• Jumping from poles
• Jumping from deer antlers
• Jumping while grounded and pressed against a wall
• Starting a slide flip
These moves therefore always have a set jump height which cannot be varied by holding jump..
Moves which set jumpBoost above zero include:
• Jumping from a neutral position (jumping, turn hopping,
• Pole hopping
• Charge pouncing
• Backflipping (includes slide flip bouncing)
• Jumping on a creature body
The length of time the jump button is held while performing these moves affects the resultant height gained from them, as shown below with regular jumps and backflips.

Storing jump ****
Moves which set jumpBoost above zero can also be interrupted under certain conditions to achieve jump storage; storing a jumpBoost value greater than zero while in a neutral position (not in the air).
Charge pounce ***
Jump storage can be gained from this move, by quickly tapping and releasing jump when transitioning from standing to crouching, such that no jump is performed. This results in a stored jumpBoost of 6. As shown in the gif below, jumpBoost is set to 8 and then depletes rapidly when jumping, overwriting the stored value 6 and removing the storage.

Tunnel slide boost ****
A jumpBoost of 8 can be stored by slide pouncing such that the pounce is performed when Slugcat is inside a tunnel. This can be done in both horizontal and vertical tunnels.

Jump interruption ****
8 jumpBoost can also be stored by jumping just before the start of a slope. With perfect timing, the slope fully interrupts the jump.

Jump storage is also possible via jumping while under a creature body or sloped ceiling.

Keeping storage ****
Jump storage is lost when Slugcat becomes airborne while jump is held. This rapidly decrements any stored jump to 0 within a few frames. jumpBoost is also set to 0 instantly if jump is not held.
Jump storage is also lost when a move sets jumpBoost to a specific value, overwriting any stored jump.
Using storage ****
There are methods to launch Slugcat into the air without initially affecting jumpBoost (jump storage is always lost when midair). These methods can be combined with jump storage, while in a neutral state, to give Slugcat significantly higher upwards velocity.
Tunnel/pipe exit boost ****
Boost upwards out of a tunnel and hold jump as slugcat becomes airborne. Unlike most jumps, boosting in a tunnel doesn't set the jumpBoost value, so storage can be easily made use of in that way.

Instant pounce ****
An instant slide pounce also gives momentum without setting this value and so can have its height increased by jump boost storage. This gives the current highest known pounce when the stored value is 8.
Jump-stored vault ^^^^^
A 5-frame-perfect-input TAS vault was found which allowed for use of jump boost storage to reach 8 tiles in the air by throwing a rock so slugcat enters a state where it gets vertical momentum using jump boost storage before regaining 6 jumpBoost almost midair.

Jump-stored crawl turn vault ****
(Explanation coming)
`

Swimming (SPOILER WARNING):
Content shown below is from an early-mid-game area.
If playing blind, we recommend that this section is avoided until swimming tips are needed.
Boosting *
Water Boosts *
Pressing jump underwater gives a speed boost but reduces breath.
The amount of speed given reduces each time, and more than a couple will quickly cause Slugcat to start drowning.

Using boosts to escape danger **
Speed boosts are usually best saved for dangerous situations (eg. escaping from salamanders)

Fast horizontal water movement *
Dipping under the surface and boosting once horizontally and slightly down, then resurfacing and repeating is an effective way to travel quickly through large surface bodies of water. This makes use of boosting, using some breath, but preserves most in case of creature attacks.

Buoyancy **
While swimming, Slugcat has a constant upwards drift towards the surface of the water. To swim underneath the surface (and consequently faster), use swim strokes / boosts to swim slightly upwards, angle down slightly to maintain initial depth, and repeat,
Counteracting upwards drift is important for swimming through underwater tunnels, to avoid being trapped against the ceiling.
Note: For swimming vertically, moving straight up makes the best use of natural buoyancy!
Bubble fruit / water nuts can also be used to increase buoyancy when activated.
Wriggling **
Alternating between up and down while swimming horizontally also increases swimming speed. This is important when navigating underwater tunnels. This is most effective on controller analog sticks.

Water hopping ****
Water hopping ****
When moving at a sufficient speed, and by entering Slugcat’s upright position with correct timing, landing on water will flip Slugcat’s vertical speed, launching them back into the air. Throw boosting is not always required to reach this speed, but can be useful for extending the timing window for entering the upright position. Multiple throw boosts can be used to achieve multiple water hops in a row.
Mushrooms can also be used to extend the timing window, which is also easier with Hunter’s extra aerial speed.

Combat:
Throwing weapons *
Throw arcs *
Throwing rubble
Rubble follows this arc when thrown. Rubble damages creatures by 1/100th the damage of a spear, and has a longer stun duration. When thrown, rocks travel through the air slightly more slowly than spears, and as such have a slightly shorter range.

Throwing spears
Spears follow this arc when thrown.
Spears will embed in walls 100% of the time within a 7 tile range.
Spears will embed in walls 33% of the time between the 7 and 28 tile range. For Hunter, this tile range is increased to 35.
Past a 28 tile range, spears will always rebound and drop to the floor to be picked up. Spears also will not embed on slopes, or where a spear is already embedded.
Tossing items
Other items follow this arc when tossed forwards. Items can also be thrown upwards by holding up when pressing throw, which can be useful for throwing items to land directly in front of Slugcat.

Angling throws ***
The angle at which objects (spears and rocks) are thrown depends on Slugcat’s momentum at the point of throwing. Throwing while moving down, either by crouching or falling, will give the object a lower arc, while throwing mid jump will give the object a higher arc.
As seen in the gif below, the spear arc is different depending on Slugcat’s upward or downward momentum.
Rubble/Spear combo *
Lizards have armoured heads which protect them from most spear damage. To hurt them, Slugcat usually needs to spear them in their softer back.
Rubble will flip lizards over when thrown at their heads. A spear can be thrown immediately after for a simple attack.
Remember to keep the rubble in Slugcat’s right hand to throw first!
Note: There are some extremely niche conditions under which a lizard will not flip when hit with rubble. These include the lizard having just climbed up onto a ledge, and being hit with rubble when directly next to Slugcat (essentially touching).

Pinning creatures to walls **
Creatures can be pinned to walls with spears to immobilise them for some time.

Spear lock *
On taking damage, lizards and some other creatures enter a stun state for a short amount of time. As lizards lose more health, this amount of stun per spear increases.
This example gif shows repeated rubble / spearing of a lizard. Note the increased stun duration with each spear.

This can be used to repeatedly spear lizards by pressing grab and instantly throwing again multiple times.
Spear cooldown *
Spears cannot be picked up immediately once thrown, preventing Slugcat from stun locking to death more resilient creatures with one spear.

Double spearing *
Spear cooldown can be circumvented with multiple spears, as the cooldown applies per spear, not for the player. This allows for more rapid stun locking, and is useful for quickly incapacitating tough creatures.

Throwing midair **
Spears can be thrown while midair to catch lizards on poles.

Hitting in front ***
Spears can hit lizards above the head when thrown from a specific distance. Note that this hits the body chunk behind the head and so does normal damage and stun.

Crouch mouth spear ***
Spears that hit the lizard mouth body part do 1.5x damage and stun for much longer.
Spears do not bounce off of lizard head armour when drifting downwards (negative Y velocity) and travelling horizontally.
This can be achieved by throwing mid crouch to angle the spear downwards.

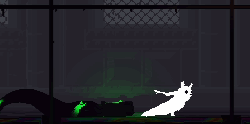
Slide spearing ***
Basic technique ***
Throwing a spear or rock forwards mid slide causes the object to bounce off the floor and travel much further horizontally. This allows spears to embed into walls much further away.
Spears can be slide thrown from further away to hit targets.

Slide spearing lizards ***
Slide spearing also imparts a downwards drift to thrown spears, which can be used to hit lizards in the mouth, dealing 1.5x damage and stunning them for longer than usual..
This allows for consistent stunlocking with a single spear.
Example video of spear sliding
Note that the spear must hit while still travelling downwards, before ricocheting off the ground.
The following gif demonstrates the downwards velocity that slide spears have before bouncing.

Slide spear pounce ****
Spears can be thrown before a pounce. Limited applicability.

Slide spear flip ****
It is also possible to throw a spear prior to slide flipping. Requires precise timing.

Extended slide spear ****
Finally, slide spearing is possible after an extended slide.

Downwards/upwards throwing **
Backflipping to downthrow **
To throw downwards, hold down and throw mid backflip without holding any other buttons. If holding left or right, the object will be thrown in that direction instead.
Spears thrown downwards will become embedded in the ground and can be climbed.
Downthrowing from storage (pole) **
You can use turn storage onto a pole to downthrow from above a creature.

Slide flipping to pass lizards ***
Slide flipping can be used to safely pass lizards without being caught. This works for lizards with high aggression.

Downthrowing from slide flips ****
You can also throw downwards mid slide flip.

Pinning creatures to floors ****
Downthrown spears can pin a creature to the ground.
Combat showcasing spear sliding and slide flipping
Combat showcasing turn storage

Slide spearing into slopes ***
Slide spearing at a slope will cause the object thrown to travel upwards.
Spears thrown upwards will become embedded in the ceiling and can be climbed.
This can also be used to pin creatures to ceilings if above a suitable slope for slide spearing.

Creature strategy (minor spoilers) *
Lizard tracking - Move safety/Laziness *
Lizards have differing levels of aggression depending on multiple factors, including lizard spawn variation and the gamemode.
Less aggressive lizards will have slower reactions and can be backflipped over, for instance, while more aggressive lizards will quickly turn and snap Slugcat out of the air if this is attempted. Backflipping is generally only recommended as a reasonably safe move for green lizards.
Dealing with tongues *
When grabbed by a lizard tongue, reaching the same height and throwing objects at the lizard is often effective.
If not possible, getting close can cause it to snap and miss, especially if done quickly.
Throwing at the same height as a white lizard's mouth has a chance to hit and is very effective when their tongue is out.

Grace period / Bite lethality *
Lizard bites have a chance to immediately kill Slugcat.
It is possible, for a short window after only being stunned by a lizard bite, to pick up / throw a rock or spear which can often hit the lizard and allow Slugcat to escape.
Information on lizard bite lethality can be found at https://rainworld.gamepedia.com/Lizards

Mask responses *
When wearing a vulture mask, lizards will run from the player for 17.5 seconds, starting from when they first see Slugcat wearing the mask. After this timer has run down, the mask will no longer scare that lizard. This is extremely effective for passing through regions without trouble, or playing as Hunter.
King vulture masks last longer, for 30 seconds.
Other:
Cut content
Wallpouncing ***
By holding towards a wall and pressing jump at the moment of collision, while in the pounce state, Slugcat is able to launch in the opposite direction and gain height.
Please note that this tech was removed in the 1.5 update, 11th Dec 2017.
A mod that re adds wallpouncing to the current version of the game can be found here.
This can be chained to scale otherwise unclimbable wide shafts.
Trivia: Joar’s stated reason for removal.
Corner Wallpouncing ****
Directly hitting a corner causes Slugcat to gain considerably more height from wallpouncing. As with regular wallpouncing this can be chained.
Slide Wallpouncing ***
Corner wallpounces can also be done from slides.


Unexplored moves
Parkour momentum backflip ^^^^^
Similarly to pole momentum, it is possible to get momentum up a small ledge via slide parkour, to perform a midair jump. This move has not yet been found to be applicable in place of a crawl turn jump.

Parkour slide backflipping ^^^^^
In this move, the member Ga appears to gain a ledge crawl turn backflip worth of height significantly early in the pullup animation. We believe that this is just a very frame precise example of this move.

Pole hop save ***
It should be possible to still grab the pole if a pole hop is missed, by holding up from immediately after tapping jump until the next jump input. This has not yet been explored as regular pole hopping is consistent with practice.
Backwards roll out of some pipes ^^^^^
Specifically for tunnels with 1 tile high exits, exiting backwards holding forwards and down sometimes allows for rolls. This isn’t consistent and depends on the tunnel. Examples include the top left tunnel exit in the refinery arena map.
Tunnel slide pounce ^^^^^
Starting a slide pounce over a tunnel shortens the distance before pouncing. Currently has no applicable use.

Credits
This Guide was designed by Axolittle (gwynlttm on discord) and laurapigeon (laurapigeon on discord), with editing feedback from Rob and ICED.
Gifs in this guide were made with screentogif, OBS and Nohboard.
Our Nohboard config + download can be found pinned in #meta and tech on the discord.
Credit also goes to:
Ga - Posted a ton of amazing movement gifs in early 2018, introduced fast pole climbing, backflip pole jumping, grounded wall hopping, and many more invaluable “tipssssss”. Messages can be searched on the Discord server.
Kehtapbi - Communicated a lot of interesting gifs and information from the Chinese rainworld community in early 2018. Possibly led to Ga joining the discord.
Olkinim - Co author of the original turn storage discoveries + guide along with other moves (pole movement, sliding into ground pipes)
Trash Typhoon - Finding pole hopping in the 1.5 beta test.
Turtle - Finding turnaround pole grab, leading to turn storage discoveries.
Applebread - Early player, found a lot of tech and posted tutorials on youtube.
Henpemaz - Experimenting with movement, finding practical applications for instant slide pounces/flips. General guide feedback.
Slime_Cubed - Created the TAS tool for Rain World, experimenting with movement and finding practical applications for instant slide pounces/flips.
DrSunshine for finding 2 tile high pole jumps, & in general along with Antehman and Krogg for experimentation and finding plenty of interesting applications for moves.
Houkou, Xen, Sipik, Butcherberries for noticing moves we forgot to include.
And many others for experimenting, discovering, rediscovering and documenting movement tech online.
If there’s anyone missing here or if you have any questions about contributions, please do contact us! We’d like to give as much credit as possible where due.
There’s a lot more out there to discover! Procedural physics based movement has some really interesting quirks which can take hundreds of hours to find out.
It’s been a collective community effort to find, share and document as much as possible, but it’s always likely that there are undiscovered tricks and options still waiting to be found.
If you notice any mistakes or have any suggestions, feel free to add and DM @gwyn#9899 (Axo) or @laura#2871 (pine) on Discord if you have any questions, or email gwyncardiff@gmail.com or laurahannah44@gmail.com. You could also ping us in the #movement channel on Discord - we check there regularly!
Happy hunting!
Gif Archive
Index
Please note that this index was mostly used as a construction aid, and so has become less accurate as more content has been added to the guide over time
A - Basic Moves:
Aa - Jumping *
Aa1 - Pulling up onto ledge *
Aa2 - Coyote jump*
Aa3 - Pole coyote jump*
Aa4 - Grounded wall hop **
Aa5 - Aerial wall jump **
Aa6 - Contact wall jumping **
Aa7 - Extended coyote jump ****
Ab - Item management *
Ab1 - Right hand usage *
Ab2 - Swapping hands *
Ab3 - Dropping items *
Ac - Charge pouncing *
Ac1 - Charge pouncing *
Ac2 - Crouching to safely position on edges *
Ac3 - Landing upright out of charge pounce *
Ac4 - Throw boosting *
Ac5 - Pounce + throw boosting **
Ad - Backflipping *
Ad1 - Backflipping *
B - Slides:
Ba - Basic slide**
Ba1 - Sliding *
Ae1.1 - Execution
Ae1.2/3 - Failure
Bb - Slide pouncing **
Bb1 - Slide pouncing **
Bb1.1 - Execution
Bb1.2 - Failure
Bb2 - Landing upright from pounce **
Bb3 - Slide parkour ***
Bb4 - Extended Sliding ***
Bc5 - Extended slide hopping ****
Bc5 - Extended slide backflip ****
Bc6 - Extended side pouncing ****
Bc - Slide flipping ***
Bc1 - Slide flipping ***
Bc1.1 - Execution
Bc1.2 - Failure
Bc2 - Slide flip pick up ***
Bd3 - Extended slide flipping ****
C - Rolls:
Ca - Roll from falling *
Ca1 - Drop rolling *
Cb - Chaining from moves **
Cb1 - Rolling from backflips **
Cb2 - Rolling from slide pounces **
Cb3 - Rolling from slide flips ***
Cc - Roll pouncing **
Cc1 - Roll pouncing **
Cc1.1 - Execution
Cc1.2 - Repeated execution
Cc1.3 - Other options
Cc1.4 - Rolling up single tile heights
Cd - Fast fall Rolling ***
Cd0 - Dropping off ledges ^^^^^
Cd1 - Dropping down a tile ^^^^^
Cd2 - Rolling from crouching ***
Cd3 - Instant slide pounce ***
Cd4 - Ledge hang and fast falling ***
Cd4.1 - Positioning
Cd4.2 - Execution
Cd4.3 - Application
Cd5 - Stumble roll ***
Cd6 - Tumble roll ***
D - Turns:
Da - Dash turns*
Da1 - Turning around *
Da2 - Backflipping *
Da3 - Turn hopping *
Db - Storing **
Db1 - Crouching **
Db2 - Crouching pole grab **
Db3 - Backflip pole coyote jump**
Db4 - Sliding ***
Db5 - Sliding pole grab ***
Db6 - Turning pole grab **
Db7 - Turning fast fall ***
Dc - Out of storage ***
Dc1 - Turn hopping **
Dc2 - Crouch backflipping **
Dc3 - Slide backflipping ***
Dc3.1 - Execution
Dc3.2 - Failure
Dc4 - Parkour slide backflipping ****
Dc5 - Hanging backflip ^^^^^
Dd - Turn stored slide pouncing ***
Dd1 - Turn stored slide pounce to pole ***
Dd2 - Turn stored slide pounce backflip ***
Dd3 - Turn stored slide pounce backflip roll pounce ***
Dd4 - Turn stored slide pounce roll pounce backflip roll pounce ***
De - Turn stored slide flipping ****
De1 - Turn stored slide flip to pole ****
De2 - Turn stored slide flip bounce ****
De3 - Turn stored slide flip backflip ****
De4 - Turn stored slide flip bounce roll pounce ****
De5 - Turn stored slide flip backflip roll pounce ****
Df - Turn stored Extended Sliding ^^^^^
Df1 - Turn stored extended slide hopping ****
Df2 - Turn stored extended slide flip bounce ^^^^^
Df3 - Turn stored extended slide flip backflip ^^^^^
Df4 - Turn stored extended slide flip bounce roll pounce ^^^^^
Df5 - Turn stored extended slide flip backflip roll pounce ^^^^^
Dg - Crawl turns ****
Dg1 - Crawl turn *
Dg2 - Crawl turn roll ***
Dg3 - Crawl turn corner jump ****
Dg4 - Crawl turn ledge drop ****
Dg5 - Crawl turn hop ****
Dg6 - Crawl turn jump ****
E - Tunnels
Ee - Mobility in tunnels *
Ee1 - Turning around *
Ee2 - Free falling *
Ea - Tunnel boosting *
Ea1 - Boost end lag *
Ea2 - Boosting to end of/out of tunnel *
Ea3 - Boosting out of shortcuts/room pipes **
Ea4 - Boosting out of shortcuts/room pipes in tunnels **
Ea5 - Boosting around tunnel corners *
Ea6 - Sliding into a tunnel ***
Ea7 - Sliding into a pipe **
Ea8 - Slide into tunnel boost ***
F - Poles
Eb - Vertical pole movement **
Eb1 - Boost end lag *
Eb2 - Boosting to top *
Eb3 - Pole wall jumping **
Eb4 - Hybrid boost jumping **
Eb5 - Pole re grab ***
Eb6 - Fast pole climbing ***
Eb7 - Dropping down poles *
Fa2 - Vertical pole movement
Fb2.1 - Climbing
Fb2.2 - Wall jumping
Fb2.3 - Wall jump boosting
Fb2.4 - Regrab boosting
Ec - Backflip pole momentum ****
Ec1 - Backflip pole momentum ****
Ec2 - Backflip pole jump ****
Ed - Horizontal pole movement ***
Ed1 - Landing on pole tip ^^^^^
Ed2 - Jump pullups along a pole *
Ed3 - Jump pole hopping ***
Ed4 - Pounce pole hopping ****
Ed5 - Pole hop save ***
Fa3 - Horizontal pole movement
Fb3.1 - Hanging
Fb3.2 - Walking
Fb3.3 - Pullup jumping
Fb3.4 - Pole hopping
Fb3.5 - Pounce pole hopping
F - Speedrunning:
Fa - Skip tech
Fa1 - Den boosted slides ****
Fb - Speed comparisons
Fb1 - Flat ground movement
Fb1.1 - Running
Fb1.2 - Backflip rolling
Fb1.3 - Turn hopping
Fb1.4 - Slide pouncing
Fb1.5 - Extended slide hopping
Fb1.6 - Extended slide pouncing
G - Water Movement:
Ga - Boosts *
Ga1 - Water boosts *
Ga2 - Using boosts to escape danger **
Ga3 - Fast horizontal water movement *
Ga4 - Wriggling **
Gb - Hopping ****
Gb1 - Water hopping ****
H - Combat:
Ha - Throwing weapons *
Ha1 - Throw arcs *
Ha1.1 - Tossing items
Ha1.2 - Throwing rubble
Ha1.3 - Throwing spears
Ha1.4 - Angled throws ***
Ha2 - Rubble/Spear combo *
Ha3 - Pinning creatures to walls **
Ha4 - Spear lock *
Ha5 - Spear cooldown *
Ha6 - Double spearing *
Ha7 - Throwing midair **
Ha8 - Hitting above the head ***
Hb - Slide spearing **
Hb1 - Slide spearing **
Hb1.1 - Execution
Hb1.2 - Application ***
Hb1.3 - Angling throws ****
Hc - Downwards/upwards throwing **
Hc1 - Backflipping to downthrow **
Hc2 - Downthrowing from storage (pole) **
Hc3 - Slide flipping to pass lizards ****
Hc4 - Downthrowing from slide flips ****
Hc5 - Pinning creatures to floors ****
Hc6 - Slide spearing into slopes ***
Hd - Creature strategy *
Hd1 - Lizard tracking - Move safety/Laziness *
Hd2 - Dealing with tongues *
Hd3 - Grace period / Bite lethality *
Hd4 - Mask responses *
J - Misc Tech:
Ja - Unidentified moves ^^^^^
Ja1 - Backwards roll out of some pipes ^^^^^
Ja2 - Turn store crouch flop ^^^^^
Ja3 - Turn store crouch turn ^^^^^
Ja4 - Frame jump instant slide pounce
Jb - Miscellaneous moves ^^^^^
Jb1 - Tunnel caught slide pounce ^^^^^
Glossary
Tomato jump / Fliphop / Flip hop - Name used for crawl turn jump before the move was fully understood. Sometimes used by members of the speed and score running community.
Rocket jump - Name used for slide pouncing in the code.
Whiplash - Name used for slide flipping in the code.
Air hop / Airhop / Double jump - Common terms used to refer to a second jump performed midair. This guide uses the terminology “hop” for brevity.
Boosted slide / Backthrow slide - Variant terms for extended sliding.
Spear slide / Throw slide / Slide throw - Variant terms for slide spearing.
Fast fall / Fastfall - Fast fall
Den boost / Den jump - Den slide
Slide flip - Slide flip
Slide pounce / Slide pounce
Pending List
• Add external gif links for down holding roll conditions, determine whether downwards running roll merits adding.
• Add recently documented instant extended slide moves.
• Add jump storage and run storage (and run storage accumulation).
Changelog
22/05/20 - Announced main body of guide, added several gifs, updated several difficulty ratings and added a couple more accurate move descriptions. Began implementing ICED’s feedback
23/05/20 - Finished implementing ICED’s suggestions for clarity - found here. Added additional tunnel boosting and dropping gifs
24/05/20 - Added pole boost endlag jump cancel gif, added 3 speed comparison gifs with links and notes
25/05/20 - Added wall jumping gifs and description
26/05/20 - Began adding Rob’s suggestions for clarity
Updated throwing section, added angled throw section and gif
Updated throwing range info for Hunter
Added mask timer info in the creature strategy section
Added extended slide backflip gif and description
27/05/20 - Updated Aerial wall hop terminology for clarity, condensed explanation and added gif of intermediate state, found and explained failure case for holding inwards, and for the timing window
Added controller disclaimer on title page
Linked to coyote definition on first section
Updated grounded wall hop gif to one without pole, to avoid confusion / conflation
Added reference links to index
Updated primary hand terminology to reflect Slugcat using its right hand.
28/05/20 - Added ceiling slide, added turn hopping to basic moves section and renamed backflipping to turning around
Updated backflip gif for clarity
Added note to throw boosting for general applicability to aerial moves
Split up roll arc variations into side by side for clarity
Reorganised early turn storage section for clarity.
Added glossary for community/code names.
29/05/20 - Renamed re grab pole boosting to fast pole climbing for visibility. It’s really important
30/05/20 - Moved vertical / horizontal pole speed comparisons to appropriate sections.
Dissolved speedrunning section
Moved den boost to slides section
Moved speed comparisons to relevant sections to demonstrate utility.
Split pole and tunnel movement into different sections
Moved pole movement in front of turn storage (more important)
Moved tunnel movement before rolls (more important)
Shortened to tunnels and poles
Renamed misc moves to other
Updated credits section with links
Updated spear cooldown and double spearlock gifs to show effect on resilient green
Added throw boost note to pole hopping
Update: We’re working on making a condensed steam guide at the moment, so won’t be adding creature tech until we’re:
a) Finished with the current round of feedback
b) Happy enough to release the steam version
This should take a couple of days max.
Added throwing midair to combat section
Added wriggling section and gif, updated buoyancy section for accuracy
31/05/20 - Added slide throw angle
Added hitting with spear over head
Added turning fast fall, updated storing turns for clarity
01/06/20 - Created condensed Steam guide!
Overhauled wiki controls page and subpages.
02/06/20 - Updated crawl turn section, updated gifs
Added pole tip balancing
Corrected ledge drop turn store info and updated gif to remove unnecessary input
Updated comparison gifs with freeze frames
Finished implementing Rob’s feedback, found here
07/06/20 - Clarified pounce pole hopping
Codified dash turns
Codified object arcs
Amended rubble arc
Amended spear arc
Added backwards roll out of some pipes gif
10/06/20 - Added short comment in item management on storing items.
19/06/20 - Added fast horizontal pole crawl
Moved recommendations to the start of the guide
16/09/20 - Added instant slide pounce & instant slide flip!
TAS section will be implemented in the near future.
Update: Adding a creature section is less of a priority at the moment; pinecubes has intensive studies and I’m focusing on speedrunning. We’ll look into it once we’ve finished another project.
Added henpemaz and slime cubed to credits
Cleared up Other section, removed now documented/understood moves
17/09/20 - Updated instant slide pounce/flip inputs with 🡸 🡺 🡹 🡻 🡼 🡽 🡾 🡿
27/10/20 - Added fast rolling + rolling from a +1 tile jump!
Added +1 tile jump to Adept recommendations; it’s really good!
08/01/21 - Added glossary terms for easier navigation using synonyms.
22/01/21 - Added cut content, wallpouncing, all variants.
29/01/21 - Added more info on +1 tile rolls, storing up/down inputs. More to come!
01/02/21 - Linked to gif creation programs in Credits. Currently creating intermediate gifs for fast pole climbing, as a discord resource.
12/02/21 - Reorganised misc roll starters into two distinct groups - fast fall & tumble rolling.
24/03/21 - Replaced To Do list with Pending List - more direct relationship between pending items and list.
Added Hanging backflip.
Added Extended coyote jump.
Added Slide spear pounce.
Added Slide spear flip.
Added Extended slide spear.
Added Crouch mouth spear.
Updated wording and explanation for slide spearing, downwards drift for spears.
Updated 3 basic turn storage gifs.
Updated turn storage explanation, wording for clarity. Mentioned frame depletion as an issue.
Added turn directionality gif to illustrate benefit of > clockwise/outwards rotation for horizontal distance.
Added 2 backflip out of slide pounce roll gifs.
Added 2 backflip out of slide flip roll gifs.
Added gifs for climbing 5 + 6 tile high ledges.
Moved landing on pole tips to vertical pole movement with the other pole tip gifs
Adding slide pole jump and slide pole backflip, in backflip pole movement and turn storage applications respectively. Separated because slide pole backflipping requires turn storage and is otherwise identical. Linked between for reference.
25/03/21 - Added turn stored ledge climb.
Added 8 tile high pole momentum jump
Moved parkour momentum backflip and parkour slide backflipping to Unexplored as we have not yet replicated them satisfactorily.
Added stumble roll.
Updated instant slide pounce cleanest input set, two jumps unnecessary.
Update: We haven’t said so explicitly yet but we’re no longer planning to add a creature section to this guide, as it is large enough already and is consistently expanding. A creature section would require its own standalone guide given the breadth and depth of possible interactions. We may take this up in the future, otherwise it’s open for the community!
16/04/2021 - Linked to wallpouncing mod in relevant section
Fixed broken links in contents.
19/04/2021 - Renamed Boosted Sliding to Extended Sliding. This has always been a used term that distinguishes the move from the numerous other uses of “boost” in RW movement, especially in light of recent jump storage/jump boost discoveries. More coming soon!
10/09/2021 - Removed hyphens from move names, making them easier to search with ctrl + f.
11/09/2021 - Added jump boost section outline, gifs
13/09/2021 - Continued expanding jump boost section
31/03/2022 - Repositioned gif