Vegan Ramen Cookbook
Ad-free recipes. Let’s talk about vegan ramen!
Click blue links to navigate this book.
**For better viewing on mobile, click the ፧ in the upper right corner of the app, and enable “Print layout”.
***On mobile, view from the Google Docs app for best performance.***
Copyright © 2023 by Christopher Gantan and Jules Anderson.
All rights reserved.
Completed Ramen Bowls
- Vegan Dark Tonkotsu Ramen
- Vegan Light Tonkotsu Ramen
- Instant Vegan Tonkotsu
- Vegan Shio Ramen
- Vegan Shoyu Ramen
- Vegan Saimin
- Puerto Rican Saimin
Components
- Stocks
- Tares (Sauce)
- Noodles
- Oils
- Toppings
Misc. Recipes
Blog
Send a Tip
This ad-free book is free, accessible, and continually updated. More recipes will be added over time, and I am always considering requests for traditionally non-vegan dishes that you would like to see veganized.
If you can afford it and are making use of this book, please tip to support my work! Much time has gone into this book, and more time will be put in to keep it updated.
To send a tip, click the link below -- When sending a tip, let me know your Instagram or Reddit tag so I can properly thank you :)

(https://linkr.bio/vegan.tanmen)
On Reproduction and Reposting
Making these recipes is a passion, and I would love to continue to provide free and accessible recipes. This book is made for the benefit of home cooks seeking to better their vegan cooking. Please do not share, reproduce, or profit off of this work in a monetary sense without explicit credit to me - @vegan.tanmen.
Thank you!
Introduction
Vegan.tanmen started with a foodgasm. That’s when someone eats food so good that they moan, and their clothes explode off their body in a lewd manner.
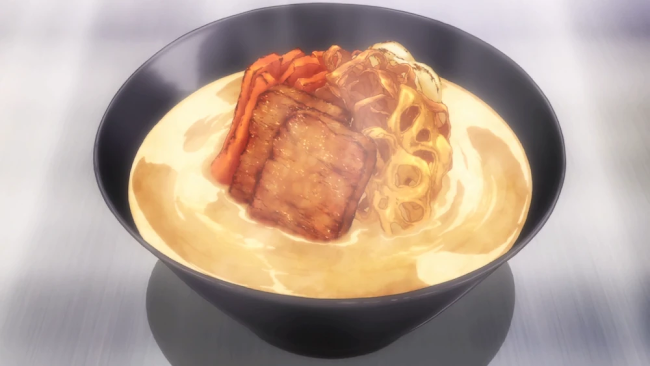
I am serious. Some anime watchers know what I’m talking about - a Japanese animated show called Shokugeki no Souma, also known as “Food Wars!” in English.

I was in college when my friend told me “Chris you like cooking, don’t you? You like anime, don’t you?” and he looked up a pirating site on his laptop to load up Shokugeki, an ecchi anime where pro chefs compete in 1-on-1 cooking duels. In this show, it is typical for the loser to eat the winner’s superior cooking and moan in defeat, convulsing with waves of culinary pleasure that erupt, scattering their clothes off their body and into oblivion. I thought it was too much and gave up watching after Episode 1.
Months later, at the urging of the same anime-recommending friend, I gave it a second chance and decided to give it a few episodes. After getting to know the characters and experiencing an absolutely ridiculous ending to Episode 10, I was hooked. It wasn’t the sexual part of the show that kept me there, but the fact that the food in the show looked good. The cooking techniques it taught me were novel and creative. The writer of Shokugeki had worked with a trained chef to design the food it portrays, and I began to try recreating food from the show out of pure fun and curiosity. Themes of balancing flavors, subversive cooking techniques, and finding a reason to cook emerged as the show went on. A chef’s reason is central to Shokugeki. Through all of the show’s goofy banter, tropey characters, and sexual foodgasms, a question was asked of the chefs. To me, this question was so thought-provoking that it broke the fourth wall of the show, reaching past the English subtitles and through the laptop screen to grip me by the collar and demand that I reflect on my own cooking:

“When you cook, who are you cooking for?”
I wasn’t always vegan. I was actually a huge meat eater with a tendency toward beef back in high school. That was, until I met a vegan named Jules, who ended up becoming my romantic partner and best friend, and I naturally learned from them about the ethical and environmental impacts of animal products. I gave up meat in 2014, and my tolerances for milk, honey, leather, and non-vegan shampoo fell like dominoes in the next few months.
Do you know what my initial thought was when I first gave up my favorite foods? Man, this sucks! I lacked knowledge of where to get good vegan meat and cheese replacements. I was convinced that food wouldn’t be good ever again without In-n-Out burgers or one pound bags of cheap mozzarella. And ironically, it was during this time of culinary struggle that I started watching Shokugeki.
Soma, the main character in Shokugeki, is often put in a situation where a particular dish is ordered, but he doesn't have the ingredients to properly cook it. So he gets creative. When a substantial meat dish is ordered but Soma only has bacon and potatoes, he makes a faux roast by wrapping mashed potatoes cooked in sweet wine sauce in a shell of bacon. When Soma needs to defeat a rival chef who is using A5 wagyu steak that he cannot afford, he turns to tenderizing a discount steak with marinade made entirely of minced onions. Obviously none of this is vegan, but I was inspired by the themes of subversion, creativity, and always, always believing there has to be a way to get a delicious dish even when your options are limited.
Being a college student at the time, I often was staying at Jules’ dorm or having Jules over at my apartment. During those times I tried to make the most impressive vegan food possible. Though I had just gone vegan, we had been dating for 3 years and I was familiar with the vegan culinary scene. At this time, it was globally known to be not that good. Our vegan cheeses were like cardboard, our vegan meats too soft, and oat milk wasn’t mainstream yet. When Jules came over to my place, I wanted to cook for them, and I constantly was experimenting to show them meals that proved that even though we were vegan, our food could be good anyway.
One day I tried recreating a ramen dish from Shokugeki for Jules. It was the first time I made ramen, and it happened to be vegan. The soup was made of soy milk, miso, and grated mountain yam, and topped with grilled vegetables and tempeh. Even with my amateur execution and the fact I was using dried buckwheat noodles of all things, Jules took a sip of the broth and told me that I had made something especially delicious. They urged me to make them more ramen dishes, and this prompted me to look up recipes and read up on the culture of the dish.
I learned how obsessed people were with this noodle dish. I learned about how chefs spend 24 hours tending to a pot of tonkotsu broth, and how some people travel to Japan just so they could eat three bowls of it a day. I learned about a guy named Mike Satinover, AKA Ramen Lord, whom people regarded as a god of ramen on Reddit, and began listening to the Way of Ramen podcast. I was thrilled when Jules took me to see Ramen Heads, a movie about Osamu Tomita, the #1 ramen chef in Japan at the time. I absolutely lost it after the screening when Tomita himself came on stage and answered questions from the audience, including my inquiry about what the best kombu is (he said rausa is the best). Ramen was not just a dish, but a way of life. I began to understand that ramen was something you give hours and days of your time to, all for the sake of creating the purest expression of your cooking.
I ate 21 bowls of vegan ramen on my 2018 trip to Japan, and I was delighted to find the culture of vegan ramen alive and well. From a stunning garlic shoyu in Harajuku, to a surprisingly good gluten-free carrot ramen in Tokyo station, to a massive Halal curry ramen in Shinjuku, I was blown away. In Asakusa I ate a shio ramen that had a curious piece of chewy, dried bread as a topping. Upon closer inspection of the pink swirl drawn on, I was delighted to realize it was a vegan stand-in for naruto, the iconic fish cake topping.
I took photos of every bowl I had, with the idea of posting all of the photos online as a food journal. Since I had been making tomato ramen and vegan chicken paitan at home, featuring my own cooking wasn’t out of the question. I was overlooking the evening Shibuya skyline when I thought of the name “@gantanmen”, a play on words combining my Filipino surname “Gantan” and the Chinese ramen dish “tantanmen” in a nod to my two ethnic cultures.
When Ryan from Way of Ramen asked me to appear on the podcast, I came on with such limited knowledge of the dish, but a firm belief in its ability to overcome its need for animal products. I remember talking about known things such as creating tonkotsu from plant-based milk, and theoretical things like making bone broth out of agar agar powder. As much as I stuttered through that interview (I haven’t personally listened to it), it was released. People with questions on how to make their vegan ramen started to message me on Instagram. Through answering questions from ramen heads around the world, I learned that - at any given moment - someone, somewhere is out there scheming on how to make the best bowl of vegan ramen possible. And they’re always trying to give it to someone - a vegetarian girlfriend, distant vegan relatives, or a close plant-based friend.
Vegan ramen has been my vehicle to show others that, even though they see the ways in which vegan cuisine is limited, I can prove time and again that it has the power to subvert expectations. Our global food system mistreats people and animals and destroys our environment. I am not a pushy vegan that likes to shame, but I am determined to prove to everyone I talk to how awesome the world of plant-based cooking can be. And I figure that if I can take ramen, an iconic dish known for its powerful umami, veganizing it while still maintaining its ability to blow away both you and your clothes, I think I will have made my point.
Jules was, and still is, the person I want to make the absolute best damn bowl of vegan ramen for. But today, with the advent of this free book, it’s become more than that. With the people around the world who follow my content asking me questions about how to improve their bowls, I have made it my goal to help others perfect their craft. Whether you’re trying to make vegan ramen for your mom, your partner, your friend, or yourself -- I want you to know that this genre of ramen is my passion, and I plan to take it as far as I can. With that being said, allow to ask you the same question that I once asked myself:
“When you cook, who are you cooking for?”

Kitchen Essentials
- Electric kitchen scale - for this book it is a non-negotiable. Measuring by weight is the only way to ensure accurate seasoning of soup and precise hydration of noodles. Everything in this book is measured in grams (g) for simplicity
- Fine mesh sieve or ramen sieve - for cooking noodles and shaking the water out
- Large stock pot - for preparing both stock ahead of time and cooking ramen noodles the day of serving
- Ramen bowl - large serving bowls you can find in Asian grocery stores or restaurant supply shops. Ramen is a big dish with a lot of components to accompany it
- Chopsticks - ideally Japanese wooden chopsticks with pointed ends
- Asian soup spoons
- Tofu press - most of these recipes use Tofu Chashu as a topping. Anyone who makes tofu on a regular basis should have a tofu press because of how many paper towels you save when squeezing the water out. Tofu presses also help control the pressure put on tofu, reducing the possibility of crushing it
Pantry Essentials
- Dark soy sauce (koikuchi shoyu) - Japanese soy sauce. Has a deep and robust flavor, and we will be using it in a lot of tares and toppings
- Salt (shio) - Don’t be afraid to splurge on salt - it’s the most common spice in every kitchen after all. I am partial to Diamond Kosher Salt
- Nutritional yeast - also called “nooch”, this yellow flaky seasoning is full of glutamines, meaning it imparts a ton of plant-based umami on broth. I buy it buy the pound online and use it in my tares and virtually the rest of my everyday recipes
- All-purpose flour - for the purpose of simplicity, we will be using only all-purpose flour to make noodles. AP flour is soft, easy to work with, and common. In the future we will go over the pros and cons of mixing in bread flour and cake flour to modify the texture of your noodles
- Baking soda - when making fresh noodles, you will need to know how to make your own kansui out of this
- Konbu - dried Japanese kelp for extracting glutamines, the building blocks of umami, and making dashi. You’ll notice at the Japanese grocery store that prices can vary widely based on what type of konbu you are using
- Rausa and rishiri konbu are high end konbu that impart more umami. In my experience, they are wildly expensive compared to other types.
- Hidaka and ma konbu are more budget friendly, while still having great flavor. I recommend choosing these types of konbu if you are just getting started in making ramen
- Dried shiitake mushrooms - dried mushrooms for extracting guanylates, another building block for umami flavor. Dried shiitake can be found in any Asian grocery store
- Sundried tomato - a lesser-known source of umami. I like to put a very small amount of dried tomatoes into my dashi for the added flavor, and also to give it the slightest amount of tart
Vegan Dark Tonkotsu Ramen
FORMERLY: “Vegan Chicken Paitan”
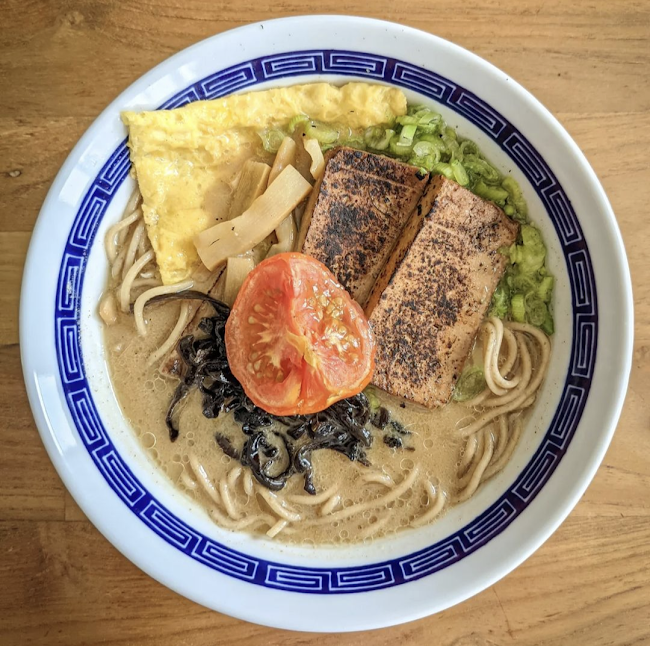
I consider this my signature bowl. This take on shoyu tonkotsu is extremely rich, with strong herbal notes. Shoyu and nutritional yeast work in tandem to deliver so much glutamic acid that its umami rivals the non-vegan counterpart. The addition of oat milk makes the broth creamy, rounding out its punchy flavors. If you were to try only one recipe from this blog -- I would recommend you try this one.
15g Shallot Oil 240g Dashi Stock (1 cup) 120g oat milk (½ cup)* 1 portion of fresh noodles (weighing in at around 140g) 1/2 Roasted Tomato Tofu Chashu, 3 pieces Thinly sliced green onion Just Egg Sheet | Method 1. Place the tare and oil at the bottom of your serving bowl. 2. Combine the measured dashi stock and oat milk in a small pot. Heat on medium heat until it reaches a hot soup temperature, around 190°F/88°C. Do not let this boil, or the oat milk will break and the soup might over-concentrate. 3. Pour the heated stock and oat milk directly into your bowl. 4. Add in your cooked ramen noodles and garnish with toppings. |
Vegan Light Tonkotsu Ramen
FORMERLY: “Vegan Tonkotsu Ramen”
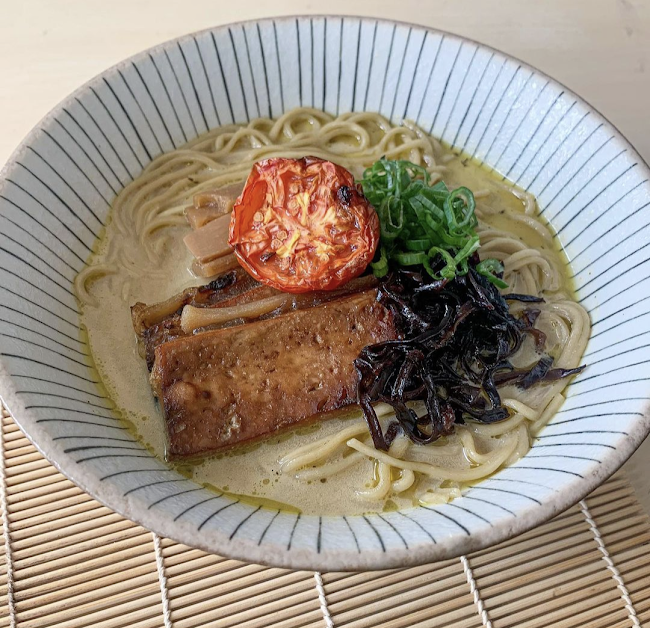
This is the sibling recipe to Vegan Dark Tonkotsu Ramen. The clearest change is the difference in tare. Taking inspiration from smoked bacon, this broth uses a different tare that has little to no shoyu, and favors accentuating the combined flavors of salt and nutritional yeast. This can be considered the vegan equivalent to shio tonkotsu.
15g Shallot Oil 240g Dashi Stock (1 cup) 120g oat milk (½ cup)* 1 portion of fresh noodles (weighing in at around 140g) 1/2 Roasted Tomato Tofu Chashu, 3 pieces Thinly sliced green onion | Method 1. Place the tare and oil at the bottom of your serving bowl. 2. Combine the measured dashi stock and oat milk in a small pot. Heat on medium heat until it reaches a hot soup temperature, around 190°F/88°C. Do not let this boil, or the oat milk will break and the soup might over-concentrate. 3. Pour the heated stock and oat milk directly into your bowl. 4. Add in your ramen noodles and garnish generously with toppings. |
Instant Vegan Tonkotsu
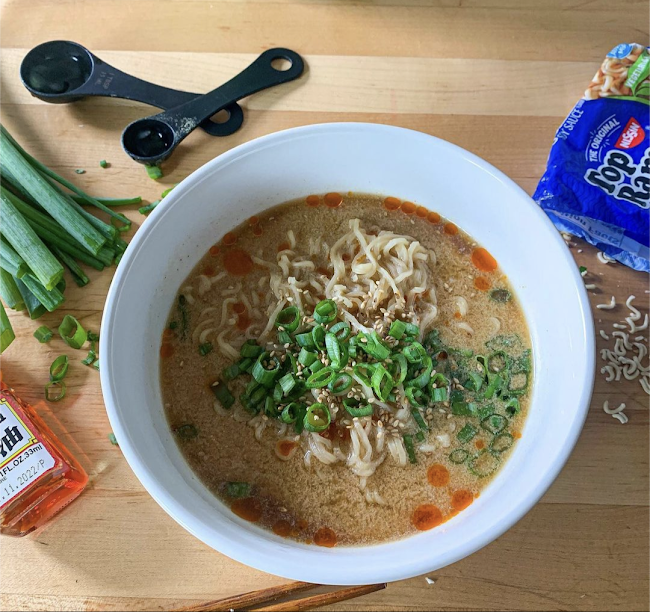
If you don’t have time for the above recipes and want to try a quick version of their broths, this is the recipe for you. Cutting out most of the toppings but keeping the essential broth makes an instant broth that is very much creamy and rich like the recipes above it.
1 Tbsp + 1 tsp shoyu 2 tsp nutritional yeast 1/4 tsp celery salt 1/4 tsp garlic powder 1/4 tsp onion powder 1/4 tsp white wine vinegar A few shakes of paprika 2-3 drops of liquid smoke 1/2 C boiling water 3/4 C oat milk 1 serving instant Ramen noodles from a packet Chili oil Green onion | Method 1. Put shoyu, nutritional yeast, celery salt, garlic powder, onion powder, white wine vinegar, paprika, and liquid smoke into a small pot. 2. Heat on medium heat and mix with chopsticks. When the seasoning starts to bubble, turn off the heat. 3. Fill a medium pot with water and bring to a boil. 4. Cook your noodles in the boiling water based on the manufacturer’s directions. (Discard any seasoning packet the noodles came with) 5. While the noodles cook, use a measuring cup to take 1/2 Cup of boiling water from them, and add that to your seasonings. Mix thoroughly. 6. Add 3/4 Cup of oat milk to the seasoning and water mixture. This is your soup. Heat to a near boil, but do not actually let it boil or the oat milk will break. 7. When the noodles are done, put them in your serving bowl, followed by the hot broth. 8. Top with scallions, your favorite chili oil, and anything else you’d like. Enjoy! |
Vegan Shio Ramen
Clear, straightforward shio. The soup used here can be swapped out for any of the other soups such as onion dashi or vegan bone broth. This is a great recipe to use if you want to highlight the flavor and texture of noodles.
36g Shio Tare 15g Shallot Oil 400g Dashi Stock 1 portion of fresh noodles (weighing in at around 140g) 1/2 Roasted Tomato Tofu Chashu, 3 pieces Thinly sliced green onion | Method 1. Place the tare and oil at the bottom of your serving bowl. 2. Heat the broth in a pot over medium heat until it reaches a hot soup temperature, around 190°F/88°C. Do not let this boil. 3. Pour the heated stock directly into your bowl. 4. Add in your cooked ramen noodles and garnish with toppings. |
Vegan Shoyu Ramen

Pardon Our Mess - This area is under construction
There’s a lot I want to do with shoyu ramen to make it really unique. For one thing, I want to incorporate Onion Dashi, but I am keenly aware through my tests that the flavor isn’t where I want it to be. I use Shallot Oil in almost all of my ramen recipes, but I’m reconsidering that. The best ramen I’ve ever gotten at a restaurant is the shoyu at Kyushu Jangara in Harajuku, which had endless fried garlic available to pile on. I do believe that garlic oil might actually be more fitting.
Every recipe in this book is heavily vetted before being allowed to stay, thus this classic bowl requires more testing before it is a staple.
Vegan Saimin
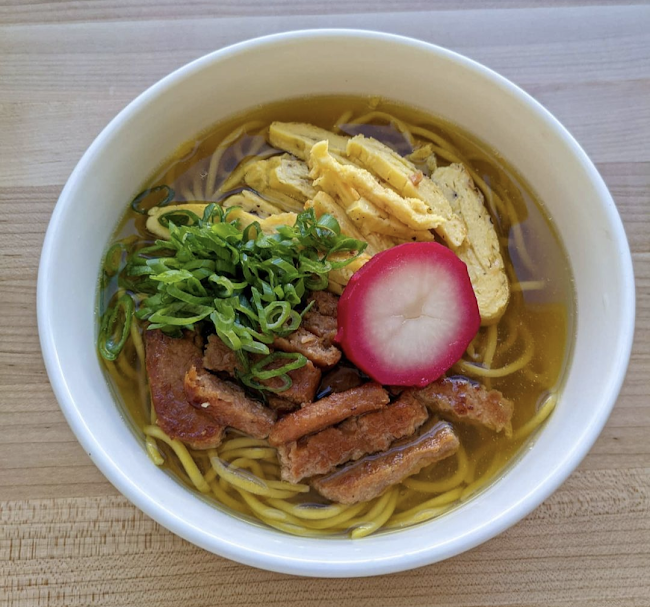
Saimin is a melting pot of Chinese, Japanese, Korean, Portuguese, and Filipino cuisine. Romantic lore states that migrant workers from each of these groups came together with their cultures’ ingredients and co-created this dish over communal dinners, after a full day of working the sugar plantations in Hawaii during the 19th century.
This humble and sentimental Hawaiian noodle soup is known for its shrimp-based broth, egg noodles, egg shreds, sliced pork, and fish cake. Do I have the right to take all of that away and call it the same dish? Probably not, but there's probably vegans in Hawaii that wish they could still eat the soup they grew up with. Using modern vegan products like shredded Just Egg and sliced Omnipork Luncheon Meat, I can attest that the vegan experience of saimin lives.
400g Dashi Stock 36g Shio Tare 140g bundle of fresh yellow ramen noodles, cooked* 2 slices of fried Omnipork** Luncheon Meat, sliced 90g Just Egg Plant-Based scramble, cooked and thinly sliced*** Potato Kamaboko, 1/2” slice Green onion | Method
|
** Omnipork is an accurate vegan pork alternative made by the Hong Kong-based @omnifoods.global. Its release was actually what prompted me to make this recipe in the first place :)
There are 3 types of Omnipork
- Ground (ideal for vegan pork dim sum)
- Strips (ideal for stir fry)
- Luncheon (just like Spam. Ideal for saimin and vegan spam musubi)
In the US, you can find all 3 Omnipork products at your local Sprouts Grocery. The Ground and Strips can be found at any Whole Foods.
***Just Egg is a vegan egg scramble made from mung beans. It can be found at many US grocery stores. Cooking Just Egg is similar to cooking regular eggs, but I find that it takes a little longer to come together. For this “egg” topping, I cooked the Just Egg in a tamago (rectangular, Japanese omelet) pan and cooked the egg into a rectangular loaf. From that shape, it is easy to slice it into 2” x 1/4” matchsticks that are a suitable shape to be a soup topping.
Puerto Rican Saimin

Another group of migrant workers in 19th century Hawaii were from Puerto Rico. Saimin is not known to have Puerto Rican influence, but as a gift to my Puerto Rican mother-in-law (who loves ramen) I created this imagined version by adding in a traditional Puerto Rican seasoning, recaito. The recaito cuts through the rich broth and adds an herbaceous zing. With the re-addition of shallot oil and a drop of lime juice, all of the elements play together wonderfully.
400g Dashi Stock 40g Recaito 35g Shio Tare 10g Shallot Oil 1g lime juice 140g bundle of fresh yellow ramen noodles, cooked Sliced Tofu Chashu Sliced Just Egg Potato Kamaboko, 1/2” slice Green onion Thin slice of lime | Method
|
Dashi Stock
All purpose. This is the soup I mostly use because it has a strong, well-rounded flavor profile. The ingredients should be sliced thinly to promote max extraction. We do NOT peel ingredients for this soup because of the earthiness the vegetable skins bring, particularly from the russet potatoes. Because we aren’t peeling, the soup will have a cloudy texture that is more suitable for thick broths like miso or tonkotsu. Use organic ingredients when possible -- the skins hold a ton of flavor and nutrients, but also pesticides.
3L of water, or just enough to cover the ingredients 20g kombu 20g dried shiitake One small sundried tomato 1 large onion, sliced 2 medium carrots, sliced 4 ribs of celery, sliced 4-5 green onions, chopped 1 large russet potato, sliced 1 fuji apple, sliced 1” knob of ginger 1 head of garlic, cloves peeled and smashed 10g parsley leaves and stems 1 tsp peppercorns 4 bay leaves 1 - 15oz can of white beans (such as cannellini or garbanzo), drained and rinsed | Method 1. Place the konbu, shiitake, and sundried tomato in 1L of water and let it soak in the fridge for 24-48 hours. This makes dashi. 2. Place the dashi, remaining 2L of water, and the rest of the ingredients into a large stock pot. (Recommendation: make sure the konbu is at the very top). 3. Bring to a near boil, around 190°F/88°C. Immediately remove the konbu to discard. 4. Turn the heat down to low, and simmer for 50 minutes. 5. Strain the stock through a mesh strainer. For clearer broth, strain a second optional time through a nut milk bag. 6. Set aside. |
Clear Dashi Stock
Lighter in flavor and serenely clear, this stock is ideal for a clear chintan broth such as shio or shoyu. An important distinction between this recipe and the recipe above is that the vegetables here are peeled and roughly chopped rather than being left unpeeled and thinly sliced. This discourages the vegetables from breaking down and clouding the broth with vegetable particles that will escape even a nylon mesh strainer.
3L of water, or just enough to cover the ingredients 20g kombu 20g dried shiitake 1/3 head of napa cabbage, roughly chopped 1 large onion, peeled and chopped 2 medium carrots, peeled and chopped 1 leek, chopped 4 ribs of celery, chopped 4-5 green onions, chopped 1 fuji apple, peeled and chopped 1” knob of ginger 1 head of garlic, cloves peeled and left whole 10g parsley leaves and stems 1 tsp peppercorns 4 bay leaves | Method 1. Place the konbu, and shiitake in 1L of water and let it soak in the fridge for 24-48 hours. This makes dashi. 2. Place the dashi, remaining 2L of water, and the rest of the ingredients into a large stock pot. (Recommendation: make sure the konbu is at the very top). 3. Bring to a near boil, around 190°F/88°C. Immediately remove the konbu to discard. 4. Turn the heat down to low, and simmer for 50 minutes. 5. Strain the stock through a mesh strainer. For clearer broth, strain a second optional time through a nut milk bag. 6. Set aside. |
Onion Dashi
A lot of veggie broth recipes try to impart flavor on a veggie stock by browning the vegetables, and then simmering them to make a broth with those caramelized edges melded in. This recipe seeks to maximize that effect by slow drying onions, causing them to brown very evenly throughout without burning. Onions are full of sugar that will caramelize in this process, so they will impart a very strong savory and sweet flavor onto your recipe.
3L water (or enough to just cover the ingredients) 20g kombu 20g dried shiitake 3 large sweet onions, thinly sliced (about 1200g) 2 medium carrots, sliced 4 ribs of celery, sliced 4-5 green onions, chopped 1 large russet potato, sliced 1 fuji apple, sliced 1” knob of ginger 1 head of garlic, cloves, peeled and smashed 10g parsley leaves and stems 1 tsp peppercorns 4 bay leaves 1 - 15oz can of white beans (such as cannellini or garbanzo), drained and rinsed | Method
|
Vegan Bone Broth
I had a lot of great comments about this recipe. Vegans and non-vegans alike didn’t like the name for different reasons. Some didn’t read the recipe at all and were angry because they believed I had ACTUALLY made a broth out of bones and presumptuously called it vegan. Others joked, asking me where they could obtain the bones of vegans.
Let me be clear here -- this is a bone free vegetable broth. Non-vegan ramen uses chicken, pork, and seafood stocks that have a lot of bones. These bones are full of gelatin and collagen that, when boiled aggressively for hours, deliver a soup that has a particularly silky mouthfeel that is signature to non-vegan ramen.
My vegan argument has always been that plant-based ramen can have EVERY aspect of non-vegan ramen and deliver the same level of satisfaction -- from the toppings, to the aroma oils, to the soup. And ever since I talked big about the possibility of making vegan bone broth on the Way of Ramen Podcast, the fact that my recipe was incomplete and untested has been a chip on my shoulder ever since. So after going through a ton of agar agar and dried beans, I present to you a complete bone broth recipe that uses no bones and still delivers that luxurious, silky mouthfeel.
This recipe requires a lot more care, time, and precision than regular Dashi Stock and Clear Dashi Stock. I recommend making either of those recipes first before attempting this one.
Vegan Bone Broth

200g of dried chickpeas (about 1 Cup) 20g kombu 20g dried shiitake One small sundried tomato 1 large sweet onion 2 medium carrots, sliced 4 ribs of celery, sliced 4-5 green onions, chopped 1 large russet potato, sliced 1 fuji apple, sliced 1” knob of ginger 1 head of garlic, cloves, peeled and smashed 10g parsley leaves and stems 1 tsp peppercorns 4 bay leaves Agar agar powder* *Make sure you are using agar agar powder, rather than agar agar flakes | Method
|
Vegan Bone Broth (Universal Method)
There’s no need to be confined to my specific recipe. Vegan bone broth is less of an end-all be-all recipe and more of a method. Use the following method in tandem with any of your favorite veggie stock recipes to add a silky, gelatinous texture.
Dried chickpeas (1/3 Cup, or 65g, per Liter of water used in broth recipe) Agar agar powder One entire veggie broth recipe | Method
|
FORMERLY: “Vegan Chicken Tare”
Used for making Vegan Dark Tonkotsu Ramen. This tare is shoyu-forward, so it gives a bold flavor to soup and darkens the color.
240g shoyu 56g nutritional yeast flakes 12.5g white wine vinegar 4g liquid smoke 7g kosher salt 5g celery salt 5g onion powder 4g garlic powder 1/2 tsp ground sage 1/2 tsp ground thyme 1/4 tsp smoked paprika | Method 1. Place all ingredients in a medium pot. 2. Bring to a boil on medium heat. Once simmering, reduce to medium-low heat and simmer for 1 minute. Using a wooden spoon, stir continuously and scrape the sides of the pot as it cooks to avoid burning the shoyu. 3. Turn off the heat and allow to cool entirely, then store in an airtight container in the fridge until ready to use. 4. Mix this tare before using to ensure even distribution. |
Light Tonkotsu Tare
FORMERLY: “Vegan Tonkotsu Tare”
Used for making Vegan Light Tonkotsu Ramen. This tare has reduced shoyu and is salt-forward, placing an emphasis on the umami of the nutritional yeast and preserving the bright creamy color that tonkotsu should have.
200g water 100g usukuchi shoyu (light soy sauce) 10g brown sugar 12.5g apple cider vinegar 4g liquid smoke 56g nutritional yeast 20g kosher salt 5g onion powder 4g garlic powder 4g msg 1/4 tsp ground thyme 1/4 tsp ground black pepper 1/4 tsp smoked paprika | Method
|
Shio Tare
This tare is taken from Ryan of Way of Ramen and I use it all the time. It’s simple and versatile, and is perfect for making a chintan that highlights the flavors of your noodles and aroma oil.***
I’ve stripped the recipe down to provide more simplicity to it.
450g water 70g salt 25g mirin 7.5g rice vinegar 25g light color shoyu (usukuchi) 5g sugar 2.5g msg | Method
|
***For an extremely simple vegan shio broth, add 36g of this tare to 15g of shallot oil and 400g of boiling water. This is a very good practice broth to use in order to test your noodles’ flavors. (measurements by Way of Ramen)
Shoyu Tare
Pardon Our Mess - This area is under construction
Recaito
Fresh, green Puerto Rican sofrito. This recipe makes about a quart, so you will have extra. Recaito can be added to most vegetable stews to add an herbaceous twist, and a deep green color. Used in Puerto Rican Saimin.
1 large green bell pepper 1/2 lb aji dulces OR anaheim peppers, stemmed and deseeded 1 bunch of culantro (about 65g)* 1 large sweet yellow onion 10 cloves of garlic | Method
|
*Culantro is also known as Sawtooth Herb in English, or Ngo Gai in Vietnamese
Noodles
In this section I want to put only what I know, and not oversell my knowledge. This is because noodles are the most complicated ingredient in ramen, and people dedicate their lives and careers to mastering and understanding them.
On the surface, noodles are essentially four ingredients: wheat flour, water, kansui, and salt. That sounds simple enough, and it must be just a matter of kneading the dough, rolling it into a sheet, and cutting it.
When you look more into noodles making, you start to learn about the finer details that make big differences. The types of kansui you use, the protein percentage of your wheat flour, the temperature of the room you make your noodles in, the hardness/softness of your water, etc.
The list goes on.
Ramen is defined by its noodles in that it strictly uses wheat noodles that have been made springy, chewy, and somewhat bitter by the addition of alkaline salts, or “kansui”.
There are two kansui primarily added to noodles, and most ramen noodles contain a combination of these in different ratios.
1. Sodium Carbonate (Na₂CO₃)
This is the easiest kansui to find because it can be made at home using baking soda. While sodium carbonate and potassium carbonate both bring out the signature alkaline scent and taste of proper ramen noodles, sodium carbonate distinctly promotes a softer texture in noodles. When making thicker or wider ramen noodles that would pair with a clear broth such as vegan shio, it’s ideal to use more sodium carbonate to emphasize a chewy, stretchy noodle.
Depending on the context, sodium carbonate can have other names
- “Washing soda” - in the late-19th to early-20th centuries, sodium carbonate was used to do laundry and clean kitchens. As you’ll see in a second, sodium carbonate is easy to come by, and if you are ever low on dishwasher detergent, a tablespoon of sodium carbonate is a great substitute

- “Soda ash” - the usage of the term “ash” dates back to ancient times when plants were burned to ashes in order to separate the precious alkaline salts. The term “soda” theoretically comes from the Arabic word suda (صداع) which directly means headache, referring to the ancient practice of burning a saltwort plant and mixing its ashes (alkaline salts) in water to cure headaches. Today “soda ash” is an industry term for sodium carbonate in its unrefined, crystalline form.
- “Baked baking soda” - It’s exactly what it sounds like. Baking soda, or sodium bicarbonate (NaHCO₃) is just a less intense version of sodium carbonate. Below is a recipe on how to make sodium carbonate at home with just baking soda and an oven.
2. Potassium Carbonate (K2CO3)
Although it has less practical uses, potassium carbonate is very important in providing ramen noodles with their hardness. A hard noodle does not stretch as much as it snaps. In general, you want to use a higher ratio of potassium carbonate in thin, fine noodles that would be more suited to thick, heavy broths like vegan tonkotsu.
Potassium carbonate cannot be necessarily made in a home kitchen, but it’s easy to find food-grade sales of it online.
Wanna really fall down the noodle science rabbit hole? Check out Yamamoto Noodle’s articles on noodle science.
Noodles (KitchenAid)
This is my easy, unadulterated method that I’ve used for the past several years. With 40% hydration, solely sodium carbonate, and all-purpose flour, these noodles are very soft and easy to work with. In the variations section, we’ll go over a few more complicated noodle types that are harder and snappier.
Noodles (KitchenAid) Yields one 140g bundle. Scale up as needed | |
110g all-purpose flour 44g water 1.1g kosher salt 1.0g sodium carbonate Cornstarch | Hydration
Lamination and Cutting
For curly noodles, knead the portion of noodles firmly into the counter multiple times before bagging and storing them.
Cooking
|
Noodles (Manual Method)
Pardon Our Mess - This area is under construction
Check out the Way of Ramen noodle making guide to learn the basics of handmade ramen noodles
Noodle Variations
Below are a collection of modifications that can be made to change the color, smell, or flavor of your noodles. Replacing 5-10% of your flour’s weight sacrifices a small amount of the gluten structure (the chewiness) for a fun appearance and appealing aroma.
Shallot Oil
and also Fried Shallots
Out of all the vegetables in the world, shallots are my absolute favorite. By thinly slicing them and frying them deep in oil, an aroma that is buttery, sharp, and rich rapidly fills your entire house. Your end products are a shallot oil that is liquid vegan gold, and a huge pile of crispy shallots that I like to eat as a Midnight Snack.
225g shallots, thinly sliced (about 8 medium-sized shallots) 180g canola oil (3/4 cup) Pinch of salt | Method
|
Habanero Shallot Oil
A spicy variant of Shallot Oil. This is actually my favorite oil because habaneros are the f*cking best, fresh or fried. I have made this recipe with jalapeños and peruvian yellow chilis respectively, and respectfully those batches never measured up to the buttery, fruity flavor of habanero.
Read: Wear food grade gloves when handling habanero peppers (the capsicum is active the moment the skin is cut or breaks). Wash every surface the peppers seeds/insides touch with soap and water, and use the doctor method to take off and dispose of your gloves.
Follow these steps to ensure that things besides the aroma oil don't also end up spicy!
450g shallots, thinly sliced 6-8 habanero peppers, deseeded and thinly sliced 360g canola oil Pinch of salt | Method
|
Tofu Chashu

My most used recipes, by both myself and people who follow my recipes. In the recipe, texture is key to transforming a normally soft and mild ingredient into a meaty and satisfying protein. Here’s this recipe being featured on Way of Ramen’s Youtube Channel.
One 14oz block of firm or extra firm tofu Marinade 1: 60g shoyu (4 Tbsp) 30g mirin (2 Tbsp) 20g maple syrup (1 Tbsp) 15g rice vinegar (1 Tbsp) 10g neutral oil (2 tsp) 3 cloves crushed garlic 1 tsp minced ginger Marinade 2: 45g shoyu (3 Tbsp) 20g maple syrup (1 Tbsp + 1 tsp) 10g neutral oil (2 tsp) 3g liquid smoke (1/2 tsp roughly) | Method
|
Kikurage (Wood Ear Mushroom)
Shredded black fungus is standard on especially tonkotsu ramen. This topping adds a pop of black color that contrasts light oat milk based broths. They are rich in protein and fiber, making ramen bowls more filling. Pre-shredded kikurage is long and thin when rehydrated, making it tangle with ramen noodles. Their snappy bite and mild flavor add contrast to your noodles.
30g dried shredded black fungus (about 1 Cup) Boiling water 30g shoyu (2 Tbsp) 30g mirin (2 Tbsp) 10g sesame oil (2 tsp) 4g white sugar (1 tsp) 2g MSG (1/2 tsp) | Method
|
Roasted Tomatoes

Vegan ramen doesn’t have a perfect rendition of soft-boiled eggs (yet) but that doesn’t mean we can’t make something that does the same job. Like ramen eggs (ajitsuke tamago), roasted tomatoes are 1-2 bite toppings that are soft, rich, and likely soaked in ramen broth by the time you eat them. By pricking holes deep into halved tomatoes, we can coat the inside of them with olive oil, allowing the tomatoes to cook from the inside. They are 90% water, and their flesh is full of glutamic acid -- so when you roast out most of their water weight, the tomatoes shrink and concentrate into umami-laden flavor bombs.
4 Roma tomatoes, halved Olive Oil Salt Pepper | Method
|
Potato Kamaboko

Someone looked at this recipe and told me that half cooked potatoes sounded hard, flavorless, and boring. And that was one of the best compliments I could get! Because kamaboko is just that: a tacky, boring cake. It comes in a package, it’s highly processed, and it has just one flavor: fish. But that’s just the flavor profile -- kamaboko has a striking appearance that adds a color accent to ramen. If you so please, feel free to throw 1-2 dried shiitake mushrooms into step #1 to add a little umami to this recipe.
300g small Russet potatoes, peeled (Three 100g potatoes in total)* 250g red beet, washed (1 large) 600g water 10g salt 1-2 dried shiitake mushroom (optional) | Method
|
Notes
* The potatoes MUST be Russet or some white potato. For a sunset-like mixture of yellow and pink, you can also use Yukon Gold potatoes instead
** If your potatoes are oval and lopsided, but you want the kamaboko to be CIRCULAR when sliced, I recommend to start not with 100g potatoes but 120g potatoes, and use your vegetable peeler to shave down the odd side of the already-peeled potato so that it is circular and cylindrical.
Serious Midnight Snack
Onion Rice
Probably the goofiest thing I’ll put in this book. But it’s something I’ve made for myself many, many times between 12am-3am. If you are in a household that perpetually cooks rice, then you often will have that pot of rice in your fridge that is still soft and fresh. Combined with the crispy, butteriness of the fried shallots you probably also have, and a little salt, this little mixture is the peak of fried onion flavor. Sometimes I just make a mini version of this entire thing in my right hand and press it into an impromptu midnight onigiri. Delicious!
3/4 Cup of cooked white rice (ideally cooked less than 24 hours ago) 2 tbsp Fried Shallots 1 tbsp sliced green onion 1 tsp Shallot Oil (optional) Salt, to taste | Method
|
The Five Components of Ramen
This is either your first time or your one thousandth time going over the five components. This is a book for vegan and non-vegans alike to better understand vegan ramen, so let’s go over what each component is, and how making it plant-based can change its importance in the soup.
The 5 components of a ramen bowl comprise of:
- Soup - language around soup varies -- let’s specify a few terms.
- Dashi - a soup stock used universally in Japanese cuisine to add umami to food. It's made by simmering ingredients full of ingredients rich in umami building blocks such as glutamine.
For exclusively vegan cuisine, we use konbu, mushrooms, and sometimes sun dried tomatoes to make dashi. Dashi can be made using cold OR hot extraction, meaning you can make it slowly in the fridge or quickly on the stove.
- Stock - vegetable stock is made from simmering vegetables, herbs, and aromatics to extract their flavors into a clear liquid. "Stock” is distinct from "broth" in that stock does NOT have any added salt while broth does.
- Dashi stock - This compound term means what it sounds like - dashi and stock as one homogenous soup. I usually make dashi through cold infusion - steeping konbu and dried mushrooms in water in the fridge overnight. Once that infusion is done and I have dashi, I simmer vegetables and aromatics in the dashi to make the stock -- creating one single, flavorful dashi stock
- Broth - Broth is used to describe the fully finished soup - containing dashi stock, tare, and also aromatic oil.
- Chintan (清湯) - meaning “clear broth”, chintan refers to clear soups such as shio or shoyu
- Paitan (白湯) - meaning “white broth”, paitan refers to opaque soups such as tonkotsu
- Tare (sauce) - tare is a rich sauce that seasons your soup with salt and umami flavors. Saltiness and umami aren’t the only flavors tare can add -- it can also add sweetness, sourness, smokiness, fermentation, etc. Tare is traditionally made with mostly salt or shoyu.
In non-vegan ramen, animal-based stock plays a significant role in creating the flavor profile of the final soup, while tare seasons and accents that flavor. This method is repeated in almost all non-vegan ramen because animal-based stocks are often made with animal bones and parts to extract a ton of different flavors and collagen. Non-vegan ramen treats the animal-based stock as a centerpiece, and every component around the soup seasons its flavor profile. I think a lot of non-vegan cooking follows this centerpiece approach to food.
In vegan ramen, stock and tare’s roles repeatedly switch around based on what kind of ramen you’re making.
In a clear soup like vegan shio ramen, stock and tare follow the traditional model because the tare is simple, composed mostly of salt and umami-imparting glutamines.
In a more new-age ramen like my dark vegan tonkotsu recipe, it is noticeable that the roles of stock and tare are reversed. My dashi stock is composed of vegetables and aromatics that create a soup with a delicate flavor profile. My tonkotsu tare, on the other hand, is made with a shoyu, liquid smoke, and a whopping 1/2 cup of nutritional yeast flakes. For those unfamiliar with nutritional yeast, it is a flaky vegan seasoning full of nutty, cheesy, and umami flavor. This one ingredient in the tare commandeers the flavor profile of the entire soup -- a job that tare doesn’t usually play in ramen. In this particular ramen, the delicately flavored dashi stock has the role of accenting the centerpiece flavor of the powerful tare.
- Noodles - Noodle’s biggest job is to carry broth when they are slurped. We take this component seriously for many reasons. The shape, flour choices, gluten shape, alkaline salts, and water percentage greatly affect how they will interact with the bowl.
And to answer a question you may have asked at some point: “What makes ramen ramen?” This component of the dish is your answer. Apart from noodles in udon or pho or somen or korean noodle soup -- ramen noodles are alkalized, meaning they contain an alkaline salt AKA ash that turns them yellow, makes them chewy, and grants them their soothing bitter scent.
For chintan ramen, bouncy, wide, high-hydration noodles are ideal for adding substance and chew to an otherwise thin soup.
For paitan ramen, thin, snappy, low-hydration noodles are great for carrying more broth and putting more focus on the flavor of the heavier broth.
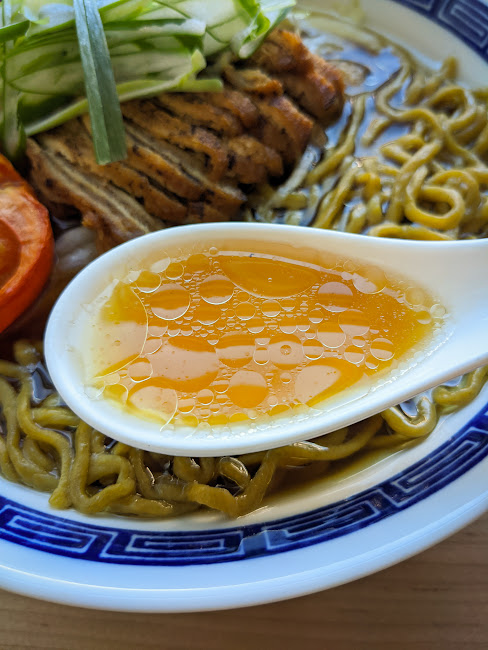
- Aroma Oil - Aroma oil is the fat that hot broth is poured over. In doing this, the aroma oil reacts to the hot broth and creates exactly its namesake, the thing that draws passerbys into a restaurant -- an aroma. Oils and fats typically don't smell like much when they are cold, but when a hot soup raises their temperature, they release palpable scent molecules into the air. Aroma is important to ramen because it's the first sensation that a diner notices before the broth hits their mouth. Aroma oil sets the tone, and raises expectations for the broth before the broth has even been tasted.
I'll be perfectly honest with you - in my kitchen, shallots are the emperor of aroma. You will find shallots in virtually all of my aroma oil recipes, and you'll even find fried shallots - the byproduct of making shallot oil - in some miscellaneous recipes. If anyone reading this thinks they have an aromatic that makes a superior oil over my favorite vegetable, the god of vegan aromatics, the Shallot, I would love if you challenged me in my DMs right now.
- Toppings - Toppings are an interesting component. They are also the most recent staple to the dish. Back during the postwar reconstruction of Japan in the 50s-60s, ramen was meant to be a fast food that was cheap, calorie-dense, and satisfying. A meal like this was suitable for laborers working to rebuild the infrastructure of Japan. Ramen wasn't really the cult dining experience it is today -- it was more of a utilitarian yet delicious fast food. Being how simple ramen was back then -- toppings beyond the simple triad of pork, menma, and green onion didn't really become a focus until late in the 20th century.
Today, modern ramen chefs use toppings to create the unique visual profile of dishes. Whereas aroma oil creates the smell of the bowl before the broth is even tasted, the toppings create the sight of the bowl. You can see the visual impact of ramen taken to the extreme in the modern jiro-style ramen.
Oat Milk Manifesto
Coming soon.
For the time being, I recommend any of these oat milks for making vegan ramen that has oat milk in it
- Califia Barista
- Oatly (Full Fat)
- Oatly (Regular)
- Planet Oat (Original)
Media
Contact
Have any questions or feedback for me about this book? Feel free to contact me! Use the link below to send me a message via Google Form.
Alternatively, you can also DM me on Instagram.
Sources
- Tsukuda, Yuto, and Shun Saeki. Food Wars!: Shokugeki no Soma, Vol. 16. VIZ Media, 2014.
- Food Wars!: Shokugeki no Soma. Created by Yuto Tsukuda and Shun Saeki, directed by Yoshitomo Yonetani, J.C.Staff, 2015-2020.
- "Simple Shio Tare." Ryan Esaki, wayoframen.com, Accessed 12/30/23. [https://wayoframen.com/recipe/simple-shio-tare/]
Send a Tip
This ad-free book is free, accessible, and continually updated. More recipes will be added over time, and I am always considering requests for traditionally non-vegan dishes that you would like to see veganized.
If you can afford it and are making use of this book, please tip to support my work! Much time has gone into this book, and more time will be put in to keep it updated.
To send a tip, click the link below -- When sending a tip, let me know your Instagram or Reddit tag so I can properly thank you :)
(https://linkr.bio/vegan.tanmen)
Change Log
12/30/23 - v1.0.0
- Recipe Repository released. 🎉
01/28/24 - v1.0.1
- Added Sources page and markers for referenced material
- Fixed hyperlinks
- Minor text edits
06/08/24 - v1.0.2
- Reduced simmering time for all veggie broths from 60 minutes to 50.
- Light Tonkotsu Tare
- Removed konbu and shiitake soaking step for simplicity.
- Replaced koikuchi dark shoyu with usukuchi light shoyu.