
Table of Contents
Publish a calendar as a webpage
Embed a class calendar in a Google Site
Calendar sharing settings in Google Sites
Add a calendar from your calendar list to a page in Google Sites
Add a calendar by URL to a page in Google Sites
Customize your calendar gadget in Google Sites
Embed a calendar into any website with HTML
Create an embed code for your calendar
Customize the embed code for your calendar
Use the calendar embed code in Google Sites
Let students embed calendars into a Google Sites start page
About start pages in Google Sites
Allow users to add a calendar to a start page
Publish a calendar as a webpage |
Make your calendar public
Publishing your calendar as a webpage follows the same instructions as making a calendar available to people who do not use Google Calendar. You must first select the broad sharing access level for your calendar to make it available to the public, then you can share the HTML, XML, or iCal address so that individuals can view your webpage in a browser or subscribe using a calendar software application.
To make your calendar public, follow these steps:
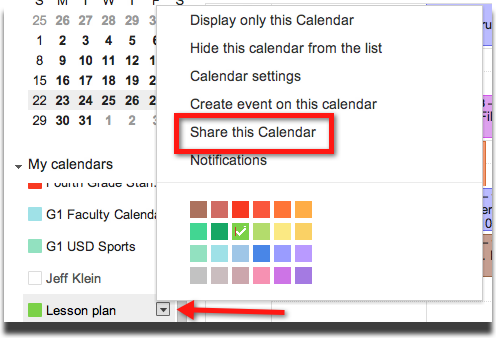
- In the calendar list on the left, click on the down-arrow button next to the appropriate calendar, then select Share this calendar.
- Select Make this calendar public.
- If you don't want others to view the details of your events, select See only free/busy (hide details].
- Click Save.

Find the calendar URL
Once you have shared a Google Calendar with the public, you will need to inform people how to access the calendar.
You can share a calendar URL that will display your calendar just like a webpage. Then, anyone can subscribe to or bookmark that URL to save your calendar for later viewing.
A 'Calendar Address' is the public address for your calendar. When you make your calendar public, others can view it in an HTML format
- For everyone: HTML - Others can view a read-only version of your calendar without signing in to Google Calendar, by accessing it directly in their browser window. With your calendar HTML address, your calendar acts as a webpage and behaves as any other webpage on the internet, with a URL that can be bookmarked.
To find your calendar's address in the HTML, follow these steps:
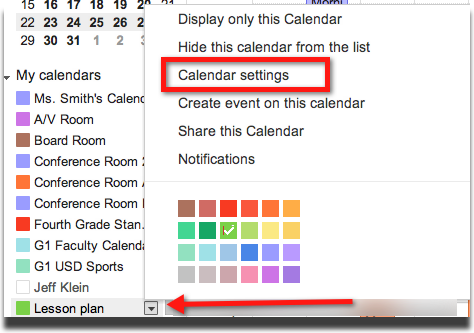
- In the calendar list on the left, click the down-arrow next to a calendar and select Calendar settings. (Alternatively, click Settings at the bottom of the calendar list, then click the name of the appropriate calendar.)
- In the Calendar Address section, click the HTML icon. You'll see a pop-up window with your calendar's public URL.
- Copy this URL. This URL can be used to access your calendar information
- Paste and share this URL with anyone who may not use Google Calendar. You can paste the link into a class newsletter for parents to access, or add it to your website.
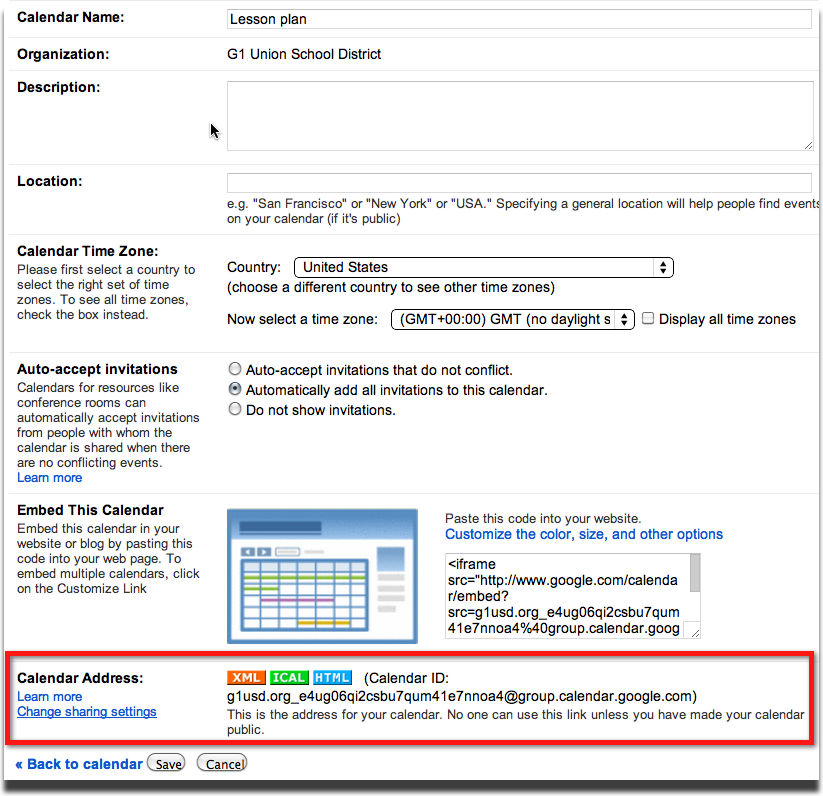
Please note: you can change the amount of information available on your calendar's address by clicking the Change sharing settings link in the Calendar Address section.
If you don't want to make your calendar publicly available to others, but you still want to share it with individuals who don't use Google Calendar, you can share your calendar's 'Private Address.' Keep in mind that this address was designed for private use only, so don't share this address with others unless you want them to see all the events -- including private events -- on your calendar.
Embed a class calendar in a Google Site |
Calendars in Google Sites
You can add a Google Calendar 'gadget' to your Google Site that shows your Google Calendar right on your webpage. You can select to display multiple calendars in a single gadget, or if you wish to have them separated, you can embed separate gadgets each with their own calendar.
Any changes you make in your calendar in Google Calendar will automatically be changed on your site in Google Sites. By using a calendar gadget, you only need to make changes in one place.
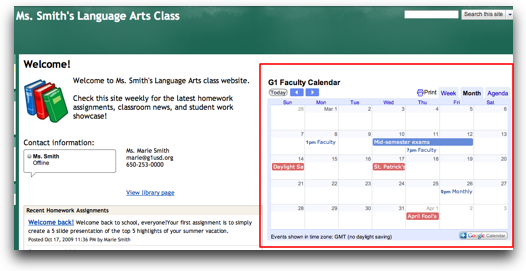
Having a calendar available in a Google Site can be useful for a class site, where you can display a class calendar with upcoming events. You could also have a homework page where you add a homework calendar that has details on all the assignments and due dates.
Just like in your usual Google Calendar view, you can choose how you want the calendar to look in your site – have it viewable by week, month, or agenda. Review the different types of calendar views.
Calendar sharing settings in Google Sites
Your calendar sharing settings still apply when you add it to your site. Those who do not have access will still not have access, even if they can see your site.
Please note: Your calendar does NOT adopt the same sharing settings as your Google Site. If you have made your Google Site public to the world, but your calendar is only available to your school domain, then those people who click to your site who are not members of your school domain will not be able to see the calendar, because the calendar will follow the sharing instructions you have set.
Here are a few other examples of viewing access of calendars in Google Sites:
- If you have only shared the calendar with specific individuals, then only those individuals will be able to see the embedded calendar. Others who go to the page with the calendar embedded will see an Insufficient Privileges error where the calendar should be.
- If you have shared the calendar with the public, than anyone in the world will be able to see the embedded calendar, provided that they can access your site.
- If you have shared the calendar only with your school domain, anyone who is logged in with their school Google Apps account will be able to view the calendar on your site.
Add a calendar from your calendar list to a page in Google Sites
If you have already created a site in Google Sites for your school domain, you can easily add a calendar to any page.
To add a calendar from your calendar list, follow these steps:
- Click on Edit page button to enter the page editor.
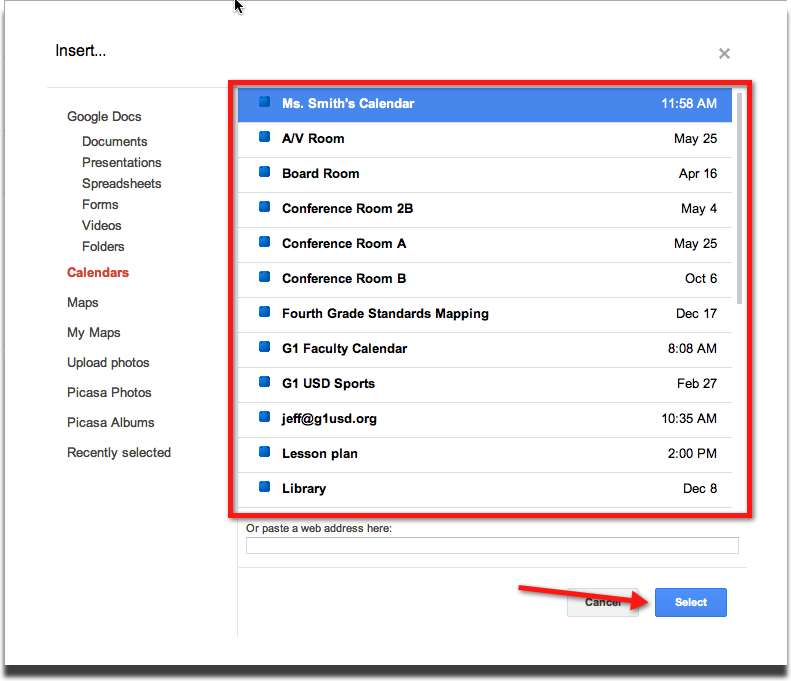
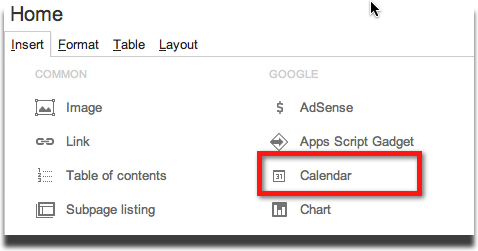
- Click on Insert and select Calendar.
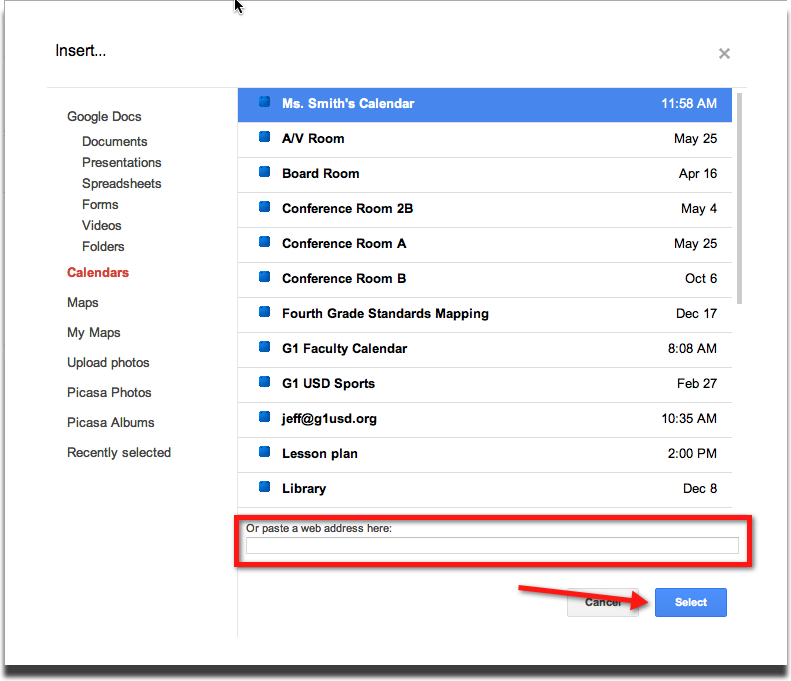
- Select the Calendar that you want from the list of your calendars.
- Click the Select button.
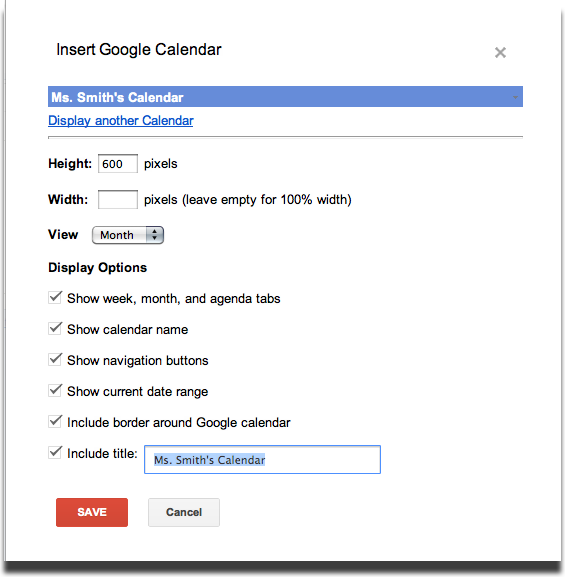
- Choose the customize options you want for your Calendar and click Save.
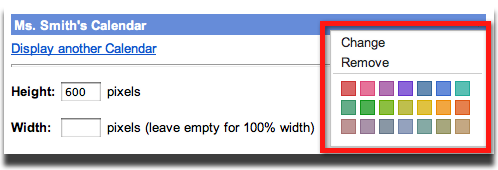
- To choose the color in which your calendar will appear, click the down arrow to the right of the calendar name and select the color you wish to use.
- When you're finished editing your page, click the Save button and your Calendar will appear.


Please note: You'll need to make sure that the calendar is shared with the members of your site in order to avoid an Insufficient Privileges error.
Add additional calendars to the calendar gadget
You can add additional calendars to your gadget by clicking the Display another calendar link in the calendar gadget properties.
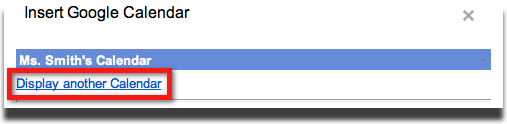
Your calendar list will display as before and you can select another calendar.
Add a calendar by URL to a page in Google Sites
To add a calendar by URL, follow these steps:
- Click on Edit page button to enter the page editor.
- Click on Insert and select Calendar.
- At the bottom of the Calendar list there is a box for web address. Paste your calendar web address here.
- Click the Select button.
- Choose the customize options you want for your Calendar and click Save.
- When you're finished editing your page, click the Save button and your Calendar will appear.

Review how to find a URL for your Google Calendar »
Customize your calendar gadget in Google Sites
You can customize how your calendar looks in your site. You can change these settings at any time.
About the calendar settings (you will see these when you first add a calendar to your site):
- Display another calendar: Link to add more calendars to be displayed in your gadget.
- Calendar color: menu to the right of the calendar name, will allow you to change the color of text and event blocks that appear on the calendar view of your gadget.
- Height: how tall the calendar will appear in your page (measured in pixels)
- Width: how wide the calendar will appear in yoru page (measured in pixels). You can also leave this value empty so that the calendar takes up the entire page or column.
- View: You can choose how the calendar will appear by default, either in the Week, Month, or Agenda view. Review the different calendar views »
- Display Options

- Show week, month, and agenda tabs: Allow anyone who sees the calendar on your page to switch calendar view with this option.
- Show calendar name: Show the calendar name.
- Show navigation buttons: Allow anyone who sees the calendar on your page to click to the next week/month.
- Show current date range: Displays the date range of the calendar. This option will also produce a drop-down menu that will display a mini-calendar to allow a user to switch to a different week/month.
- Include border around Google calendar: Displays a border around the entire Google calendar to separate from other content on the page.
- Include title: This will display a title outside of the Google calendar, within the border. This is different from the Calendar name - you can choose what the title will be.
To make changes to these settings after you have added a calendar to your site, follow these steps:
- Click on Edit page button to enter the page editor.
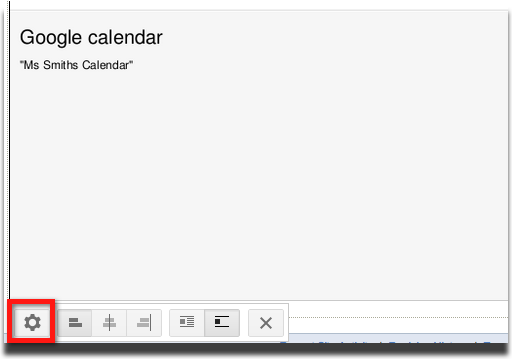
- Click on the box that has your Calendar name on the page.
- Click the gear icon. This will bring up the customization options.
- Choose the options you want for your Calendar and click Save.
- When you're finished editing your page, click the Save button and your Calendar will appear.

Embed a calendar into any website with HTML |
Create an embed code for your calendar
With Google Calendar, you can create a snippet of code that will allow you to embed your calendar into any webpage using an HTML iframe.
To generate the calendar snippet for your website, follow these steps:
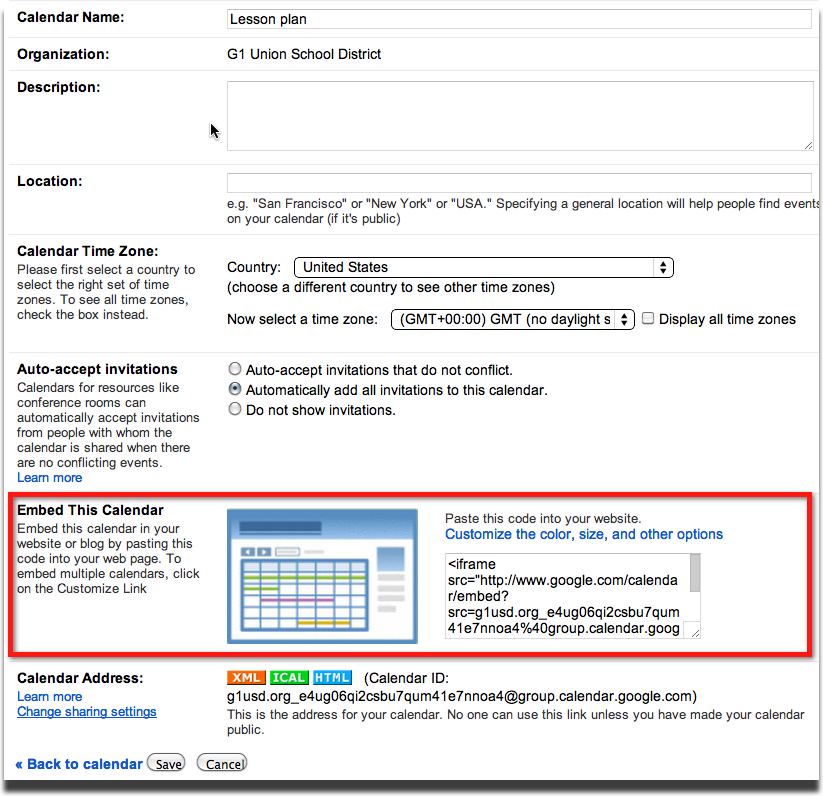
- In the calendar list on the left, click the down-arrow next to the calendar you want to embed, and select Calendar settings. (Alternatively, click the Settings link at the bottom of the calendar list, then click the name of the calendar.)
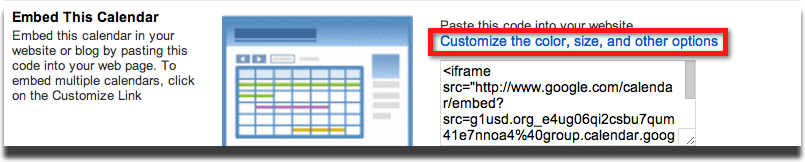
- Copy the iframe code displayed in the Embed This Calendar section.
- Paste this code into the html code of your website to embed your calendar.

Customize the embed code for your calendar
You can customize how your calendar will appear on your website with the embed code.
To customize your embedded calendar, follow these steps:
- In the calendar list on the left, click the down-arrow next to the calendar you want to embed, and select Calendar settings. (Alternatively, click the Settings link at the bottom of the calendar list, then click the name of the calendar.)
- Click the Customize the color, size, and other options link above the iframe field to access the Google Embeddable Calendar Helper.
Carefully select your options in the Calendar Helper:

- As you make changes, the calendar will change to reflect how it will appear on your website.
- You can choose to display multiple calendars by checking the boxes in the list in the 'Calendars to Display' section.
- Copy the iframe code displayed in the large box above the calendar.
- Paste this code into your website to embed your calendar.

Use the calendar embed code in Google Sites
The calendar gadget in Google Sites does not allow for as much customization as the iframe embed code does. You can actually use the same iframe embed code to add a custom calendar gadget in Google sites.
To add a custom calendar gadget with the embed code, follow these steps:
- Click on Edit page button to enter the page editor.
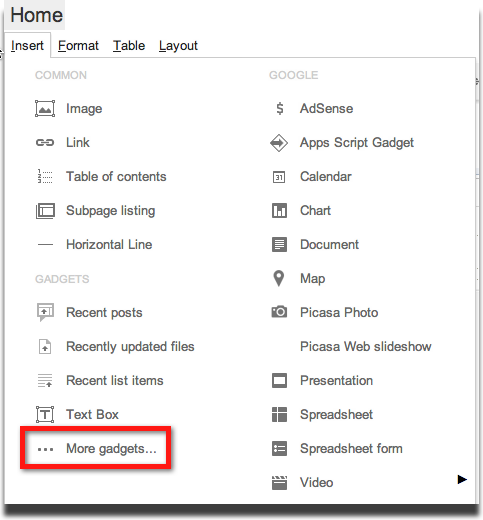
- Click on Insert and select More gadgets.
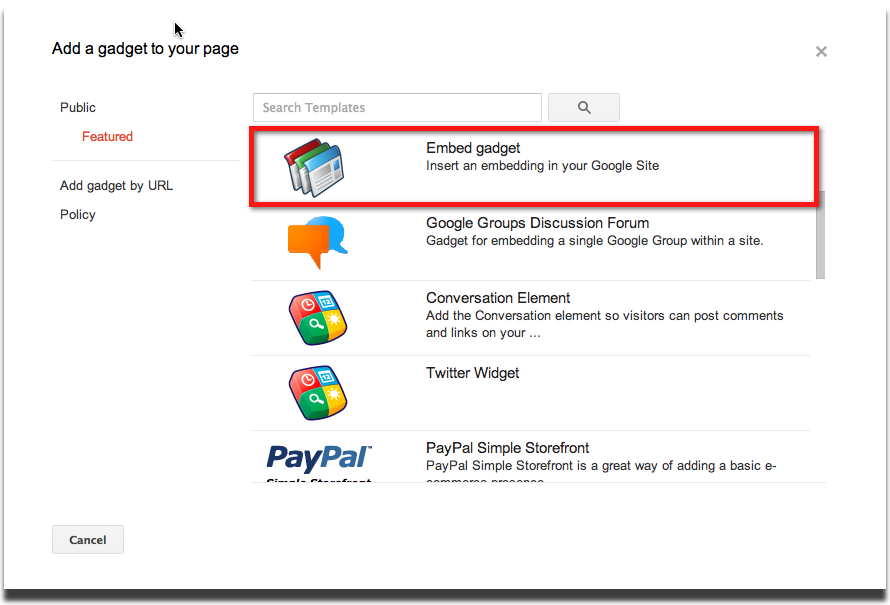
- In this window, click Featured under the Public section. Scroll or search for Embed gadget.
- Click Embed gadget and then click Select.
- Paste your embed code (as generated in the previous steps) into the large text box.
- Select the display options including the dimensions of the gadget and if you'd like to include a title or border to separate the gadget from the rest of the content on your page.
- You can preview the gadget by clicking Preview gadget. To change the settings, click the Back to Configuration link or click OK if the calendar is to your liking.
- If you do not preview the gadget, you can click OK.
- When you're finished editing your page, click the Save button and your customized calendar will appear.

Let students embed calendars into a Google Sites start page |
About start pages in Google Sites
A start page is a page type in Google Sites that has a special area where each viewer of the page can add their own personalized set of gadgets. Page collaborators can still put content on the page that everyone will see, but below that is content that will be different for every viewer.
A start page can be useful for schools as they can create a student portal where they add content that everyone can see in addition to an area where students can add their own gadgets. Think of it as an iGoogle page on the bottom, with the ability to control what appears on top.
Adding a calendar to the 'everyone' content of a start page is the same as adding a calendar to any other Google Sites page.
The key difference is that while you as an administrator or teacher might add school-related calendars for sports, holidays, or class projects, a student could also add a calendar in the custom section.
Allow users to add a calendar to a start page
Users do not have to be collaborators or owners of site to add personalized content. With the start page, they will have the ability to add gadgets - one of which can be a calendar gadget.
Here are the instructions for a user (like a student) to add a calendar to their school start page:
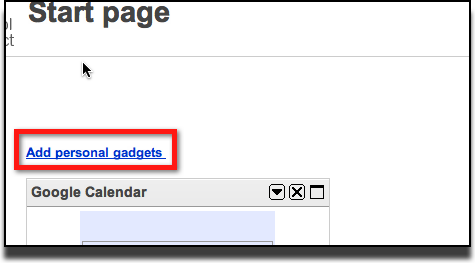
- On the school start page, Look for the area beneath the content that has a box that says 'Gadgets in this area only visible to you.' This is the custom section that any user visiting this page can change.
- Click the Add personal gadgets link on the top left of the 'Gadgets' box.
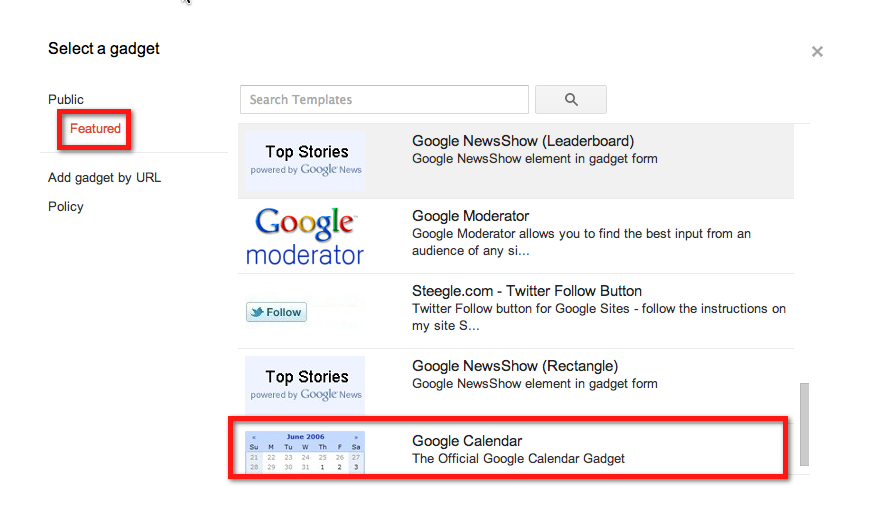
- From here, click on the Featured link within the 'Public' section.
- Scroll down and click the Google Calendar gadget.
- Click Select to add the gadget to the start page.
- To customize the gadget, click the down arrow in the top right corner of the gadget. Here you can choose the display options of the calendar.
This calendar gadget will automatically identify the school Apps account and display that primary calendar, you do not need to select a calendar or sign-in.