Android Tutorial - CS247L 1/12/2011
Setup:
The following steps are a summary of what you need to do to get setup.
If you would like to use a more detailed & lengthy instruction instead, you can follow the steps on this link: http://developer.android.com/sdk/installing.html
*UPDATE: We will be using Android Platform 2.2 (API 8), since it is the last stable version of the platform. If you have already followed the setup instructions, look at step 4 again to also install the SDK Platform Android 2.2, API 8.
1. Download and install Eclipse : http://www.eclipse.org/downloads/
2. Download Android SDK : http://developer.android.com/sdk/index.html
3. Install the ADT Plugin for Eclipse : http://developer.android.com/sdk/eclipse-adt.html#installing
4. Add Android platforms and other components to your SDK:
a. From within Eclipse, select Window > Android SDK and AVD Manager.
b. Select Available Packages from the left navigation bar
c. Click on Android Repository and select the latest version of the following packages:
- Android SDK Tools
- Android SDK Platform-tools
- SDK Platform Android 2.3, API 9 (latest platform)
- SDK Platform Android 2.2, API 8 (latest stable platform) - UPDATE
- Documentation for Android SDK, API 9
- Samples for SDK API 9
- Google API’s (optional)
d. Install all of these packages (this may take several minutes)
5. (OPTIONAL -- this is what we are going to start with in lab)
Make sure everything is ready by trying the “Hello World” application : http://developer.android.com/resources/tutorials/hello-world.html
------------------------------------------------------------------
Overall Development Tools:
http://developer.android.com/guide/developing/eclipse-adt.html#Running
Using Android Emulator:
1. Create an AVD: http://developer.android.com/guide/developing/eclipse-adt.html#AVD
2. Using Eclipse, select Run > Run (or Run > Debug) from the Eclipse menu bar. The ADT plugin will automatically compile, install and start your application on the default AVD you create.
Using Mobile Device:
http://developer.android.com/guide/developing/device.html
1. In Eclipse, open AndroidManifest.xml of the current project, click on Application tab, set Debuggable to true.
2. On your device, press MENU (in some cases, Settings), select Applications > Development, make sure USB debugging is checked.
3. If using Eclipse, run or debug as usual. You will be presented with a Device Chooser dialog that lists the available emulator(s) and connected device(s). Select the device upon which you want to install and run the application.
How to Debug:
Strategy 1. Print out statements using LogCat
Example: Log.i(“myTag”, “mymessage”);
a. Log is a logging class you can use to print out messages to the logcat.
Available logging methods include:
v(String tag, String message) (verbose),
d(String, String) (debug),
i(String, String) (information),
w(String, String) (warning),
e(String, String) (error).
b. View logcat messages by opening the Logcat view:
Window > Show View > Other > Android > Logcat.
c. Filter the logcat messages by tag or message content.
Strategy 2. Use Alert Dialogs:
a. Helper Class (include this inside your activity class):
/* An optional helper method for showing an alert dialog. May be helpful for debugging.*/
public void alertbox(String title, String mymessage)
{
new AlertDialog.Builder(this)
.setMessage(mymessage)
.setTitle(title)
.setCancelable(true)
.setNeutralButton(android.R.string.cancel,
new DialogInterface.OnClickListener() {
public void onClick(DialogInterface dialog, int which) { }
})
.show();
}
b. To Call:
alertbox("ERROR", "! "+error); //include whatever error messages you want to use for debugging
------------------------------------------------------------------
TUTORIALS:
A. Hello World:
http://developer.android.com/resources/tutorials/hello-world.html#create
1. Follow all the instructions in the link, starting from Create a New Android Project, Construct the UI, and finally Run the Application.
Note: Your build target (during new project creation) should be the lowest revision (2.2 in our case).
You may need to wait a few minutes for the emulator to load up, and for the application to install. Your screen should appear as follows:
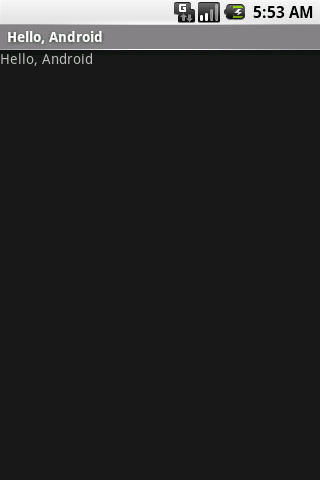
If you click on the Launcher icon on the Home screen, you should see Hello, World! as an installed application.
B. Basic Display
1. Download the skeleton code we have provided here: http://hci.stanford.edu/courses/cs247/2011/androidLab/AmbientBasic.zip
2. Import this directory to a project in Eclipse : File > Import > Existing Projects Into Workspace.
UPDATE: If you get an error about incompatibility with 5.0, try the following: File > Android Tools > Fix Project Properties
3. Take a look at the skeleton code we have provided for P3. Currently, this code is an ambient display of shades of red.
4. Try to change the colors of the display (hint: look in ColorHandler.java)
C. Using the microphone
1. Using the same skeleton code from part A, we will update the code so that the ambient display is affected by the volume of microphone feedback.
2. Paste the following line into the AndroidManifest.xml. In order to access certain features of the phone, you must activate those permissions in this file.
... <uses-permission android:name="android.permission.RECORD_AUDIO"></uses-permission> </manifest> |
3. Update MobileAmbientDisplay.java so that it matches the following code:
http://hci.stanford.edu/courses/cs247/2011/androidLab/MobileAmbientDisplay_Audio
4. Make sure you close the emulator and restart it (for the manifest permissions to take effect), otherwise the updated application may not run properly.
D. Camera (actual phone only, doesn’t work on emulator)
1. Using the same skeleton code from part B, we will update the code so that the ambient display is affected by feedback from the camera. Essentially, when you move the camera over certain areas, the screen will display the average color of the current input frame.
2. Paste the following line into the AndroidManifest.xml. In order to access certain features of the phone, you must activate those permissions in this file.
... <uses-permission android:name="android.permission.CAMERA"></uses-permission> </manifest> |
3. Update MobileAmbientDisplay.java:
http://hci.stanford.edu/courses/cs247/2011/androidLab/MobileAmbientDisplay_Video
4. Make sure you close the emulator and restart it (for the manifest permissions to take effect), otherwise the updated application may not run properly.
E. Accelerometer
1. In Eclipse, go to File > New Project > Android Project > Next.
2. Under Build Target, select “Target Name: Android 2.3”. Under Contents, select “Create project from existing sample.” In the Sample drop-down, choose AccelerometerPlay. Click Finish.
(Yes, we realize that we’re not using Android 2.3 because it’s unstable, but the 2.3 platform has a pretty good accelerometer application, so we’ll cheat a little).
After creating the project, right-click on the AccelerometerPlayActivity project > Configure Build Path. On left-hand column, select Android > check Android 2.2 > Apply > OK.
3. Ignore the warning in the AndroidManifest.xml (this sample can be run on previous versions of the API, but will work on the latest platform).
4. Run > Run Configurations > Target. Make sure the Deployment Target Selection Mode is Manual.
5. Run the application. The Android Device Chooser should pop up, select the device (some serial number, with current installed platform). The application should automatically install and begin running on the phone.
*If you want to run the application on the emulator, install Google’s SensorSimulator: http://code.google.com/p/openintents/wiki/SensorSimulator
6. Look at the sample code to understand the accelerometer.
7. Optional: Another accelerometer tutorial: http://blog.androgames.net/85/android-accelerometer-tutorial/
F. GPS Coordinates
http://www.firstdroid.com/2010/04/29/android-development-using-gps-to-get-current-location-2/
1. Create a new Android project called UseGPS. The package name should be “com.example.usegps”, application name is “Use GPS”, and the activity name should be UseGPS.
2. Add the following line to AndroidManifest.xml:
... <uses-permission android:name="android.permission.ACCESS_FINE_LOCATION"></uses-permission> </manifest> |
3. Add the following code to UseGPS.java:
http://hci.stanford.edu/courses/cs247/2011/androidLab/UseGPS.java
4. To run on phone: similar to Part D, you just need to select the phone device and run the application from Eclipse. It will install and begin running on the phone. Note: GPS coordinates are not too sensitive, so you may need to move some distance before you see the values change.
5. To run on the emulator: In Eclipse, go to Window > Android SDK and AVD Manager. Select New... > input the name for the new emulator (i.e. GpsEnabled), Target: Android 2.2. Under Hardware: > select New... > Property: GPS support > OK. Click the Create AVD button. When you run the application from Eclipse, select this AVD to run the application.
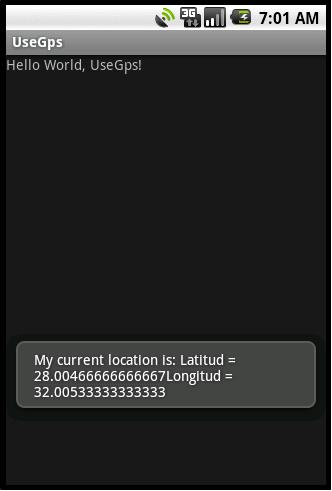
To test the GPS with the emulator, open a console and type the following commands:
telnet localhost 5554 (or whatever port you are running the emulator on)
geo fix 28 50
You should see those latitude and longitude coordinates pop up in the emulator:
F. Accessing Call Log
http://malsandroid.blogspot.com/2010/06/accessing-call-logs.html
1. Create a new project called CallLogs
2. Add the following line to AndroidManifest.xml:
... <uses-permission android:name="android.permission.READ_CONTACTS" /> </manifest> |
3. Add the following code to CallLogs.java:
http://hci.stanford.edu/courses/cs247/2011/androidLab/CallLogs
4. Run it on the phone and see that it prints out the outgoing, missed, and incoming call.
5. (Optional) To run it on the emulators :
“Create another AVD and launch a secondary emulator. In the titlebar and taskbar icon name, you can see some number associated with each emulator instance (like: 5554). From one emulator, you can "dial" the number of the other. So, for instance, in emulator 5556 open the dialer and dial 5554. Dial from one to the other; answer some not others; Dial the other direction, etc.”
Resources: Phone and Call Log classes
http://developer.android.com/reference/android/provider/CallLog.html
http://developer.android.com/reference/android/provider/CallLog.Calls.html
G. Bonus: Do something cool!
Come up with your own awesome app, or find some other tutorials, and please share it in class! If you have experience with Android apps, or just come across something really helpful or amazing, we’d love it if you could share your knowledge and resources with the rest of the class.
Some Sample Resources:
Sensor Manager:
http://developer.android.com/reference/android/hardware/SensorManager.html
Facebook API