
RKIN WHOLE HOUSE WATER FILTER SYSTEM
MODELS: CS8, CS9, CS10, CS13
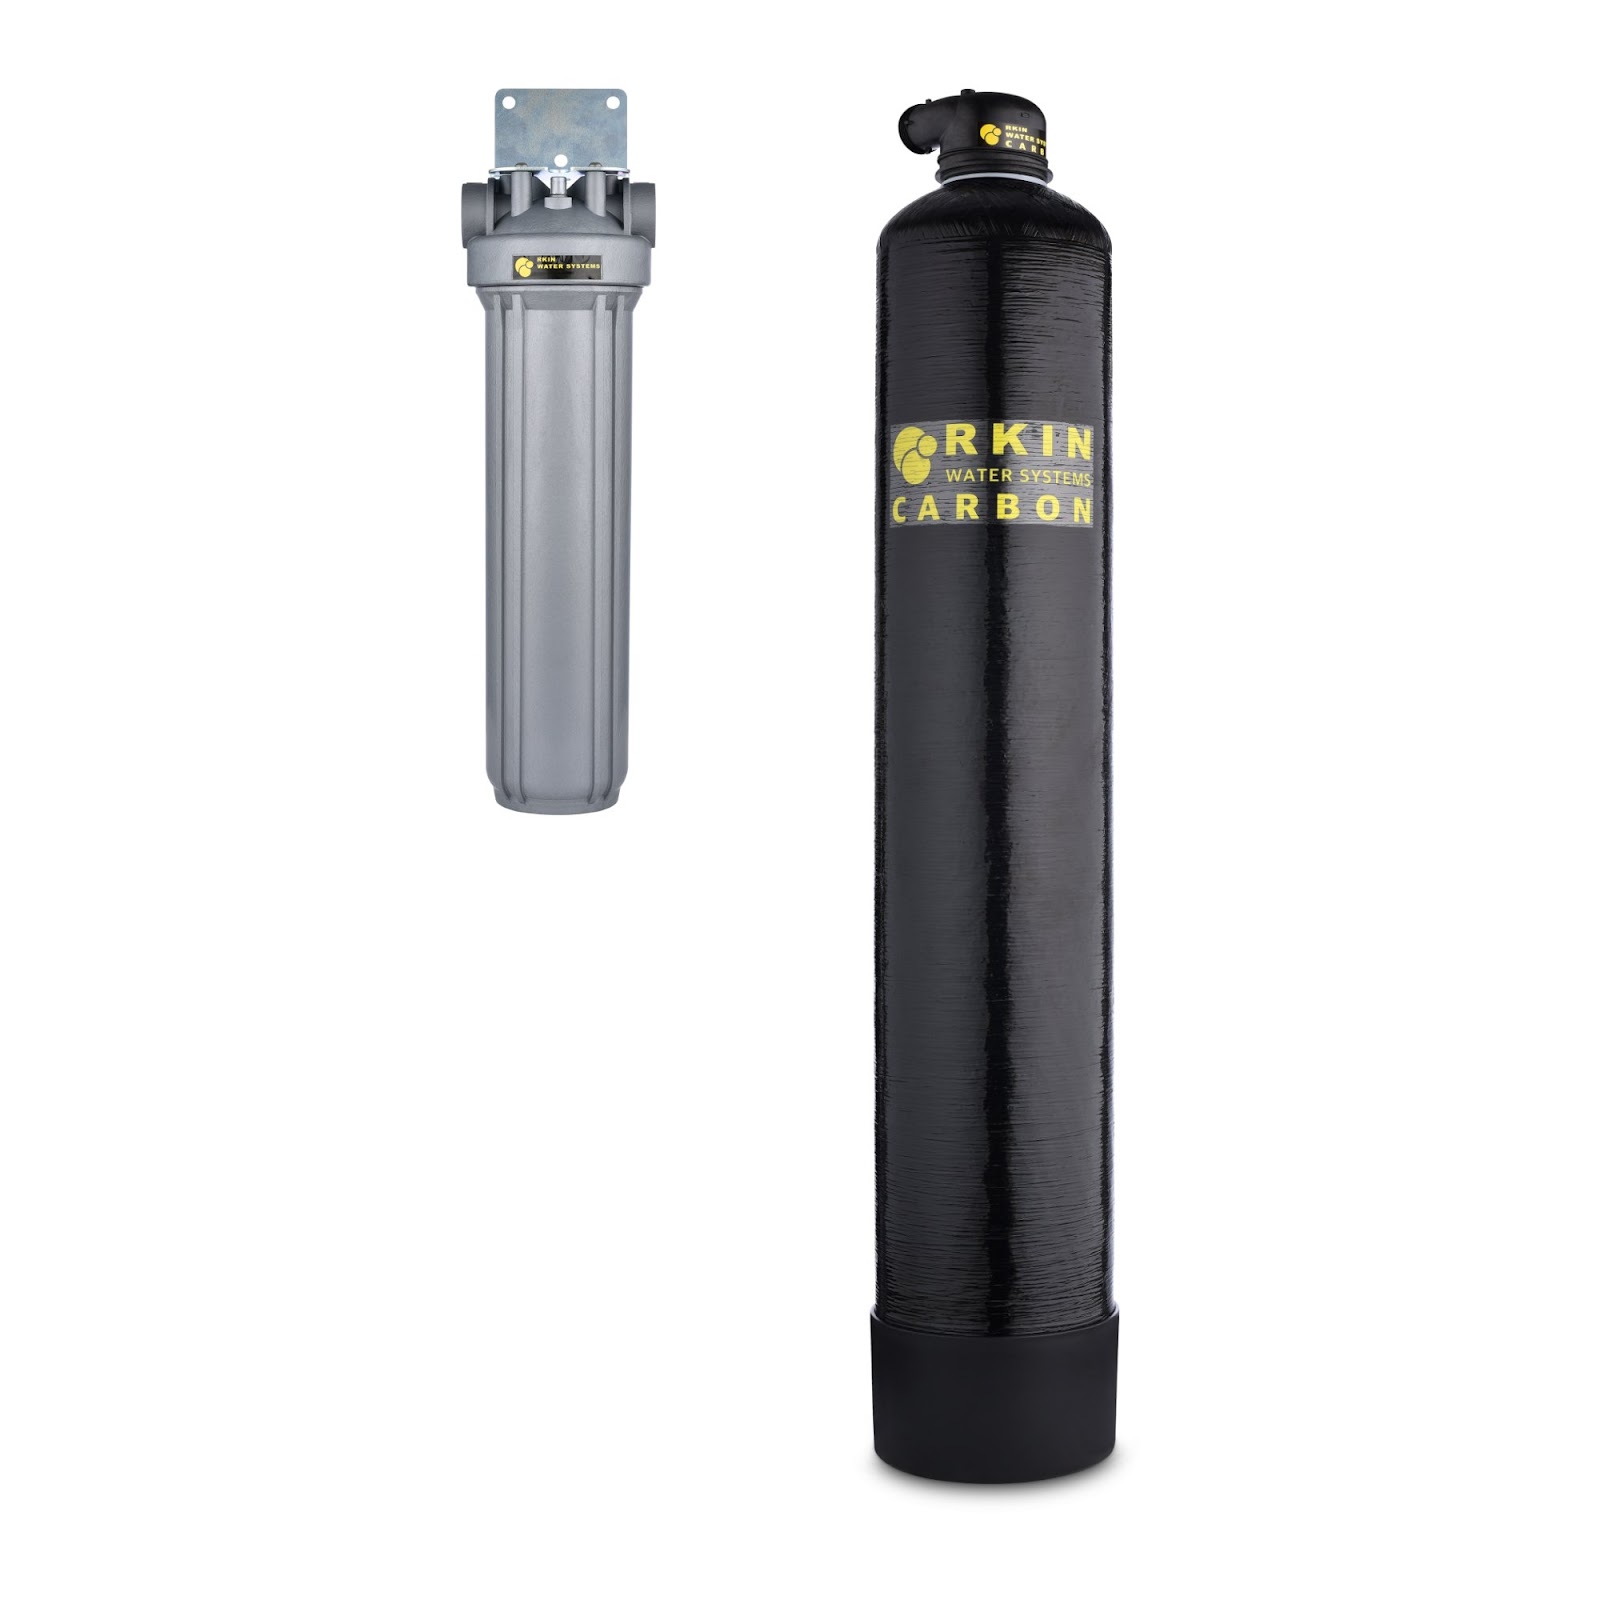
The RKIN Whole House Water Filter System removes impurities in your water.
The RKIN technology ensures that your water has the most contact time with filtration media inside the tank, ensuring the best possible filter media utilization.
Table of Contents
Carbon Filter Soak Instructions 8
Optional Installation Kit Instructions 12
Premium Whole House Water Filter Carbon Media 15
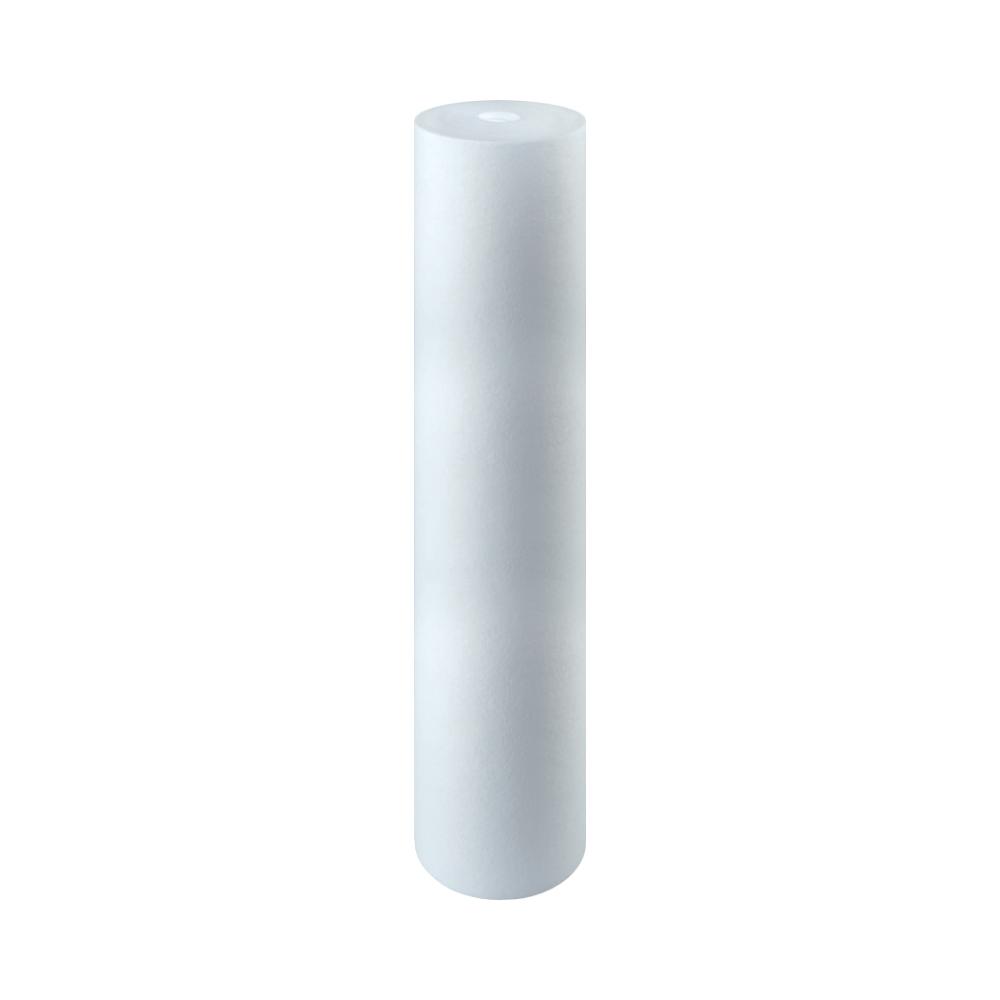
Replacing the Sediment Filter 15
⚠ CAUTION:
Do not install on well water without checking with RKIN customer service representative first.
Product Specs
Specification Description | CS8 | CS9 | CS10 | CS13 |
Bathrooms | 1-3 | 2-5 | 4-6 | 7+ |
Carbon Media Capacity | 500K Gallons or 10 Years | 1 Million Gallons or 10 Years | 1 Million Gallons or 10 Years | 1 Million Gallons or 10 Years |
ZEE Pro Sediment Filter Replacement | Every 12 Months | Every 12 Months | Every 9-12 Months | Every 6-9 Months |
Tank Width | 8” | 9” | 10” | 13” |
Tank Height with Head | 48” | 52” | 58” | 58” |
Connection Size | 1” | 1” | 1” | 1.5” |
Operating Temperatures | 36°F-120°F | 36°F-120°F | 36°F-120°F | 36°F-120°F |
Operating Pressure | 25-80 PSI | 25-80 PSI | 25-80 PSI | 25-80 PSI |
Flow Rate | 9 GPM Service / 12 GPM Peak | 11 GPM Service / 17 GPM Peak | 15 GPM Service / 23 GPM Peak | 28 GPM Service / 41 GPM Peak |
pH Range | 6-11 | 6-11 | 6-11 | 6-11 |
Complete Parts List
Carbon Tank | Sediment Filter Wrench | |||
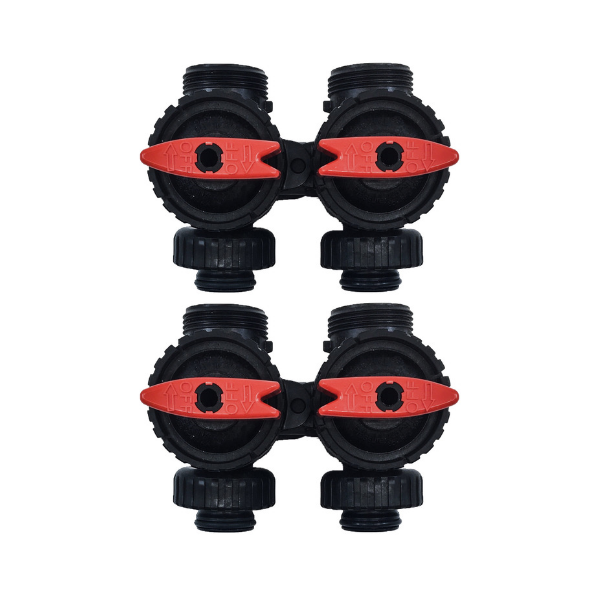
ZEE Pro Sediment Filter Housing | Bypass Valve (1) | |||
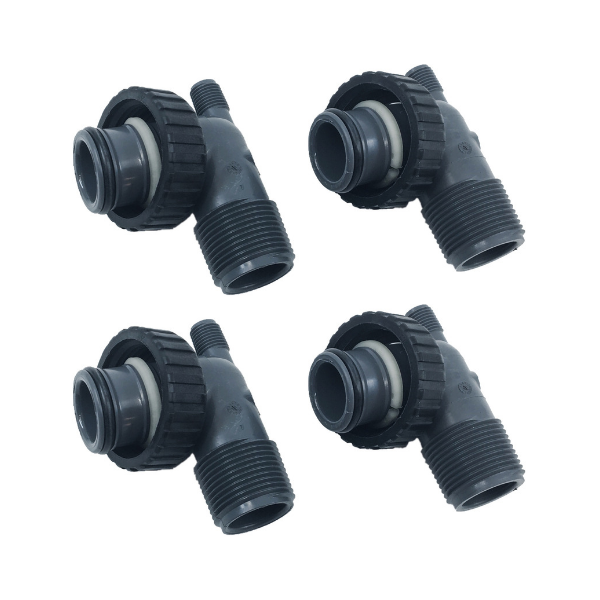
Sediment Filter | 1” MNPT PVC Elbow Fittings (2) | |||
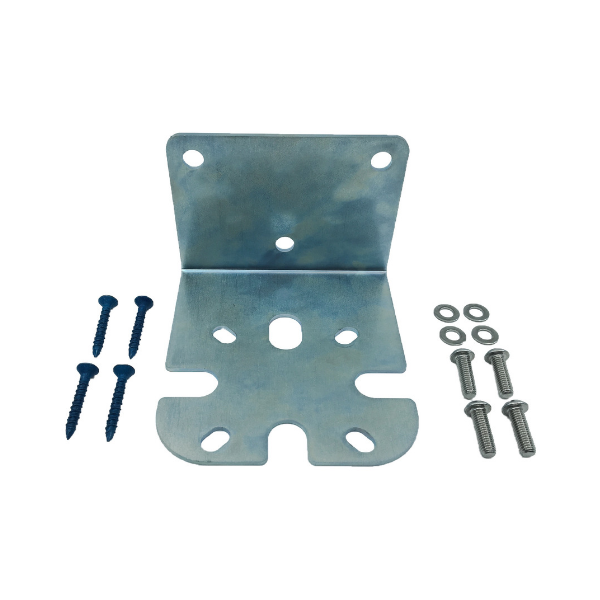
Mounting Kit for ZEE Pro Sediment Filter Housing:
| Hose Bib Assembly |

Optional Installation Kit and UV Protective Tank Jacket
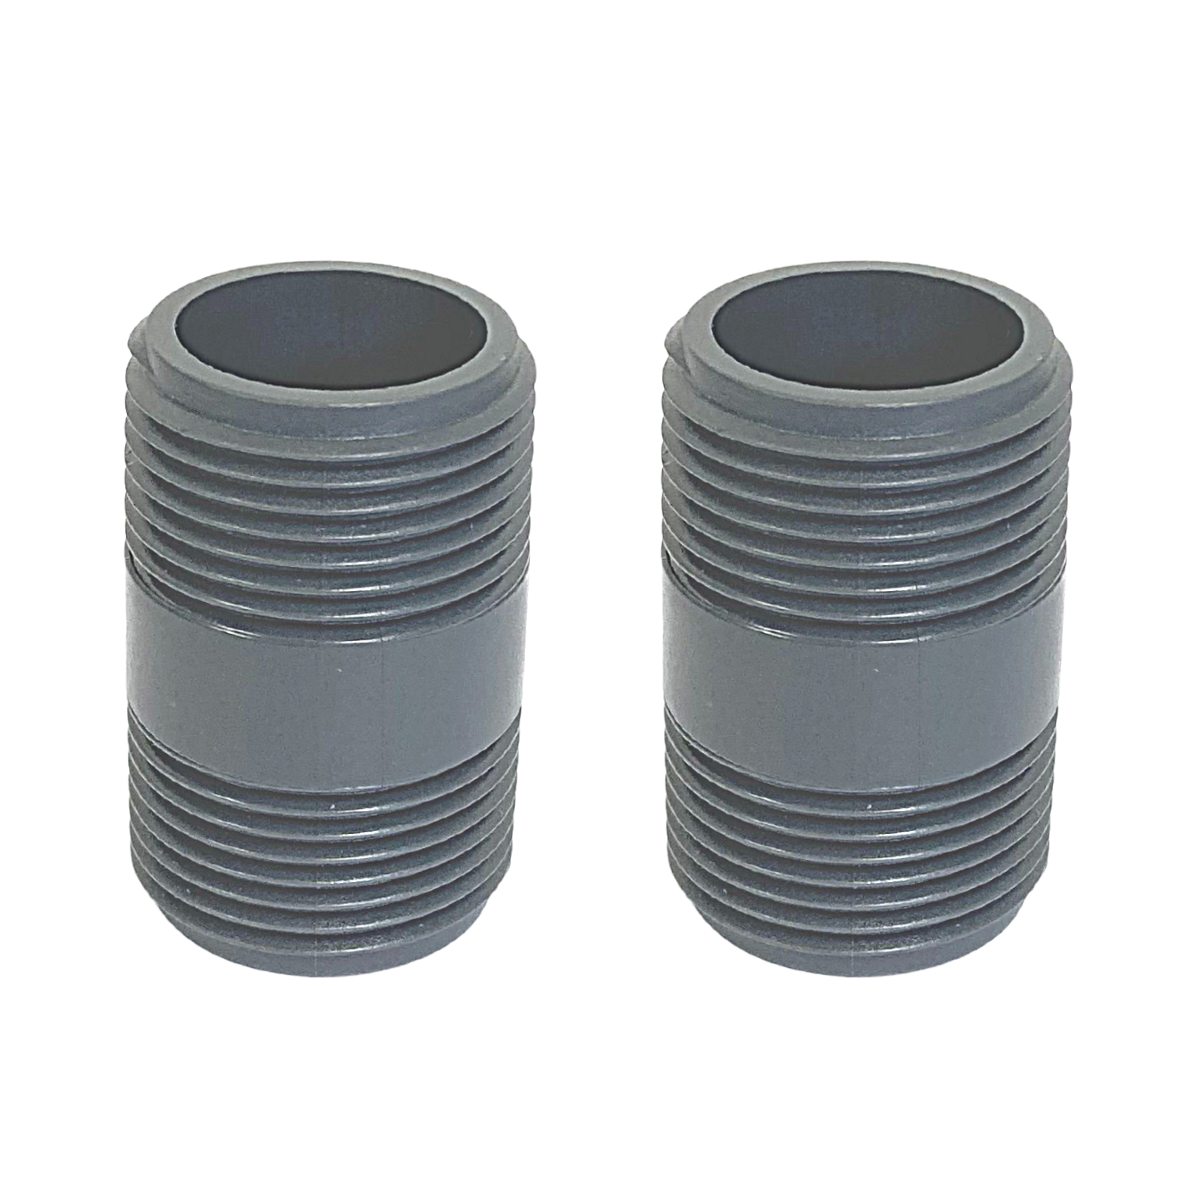
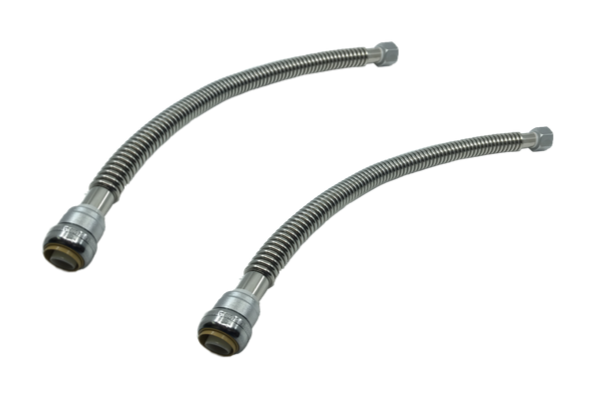
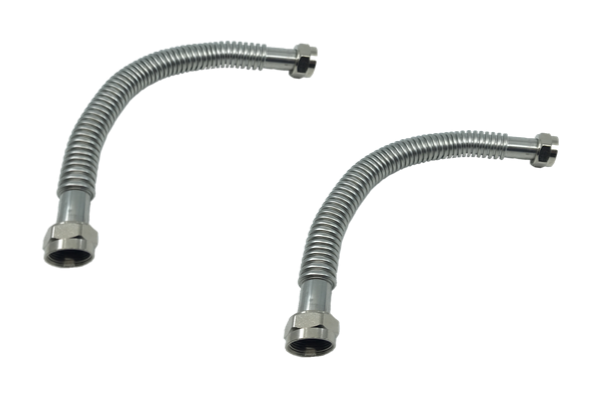
(2) 1” Male NPT Nipples | (2) Stainless Steel 24”x1” Supply Flex Hose | (1) Stainless Steel 18”x1” Water Tank Connector Hose | UV Protective Tank Jacket |

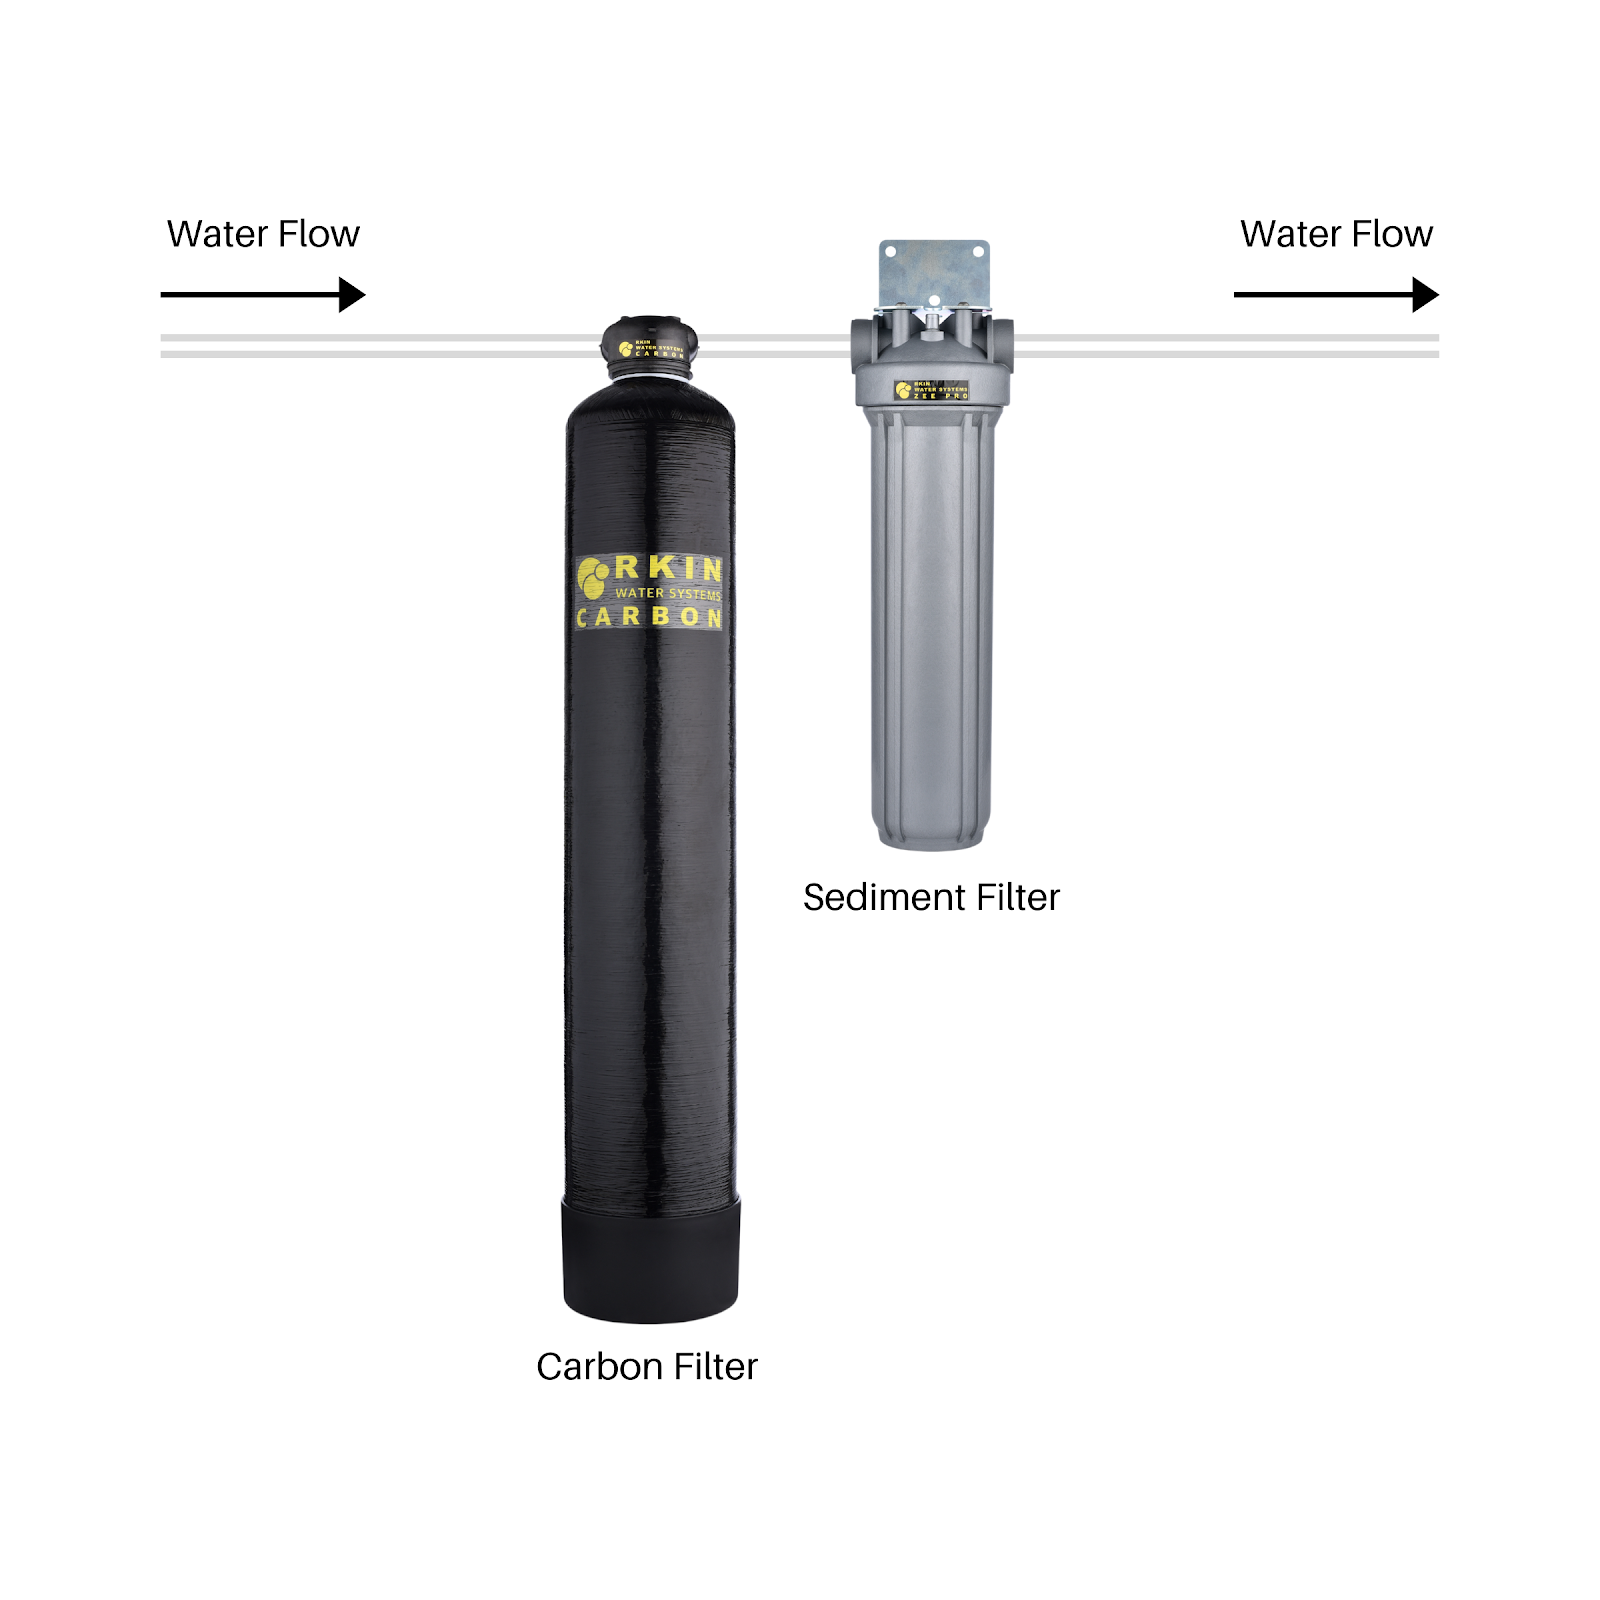
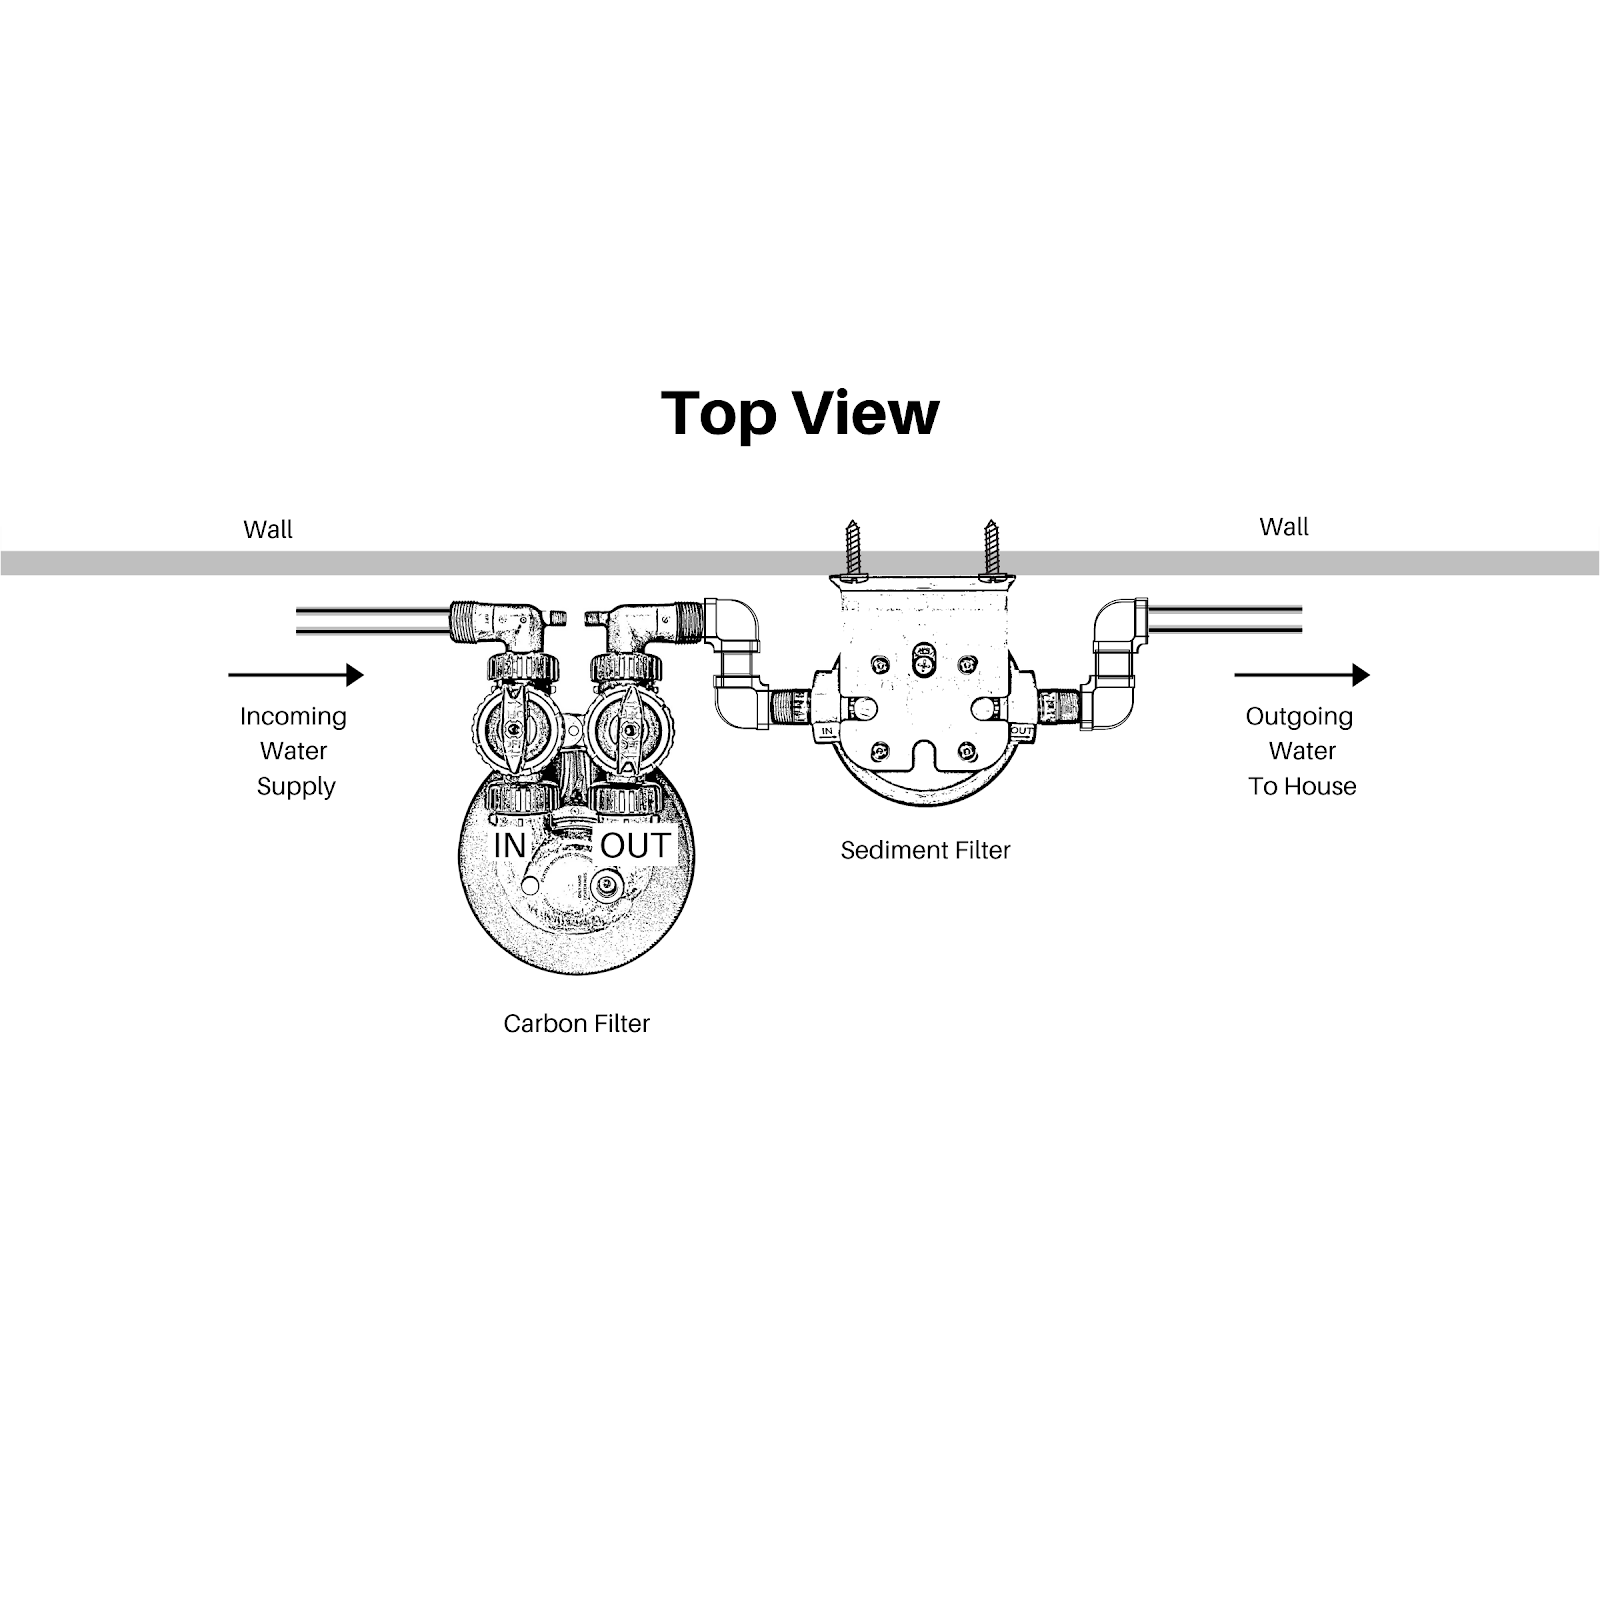
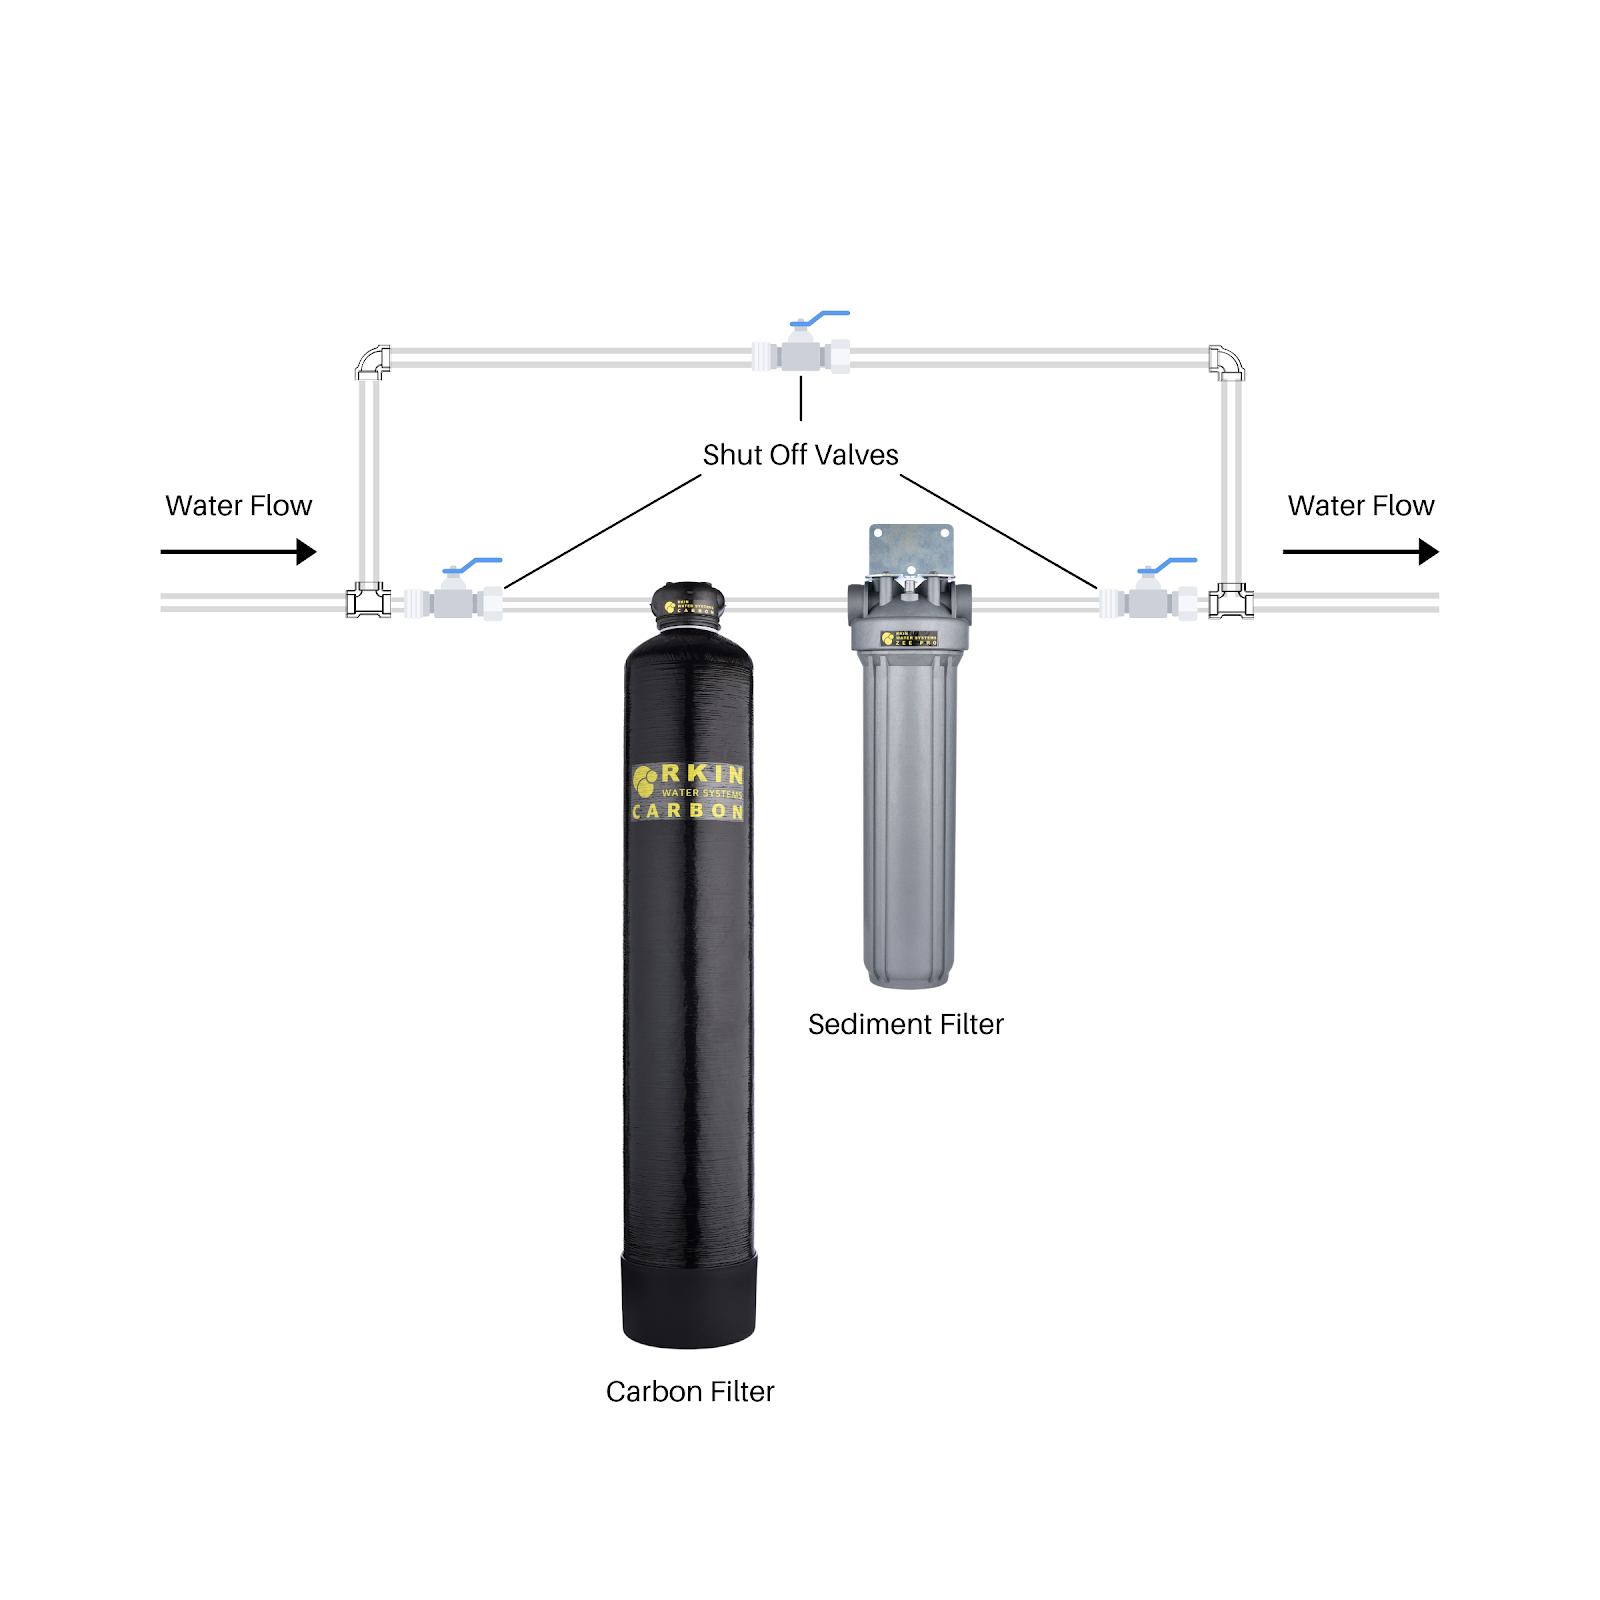
Installation Overview
Optional Bypass Overview
⚠ CAUTION:
The system must be installed on the main water supply line.
If this system is installed into a metal (electrically conductive) plumbing system such as, copper or galvanized metal, the water treatment system will interrupt the electrical ground continuity of the plumbing system. This will result in the ineffectiveness of the metal plumbing system to be used as an electrical ground for errant electricity from improperly grounded appliances or potential galvanic activity. There are building codes that encourage the grounding of electrical appliances through the plumbing system. If your home is built in accordance with such building code, you must first install either a bypass consisting of the same conductive material as the existing plumbing, or a grounded "jumper wire" that bridges the equipment and re-establishes the continuity and the conductive nature of the plumbing system before using the water treatment system.
Tank Boot Adjustment
The tanks sit in a “boot” and may need to be adjusted after shipping.
Leaning Tank ⇨ Tank Boot ⇨ | ||
(Needs Alignment) | (Correct Position) | |
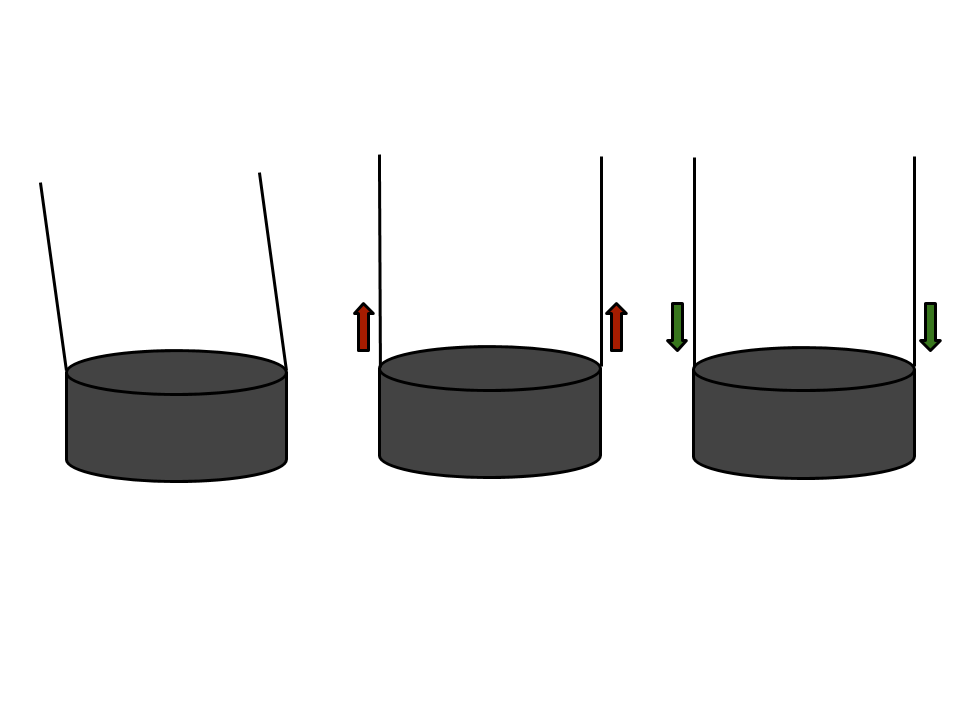
If either tank is not standing perfectly straight up and down, lift the tank up 6 inches and carefully tap it on the ground. Repeat this until the tank stands vertically straight and sits firmly into the tank boot.
The bottom of the tank is round and the boot allows the tank to stand upright.
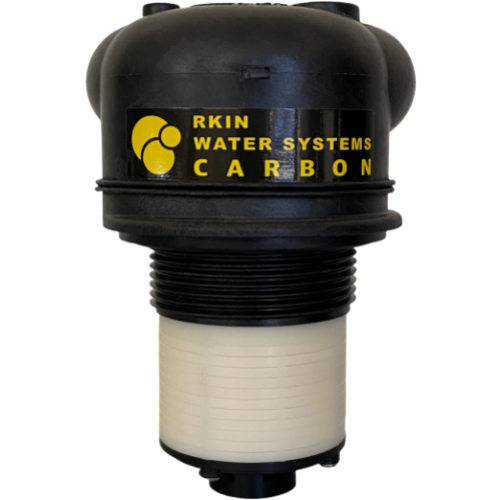
Filter Head Installation
⚠ IMPORTANT!
As soon as the tank head is attached to the pipe inside the tank IT IS IRREVERSIBLE. DO NOT REMOVE OR UNSCREW THE HEAD FROM THE TANK. Otherwise, it might cause the media to escape the tank and make its way into your home’s plumbing.
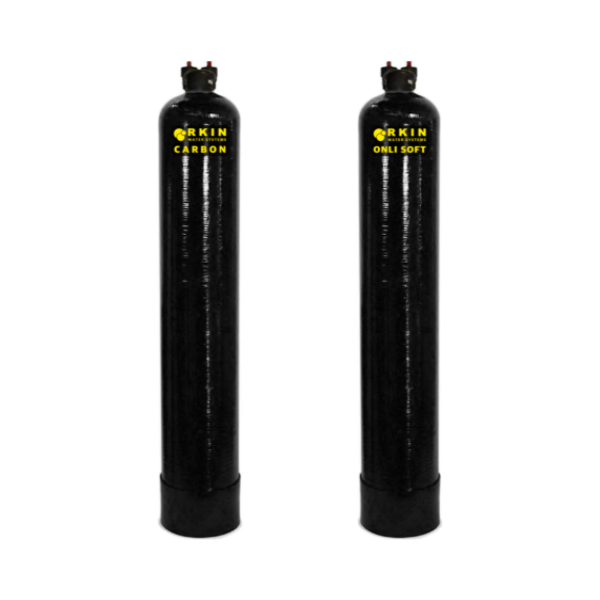
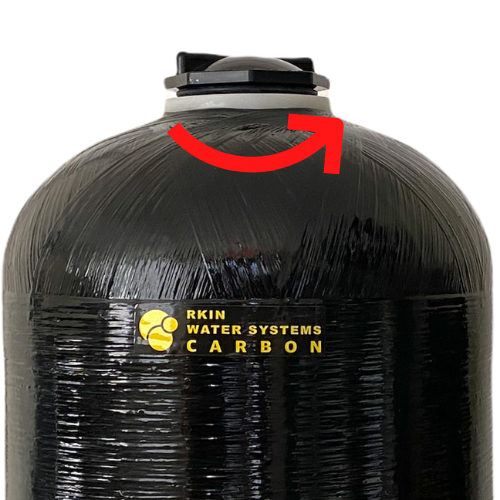
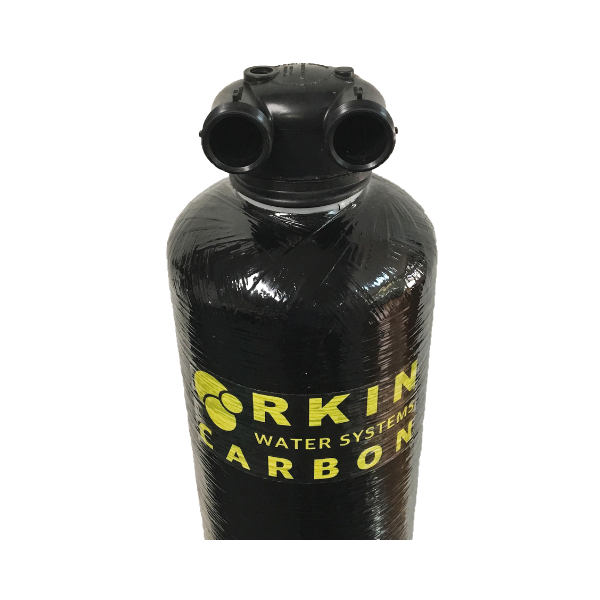
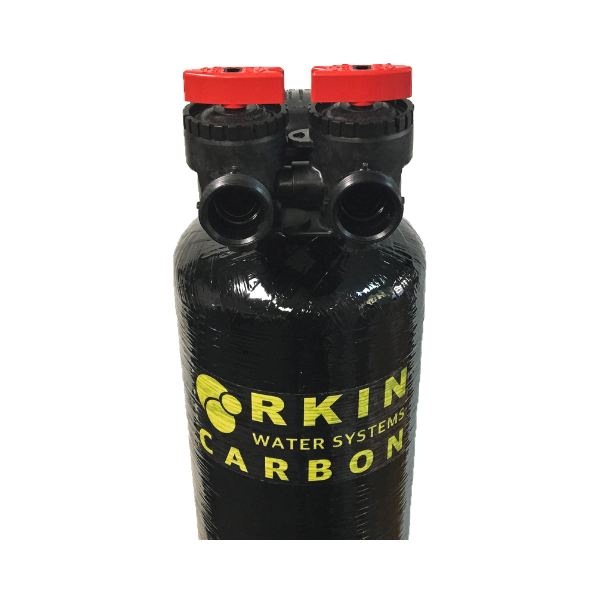
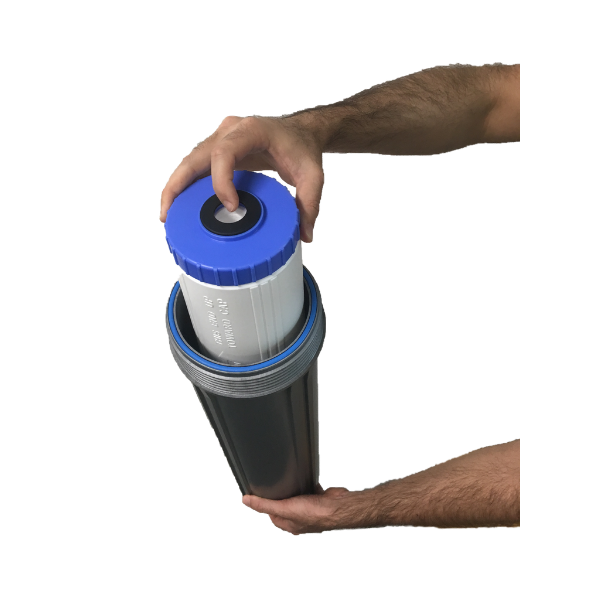
Locate Tank Head labeled “CARBON” and Carbon Filter Tank. Unscrew the Carbon Filter Tank cap by turning it counterclockwise and discard it. | ||
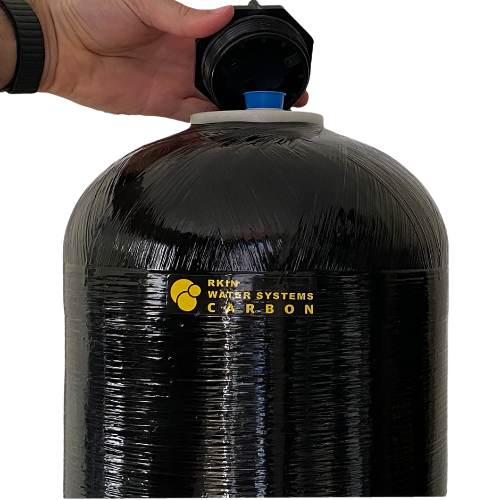
| Inside the tank, there is a pipe with a cap. Carefully remove the cap without pulling the pipe out. | |
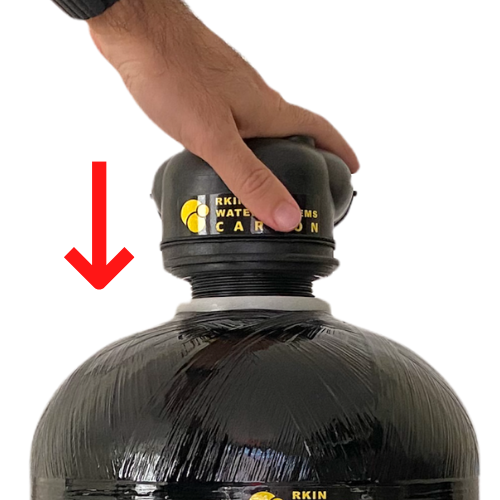
| Make sure the Tank Head o-ring is in place. Insert the bottom of the Tank Head opening over the pipe and press down. Turn Tank Head clockwise until tightened. | |
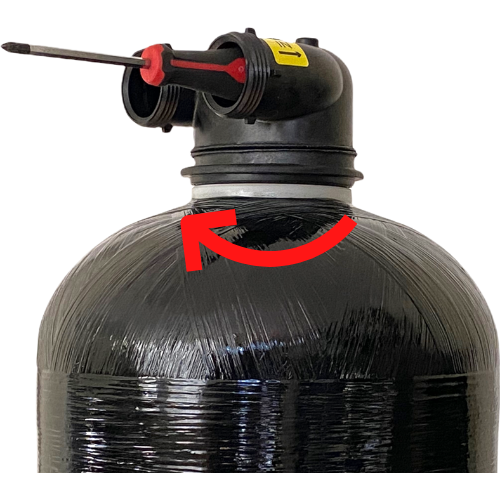
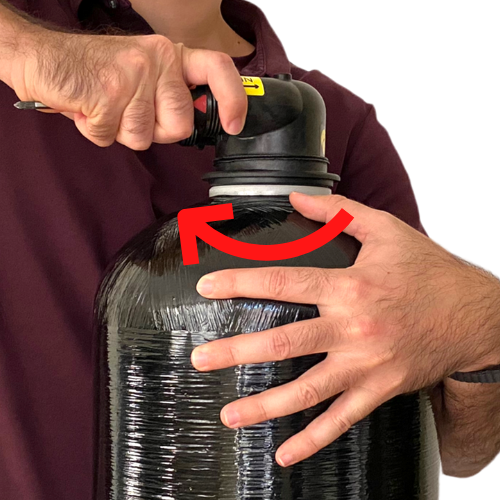
| Insert a screwdriver handle into one of the ports on the Tank Head for additional leverage. Hold the tank against your body and snugly tighten the Filter Head again. |

Carbon Filter Soak Instructions
⚠ IMPORTANT!
Before installation, soak the carbon media inside the tank in water for a MINIMUM of 2 days.
⚠ IMPORTANT!
If you notice any media pellets coming out of the tank during the soak/rinse process, please stop immediately and contact customer service at 1-800-803-4551.
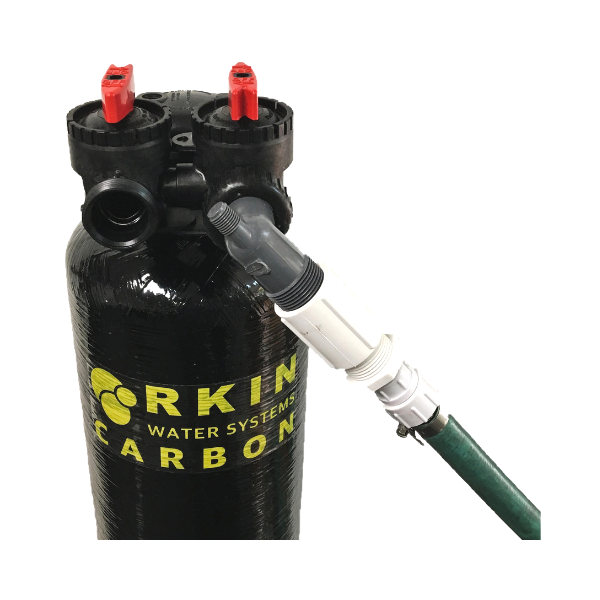
Set the tank on a level surface. Note: The area around the tank may get wet. | |
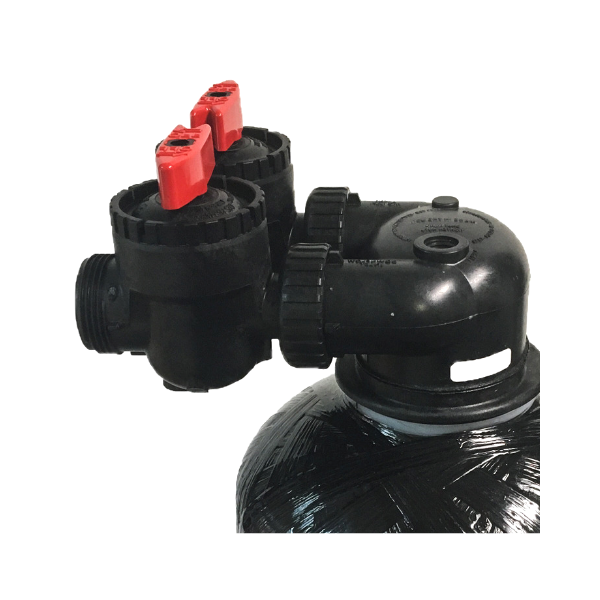
| Install the bypass valve with red arrows to the head of the tank by hand-tightening quick connects. |
| Install PVC elbow to the inlet side of the bypass valve by hand-tightening the quick connect. |
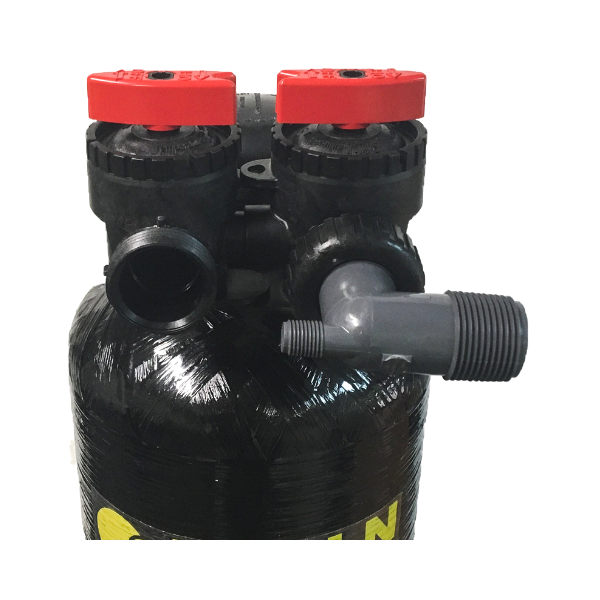
| Connect the hose bib assembly to the IN(upflow inlet) side. Hand-tighten. Connect a water hose to the opposite end of the hose bib assembly. Put the bypass valve in service mode (with the red arrows parallel to each other). |
Slowly turn the water on about halfway. Wait until the water fills the tank and overflows from the outlet side and then turn the water off. Put the bypass valve in bypass mode (with the red arrows forming a straight line) and disconnect the hose. Finally, set the tank aside in a safe place for 2 days. |

Carbon Rinse Instructions
This process removes most of the excess carbon dust out of the carbon bed. Residual dust may remain, which can be seen in toilets and sinks but will clear within a day or two.
⚠ IMPORTANT!
If you notice any media pellets coming out of the tank during the soak/rinse process, please stop immediately and contact customer service at 1-800-803-4551.
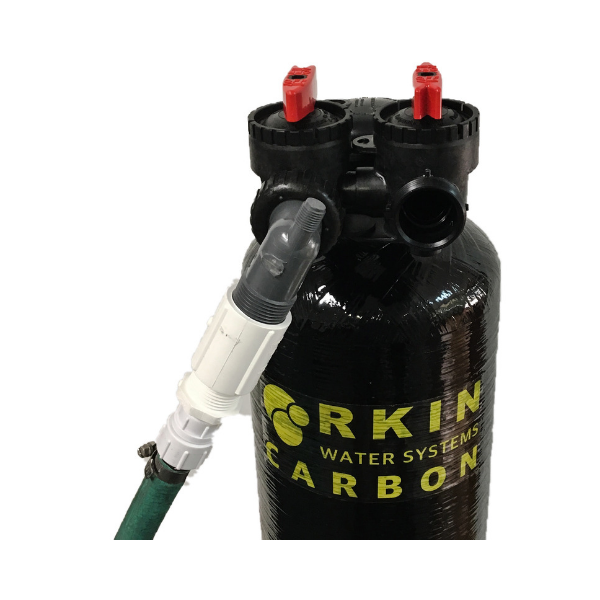
After the carbon has soaked for 2 days, take the tank outside to rinse excess carbon dust out of the filter. | |
| Connect the hose to the IN(upflow inlet) side of the bypass valve using the bib assembly and the PVC elbow. Put the bypass valve in service mode (with the red arrows parallel to each other). Slowly turn the water on halfway and allow the water to run and overflow for 15 to 20 minutes. |
| Turn the water off and disconnect the water hose. Connect the water hose to the OUT(downflow inlet) side. Slowly turn the water on to full strength. Allow the water to run and overflow for 5 minutes. |
| Disconnect the hose and connect to the inlet side. Slowly turn the water on halfway and allow the water to run and overflow for 10 minutes. Disconnect the hose bib assembly. |


Setup / Installation
- At this point, you will need to shut the main water supply off to adapt your plumbing in and through the system.
- Turn off the main water supply to your home.
- Turn on a faucet (cold water) inside the house to relieve water pressure. (Leave the faucet on)
- We recommend you plumb a shut-off valve to the pipe leading to the Carbon Tank.
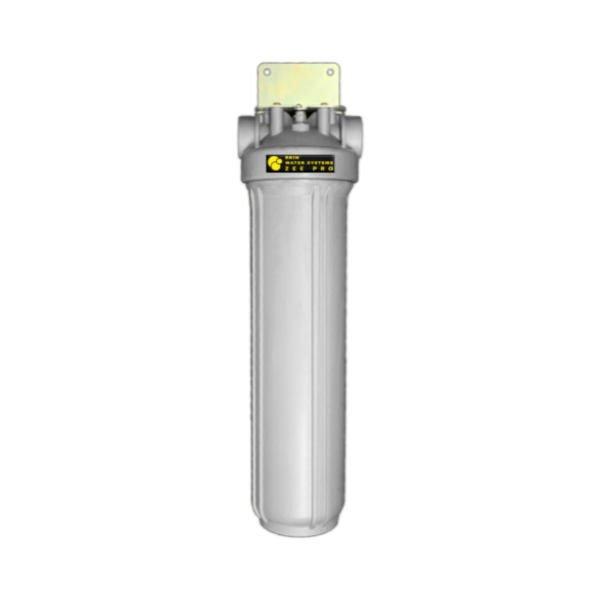
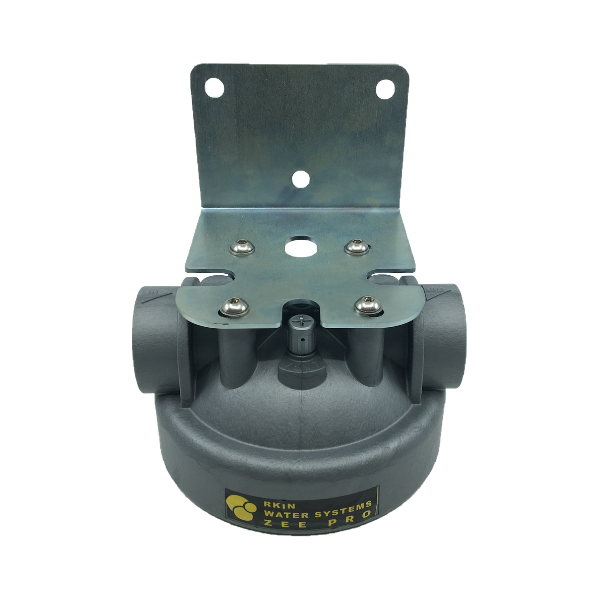
- Locate an area on your wall where you would like the ZEE Pro Sediment Filter to be installed. Locate the aluminum ZEE Pro Sediment Filter mounting bracket with hex bolts and washers.
- Mount the ZEE Pro Sediment Filter bracket to the wall using the hex bolts and washers.
Note: The aluminum bracket should be screwed into a concrete wall or into studs in the wall to support the weight of the soaked ZEE Pro Sediment Filter, which will weigh approximately 24 pounds.
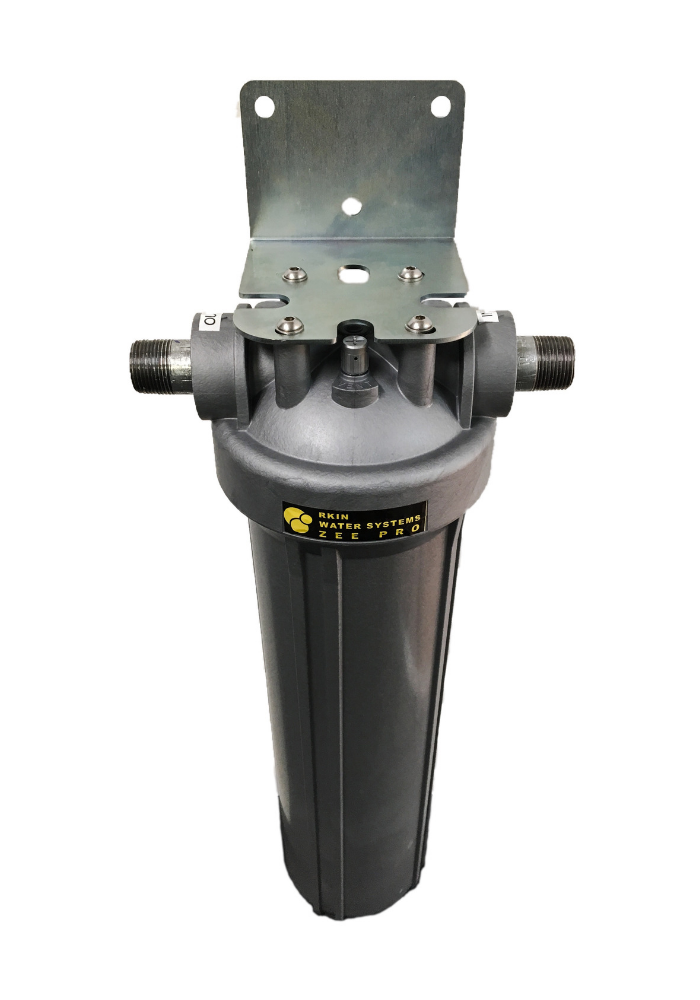
While the aluminum mounting bracket is mounted on the wall, attach the ZEE Pro Sediment Filter housing head to the mounting bracket with the hex bolts and washers provided. | |
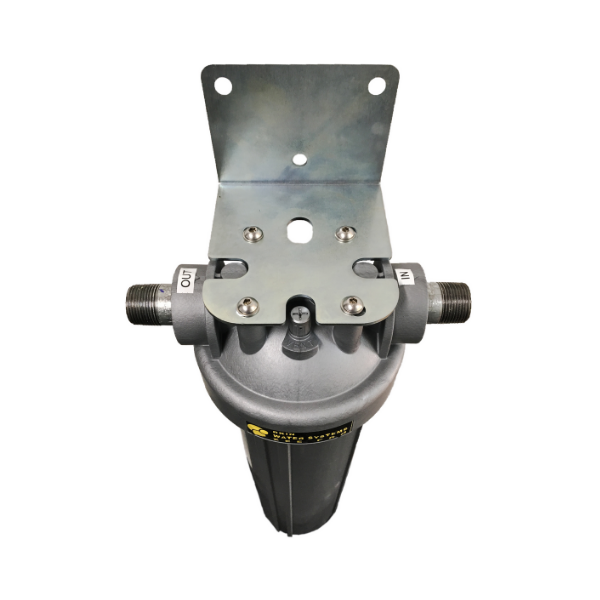
Plumb the OnliSoft Tank Outlet into the Inlet side of the ZEE Pro Sediment Filter head INLET (follow the in and out water flow indicators). Note: The ZEE Pro Sediment Filter housing head inlet and outlet take 1” male fittings. | |
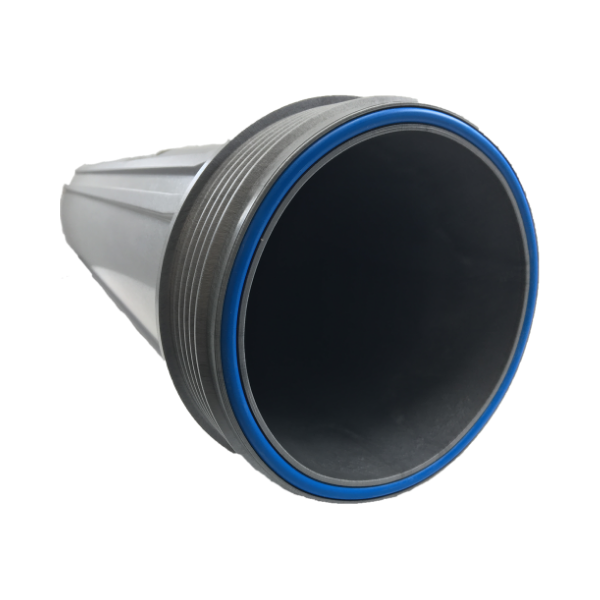
| Unwrap the Sediment Filter and install it in the housing by setting the filter onto the pipe stand inside. |
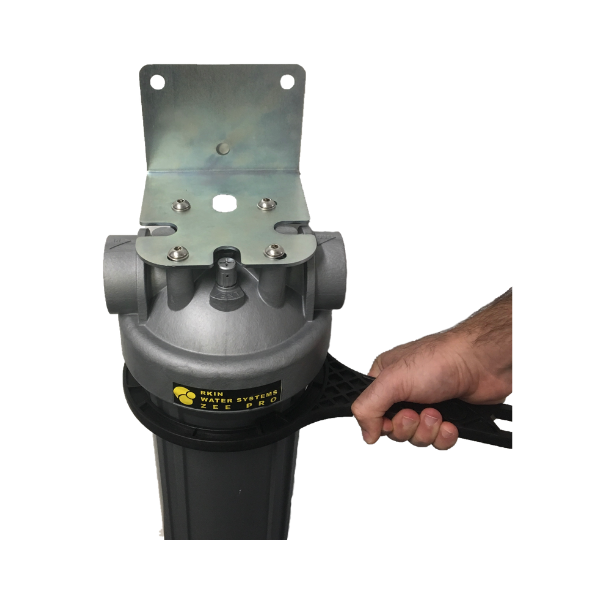
| Screw the ZEE Pro Sediment Filter housing to the head as tight as you can by hand and then tighten it further with the wrench. |


Optional Installation Kit Instructions
|
|
|
|

Preparing the Prefilter
Note: Before starting this part of the installation, be sure to have your ZEE Pro Sediment Filter Housing mounted according to the Instruction Manual included with the system.
When mounting the ZEE Pro Sediment Filter Housing, please make sure that it is close enough to the water source to connect with the 24” Flex Hose.
- Wrap Teflon tape 1-2 times around the threads of the 2 (A) 1” Male NPT nipples.
- Thread both (A) 1” Male NPT nipples onto the INLET side and the OUTLET side of ZEE Pro Sediment Filter housing.
- Use tongue-and-groove pliers or a pipe wrench to tighten the (A) 1” NPT nipples until the threads are at least 1/2inch into the ZEE Pro Sediment Filter Housing.
Final Installation
- Connect the water source from the street to the Carbon Tank with a (B) 24”x1” Flex Hose:
- Connect the threaded female end of the (B) Flex Hose to the (D) 1" PVC Elbow attached to the INLET (upflow inlet) side of the Carbon Tank.
- Connect the quick connect side of the (B) Flex Hose to the water source pipe.
- Connect the Carbon Tank to the Sediment Filter with a (C) 18”x1” Flex Hose:
- Thread the female end of the (C) Flex Hose to the (A) 1” Male NPT Nipple attached to the INLET side of the ZEE Pro Sediment Filter Housing.
- Thread the other female end of the (C) Flex Hose to the (D) 1" PVC Elbow attached to the OUTLET (downflow inlet) side of the Carbon Tank.
- Connect the Sediment FIlter to the water line going into the house with a (B) 24”x1” Flex Hose:
- Connect the threaded female end of (B) the Flex Hose to the (A) 1” Male NPT Nipple attached to the OUTLET side of the ZEE Pro Sediment Filter Housing.
- Connect the quick connect side of the (B) Flex Hose to the water line going into the house.
Complete Install

Once the plumbing is complete, it's time to test the system:
- Double-check all connections. The valve nuts should only be hand-tightened.
- Slowly turn the main water supply on.
- Slowly turn the bypass valve on the Carbon tank to the in-service mode (with red arrows parallel to each other).
- Turn off the faucet. If there are no leaks, you have completed the install.
- Cover the Carbon Filter tank with an optional protective neoprene jacket.
- It’s natural to have some discoloration of the water for the first few days as it will take some time for the filtration media to get completely rinsed out of fines.
If you notice any leaks between the Tank Head and the Tank. It usually means that the o-ring is not in place or the head is not screwed on tight enough”
- Put the bypass valve on bypass mode and disconnect the bypass valve from the tank.
- Unscrew the head only ¼ to ½ turns, to verify that the o-ring is in place and tighten the head back on.
- Place the tank back and reconnect the bypass valve. Turn the bypass valve into the service mode.
- Retest for leaks.
CONGRATULATIONS:
You can now enjoy your new RKIN Whole House Water Filter System!
Maintenance
Premium Whole House Water Filter Carbon Media
Your Whole House Water Treatment System requires care and cleaning after a period of 5 years. Replacement media and instructions can be ordered online at www.rkin.com or by calling 800-803-4551. Model numbers for replacement media are WHRMC8, WHRMC9, WHRMC10, and WHRMC13.
Sediment Filter
It is recommended that the Sediment Filter be replaced every 6-12 months depending on the amount of sediment present in the water supply. If the system has been working properly and the pressure is slowing, it may be time to change the Sediment Filter. Check the Sediment Filter and replace if necessary. Replacement sediment filters can be ordered online at www.rkin.com or by calling 800-803-4551. The model number for the sediment filter is WH-RC-BB-20-5M.
Replacing the Sediment Filter
- Turn off the main water supply to the System and put the bypass valve of all the tanks on bypass mode (with the red arrows forming a straight line).
- Turn on a faucet (cold water) inside the house to relieve water pressure. (Leave the faucet on)
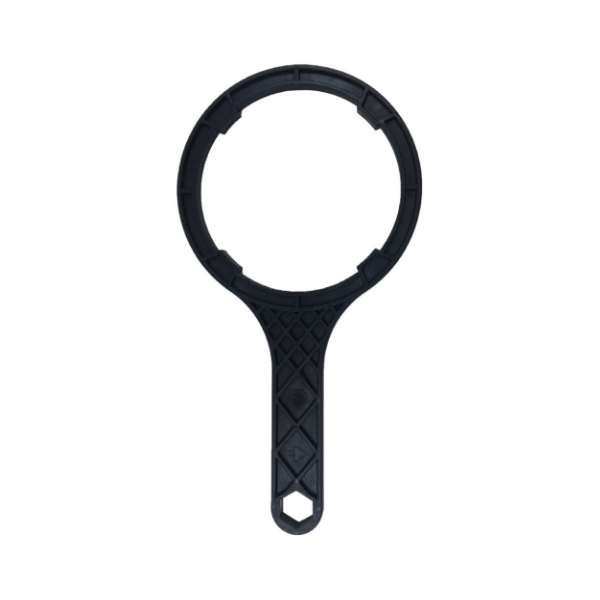
- Using the supplied Filter Wrench, unscrew the ZEE Pro Sediment Filter Housing clockwise.
- Remove the existing Sediment Filter and discard.
- Remove the O-ring and wipe the groove clean. Lubricate the new O-Ring with a coating of the LubriKit provided. Replace O-Ring and press the new O-Ring down into the groove. Note: Changing the O-ring is recommended to ensure water tightness throughout the life of the housing. If replacing the O-ring is not possible, we highly recommend lubricating the O’ring every time the ZEE Pro Sediment Filter housing is separated from the head.
- Place a new Sediment Filter onto the Stand Pipe in the ZEE Pro Sediment Filter Housing.
- Screw the ZEE Pro Sediment Filter Housing onto the Filter Cover and hand-tighten it. Carefully snug the ZEE Pro Sediment Filter with the filter wrench without over-tightening.
- Slowly turn on the main water supply and allow the Sediment Filter System to fill with water and push out air pressure from the water lines.
- Once the air is out of the water lines, turn the faucet (cold water) used to relieve air pressure inside the house off.
- Put tanks back in service mode, out of bypass.
- Check for leaks.
Troubleshooting
Problem | Solution |
There is a water leak at the top of the tank around the head. | You may need to turn the head to tighten it:
|
The tank leans to one side or is standing vertically level. | If the tank is not standing perfectly straight up and down:
The bottom of the tank is round and the boot allows the tank to stand upright. |
The water pressure is slowing | It is recommended that the Sediment Filter be replaced every 6-12 months depending on the amount of sediment present in the water supply, If the system has been working properly and the pressure is slowing, it may be time to change the Sediment Filter. Check the Sediment Filter and replace it if necessary. |
The water coming out appears grey or cloudy. | Right after installation, the water output may appear grey or cloudy due to the remaining extra carbon dust exiting the system. This is completely normal and should clear after a week or so. |
The water pressure is slowing immediately after installation. | This could be due to a blockage inside the system caused by insufficiently soaked carbon sticking to the top part of the tank. To prevent this from happening, avoid using water outlets with high flow rates such as bathtubs, utility sinks, hose bibs, and multi-headed showers for the first 72 hours of installation. If you suspect a carbon blockage inside the system due to high flow rate use within the first 72 hours of installation, turn off all running water for 10 minutes. This will help the carbon to settle and clear the blockage. You can then resume using water at low or normal flow rates. |
Warranty Information
For more information on our warranty, please visit www.rkin.com/onlisoft-pro-warranty/
V.120821 © 2021 RKIN Water Systems Customer Service MON-FRI 9 AM-5 PM EST 1-800-803-4551