
USFWorks UserGuide:
Change Job
Job changes are most often used for transfering a student to another supervisor (Transfer), increasing a well performing student’s pay (Promotion), or adjusting a student’s FWS status either at the end or beginning of the academic year (Data Change).
Most job changes, particularly transfers and FWS updates, must be submitted in advance of the requested change -- the effective date of your job change will be the first day of the upcoming pay period. If you are unsure about the appropriate effective date for a job change, contact us at StuEmp@usfca.edu.
- Find the intended student employee whose job you wish to change and go to their profile.
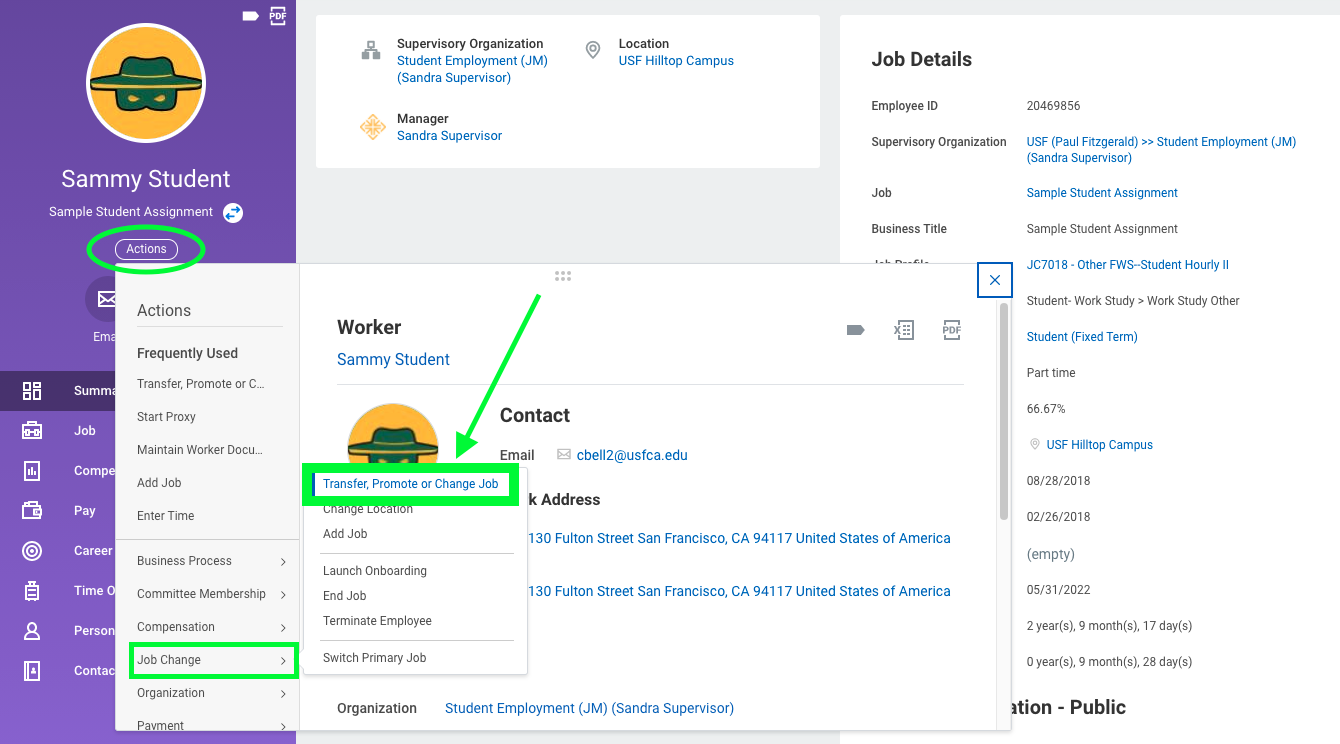
- Click the Actions button.
- Under Job Change,
- Click “Transfer, Promote, or Change Job”
- Select the date you want this change to take effect (**see below for information regarding which job changes may be backdated and which must be submitted in advance of the required change).
- There are four general tasks you can perform from the Change Job business process. The reason for submitting each task can be found in the dropdown menu: “Why are you making this change?” The subsequent steps of the Change Job business process will vary depending on which task is selected from the dropdown.
- Data Change (**Data Change tasks allow you to change all job details.)
- Change Job Details
- Use when changing their job details, such as the job profile, job title, or End Employment Date
- Change Location
- Use when they are working at a different USF location
- Reclassification
- Use for job profile changes that are unrelated to promotions or Federal Work-Study, such as applying a day/night shift differential to a student’s job
- Update Work Study Status Only
- Use for updating Work-Study status
- Prior to updating a student’s FWS status, confirm with the Office of Student Employment the correct process and the student’s eligibility.
- Lateral Move (**Lateral Move task allows you to change all job details.)
- Move to another position on my Team
- Use when student is starting an entirely new position within your team
- Promotion (**Promotion tasks allow you to change all job details.)
- Increase in Responsibility
- Use for promotions related to increases in responsibility
- Performance
- Use for promotions related to performance
- Transfer (**See below for information about which details you can adjust when selecting these tasks.)
- Move to another Manager
- Use for moving students to another Manager
- **Tasks transferring to another manager allow you to add attachments and update Organizations (Legacy FOP) only.
- New Job
- Use for cases where the job is neither a promotion nor a lateral move. For example, if a student worked as a Teaching Assistant for one professor in fall and will work as a Teaching Assistant for another professor in spring, their supervisor would update the job details using the New Job task .
- **Tasks transferring to a new job within your organization allow you to change all job details. Tasks transferring a new job to another manager and JM organization allow you to change only the attachments and organization assignments (Legacy FOP).
- After selecting the appropriate task, continue through the business process by updating relevant fields and then submitting for approval. The data included in these business processes mirrors the data used for a job requisition.
Resources
- USFWorks Training: The USFWorks Team has created several training resources in a variety of formats, including videos and PDFs.
- Student Employment page for Supervisors: has general information on hiring students and a FAQ.
- Payroll Pay Schedule
If you have any questions, please do not hesitate to ask! You can reach the Student Employment Office at stuemp@usfca.edu or at extension x6770.