
REPORTER Help Documentation
Additional Items for the Cart
Last Updated 02/17/2025
Table of Contents:
Adding Cart Add-Ons to an Instance
Creating a Sponsorship Cart Add-On
Creating a Donation Cart Add-On
Creating a Membership Cart Add-On
Approving a Drop Request with a Cart Add-On
With Cart Add-Ons you are able to add Sponsorship and Donation items to the Instance Financials that users will be able to add to their registration price while in their shopping cart.
Adding Cart Add-Ons to an Instance
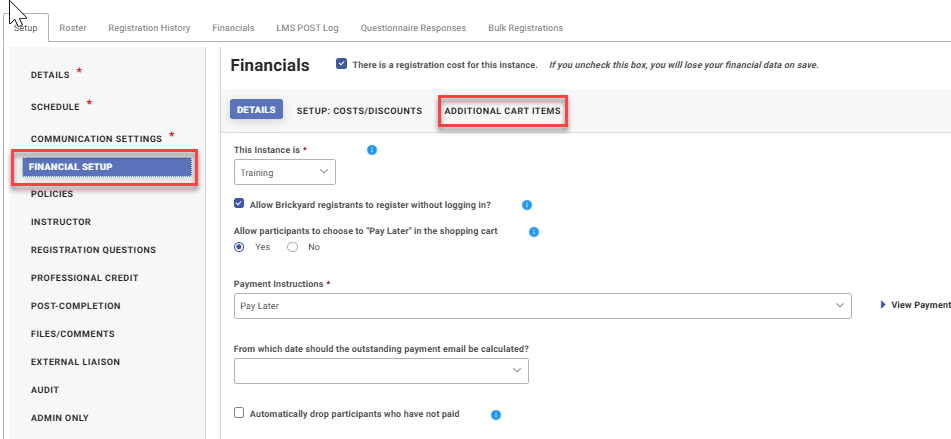
Navigation: Courses & Instances>Courses>Instances>Instance Edit> Financial> Cart Add-On
Note: “There is a registration cost for this instance” must be checked for the Financials tab to appear.
- Search for your Course and open an Instance in Edit Mode (or create a new instance).
- Scroll down to the Financial Setup section.
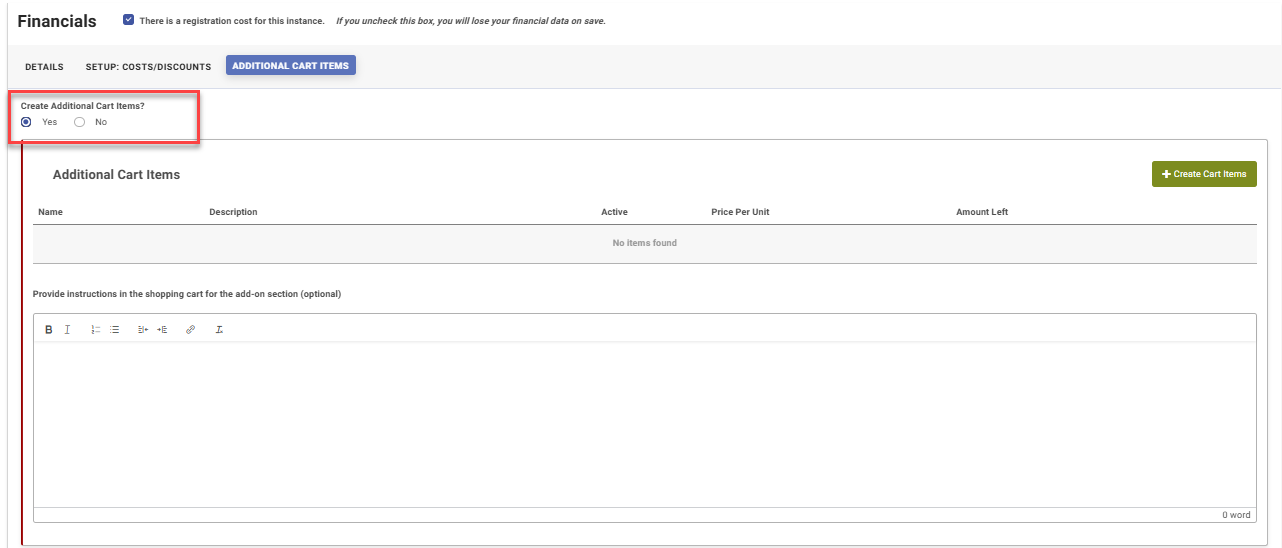
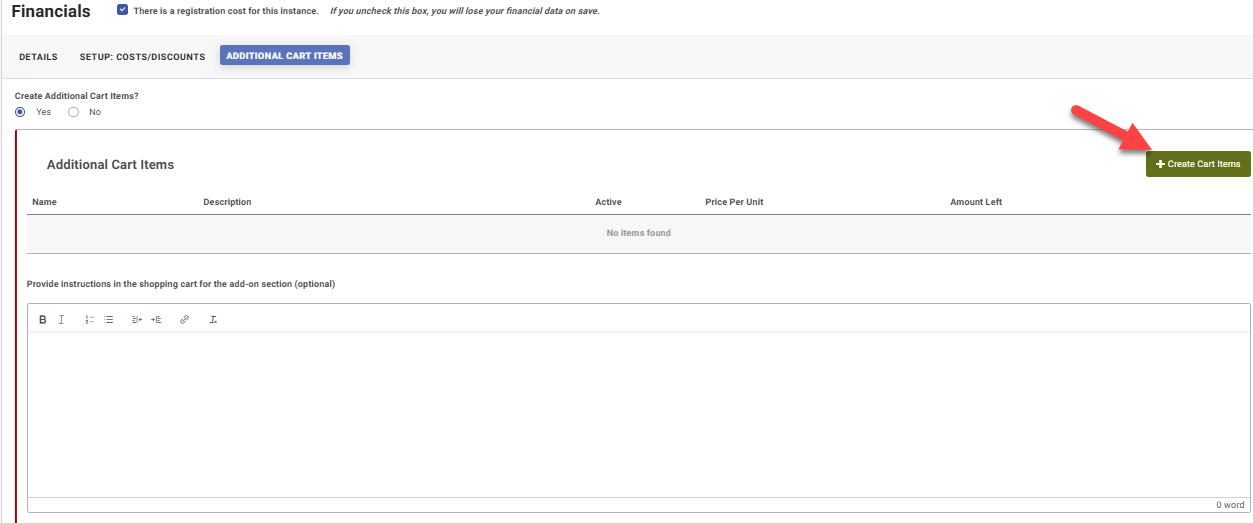
- Click the “Additional Cart Items” button at the top of the financials tab
- Click “Yes” to create additional cart items.
- Identify the cart add-on item type and complete set up fields.
- Click Save.
- Click “Save” on the Instance.
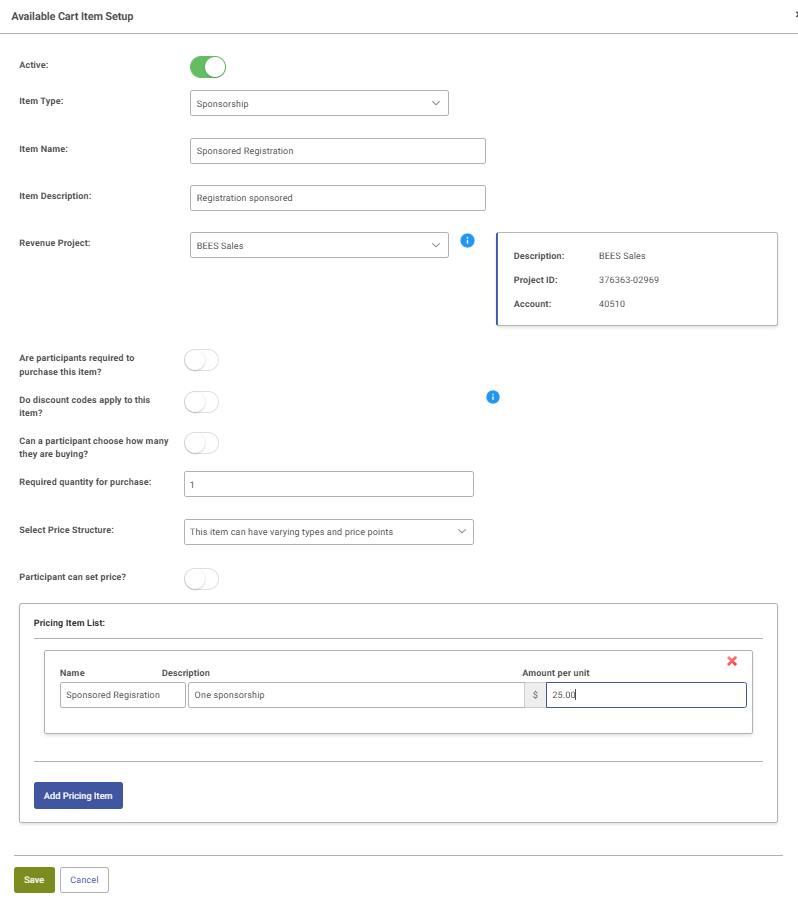
Creating a Sponsorship Cart Add-On
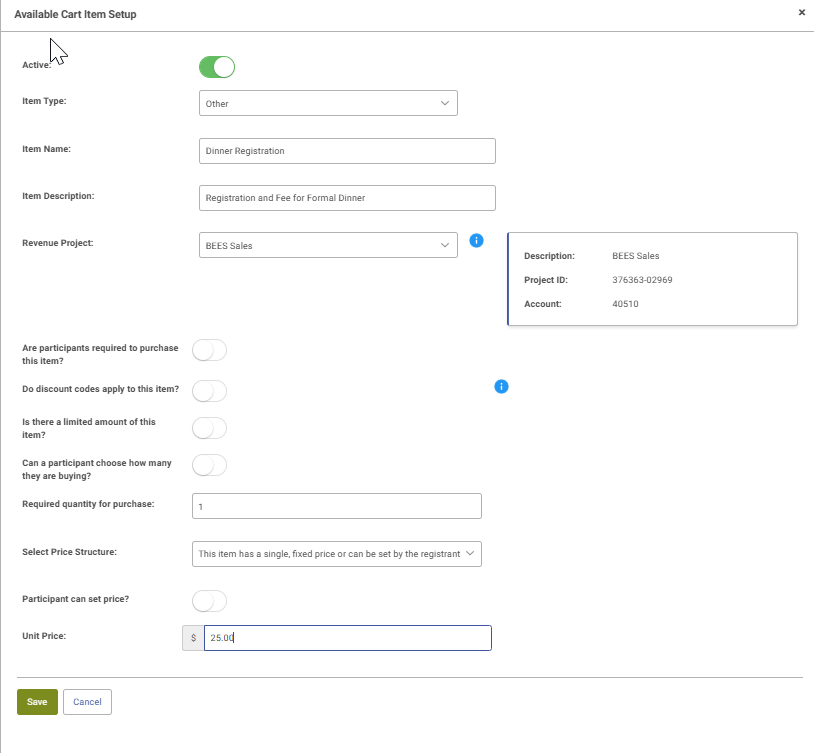
- Select Sponsorship from the Item Type dropdown.
- Type in the Item Name and Item Description.
- Select a revenue project from the dropdown. This is the account that all profits from the add-ons will go to.
- Scrolling down, you will be asked questions about how you want to structure the sponsorship and set the price. You can toggle yes or no if participants are required to purchase the item, if discounts apply (which means that if you have applied discounts to the registration price, they will apply to the add-ons as well), if you want the participant to be able to purchase more than one add-on, and whether the price will be a single fixed price or have varying types and price points. You can also indicate if the participant can set their own price or if you will be setting the price.
- Add Pricing Items in the “Pricing Item List” by selecting the blue button.
- Once you have added all of your pricing items, click Save.
- Click “Save” on the Instance.
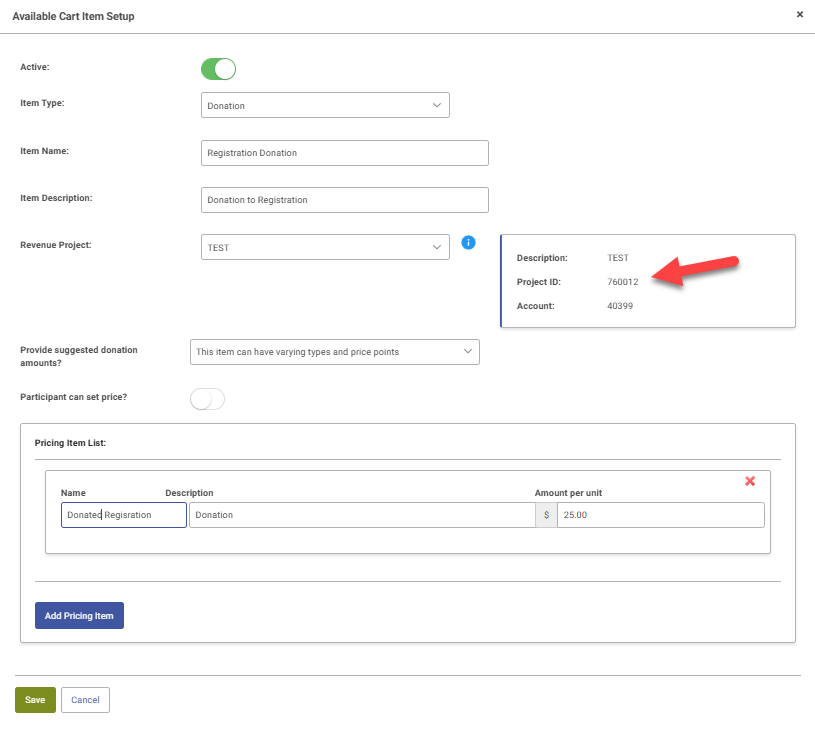
Creating a Donation Cart Add-On
*Donation Cart Add-Ons are restricted to upper 7 ledger Project IDs with subclass 73 & 79.
- Select Donation from the Type of Add-On dropdown.
- Type in the Item Name and Item Description and select a revenue project from the dropdown. This should be the account that all proceeds go to.
- In the “Provide suggested donation amounts”, select the relevant information.
- Fill in the Pricing Item List.
- When finished, click “Save”.
- Then “Save” the Instance.
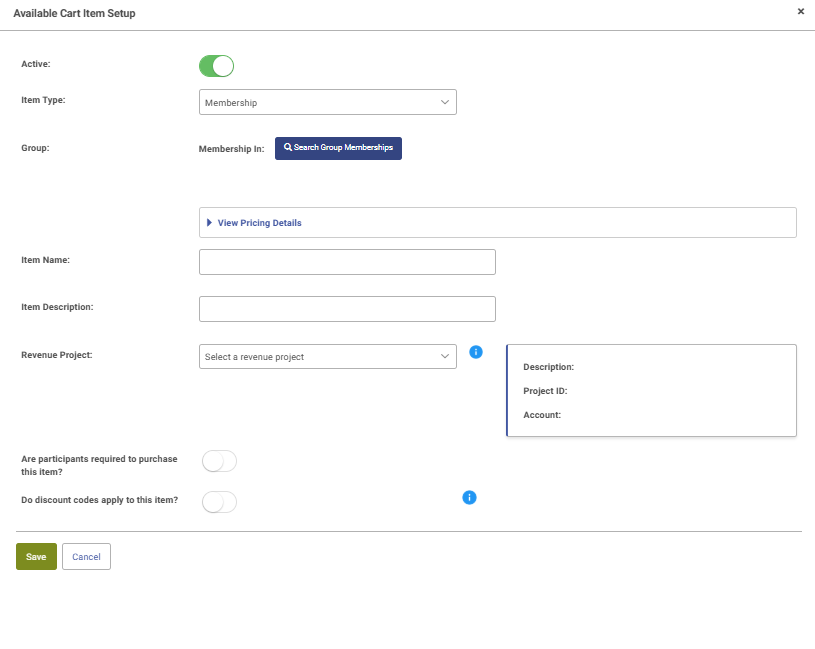
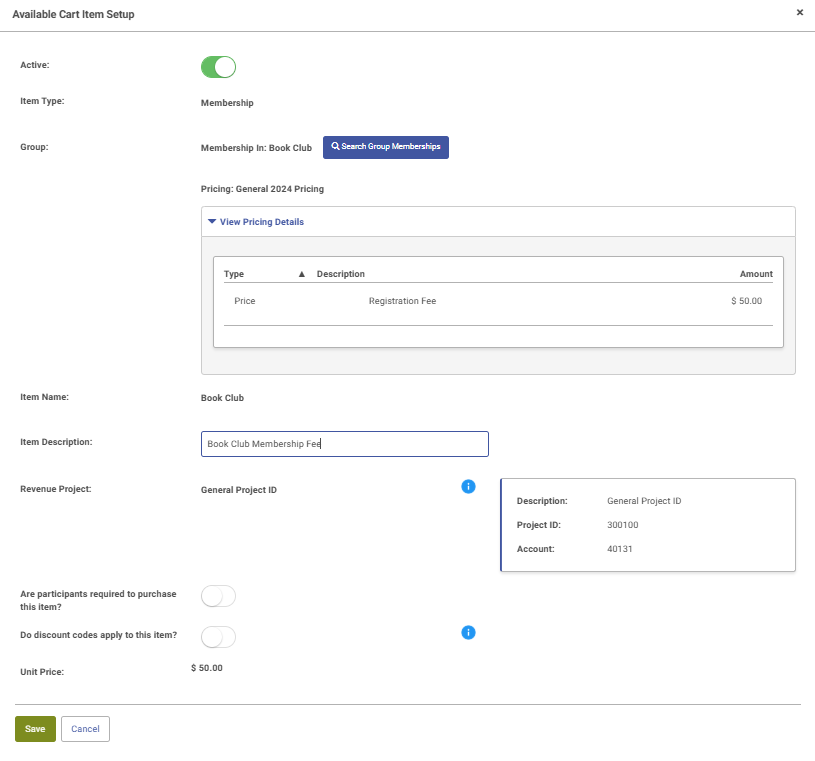
Creating a Membership Cart Add-On
- Select Membership from the Item Type dropdown field.
- Click the “Search Group Memberships” button
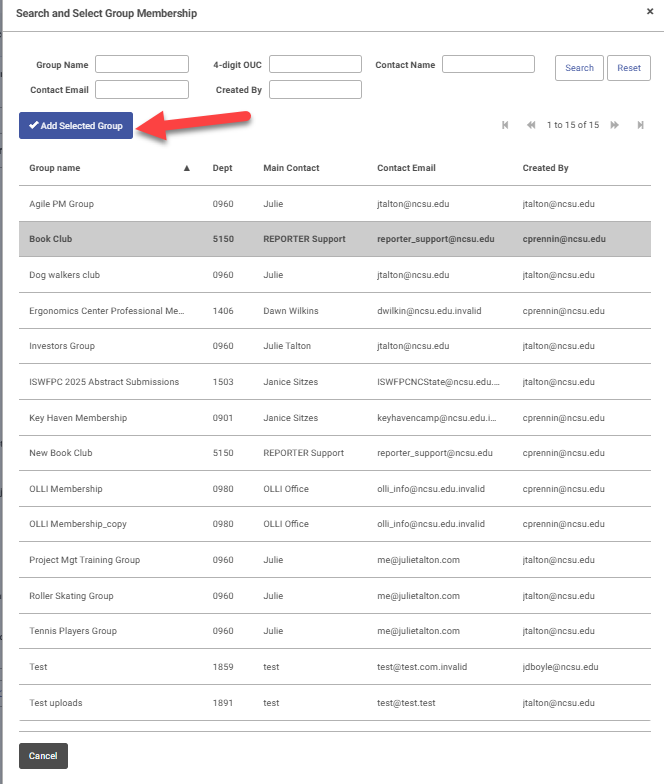
- Select the Membership to add by entering information in the search fields or clicking on the group to highlight in the search results field.
- Click “Add Selected Group”
- Add an “Item Description”
- Complete any other relevant fields
- Click “Save”
- Then click “Save” to save the Instance.
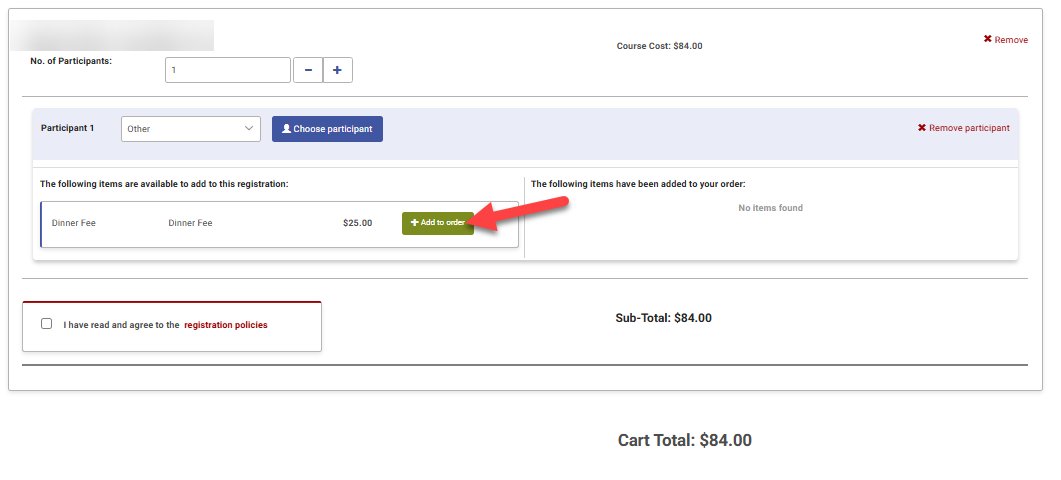
Add-Ons in the Cart
When a participant adds their course to the Cart, they will see a green button stating Add to Order for any available Add-Ons. You will see the subtotal increase with the Add On amount.
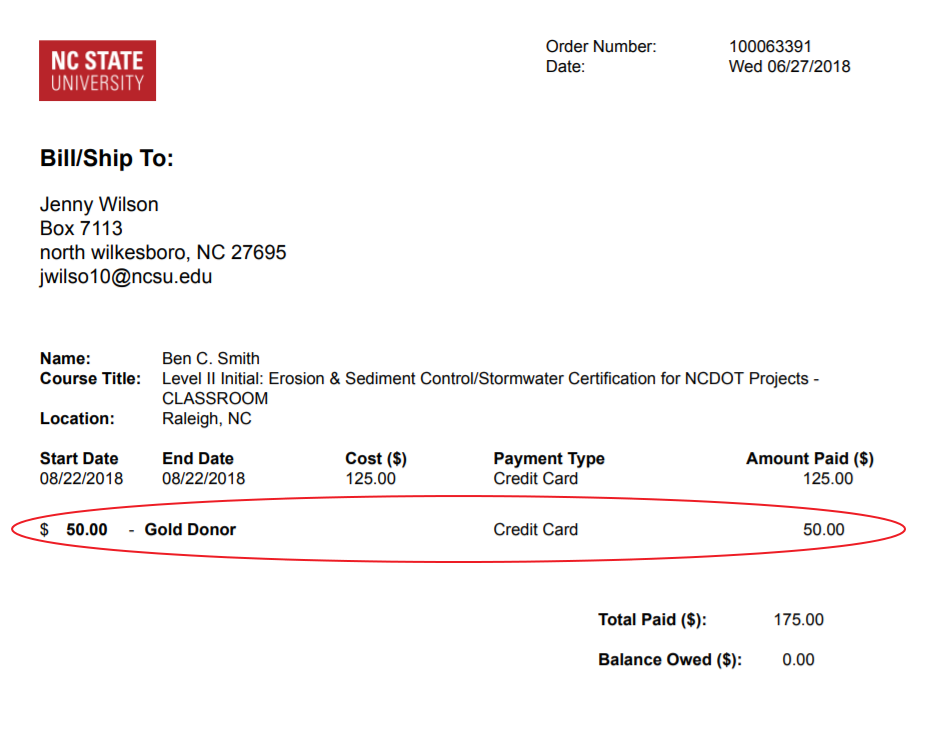
Once they proceed to Checkout, the participant will be able to complete their order, and see the Add-On separately from the registration price in the Order Summary.
Approving a Drop Request with a Cart Add-On
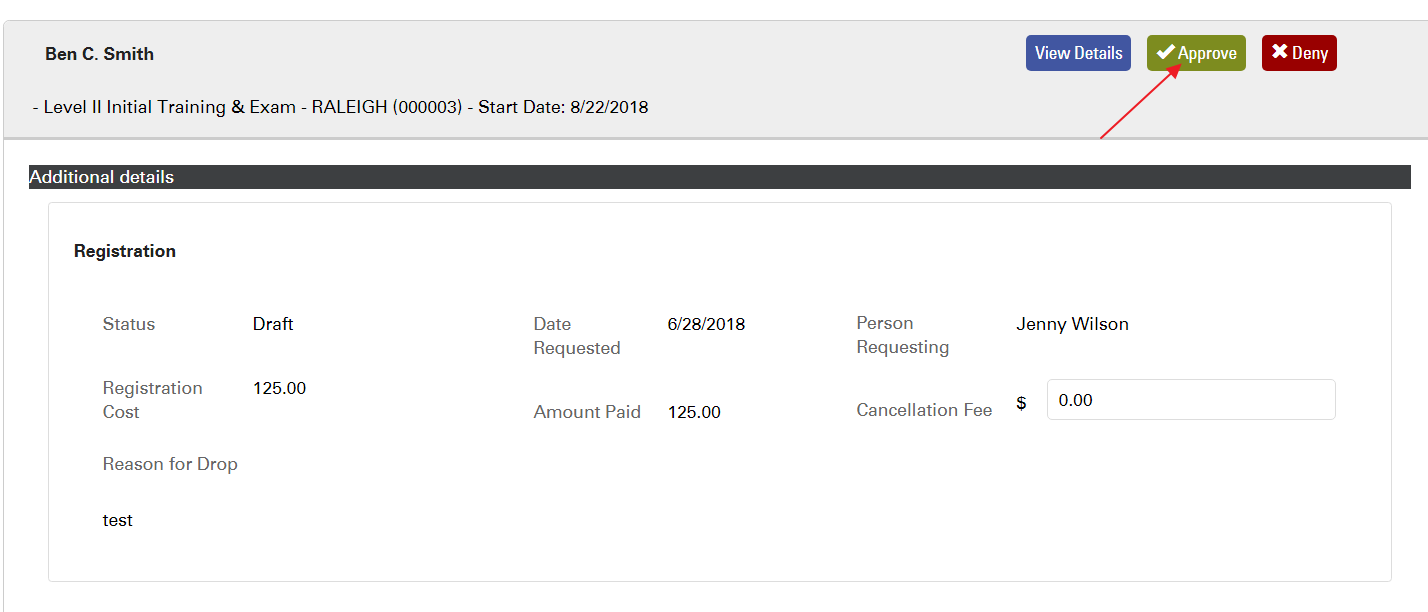
If a participant chooses to drop their registration that has an Add-On, as the Course Admin when going in to Approve the Drop Request (Help Doc on Drop Request and Approving Drop Requests here), you will have the option whether you want to include the Add-On in the Drop Request Approval.
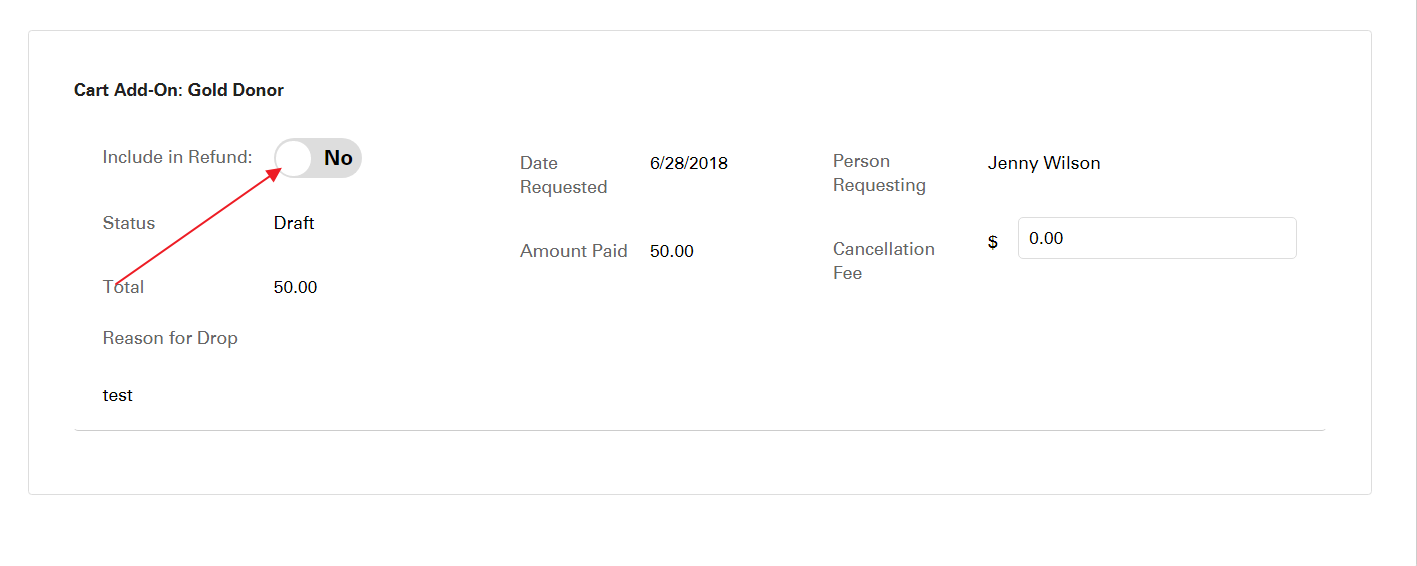
You will see the Add-On as a separate item in the pending Drop Requests, and you can choose to toggle Yes or No to include in the Refund. Once you make your selection, click Approve at the top of the Drop Request.