
Pass Mobile App Documentation (for Adult users)
Adults will now be able to download the Pass App to their mobile device from the Google Store or the Apple Store. The Mobile App does not mirror the Web application. Once downloaded, adults can do the following:
- Switch between My Passes and All Passes
- Switch between Active and Ended
- Scroll through the List of Passes
- View Active Building Pass Limit
- Adjust Auto Pass Locations/Limit
- Adjust Location Limits
- Change View of Passes
- Expand a Pass View
- Filter/Search the dashboard
- Turn Sound Notifications ON/OFF
- Approve student created passes (STU)
- End student created passes (STU)
- Create Teacher passes (TCH)
- End Teacher-created passes (TCH)
- Add Comments to passes
- De-select a pass
- Access your Profile and make changes
- Switch between schools
- Adjust Active Building pass Limit (for Admins only)
- Access Training Documents and Videos
- Access Other Features
To begin, go to your app store and download the Pass app.
App Store | Google Play |

Enable Audible Notifications
The Pass Mobile App does have sound notifications when passes are created. To get the audible chime, when accessing the App for the first time, “allow” the notifications in the pop-up for the Pass Mobile App on your mobile device.

You can allow notifications after downloading the app. (The directions to allow notifications may differ slightly depending on your mobile device.)
- iPhone - Settings → Notifications → Securly Pass → Select the types of notifications that you desire.
- Android - Settings → Notifications → App notifications → Locate the Securly Pass app and toggle notifications ON.
Logging into Securly Pass
If you are using one of the Single Sign-on (SSO) methods, make the appropriate choice from the login screen and enter your SSO credentials.

Clever | ClassLink | Microsoft-O365 | GG4L | |


If you are using your Pass-specific credentials (Username and Password), enter those credentials in the appropriate fields. On the next screen, select Go to App or Go to browser.
If you choose Go to App . . . | If you choose Go to browser . . . |


Access the Dashboard
Once you are logged in, your screen will be similar to your web Dashboard where you can view “Active” or “Ended” passes and switch between “My Passes” and “All Passes” by tapping on the matching words for your desired view.

To view only “My Passes” on the Dashboard, simply tap on “My Passes”. To View “All Passes” on the Dashboard, tap on “All Passes”.

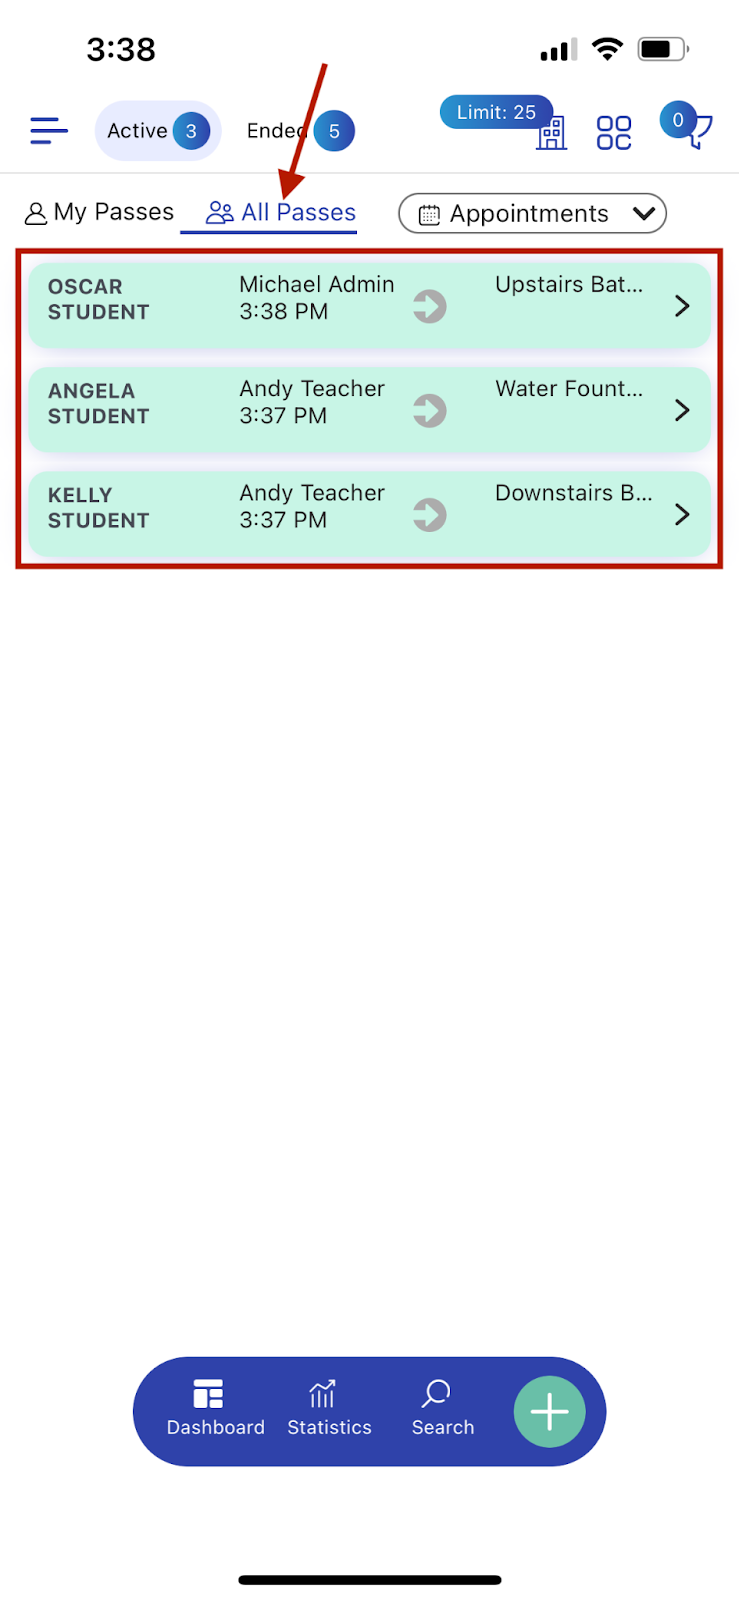
To view your “Active” passes, tap on the “Active” pass button on your Dashboard. To view your “Ended” passes, simply tap on the “Ended” button on your Dashboard.


If your school is larger and your hallways are rather busy, you may have the need to scroll through the list of passes to find a particular pass. Click and slide on the passes. When you see the scroll bar, you will be able to scroll through the list of passes on your screen. This functionality works in both the List View and the Tile View. (Please note: The scroll bar functionality exists for iOS devices. For Android devices, the scrolling functionality does work without a visible scroll bar.)
List View | Tile View | |


You can also change the view of the passes by clicking on the Tile icon to the right of the screen. Your passes will be displayed as tiles. If you prefer a list view, tap on the list icon, and your passes will appear in list form.


To view your Active Pass Limit and see which types of passes are applied to the limit, click on the “Limit” button. On the next screen, you will see the limit as well as the types of passes that are applied to the limit. To navigate back to the Dashboard, click on “Back”.


To adjust your Auto Pass locations or to change the limit for the number of students who may use an auto pass from your location, click on the “Statistics” button, click “Auto Passes”, make the necessary changes, and then click “Submit”. Click the “refresh” button on the web application to see the changes that you made on the adult app.


Adjusting the Limits to the locations to which you are associated is a rather simple process. Click on the “Statistics” button, select the location, make the change or adjustment to the limit, and then click “Update”. Click the “refresh” button on the web application to see the changes that you made on the adult app.


Once you have chosen the view for your passes on the Dashboard, you can expand that view so that you can easily see the details of that pass. In the List view, click on the right-facing “>” on the right side of the pass. In the Tiles view, tap on a particular student’s tile to see the details of that student’s pass. From the expanded view, adults can add a comment, “END/KEEP” the pass, or click on the “Back” button to return to the List view or the Tile view.
List View | Tile View |


To “Filter” or “Search” passes, tap on the funnel on the top right of the screen. If your Dashboard is rather active, you will be able to click “Pause Update”, which will allow you to scroll through existing passes on the Dashboard without new passes interrupting what you are looking for. You are also able to select the filter that you would like to apply or to select the “Search” option that you need (“Search Student”, “Search Teacher”, or “Search Room”). Once you have made your selections, click the blue “Search” button at the bottom. The number in the blue dot beside the funnel will alert you to how many filters you have in place. When finished with your search or filtering, remember to click “Clear”.


Turn Sound Notifications ON/OFF
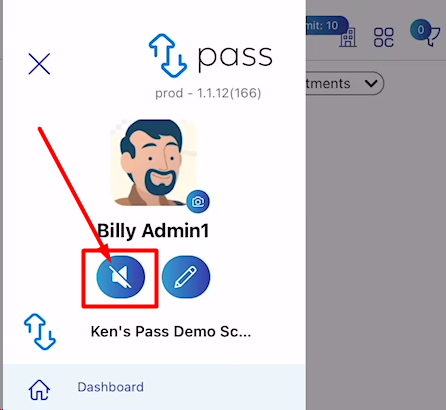
To enable notifications within the app, click on the three horizontal bars. On the next screen underneath your name, click on the sound icon to remove the slash to enable the audible ding. To turn the audible notification off, simply click on the sound icon so that the slash appears.
Sound Notifications OFF | Sound Notifications ON |


Approve Student-created Passes
When a student creates a pass from the student app or web application, the pass will appear in the same format as it does on the Pass web application. For teachers on the mobile App, the student-created pass will appear white (Awaiting approval). On the student screen, the pass will be red until approved or canceled. To approve the pass, click anywhere on that pass. You can now APPROVE or CANCEL the pass. If you approve the pass, it will be a green ACTIVE pass, on your dashboard and the student view. If you do not want to act upon the pass, you can click anywhere on the dark gray pass to deselect the pass.
Student’s Screen | Teacher’s Dashboard |
Pass awaiting action | Pass awaiting action |
An APPROVED student-created pass | Teacher’s Dashboard - Active Passes |


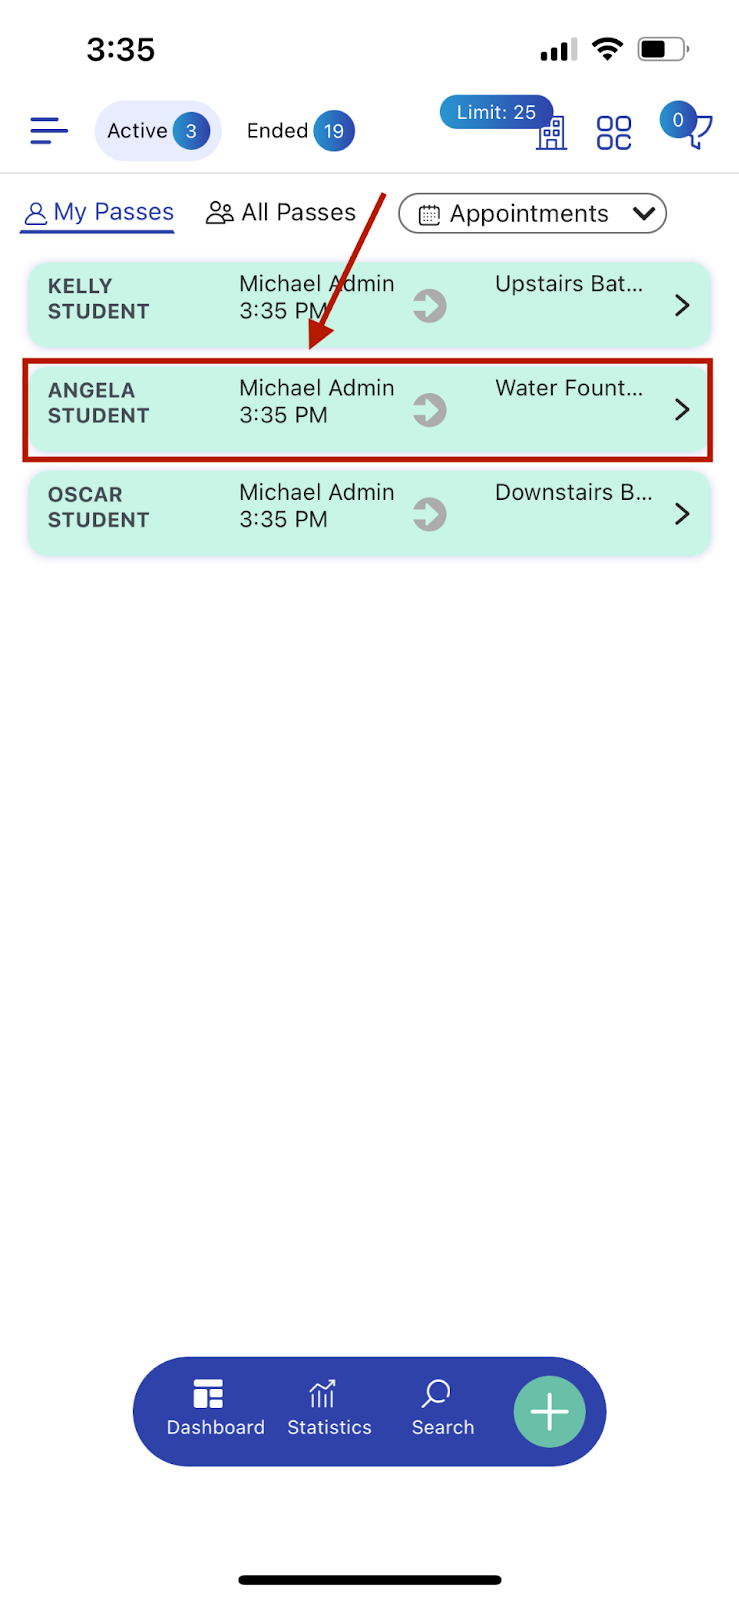
End Student-created Pass
To end a Student-created Pass, click the arrow or the right-facing carrot and then click on the correct option for that pass. If it is a Roundtrip Pass, the option will be END/KEEP. If it is a Layover Pass or One Way Pass, click on the appropriate option for that pass.
Student’s Screen | Teacher’s Dashboard |


Create Teacher Passes
To create a Teacher (Adult) Pass, click on the Menu bars.

From the Menu options, choose “Teacher Pass (Proxy Pass)”.

On the next screen, select the name of the student from the list of students or begin to type the name of the student and then select that student from the choices below. Then select the Destination for this pass, either from the Favorites buttons, or using the drop down list. Finally, click on “Submit”.

End Teacher-created Passes
To End/Keep a pass, click anywhere on the pass that you wish to end. Doing so will prompt you to click “END/KEEP”. Once you tap “END/KEEP”, the pass will disappear from the screen.

By touching and holding the “>” on the right side of the pass, you will see an expanded view of the pass. You will also be able to act on that pass as well.


Add Comments to Passes
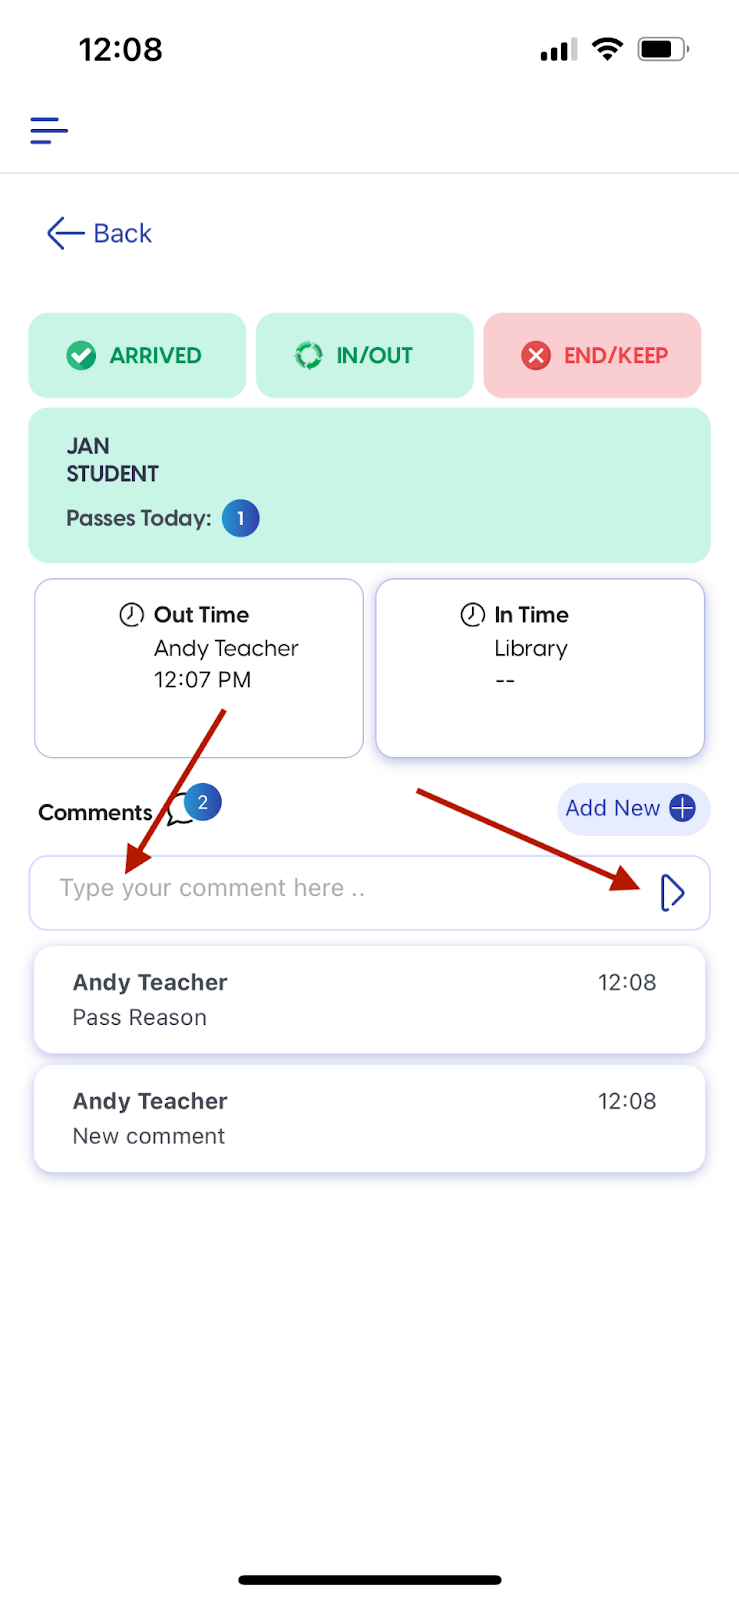
If you need to add a comment to a pass, click and hold the right facing “>” to open the pass view. Then click on the “Add New” button, type your comment in the “Type your comment here” box and then click on the arrow to the right. Your comment will appear below.

De-select a pass
If you happen to click on a pass by mistake, you can easily undo that click by clicking in the dark gray area of the pass. Doing so will restore the pass on your Dashboard.


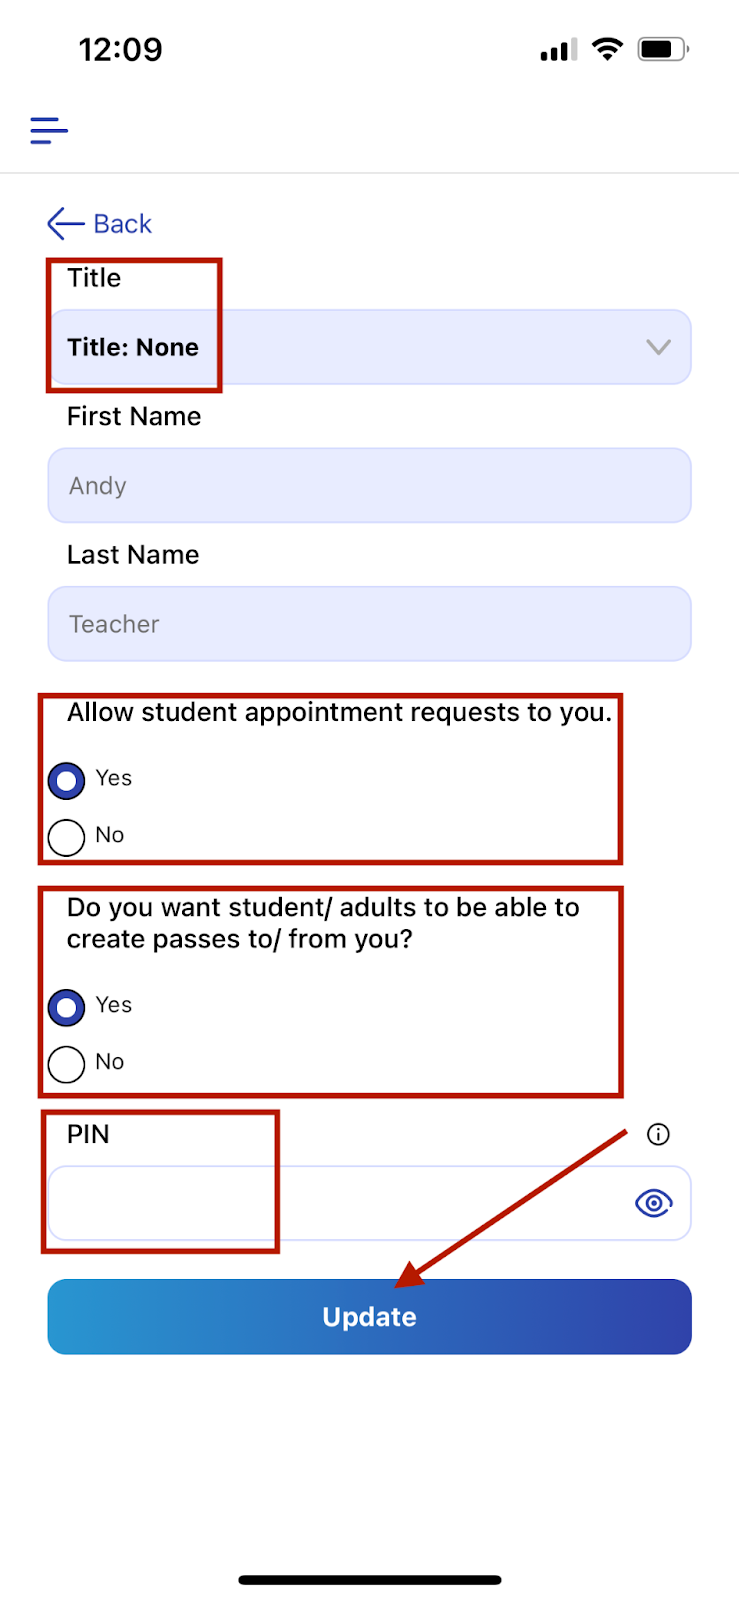
Access Your Profile and Make Changes
You can also access and change your Profile by clicking on the Menu bars on the left side, clicking on the blue Edit pencil, and then making the appropriate changes to your “Profile Settings” or “My Locations”.


To adjust your Profile Settings, click on “Profile Settings'', make the appropriate changes, and then click “Update.” You will need to log out and then log back into the web application in order to see the changes that were made.
To change or adjust the locations with which you are associated, click on “My Locations”, make the appropriate adjustments or additions to this list, and then click “Update Locations”. You will need to refresh the web application to see the changes or adjustments that were made to “My Locations”.

Switch Between Schools
If you are a user in multiple schools within your district, you can switch between schools by clicking on the Menu bars and tapping the “ᐯ” to the right of your school name.


The other schools with which you are a user will appear in a dropdown menu. Click on the school that you would like to access.

Adjust Active Building Pass Limit
To adjust or change the Active Pass Limit (Admins only), you have two options:
- Click on “Limit”(top right) and make the appropriate adjustments to your active pass limits and then click “Submit”.
- Click on “Statistics”, then “Building Passes”, make the appropriate adjustments to your active pass limits, and then click “Submit”.
To see the change on the web application, refresh your screen and click “Limit”.


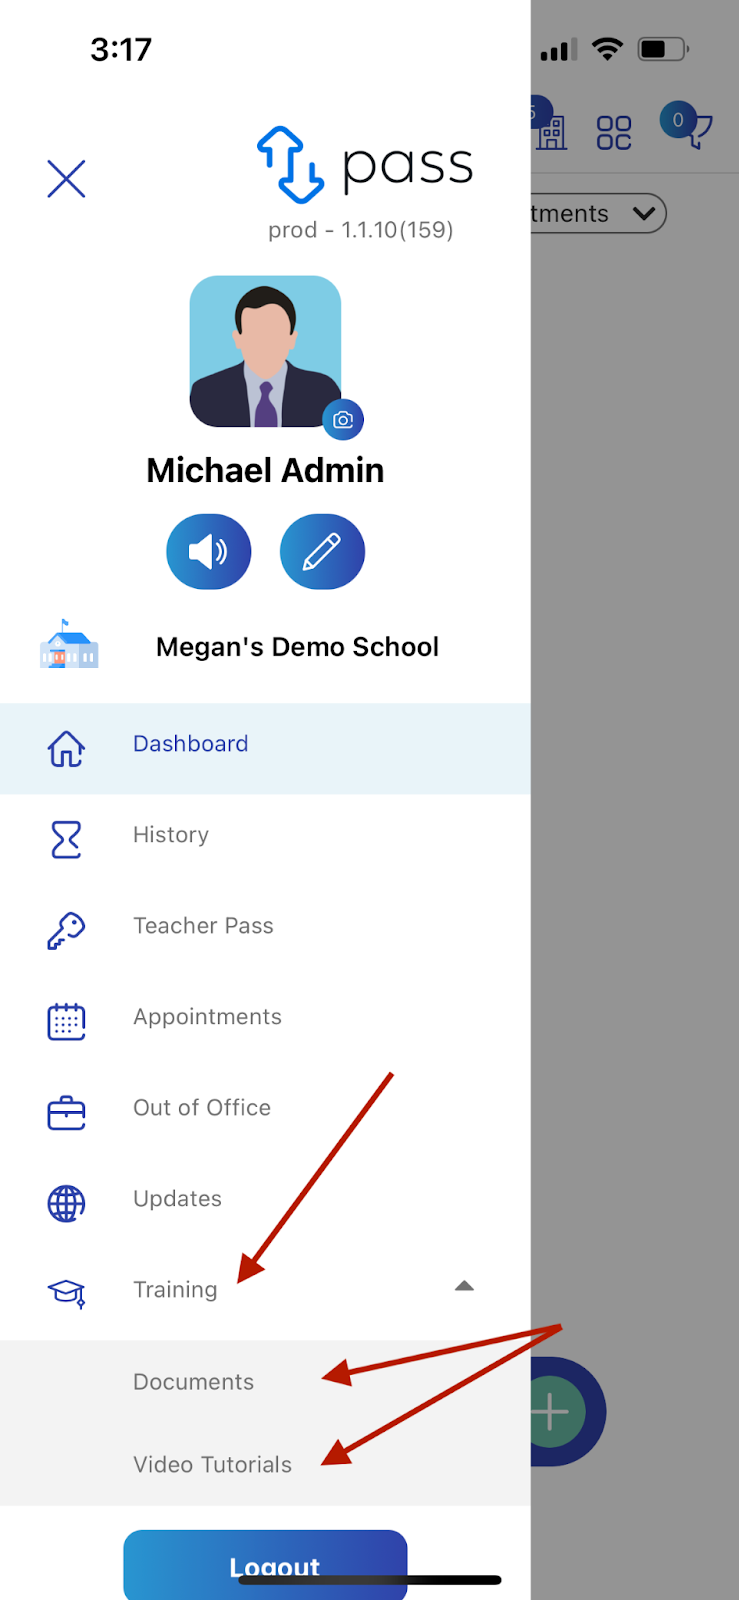
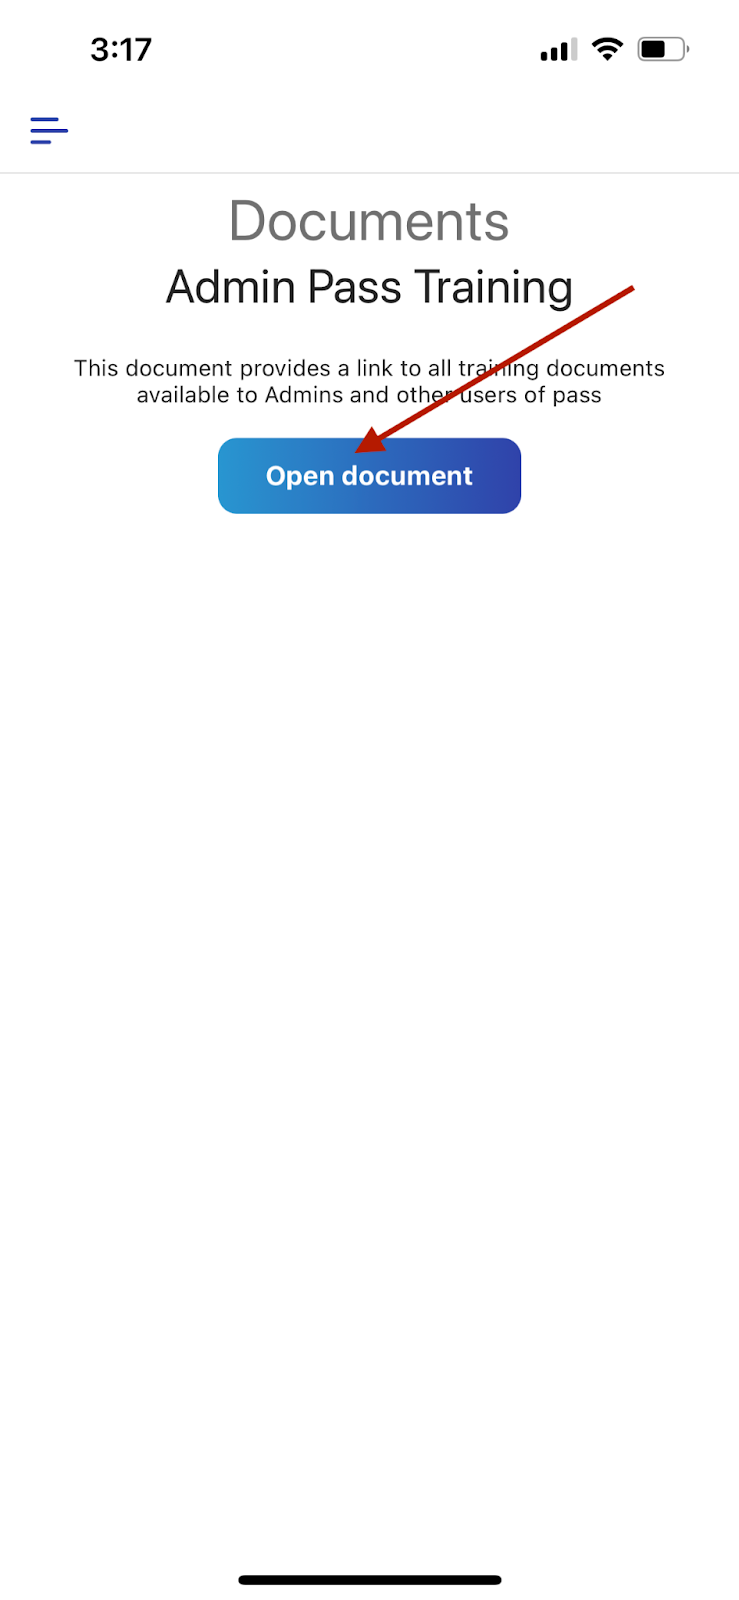
Access Training Documents and Videos
To access the Training documents and tutorial videos, click on the Menu bars. From the menu options, choose Training and then select either “Documents” or Video Tutorials”. On the next screen, click on “Open document”. From there you will be able to select the document or video of your choice.
Access Other Features
There are other features in the mobile app that are still under development and are slated to be released in the future. When you click on these features, you will be brought to a screen like the one below. You can use the menu back to the working features. Some of the features under development include Pass History, Appointment Pass, and Out of Office. To create and modify appointments, access Pass History, and other features currently unavailable in the mobile App, please use the web version of Pass.


Updated: 12/19/23