SIS Job Aid #241
Academic Progress Report (APR) Exceptions
This guide is intended for staff. It describes how to enter and edit exceptions on a student’s APR. Exceptions are manual adjustments for particular students, not a change in the requirement itself.
Note 1: Some graduate requirements are met by Milestones. These are usually requirements that are NOT fulfilled by taking certain classes or units. Common examples of milestones include papers, presentations, and qualifying exams. If reviewing a graduate student’s APR, do not waive the Graduate Division Requirements.
Note 2: It is recommended to enter an exception when a course is complete or the exception is confirmed. For example, X requirement requires a grade of C or better. If an exception is made so that English 10A will count for the requirement, then English 10A will count even if the student’s grade is D. Therefore, wait until the student completes the course before making the exception.
Contents
Overview & Navigation
Types of exceptions:
- Course Directive: Identify course or exam that meets a requirement OR one that should be excluded from meeting a requirement. Mainly for undergraduates, this is the most common type of exception.
- Requirement Change: Change the number of required units or courses for a requirement.
- Requirement Waiver: Waive an existing requirement. This will exempt a student from the requirement entirely, allowing any courses previously listed to count towards other requirements. This should be used only when a course directive or requirement change cannot be used.
Initial navigation is the same for all 3 types.
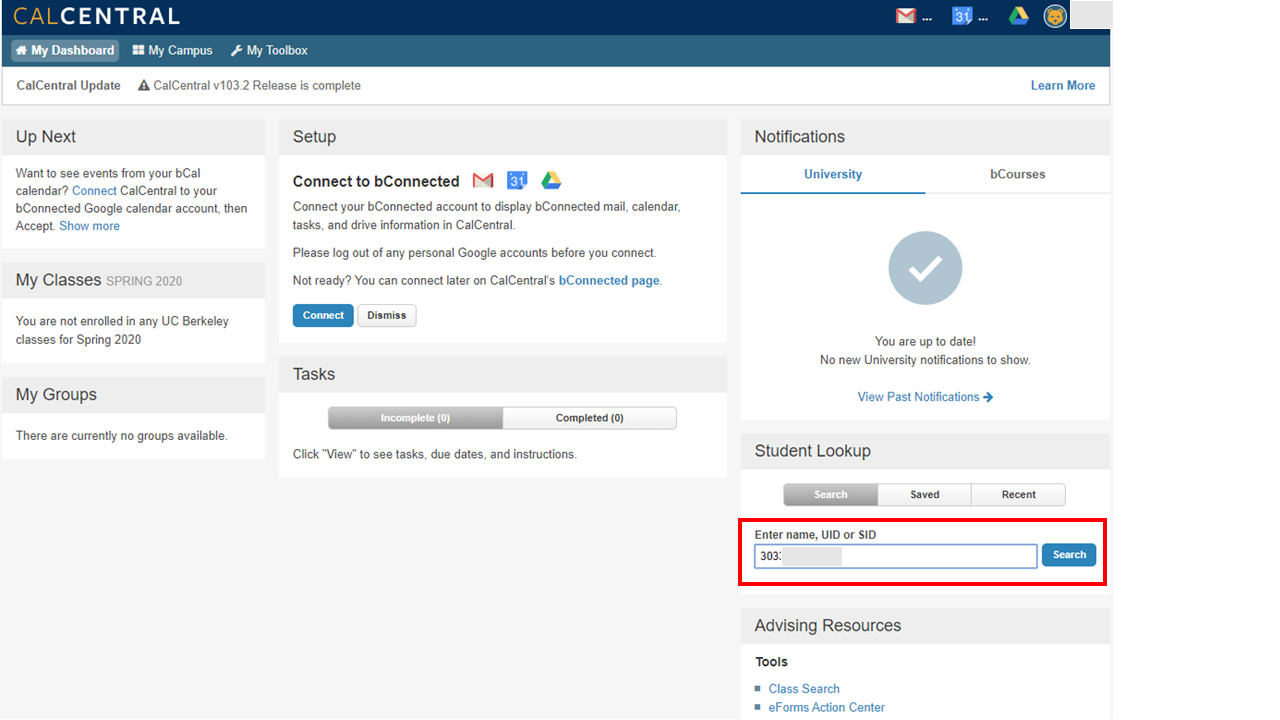
- Enter SID in Student Lookup. Select Search.
Campus Solutions navigation: NavBar > Navigator > Self Service > Advisor Center > Advisee Student Center > Academic Requirements
- Select Academic Progress Report under Degree Progress.
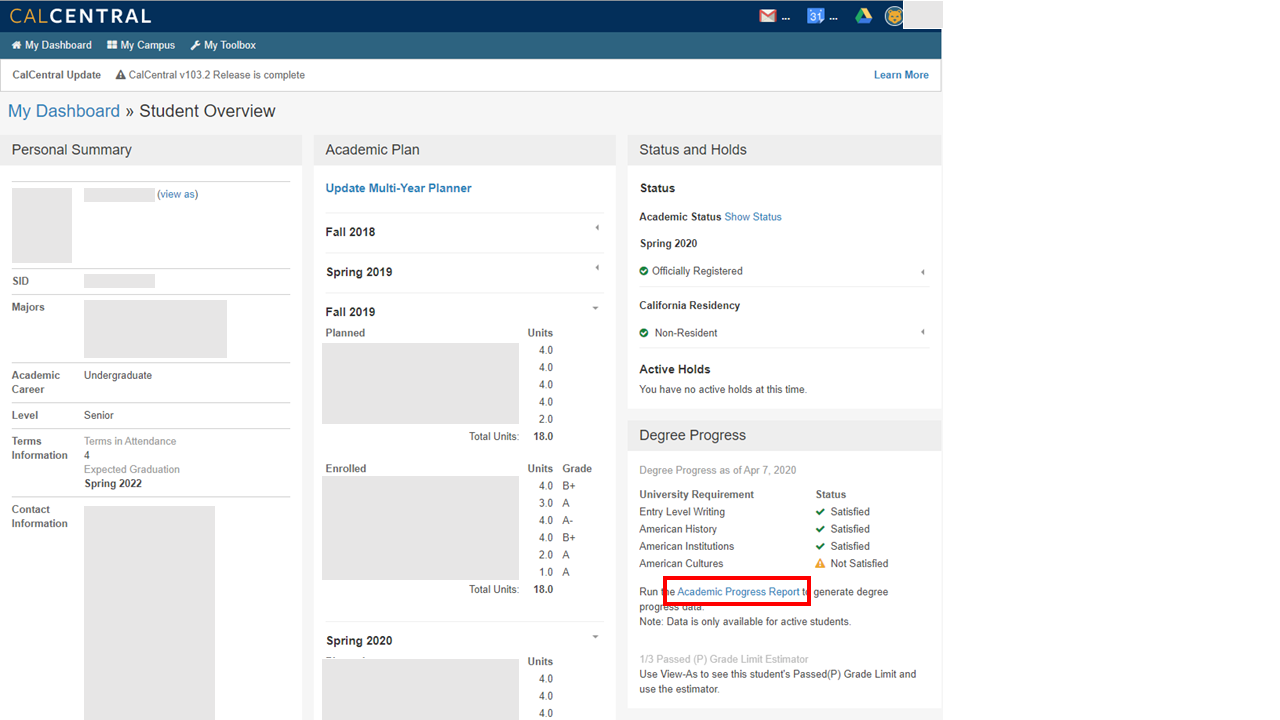
- Scroll down the page. You may enter exceptions for items with a drop down menu.
- Select Course Directive, Requirement Change, or Requirement Waiver. See below for further details on each type of exception.
- Select Go (>>)

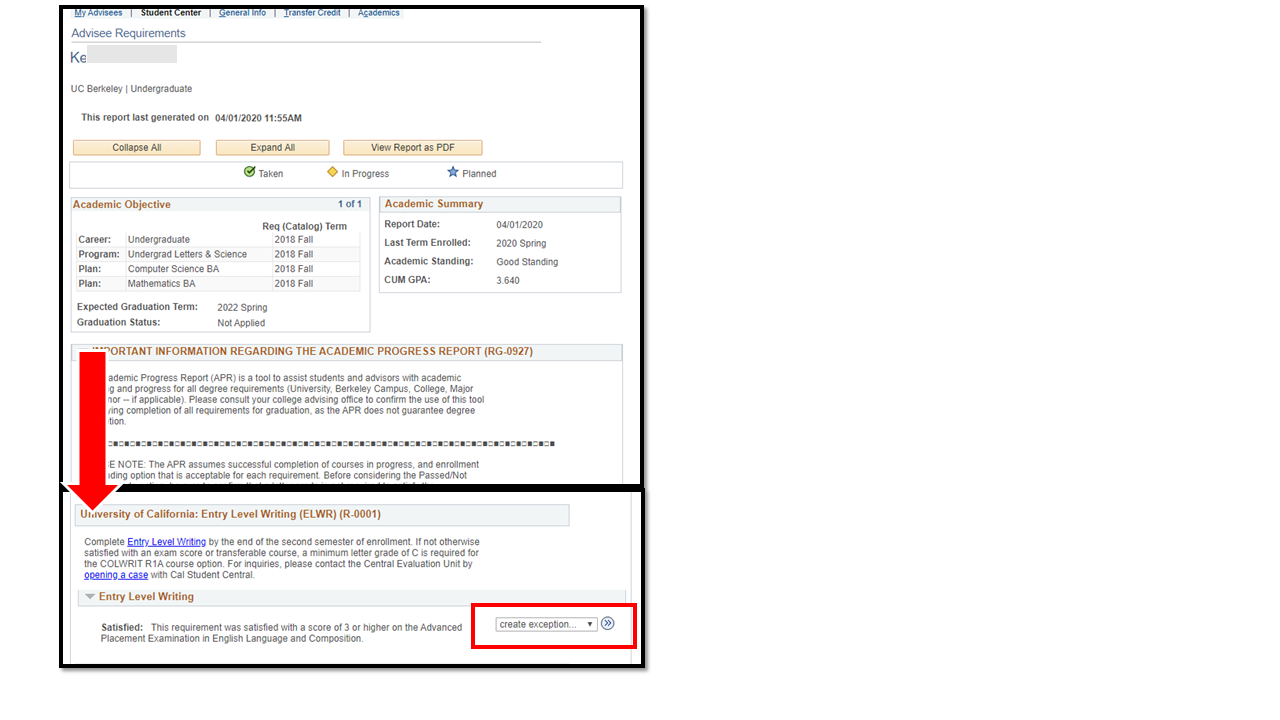
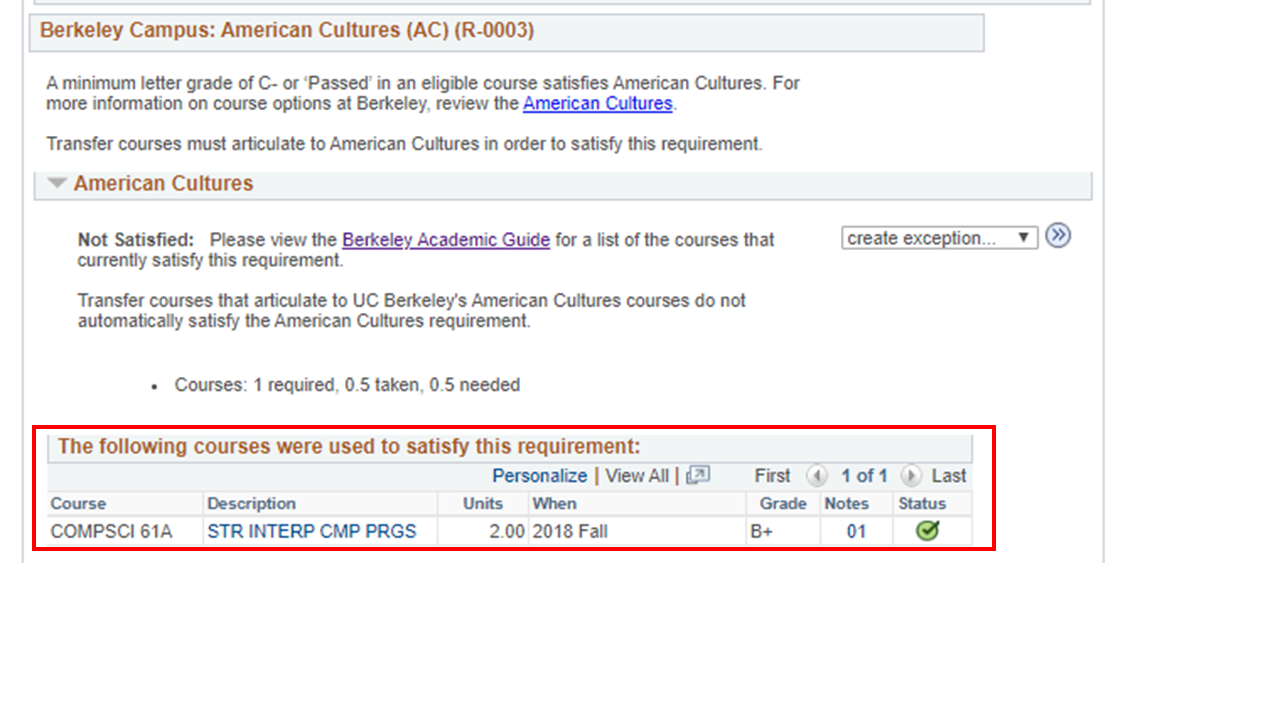
A. Course Directive
- Add Exception Note. Describe reason for exception. This is visible to student and advisors.
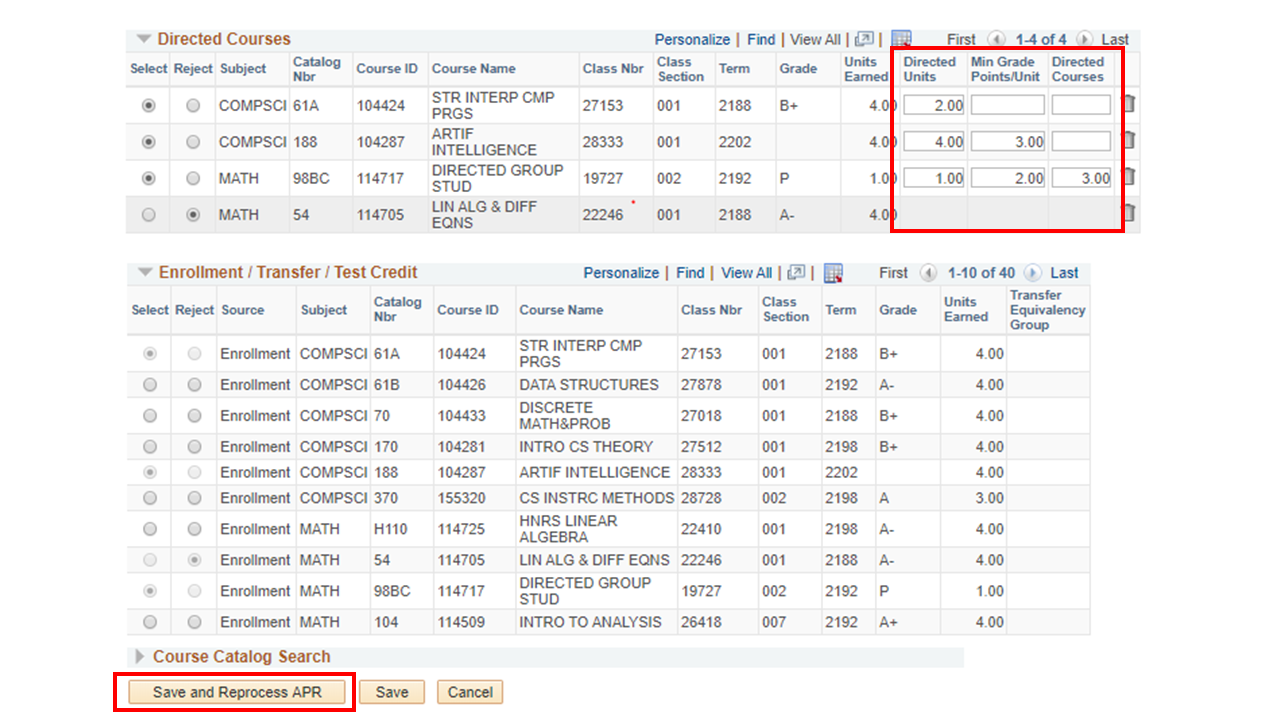
- Select courses by choosing:
- Select - allows course to meet requirement
- Reject - excludes course from meeting requirement
Courses will automatically appear in Direct Courses above.
- Find additional courses, exams, or transfer credits by using the Navigation Controls.

- Edit Directed Courses as needed:
- Directed Units (optional) - Number of units to be counted toward the requirement. If blank, all class units may be counted toward requirement.
- Min Grade Points / Units - Minimum grade points needed for in-progress class to meet requirement. Example: 1.70 = C- or better. If class is complete, leave blank.
- Directed Courses - Number of times course may count towards requirement.
- Select Save and Reprocess APR.
- The APR should now include the changes:
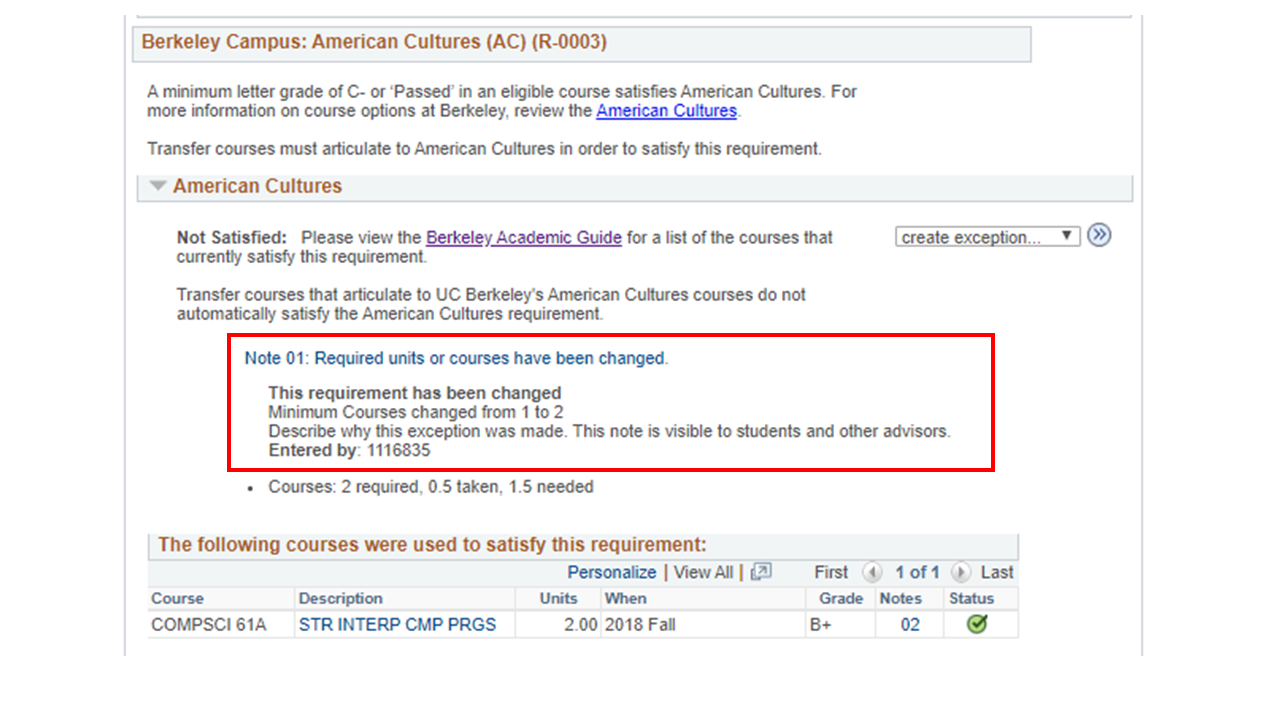
B. Requirement Change
- Add Exception Note. Describe reason for exception. This is visible to student and advisors.
- Enter New Values as needed. Most fields may be left blank, but at least one minimum must be set. Setting both minimums to “0” will automatically satisfy the requirement.
- Select Save and Reprocess APR. This will save changes and re-run APR.

- The APR should now include the changes:
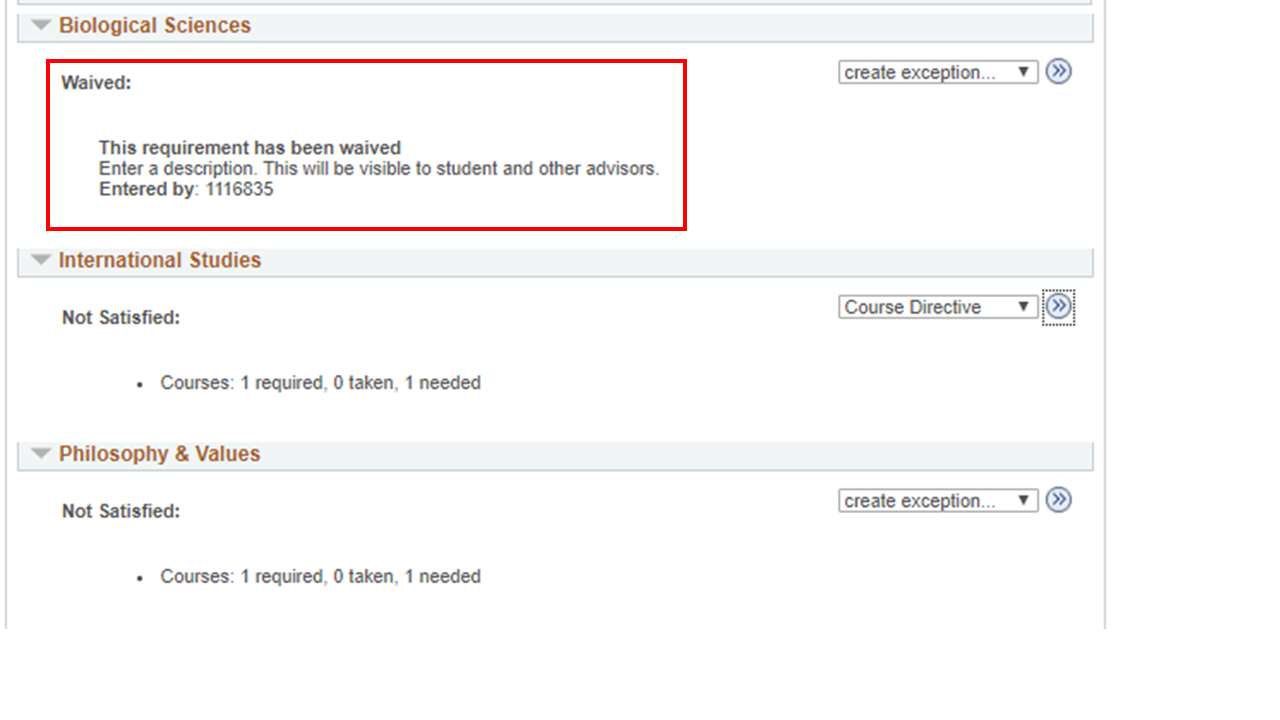
C. Requirement Waiver
- Add Exception Note. Describe reason for exception. This is visible to student and advisors.
- Select Save and Reprocess APR.

- The APR should now include the changes:
SIS Job Aid #241 Page of