Beekmantown Central School District
Schooltool Parent Portal
Access Guide

Organizing Data Using Column Headings
First Time Logins/Forgotten Passwords
Marking Period / Progress Report Grades
Getting Started
Basic Information
SchoolTool is Beekmantown Central School District’s student information system. It is a historical application that holds all permanent record information on an individual student by school year. SchoolTool also allows users with appropriate permissiions view past information about students such as classes, grades, attendance, and discipline information. Historically, SchoolTool also keeps records for state reporting purposes.
SchoolTool is a web-based application. Because if this iit can be accessed from any Internet connection anywhere in the world if you know the district’s URL. This also means that if there is no Internet connection, you cannot access SchoolTool.
Because SchoolTool is a real-time application, users may experience brief pauses while the system updates itself from screen to screen. Be sure to watch your browser’s progress bar to see when the refresh is complete.
Navigation
While viewing SchoolTool through a web browser, you should always use the buttons and links within the SchoolTool interface, and not those of your browser. If you use the toolbar buttons and/or menus of your browser, this may cause errors and impact the data on your screen. As a general rule, do not use the Back button on your browser as this will halt your connection to the database.
Finally, all of the links and navigation buttons are accessed with a single click, not a double click. Double clicking may not produce the desired results.
Note: The preferred browser for SchoolTool is Chrome, but you can also use Safari, Firefox or any other modern browser. SchoolTool will work no matter the connection type you use (e.g., dial up, DSL, cable, satellite, etc.)
Note: SchoolTool uses several pop-up windows for calendars, alerts, confirmations, and reports. Please make sure to disable your pop-up blocker for the SchoolTool URL.
Navigation Buttons
SchoolTool uses simple navigation buttons that allow you to perform basic functions with a single click of the mouse. The specific tool tips associated with each button may give more descriptive text than shown below, but the basic functionality remains the same.
Show/Hide | Print or Report | Cancel |
Show/Hide | Done or Return | |
Select or Details | Previous or Done | Check Spelling |


Organizing Data Using Column Headings
In many lists, column headings may be used to reorder the list. Click once on a column heading and the list will sort in ascending order, using the data in that column. Click again and the data sorts in descending order. If a column heading can be sorted, your mouse pointer will become a hand when held over the column heading, which indicates that the column can be sorted.
For example, if you clicked the heading for First Name, the information would appear in ascending alphabetical order of first names. Click First Name again, and the list sorts in descending alphabetical order of first names.
Note: SchoolTool often uses a simple sort where numbers are treated as text. For this reason, numeric columns can be sorted, but may display the data in an unexpected order. For example, you may see grades 1, 10, and 11 listed before grade 2, because the list sorts on the first digit then the second.
Accessing SchoolTool
First Login
Preparation
When first logging in, a parent (in this case) will need three things:
1. An email address
Your current email address may be used to access SchoolTool. For this to happen, simply make sure to provide the school with this, and confirm that they have allowed your email address to be used when logging into to SchoolTool. Prior to logging in to Schooltool you will need to establish a Schooltool Parent Portal account. This can be accomplished by visiting www.bcsdk12.org/parentportal/ and filling out the “Beekmantown CSD Parent Portal Account Request” form linked from that page.
You will want to make a note of the email address that you registered under as that will be the only email address that you will be able to access your account with.
2. The web site address (URL)
The website address that you will need to use to access SchoolTool is https://schooltool2.neric.org/SchoolTool_BEEK/ This address may be used on any computer with an internet connection, but is also needed when using the Parent Portal Mobile App as well and must be input into the settings area for the app.
3. Access to your own email
You may be receiving your first SchoolTool password through your email. It will be necessary to make sure you have access to your email for any passwords resets as well.
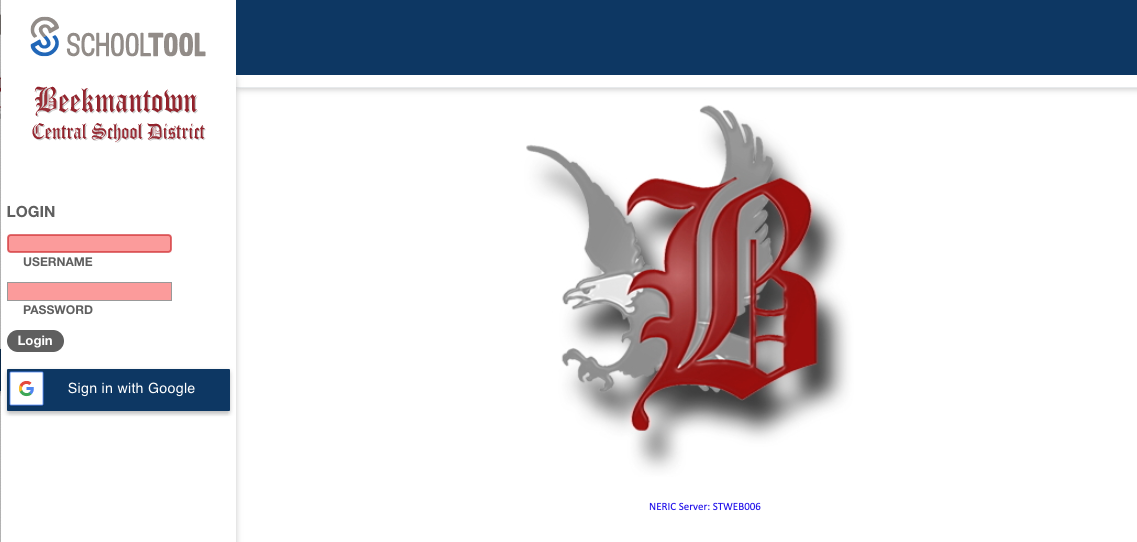
Logging In
- Open your browser and navigate to the SchoolTool URL for your school district.
- Enter the email address you provided to the district.
- You should have received a password emailed to you from Schooltool. If you have this password, enter it now. Otherwise, skip to the “First Time Logins/Forgotten Passwords” section. Remember that passwords are case sensitive and must be entered in exactly as you received them.
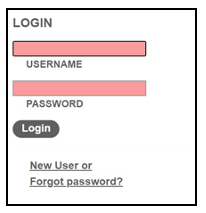
- Click the Login button to login.
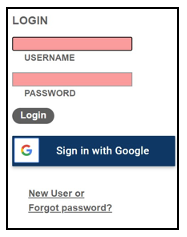
Please note that ONLY Beekmantown Central School District employee accounts are set up to use the "Sign in with Google" button. If you are a parent, even if you have a Gmail account, clicking on the “Sign in with Google” button with not provide you access. You will need to type your username and password instead and click on the login button to enter the Schooltool Parent Portal.
First Time Logins/Forgotten Passwords
Since our district has enabled the “Forgot Password” link on the login page, you will see a link that allows you to reset your password.

- You will see the screen refresh, and you will be prompted again to enter your username. Fill in the box with your email address, and click the Submit button.
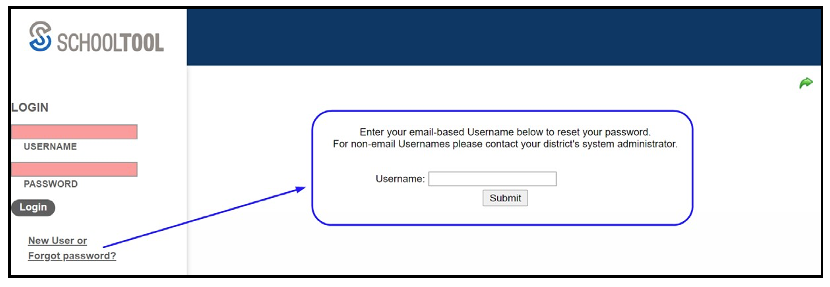
- Clicking Submit will cause an email message to be sent to you that will contain your new password.
- Retrieve the new password from email.
- Log into your email account and look for an email message from "SchoolTool".
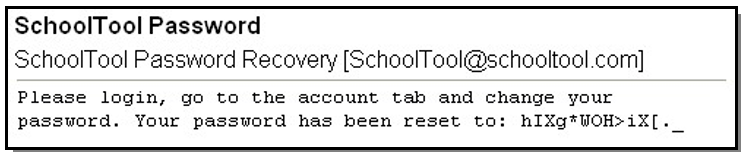
- Copy the password provided exactly, including any numbers, capital letters, and special characters and enter this temporary password into the appropriate field on the login screen.
- Once you have logged in successfully you will see the main Home screen, which generally includes 3 tabs: Students, Campus, and Account. Additional tabs may be available depending on district settings.
- Click the Account tab to change your password.
We highly recommend that the first thing you do within the Schooltool Parent Portal is to create a new password so that your child(ren)’s personal information remains private and secure. You should create a new password that has the following characteristics:
- Greater than or equal to eight (8) characters.
- Combination of letters, numbers, and symbols (including upper and lower case letters)
- Something that can be remembered easily
Good passwords do not have to be hard to remember. For instance, "NeverLate2School!" is a good password that has upper and lowercase letters, a number, a symbol, and is greater than 8 characters long but still easy to remember.
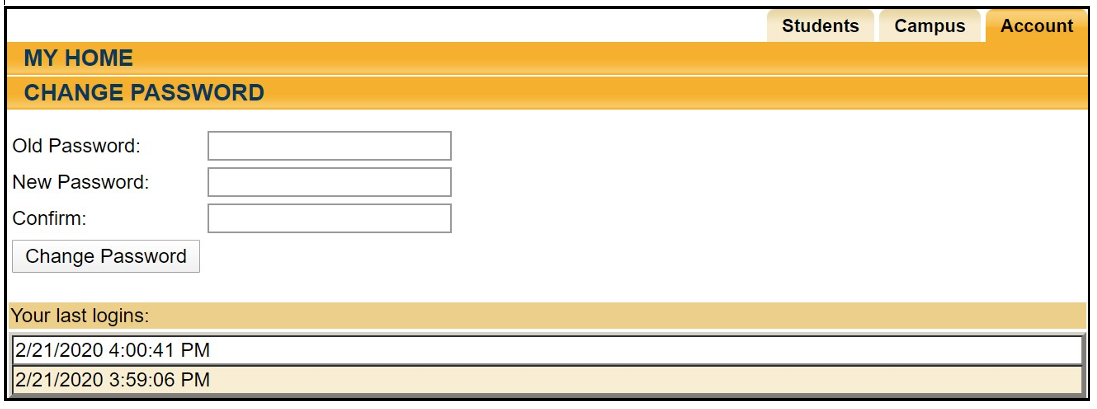
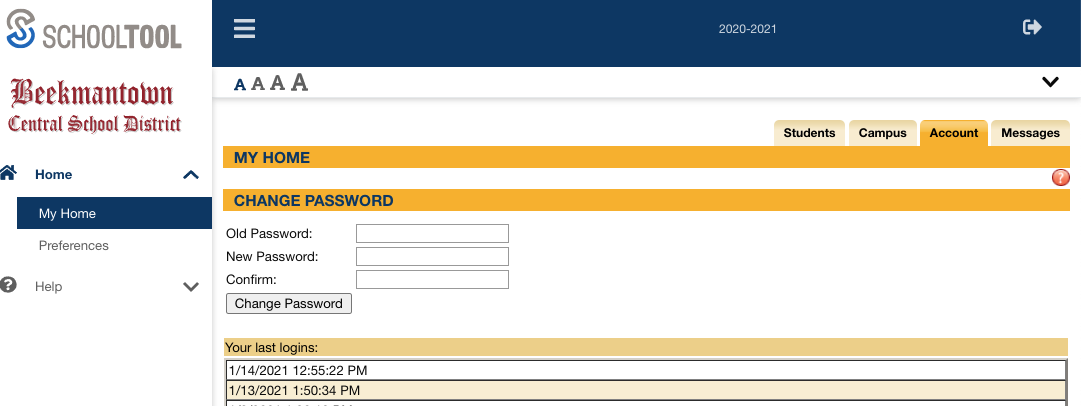
To change your Schooltool Parent Portal password, simply click on the Account sub tab, enter the existing password, then the new desired password in both the New Password and the Confirm boxes. Click on the Change Password button to finalize the change.
Please note: If you need to change your email address, you will need to contact the Registrar’s Office in order to update your Parent Portal Account. This can be done by sending an email with a brief message to registrar@bcsdk12.org
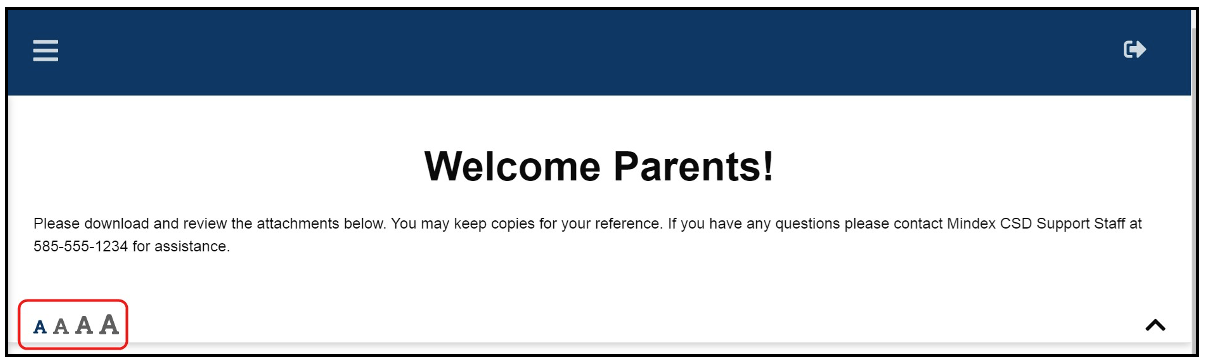
The district will sometimes provide information to users in the system banner area. This might include general announcements, helpful links, and more. If we have an active banner message, this will be displayed in the banner area by default. You can collapse this area by clicking on the Collapse button at the bottom right of the message area. Note that this will collapse the banner during your active SchoolTool session only; the next time you log in the banner will automatically be expanded again.

When the banner is collapsed, you will still see a white bar at the top of the screen where you can access the font size buttons or expand the banner content at any time.

Adjusting Font Size
All users have the ability to adjust font size within SchoolTool by clicking on the font size buttons in the bottom left of the system banner area.
Changing the font size will increase or decrease text throughout SchoolTool. Note that not all images, icons, or buttons are scalable and therefore may not resize when the font size is changed. In future releases of SchoolTool these elements will respect the selected font size as well.
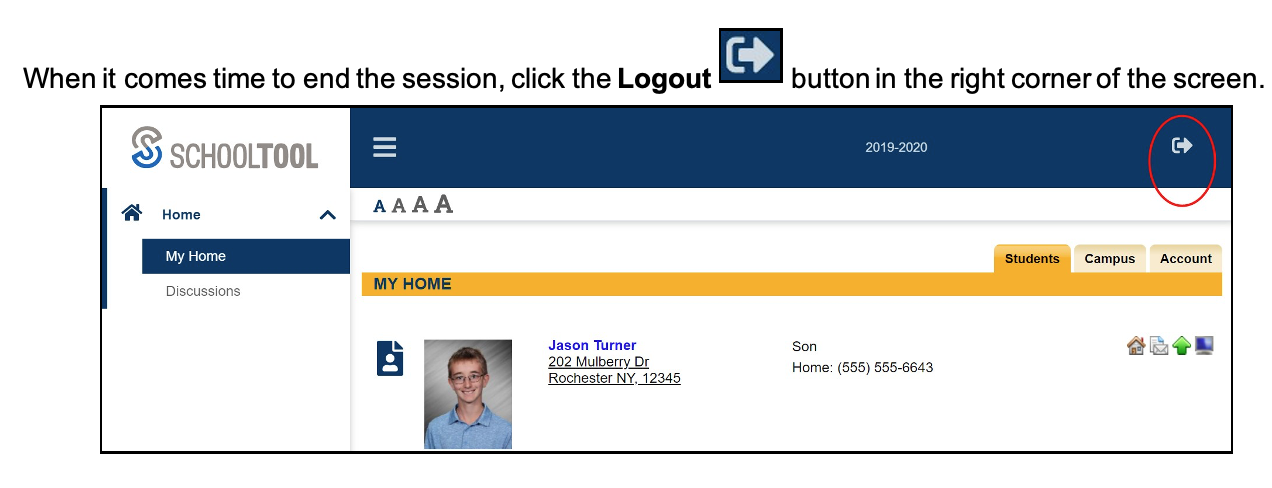
Logging Out
Using SchoolTool
Students Tab
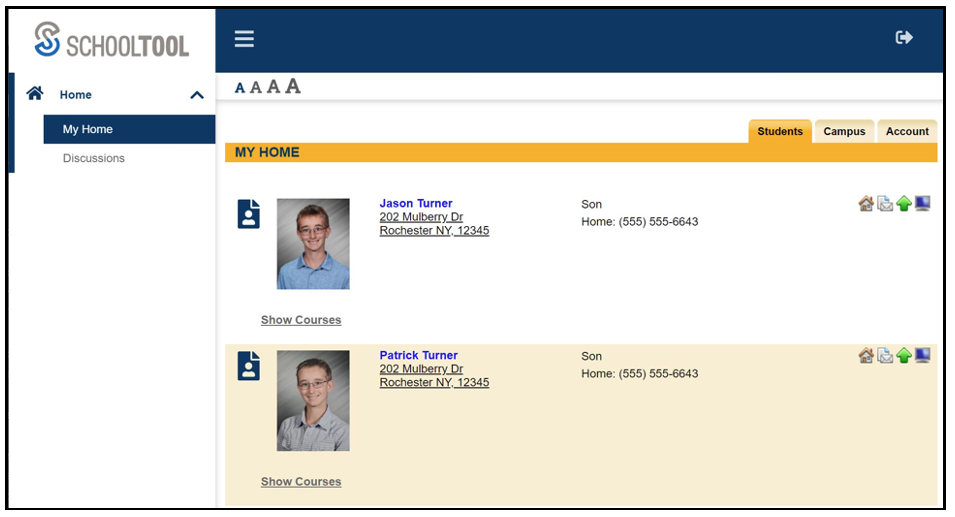
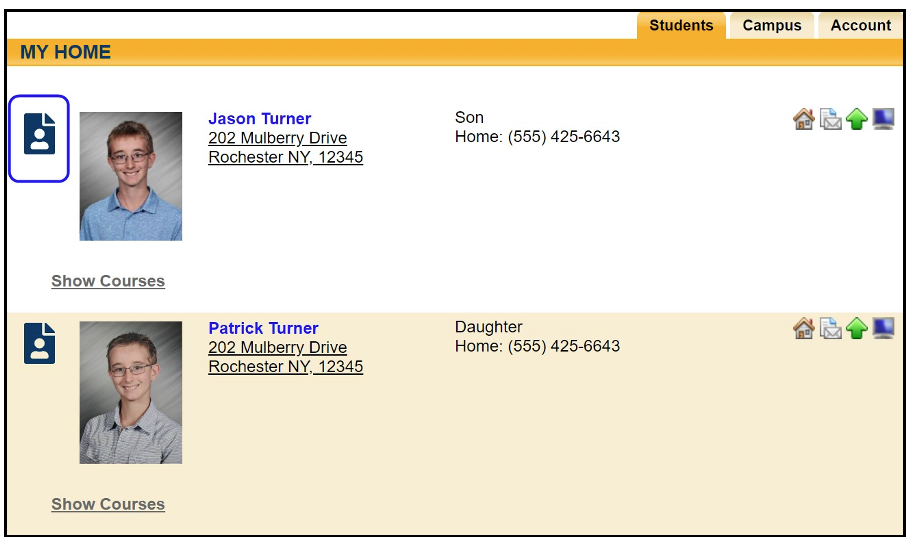
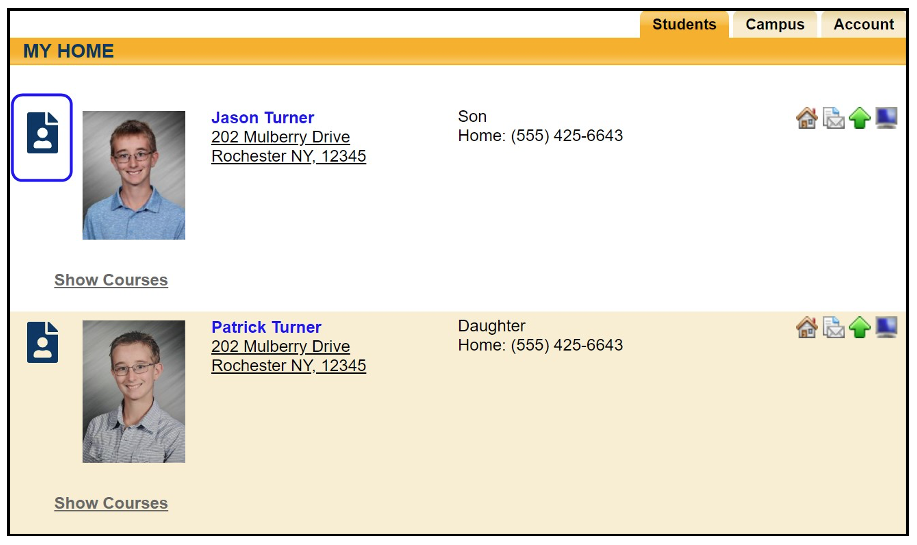
The Students tab will display a list of any student contacts for whom the user has Parent Portal Access, followed by a list of Limited Search results. To access the student record for an individual, click the View Student Record button, or click on the student's photo or name.

Student schedules are hidden by default; click the "Show Courses" link to expand a student's schedule. Note that the options to view courses for Current Semester or All semesters will only be visible when at least one student's schedule has been expanded.
Note: Depending on each school’s individual settings, the information available may be different from student to student depending on each student’s building/school level.
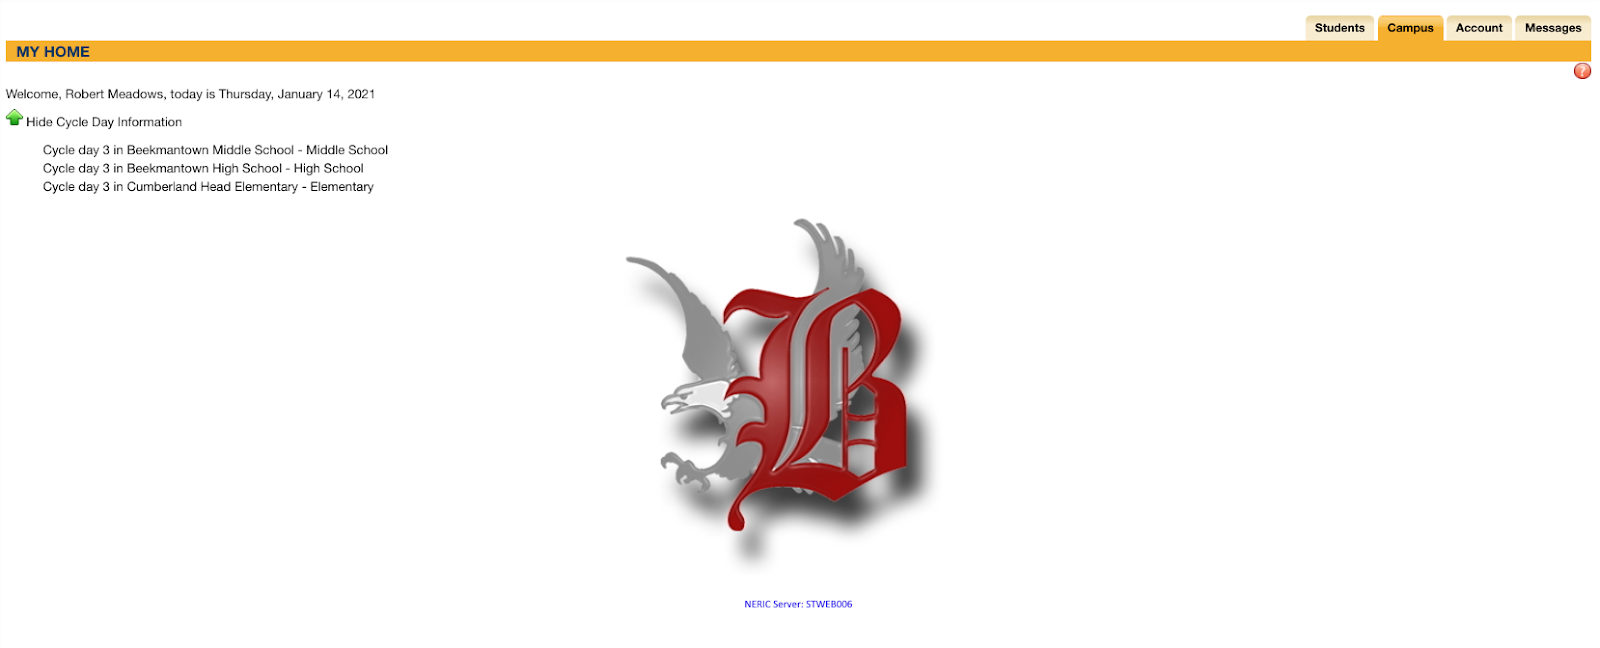
Campus Tab
This tab is where districts can add general information for users, including cycle days, announcements, and other pertinent school information. This tab may or may not contain information depending on the circumstance.
Account Tab
This tab is used to change passwords. As mentioned previously, when logging in for the first time users should immediately access this tab to change the initial password. This tab may also show the date and time of that user’s previous logins.
Messages Tab
This tab displays any available messages. These messages may contain text, links, images, or attachments. If the message has an attachment, an icon and the attachment filename will be displayed at the bottom of the message. To download an attachment, simply click on the Download Attachment icon beside the filename.


Parent Portal
Once a parent has selected a student, the screen will refresh with that student’s Personal Information and several additional tabs.
Note: The specific tabs available to parents will depend on each student’s individual school settings. This document provides a brief overview of the most common tabs that a parent user might see but may vary slightly from what is shown here.
Student Record
The top portion of the screen will provide basic information about that student. This includes the student’s full name, age, date of birth, primary language, address, phone number, grade, enrollment type, and building/school level. Depending on permissions, parents may also see that student’s current location.
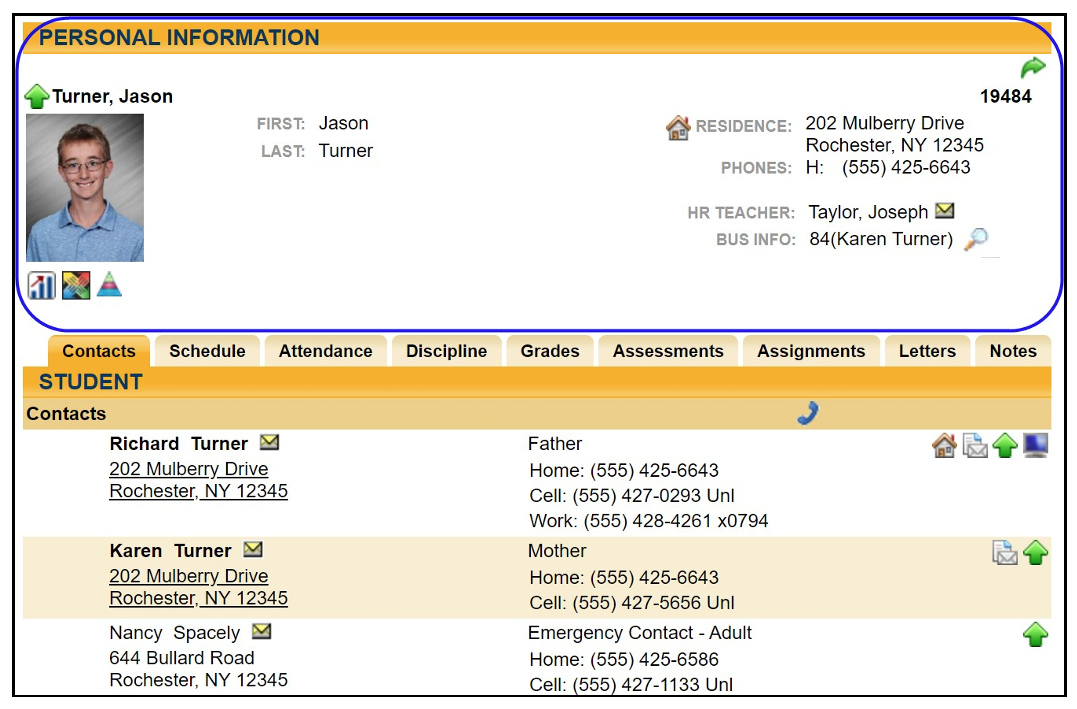
Buttons available on the Personal Information section include the following:
- The Show / Hide information button allows the user to show or hide the Personal Information section.
- Done button will return to the user to the main Home screen


The bottom portion of the screen will show the Contacts tab by default, but will change when other tabs are selected. Each of the tabs are described in detail on the following pages. The tabs available to you are dependent on district settings, so you may not see all of these tabs.
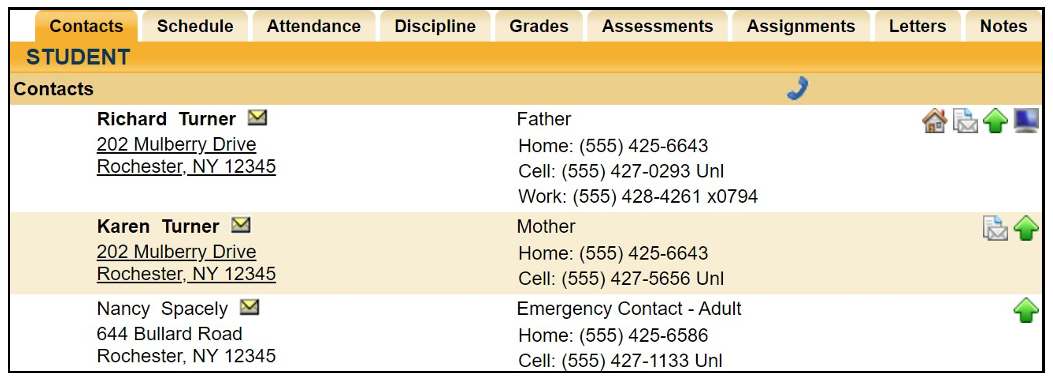
Contacts Tab
The Contacts tab provides a list of contacts associated with that student. This will show parents, guardians, and other adult contacts, and any siblings. If any of this important contact information is incorrect, you are strongly encouraged to contact the main office of your child(ren)’s school so that they can update the information.
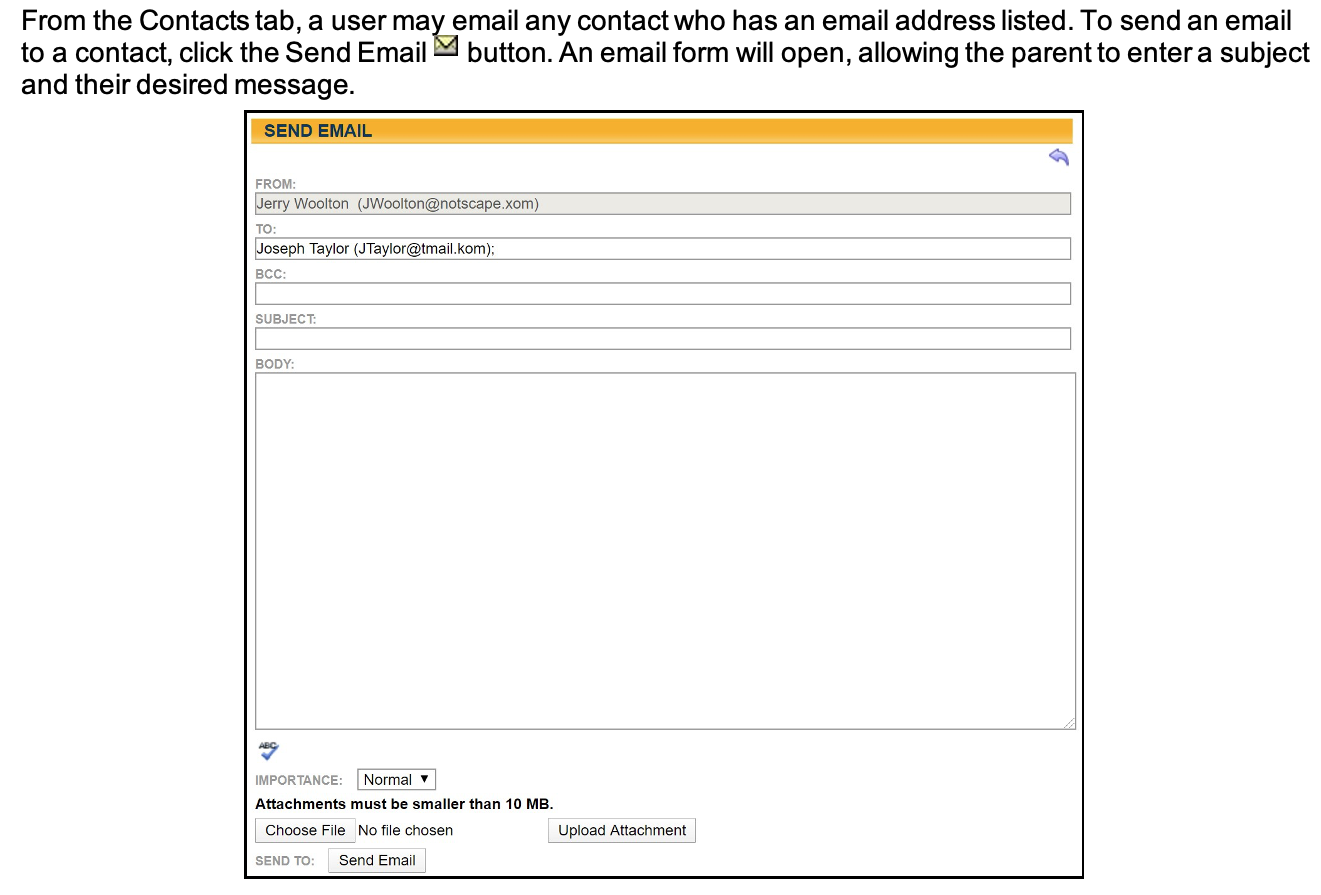
Note: The “From” and “To” fields will be pre-populated with the user’s email address in the “From” field and the contact’s email address in the “To” field. Parents may enter any additional recipient email addresses in the “BCC” (blind carbon copy) field.

- When the message is ready to be sent, click the Send Email button at the bottom of the screen.
- To cancel the message, click the Done button in the upper right corner of the screen to return to the Contacts tab without sending.


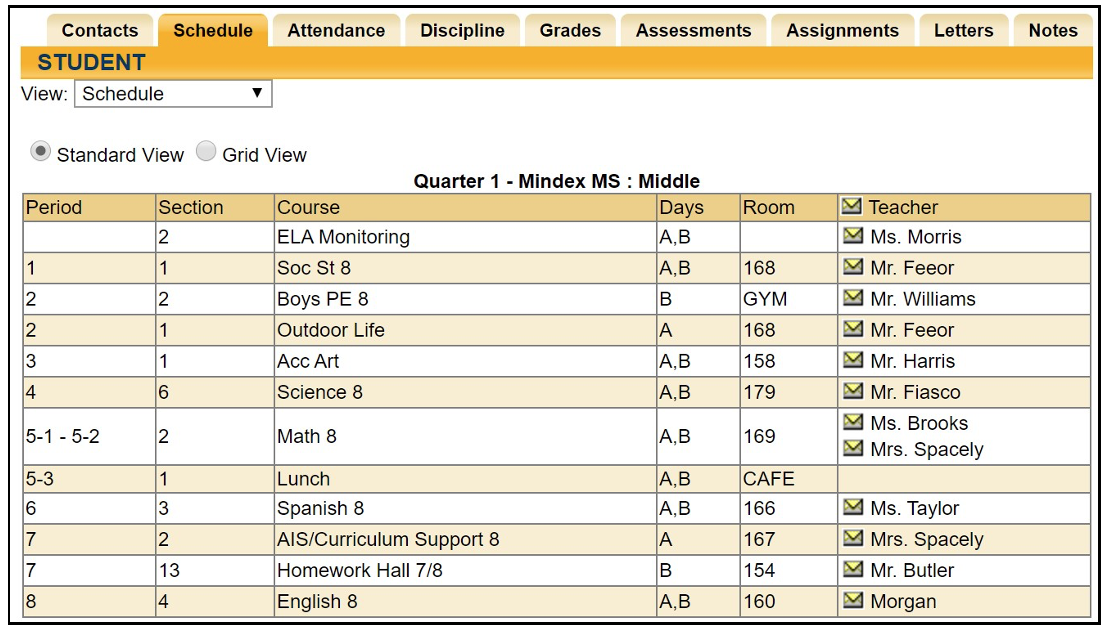
Schedule Tab
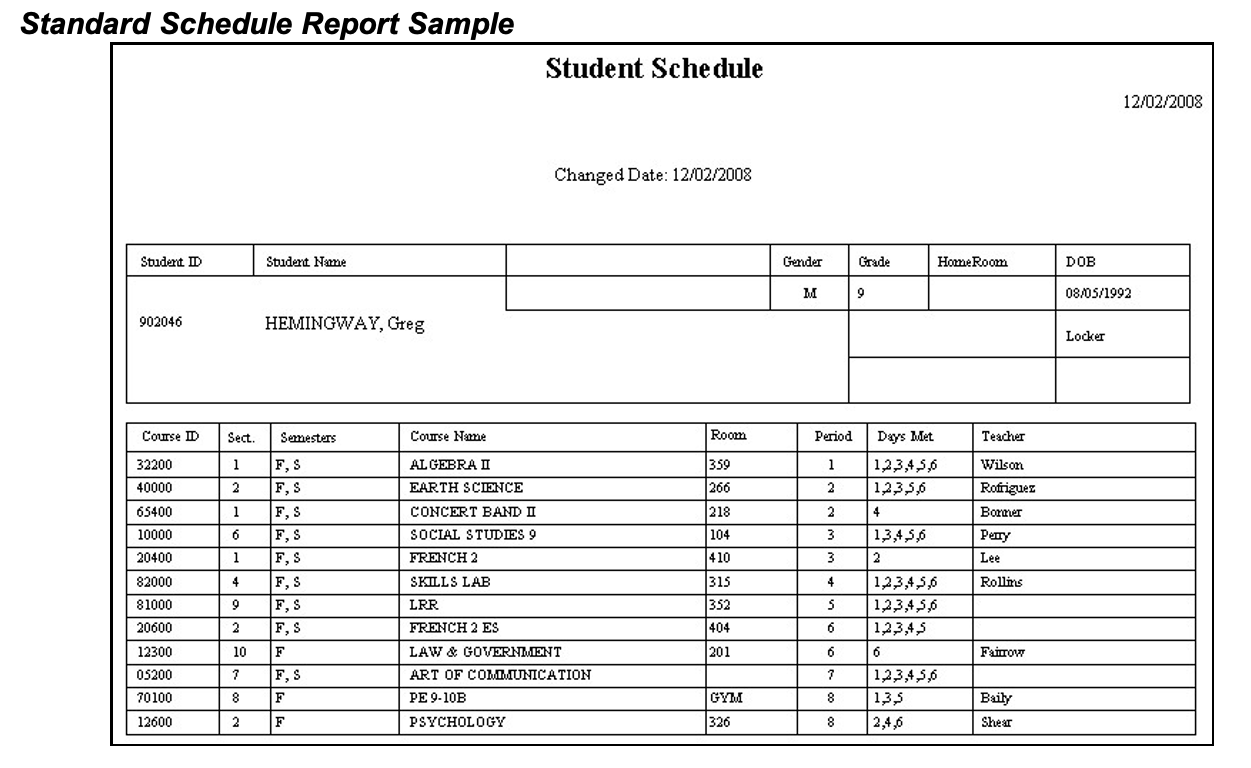
The Schedule tab provides a complete list of the student’s schedule for the current school year. This list shows which course the student has during each period, which section number the student is in, the days that course meets, the room where the course meets, and the teacher who teaches that course.
Note: Depending on settings done at the school level, student schedules may not be available until after a specified date. When this is the case, a message will appear in place of the schedule to indicate that schedules are not currently available.
an email, use the process described under the Contacts Tab section.
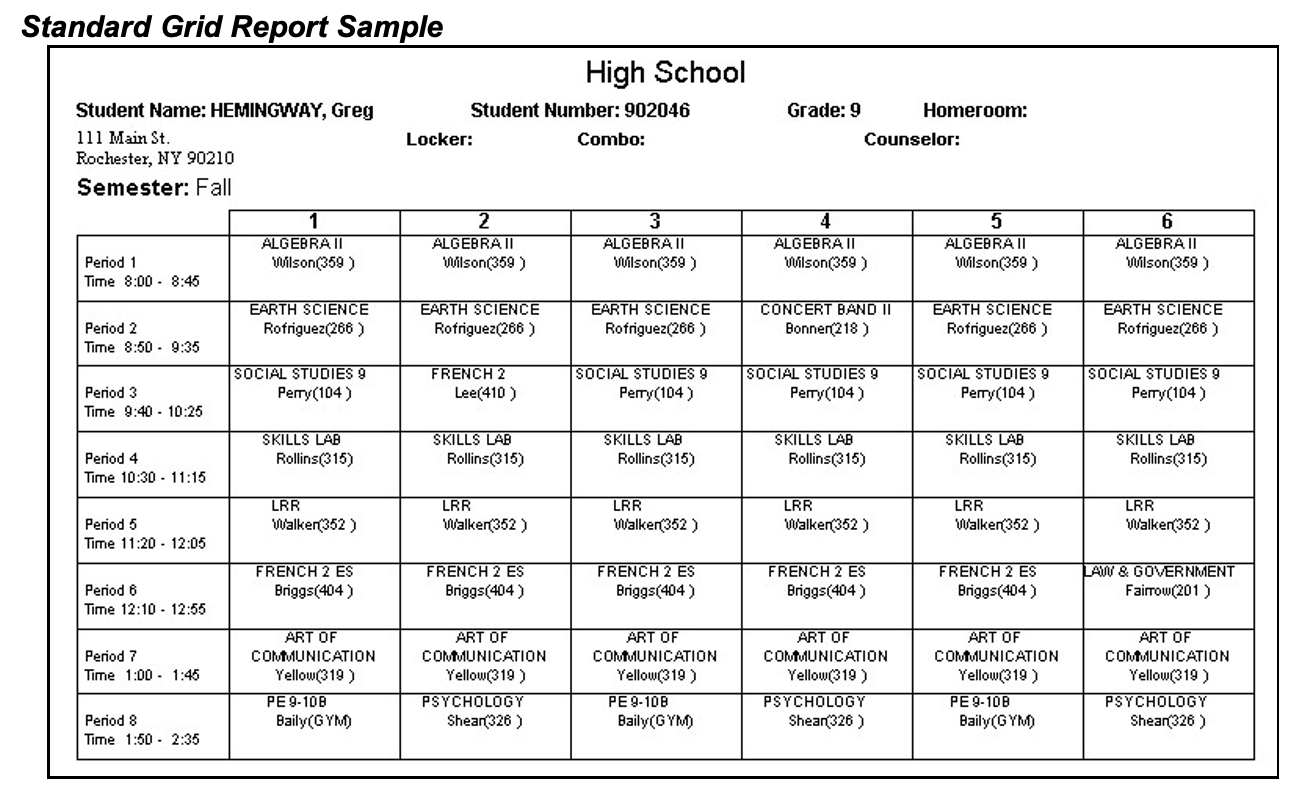
The schedule may be viewed in Standard View, or in Grid View. Parents may switch between views by clicking the appropriate radio button and waiting for the page to refresh with the new view.
Clicking on the Print Schedule button will allow users to print Student Schedule report in a new window. If multiple report formats are available, you will be provided with a drop-down menu where you may select the appropriate report format to be generated. Note: The specific report formats available in this area are determined by the individual schools. The following are samples of two commonly used reports.

Attendance Tab
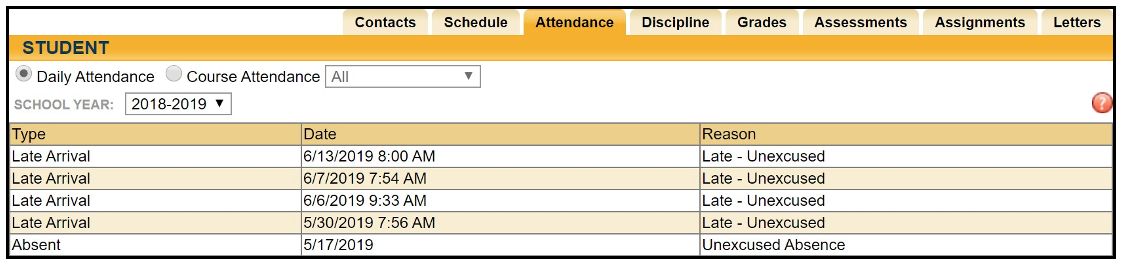
The Attendance tab shows a summary of the student’s total absences for the current year (if any). Users may view a summary of Daily Attendance, All Course Attendance, or Missed Course Attendance by selecting the appropriate radio button. Use the year drop-down to review historical data for a previous year. Keep in mind that not all districts are configured the same way, so some of these options may not be available for all users.
- The Daily Attendance view shows users all daily absences. This may also include early dismissals, late arrivals, and in/out records.
- The Course Attendance options (All, Missed Courses, and Attendance Letter) allow users to see a summary of course attendance for that year:
- All: shows all course absences, including those that are tied to daily absences.
- Missed Classes: shows all period misses where the student was marked absent by a teacher (this view only includes period misses for times when the student was expected to be in class, and does not include period absences that are tied to daily absences).
- Attendance Letter: shows a list of period attendance that may contribute to attendance policy letters.
Note: Each summary view is controlled by its own permission; if you do not have permission to view a specific option, the radio button for that option will not appear. In addition, depending on your school’s settings, newly submitted absences may not be visible immediately.
Discipline Tab
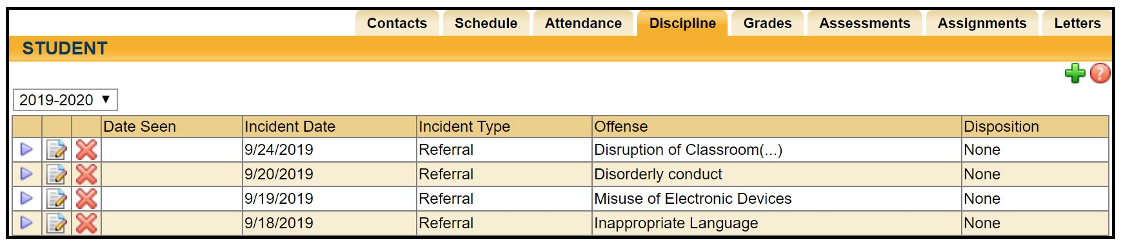
On the Discipline tab, parents can view a list of all discipline incidents the student has received for the selected year. Users may view incidents from past years by selecting a different year from the drop-down menu at the top left corner.
Depending on the school’s settings, these may include classroom incidents and/or referrals. The list shows the student’s grade, the date seen, the date of the incident, the incident type, the offense type, the disposition assigned for that incident, and any related disposition points. This tab will also show the total points accumulated for that year.
Depending on school permissions, users may be able to see all incidents for that student or only those for which a “Date Seen” has been entered.
Grades Tab
The My Home > Grades tab shows grades in each class based on the selected view. The Grade column displays the word “None” until grades have been published. To view grades, select the appropriate view from the drop-down menu.
- Marking Period Grades
- Progress Report Grades
- Marking Period Average
- Assessment Grades
- Final Grades
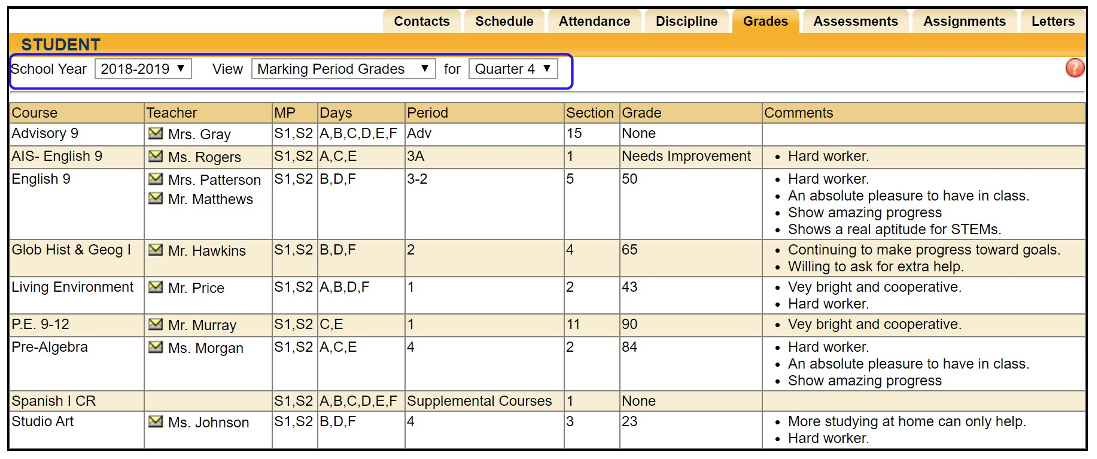
Marking Period / Progress Report Grades
The Marking Period Grades and Progress Report Grades views allow users to see marking period grades and/or progress report grades for each grading interval. For both views, the screen will show grades for the current grading interval by default. Whenever grades are not available, the Grade column will display “None.”
Descriptor-based course grades may be visible on the Marking Period Grades view. Descriptor topics for each course will be listed, with any available grades, grouped alphabetically by course name.
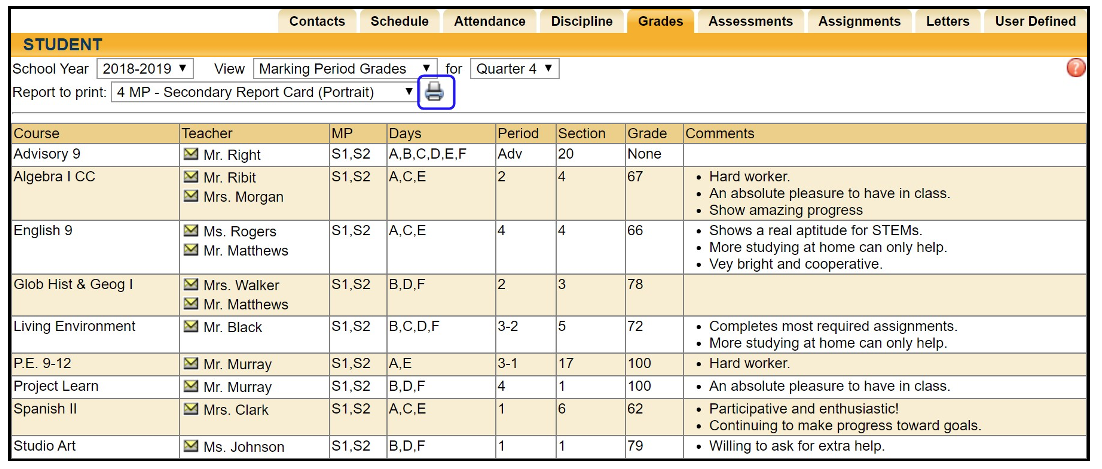
Users with the appropriate permissions also have the option to print report cards and/or progress reports from these views. If more than one report format is available for printing, a drop-down menu will appear and the user must select a report format to print. Any configurable options will default to the values set in Counseling. To print, navigate to the appropriate Marking Period or Progress Report Grades view and click the Print Icon
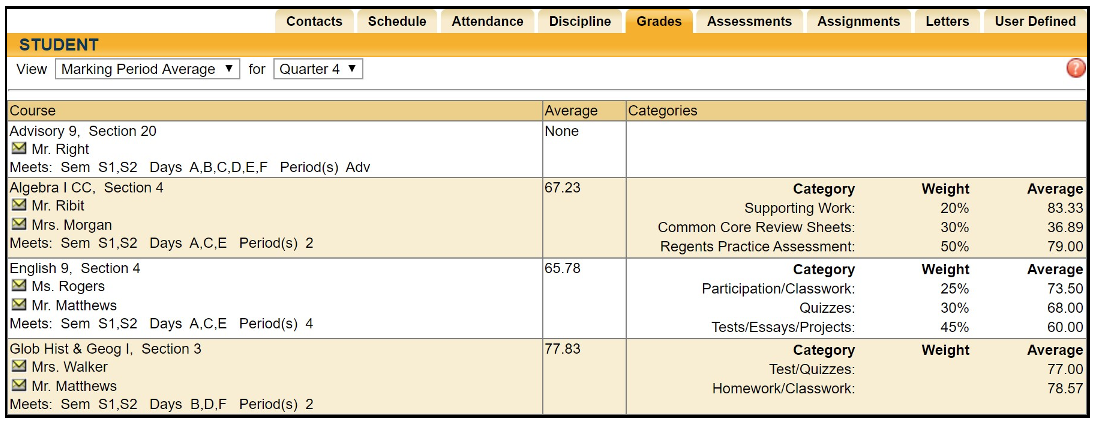
Marking Period Average
To view the marking period averages for each course, select the appropriate year from the drop-down menu and choose the Marking Period Average option from the View drop-down. This view will display the current grade book average for that course.
Assessment Grades
To view assessment grades, select the appropriate school year and select the “Assessment Grades” option from the View drop-down. The screen will refresh to show all assessments assigned to that student for the selected school year. Any available grades will display in the “Score” column; for exams where scores have not yet been entered, the word “None” will display instead.
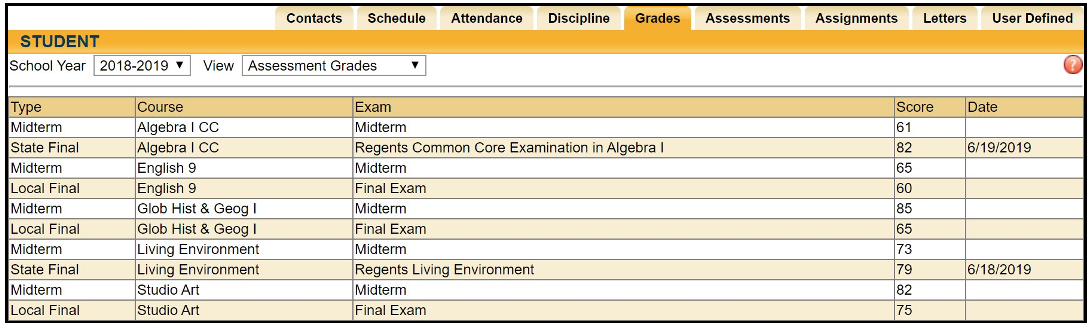
If a student has received an assessment note for any assessment, the short code of the note may display instead of the score, depending on yearly configuration options.
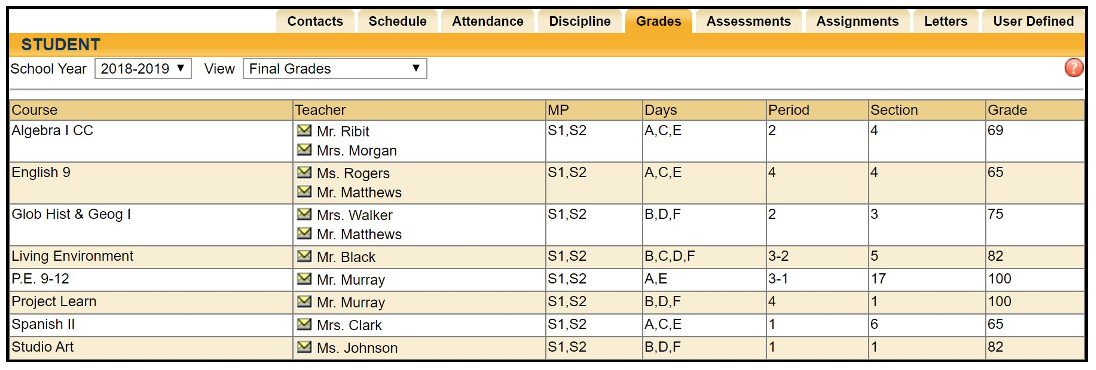
Final Grades
To view final course grades, select the appropriate school year and select the “Final Grades” option from the View drop-down. This view will display the final grade for all courses for which grades have been submitted. This view is year-specific and is not limited to a specific marking period or progress interval. If grades are not available for any course, the Grade column will display “None” for that course.
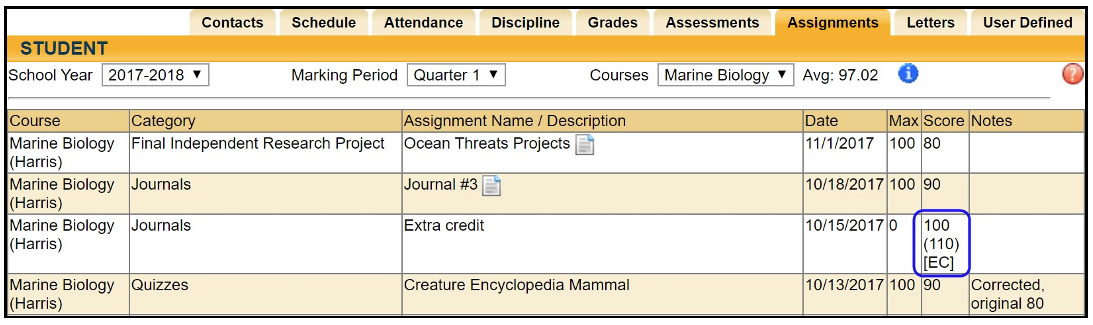
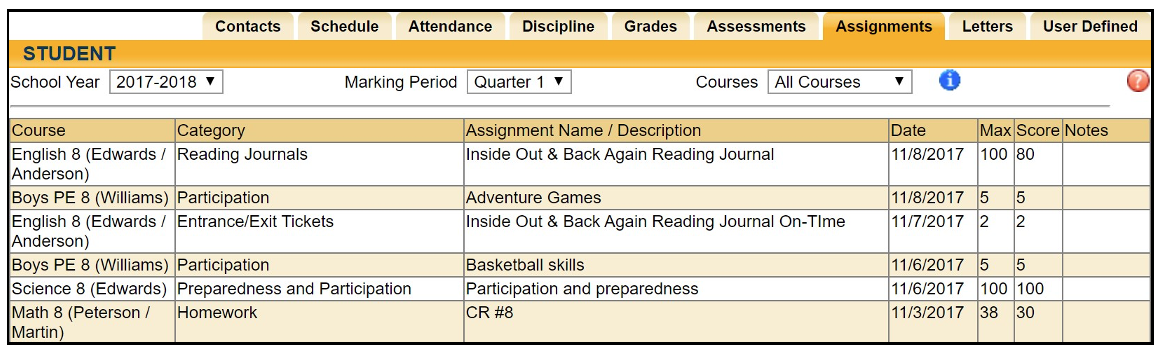
Assignments Tab
The Assignments tab shows a list of all graded assignments for the current year. This list may be filtered by school year, marking period, and/or course. If multiple teachers are assigned to a course, all teachers’ last names will be displayed in the “Teacher Name” column, separated by a “/.”
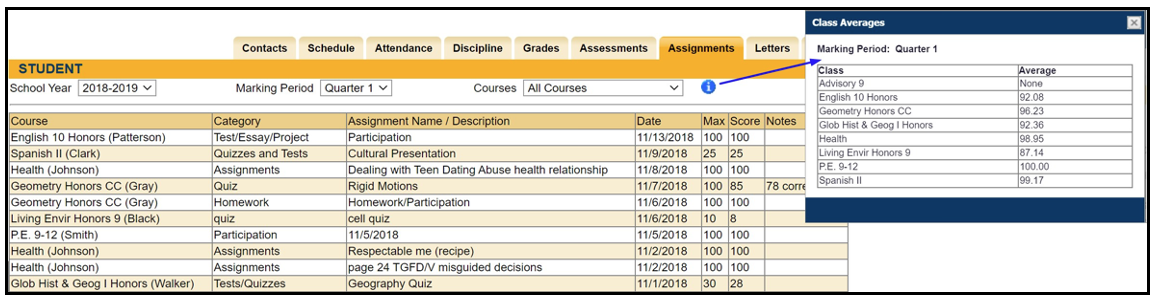
when viewing all course, you may see the info button; clicking on this will display a popup with a breakdown of each class average for the selected marking period.

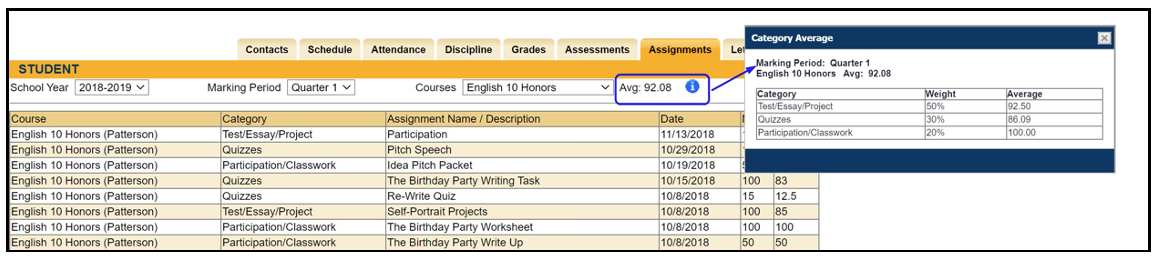
When viewing assignments for a specific course, the Assignments screen will display that course’s average and the popup will change to display a breakdown of the student’s average by grade book category.
Note: Teachers may determine whether or not each assignment may be viewed by parents; if a teacher opts not to show a specific assignment, it will not be displayed even if it has been given a grade.
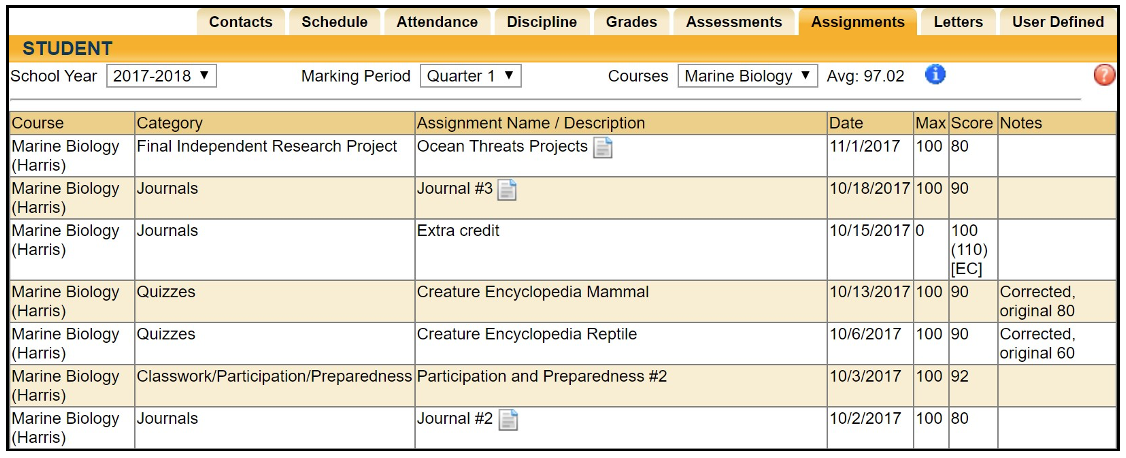
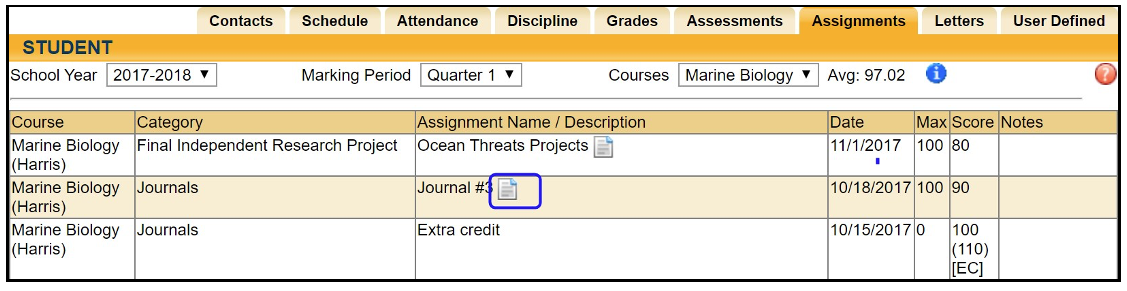
If a teacher has shared any assignment notes, a Notes column will display for users who have permission to view assignment notes.
Attachments are indicated by an icon in the Assignment Name column. To view an attachment, click on the icon and download the file.


Assignment Grades
For any assignment with an attribute associated with it, the Student Score column will display the score, if any, as well as the short code for any attributes applied to that assignment and the adjusted score (if appropriate). Multiple attributes are separated by a comma.
Scores, attributes, and adjustments are displayed as follows:
Score (Adjusted Score) [Attribute Short Code]
For example, a student originally received a 100 on an assignment, but the teacher applied an “EC” attribute to that assignment to designate Extra Credit of 10%. The student’s score now shows 100 (110) [EC] to indicate the adjustment.
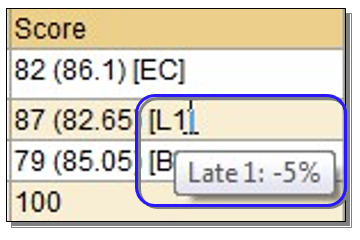
Users can mover their mouse over any attribute in the Student Score column. The mouse-over text will show the user the full name of the attribute and any adjustment defined for that attribute. For example, holding the mouse over the “L1” attribute may display “Late 1: -5%” to indicate that the score has been adjusted by -5% based on the application of that attribute.
Other Tabs
Depending on district settings, additional information or tabs may be available. Some parents will see an Assessments tab, which includes data about state assessments for grades 3-8, or a Letters tab, which displays a list of attendance letters that were sent home.
Schooltool Mobile App Guide
For specific information regarding the Schooltool Mobile app, please visit the link below provided by Mindex, the developer of Schooltool and the Schooltool Mobile app. https://www.mindex.com/mobile-app-parent/st-mobile-app-copy/