Top of document
Last Updated 11/28/23 REPORTER Help Documentation |

Attendance (Quick Guide)
One type of activity that users can register for in REPORTER are Course Instances. A course in REPORTER consists of the general information about an activity as well as compliance and department settings. Specific sessions or offerings of that course are known are Course Instances (‘Instance’ for short) which will contain specific information about when and how the activity is offered.
In order for registered users to get credit for completing a course, they need to receive a final attendance status of ‘Pass’ or ‘Complete’ for an instance of the course. Final attendance can either be automatically managed by integrating an instance with Moodle or the final attendance should be manually updated by a course admin or Instructor.
Table of Contents
Quick Steps to Mark Completion
Navigation to Access Attendance
For More Information, click here to view the Attendance Full Guide
Quick Steps to Mark Completion
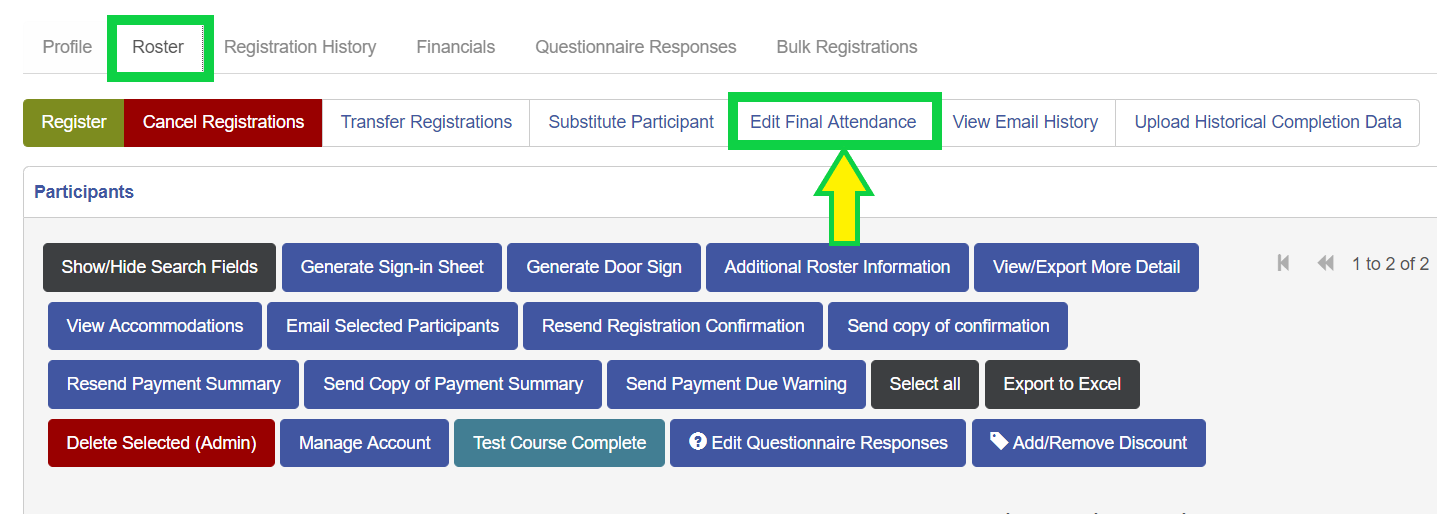
In order to give someone credit for completing an instance, you will edit the relevant instance, go to the ‘Roster’ tab, and select Edit Final Attendance. From there, you will locate the related user(s) and change their status using a dropdown field. To mark them complete, you can choose ‘Pass’ or ‘Complete’. Once changed, you will select the button to Save Final Attendance.
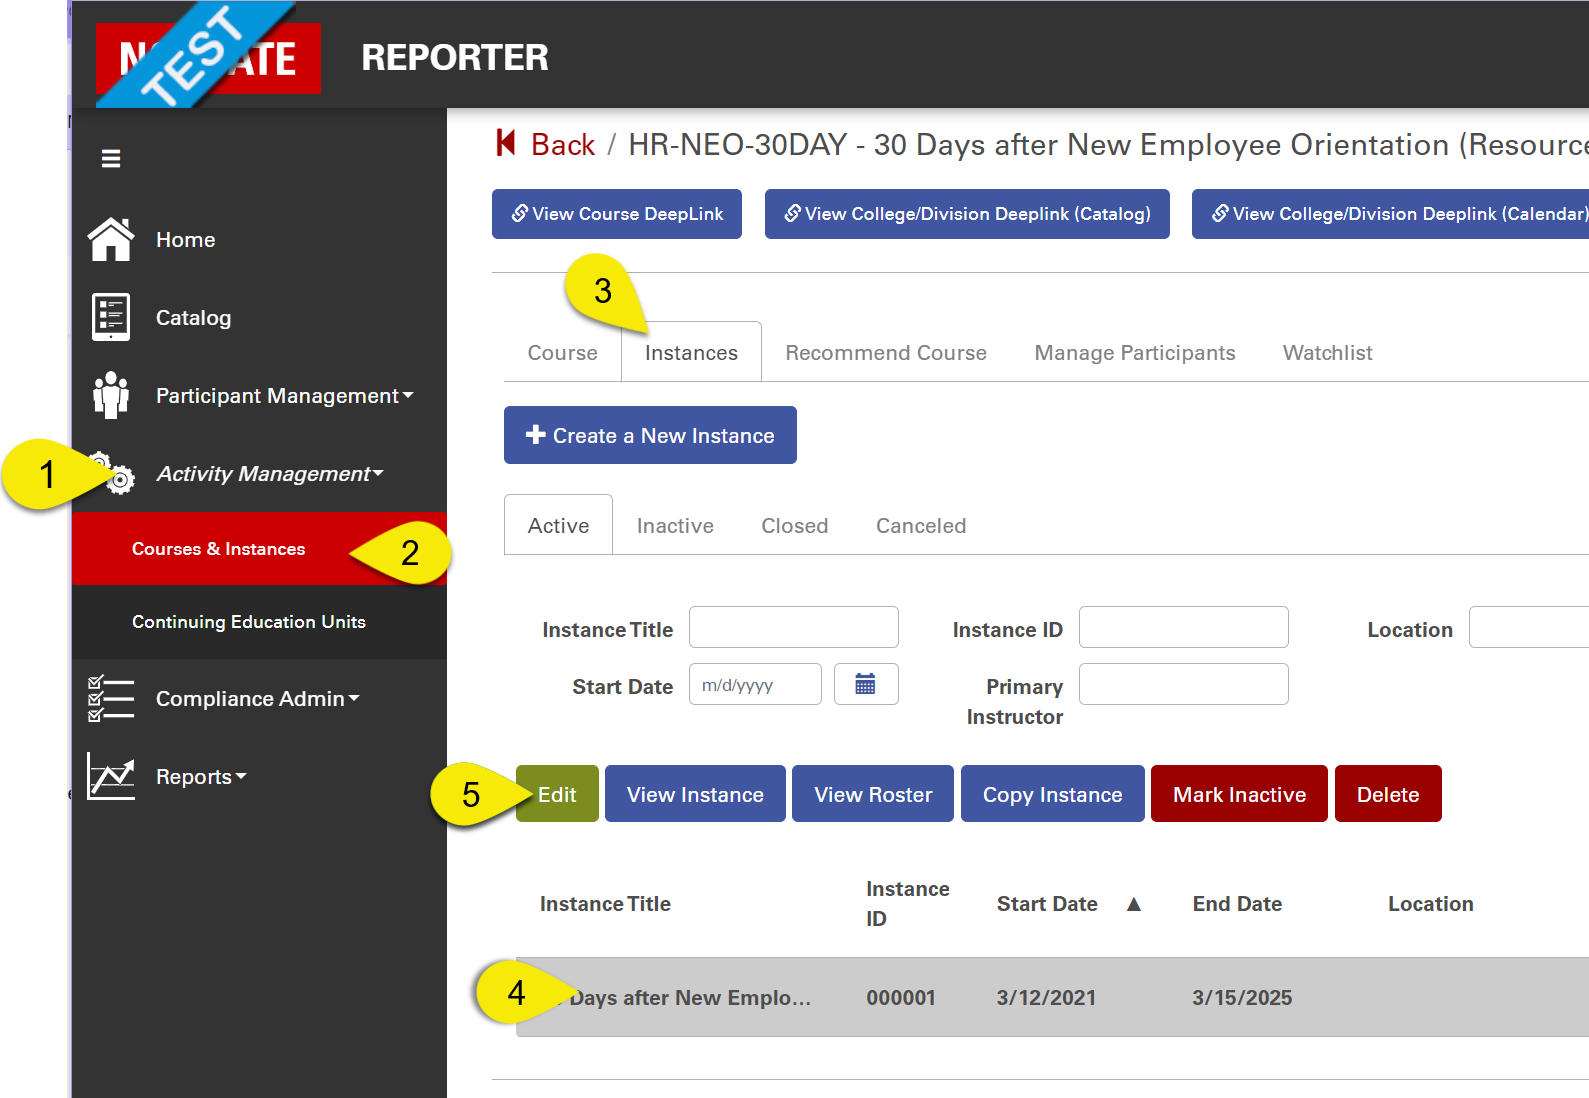
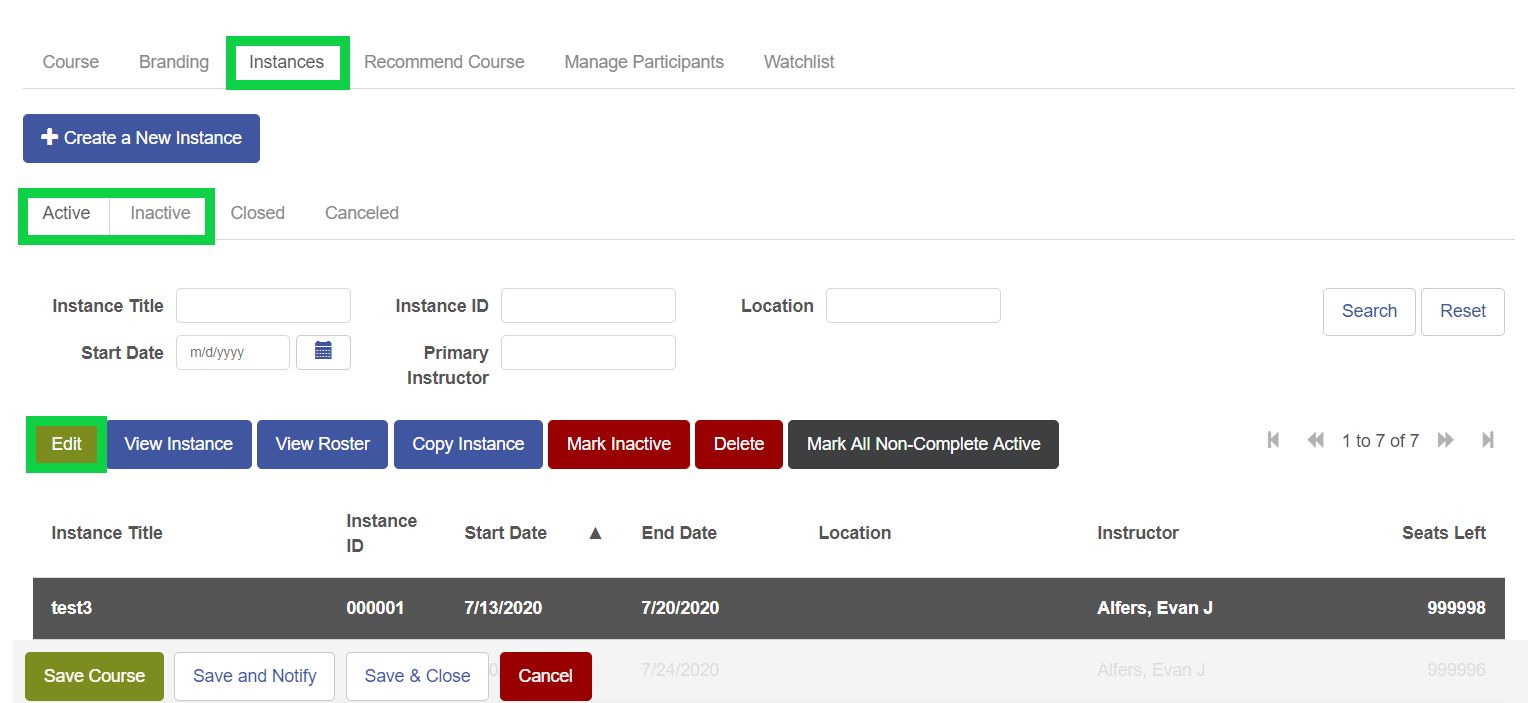
- To edit an instance the navigation is: Left Menu - Activity Management > Courses and Instance >
- [click course in list] > "Edit" button > 'Instances' tab > double click or select then "Edit"
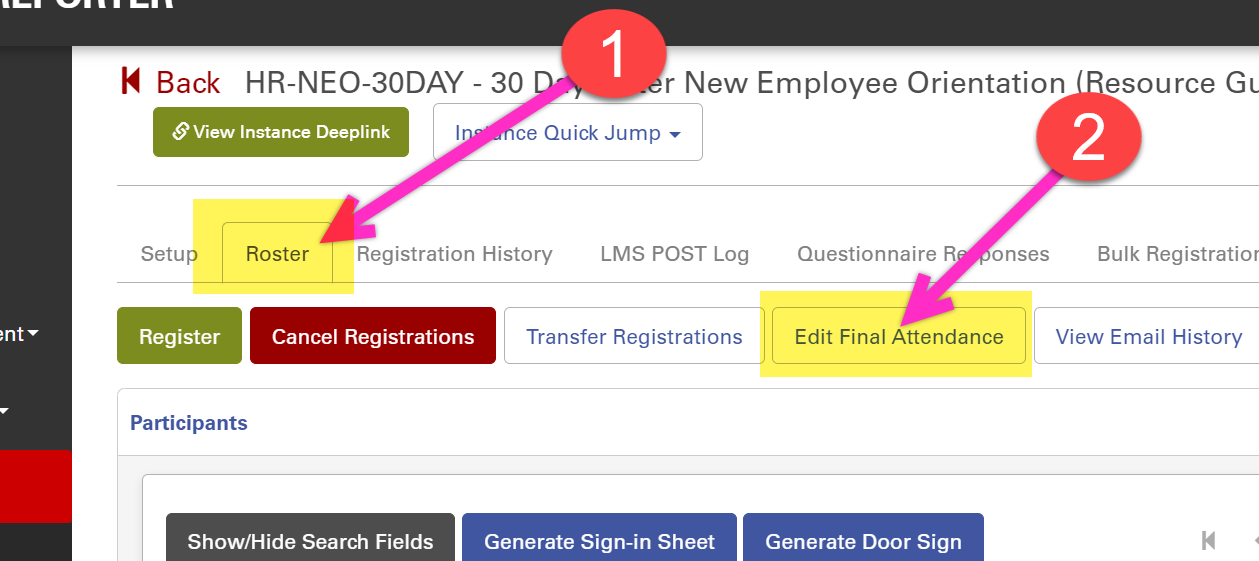
- Then select the “Roster” tab and click the button to Edit Final Attendance
- If there are more than 500 people on the roster, you will need to use the search fields to locate the person(s) to be marked complete. Otherwise, you will see a list of everyone registered who does not have final attendance.
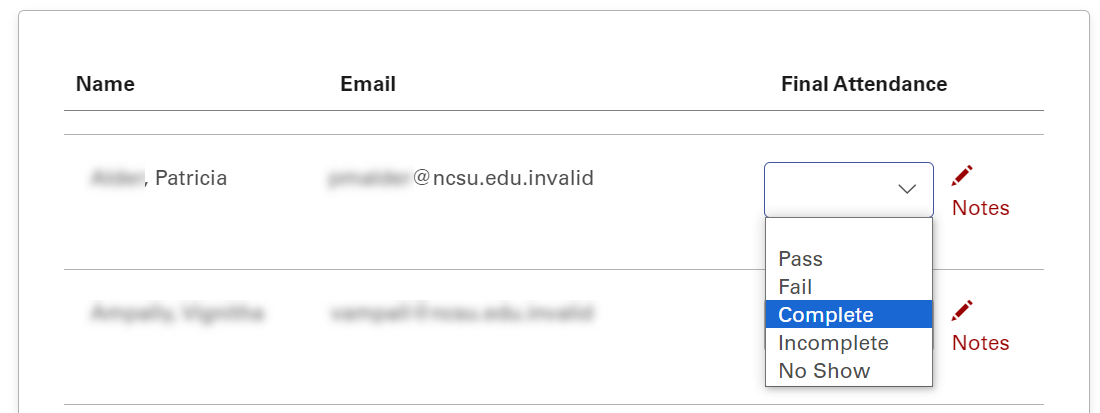
Locate the relevant users - Use the dropdown on the far right to mark the person(s) Complete
- Then click Save Final Attendance
Attendance Options
Instances can be set up to include one or two options for entering attendance, Final Attendance and Daily Attendance. All instances will have the ability to view and edit Final attendance, but will only see the Daily Attendance option if the setting to “Track Daily Attendance” has been turned on in the instance setup.
- It is important to enter Final Attendance, as it will update participant Training Summaries in the system, send Completion Certificates (if configured) and move courses to the Completed Courses section on the Participant dashboard. Final attendance can either be automatically managed by integrating an instance with Moodle or the final attendance should be manually updated by a course admin or Instructor.
- Daily Attendance is primarily used to support a multi day in-person class that wants to track attendance separately each day. Those daily attendance records can be viewed while completing the Final Attendance to aid course owners in determining if a user attended enough to be marked complete.
If daily attendance is enabled, the instructor and the Course Admins will see the option to update the Daily attendance records when managing the roster; otherwise, only the final attendance option will show.
Navigation to Access Attendance
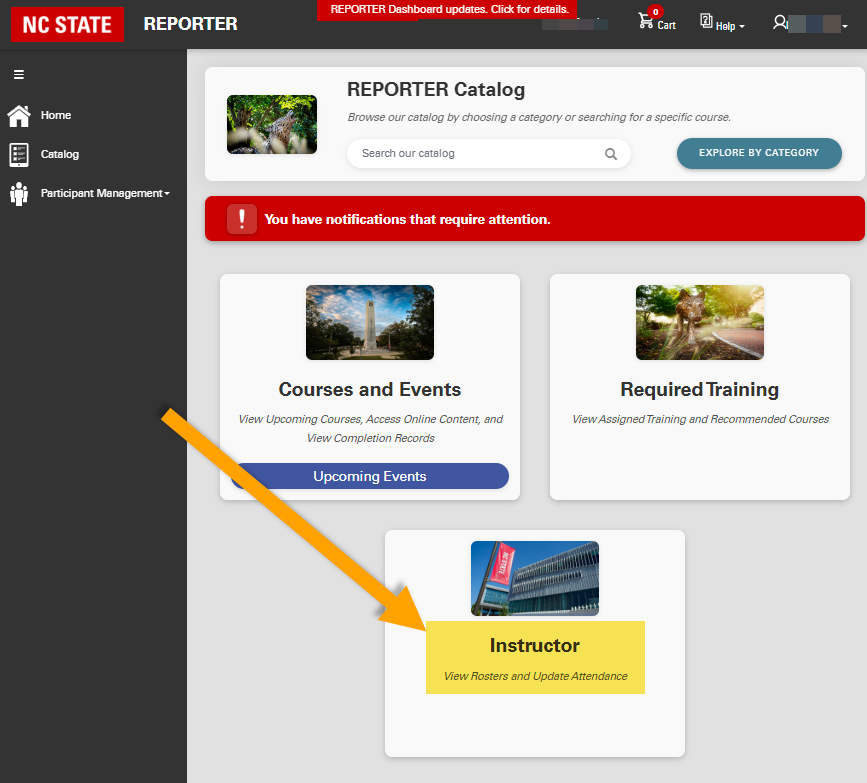
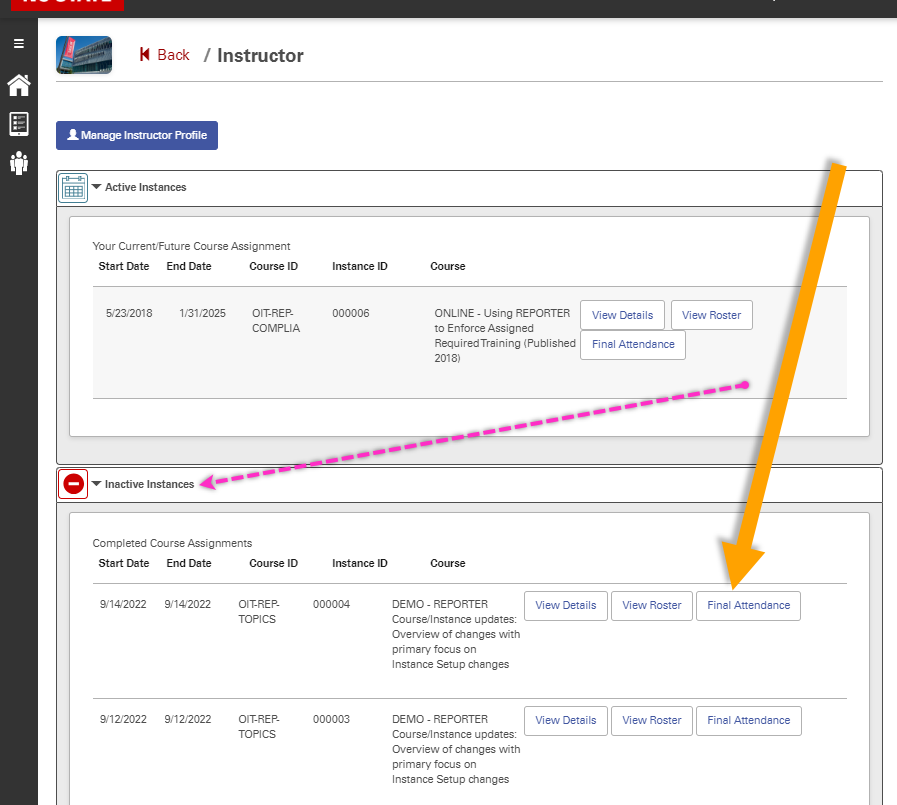
As an Instructor: |
|
As a Course Admin: |
|
The attendance window will open where you can edit final attendance. Simply set each participant’s dropdown to indicate final attendance and Save
After you save Final Attendance, you have the ability to go back and change the participant’s attendance status. If the participant already received a certificate, they will still have the certificate, but all other records (Roster, Training Summary, Compliance) in REPORTER will be updated to reflect whatever you change the status to.
Understanding the Attendance Window
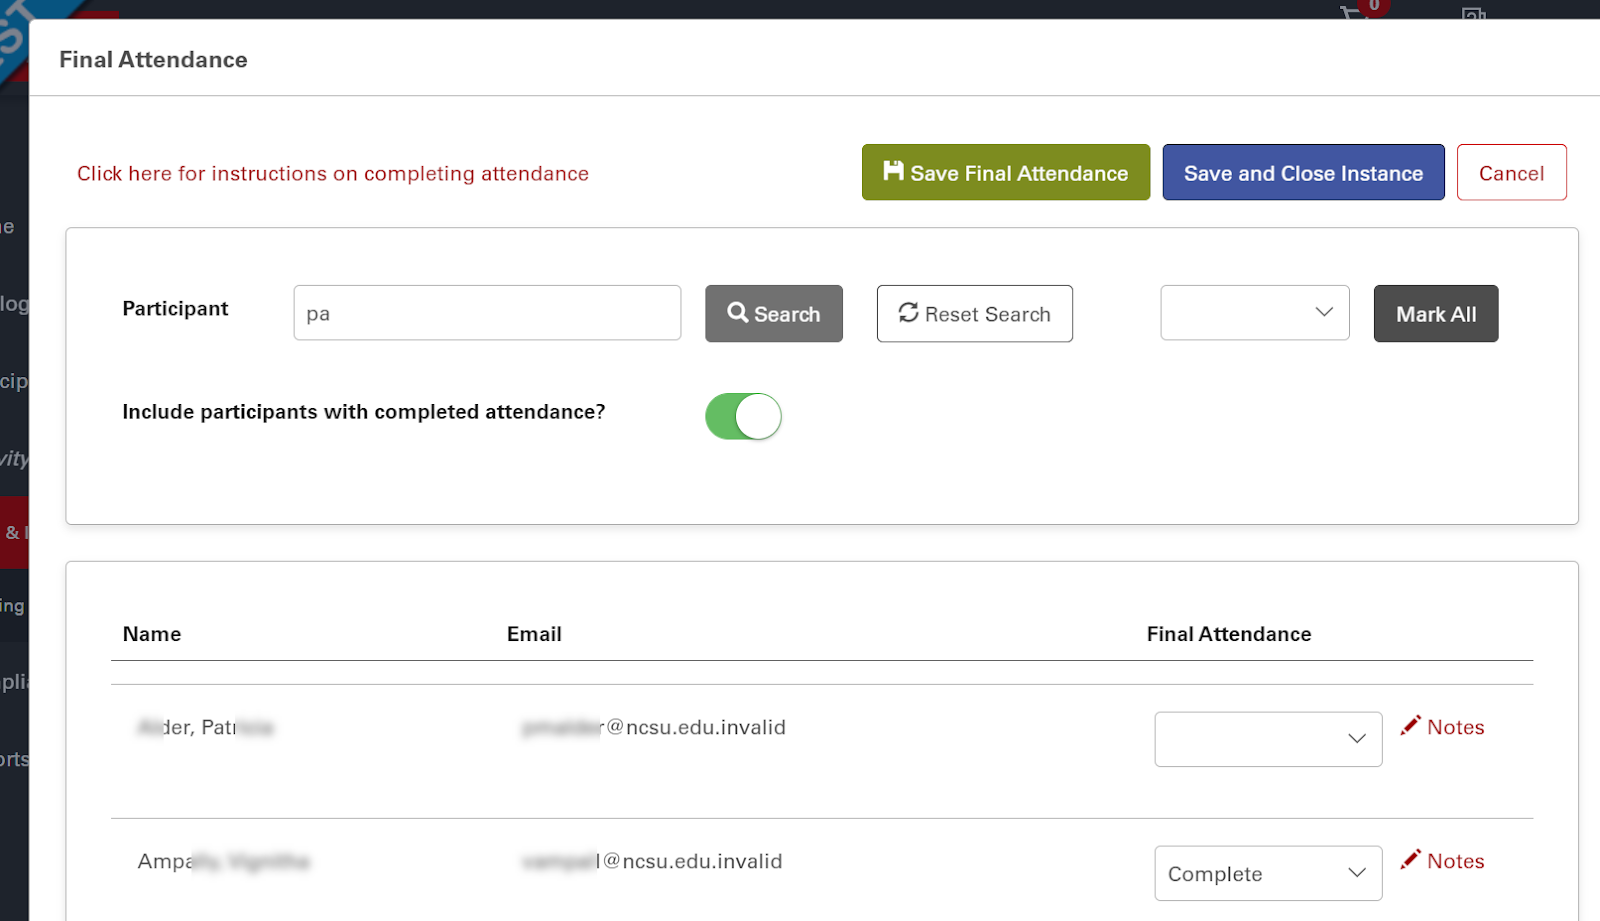
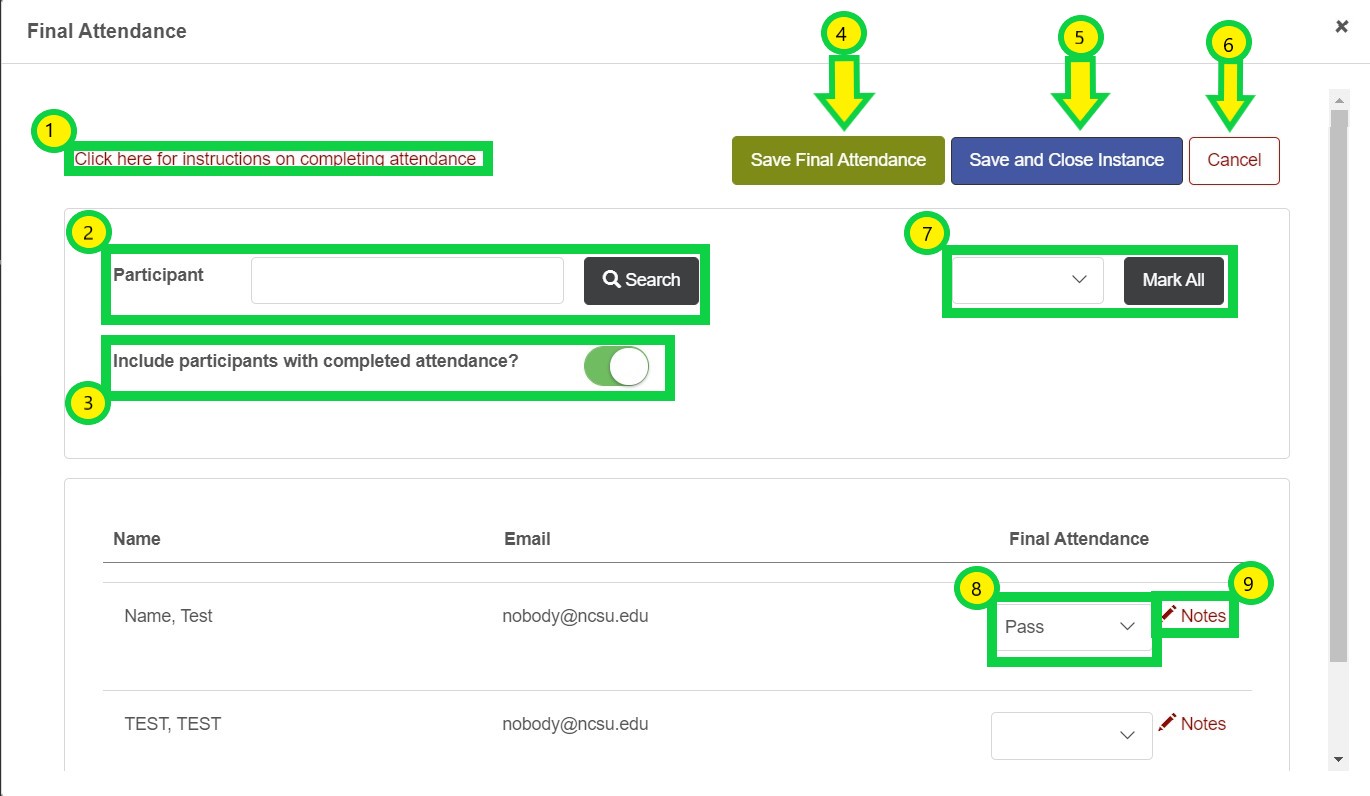
- Click Here for instructions on completing attendance: Link to the Help Document you are currently viewing.
- Participant: You can search for a particular participant using this search box. The search accepts partial terms and will search on Participant’s name, Unity ID, and email address. Once results return, you can select Reset Search to bring back non-filtered results.
- Include participants with completed attendance: By default, the attendance window will only display registrants who have not had their final attendance set. If you would like to include those who have already had their attendance set, change the toggle to Yes by clicking on it.
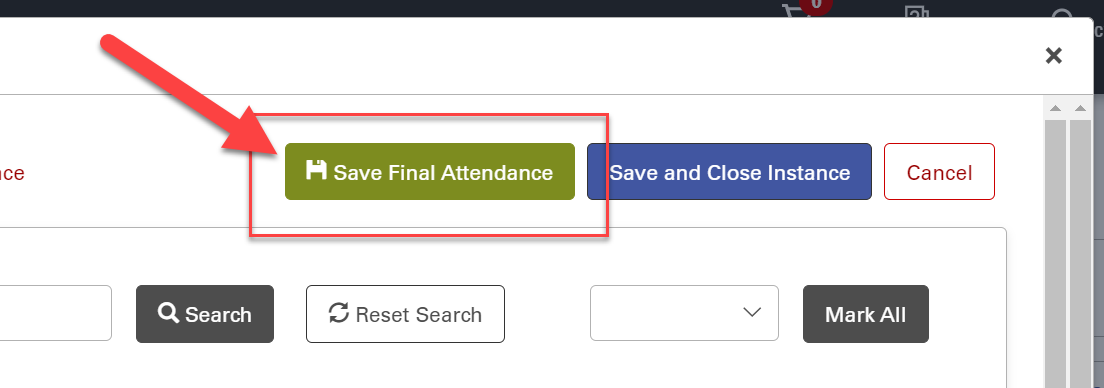
- Save Final Attendance: This button will save attendance without updating any settings on the instance.
- Save and Close Final Attendance: This button will save attendance and change the status of the instance to ‘Closed’.
- Instances should be marked as ‘Closed’ when attendance is completed and no additional follow up is needed.
- Cancel: This will cancel out of the attendance window. Any changes you have made prior to cancelling will not be retained.
- Attendance Status: If you select an attendance status and click Mark All, all empty dropdowns will be set to the attendance you chose for marking all.
- Final Attendance: Use this dropdown to indicate final attendance status per person. You will need to save before the attendance is official.
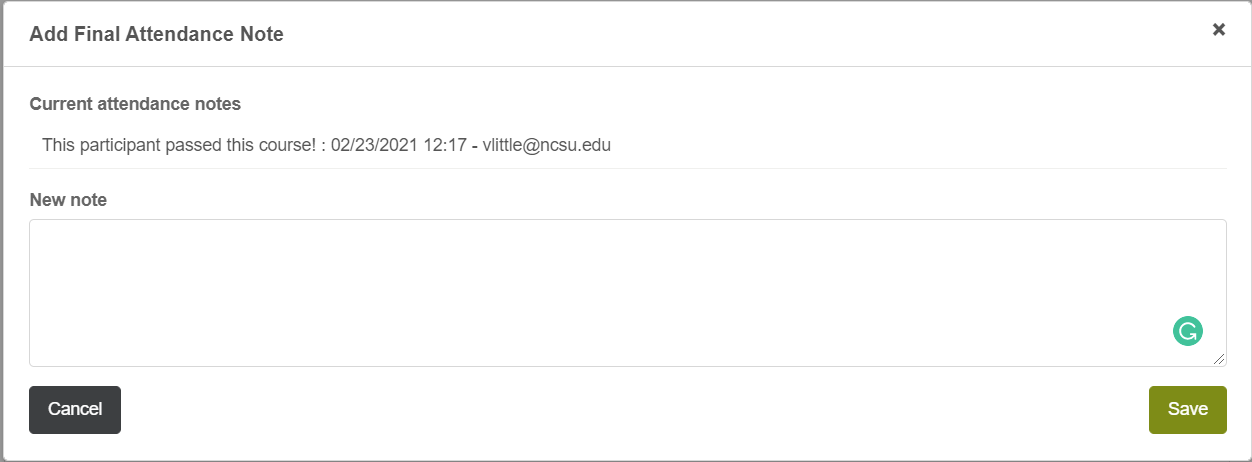
- Notes: Use this link to edit notes to the attendance. You are only allowed to add new attendance notes.
FOR MORE: see Detailed Attendance Help Guide
For questions or additional information you can view our support site at support.reporter.ncsu.edu or you can contact us at reporter_support@ncsu.edu.