Meepit time!

I've never written a pattern before, so I'm sorry if it's hard to understand! I did a lot of needle felting for the details but I'll explain how you might be able achieve a similar effect without it (all alternatives are untested).
Stitches Used:
- magic ring
- single crochet (sc)
- increase
- invisible decrease
- normal(?) decrease except four stitches instead of two
- half double crochet (hdc)
- foundation single crochet
Materials & Supplies:
I used thrifted/secondhand materials so I don't have any exact product names for most of these.
- Pink yarn
- Mine is probably acrylic and probably size 4 worsted.
- Suitable hook size (you don't want the stuffing to be visible)
- I used a 4.0mm hook
- Stitch markers
- Fiberfill
- Embroidery floss or yarn for nose and mouth detail
- Black and white yarn or wool roving for the eyes
- Light pink yarn or wool roving for the tail
- Needle felting needle
- Tapestry needle (for sewing)
If you use yarn instead of roving you will need a slicker brush and an iron!
Pattern:
All crocheting is done with the pink yarn! Head, body, and arms are crocheted in the round. Use a stitch marker so you don't forget where each round begins.
Head:
- 4 sc in magic ring (4 sts)
- 4 inc (8 sts)
- [1 sc, inc] four times (12 sts)
- 2 inc, 10 sc (14 sts)
- inc, 2 sc, inc, 10 sc (16 sts)
- inc, 4 sc, inc, 10 sc (18 sts)
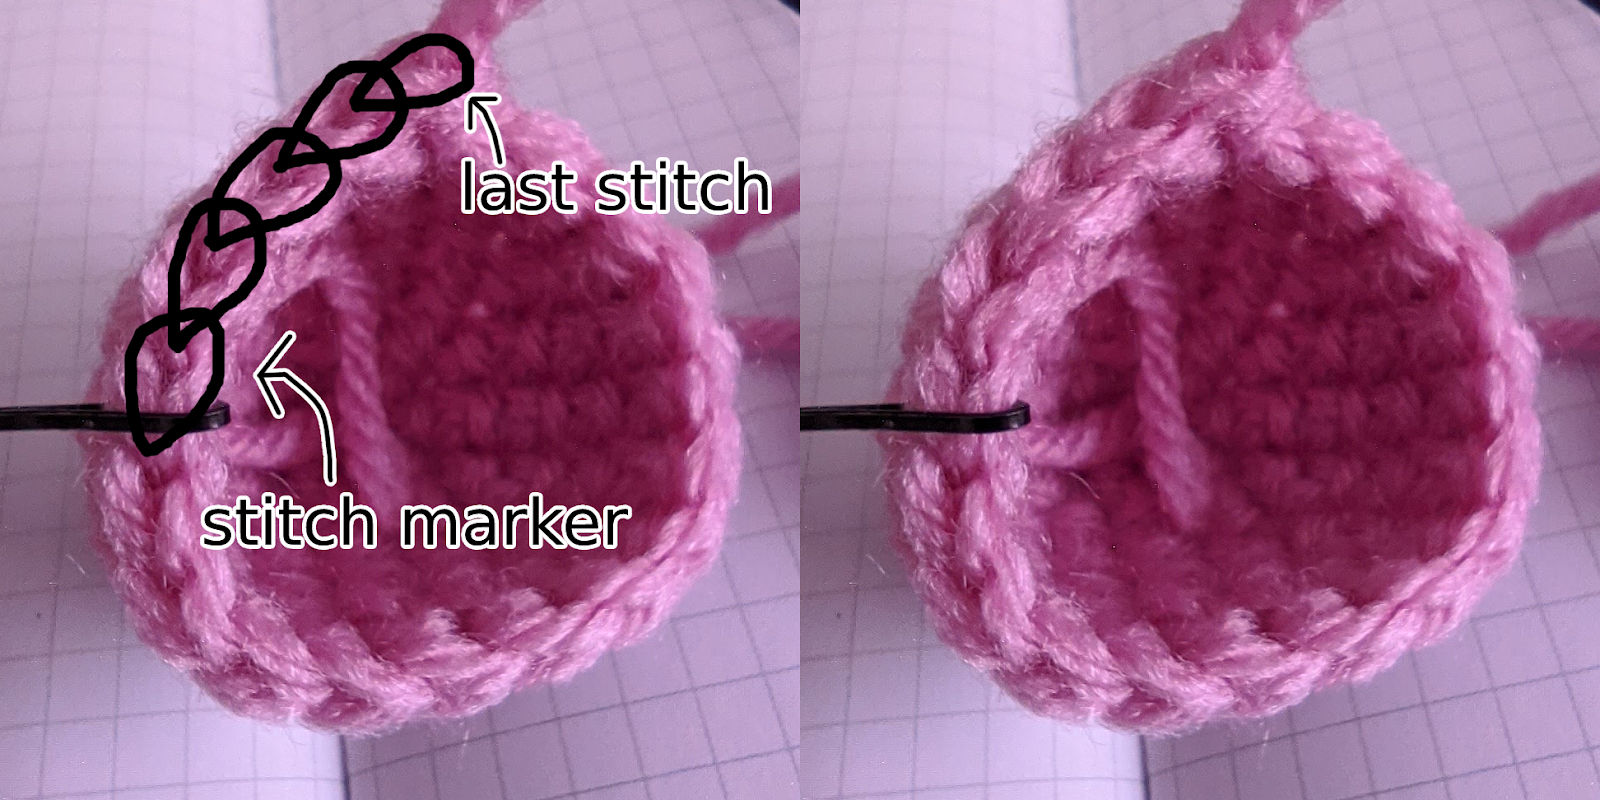
- sc around (18 sts)t
- cut the yarn and mark the fifth stitch from the end (see photo)
Body:
- 6 sc in magic ring (6 sts)
- 6 inc (12 sts)
- [1 sc, inc] six times (18 sts)
Do not cut the yarn or fasten off! We will now be joining the head and body.
- sc into the stitch you marked on the head. The direction of the stitches should be facing the same direction on both (clockwise if right-handed).
sc around the head and body (36 sts) - 36 sc around (36 sts)
- 36 sc around (36 sts)
- 36 sc around (36 sts)
- 3 sc, [1 sc, dec] four times, 6 sc, [1 sc, dec] four times, 3 sc (28 sts)
- 3 sc, 4 dec, 6 sc, 4 dec (20 sts)
Stuff.
- If you don't plan on needle felting the eyes, you may want to consider putting in safety eyes at this step (see here for where to position them)
- 1 sc, 4 dec, 2 sc, 4 dec, 1 sc (12 sts)
- sc, 4 sc together, 2 sc, 4 sc together (6 sts)
Note, I tried using 6 dec as well and the result is very similar if that's easier for you.
- Cut the yarn and fasten off. Sew your end through all six stitches and pull taut before weaving in.
Arms (make two):
- 4 sc in magic ring (4 sts)
- 4 inc (8 sts)
- [1 sc, inc] four times (12 sts)
- 6 dec (6 sts)
Leave the end open and stuff.
Legs (make two)
- 4 foundation sc
- Turn and make 4 sc into the posts (see photo-- I’ve highlighted the posts.)
- When making the second leg, flip over the first row after turning so the two legs will be more symmetrical. (The slip knot will be on opposite sides of each leg.)
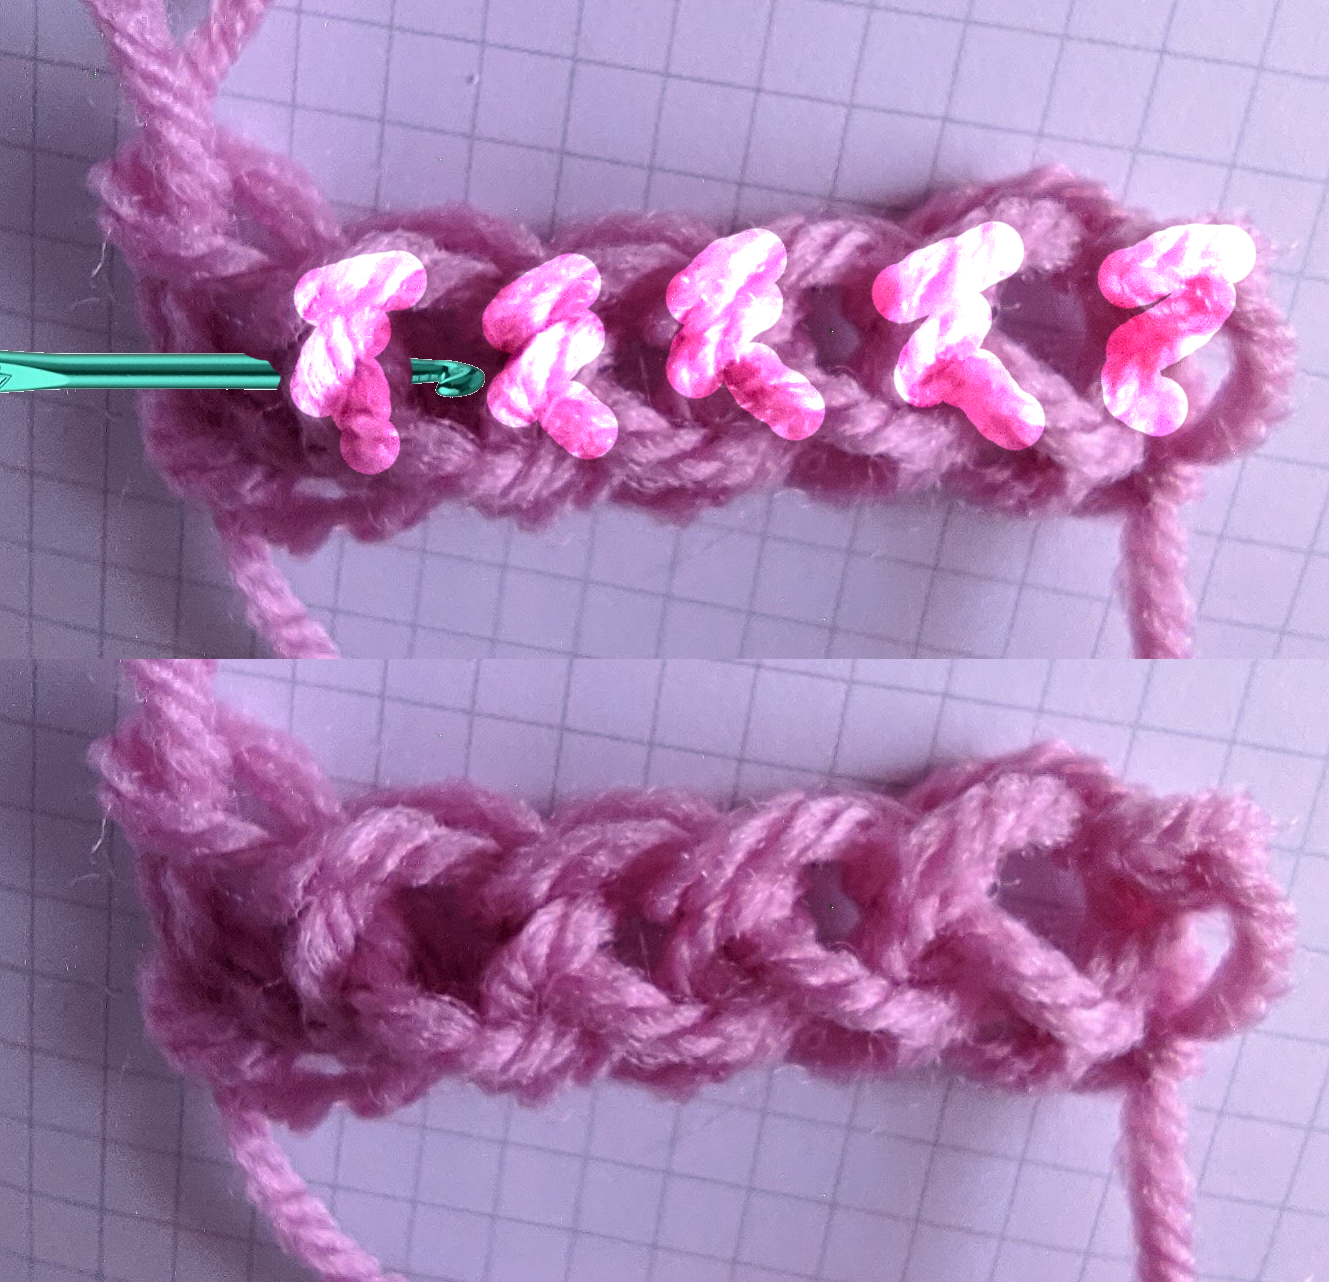
Please note there are 5, not 4, foundation single crochets in this photo, and I used a much larger hook so my stitches would be more visible.
Ears
Sorry if these instructions suck because this was the trickiest part to explain despite being literally only 6 stitches. Instructions below are for right-handed crocheting.
- With the snout facing you, sl into the top of the head where you want the outside of meepit's left ear to go (your right!)
- I did this between the eight and ninth row from the snout.
- sc into the next stitch, and hdc into that same stitch.
- Cut the yarn leaving ~8 inches and pull through. You will be using the remaining tail for the other ear so make sure it's long enough.
- Take the tail, and thread it back down through the post of the hdc, into the head, and back up through where the outside of the other ear will go (about 5 sts away on the same row). Do not pull tight.
- Flip the meepit so the snout faces away from you. Using the tail, sl into the top of the head where you want the right ear to go.
- sc into the next stitch and hdc into that same stitch.
- Thread that tail back down through the post of the hdc and weave it in.
If you can crochet with both hands, instead of flipping the meepit to face away from you on step 5, just switch hands-- it looks sliiiightly better/more symmetrical.
Assembly notes:
- One arm is sewn into the 6-8th rows from the belly, the other into the 5-7th
- Trust me, this looks more symmetrical than putting them on the same row because of where the round begins and ends.
- Both legs are sewn into the 4-5th row from the belly.
Needle felting details
I have suggested alternatives (untested but I'm pretty confident they'll work fine).
If you have yarn, not roving, use the slicker brush to unravel and fluff it up. I got the idea from this tutorial but the flat iron is not necessary except for the tail (a regular clothing iron works just as well).
Wool is best but acrylic felts just as well for our purposes, just make sure you don't melt it.
Nose/mouth
- Needle felt the white wool into a small rectangle for the teeth.
- Felt it in between the 4th and 5th row from the snout directly under it.
- You can also cut out a bit of white felt and glue or sew it on with sewing thread.
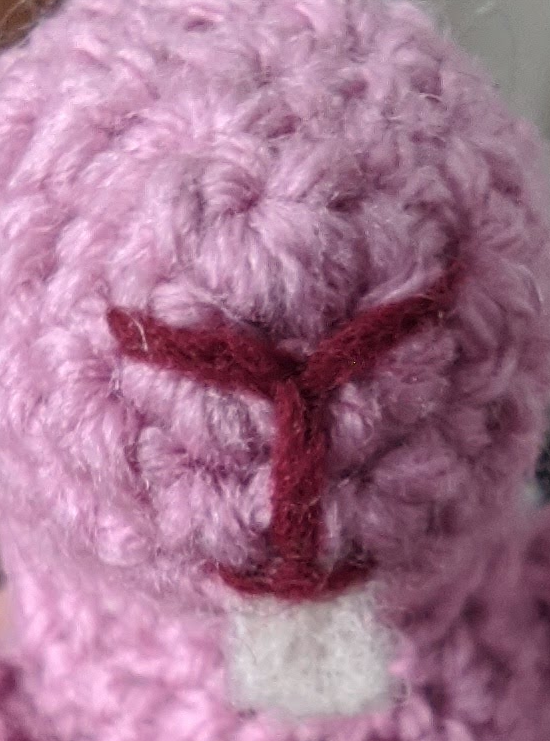
- With your embroidery thread or yarn, sew a Y directly under the magic ring. (see photo)
Eyes
- Needle felt them on about 2-3 rows from the ears. If you imagine a line from the base of the ears to the nose, the eyes should be on that line.
- Try and make them the same size and position. Anguish if you fail to do so.
- Alternatives:
- Cut out the shape from white felt and draw the pupils with a sharpie. Hot glue ‘em on.
- Hot glue and googly eyes for a fun, less creepy meepit
- If you added safety eyes earlier, take some white and embroider a ring around them for the sclera.
Tail:
- Needle felt it on about three rows from the legs
- I used brushed yarn longer than needed and trimmed it afterwards
- You can make and sew on a pompom instead. With how small the tail is, you'll probably need to trim it.