
Suite C Instructor Support Package
Updated Spring 2023

“Curate, Collaborate, and Create”

DOCUMENT CONTENTS
Join the
SuiteC Professional Learning Community
To post questions, view SuiteC tutorials, & access digital resources: https://bcourses.berkeley.edu/enroll/8RMN4M
SuiteC Overview
What is SuiteC?
SuiteC consists of three tools embedded on the left side menu of your Canvas bCourses page. They include:
- Asset Library
- Whiteboards
- Engagement Index
The tools are designed to work seamlessly with the rest of your bCourses experience and offer increased opportunities for peer to peer sharing and collaboration, for curating and remixing course media such as PDFs, videos, and images, and for tracking and assessing student work online. All three of the SuiteC tools are mobile and tablet friendly via the browser (not the Canvas app).
Who created SuiteC?
SuiteC is the product of a collaboration between UC Berkeley faculty and graduate students at the Graduate School of Education, Art Practice, and Berkeley’s Research, Teaching, and Learning unit. Original development was supported through Innovation Learning Technology Initiative grants sponsored by the University of California Office of the President and Online Education. The goals behind this effort were to provide instructors access to innovative tools that were simple to use, tightly integrated into the current bCourses experience, and informed by current research in online learning and digital pedagogy.
Why use SuiteC in your course?
SuiteC offers instructors and students a unique way to share and view media inside of bCourses beyond comment threads in Discussions. It is an intuitive and visual way to organize and access course content, such as PDFs, videos, and other media, while providing social features such as commenting and liking media.
Tagging and filtering media content allows students to easily revisit content from across a course, aiding in synthesizing and reviewing course material over time.
SuiteC also provides a customizable assessment tool for instructors to quickly gain a high-level sense of student participation and activity in course.
Asset Library
Video Tutorial Links:
Full Tour: https://www.youtube.com/watch?v=cTVaDgNnA2M
Add Media: https://www.youtube.com/watch?v=_lL_33lbqZw
Add Comment: https://www.youtube.com/watch?v=q94tIYBkjr0
Asset Library Key Features
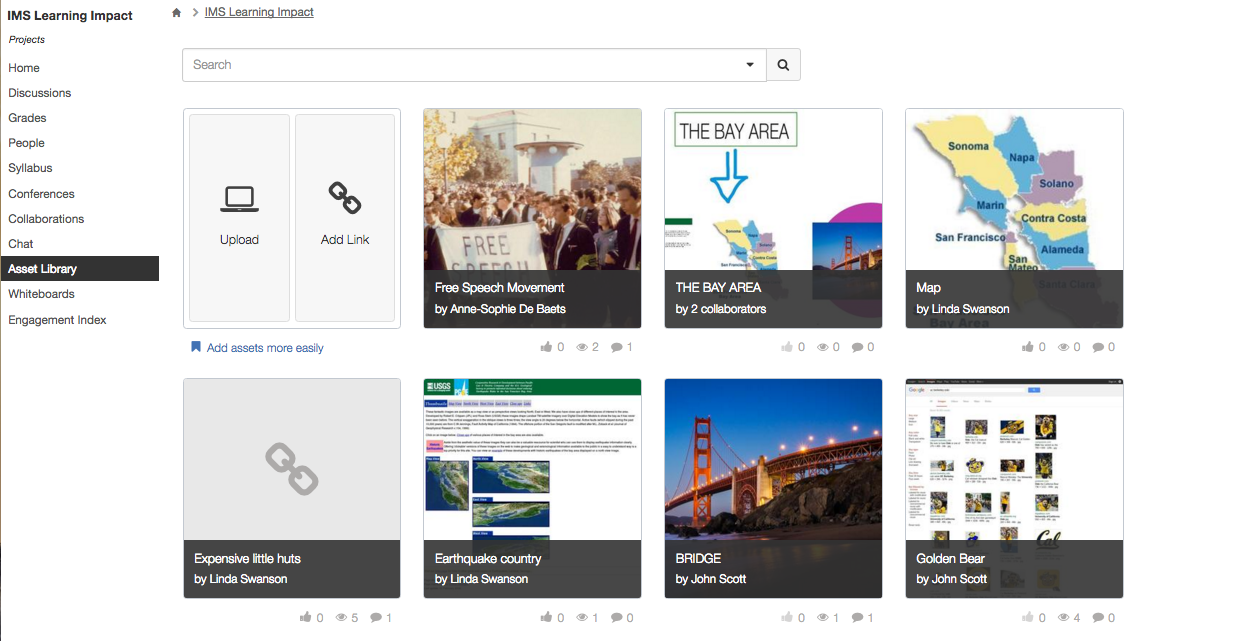
The Asset Library consists of a thumbnail-view, infinite-scroll mediafeed where students and instructors can post and view media of most common file formats (urls, gif, jpgs, pdfs, docx). Students can like, comment, and track views on posted media.
Browsing the Library
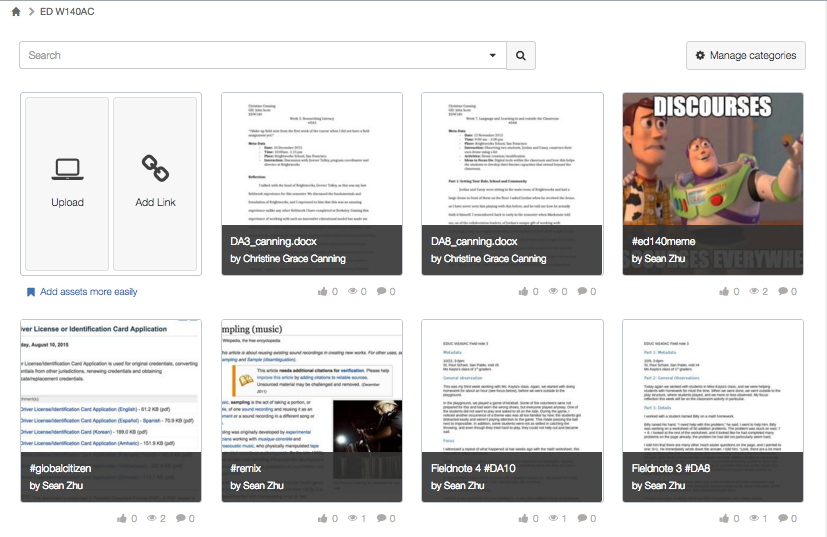
When you enter the Library, Assets are arranged in the Library by most recently added. The Search allows you to filter the Library by keywords or by Categories. Categories are generated when an instructor creates an Assignment in bCourses, and is an easy way to track and sort Asset submissions to the Library. The Advanced Search allows you to filter by Uploader (who added the Asset) and Asset type (File, Link, or Whiteboard). When browsing the library, student and instructor content appears adjacently. Copying and pasting URLs from Asset Library searches or from a single Asset allows you to create hyperlinks on external pages (such as in Canvas Discussions, Canvas Pages, or an external site) to specific content within the Library. You can like an Asset, view the number of times an Asset has been viewed, and read and add comments added to an Asset. You can also click a hashtag in an Asset description, the date added, or the user to view other related Assets.
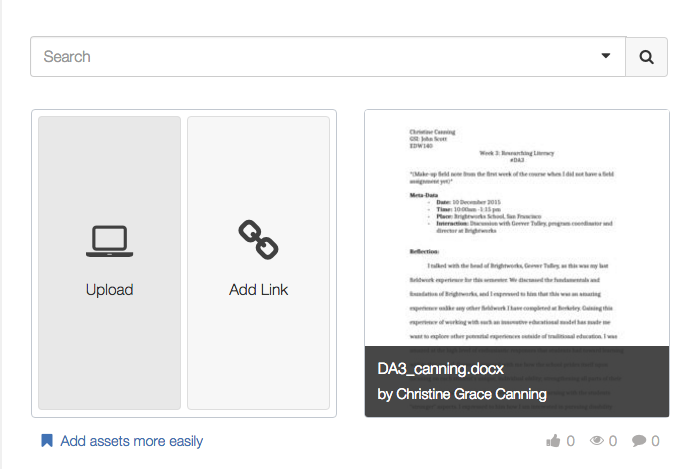
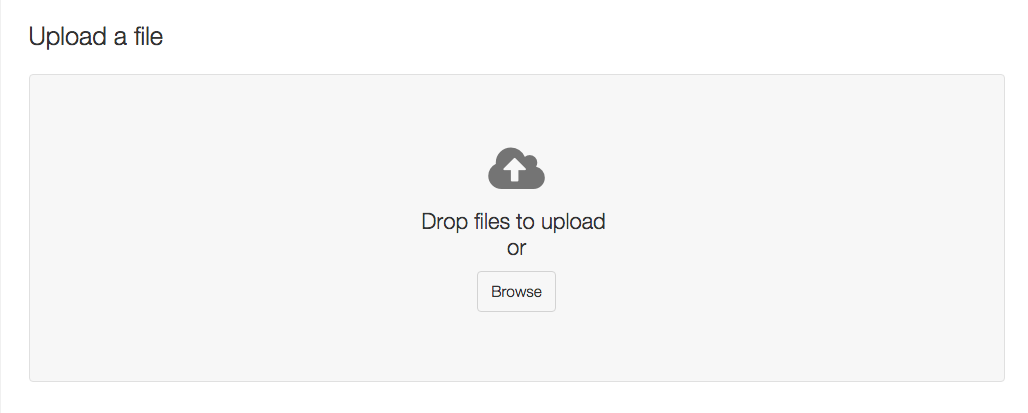
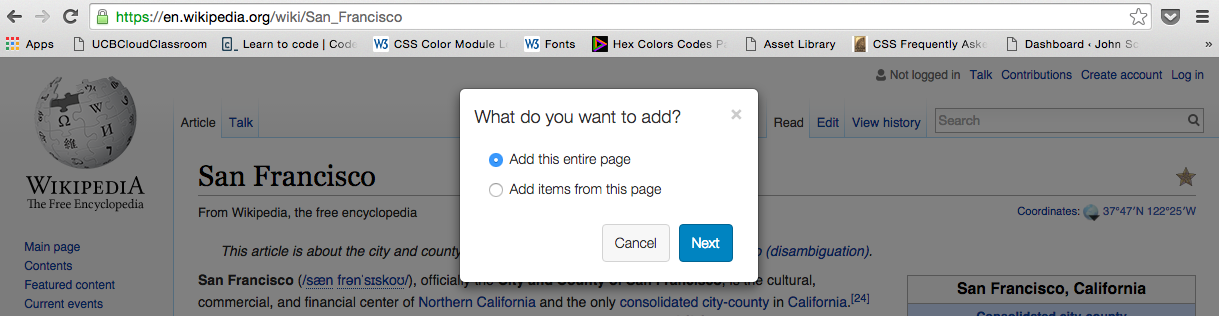
Uploading Files
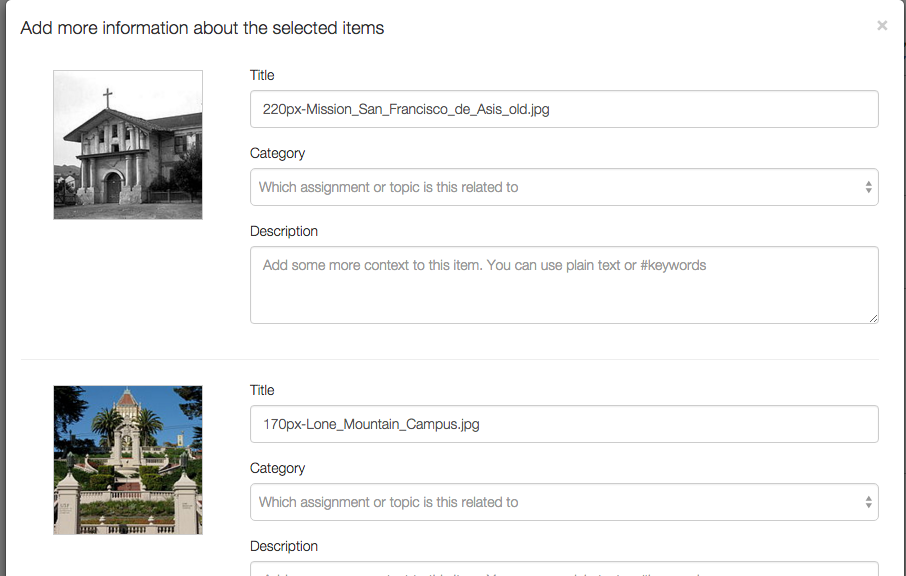
By selecting ‘Upload’, instructors and students can add a file from their computer, tablet or phone directly to the Asset Library. There is a 10MB file size limit on your uploads. Once you choose a file to upload, the Asset Library will automatically generate a thumbnail preview for your file, which will be how the Asset appears in the Library Feed. It will also generate a title for your Asset, which you can edit, and you can add a description (including hashtag keywords). Instructors and students can also select a Category as a descriptor for an Asset.
Adding a Link
By selecting ‘Add Link,’ instructors and students can add a link to a webpage, YouTube or Vimeo video, and other web content such as third party whiteboards. You can then add a title, description, and category to the linked Asset. When published, Linked Assets include direct access to the original web source. If a preview does not generate, or a webpage has changed, you can use the refresh button to generate a new preview image for a link.
Adding a Hashtag Descriptor
When you add an Asset to the Library, you can include a #[keyword] in your description. #[keywords] added to asset descriptions can be found using the search function. Hashtags are an effective way to organize thematically related course content.
Upload to Asset Library through Assignments
Students can upload a file to a bCourses Assignment, and it will appear in the Asset Library. Instructors can control whether or not an Assignment submission is automatically added to the Asset Library. This feature enables new use cases and allows for a submission to appear both in the Canvas Speedgrader for easy grading, and in the Asset Library for visibility. Note that there may be a delay between the time when an assignment is submitted, and when it appears in the Asset Library.
FAQs
What happens if a student adds an Asset that exceeds the file limit?
The student will receive an error message and the upload will be terminated. For larger files, in particular videos, it is suggested to host the videos on a site such as YouTube or Vimeo, and add a Link to the video in the Asset Library.
Does the Asset Library have a capacity limit?
There is currently no cap on the number of Assets a course can add to the Library.
Why isn’t my Asset generating a preview?
Certain file types, such as documents created using the Text Editor Pages, will not generate a thumbnail and will not be viewable in the Library. Such files can be downloaded from the Library and viewed on your computer or tablet. Sometimes it can take longer to auto-generate the thumbnail based on the file type, or your Internet may be running slow in generating previews. Refreshing your browser page can help in reloading the previews.
Can I add a custom thumbnail?
Currently, you cannot add a customizable thumbnail. All thumbnails are autogenerated.
Can I add Google Docs to the Library?
Yes, you can add a link to a Google Doc into the Library, but you cannot edit a Google Doc from within the Library. Based on the sharing settings in your Google Doc, students and instructors can access the Doc through the source link and edit in the Google environment.
Why is the text so small when viewing in the Library?
Depending on the original file, font sizes may appear small. Use CTRL (PC) or Command (Mac) and +/- keys to zoom in or out on a document. Use the +/- buttons to zoom in or out, and option (Mac) or alt (PC) to pan a Whiteboard.
Why can I interact with some linked web pages and not others? Web pages are coded in lots of different ways, and so can interact differently within the SuiteC system. Remember, when viewing a website that only previews in the Library, you can access the live web page from selecting the Source link.
Can I add ‘private’ Assets to the Library that can be viewed only by me?
Currently, all the Assets added to the Library can be viewed by the entire class. There is no privacy feature or way to make an Asset private.
Can students and instructors delete an Asset?
Yes, students and instructors can delete an Asset.
Is there any connection between the Asset Library and Media Gallery?
While they can serve similar purposes, there is no direct connection between the Asset Library and the Media Gallery. The Asset Library is open to contributions by all students by default. By default, only instructors can add items to the (Kaltura) Media Gallery. It’s possible to change this setting and allow all students to contribute to the Media Gallery, but this is not the default state. Further, the Media Gallery is limited to video, audio, and image files. The Asset Library supports documents and all file types.
Whiteboards
Links to video tutorials
Whiteboard Full Demo: https://youtu.be/Dge9_dDOjd0
Whiteboard Shapes: https://youtu.be/EvsvLWbGY50
Export to Library:https://youtu.be/6QRxrLWgjqA
Whiteboards Key Features
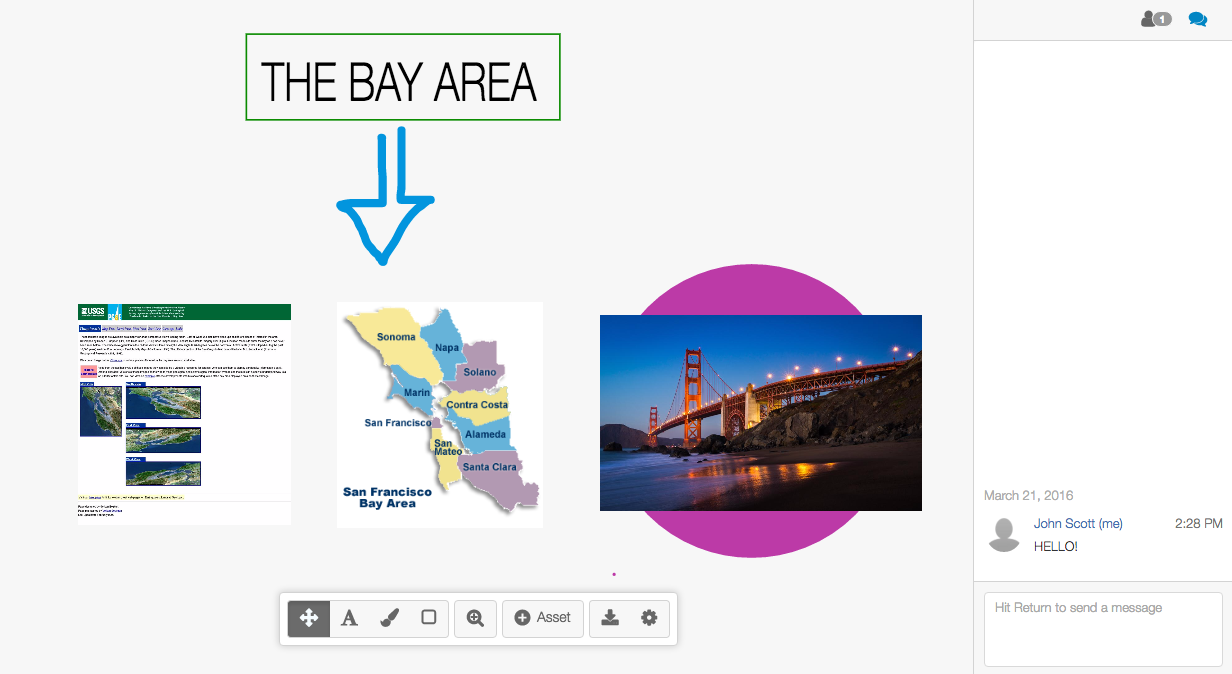
Whiteboards offer an infinite canvas, where students can invite each other to a blank canvas, and synchronously create multimedia content, which is then published back into the Asset Library. The editor tools include text (with colors), basic shapes, freehand drawing, layering, resizing and rotating and rearranging of object layers. Students can also directly access the Asset Library to import media, such as movies, images, pdfs, or GIFs
Setting up a Whiteboard
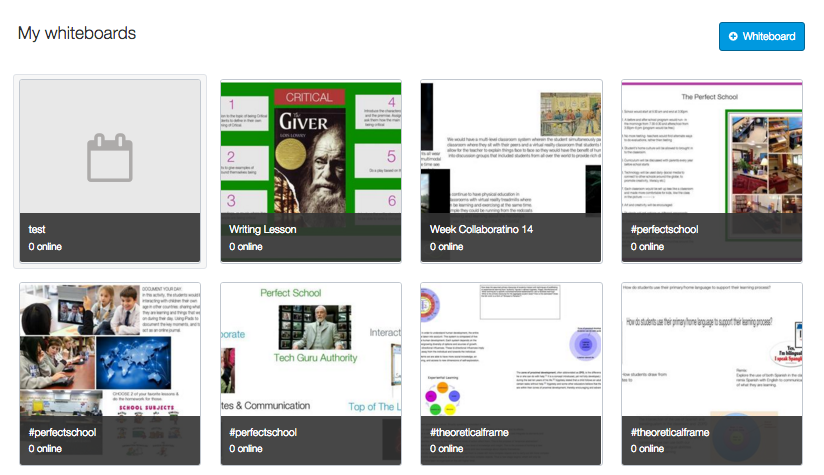
When you select “Whiteboards’ from the left menu panel on your bCourses page, you will be directed to the Whiteboards page where you can either create a new whiteboard or view whiteboards you are currently working on or previously published. You can access any current or previous Whiteboards by selecting the desired thumbnail. Whiteboards are organized by most recently created.
If you select create a New Whiteboard, you will be directed to a page to add a Title and add your collaborators. Once you have completed this step, you will be directed back to the Whiteboards main page where you can then click on your new Whiteboard, which will appear as the first thumbnail on your page.

Navigating the Editor Panel
When you open a new Whiteboard, you have a blank canvas for creation. Anything you add to the Whiteboard [Text, Shapes, Drawings, Media] become objects that you can manipulate [Moving, Rotating, Resizing, Layering]. Hovering over an icon will reveal what each tool does. Course instructors appear in the Whiteboard with a graduate cap icon next to their names when inviting collaborators.
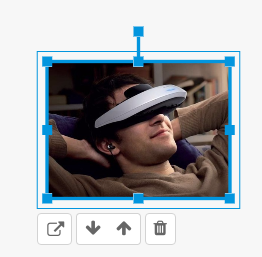
Cross-Arrows Icon: Selecting this tool allows you to move objects around as well as access their object controls. You can also access this tool simply by clicking on any blank area of your Whiteboard canvas.
Once you have selected an object, a blue border will appear around it as well as icons for manipulating it. You can stretch it or shrink it vertically by grabbing and dragging its horizontal axis. You can stretch it or shrink it horizontally by grabbing its vertical axis. By grabbing and dragging a corner point of the object, you can stretch or shrink it in proportion. By holding down the shift key when dragging, you can maintain the original proportions of an object.
By grabbing and spinning the handle of a highlighted object, you can rotate the object in 360 degrees.
You can delete the highlighted object by selecting the trash can icon. By selecting the up or down arrow icon on a highlighted object, you can move the object layer to the front or back of your canvas to layer multiple objects on top of one another.
You can select multiple objects by either holding down the shift key and selecting objects you want to cluster, or by clicking onto a blank section of your Whiteboard canvas, and then holding and dragging over all the objects you wish to select. This allows you to move multiple objects, resize them proportionally, rotate, and delete.
You can copy + paste a selected object as a shortcut to create duplicates of an object.
Text Icon: When you first select the text tool, you can choose a font color from the palette and style (title or normal). You can then click anywhere on the canvas to begin adding text. Once you click, a blinking cursor will appear. You can copy + paste text from another document onto your canvas, and then reformat the text as you like.
Once you have finished typing, you can click onto a blank part of the canvas or onto the cross-arrows icon to resize or rotate. By clicking twice on the text, you can edit what you have written.
Paintbrush Icon: When you first select the Paintbrush tool, you can choose a color and brush thickness for free-hand drawing on your canvas. You can then click + hold anywhere on the canvas, and then use your mouse, trackpad, or finger to begin drawing. Releasing your hold will end your drawing action, and the line will become an object layer which you can resize, rotate, layer, or delete. You cannot edit a line once it has become an object.
Shapes Icon: When you first select the Shapes tool, you can choose a color, as well as a variety of shapes, thicknesses, and fill options. You can then click + hold + drag to generate your shape. Once you release your drag, you can resize and rotate the shape object.
Magnifying Glass: When you drag an object to the right vertical or bottom horizontal boundaries of your canvas, the canvas will automatically expand. The Magnifying Glass allows you to zoom in on a specific area of the canvas. This tool is useful when creating a very large Whiteboard or when you are collaborating with many others and want to have spaces on the board for each participant. When zoomed in, the magnifying glass will automatically change to ‘zoom out’ where you can view the entire Whiteboard.
Add Existing Asset: Allows you to search the Asset Library for existing media to add to your Whiteboard. Check the box at the bottom right of an Asset or the Asset thumbnail (you can select multiple Assets at a time), and then click ‘Add Selected.’ Select a highlighted Asset again to deselect it. The selected Assets will drop onto your canvas. When searching the Library, select the small triangle in the Search bar for an Advanced Search.
Add External Link: ‘Add Link’ allows you to add a new link from the web to your Whiteboard, such as a video or website. You can check the box “Also add this link to Asset Library” if you wish to make the link available in that location as well as your Whiteboard.
Upload File: Selecting ‘Upload New’ allows you to add a new file from your computer to your Whiteboard. You can check the box “Also add this file to Asset Library” if you wish to make the link available in that location as well as your Whiteboard.
Once Assets have been added to your Whiteboard canvas, you can select the Asset as an object to drag, resize, and rotate them like any other object. You can also view the original Asset in the Library in a new browser tab by selecting the ‘Open Original Asset’ icon (square with arrow) below the Asset and to the left of the layering icons.
Export Icon (Down Arrow to Rectangle): When you first select the Export tool, you can either choose to export (publish) your Whiteboard to the Asset Library, where you will be prompted to add a title, description, and category to your Whiteboard. It will appear in the Asset Library as any other Asset. Or, you can choose to download your Whiteboard to your computer as an image file. Once a Whiteboard is downloaded it is a static image and the media content (such as videos) can no longer be played.
Gear Icon (Edit Settings): When you select the Gear icon, you can edit the title of your Whiteboard as well as invite or remove collaborators. Only the owner of a Whiteboard can add/remove collaborators, edit the title, and publish the Whiteboard.
Collaborators
On the right side of your Whiteboard page, you can view a list of collaborators, and see which ones are online now. Collaborators (user icon with number) reveals the total number of collaborators who have been invited to the Whiteboard. If user names appear in Green, this means they are currently on the Whiteboard. If user names appear in Red, this means they are not currently on the board.
Google Slides and Jamboards
Whiteboards composed using the Google Jamboard or Google Slides tools can be added to the asset library using the add link tool. Be sure to make sure they are publicly visible in the google sharing settings.
FAQs
How many people can collaborate on a Whiteboard?
There is no limit to how many collaborators can be added to a Whiteboard or how many collaborators can work simultaneously on a Whiteboard. However, if too many users are actively editing a Whiteboard at the same time, performance issues may result, such as lagging or slow loading. Groups of 4-6 are optimal for simultaneous editing.
How do I know when someone has edited the Whiteboard?
All changes your collaborators make to a Whiteboard appear instantly in your view of the Whiteboard. Currently, the Whiteboards tool does not track changes for a user, so you will not be able to revert to a previous version of a Whiteboard or reveal changes to a Whiteboard made by Collaborators. You can publish multiple versions of the same Whiteboard to keep track of how a Whiteboard evolves over time.
Can I remove a Collaborator from my Whiteboard?
Yes, if you are the owner of the Whiteboard, you can remove a collaborator by going to the Whiteboard settings in the Toolbar. All collaborators on a Whiteboard are listed as authors once the Whiteboard is published to the Library.
Can I edit a Whiteboard after it has been published?
Yes, you can always return to and edit a Whiteboard so long as the Whiteboard has not been deleted by the Whiteboard owner. When you edit a published Whiteboard and re-publish the Whiteboard in the Library, both the old version and the new version of the Whiteboard will be visible in the Library. If you want to remove the old version, simply delete the Asset.
Who can view an unpublished Whiteboard?
Only invited collaborators and course instructors can view an unpublished Whiteboard. All invited collaborators and instructors have editing capabilities inside of a Whiteboard- there is currently no ‘read-only’ invitation to a Whiteboard.
Is there a maximum number of Assets I can add to a Whiteboard?
There is currently no limit on how large a Whiteboard can become, or how many Assets you can add to a Whiteboard. Like any web-based tool, the ‘heavier’ a page becomes (the more media you add to something) the more likely performance issues are to arise, such as lagging or slow load times.
Can I edit or crop image/media inside a Whiteboard?
Currently, outside of layering objects created with the paintbrush tool and shapes tool on top of media, you cannot edit the Asset itself beyond resizing, rotating, and layering.
Changes my partner has made are not appearing in my view of the Whiteboard?
Any time you are experiencing issues with editing or updating in your Whiteboard, refreshing your browser will reload the page and likely fix any lingering issues. Poor Internet connections can also affect the performance of Whiteboard features.
Does the Whiteboard reveal what individual collaborators added to a Whiteboard?
Currently, the Whiteboard does not automatically indicate what an individual collaborator contributed to a Whiteboard. If a creator wants to highlight individual contributions, you can use the various editing tools to spotlight or point to individual contributions within a Whiteboard.
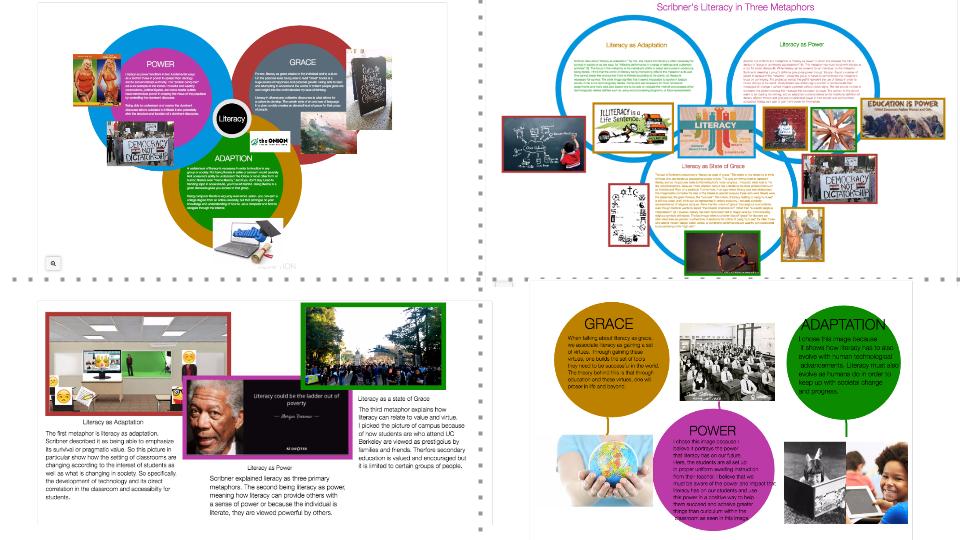
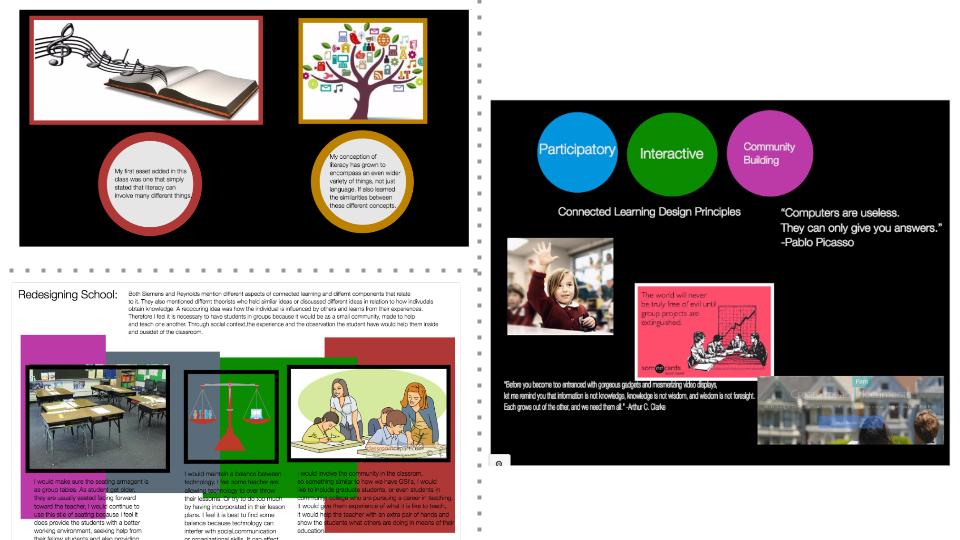
Examples of Whiteboards:
Engagement Index
Engagement Index Key Features
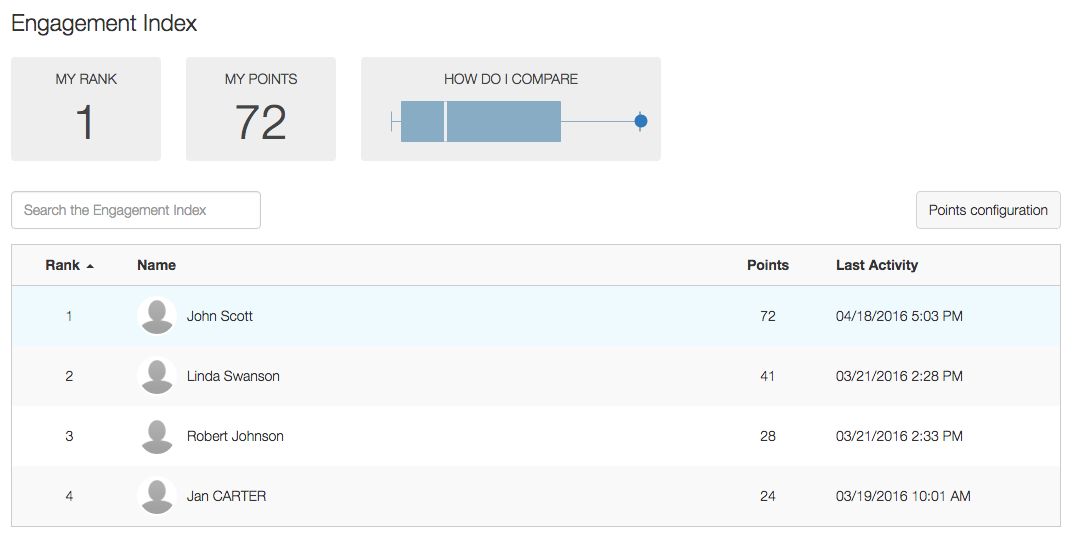
The Engagement Index provides a high-level view into student participation in the course. It tracks student activity on the site and displays this activity as a numerical score on a course leaderboard. Teachers can customize the point value of various site activities, such as awarding one point for ‘liking’ someone’s post and two points for having one’s work ‘liked.’
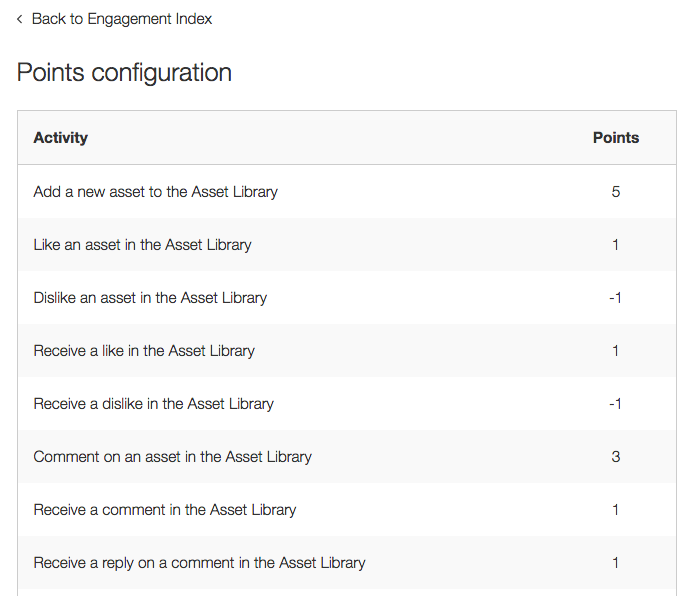
Customizing Point Values
Instructors can set point values for a number of actions students take within SuiteC, and bCourses Discussions / Assignments. Instructors can adjust point values for contributions to promote peer engagement.
Leaderboard
The leaderboard displays the cumulative point total from all activities tracked by the Engagement Index, based on the specific point values for each activity designated by the instructor. It ranks students from highest to lowest point total. Students can choose to opt-in to the leaderboard, and can only view the scores of other students in the course if they opt-in.
FAQs
Can the Engagement Index award points for quality of work?
Currently, there is no system for evaluating and measuring the quality of activity, just the quantity of activity. It is meant as a high-level view, and instructors can use the numerical score as a baseline for further qualitative evaluation.
Can an instructor make changes to the Engagement Index point total?
The instructor can adjust the point values for activities at any time during the course, and the Engagement Index totals will reflect the changes. However, the instructor cannot manually add or subtract points from an individual student.
What happens if a student ‘games’ the system?
If the Engagement Index is directly tied to a student’s grade, he or she might try to rapidly accumulate points by ‘liking’ a number of Assets in a short time or by adding a number of repetitive comments to Assets. Instructors can try to limit ‘hollow’ engagement by describing that such behavior is not conducive to an effective learning community and deducting points when observed.
Impact Studio
Availability
The Impact Studio is currently available by request. Please email bcourseshelp@berkeley.edu with the URL of your course site to request access.
Impact Studio Key Features
The Impact Studio provides visualizations about students' contributions to a course and how students interact with each other's contributions. This tool enables fostering a sense of community and provides a space to more easily find collaborators for group projects.
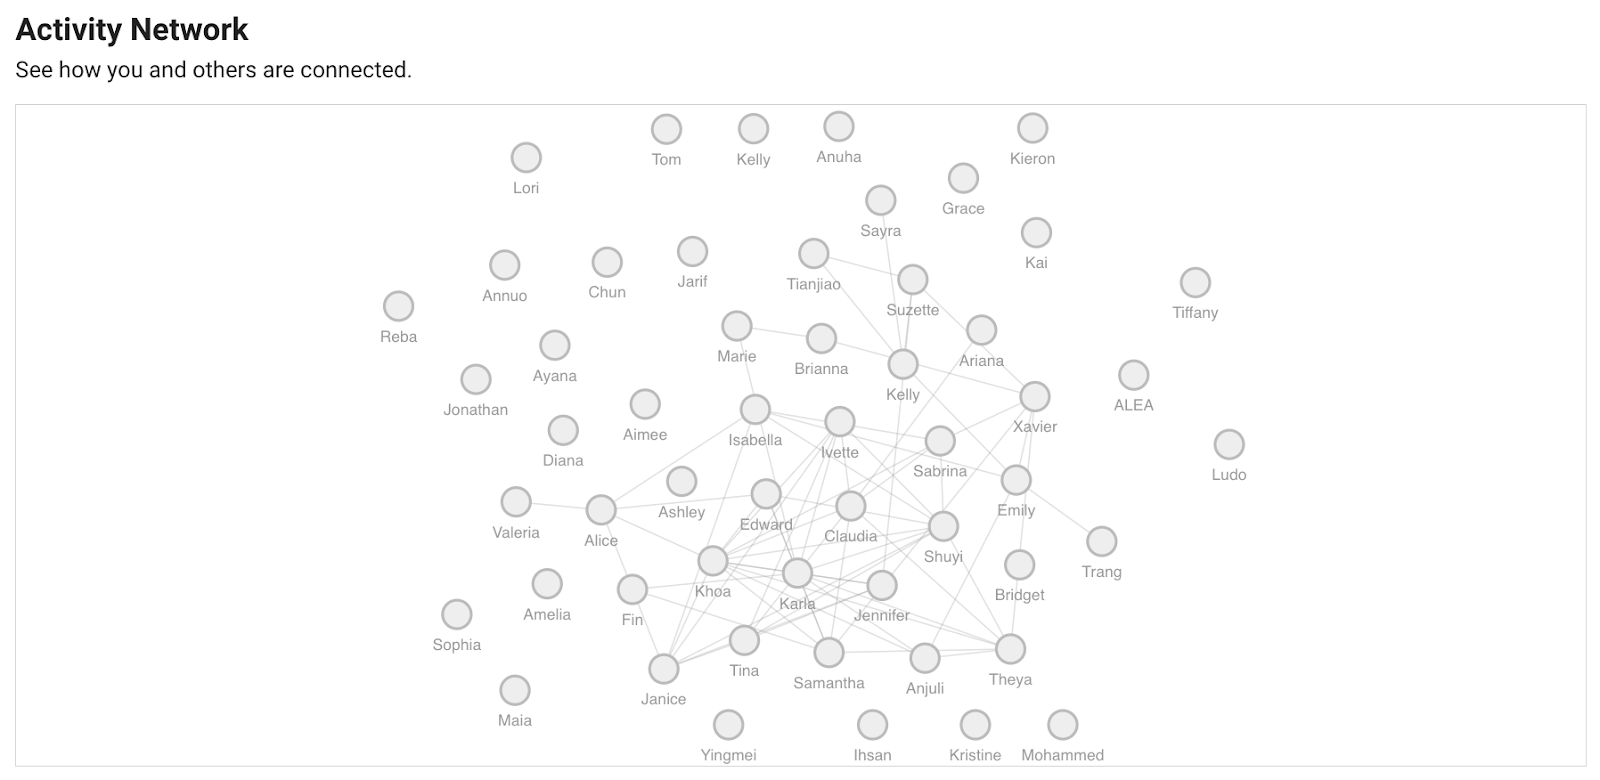
Activity Network
The activity network displays a node for every student in the course. Students who have interacted with one another using SuiteC will display a line or connector between their nodes. Altogether, this creates a network diagram of how all the students in the course have engaged with one another.
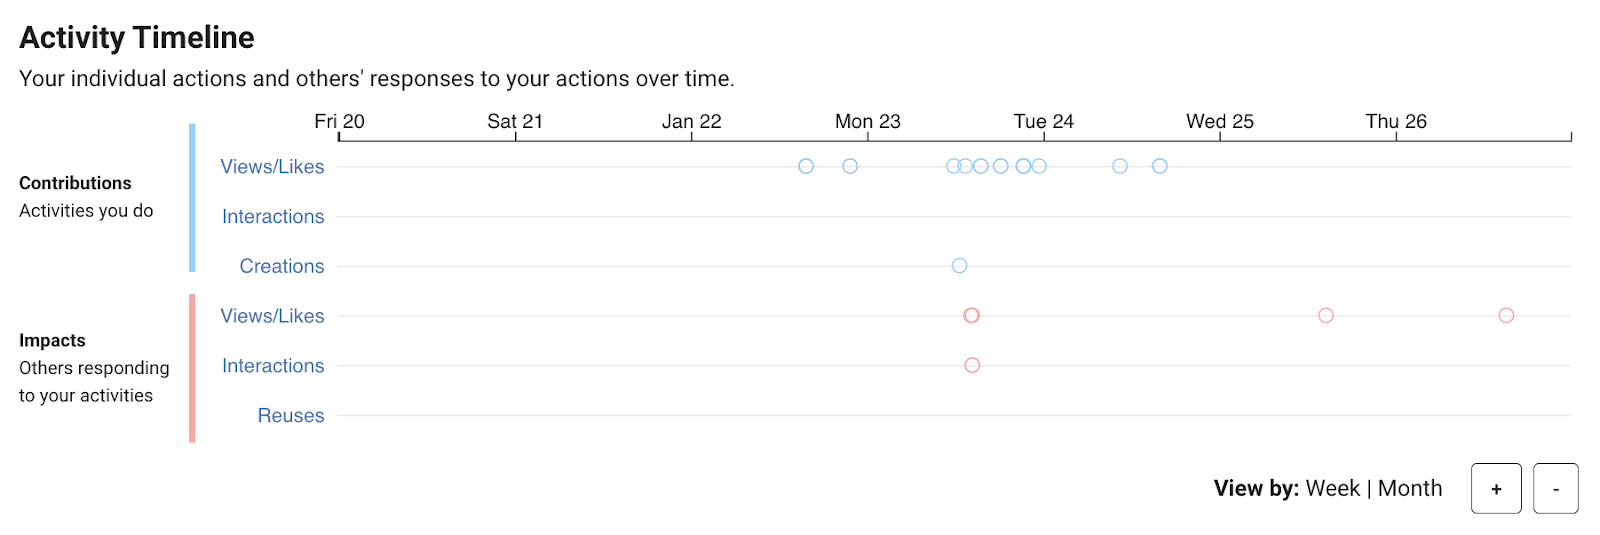
Activity Timeline
The activity timeline displays a specific student’s activity over time. You can identify when a student made particular types of contributions, and when they were active or inactive. The activity timeline is divided into two sections: the top/blue section shows activity made by the user. The bottom/red section shows activity made in response to the user.
Finding Collaborators
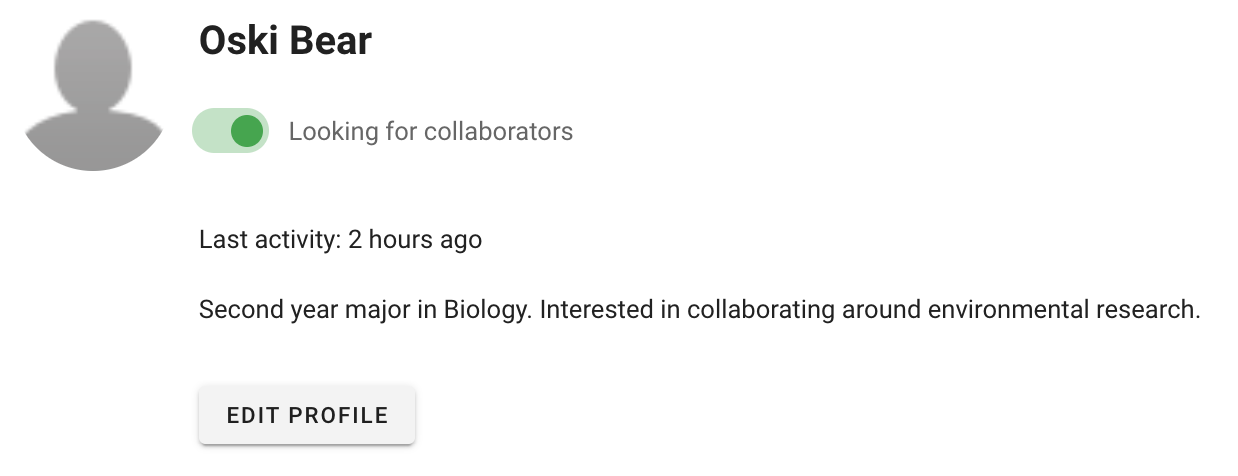
Students can toggle the “looking for collaborators” switch to signal to their classmates that they are available. Students can also create a brief (255 character) bio to communicate their interests. Students can easily send messages to other students open to collaboration. You can find other students looking for collaborators in the Engagement Index.
FAQs
Please send questions to bcourseshelp@berkeley.edu
Getting Started with SuiteC
The SuiteC tools are available in all bCourses sites, and must simply be enabled to use. See this knowledge base article for instructions on enabling SuiteC. Once enabled, the Asset Library and Engagement Index are available to all members of your bCourses site, and there is no additional sign-in or authentication necessary to access the tools. The tools are designed to support a range of uses, a few of which are outlined below. An instructor may choose to use one tool more than others, for example, focusing activity around the Asset Library or only using the Engagement Index to track points.
A Space for Sharing and Collaborating
The Asset Library can serve as a formal or informal space for sharing course-related media, generating ideas, and interacting with course participants. Instructors can invite students to add to the Library freely during a course and engage in commentary around artifacts.
Pre-Populating the Asset Library to Flip your Classroom
The SuiteC tools are ideally suited for providing an interactive environment for students to engage with instructional content, such as video lectures, multimedia content curated from the web, PDFs and Google Docs, and even powerpoint presentations.
Create department-level Asset Libraries to share Instructional Resources
Tag content to easily filter across subject, content-areas, or courses. Share feedback, lesson plans, or learning activities. Use a department-level library to create course libraries and analyze student engagement with learning content across courses.
Develop an Analytics Strategy
SuiteC delivers detailed click data back to instructors about student engagement and participation. Organize Assignment submissions and configure the points in the Engagement Index to quickly assess student progress and output. Analyze patterns in student participation as formative assessments for proactive intervention.
Acknowledgements
SuiteC has been made possible through collaborations between UC Berkeley Education Technology Services, the Graduate School of Education, Arts Practice and the Berkeley Center for New Media, and the Office of the President’s UC Online Education- Innovative Learning Technology Initiative.
In 2016, SuiteC was nominated as a finalist for the IMS Global Learning Impact Awards. View the video: https://youtu.be/3mm1_eY9qf0
Key Project Personnel for the initial development of SuiteC (circa 2016)
Principal Investigators
Greg Niemeyer, UC Berkeley Arts Practice, Berkeley Center for New Media
Glynda Hull, UC Berkeley Graduate School of Education
Graduate Student Researcher/Instructor
John Michael Scott
ETS Staff
Oliver Heyer
Project Director
Nicolaas Matthijs
Lead Applications Developer
Anne-Sophie de Baets
Lead Designer
UC Online Education- Innovative Learning Technology Initiative
Michael Wood
Scott Friese