Super Mario RPG (Switch)
Any% Breezy
Notes to Read Before You Start! 4
Level Up Chart
This route is written to assume that your level up locations won’t be 100% consistent, so for simplicity, reference this table for what to pick at each level.
Mario | Mallow | Geno | Bowser | Peach | |
2 | Magic | – | – | – | – |
3 | Attack | Magic | – | – | – |
4 | Magic | Magic | – | – | – |
5 | Magic | Magic | – | – | – |
6 | Attack | Magic | – | – | – |
7 | Magic | Magic | HP | – | – |
8 | Magic | Magic | HP | – | – |
9 | Attack | Magic | Attack | – | – |
10 | Magic | Magic | Attack | Attack | HP |
11 | Magic | Magic | Attack | Attack | HP |
12 | Attack | Magic | Attack | Attack | HP |
13 | Magic | Magic | Attack | Attack | HP |
14 | Magic | Magic | Attack | Attack | HP |
15 | Magic | Magic | Attack | Attack | HP |
16 | Magic | Magic | Attack | Attack | HP |
17 | Magic | Magic | Attack | Attack | HP |
18 | Magic | Magic | Attack | Attack | HP |
19 | Magic | Magic | Attack | Attack | HP |
Notes to Read Before You Start!
Super Jumps
This route assumes you can do 30 super jumps for an Attack Scarf at some point, but otherwise requires nothing special. Getting 100 super jumps instead of the Johnny fight as written, and using Super Suit optimally over the remainder of the run would save less than 30 seconds overall.
Frog Coins
Some small optimizations you can go for include skipping the party energizer / bracer for Smithy (including the 10 frog coins to buy them), as well as replacing 6 coins in the early game with wiggler jumps. Some optional replacements that could be made to save a little time:
- Pipe Vault Frog Coins + Booster Pass revisit -> 4 Wiggler Jumps (saves around 10 seconds if wiggler jumps are perfect, forces a different shop in Seaside)
- Marrymore Frog Coin + Moleville Mines -> Skip Energizer (saves somewhere from 10-20 seconds)
- Skipping Party Bracer + Party Energizer is riskier for Smithy, but there are some fights written that would make it save a small amount of time as well (not timed extensively, estimate around 10-20 seconds saved by skipping the extra frog coins). The Super Jump Smithy 1 fight is slower than fast attacks from Smithy and breaks even with the trip to buy the party buff items.
Toad Assist
There is an optional fight written in that uses Toad Assist on Bowyer. When doing this fight, the Tadpole Pond Energizer purchase is skipped, allowing for 2 other frog coins to be skipped later on. Optimally this would likely skip the trip to Pipe Vault and do a single wiggler jump when entering Forest Maze.
Special Enemies
It’s ok to fight special enemies if you get them on Shoguns and Heavy Troopas. Lets you skip other frog coins if you’re getting Party Bracer / Energizer for Smithy. It will mess up the experience routing a bit, but it’s not the end of the world.
Star 1
Bowser’s Keep
- Terrapins: Untimed Jump on Each {2}
- Bowser: Timed Jump on Chain {3}
Mushroom Way
- 10 Coins from Chests (4 from first, all 6 on second)
- Flower Tab behind Goomba that jumps out
- Get Mushroom box
Hammer Bros.
45HP
- Untime Jump on Left {4}
- Jump on Right {5}
- Jump on Left {6}
Mushroom Kingdom
- Immediately go to shop
- Sell 4x Mushroom
- Buy 1 Honey Syrup
- Buy 1 Jump Shoes and equip
- Go to Castle
- Get Frog Coin by jumping on moving Toad in Castle [1]
- If you miss this on the first trip, it can be grabbed when you come back to recruit Peach
- Say NO to tutorial (2nd textbox after getting stopped once)
- Talk to Mallow and leave after he joins
Bandit’s Way
- Grab the coins above the moving platforms (3)
- Grab Croaka Cola by jumping right off the spinning flower
- Grab Star from first chest in K9 room, try to kill at least 15 (18+ levels Mallow here instead of on Croco)
- Use Flower Jar before fight
Croco
288HP
- Jump / Attack
- Jump / Attack (Defend if you got 18 dogs and Mallow leveled)
- Jump / Defend
- Jump / Honey Syrup
- Jump / Defend
- Jump / Defend {12}
- Map warp to Mushroom Kingdom after fight
Mushroom Kingdom 2
- Go to shop
- Sell Wallet and Cola
- Buy 3x Honey Syrup
- Buy 2x Pick Me Up
- Buy 2x Cleansing Juice
- Use Flower Tab before fight
Claymorton
432HP
Star 2
Kero Kero Sewers
- Go straight to the switch to lower water (down left in first room then down right to pipe)
Belome
450HP
- Jump / Thunderbolt
- Jump / Thunderbolt
- Jump / Honey Syrup
- Jump / Thunderbolt
- Jump {22}
Midas River
- Four frog coins on the falls [5]
- Try and get 60 coins for a Frog Coin [6]
- If you miss the 60 coin reward, get a frog coin on Yo’ster Island
Tadpole Pond
- Go to center island and talk to Frog Sage
- Map warp to Tadpole Pond and go to Frog Coin Emporium
- Buy 1 Energizer [4] (skip this if doing timed Toad Assist on Bowyer, can skip two frog coins elsewhere)
- Leave pond
Rose Way
- Get 2 big coins in first room with moving platforms
- Get 1 coin from each block you pass in the bandit room at the end
Rose Town
- Grab Flower and Frog Coin [5] from item shop (go through chimney)
- Grab 2x Flowers and Frog Coin [6] from top house
- Map warp to Rose Town
- Go to the Inn
- Pause Menu -> System -> To World Map
Forest Maze
- Get hidden Cola and Mushroom in first room
- Frog Coin [7] after underground
- Cola behind wiggler
- Red Essence before Bowyer

Bowyer
648HP
- Geno Beam / Defend / Energizer on Geno
- Geno Beam / Defend / Defend (Locks X)
- Geno Beam / Defend / Defend
- Geno Beam / Defend / Defend (Locks X)
- Geno Beam / Defend / Defend
- Attack
Do this if you skipped the Energizer:
- Flower Essence (Toad Assist) / Jump / Defend
- Geno Beam / Defend / Defend (Locks X)
- Geno Beam / Defend / Defend
- Geno Beam / Defend / Defend (Locks X)
- Geno Beam / Defend / Defend
- Geno Beam (this is an exact kill)
Star 3
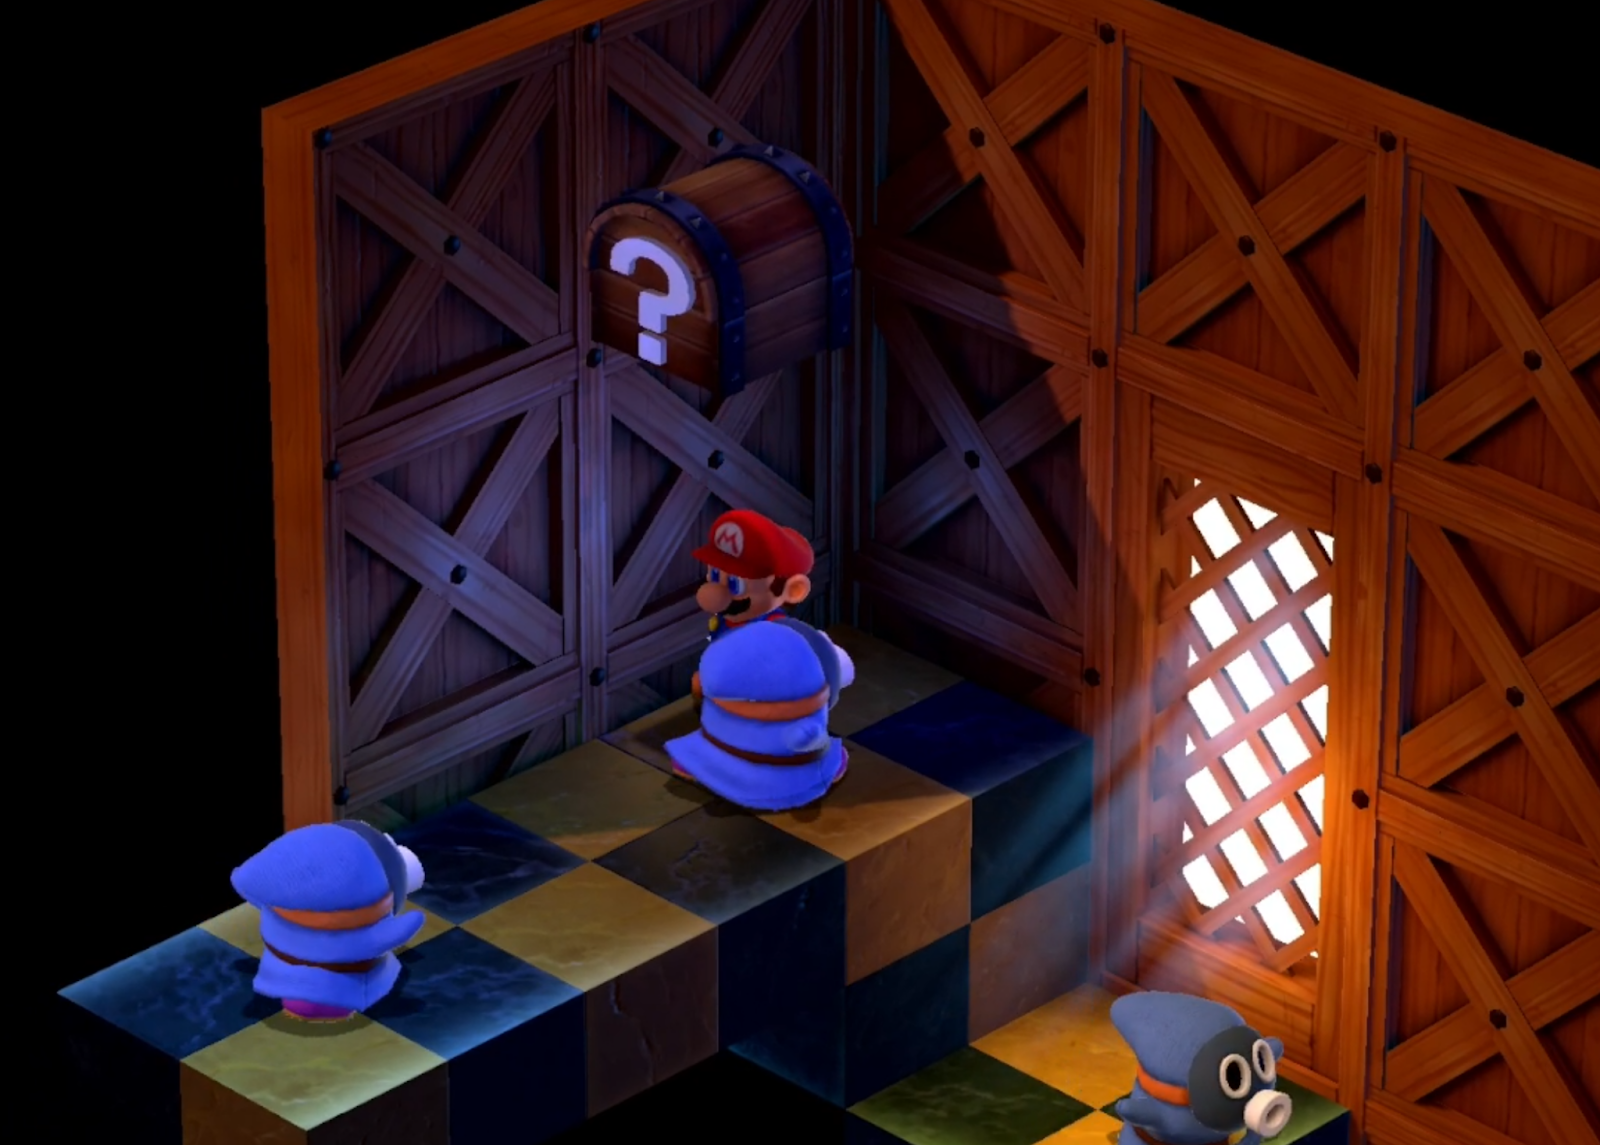
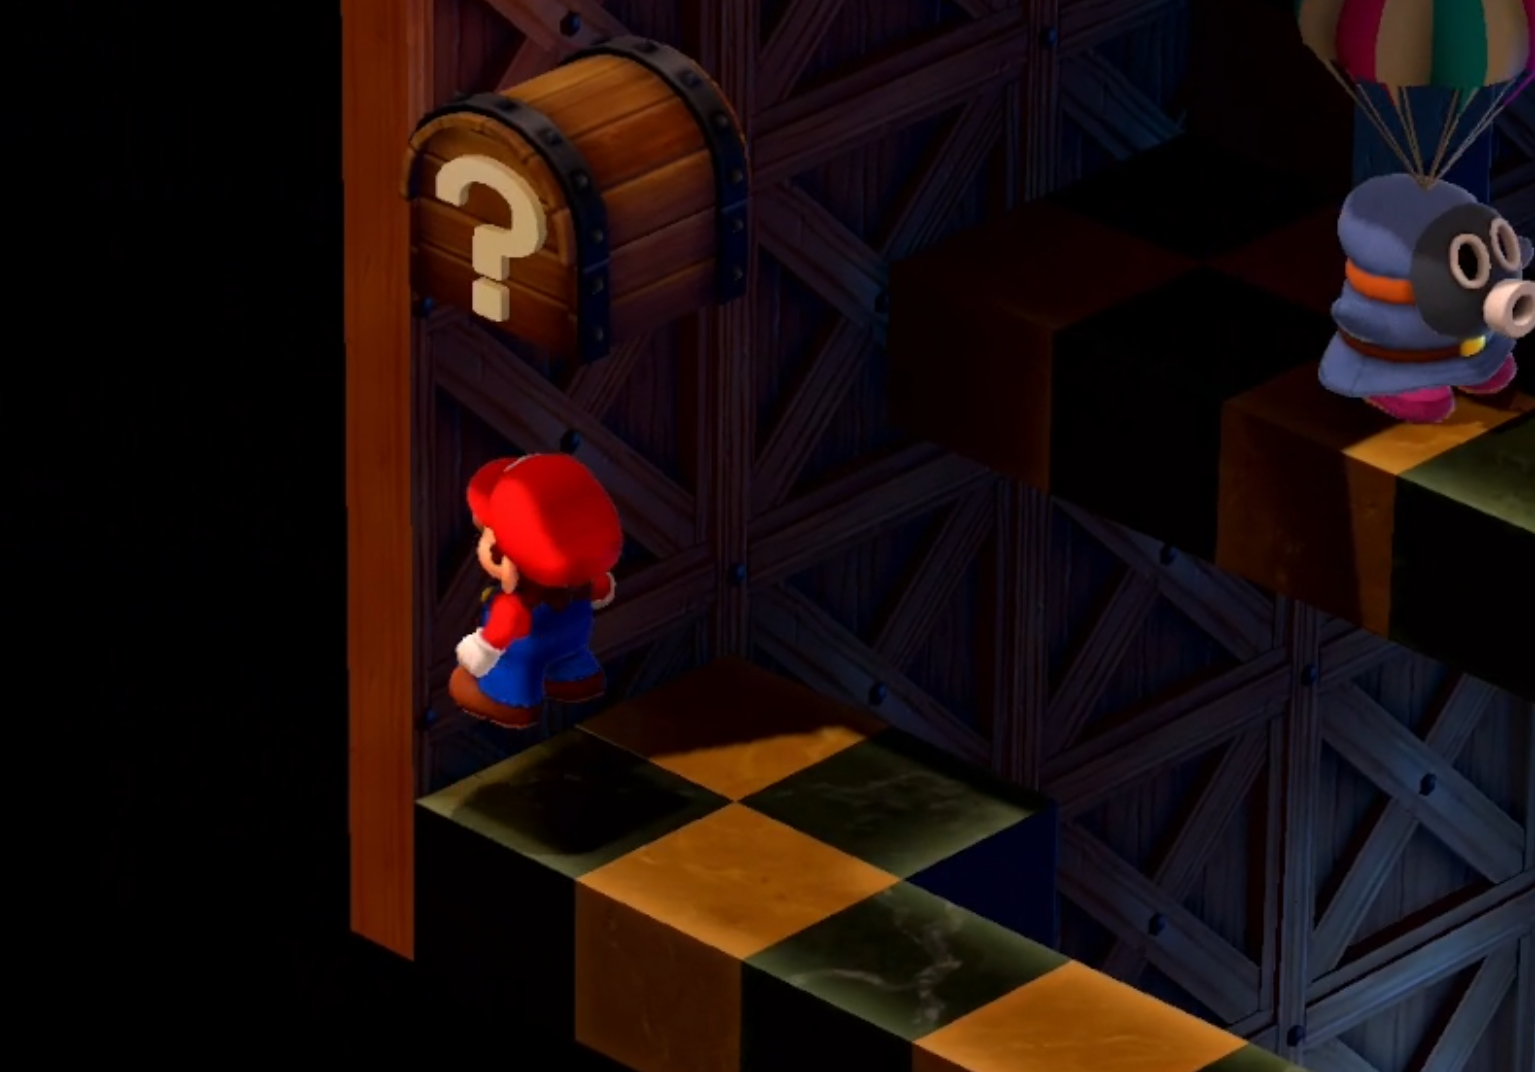
Pipe Vault
- Navigate Pipe Vault for 3 Frog Coins [10]
- Take the second pipe in the room with a ton of pipes
- For the crouching coin, run at the wall and press down at the end
- Pause Menu -> System -> To World Map
- Grab the Frog Coin behind the save block on Yo’ster Island (backup if you missed Midas River bonus)
Moleville
- Go to shop
- Buy all Weapons and equip
- Buy 3x Work Pants and equip
- Go into the mines
- Jump on spring to trigger Croco, then take the up right path to activate the chase. Wait in the second doorway he blows open until he loops around to you
Croco 2
675HP
- Attack / Jump / Attack (Energizer Geno if Freebie earlier)
- Attack / Jump / Attack
- Attack / Jump / Attack
- Attack / Attack (might be low on damage from chain, etc) {25}
- Go up left path and talk to mole to blow up wall
- Get Frog Coin [11] from Shy Guy minecart in the lower level before the star
- Run all the way to the save block with the star active, aim to hit 9 enemies (10 will level Mario on the first bandana red fight instead of the second, pairing it with a Peach level)
Punchinello
1080HP
- Attack / Attack / Attack (Energizer Geno if Freebie)
- Spam basic attack on Punchinello, bombs will die if you perfect hit every action
Star 4
- Do the minecart minigame lol
Booster Pass
- Get Frog Coin [12] and Rock Candy

Booster Tower
- Get Bowser
- Frog Coin [13] on 2nd screen
- Flower Tab in train room
- Press green switch
- 2 Frog Coins after Thwomp [15]
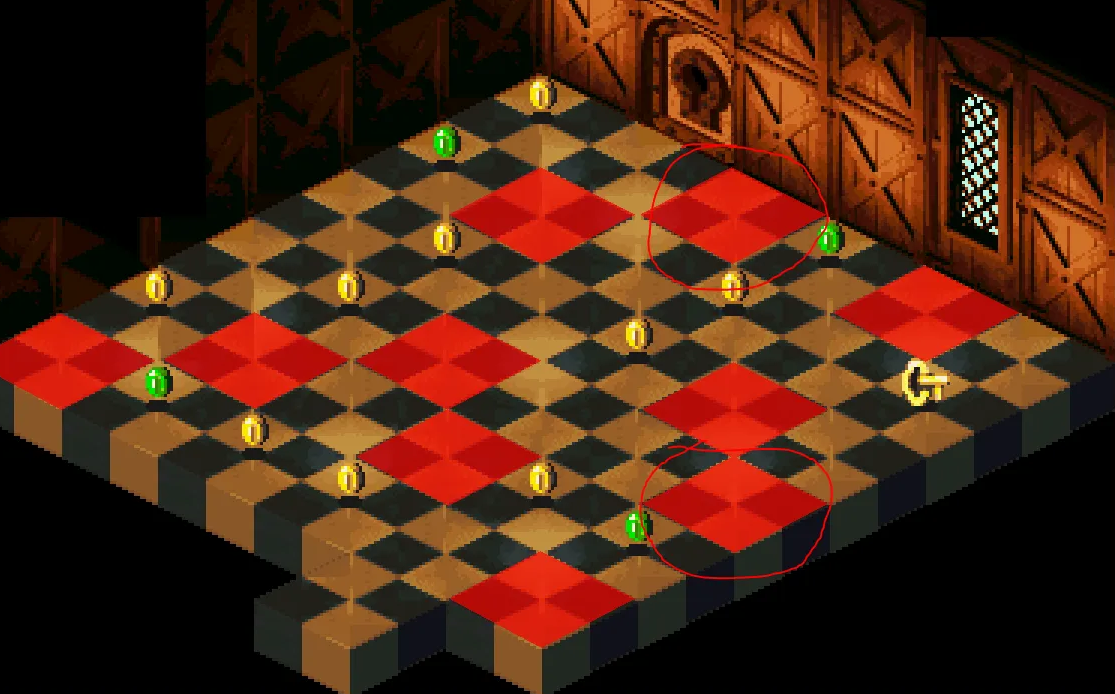
- Get Key/Zoom Shoes and Frog Coins from Checkerboard Room [19]
- Grab Goodie Bag and Frog Coin [20] in save room
- Menu before curtain minigame:


- Swap Mallow for Bowser (Mario / Bowser / Geno)
- Bowser: Work Pants (off Geno) + Zoom Shoes
- Instantly fail curtain game
Booster
Booster: 720HP
Snifster: 180HP
- Rock Candy / Terrorize / Jump
- Attack / Attack / Jump {27}
- Swap to Mallow and Attack / Attack / Jump (shouldn’t need to jump)
- Use Flower Items (should have 2 boxes)
Knife Guy / Grate Guy
KG: 630HP
GG: 810HP
- Terrorize / Fireball Knife Guy / Clown Car Barrage
- Attack / Attack / Switch to Geno and Attack (Mallow turn)
Booster Hill
- Get as many flowers from Peach as you can
- Need at least 10 flowers for optimal Weapon World strats
Marrymore
- Go through back door into church
- Break down doors
Bundt
Bundt: 810HP
Raspberry: 540HP
- Attack / Attack / Attack
- Attack / Attack (Torte runs) / Red Essence Mario (don’t use this before Torte’s run)
- Attack / Attack / Attack
- Attack / Attack / Attack
- Attack / Attack / Attack (Candle phase ends probably)
- Attack / Attack / Jump (should die in 2 rounds of this) {29}
- Walk out of town
Mushroom Kingdom
- Go to shop to be given Cricket Pie
- Peach joins
- Map warp to Tadpole Pond and talk to Frog Sage
- Map warp to Booster Pass
Booster Pass
- Go north, grab the hidden Flower on top of the plant and enter the secret for a Cola, Frog Coin [21] and second Flower
- The Snifit in the secret can be skipped if you talk mario just slightly off the edge
- Map warp to Marrymore
- Go inside the inn, go to the second floor and grab a Frog Coin [22]
- Pause Menu -> System -> To World Map

Star Hill
- Activate all the doors and grab the star
- Menu:
- Party: Mario / Mallow / Geno
- Mario
- Unequip Punch Glove (Mash A equip Hammer)
- Unequip Jump Shoes
- Mallow: Unequip Cymbals (Mash A equip Froggie Stick)
- Geno
- Unequip Finger Shot
- Equip Work Pants (off Bowser)
- Bowser: Unequip Zoom Shoes
- Peach: Unequip Slap Glove
- System -> To World Map
Star 5
Seaside Town
- Go to first shop
- Sell 3 Cola’s and Goodie Bag
- Sell all weapons and accessories
- Buy 2 Ice Bomb
- Buy 6 Fire Bombs
- Buy 1 Fright Bomb
- Go to Elder’s house, talk to Elder
- Go upstairs and talk to Frog
- Buy EXP Booster [0] and equip to Mallow
- Menu:
- System -> To World Map
Sea
- Take lower path, grab star, try to hit every Zeostar
- Enter ship
Sunken Ship
- Grab 100 coin chest in rat staircase
- Go straight all the way to the blooper fight, use flower tabs/jars/box if you have them
- Password: PEARLS
- Note: Bottom left two and top right two are the only ones that need to change
King Calamari
720HP
- Geno Boost Mario / Fire Bomb / Fire Bomb (King Calamari appears)
- Fire Bomb / Fireball / Defend (Fire Bomb if Freebie)
- Attack / Fireball (Jump if Fire Bomb freebie) / Switch to Bowser and Attack
- Leave this fight with at least 3 fire bombs
- Grab both coin chests on top of the crates (+200)
- Grab Cola in Mario Clone room
- Get the Safety Ring in the underwater room behind barrels (hug the top wall)
Bandana Red 1
- Defend / Defend / Thunderbolt
Bandana Red 2
- Defend / Defend / Thunderbolt
- Menu:
- Mallow: Safety Ring
- Mario: EXP Booster
Johnny
738HP
- Fright Bomb / Shocker / Super Jump x30 (dies to 43 jumps)
- 100 jumps would get you the Super Suit later, this route assumes you don’t get that, but Super Jumping as much as you can is pretty fast and we need 30 for Attack Scarf. If you do get Super Suit, just put it on Mario or Mallow and adjust turn orders as necessary. Notably, doing 100 SJs loses enough time on the spot here that the eventual timesave from having SS comes close to breaking even at best.
- Menu:
- Map warp to Seaside
Seaside
Speardovich
1350HP
- Geno Boost Mallow / Defend / Shocker
- Defend / Croaka Cola / Shocker
- Defend / Defend / Shocker
- Defend / Defend / Shocker
- Defend / Defend / Shocker
- Go to shop (middle on left)
- Buy Paratroopa Shell and equip
- Buy Double Punch and equip
- Buy Fake Chomp and equip (this is literally just for a damage roll on Axem)
- Go talk to Mushroom Boy (middle shop on the top) (this sets a flag where the first Shogun is already defeated)
- Go to Elder house and talk
- Menu
- Mallow: EXP Booster
- Geno: Safety Ring
- System -> To World Map
Star 6
Land’s End
- Hidden Red Essence if no freebie on Bundt (jump up from platform at its peak)
- Go left when you hit the desert and follow the ants in the sand
Shogun Fights
- Attack / Attack / Attack (switch to Bowser for third physical if you need to)
- Use an Ice Bomb if you have more than 1
- Use a Rock Candy as long as you have them
- Can use extra fire bombs with one attack if you got freebies, need to keep 3 for later fights
Belome Temple
- Aim to hit 5+ lizards on the last screen (22 total enemies with first star)
- Pay 400 coins for second star behind crates in lizard room
- Get 150 coin block in room before RNG
- Get these 2 frog coins [2] also
- Reload room until you get “Mmm, I’m so hungry”
- Make sure party is Mario / Mallow / Geno
Belome 2
1080HP
- Fright Bomb (or switch to Bowser and Terrorize) / Jump / Shocker
- Attack / Jump / Shocker {31}
Monstro Town
- Enter first door and find the “star” upstairs
- Enter second door and grab Attack Scarf for hopefully getting 30 super jumps by this point
- If you have not done 30 consecutive super jumps, go to the dojo and fight Jagger to grind it out
- Map warp to Land’s End -> Belome Temple
- Pay 100 coins for the shortcut and take the spring
Land’s End
- Do the paratroopa climb game. Need a 10.x time for the Troopa Medal
- Can repeat the climb with a 9.x time or better for 5 frog coins
Bean Valley
- Menu:
- Mario / Mallow / Geno (if not)
- Mario: Attack Scarf
- Geno: Troopa Medal
- Take right pipe at the start and go to the boss
Megasmilax
Mega: 900HP
Smilax: 180HP
- Geno Boost Mario / Attack / Snowy
- Fire Bomb (Megasmilax appears) / Ice Bomb / Star Riders
- Take pipe
- Hit block for vine, hit block again to start climbing
- Try to get 4 of the big coins (leave with at least 200 coins)
- Grab Flower and two frog coins [4]
- First frog coin is on the side of the right, second is on top of left side
Nimbus Land
- Menu
- Mario:
- Unequip Mega Glove
- Equip EXP Booster
- Mallow: Equip Troopa Medal
- Geno:
- Unequip Double Punch
- Equip Safety Ring
- Shop
- Frog Coin [5]
- Sell Paratroopa Shell and Double Punch
- Buy Mega Glove and equip
- Buy Sticky Glove and equip
- Buy Hand Cannon and equip
- Examine King Nimbus statue in top house to enter palace
- Don’t fail Dodo minigame (get Feather)
- Go straight up the top left path
- Grab flower by left door in corner
- Go in the first door and downstairs for key
- Go back up and fight the chonky turtle
Big Troopa’s
- Defend / Snowy
- Menu
- Mario: Attack Scarf
- Mallow: EXP Booster
Birdo
Shelly: 450HP
Birdo: 699HP
- Attack / Attack / Geno Boost Mario
- Attack / Attack / Attack (egg hatches)
- Attack / Defend / Defend
- Attack / Defend / Defend
- Attack / Defend / Defend (do extra attacks with Geno if missed block(s))
- Menu
- Mallow: Troopa Medal
- Mario: EXP Booster
Big Troopa’s 2
- Snowy
- Walk straight up right into the next room for Valentina cutscene
- Grab star on exit path and run through enemies + Dodo (try to hit 7 enemies total)
- Fall down
- Menu:
- Mario: Attack Scarf
- Bowser: EXP Booster
- Map Warp to Nimbus
Valentina/Dodo
Dodo
- Fire Bomb
Valentina
1800HP
This fight can be pretty dynamic, you may need to swap in Peach for a Group Hug depending on how she opens
- Attack / Geno Boost Mario
- Attack / Attack / Attack
- Attack / Attack / Attack
- Menu
- Party (Mario / Mallow / Geno)
- Geno: Feather
- Map warp to Nimbus Land after king cutscene
- Leave and fall down to the hot spring
- Fall into volcano
Barrel Volcano
- First chest is a flower
- Grab star and run through as much as possible
- Both frog coins on donut platforms [7]
- First chest in save block room is a flower
- Chest by the save block is a frog coin [8]
- You can do a jump to skip the first Stumpet
Stumpet
- Defend / Defend / Snowy
Stompillar
- Defend / Defend / Snowy
- Walk right past the last Stumpet
- Restore FP before the fight
Czar Dragon / Zombone
1260HP
- Geno Boost Mario / Jump / Snowy
- Defend / Defend / Snowy {30}
(use a Croaka Cola with Geno for safety if you had a freebie and he uses Water Blast)
Zombone
1620HP
- Attack / Attack / Shocker
- Defend / Attack / Shocker
Axem Rangers
Red: 720HP
Black: 495HP
Yellow: 540HP
Green: 405HP
Pink: 360HP
- Switch to Bowser (Clown Car Barrage) / Jump (Yellow) / Fire Bomb
- Defend / Shocker (transition to Blade) / Red Essence Mallow {31}
- Don’t use Red Essence if the fight doesn’t transition for any reason! Just keep defending and end on Mallow’s turn
- If you lost chain early, will need to use Snowy on Axem Red
The Blade
899HP
- Attack / Shocker / Defend
- Defend (Attack if low chain) / Shocker
Star 7
Nimbus Land
- Go through palace, talk to Mallow’s parents
- On the way grab 2 frog coins [10]
- Menu:

- Map warp to Tadpole Pond
Tadpole Pond
- Frog Coin Emporium
- Buy 1 Party Energizer
- Buy 1 Party Bracer
- If you killed Special Enemies or have extra frog coins, buy up to 2 Sleepy Bombs to replace Sleepy Time usage in Weapon World
- Map warp to Nimbus Land
- Take bus
Bowser’s Keep
- Run straight through to the 6 door room
- If you get a battle door, immediately give up by press the minus (-) button
Rising Platform Room
- Grab Croaka Cola in room 1
- Rock Candy in room 2 (last item on the right)
- Croaka Cola in the last chest of rotating platforms room
- Sonic Cymbals reward
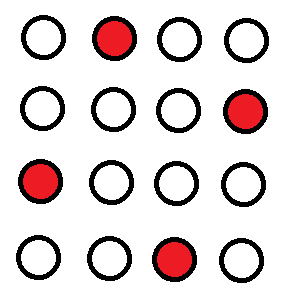
Quiz Door
- Barrel counting #2 is 40 + top-most layer (if the side has fewer than 8 barrels, subtract)
- Final room
- 1st Place: “I outdid <name>” (the one who gets outdone is 2nd)
- 2nd Place: “I fell into fourth”
- 3rd Place: “I placed the same in the swimming and cycling events”
- 4th Place: “I came in third for swimming”
- Grab Rock Candy from reward chest
Coin Door
- Don’t take the 21st coin lol. If you stop on the 15th coin you will always win the next round.
- Second room
- Third room:
- Rock Candy reward chest
“Invisible” Floor Door
- Grab Ice Bomb, Rock Candy (left side and last before door)
- Room 2 straight down the middle
- Red Essence on the left if you want to be extra safe on Smithy and skipped Party Bracer / Energizer
- Menu before Wizakoopa
- Swap Geno for Bowser (Mario / Mallow / Geno)
- Mallow: Sonic Cymbals
- Geno: Safety Ring
- Bowser: No Accessory
Wizakoopa
1440HP
- Attack / Attack / Attack
- Attack / Attack / Attack (shouldn’t need this last attack, using a fright bomb guarantees max 5 attacks, likely to get that without the fright bomb though)
Boomer
1800HP
- Jump / Shocker / Defend
- Jump / Shocker / Attack
- Jump / Shocker / Attack {34}
- Basic attack if still alive and blue
Exor
- Jump Left Eye / Geno Whirl Exor {35}
Weapon World
Count Down
2160HP
- Attack (left Ring-a-Ding) / Thunderbolt / Rock Candy
- Attack (right Ring-a-Ding) / Thunderbolt / Attack (use a Rock Candy if a Ring-a-Ding healed)
- Jump / Shocker / Attack
- Jump / Attack / Attack (number of attacks here depends on heals)
Machine Made (Speardovich)
- Jump / Shocker / Attack {38}
- Attack
- Eat a Royal Syrup if <18 FP
Cloaker & Domino
Cloaker: 1080HP
Domino: 810HP
- Jump Cloaker / Shocker Cloaker / Geno Boost Mario
- Jump Cloaker / Attack Cloaker (Mallow physical should kill with chain) {40}
If you don’t have fp for the second Jump, physical with Mario + Geno
Mad Adder
1340HP
- Star Riders
- Attack
Mad Mallet
- Defend / Thunderbolt
Clerk
450HP
- Attack Clerk / Thunderbolt / Attack
Manager
720HP
- Attack / Snowy / Attack (can kill this turn with incredible attack rolls)
- Defend / Thunderbolt
Director
900HP
- Defend / Defend / Switch to Peach and Sleepy Time
- Jump / Shocker / Switch to Geno and Defend
- Jump / Shocker / Defend
- Defend / Thunderbolt
Gunyolk
Gunyolk: 1350HP
Chief: 900HP
- Jump (on Chief) / Snowy / Switch to Peach and Sleepy Time
- Jump (on Chief) / Snowy / Switch to Geno and Rock Candy (both die with good chain)
Smithy
1800HP
- Party Energizer / Shocker / Party Bracer
- Attack / Shocker / Attack (Rock Candy if you have them)
- Attack / Shocker / Croaka Cola (if health looks good, just Attack)
- Attack / Shocker (should die here assuming chain stays up)
Turn order: Mario -> Mallow -> Geno
Mario Physical ~ 258-294 (Jump is doing less than this)
Geno Physical ~ 168-198
Shocker ~ 225
Smithy Phase 2
7200HP
Start with the Triple on Geno and attack with Mario/Mallow until transformation
Triple Attack ~ 1000 damage start (with large chain)
Geno Attack ~ 302-332
Mario Attack ~ 392-428
Mallow Attack ~ 276-318
Should get at least 2000 damage before Tank Head transform
Tank Head: Super Jump / Shocker
Consider swapping Geno for Peach here to spam heal unless you have extra good items
Use a Geno Boost on Mario if he died at any point
Jump ~ 310+
Super Jump ~ 34 damage each (10 ~ 457, 20 ~ 707, 30 ~ 957, etc) [very slow]
Shocker ~ 651 (534 without chain)
Geno Beam ~ 248 (not really worth, just use items)
Mage Head: Physical attacks
Mario ~ 470-510
Mallow ~ 354-398
Geno ~ 384-414
Chest Head: Fire
Fireball ~ 529
Fire Bomb ~ 360
Mallow Physical ~ 164-210
Snowy ~ 291
Geno Physical ~ 194-224
Casket Head: Cry
He can use shredder, so these damage values will be lower if that happens
Mario Physical ~ 200-240
Snowy ~ 480
Ice Bomb ~ 420
Geno Physical ~ 114-144
Misc. Notes
Coin Route
Coins | Current Total | |
Bowser's Keep | 2 | 2 |
Chests | 12 | 14 |
Hammer Bro Fight | 20 | 34 |
Sell 3 Mushrooms | 6 | 40 |
Buy Honey and Jump Shoes | -40 | 0 |
Bandit's Way | 3 | 3 |
Croco 1 | 10 | 13 |
Sell Wallet and Cola | 323 | 336 |
Buy before Claymorton | -48 | 288 |
Claymorton | 20 | 308 |
Belome 1 | 40 | 348 |
Rose Way | 22 | 370 |
Bowyer | 50 | 420 |
Moleville Purchase | -194 | 226 |
Croco 2 | 50 | 276 |
Minecart | 115 | 391 |
Booster Tower | 0 | 391 |
Booster | 147 | 538 |
KGGG | 25 | 563 |
Seaside Sell Items | 1344 | 1907 |
Seaside Bomb Purchases | -1800 | 107 |
Ship Coins | 300 | 407 |
King Calamari | 100 | 507 |
Bandana Red 1 | 40 | 547 |
Bandana Red 2 | 50 | 597 |
Johnny | 50 | 647 |
Speardovich | 50 | 697 |
Seaside Weapons Purchase | -238 | 459 |
Shogun Fights | 90 | 549 |
Exp Star | -400 | 149 |
Belome Temple | 150 | 299 |
Belome 2 | 20 | 319 |
Trampoline | -100 | 219 |
Bean Valley | 40 | 259 |
Nimbus Sell Weapons | 99 | 358 |
Nimbus Purchases | -305 | 53 |
* Coins can be removed in various places like Belome Temple
Exp Route
Import the following to this site: https://pidgezero.one/expchart/build/index.html
{"mode":"Switch (Breezy)","gameEvents":[{"type":"Fight","enemies":[{"defn":{"name":"Terrapin","exp":0,"switch_exp":1},"special":false},{"defn":{"name":"Terrapin","exp":0,"switch_exp":1},"special":false}],"booster":"(nobody)"},{"type":"Fight","enemies":[{"defn":{"name":"Bowser","exp":0},"special":false},{"defn":{"name":"Kinklink","switch_name":"Chaindelier","exp":0},"special":false}],"booster":"(nobody)"},{"type":"Fight","enemies":[{"defn":{"name":"Hammer Bro","exp":3},"special":false},{"defn":{"name":"Hammer Bro","exp":3},"special":false}],"booster":"(nobody)"},{"type":"New party member"},{"type":"Star","star":{"name":"Bandit's Way star","exp":1},"hits":18,"booster":"(nobody)"},{"type":"Fight","enemies":[{"defn":{"name":"Croco (1)","exp":16},"special":false}],"booster":"(nobody)"},{"type":"Fight","enemies":[{"defn":{"name":"Mack","switch_name":"Claymorton","exp":24},"special":false},{"defn":{"name":"Bodyguard","exp":0},"special":false},{"defn":{"name":"Bodyguard","exp":0},"special":false},{"defn":{"name":"Bodyguard","exp":0},"special":false},{"defn":{"name":"Bodyguard","exp":0},"special":false}],"booster":"(nobody)"},{"type":"Fight","enemies":[{"defn":{"name":"Belome (1)","exp":30},"special":false}],"booster":"(nobody)"},{"type":"New party member"},{"type":"Fight","enemies":[{"defn":{"name":"Bowyer","exp":60},"special":false}],"booster":"(nobody)"},{"type":"Fight","enemies":[{"defn":{"name":"Croco (2)","exp":30},"special":false}],"booster":"(nobody)"},{"type":"Star","star":{"name":"Moleville Mines star","exp":5},"hits":9,"booster":"(nobody)"},{"type":"Fight","enemies":[{"defn":{"name":"Punchinello","exp":0},"special":false}],"booster":"(nobody)"},{"type":"New party member"},{"type":"Fight","enemies":[{"defn":{"name":"Booster","exp":60},"special":false},{"defn":{"name":"Snifit","switch_name":"Snifster","exp":2},"special":false},{"defn":{"name":"Snifit","switch_name":"Snifster","exp":2},"special":false},{"defn":{"name":"Snifit","switch_name":"Snifster","exp":2},"special":false}],"booster":"(nobody)"},{"type":"Fight","enemies":[{"defn":{"name":"Knife Guy","exp":40,"switch_exp":50},"special":false},{"defn":{"name":"Grate Guy","exp":50,"switch_exp":40},"special":false}],"booster":"(nobody)"},{"type":"Fight","enemies":[{"defn":{"name":"Bundt","exp":25,"switch_exp":75},"special":false},{"defn":{"name":"Raspberry","exp":50,"switch_exp":0},"special":false}],"booster":"(nobody)"},{"type":"New party member"},{"type":"Star","star":{"name":"Sea star","exp":8},"hits":14,"booster":"Mallow"},{"type":"Fight","enemies":[{"defn":{"name":"King Calamari","exp":100},"special":false},{"defn":{"name":"Tentacles (Left)","exp":0},"special":false},{"defn":{"name":"Tentacles (Left)","exp":0},"special":false},{"defn":{"name":"Tentacles (Left)","exp":0},"special":false},{"defn":{"name":"Tentacles (Left)","exp":0},"special":false},{"defn":{"name":"Tentacles (Right)","exp":0},"special":false},{"defn":{"name":"Tentacles (Right)","exp":0},"special":false},{"defn":{"name":"Tentacles (Right)","exp":0},"special":false},{"defn":{"name":"Tentacles (Right)","exp":0},"special":false}],"booster":"Mallow"},{"type":"Fight","enemies":[{"defn":{"name":"Bandana Red","exp":18},"special":false},{"defn":{"name":"Bandana Red","exp":18},"special":false},{"defn":{"name":"Bandana Red","exp":18},"special":false},{"defn":{"name":"Bandana Red","exp":18},"special":false}],"booster":"Mallow"},{"type":"Fight","enemies":[{"defn":{"name":"Bandana Red","exp":18},"special":false},{"defn":{"name":"Bandana Red","exp":18},"special":false},{"defn":{"name":"Bandana Red","exp":18},"special":false},{"defn":{"name":"Bandana Red","exp":18},"special":false},{"defn":{"name":"Bandana Red","exp":18},"special":false}],"booster":"Mallow"},{"type":"Fight","enemies":[{"defn":{"name":"Johnny","exp":90},"special":false},{"defn":{"name":"Bandana Blue","exp":20},"special":false},{"defn":{"name":"Bandana Blue","exp":20},"special":false},{"defn":{"name":"Bandana Blue","exp":20},"special":false},{"defn":{"name":"Bandana Blue","exp":20},"special":false}],"booster":"Mario"},{"type":"Fight","enemies":[{"defn":{"name":"Yaridovich","switch_name":"Speardovich","exp":120},"special":false}],"booster":"Mario"},{"type":"Fight","enemies":[{"defn":{"name":"Shogun","exp":24},"special":false},{"defn":{"name":"Shogun","exp":24},"special":false},{"defn":{"name":"Shogun","exp":24},"special":false}],"booster":"Mallow"},{"type":"Fight","enemies":[{"defn":{"name":"Shogun","exp":24},"special":false},{"defn":{"name":"Shogun","exp":24},"special":false},{"defn":{"name":"Shogun","exp":24},"special":false}],"booster":"Mallow"},{"type":"Fight","enemies":[{"defn":{"name":"Shogun","exp":24},"special":false},{"defn":{"name":"Shogun","exp":24},"special":false},{"defn":{"name":"Shogun","exp":24},"special":false}],"booster":"Mallow"},{"type":"Star","star":{"name":"Land's End (1) star","exp":11},"hits":22,"booster":"Mallow"},{"type":"Star","star":{"name":"Land's End (2) star","exp":6},"hits":11,"booster":"Mallow"},{"type":"Fight","enemies":[{"defn":{"name":"Belome (2)","exp":80,"switch_exp":84},"special":false}],"booster":"Mallow"},{"type":"Fight","enemies":[{"defn":{"name":"Megasmilax","exp":120},"special":false},{"defn":{"name":"Smilax","exp":0},"special":false},{"defn":{"name":"Smilax","exp":0},"special":false},{"defn":{"name":"Smilax","exp":0},"special":false},{"defn":{"name":"Smilax","exp":0},"special":false},{"defn":{"name":"Smilax","exp":0},"special":false},{"defn":{"name":"Smilax","exp":0},"special":false},{"defn":{"name":"Smilax","exp":0},"special":false},{"defn":{"name":"Smilax","exp":0},"special":false}],"booster":"Mallow"},{"type":"Fight","enemies":[{"defn":{"name":"Heavy Troopa","switch_name":"Big Troopa","exp":32},"special":false},{"defn":{"name":"Heavy Troopa","switch_name":"Big Troopa","exp":32},"special":false},{"defn":{"name":"Heavy Troopa","switch_name":"Big Troopa","exp":32},"special":false}],"booster":"Mario"},{"type":"Fight","enemies":[{"defn":{"name":"Birdo","exp":60},"special":false},{"defn":{"name":"Shelly","exp":0},"special":false}],"booster":"Mallow"},{"type":"Fight","enemies":[{"defn":{"name":"Heavy Troopa","switch_name":"Big Troopa","exp":32},"special":false},{"defn":{"name":"Heavy Troopa","switch_name":"Big Troopa","exp":32},"special":false},{"defn":{"name":"Heavy Troopa","switch_name":"Big Troopa","exp":32},"special":false}],"booster":"Mario"},{"type":"Star","star":{"name":"Nimbus Castle star","exp":5},"hits":7,"booster":"Mario"},{"type":"Fight","enemies":[{"defn":{"name":"Dodo (2)","exp":40},"special":false},{"defn":{"name":"Valentina","exp":120},"special":false}],"booster":"Bowser"},{"type":"Star","star":{"name":"Barrel Volcano star","exp":11},"hits":9,"booster":"Bowser"},{"type":"Fight","enemies":[{"defn":{"name":"Body","exp":30},"special":false},{"defn":{"name":"Corkpedite","switch_name":"Stompillar","exp":50},"special":false},{"defn":{"name":"Oerlikon","switch_name":"Urspike","exp":22},"special":false}],"booster":"Bowser"},{"type":"Fight","enemies":[{"defn":{"name":"Zombone","exp":50},"special":false},{"defn":{"name":"Czar Dragon","exp":100},"special":false}],"booster":"Bowser"},{"type":"Fight","enemies":[{"defn":{"name":"Axem Rangers","switch_name":"The Blade","exp":50},"special":false},{"defn":{"name":"Axem Green","exp":20,"switch_exp":0},"special":false},{"defn":{"name":"Axem Red","exp":40,"switch_exp":0},"special":false},{"defn":{"name":"Axem Black","exp":40,"switch_exp":0},"special":false},{"defn":{"name":"Axem Pink","exp":10,"switch_exp":0},"special":false},{"defn":{"name":"Axem Yellow","exp":40,"switch_exp":0},"special":false}],"booster":"Bowser"},{"type":"Fight","enemies":[{"defn":{"name":"Magikoopa","switch_name":"Wizakoopa","exp":30},"special":false}],"booster":"(nobody)"},{"type":"Fight","enemies":[{"defn":{"name":"Boomer","exp":55,"switch_exp":57},"special":false}],"booster":"(nobody)"},{"type":"Fight","enemies":[{"defn":{"name":"Neosquid","switch_name":"Mouth","exp":40,"switch_exp":0},"special":false},{"defn":{"name":"Left Eye","exp":30,"switch_exp":0},"special":false},{"defn":{"name":"Right Eye","exp":30,"switch_exp":0},"special":false},{"defn":{"name":"Exor","exp":100},"special":false}],"booster":"(nobody)"},{"type":"Fight","enemies":[{"defn":{"name":"Ding-A-Ling","switch_name":"Ring-A-Ding","exp":30},"special":false},{"defn":{"name":"Ding-A-Ling","switch_name":"Ring-A-Ding","exp":30},"special":false},{"defn":{"name":"Count Down","exp":140},"special":false}],"booster":"(nobody)"},{"type":"Fight","enemies":[{"defn":{"name":"Machine Made (Yaridovich)","switch_name":"Machine Made (Speardovich)","exp":180},"special":false}],"booster":"(nobody)"},{"type":"Fight","enemies":[{"defn":{"name":"Mad Adder","exp":200,"switch_exp":120},"special":false},{"defn":{"name":"Domino (2)","exp":60,"switch_exp":0},"special":false},{"defn":{"name":"Domino (1)","exp":60,"switch_exp":0},"special":false},{"defn":{"name":"Cloaker (1)","exp":60,"switch_exp":0},"special":false}],"booster":"(nobody)"},{"type":"Fight","enemies":[{"defn":{"name":"Mad Mallet","exp":20},"special":false},{"defn":{"name":"Mad Mallet","exp":20},"special":false},{"defn":{"name":"Mad Mallet","exp":20},"special":false}],"booster":"(nobody)"},{"type":"Fight","enemies":[{"defn":{"name":"Mad Mallet","exp":20},"special":false},{"defn":{"name":"Mad Mallet","exp":20},"special":false},{"defn":{"name":"Clerk","exp":50},"special":false}],"booster":"(nobody)"},{"type":"Fight","enemies":[{"defn":{"name":"Manager","exp":60},"special":false},{"defn":{"name":"Pounder","exp":24},"special":false},{"defn":{"name":"Pounder","exp":24},"special":false},{"defn":{"name":"Pounder","exp":24},"special":false}],"booster":"(nobody)"},{"type":"Fight","enemies":[{"defn":{"name":"Director","exp":70},"special":false},{"defn":{"name":"Poundette","exp":28},"special":false},{"defn":{"name":"Poundette","exp":28},"special":false},{"defn":{"name":"Poundette","exp":28},"special":false},{"defn":{"name":"Poundette","exp":28},"special":false}],"booster":"(nobody)"},{"type":"Fight","enemies":[{"defn":{"name":"Gunyolk","exp":100},"special":false},{"defn":{"name":"Factory Chief","exp":80},"special":false}],"booster":"(nobody)"}]}