Hyperlink in MyCourse HTML Editor
IMPORTANT: This document serves as a practical guide, outlining step-by-step instructions for implementing accessibility features in your course materials. These steps incorporate best practices gleaned from our Inclusive Course Design certificate courses on RIT Talent Roadmap. Familiarity with these practices, applicable to all course materials, is recommended before proceeding with the guide here.
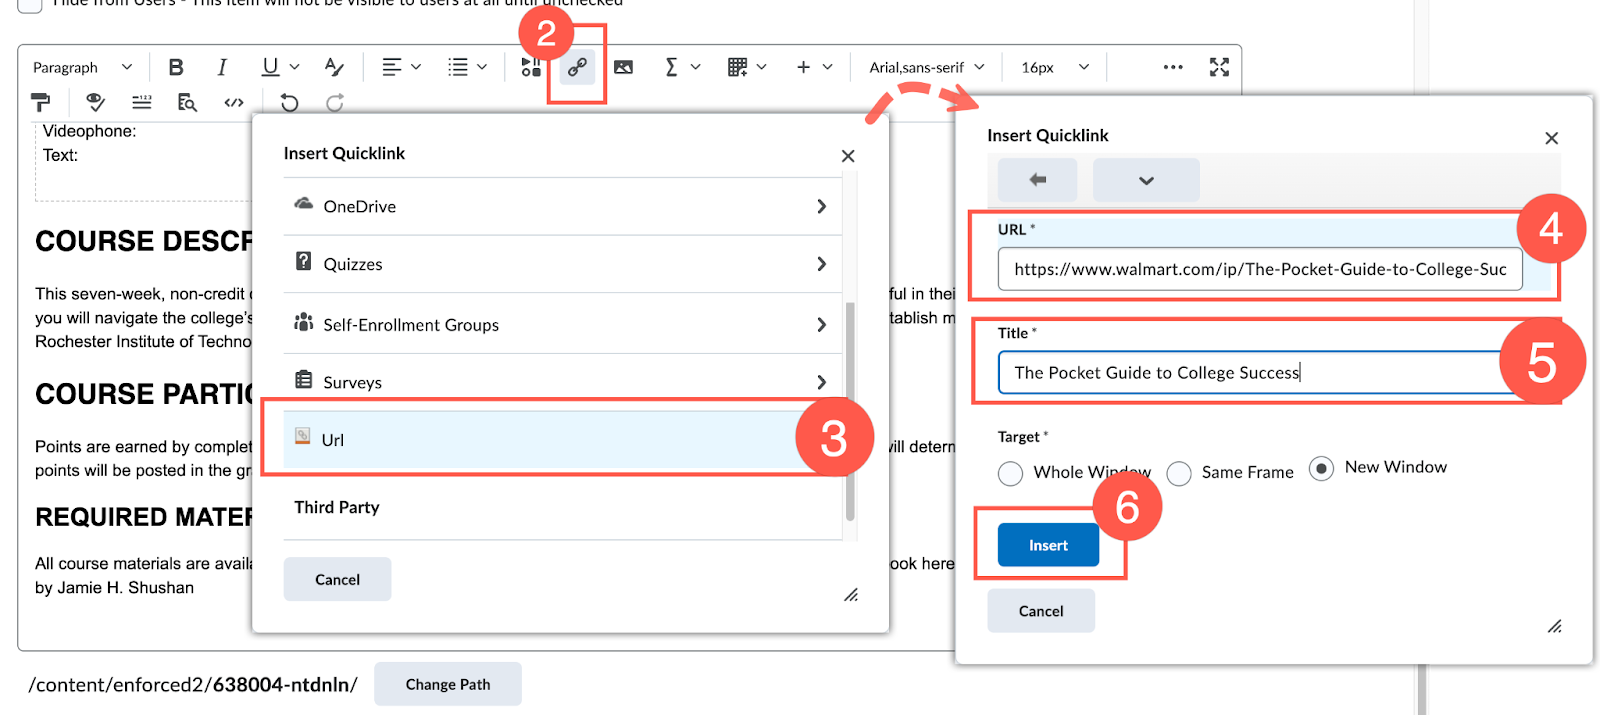
This instruction shows HOW to create accessible hyperlinks in the MyCourses HTML editor.
Add hyperlinks in MyCourse Editor.
Add a new hyperlink
- Place your course anywhere you want to add hyperlinks.
- Click on the Insert QuickLink icon on the toolbar.
- Select URL in the popup window. Scroll down until you see the URL option.
- In the URL box, type or paste the URL address
- In the Title box, type the descriptive text that describe the destination of the URL
- Click on the Insert button.
Note: When you select any type of link other than URL from the popup windows, such as a Google Drive file, the HTML editor will automatically use the name of the external file to generate the hyperlink text for that link.
Create a hyperlink text from the existing link.
- Double-select the link you want to add a text to
- When the Quick dialog box appears, click the Edit link icon.
- In the Title text, enter a descriptive text for that link.
- In the Link text, type or paste the destination's full link address.
- Select Create
