Berkeley|Student Information Systems |
SIS Job Aids #1121
Viewing Customer Accounts
This document will cover how to view a student’s account in Campus Solutions.
Please note:
- A student’s account is only viewable once a charge or credit transaction has been posted.
- As of Fall 2016, tuition and fees are calculated under these conditions:
- tuition is ready to be calculated (after the UC Regents meet and approve the fee amounts)
- the student has enrolled in at least 1 unit
- a student changes enrollment by dropping or adding a class
- In the previous system, due dates fell on the 15th of a month. Due dates in Campus Solutions are dynamic and can fall on any day of the month.
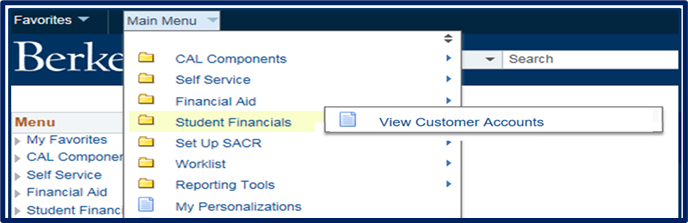
Path
Main Menu > Student Financials > View Customer Accounts
- Log into Campus Solutions
- Using either the Classic Menu or the Navigator icon, navigate to Main Menu > Student Financials > View Customer Accounts.
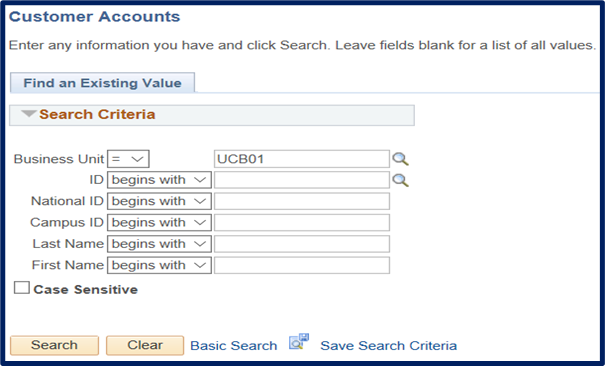
The Customer Accounts search page displays.
- Enter the Student ID.
- Click the Search button.
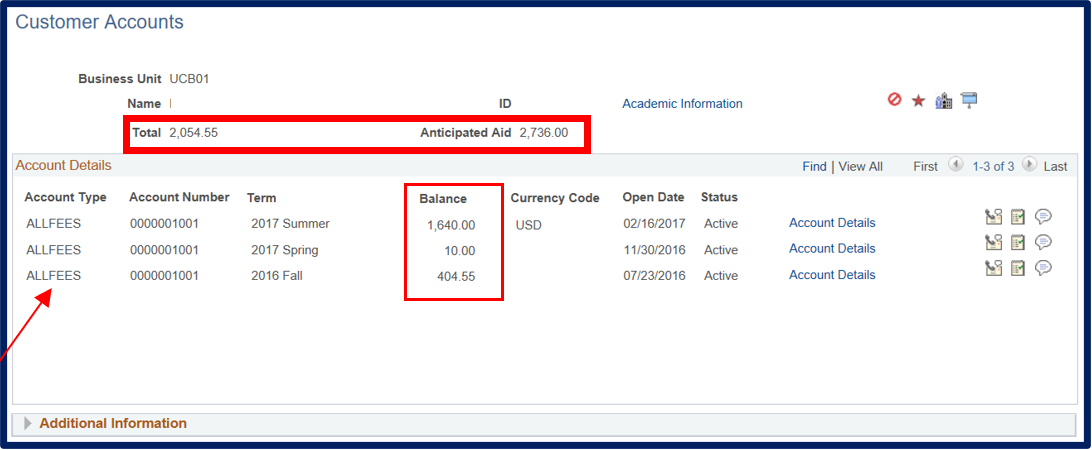
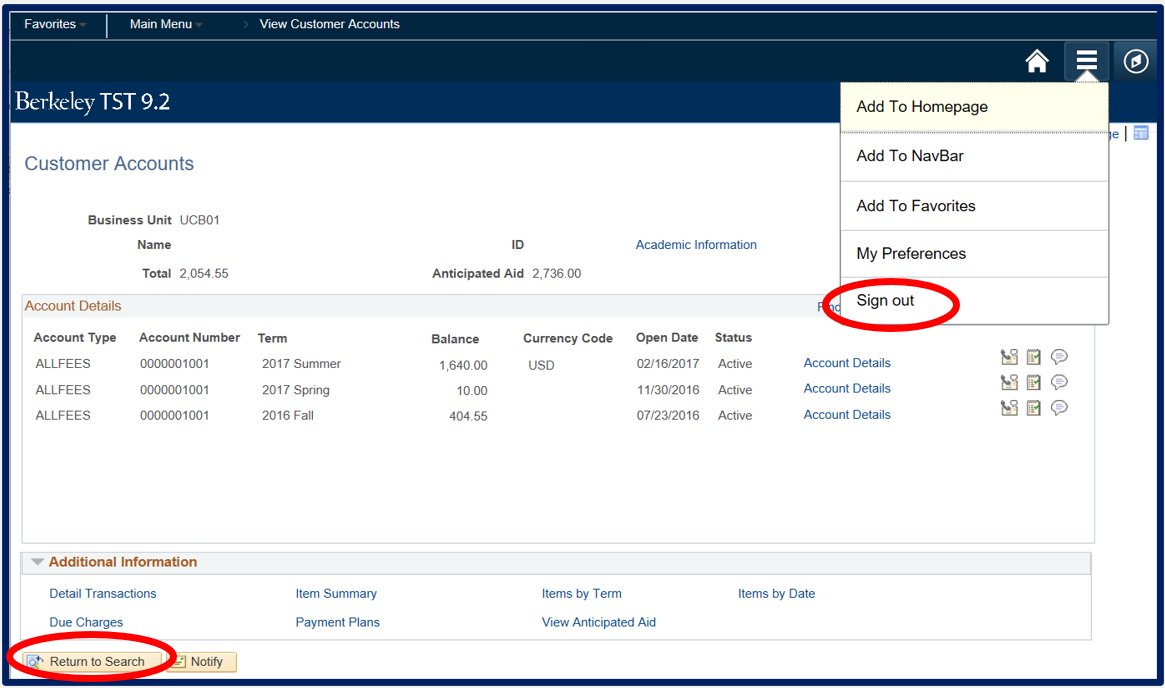
- The Customer Accounts page displays.
At the top, the Total balance and Anticipated Aid show.
Anticipated Aid is aid that has been awarded but not yet disbursed.
The Account Type of ALLFEES is listed. Account Types are used to classify charges. ALLFEES is the most common Account Type.
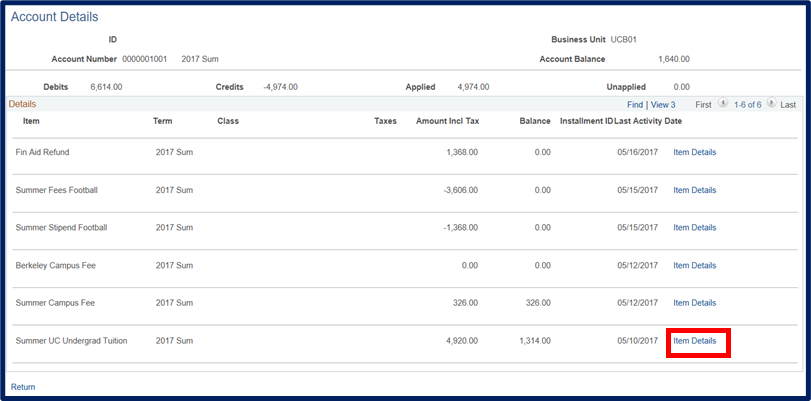
The remaining Balance for each term is shown
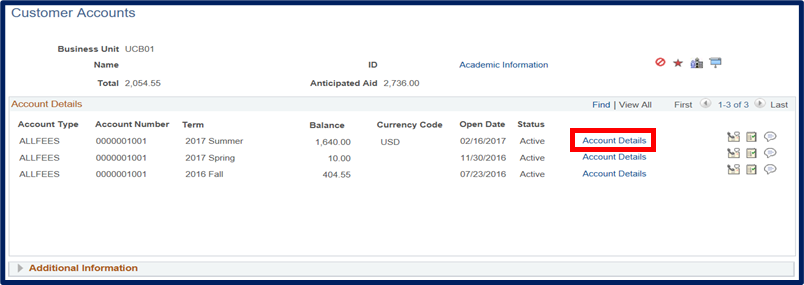
- Click on the Account Details link to view the transactions for this term.
- Click on View All to see all transactions.

- Click Item Details for a specific line item, to view its details, including:
- When the item was posted to the account
- Due Date for charge transactions
- Payments which have been applied to charges
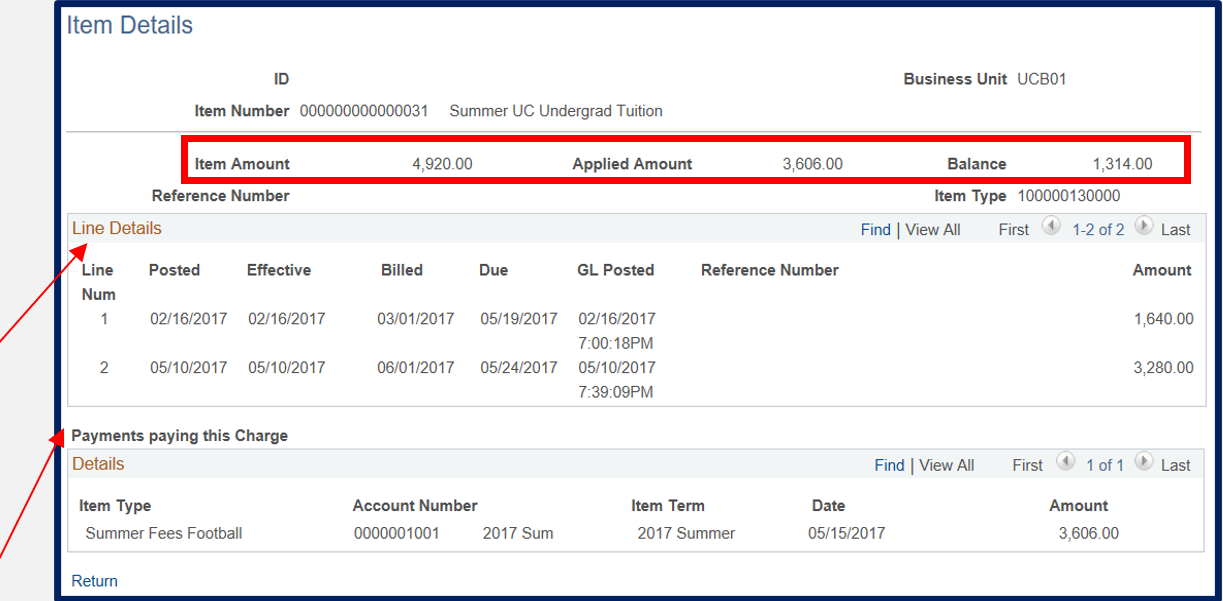
This is the most detailed data for a transaction.
- For charge items, the Item Amount total is displayed at the top of the page. The Applied Amount represents the credits applied against the charge.
The Line Details shows multiple lines for the transaction including relevant dates.
Payments paying this Charge shows the credit items that were applied to the charge.
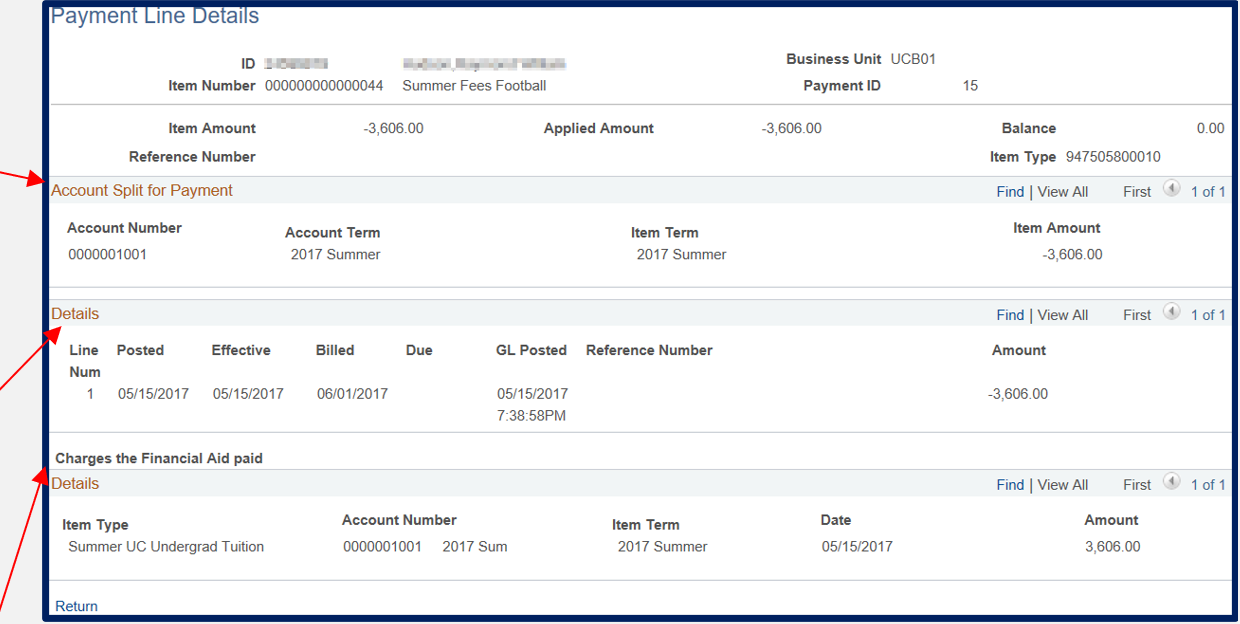
- If the transaction is a credit, Payment Line Details displays.
Account Split for Payment displays to what accounts the payment has been applied.
Details identify the relevant dates for the transaction; Posted, Effective, Billed, Due and GL Posted.
Charges the Financial Aid paid lists the charge transactions paid by this credit.
Click Return to return to the Customer Accounts page.
- At the bottom of the Customer Accounts page is a box labeled Additional Information
Click the Detail Transactions link.

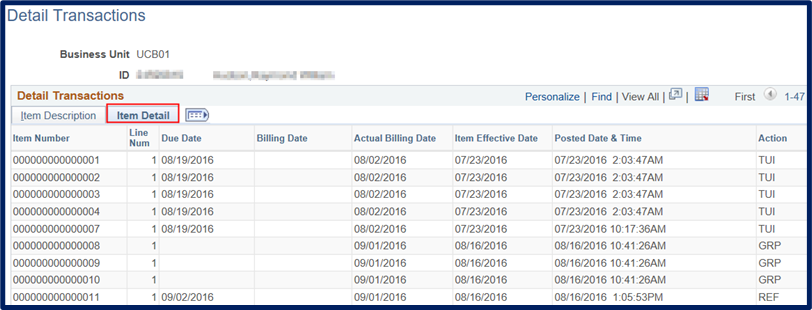
- The Item Description tab displays each transaction by Item Number. Item numbers are “counters” generated as transaction posts.
If the transaction is a payment, a Payment ID is displayed.
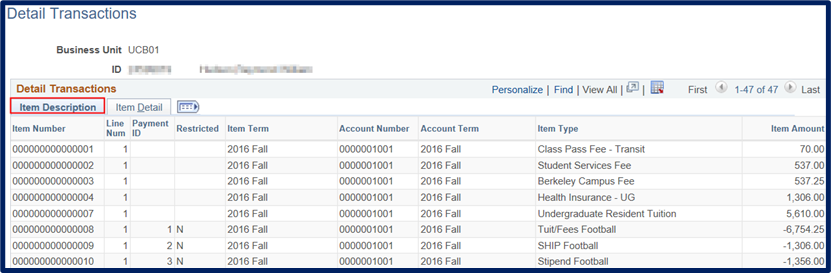
The Item Detail tab displays relevant dates for the transaction as well as identifying the action used to post it.
Clicking on any of the column headings sorts by that field.
Click Return to go back.
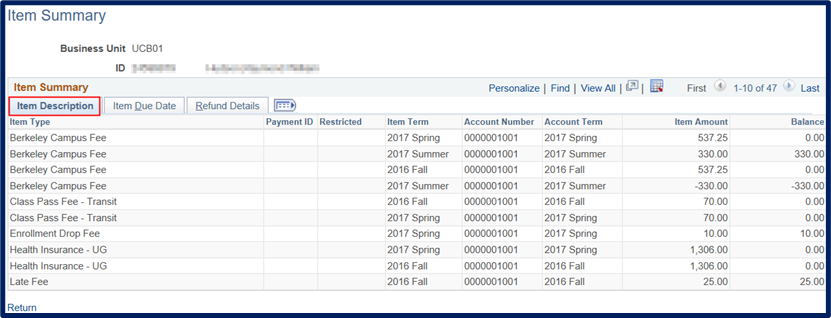
- Click on the Item Summary link.
The Item Summary page has three tabs and is organized by Item Type.
Item Types are codes created in Student Financials which describe the transaction. They also define the General Ledger accounts to which the transactions will be posted.
The Item Description tab shows each Item Type along with the Term and Item Amount.
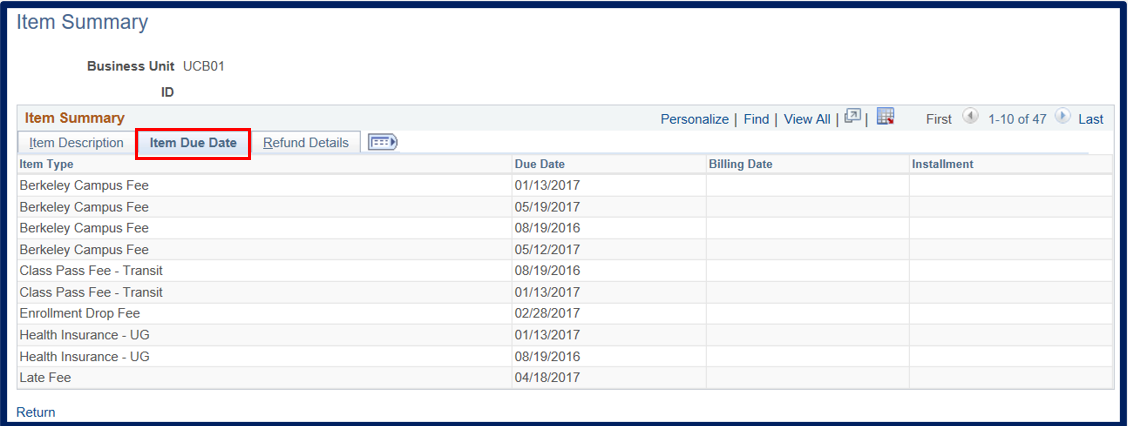
The Item Due Date tab displays the Item Type description and Due Date for charge transactions. For credits, no date is displayed.
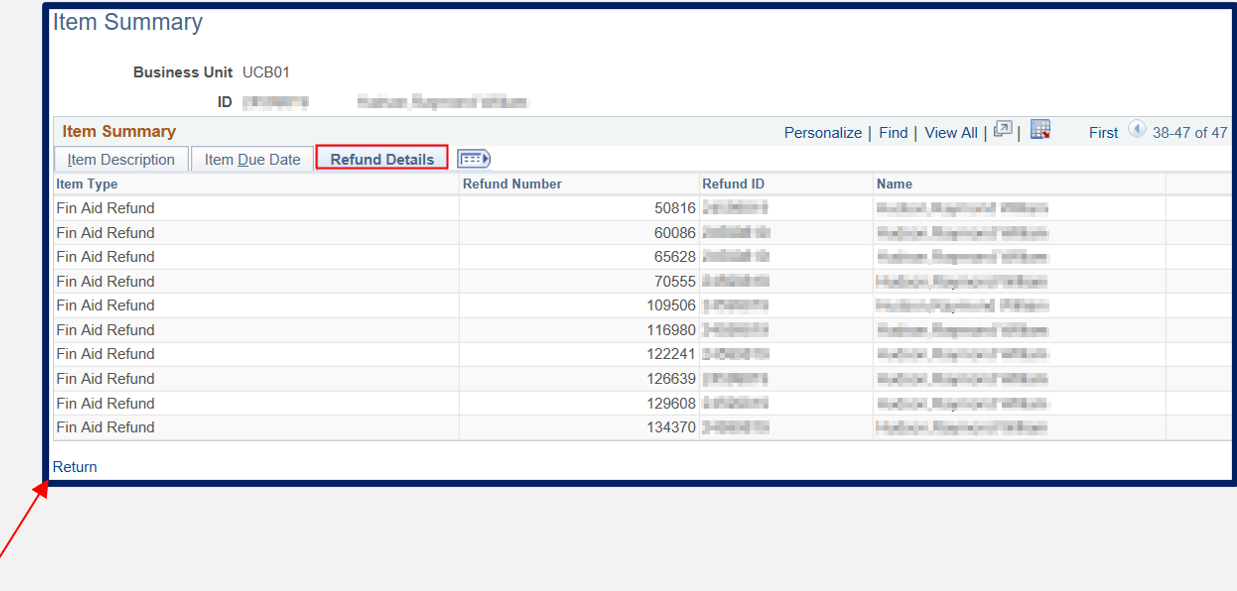
If a refund has been processed, a Refund Number will display.
The Refund Number is another “counter” to differentiate transactions.
Note: A refund is not a “reimbursement”, it is funds disbursed to the student.
Click Return to get back to Customer Accounts.
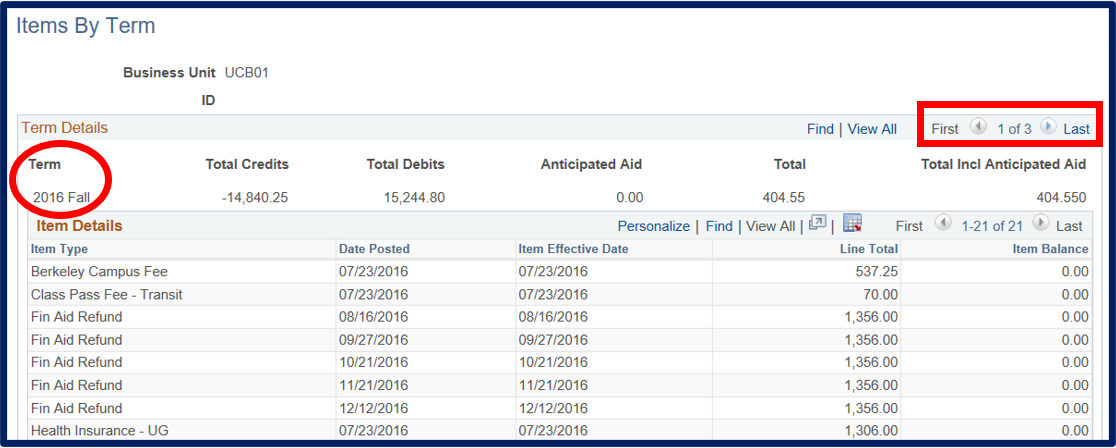
- Click on the Items by Term link.

Items By Term displays transactions by term. To change terms, use the arrows in the upper right.
Balances owed for each Item Type are shown in the far right column.
- Click the Return link to go back to Customer Accounts.
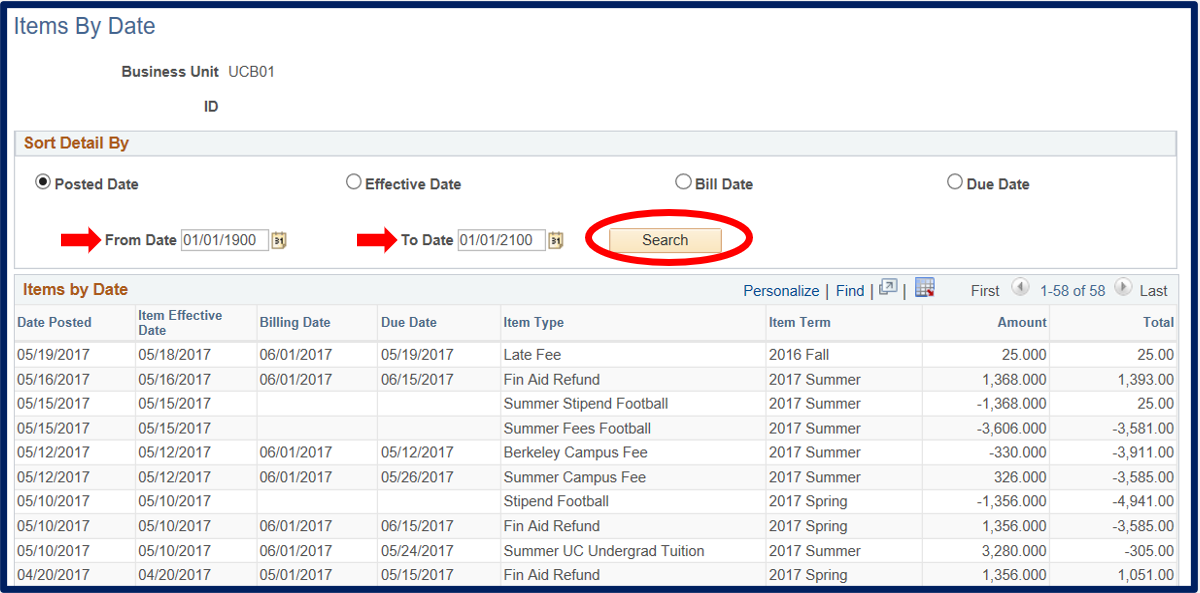
- Then click on the Items by Date link.

At the top of the page there are 4 date search options: Posted Date, Effective Date, Billing Date, or Due Date. The default is Posted Date.
Enter a date range in the From Date and To Date fields.
Click on the Search button.
Negative numbers are credits; positive numbers are charges.
The Total column shows a running total of the transactions.
- Click on Return at the bottom of the page.
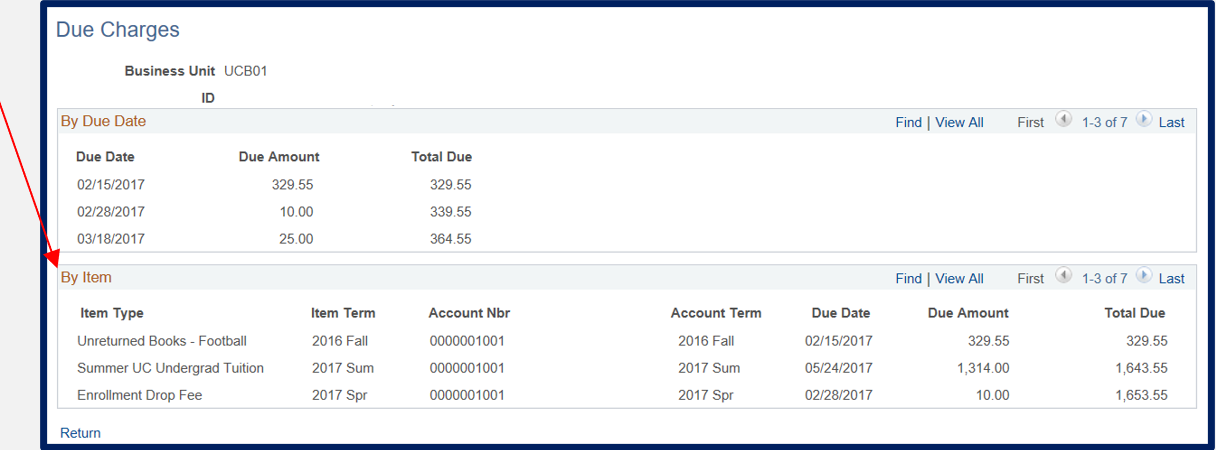
- Then, click the Due Charges link.

The By Due Date section of the page displays the total of transactions by Due Date. With multiple due dates, the Total Due shows a running total.
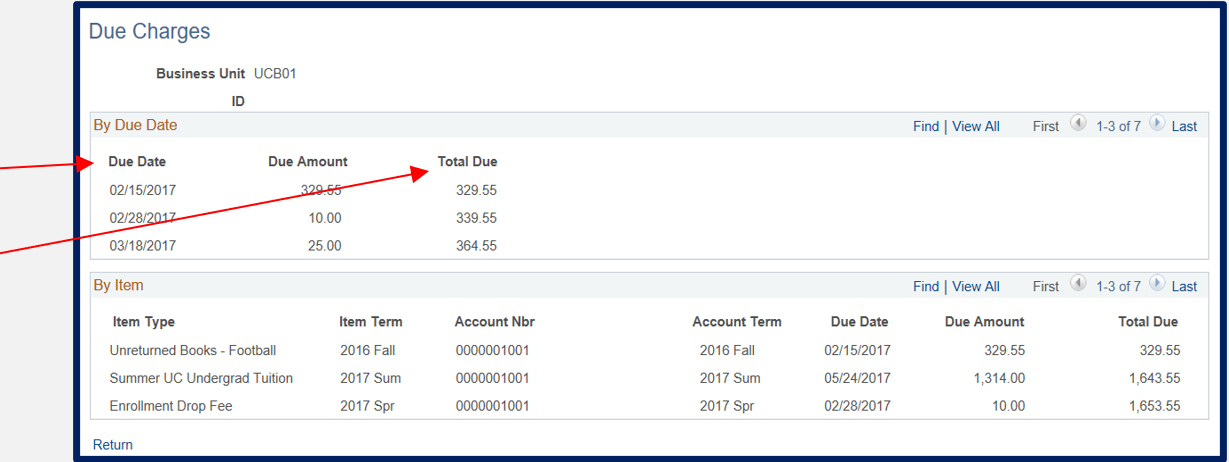
By Item shows the Item Types and their Due Dates along with a running total on the far right.
Click the Return link to return to the Customer Accounts page.
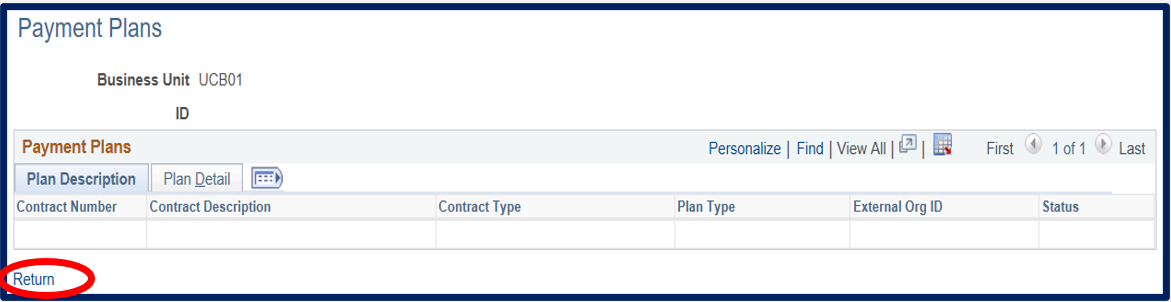
- If the student is enrolled in a payment plan, click on the Payment Plans link to view details.

Click the Return link to go back to Customer Accounts.
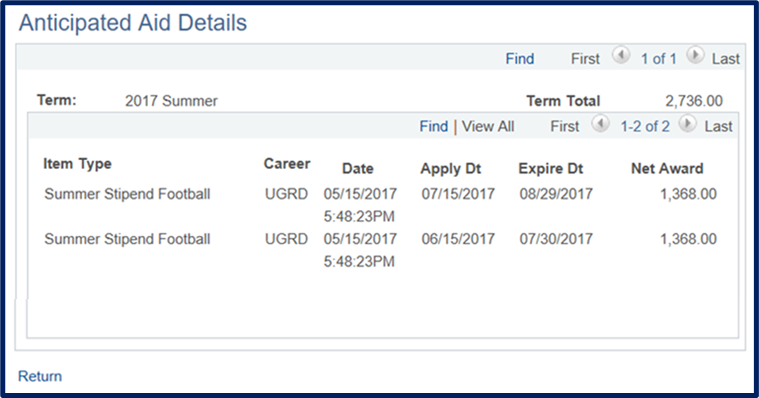
- Click the View Anticipated Aid link.

Anticipated Aid Details is a preview of awards.
Date is when the aid became anticipated. Apply Date is when the aid is expected to disburse. Expire Date is when the aid will expire. If the aid expires, it does not disappear from the student’s awards.
Click Return to go back to Customer Accounts.
- Click the Return to Search button to search for another student.
- Or click the Actions List icon to exit Campus Solutions.
SIS Job Aid #1121 Page of