TOP OF HELP DOCUMENTATION
Last Updated 11/17/2023 REPORTER Help Documentation |

Register Users and Mark Completion
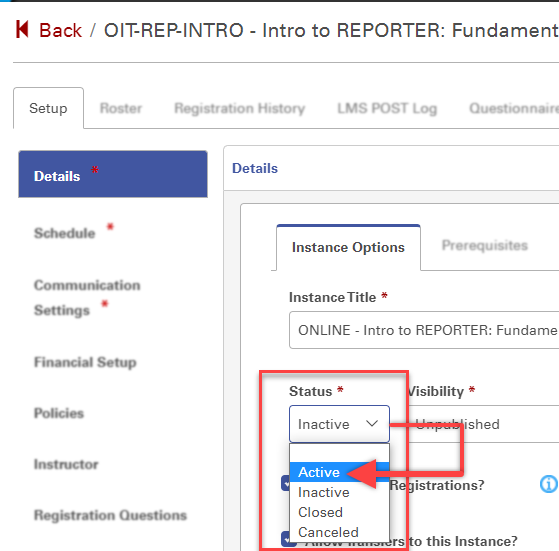
Participants can only be registered by a Course Admin after an instance’s registration end date passes. In order to register users for an instance, the instance’s status must be Active. The instance’s dates (Registration start/end, and instance start/end) do not matter; meaning an instance could be active even if it is in the past.
If you are a course admin for the related course, you will have access to the instance when editing the course using the left side menu options for “Activity Management > Courses & Instances”. If an instance is active, you will see a Register button within the roster tab of the instance while editing.
If you do not see this button, return to the profile tab of the instance edit and change the status dropdown field to ‘Active’. Then save the instance and return to the roster tab. You will then be able to register users through the cart and through bulk registration.
Table of Contents
Register Users to a Specific Instance
Historical Import / Import Completion Dates
Register Users to a Specific Instance
In order for anyone to register anyone else for an instance, they must add the instance to their cart, select the users they wish to register, and checkout. As a Course Admin, there are multiple ways you can select and instance to register users for:
- If the instance is public, you can select it from the course catalog using the ‘Add to Cart’ option
- You can select the ‘Add’ link next to the instance from your manage courses tab
- You can select ‘Register’ from the instance Roster tab
In this example, we will be selecting Register from the instance roster tab.
- In REPORTER, from the left sidebar, select Activity Management, then Courses & Instances
- Search for the course you wish to register users for and either double click, or select it to highlight it, then click the green “edit” button.
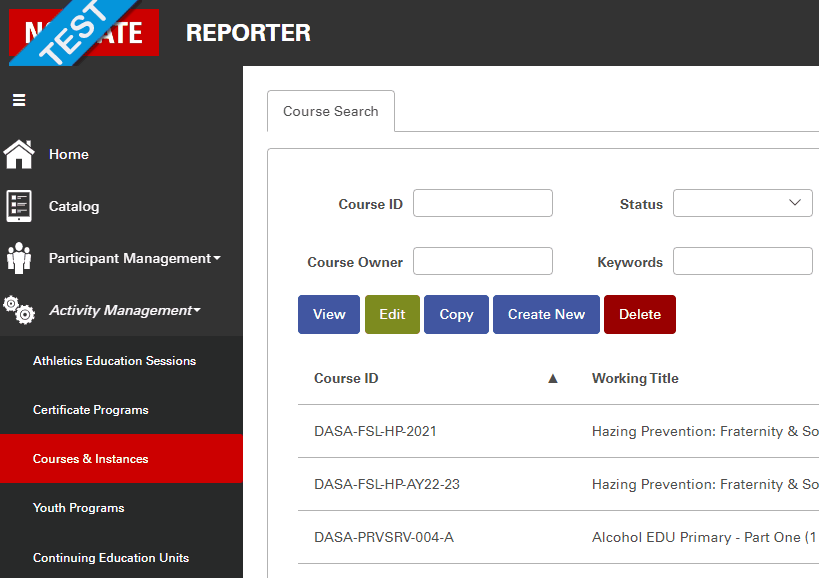
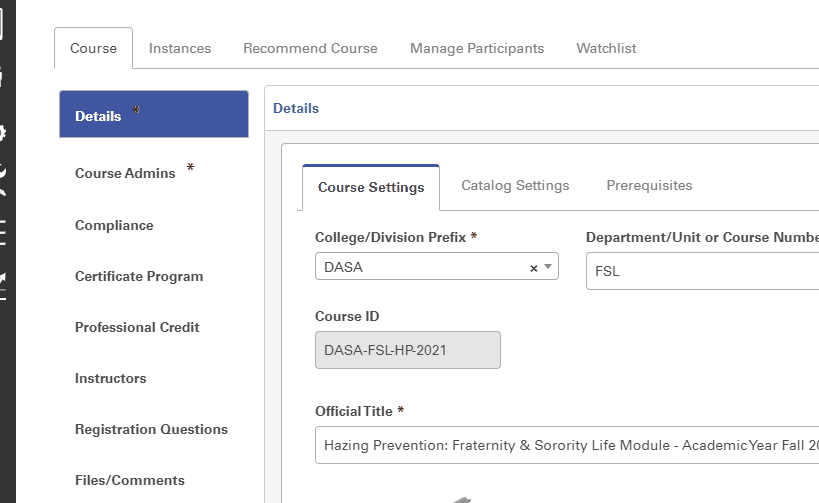
- Click on the Instances tab. Locate the instance you wish to register users to, double click it to edit.
- Select the Roster tab then click the Register button -- If you do not see a register button, it means the instance is not active.
- The instance will be added to your cart. Here you will indicate how many people you are registering and who those people are.
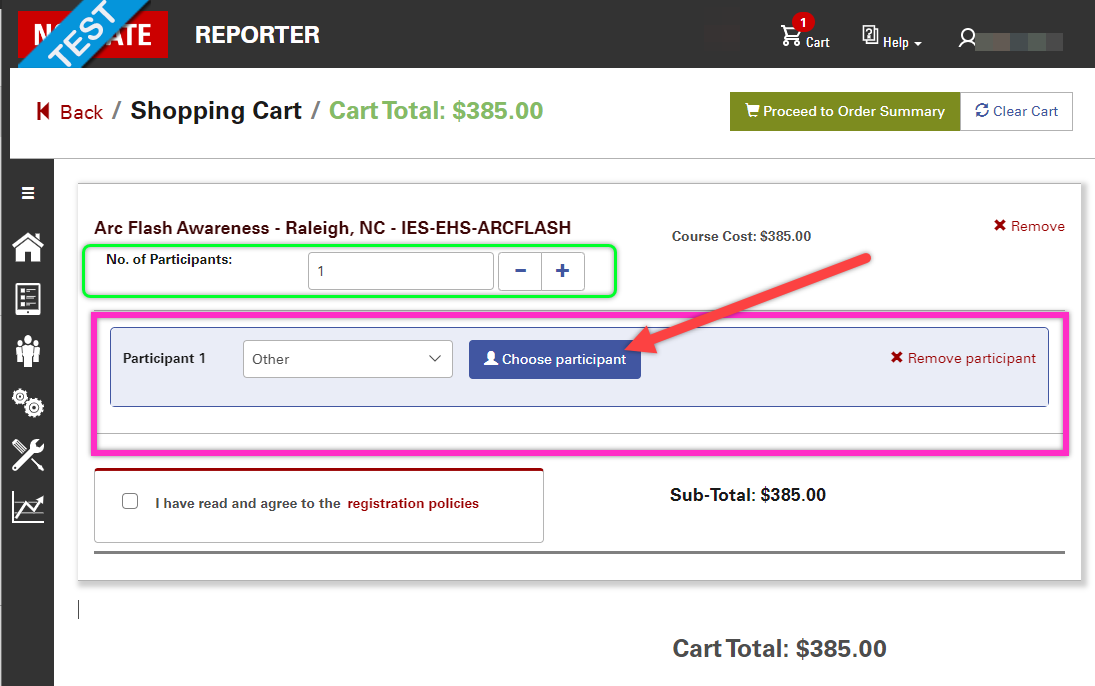
- Once you have selected all the users you wish to register, select the Proceed to Order Summary option..
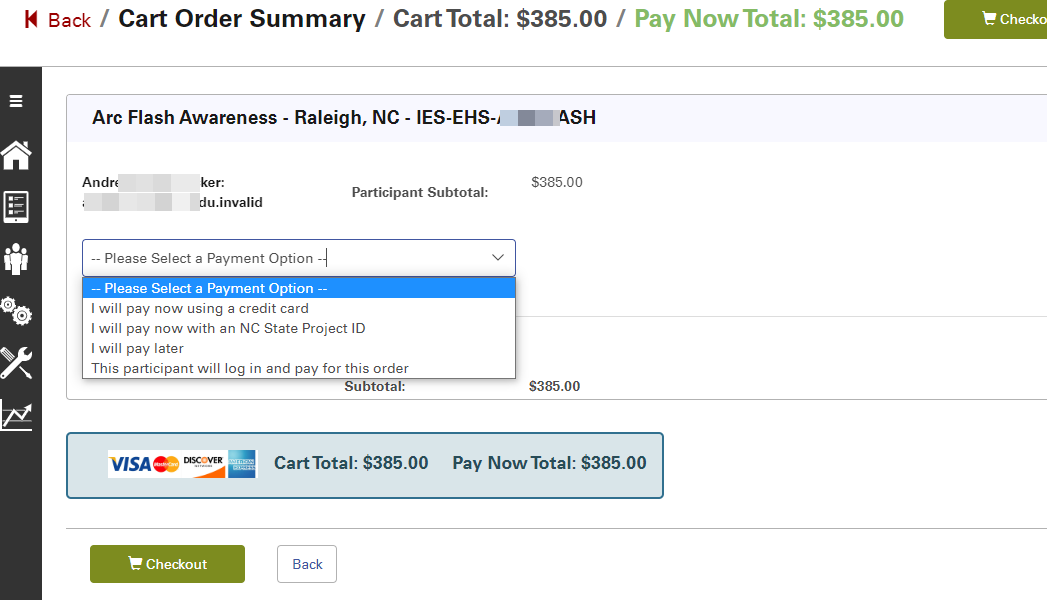
- Review your selection, if applicable indicate the payment option to be used for the registrant(s). Then select Checkout.
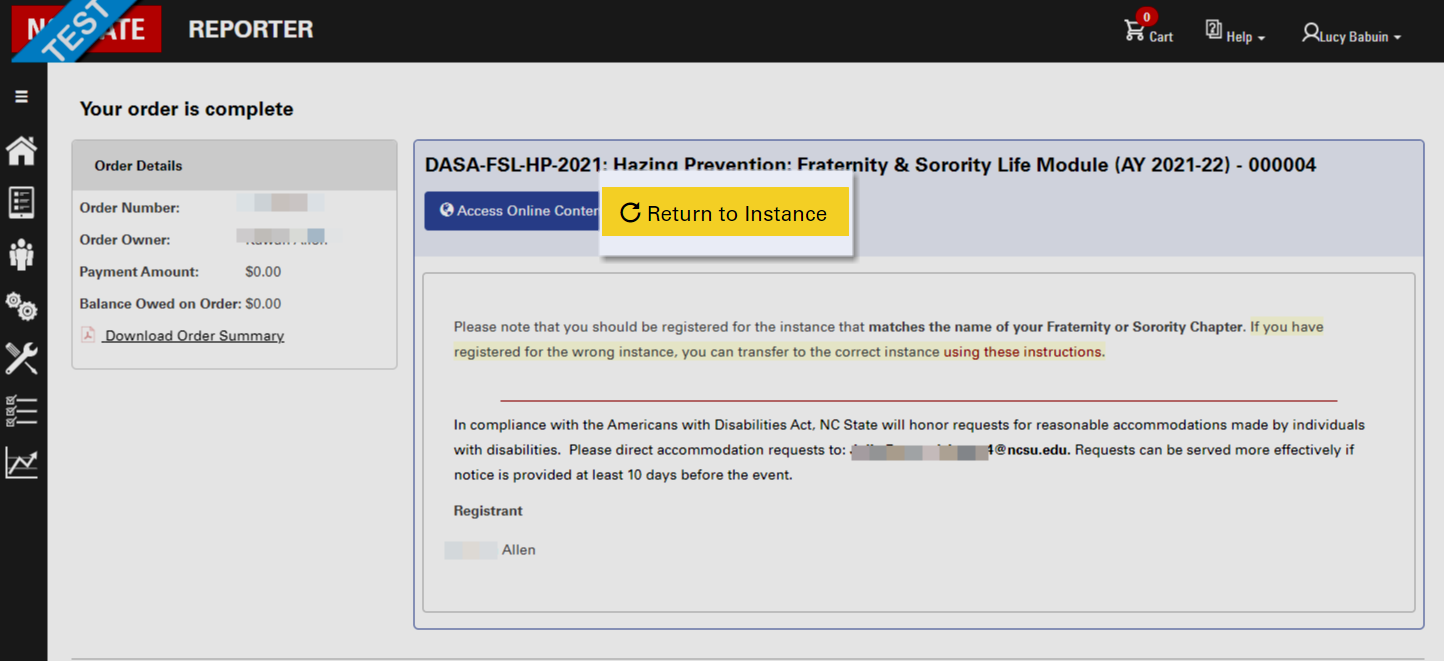
- Once the registration is complete, you will be brought to the order summary. You will have the option on that page to return to the instance.
Mark User’s Completion
In order for a participant to get credit for a course, the final attendance must be completed for the instance. To complete final attendance as a Course Admin, you will edit the instance and go to the Roster tab; then complete final attendance.
Open the instance in edit mode and open the Roster tab (Steps 1-5 above).
- Select the Edit Final Attendance button
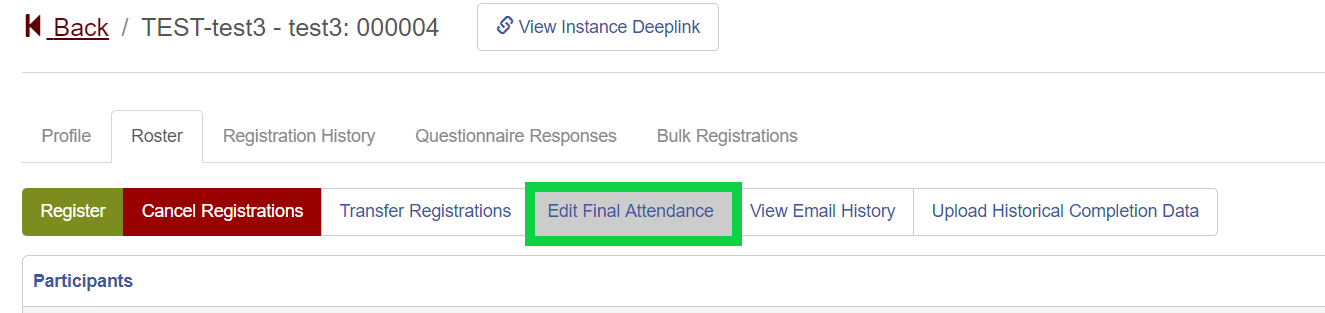
- A window will open displaying all of the users who are registered for that instance. To set their attendance, click on the dropdown next to their name and select their status. For more on attendance see Attendance Help Document.
- After you have entered everyone’s status, select Save. If the instance has a completion certificate configured, it will send to any users marked ‘Complete’ or ‘Pass’.
- Do Not select ‘Save and Close Instance’ until the instance has completed and all records have been updated for the instance.
Participants completion dates will be:
For Online Instances: The date you mark their final attendance
For Classroom & Webinar Instances: The end date of the class

Begin Section: Import Registrant after End Date
Importing Completions and/or Import Registrant after End Date
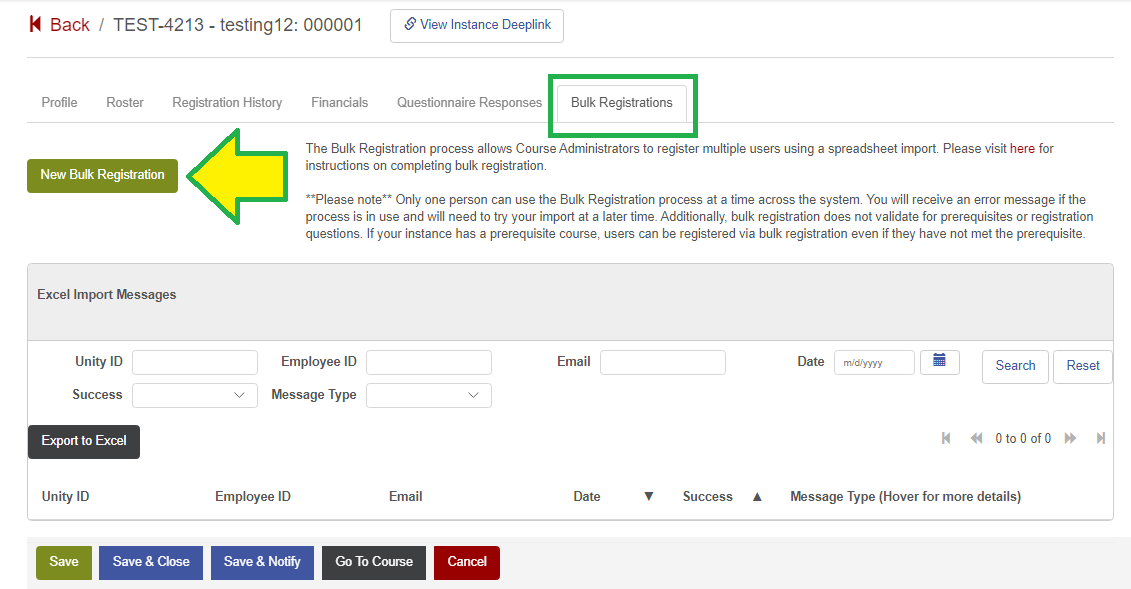
If someone attends class that is not registered, or if you need to add anyone to the roster after the fact, you can do so using the Bulk Registration import. If the participants should also be marked complete, you can include the completion date in the import template and the user will be marked complete.
1). | Edit the relevant instance and use the ‘status’ dropdown to ensure the instance is Active. | ||
If you are changing the status to ‘Active’, be sure to save the instance before continuing to the next step. | |||
2). | Then select the tab for Bulk Registration | ||
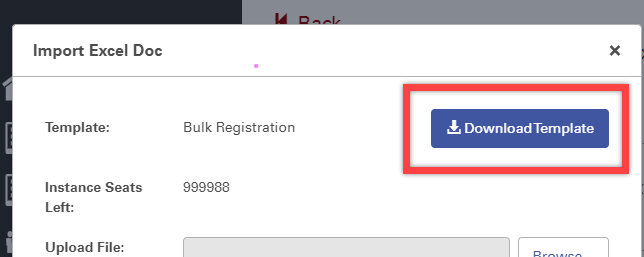
3). | Click the button for New Bulk Registration | ||
4). | Select the option to Download Template | ||
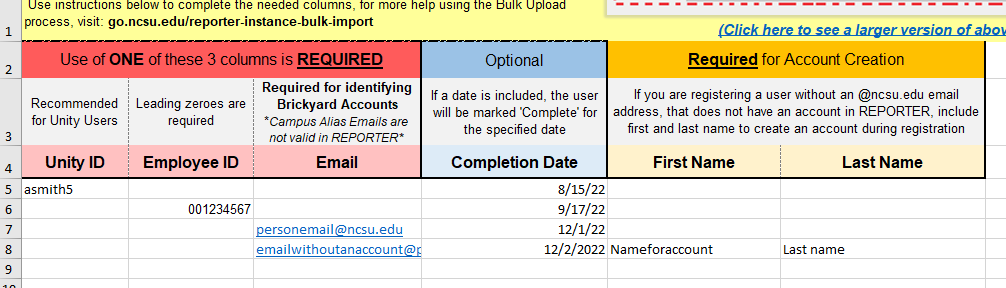
5). | Open the template in Excel and use one of the first three columns to identify who should be registered -- if they should also be marked complete, be sure to include the completion date in the template on the corresponding row of identified user(s). | ||
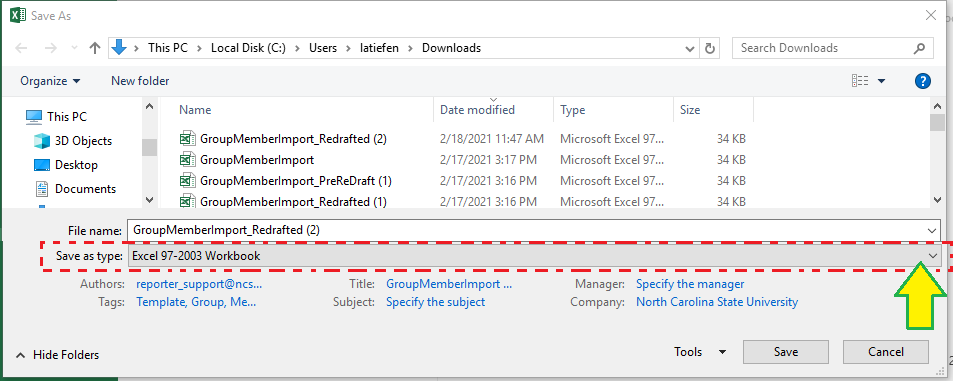
6). | Save the file, be sure you keep it in the .xls format | ||
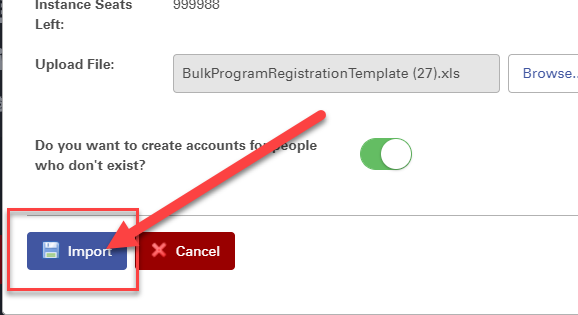
7). | Return to the Bulk Registration tab -- reselect ‘New Bulk Registration’ if the window is no longer open | ||
8). | Select the Browse option and select the file you just saved | ||
9). | Once the file is selected, click Import | ||
10). | Click Proceed | ||

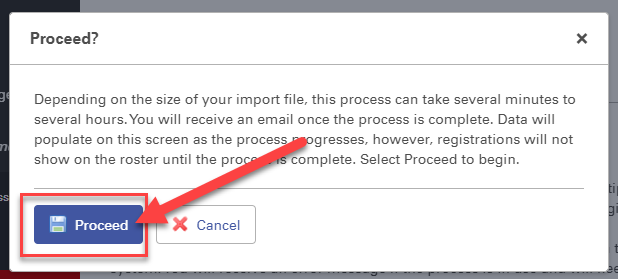
You can now navigate away from this page and will receive an email when the import has completed.
For more information about bulk registration import, please see: Import Registrants and/or Completions
For questions or additional information you can view our support site at support.reporter.ncsu.edu or you can contact us at reporter_support@ncsu.edu.