
Can-Am Renegade XMR DUAL Slip On
Thank you for purchasing from Empire Industries Inc. Please read all instructions thoroughly before installation. Failure to follow all installation instructions will void any warranty implied or otherwise. Empire Industries Inc. is not responsible for problems due to improper installation and/or improper use. Before installing this product, we recommend wearing safety glasses and mechanics gloves. You must know how to remove and replace your stock exhaust to install this Empire Industries product otherwise have it installed by a professional mechanic. Keep all stock parts from your existing system as some components may be necessary to install your new Empire Industries exhaust depending on the application
Installation Hardware
1- Billet clamp
1- Billet mounting bracket
2- Flat Steel mounting plates
2- 1” Round Aluminum spacers
6- 8mm Nylon nuts
4- 8mm X 45mm Flange Bolts
4- 8mm Flat Washers
3- 5mm X 12 Alan Screws
2- 8mm X 30 Flange bolts
2- Exhaust gaskets
2- 2” T bolt clamps
1- 1 7/8 T bolt clamp
12- 8mm X 20mm Button head alan bolts
Installation instructions
This Exhaust system requires the use of an aftermarket fuel controller. Running your motor without one can result in motor damage.
- Remove the rear seat and plastic.
- Remove the rear section of the stock exhaust system. Leaving the header in place
- Slide the new Y tailpipe onto the head pipe with the supplied 1 7/8 T bolt clamp
Next, Install the Supplied black brackets to the lower portion of the rear bumper using the Aluminum Spacers, 8mm X 45mm flange bolts, and nylon nuts as shown below.

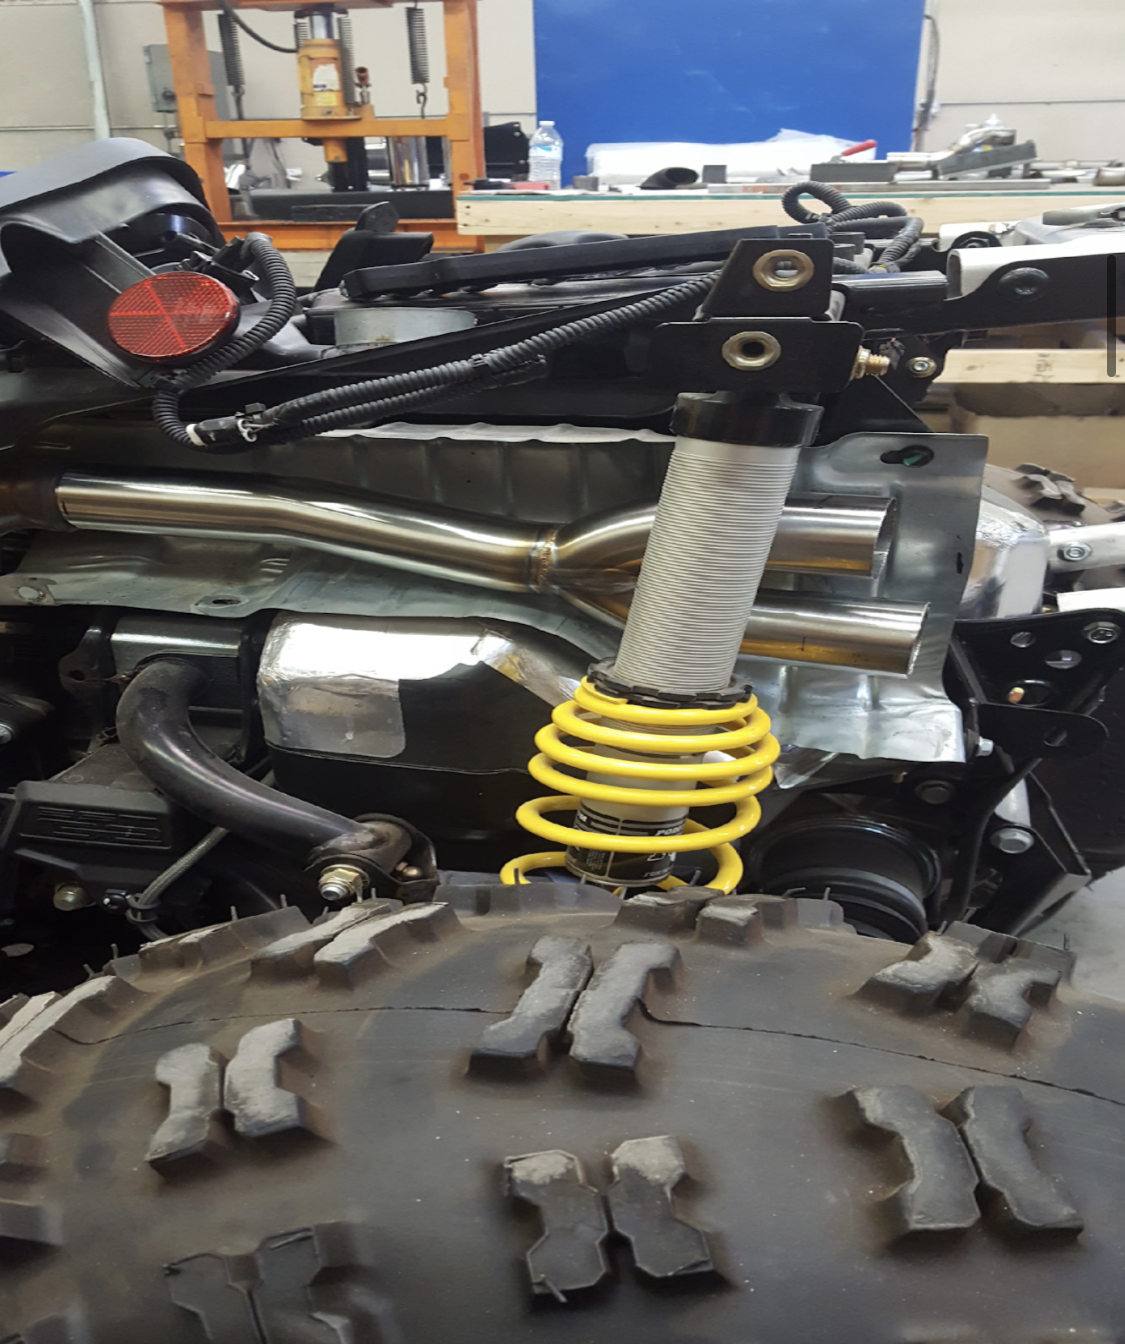
- Next install the long S-shaped pipe to the lower side of the new Y pipe making sure the clamp is installed, then Install the short S-shaped pipe onto the upper portion of the Y pipe as shown in the picture below, make sure the T bolt clamp is installed before installing upper S pipe.

Next, Install the frame mount bracket to the lower portion of the silencer mount bracket using the 3 supplied 5mm alan bolts as shown below.

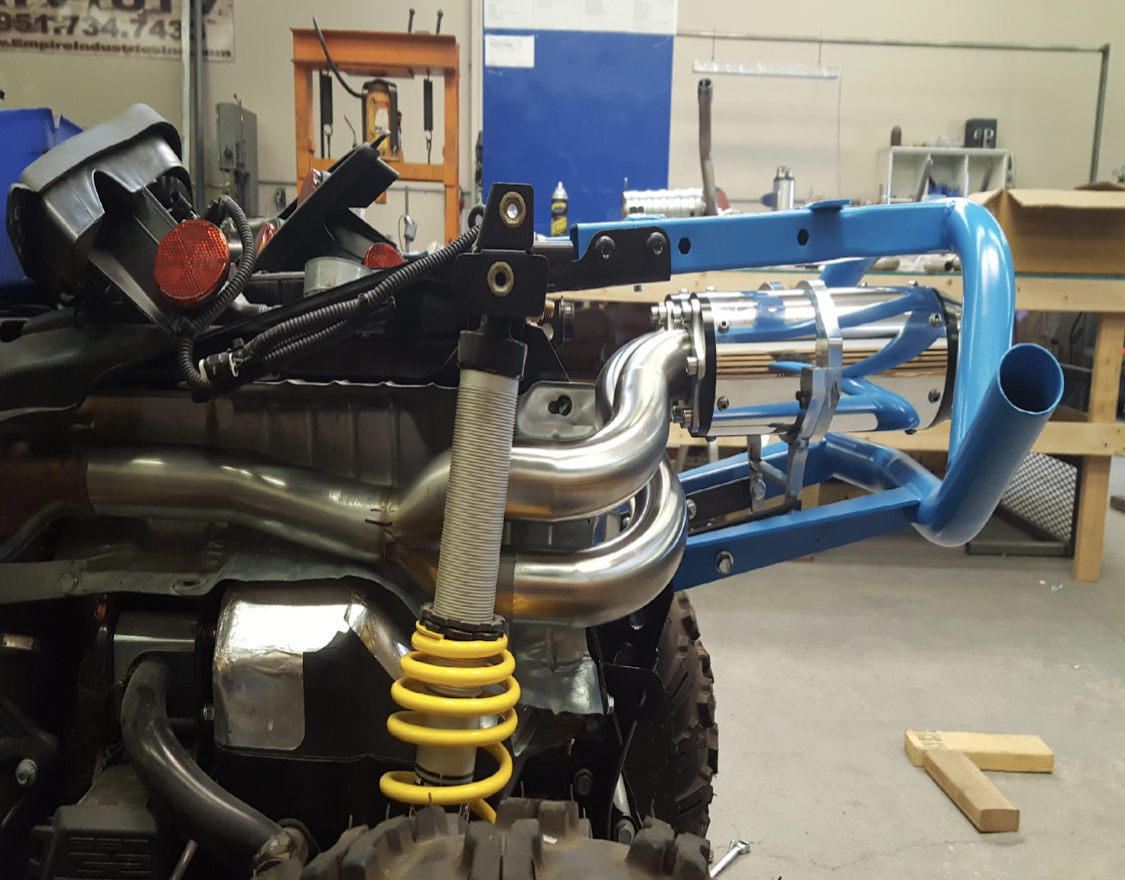
Next, install the frame mount bracket to the black brackets that you attached to the lower mount of your rear bumper. Mount with the frame mount bracket facing the front of the machine. Then line up silencers and mount them to the S pipes using the supplied 8mm alan bolts. Use Red Loctite on the threads of the bolts going into the silencers. Use the 1 short button head alan bolt on the inside radius of the left side silencer as shown in the picture. Last install the top silencer mount bracket using the 6mm x 16mm alan screws

Your end result should look like this. Make any small adjustments to ensure a good fit Then tighten up T bolt clamps and reinstall the rear plastic
- We recommend using red Loctite on the Allen bolts to ensure they don’t come loose
- We recommend repacking the muffler every 30 hrs
- Repack kits are available at Empire Industries Part # EMP-PAC-8
- Quiet cores available Part # Q-Core
- Spark Arrestor Available Part # EMP-SA
DISCLAIMER: All products manufactured and/or distributed by Empire industries Inc. are a) intended for use on stock vehicles specific to the U.S. market; b) for closed course use only unless otherwise stated and c) not intended to meet emission regulations for use on public lands, roads or access routes – consult with local jurisdictions. Empire Industries Inc. makes no claims as to the products applicability, effectiveness or fitment on modified machines. Empire Industries Inc. is the sole determines of abuse, misuse, installation errors and modifications. We assume no liability for any errors in listings, specifications, part numbers, prices or model applications. We reserve the right to change specifications, product descriptions, product quality, pricing and application at any time without notice and without further obligation. Buyer assumes all risk for any and all damage caused to themselves, a third party and/or property by virtue of failure of these products. By installing and/or using an Empire industries Inc. product, you hereby accept and understand these stated terms and conditions and have followed all instructional steps.
EMPIRE INDUSTRIES WARRANTY
All our exhaust systems come with a warranty against material defects and or workmanship for a period of 90 days. Any exhaust that is damaged by improper installation, modification, incorrect jetting, fuel mapping, misuse, abuse, or a crash will not be covered under warranty. Empire Industries can repair exhausts that are not covered under warranty at the customer’s expense.
Empire Industries recommends repacking the silencer every 15 to 20 hours. Failure to replace silencer packing can cause serious damage to the silencer. Any exhaust that is deemed by Empire Industries to be lacking in packing material is considered misuse, and abuse, thus voiding the warranty.
Any damage that occurs to the exhaust during shipping must be reported within 72 hours of receipt. Empire Industries is not responsible for any damage during the shipping process. Upon being notified of shipping damage a claim will be filed with the shipping company.
If there is a fitment issue with the exhaust, please call us immediately. Any Exhaust that has been fit on the vehicle and fired up or modified in any way will not be covered under warranty.
Empire Industries recommends that all exhaust systems be installed by a professional mechanic.
Customers must produce the original receipt to qualify for warranty repairs.
Shipping/Returns
If you should need to return your exhaust for any reason, please follow the following procedures.
1. Call Empire Industries at 623 439 5038 for a Return Merchandise Authorization (RMA)
2. All Costs associated with shipping are the responsibility of the customer. Empire Industries will not incur any shipping-related costs for non-warranty items. Items that are deemed to be covered under warranty will be returned free of charge UPS ground ONLY. Faster shipping is available at the customer’s expense.