
Zoom for Instruction FAQ
Instructors: For Zoom support please email zoom-help@berkeley.edu
Can I Integrate Zoom with bCourses?
How do I upload (Zoom) videos to bCourses?
Can I take attendance in Zoom?
How do I see and/or interact with my students in live Zoom sessions?
How do I make someone a co-host? Do they have to have a Zoom Pro account to be co-host?
What’s the best way to set up my display so I can see the chat and run my class at the same time?
How do students raise their hand?
How do I see if someone has raised their hand?
How can I prevent students from changing their participant name?
How do I share my screen in Zoom?
What do students see when I share my screen?
Can students share their screens? How do they do it?
Can I write on the screen (mine or the student’s shared screen)? How do I do that?
Can I use Zoom on my tablet or phone to share my screen?
What if my students can’t share their screen and/or audio?
Can I take remote control of a student's screen if they’re sharing? How do I do that?
How do I teach a music class using Zoom or get the best quality audio?
If I play a video during a Zoom session with students, will they be able to see and hear the video?
Why am I seeing a grey box when I’m screen sharing a DVD from a Mac?
How do I trim the beginning or end from a zoom video file?
Can I record only the audio of my Zoom session?
Can participants record a Zoom session via Zoom? How can you enable or disable this feature?
Can I publish Zoom recordings to my Course Capture private channel?
Microphones for recording: do I need? Where can I get one?
What are some best practices to ensure a positive learning environment online?
How do I prevent inappropriate behavior and “trolling” or “bombing”?
Permissions, Copyright, and Privacy
Do I need to get student permission to capture their video and save sessions?
Can I make my lectures public? Can I use YouTube or Vimeo?
Can I still show videos under fair use?
Who retains the copyright for these videos?
Will DSP caption my Zoom recordings?
Do I have to have my Zoom recordings captioned?
How do I create breakout rooms?
Can I share course captures with selected students only?
Are my Course Capture videos publicly available? Who owns the copyright?
If I have a Course Capture room, can I still record my lecture to an empty classroom?
How long will I be able to record in a Course Capture room?
Getting Started
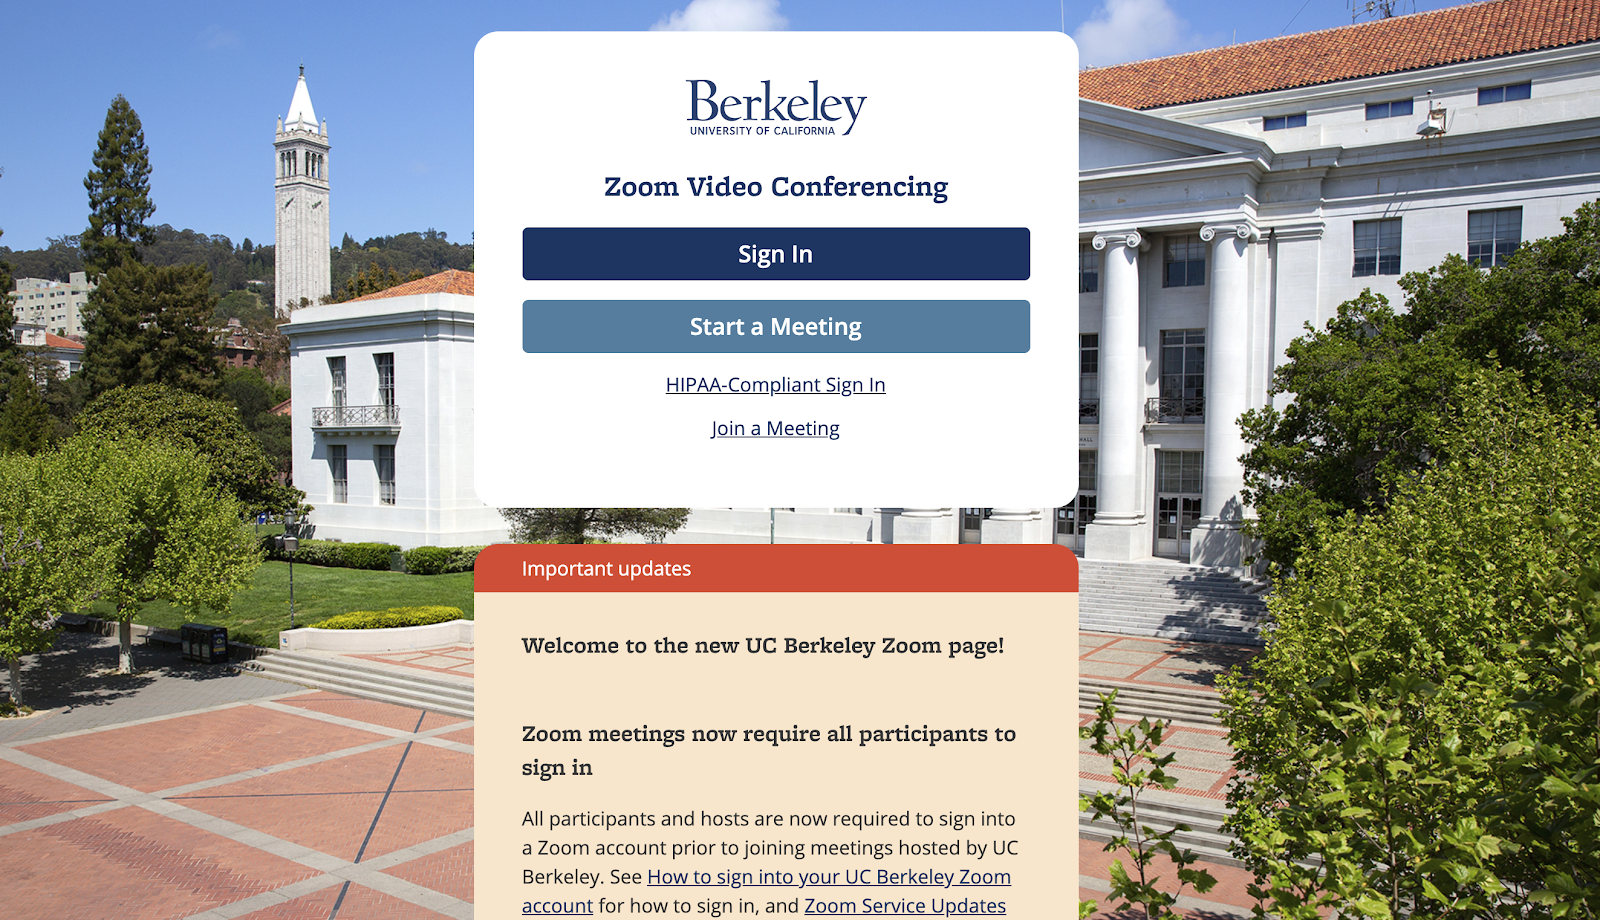
How do I log in?
Go to berkeley.zoom.us, click "Sign In" link in the top right corner. On the CalNet Authentication Service screen, enter your CalNet ID and Passphrase and click Sign In.
How do I download the app?
The desktop client ("app") will download automatically when you start or join your first Zoom meeting, and is also available for manual download from the Zoom Download Center.
- Types of Accounts
Do I have a Zoom Pro account?
Go to https://berkeley.zoom.us/profile. User Type: Licensed means you have a "Pro" account. If it doesn't say Licensed, try logging out and logging back in.

Do I need Zoom Webinar?
Your existing Zoom Licensed (Pro) account supports up to 300 student participants in a meeting. Webinar is an add-on product that is only needed for class events of greater than 300 participants. If you need Webinar for a 300+ size course, please send an email request to zoom-help@berkeley.edu and include your course name and number.
Do my students need a Zoom Licensed (Pro) account?
No, only the meeting host/organizer needs a Licensed Zoom account. Students are encouraged to download the Zoom app to their computer or mobile device, and join meetings through the app rather than their web browser. Using the app, rather than the browser, allows students to be assigned to Breakout Rooms. Note: Newer breakout room functionality, including self-selecting breakout rooms will only work on Zoom version 5.4+
- Meeting Options
Should I use my personal meeting ID for multiple live sessions via Zoom or create a new meeting with a unique meeting ID each time?
There are many reasons why you might opt to create a new meeting for each live session or use your personal meeting room ID. The main difference between the two is that once you give out your personal meeting room ID or opt to generate a meeting that uses your personal meeting room ID rather than a unique ID, it is possible for anyone with the link to join at any time. When you schedule a meeting and generate a unique link, only people invited to that meeting at that time can access it.
Some faculty have experienced “Zoom-bombing”, where an individual (usually not a member of the class) uses a link to a meeting that was shared publicly to join and to share violent or disturbing imagery. For this reason we generally suggest not sharing your personal meeting room ID with any other than close collaborators. Berkeley’s Information Security Office has more information on their website.
- bCourses and Zoom
Can I Integrate Zoom with bCourses?
Yes, an integration that allows you to schedule meetings from within bCourses is available. Instructions on enabling and using the integration are available here.
If scheduling meetings on your bCourses calendar is not essential, you may prefer to schedule directly from the web (berkeley.zoom.us). Note that students do not see the Zoom link in the course navigation menu that is displayed to instructors, and must navigate to their bCourses Calendar to access links to meetings you create using this integration.
If you are recording a lecture using Zoom or want to host private meetings (e.g. office hours, group project consultations, etc.), Zoom integration will not fit this need because all students in the class will receive the link providing access to the meeting. Review documentation on how to record and distribute lectures via Zoom and schedule private meetings with students via Zoom.
Known issue: Some users are encountering the error message “Could not identify oauth state parameter. (4,700)” when accessing the integration. If you encounter this issue, please contact bcourseshelp@berkeley.edu so we can track your issue and notify you of a resolution.
How do I upload (Zoom) videos to bCourses?
Review documentation on sharing your Zoom recordings using Kaltura or Google Drive and bCourses. We recommend using Kaltura for transferring videos to bCourses. Directly loading video files to bCourses has limitations on storage capacity, and upload/download speeds.
Using Zoom for Live Sessions
- Hosting and Moderating
Can I take attendance in Zoom?
If students login with their names or a particular screen name you have already documented for individual students, then you will be able to produce a report of who attended via computer or tablet. Students dialing in by phone will not have access to registration or polling features, and their phone numbers will either not be available or will appear as (area code)****(last three numbers) due to FERPA concerns. The number of students dialing in by phone tends to be very small, and we recommend making alternative arrangements open to them.
Asking students to register and requiring authentication will be necessary (but also raises the bar for participation, which may be undesirable).
Zoom Guide: Registration for Meetings
Zoom Guide: Authentication Profiles for Meeting and Webinars
Once the meeting is scheduled, a registration link will be generated that should be shared with students enabling them to register. Upon registering, they will receive an email with the link for the Zoom call. The default setting is that students who register will be automatically approved to join. Unless otherwise modified by editing the scheduled meeting, the following information will be required for meeting registration:
- First Name
- Last Name
- Email address (we recommend that students use their berkeley.edu email addresses)
To generate a report of the registered attendees, sign into berkeley.zoom.us, click on “Reports” in the left hand navigation, and select “Meeting.” Next, click “Generate” (next to the meeting ID) to create a report for the desired meeting. The default is to produce a report for all registrants.
Zoom Help Guide - Getting started with reports: Types of reports for members
Zoom Guide: Generating Meeting Reports for Registration and Polling
Alternatively, you may utilize a poll or polls to take attendance.
Zoom Guide: Polling for Meetings
Zoom Guide: Generating Meeting Reports for Registration and Polling
Finally, it is also possible to view meeting participants in the “Usage Reports.” To generate a report of the registered attendees, sign into berkeley.zoom.us, click on “Reports” in the left hand navigation, and select “Usage. “ To view the meeting participants, identify the desired meeting, and click the number in the column “Participants.” To generate a file, click “Export.” There are a few considerations to keep in mind when using this option:
- You may notice that the same student shows up as a participant multiple times - this likely means that they were disconnected and then reconnected.
- It is possible to see a list of attendees without registration/authentication; however, you may not be able to accurately match participants with your student roster.
- Zoom provides an “attentiveness score” which is based on having Zoom in focus, or open as the primary window. Please use caution when interpreting this value. If students are, for example, taking notes during the session in another window, this will reduce their score.
How do I see and/or interact with my students in live Zoom sessions?
When you are holding a live session in Zoom you can identify students who have joined the session; Zoom offers directions on their website with screenshots. San Jose State University created a YouTube video on managing students in a Zoom session and interacting with them utilizing “poll” settings.
If an individual has joined who is being disruptive, Berkeley’s Information Security Office has a list of options you can use to deal with the situation and to prevent it from happening again.
How do I make someone a co-host? Do they have to have a Zoom Pro account to be co-host?
When you schedule a meeting, open the “Advanced Options” and you will see a field where you can add an “alternative host.” Add the email address of the person(s) you’d like to have co-host the meeting. Note that your co-host will need to have a pro account to be added, and will need to have an @berkeley.edu email address to be added in advance of the meeting. You can appoint someone who does not have an @berkeley.edu address as a co-host during the meeting if needed.
What’s the best way to set up my display so I can see the chat and run my class at the same time?
This will be a matter of personal preference. In order to view your “main classroom” and chat area at the same time you’ll navigate to the bottom of your screen and locate “chat.” See this view for a two-step scenario.
If you have two monitors you can enable the dual-monitor display feature. See this Zoom help article for more information: Using Dual Monitors with the Zoom Desktop Client.
How do students raise their hand?
Students can raise their hands by going to “Participants” in the Zoom meeting toolbar, available whether they join via the Zoom app or via browser. Beyond raising their hand, there are lots of options people might select (e.g. Yes, No, Break Requested, etc). However, many instructors have reported that it's hard to pay attention to this feature while lecturing and that this feature does not indicate the order of who raised their hand. As an alternative, you might ask students to share their comments and questions in the chat.
How do I see if someone has raised their hand?
When you’re the host of a meeting, you will see “Manage Participants” in the Zoom meeting toolbar. When you open that window, you will see a list of participants and the hand icon next to their name when they raise their hand. Depending on how you are viewing the meeting participants windows, you will also notice that a hand appears in the corner of a participant’s video window when they are raising their hand. However, note that the raised hands aren’t ordered so you won’t know who raised their hand first. As an alternative, you might ask students to share their comments and questions in the chat.
Is there a way to take queued questions? I won’t know who came in first or asked a question first and I want to make sure I answer the questions in the order received.
You may find this information from Zoom on “In-meeting chat” (meaning synchronous chat in Zoom) useful. How you take queued questions during a live-streaming course will vary based on personal preference. You can ask students to put their questions in the chat area and they will be ordered (from top to bottom) based on questions asked first to last. You might also choose to share a Google doc during class and have students enter their questions there. Be mindful that students may be accessing your course on their mobile device and will consequently have a smaller viewing screen in which to toggle. You might also consider assigning a student to track the questions/comments to limit the potential that you become distracted while trying to deliver course content.
How can I prevent students from changing their participant name?
When a student, staff, or faculty member sets up their Zoom account through berkeley.zoom.us, this is automatically connected to their CalNet ID and Berkeley email address. However, anyone can change personal details, including their name, on their account profile. The profile information will appear by default when a participant enters a Zoom meeting and cannot be changed by the meeting host.
Within a Zoom session, participants have the ability to change the name associated with their thumbnail and chat messages just for that meeting unless this is disabled by the meeting host. To disable this (recommended), please follow these steps:
- In your open Zoom session, click on “Participants” at the bottom of the window. This will bring up a pop-up window showing a list of participants.
- Click on “More” and then uncheck “Allow participants to rename themselves.”
Note that this setting can be changed even when there are no participants in the session so it may be a good idea to do this in advance of your class starting.
See Community Norms below for more information.
- Screen Sharing
How do I share my screen in Zoom?
After you start the meeting, you will see a green button that says “Share” located in your meeting controls, at the bottom of the Zoom window. Click it and you will see options for your windows. The window outlined in green is what is selected. You can choose any window you want. If you have a PowerPoint slide deck and you’ve already opened it, you can select to only share that on your screen. If you think you’d like to show many different windows (i.e. jump from your slides to a website to a video on YouTube) then you may want to share your entire desktop. Keep in mind if you do opt to share your entire desktop to “clean it,” removing any personal items before sharing. You can read more about how to share your screen and the functions available in Zoom’s guide on sharing your screen.
What do students see when I share my screen?
Students will see whatever window you’ve shared with them on your computer and what is being recorded from your video camera. It is outlined in green. This means that they will still see your face and the space you are in if you are recording from your computer’s camera in addition to anything on the screen. You can turn off your video if you do not want students to see your face while sharing your screen.
Note: when the instructor first shares their screen with students, by default the Zoom application will suddenly switch full screen in the student view. Students will need to exit fullscreen (Click “View Options” controls at top, center) to do other computer activity. Students can prevent their display from automatically going into full-screen mode in the Zoom app, by selecting Settings -> General and unchecking “Maximize Zoom window when a participant shares their screen”.
Can students share their screens? How do they do it?
By default, only hosts can share their screen. If you wish for students/participants to be able to share their screens, you can change this by clicking the “^” menu next to “Share.” Select “Advanced Sharing Options” and change “Who can share?” from “Only host” to “All participants.”
Once participants have been given access to screen sharing, this quick video from Zoom shows how your students can share their screens as long as they’re using the Zoom app.
Can I write on the screen (mine or the student’s shared screen)? How do I do that?
Yes, please see following guide:
Zoom Guide: Using annotation tools on shared screen or whiteboard
Can I use Zoom on my tablet or phone to share my screen?
Yes, you can share your tablet screen just like you would your desktop after you begin a meeting. In order to do so, you will need to have downloaded the desktop client (“app”) on your tablet or phone. Review the directions from Zoom on iOS Screen Sharing with the Zoom Desktop Client.
What if my students can’t share their screen and/or audio?
There are several ways to troubleshoot this concern based on the precise problem being encountered. First, confirm that your students are accessing the Zoom meeting via the Zoom app (and not just copying and pasting the meeting link into their browser without having installed the application first). You can also share this resource on “Sharing computer sound during screen sharing.”
Can I take remote control of a student's screen if they’re sharing? How do I do that?
You can take control of another person’s screen in a meeting. Review Zoom’s guide on how to request or give remote control. When a student shares their screen, you also have the ability to use the annotation tool to draw on their screen without needing remote control. Review Zoom’s guide on using annotation tools on a shared screen or whiteboard. Note that you only have access to their shared screen, not their entire desktop.
Zoom Guide: Using annotation tools on shared screen or whiteboard
- Video and Audio
How do I teach a music class using Zoom or get the best quality audio?
By default, Zoom audio is optimized for speech and assumes one person speaking at a time. As a result, the audio may sound garbled or not represent the full range of sound if you are playing music or a video. To override the default, you will need to change your meeting settings to “Enable Original Sound.”
This video from the Royal Academy of Music in London guides you through this process and includes many helpful tips: https://www.youtube.com/watch?v=50NoWIiYECA. The video also shows you how to get the best audio when screen sharing.
If I play a video during a Zoom session with students, will they be able to see and hear the video?
Sharing video and audio during a Zoom session is possible; however, playback quality for viewers may be poor. It's recommended that video content be shared outside of the Zoom meeting, via a link in bCourses. An announcement can be sent to students instructing them to watch the video before class for example.
To share video and audio from your computer, first, click on the “Share” button in your meeting controls. You will see the windows available for sharing, including the video if it is a file open on your computer or a streaming via a website. At the bottom of this window, there is an option “Share Computer Sound.” Click on the box next to this before sharing your screen, ensuring the audio from the video will be heard. Note that you will need to have administrative access to your computer to allow Zoom to access the audio functionality. You can read more from Zoom about sharing your computer sound during screen sharing.
Why am I seeing a grey box when I’m screen sharing a DVD from a Mac?
By default, screen capture is disabled on the Mac when a DVD is being played, to prevent piracy. To get around this, download a media player such as VLC and use this to play your video instead of the default Mac media player. For instructions on how to play a DVD or other file, please refer to the VLC instruction guide: https://wiki.videolan.org/Documentation:Open_Media/.
- Recordings
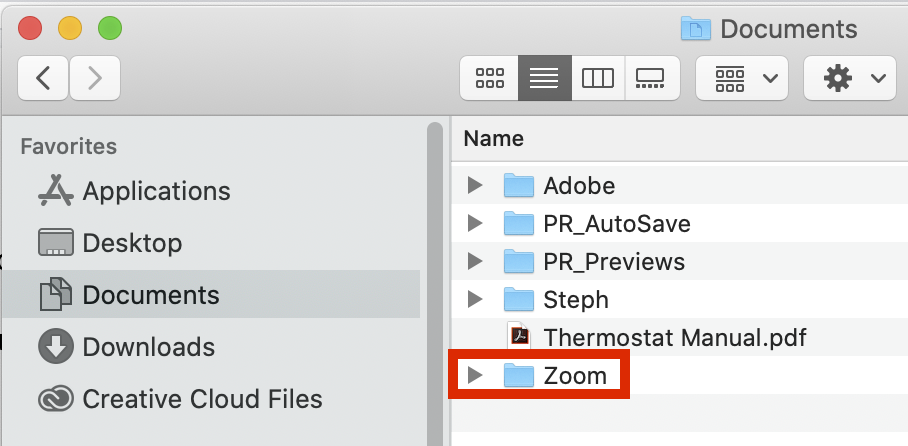
How do I trim the beginning or end from a zoom video file?
Search your computer for the “Zoom” folder where your video files are being saved; this is where you will direct Quicktime when you open the file you want to edit.
The default location is usually in the Documents folder:
On a mac, you can use Quicktime to trim extraneous video at beginning and end:
How to Use Quicktime Player (skip to Edit section)
https://support.apple.com/en-us/HT201066
On a PC, you can use Windows Movie Maker: https://berkeley.service-now.com/kb?id=kb_article_view&sysparm_article=KB0010677
Can I record only the audio of my Zoom session?
Yes. By default, pressing record will provide you with both a video (with sound) and audio only file. However, you can change these defaults: https://support.zoom.us/hc/en-us/articles/201362623-Changing-Settings-in-the-Desktop-Client-or-Mobile-App
Can participants record a Zoom session via Zoom? How can you enable or disable this feature?
By default, participants cannot record a meeting. Yes, participants can record the meeting via Zoom. You can enable this option in a meeting by selecting the student from the participants menu, and selecting the “allow record” option.or disable this feature by going to berkeley.zoom.us, logging into your account, and then clicking on “Settings” in the left navigation. Within “Settings,” click on “Recordings” at the top of the window. That will take you to the recording settings section for your account. You will see under “Local Recordings” the option “Hosts can give participants the permission to record locally.” If you want students to be able to record your live sessions themselves, then check the box. If you don’t want students to be able to record your live sessions, then uncheck the box. Any time you make a change, be sure to click “save” before leaving the window.
Recording sessions can implicate privacy, accessibility and other concerns. Before deciding to record a session, or to permit others to record a session, please review the Considerations section below.
How big is a Zoom video file?
A Zoom video file is 200MB for one hour. Note that bCourses’ file upload limit is 500MB, whereas the file upload limit is much greater for Google Drive. Upload your files to Google Drive and then share those links with your students in bCourses.
Can I publish Zoom recordings to my Course Capture private channel?
Unfortunately, existing Course Capture users cannot publish Zoom recordings or any other videos to their private channel. Course Capture only supports content captured in the classroom. Please review documentation on sharing your Zoom recordings using Google Drive and bCourses. (Beginning in Fall 2020, a new Course Capture tool will allow instructors to manage and distribute video from multiple sources into a single tool within their bCourses site.)
Microphones for recording: do I need? Where can I get one?
For recording your lectures, a laptop mic should be fine, but a dedicated microphone will always be better. Even a cheap headset mic will get the microphone closer, which will result in much better audio quality. Many UC Berkeley staff and departments use the Logitech H390 USB headset, which is widely available for $20-25 and is compatible with all Windows and Macintosh computers with USB-A devices.
Considerations
- Community Norms
What are some best practices to ensure a positive learning environment online?
This resource developed by staff and instructors at St. Marys College includes some helpful ideas for creating community and setting guidelines. It also mentions important considerations when teaching online. Another resource cautions against setting overly ambitious expectations for yourself and your students during a time of emergency.
How do I prevent inappropriate behavior and “trolling” or “bombing”?
Unfortunately, there have been reports of inappropriate behavior by students as well as by unauthorized users during open Zoom sessions.
To prevent unauthorized and unwelcome participants from joining your Zoom session, make sure you do not share Zoom meeting links publicly. Publishing links to your bCourses site is your best bet, since that is only accessible to enrolled students and this is where students are likely to look for connection information. Some instructors also require a password for their Zoom sessions, but privacy and security concerns need to be balanced against access / accessibility.
Unique meeting IDs can also be used (see Meeting Options above).
To prevent students from changing their screen name, see above.
To turn off the meeting chat, see this documentation from Zoom: https://support.zoom.us/hc/en-us/articles/115004809306-Controlling-and-Disabling-In-Meeting-Chat
The Berkeley Information Security Office has shared additional measures for security concerns. More information can be found on their website: https://security.berkeley.edu/resources/cybersecurity-and-covid-19/settings-preventing-zoom-bombing
To note, certain security settings (e.g., disabling the chat, or disabling file or screen sharing), will limit teaching approaches and activities. Instructors should consider the security settings that best fit their course.
In addition to the technological solutions listed here, it is always a good idea to set ground rules for class behavior and remind them (verbally and in writing) of appropriate expectations. Here is some sample language you may want to include in an announcement or on your bCourses site1:
This is a difficult and challenging time for everyone, and so I would like to remind you all to treat your classmates with compassion and care during remote instruction meetings. For example, when you choose your screen name, and as you participate in online chat sessions, think empathetically about the effect your choices and comments have on others, just as you would if we were all in the same physical classroom.
1This example was provided by UC Berkeley faculty: Swupnil Sahai, Ramesh Sridhara, and Sharon Inkelas.
- Privacy, Permissions and Copyright
How can students and meeting attendees protect their privacy [e.g, prevent their personal living space from being seen during Zoom meetings] when using the video functionality in Zoom?
Students/meeting attendees should be encouraged to use the virtual background functionality in Zoom, its use can prevent their living spaces from being viewed during Zoom meetings. However not all devices allow for use of virtual background. See the “How to set up a Virtual Background in Zoom” guidance available from Zoom.
Screen Sharing Privacy: Meeting hosts and attendees should ensure that no confidential information is visible on their other screens before sharing their screens. All email applications and other programs/windows that are not necessary for the current meeting/lecture should be closed prior to the start of the meeting.
Recording of Lectures and Meetings: Do I need to obtain student/meeting attendee permission to capture their video and save sessions?
Yes. Some US states (including California) are “two party” or “all party” consent states, which generally require the permission of both or all parties involved in a recording. While students participating remotely may be coming from a variety of states (or countries), we must assume the “all party” consent rule applies.
Meeting hosts should always inform attendees at the start of the meeting or in advance of the meeting if they are going to record a meeting. Zoom automatically notifies attendees present at the start of a meeting if the meeting is being recorded. However, meeting hosts/instructors should also verbally notify attendees that a meeting will be recorded. Meeting hosts/instructors may also choose to explicitly require consent to be recorded via Zoom. Students who do not consent will be denied access to the meeting, so we suggest its use only after you’ve communicated with your students, given them a chance to express any concerns, and come up with a mutually agreed-upon plan for their participation.
Before requiring students to attend any synchronous, recorded Zoom sessions, we recommend that you inform them how you intend to record, use, and share video. You may also consider giving students options to participate without having their image or voice recorded, such as allowing them to attend with no video or audio, and the option to pose questions only in the text chat window. Because you can start and stop recordings in Zoom at any time, you can choose to include unrecorded time throughout your Zoom session, giving students an opportunity to discuss topics or ask questions that they do not wish to have recorded.
For staff meetings, as a general rule, meetings should not be recorded absent an articulated business purpose (including as a reasonable accommodation) that requires recording of the meeting. Generally, you should not record a meeting if the same meeting would not be recorded if it occurred in person.
If a staff meeting is going to be recorded, hosts should inform attendees that if the meeting will be recorded in advance of the meeting and also offer attendees the opportunity to opt out of the meeting or to mute their audio and video if they object to the recording of their image or voice. Please consider whether it is necessary to record the meeting. Bear in mind that the recording becomes a University record that must be stored and retained appropriately and may be subject to disclosure upon request (e.g., in response to a request under the California Public Records Act or California’s Information Practices Act). If you believe it is necessary to record a meeting, but one or more participants object to the recording, please consult your People & Culture representative.
Storage of Recordings
If you upload the Zoom recordings file to a Google Drive with appropriate privacy settings and distribute the link via bCourses, this will limit access to the video to students in the class. Because Zoom recordings contain FERPA-protected information about the students enrolled in your course, it is important to distribute links using bCourses, or another method that restricts their visibility to only those students and staff who are associated with your course.
You will also want to be clear with students about your expectations for recorded content. They are free to share these recordings with other students in the class, and with DSP, but all other sharing should be restricted. In the case of a synchronous unrecorded session, remind them that they should treat the session like a conversation in the classroom, and should respect each other’s privacy the same way.
Can I make my lectures public? Can I use YouTube or Vimeo?
Making your lectures public is not recommended as a means to make lectures available to your students. Instead you should use UC Berkeley’s Kaltura.
Student privacy considerations generally prohibit the sharing of a recorded course lecture with individuals unaffiliated with the course without the consent of the students whose images and audio are included in the recording. In addition, accessibility requirements for publicly available instructional content, and copyright issues are among the many issues associated with sharing video publically. If you plan to share a recorded course lecture with individuals unaffiliated with the course, please consult the campus Privacy Official in advance.
Posting videos or other content via non-supported tools that make that content open to the public and present accessibility barriers (e.g., YouTube, Vimeo, etc.) is prohibited.
Can I still show videos under fair use?
Similar fair use rules apply to content shared within bCourses and behind the CalNet login. It’s essentially the same fair use argument whether you are showing a video in class or online with a restricted set of students in a time constrained manner (public sharing of video is a different matter). To learn more please visit our Library’s copyright page:
UC Berkeley Library Copyright & Fair Use: https://www.lib.berkeley.edu/scholarly-communication/copyright/basics
Who retains the copyright for these videos?
Unless they used exceptional University resources to create course materials, faculty own the copyrights in the course materials they create. That means that only the faculty member and anyone to whom the faculty member has granted permission may reproduce, distribute or display (post/upload) course materials.
Exceptions to the above are:
- Students enrolled or auditing a course may give their own recordings to other enrolled/auditing students.
- Faculty may use recordings in compliance with University policy.
- The Disability Services Center may grant the accommodation of providing course recordings to students with a disability.
For more information, review UCOP’s policies on Works created at UC, specifically: Ownership of course materials.
- Captioning
Will DSP caption my Zoom recordings?
Please see DSP, LOAs and accommodations for your students.
Do I have to have my Zoom recordings captioned?
Captioning is only needed if you have students with a letter of accommodation (LOA) requiring captions. In this case, the Disabled Students Program (DSP) provides instructions and resources for captioning. Please see DSP, LOAs and accommodations for your students for more information.
Advanced Uses
- Breakout Rooms
How do I create breakout rooms?
Zoom offers this short (2+ minutes) video on creating breakout rooms. It’s important to note that students need to access your Zoom session via the Zoom app (either on their desktop or via the mobile version) in order to participate in breakout rooms.
See also this more detailed guidance on using breakout rooms, including creating pre-assigned breakout rooms.
Course Capture
Who can use Course Capture?
In order to use the Course Capture service, your class must be in a room that is Course Capture (webcast) capable: What classrooms are enabled for Course Capture (Webcast), and what are their capabilities? (See If I Have a Course Capture Room, Can I Still Record My Lecture to an Empty Classroom?)
Can I share course captures with selected students only?
This is not the default option for the course capture service. There may be some way to create a separate course site for a restricted set of students. But this is extra effort for all involved, so not recommended unless you have a strong argument for doing so.
Are my Course Capture videos publicly available? Who owns the copyright?
Past course capture recordings are available for re-use. Go to coursecapture.berkeley.edu (CalNet login required). Search by course name or year/term for past course capture videos. Copy video link. Share link in bCourses
If I have a Course Capture room, can I still record my lecture to an empty classroom?
As outlined in Chancellor Christ’s and Provost Alivisatos' emails, instructors should prepare for the transition from course capture within their physical classroom to using Zoom and bCourses remotely following Spring Break. We will do our best to offer classroom support during spring break week (03/16 -03/20), but the ability to continue support after 3/20 will be based on staffing levels.
How long will I be able to record in a Course Capture room?
See above.