Instruction Manual for How to Install a Virtual Box on a Desktop/Laptop
By Brandon Sosa
New York City College of Technology, CUNY
Table of Contents
1.0 Introduction
1.1 Purpose
1.2 The intended audience
1.3 Scope
2.0 List of Materials/Equipment Needed
2.1 illustration of the Parts Needed to Carry Out the Instructions
2.2 Table of parts
3.0 Directions of Installment
3.1 Install and Open Virtual Box
4.0 Trouble Shooting
4.1 Installing Virtual Box Extensive Pack
5.0 What to do now?
6.0 Manual Glossary
7.0 Reference List
1.0 Introduction
- This instruction manual is a step-by-step manual on how to install and create a virtual box on a PC or laptop. This step-by-step process is shown and laid out for a user to fully understand what they are doing so they can successfully install a VirtualBox onto their computer or PCs. A user installing a Virtual Box onto their PC’s or laptop is aware of what a Virtual Box is and is aware of the common terminology for these programs. Firstly, the user will need to install Ubuntu which will help in installing the virtual box and then install the Virtual Box application. Read more down below for further instructions.
1.1 Purpose
- The purpose of this is to let the user experience a different interface on their current computer or desktop. If the user is using macOS then they would be able to install a VirtualBox letting them use Lenox as an operating system and open applications that only Linux has. Another reason on why people install VirtualBoxes is because Virtual Boxes allow for reduced overhead, with multiple systems operating from the same console at the same time. Virtual Boxes also provide a safety net for your data, as they can be used to enable rapid disaster recovery and automatic backups.
1.2 Intended Audience
- The intended audience for this instruction manual is people who wish to install this on their PCs, laptops, or desktop computers. This can also be for students, teachers, computer programmers, and entry-level people working at technology companies.
1.3 Scope
- The user will be installing a Virtual Box into their computer with the help of an application called “Ubuntu”.
2.0 List of Materials or Equipment Needed
- Computer, Desktop, laptop, and an updated version of the chosen operating system such as macOS, Linux, or Google. Monitor, Mouse, Keyboard, and 256 to 1 Terabyte SSD.
2.1 illustration of the Parts Needed to Carry Out the Instructions
- Open your preferred browser (Google, Google Chrome, Safari, Firefox) and go to “www.virtualbox.org”.
- Click download “Virtual Box” it must be the updated version. (The website will always display the most updated version of the Virtual Box.
- You must download the file depending on the operating system you are currently using. (macOS, Linux, Google).
- Click and download it to the folder or you’re downloads tab on the bottom right corner of your computer.
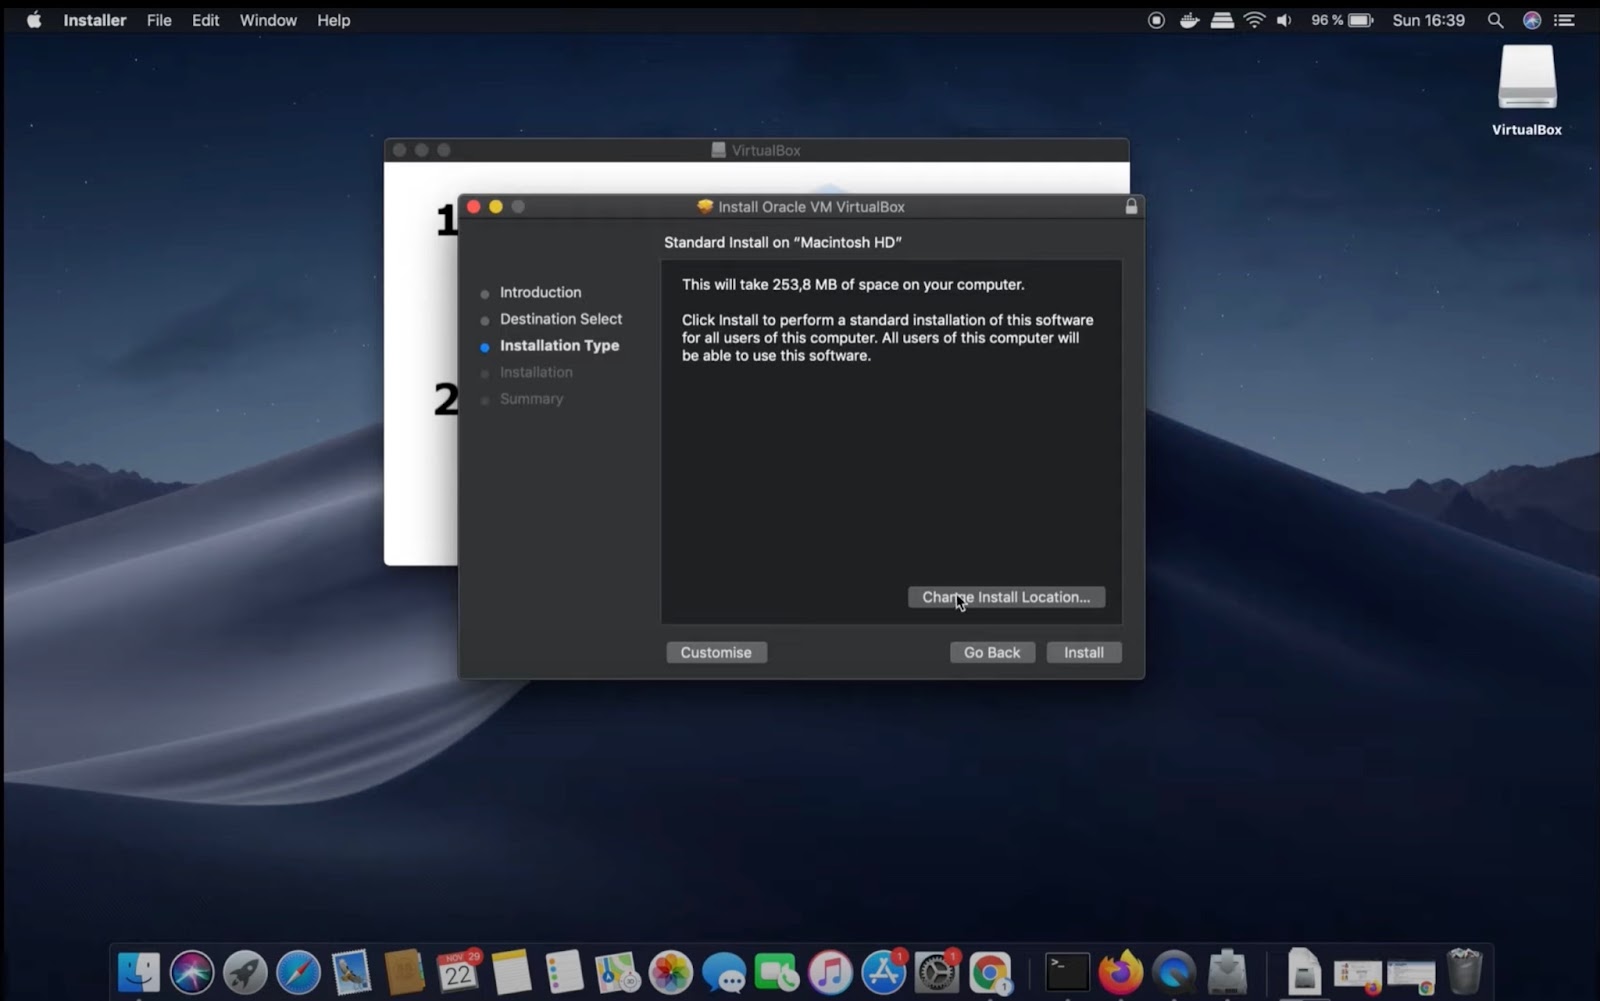
- Once the file has been downloaded, double click to install it into the computer.
- Click Next, and leave everything as is and continue with the installment process.
- After it has been installed into the computer, click “Finish” afterward to complete the installment.
2.2 Table of the parts with a description of each (images)
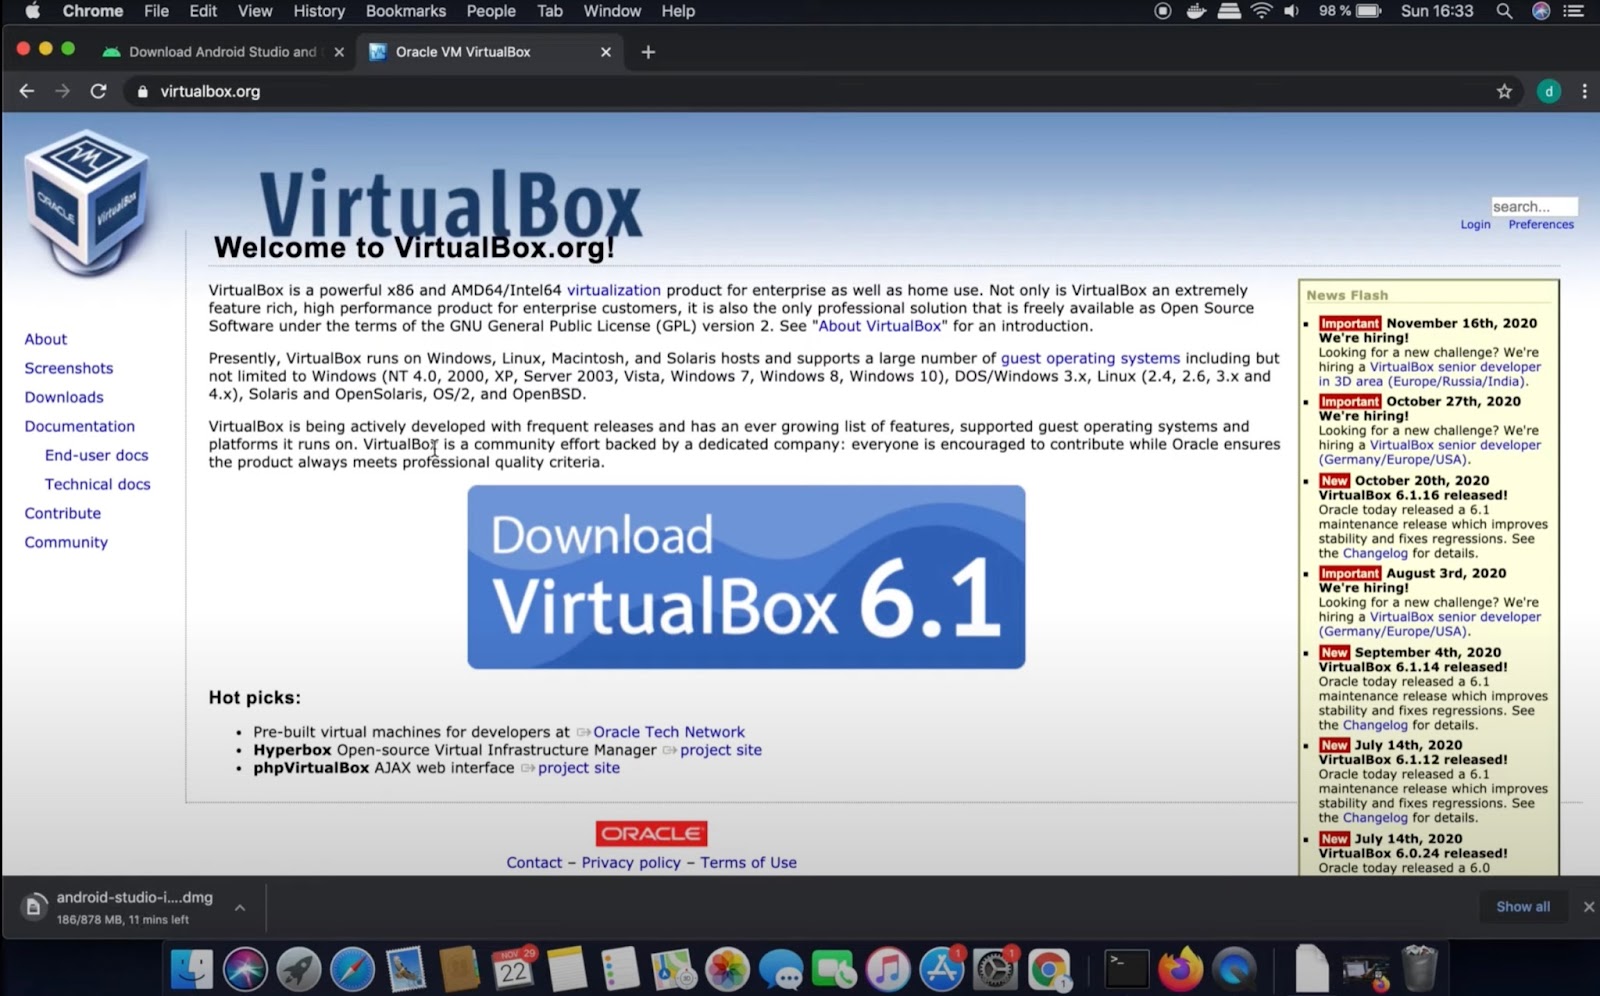
- This is what the VirtualBox website looks like when you are going to download it.
- This picture demonstrates how the installation process of downloading the Virtual Box into your computer should look like.
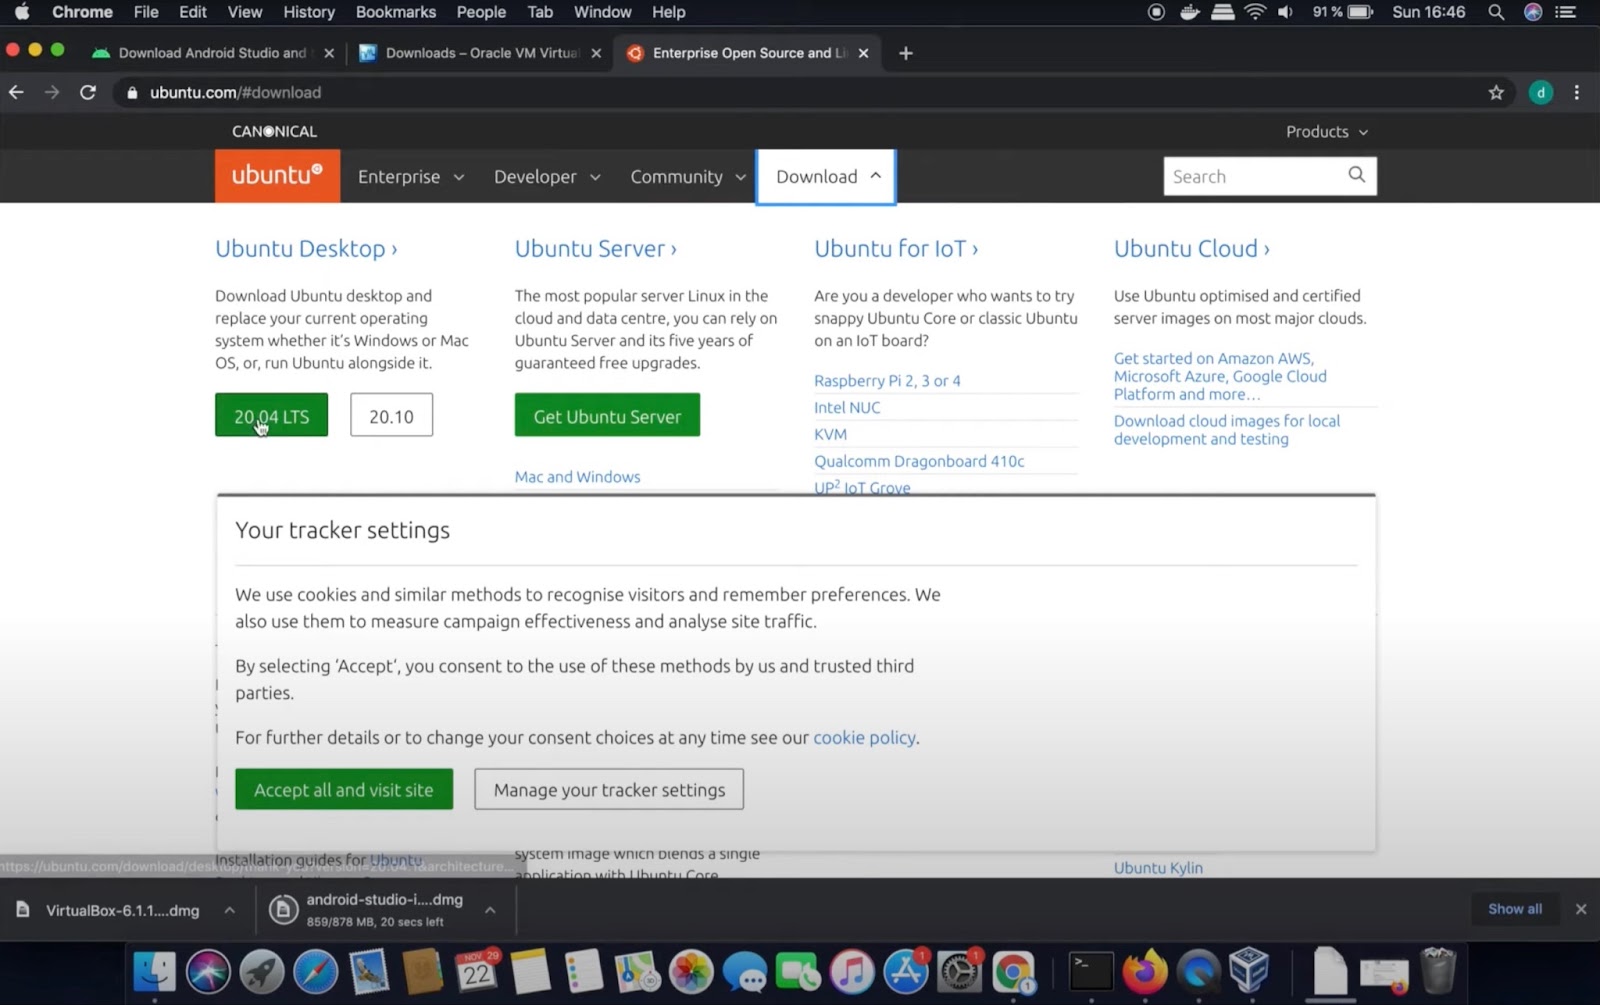
- This image shows what the Ubuntu website looks like so the user can know what the real website looks like.
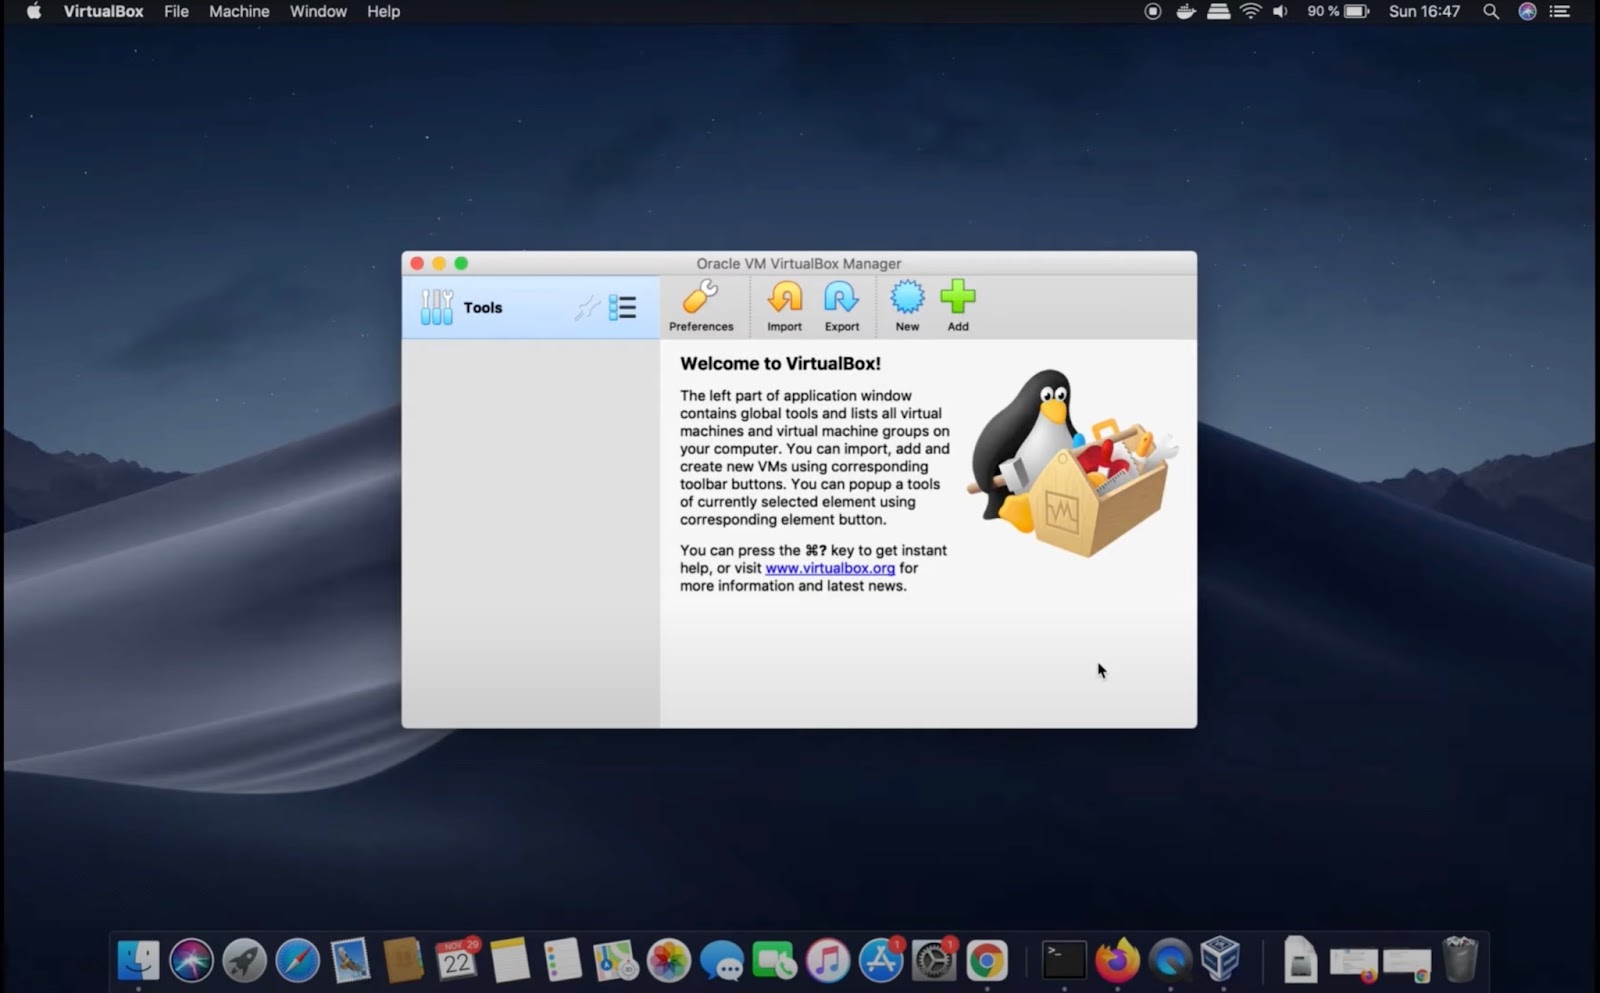
- This is the pop-up window that you will receive once you have successfully installed the Virtual Box and the Ubuntu downloads.
3.0 Directions on Installment
- Open up a tab in your preferred browser (Google, Google Chrome, Safari, Firefox) and go to Ubuntu.com,
- Select desktop and then click download Ubuntu. (Make sure it’s the updated version)
- Next, open up Ubuntu and then click “New”, and name the guest and the processor type (It is recommended to use and preferred 64 bit)
- Next, you are going to select how much memory you plan on using. It’s best to use less than half the memory of what your SSD contains.
- Then press select “Create a virtual hard disk”.
- Next, leave the option of dynamically allocated on so the guest host does not take more information from the hard disk.
- After, click “Create” to create your Virtual Box.
3.1 Install & Open the Virtual Box
- In the Details section, you can see how much memory and space is allocated to your Virtual Box.
- Next, click “Storage” to add the ISO file for ubuntu.
- Click control IDE, add and then select the disk and then click “Optical disk file”.
- Then, on the ISO file from Ubuntu, the user is then going to click open to open up the file.
- If the user would like to have access to a folder that can be used in between your main device and the Virtual Box, then follow these instructions down below.
- Click on details of ubuntu, go all down to “Shared Folders” and then click the plus icon.
- Select “Other”, and click the folder you would like to share in between operating systems, and then press “Okay”.
- Next, you’re going to click “Start” in the upper left corner and it should open your Virtual Box.
- Once, the screen loads, a pop-up box will come up and it will ask you to install ubuntu.
- Click it and check everything, select “Continue” and then continue with the process of setting it up.
- After setting everything up, it will ask you to restart the computer.
- Click “Restart” and wait for the computer to turn off then let it turn back on again.
- Once the computer has restarted, the Virtual Box is fully installed and it is ready to run for the user.
4.0 Troubleshooting
- If the Virtual Box is not opening up or working correctly, we can make sure it is enabled and try launching the Virtual Box again.
- Press Windows + S, type “Turn Windows features on or off” in the dialogue box, and open the application.
- Locate “Hyper-V” from the list of options and check it.
- Once it is checked, press OK for the initialization process to begin again.
- The process of the Virtual Box booting up again and restarting the computer is normal after performing this action. After the restart, the Virtual Box should appear.
4.1 Installing Virtual Box Extensive Pack
- To download the Virtual Box Extensive pack, the user must go to the VIrtual Box website and download it from there.
- Go to “www.virtualbox.org”.
- The extensive pack can be downloaded on any host machine, but make sure to download the same version of the extensive pack as the Virtual Box download you downloaded before. Ex: Virtual Box (6.4.1), Extensive Pack (6.4.1)
- Open and run the “Virtual Box Manager”, and click “add extensive pack”.
- From the file menu, click “Preferences”, then select the “Extensive Pack” that’s on the side panel.
- When the pop window opens up, click the “+” to add it, and then on the bottom corner, click install.
- In the end, click Install. Before it begins installation, you will be prompted to accept the software license and to enter the administrative password.
- After installing the Virtual Box Extensive Pack, you’ll need to configure the network IP address.
- Open up the Virtual Box Manager, and then click Settings.
- Click on Networks on the side menu.
- Select Bridged Adapter in the Attached to the drop-down menu.
- From there, you’ll be able to set up the network IP address so you can use your internet along with the Virtual Box.
5.0 What to do Now?
- What to do now you say? Well now that you’ve successfully installed Virtual Box and the Ubuntu application onto your desktop computer or portable computer, you can start experimenting with the application. The user might want to install the “Virtual Box Extensive Pack”. This extensive pack allows the user to install important functionalities that the user might need if they continue to use the Virtual Box more often. They would need to install functionalities for the USB ports, webcam passthrough, and disk encryptions.
6.0 Manual Glossary
- Linux - An open-source operating system modeled on UNIX.
- Operating System - The software that supports a computer's basic functions, such as scheduling tasks, executing applications, and controlling peripherals
- SSD - A solid-state drive is a solid-state storage device that uses integrated circuit assemblies to store data persistently, typically using flash memory, and functioning as secondary storage in the hierarchy of computer storage.
- Ubuntu - Ubuntu is an open-source operating system based on the Debian GNU/Linux distribution. Ubuntu is primarily designed to be used on personal computers, although server editions do also exist.
- Virtual Box - VirtualBox is designed to run virtual machines (VM’s) on your physical machine without reinstalling the OS that is running on a physical machine. The OS and applications installed inside a VM “think” that they are running on a regular physical machine since emulated hardware is used for running VMs on VirtualBox.
- Mozilla Firefox - Mozilla Firefox or Firefox is a free and open-source web browser developed by the Mozilla Foundation and its subsidiary, the Mozilla Corporation.
- IP Address - An Internet Protocol address is a numerical label such as 192.0.2.1 that is connected to a computer network that uses the Internet Protocol for communication.
7.0 Reference List