Launch your first Saga Chainlet
Requirements:
- Keplr Wallet: Download Keplr Wallet and then create your account using this guide
- Passphrase: Reach out to the Saga team to get your unique one-time passphrase.
- PSAGA tokens: The passphrase will add PSAGA (platform saga) tokens to your wallet which can be used to create and fund the chainlet
- Saga App: The Saga App is your destination to create and manage your chainlets. You can find it at: https://app.saga.xyz/
Launching you Chainlet
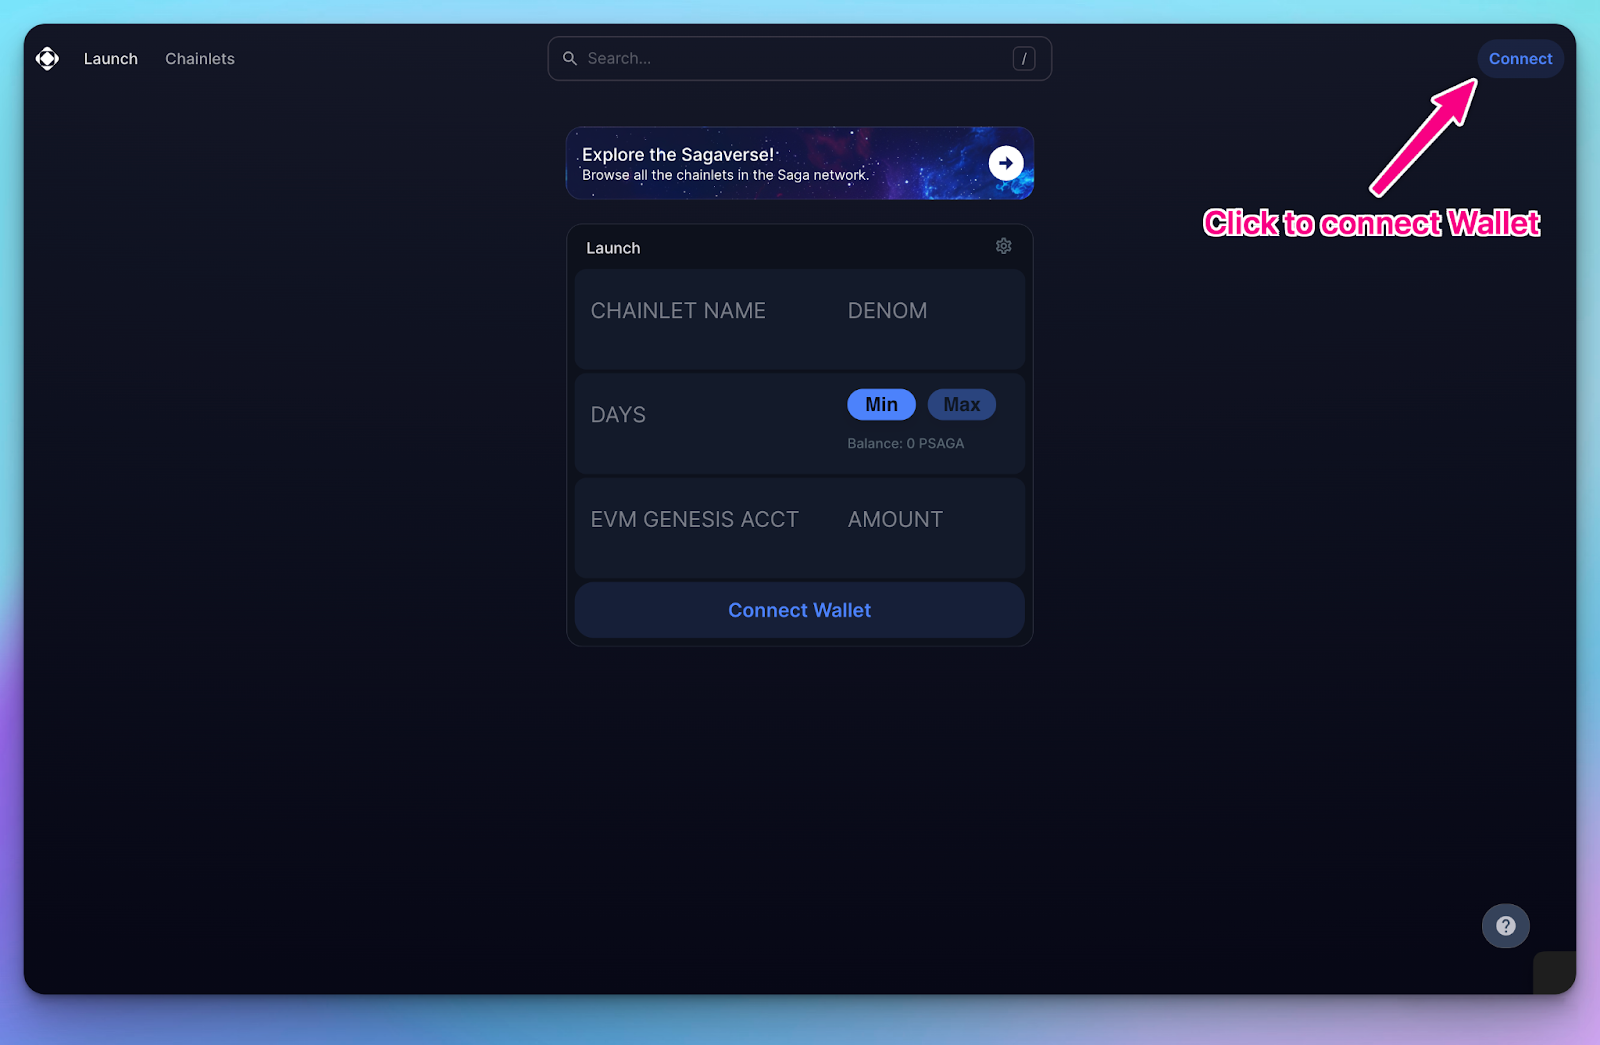
Connect Keplr to Saga App
In the top right corner of the web app, click on the Connect button.
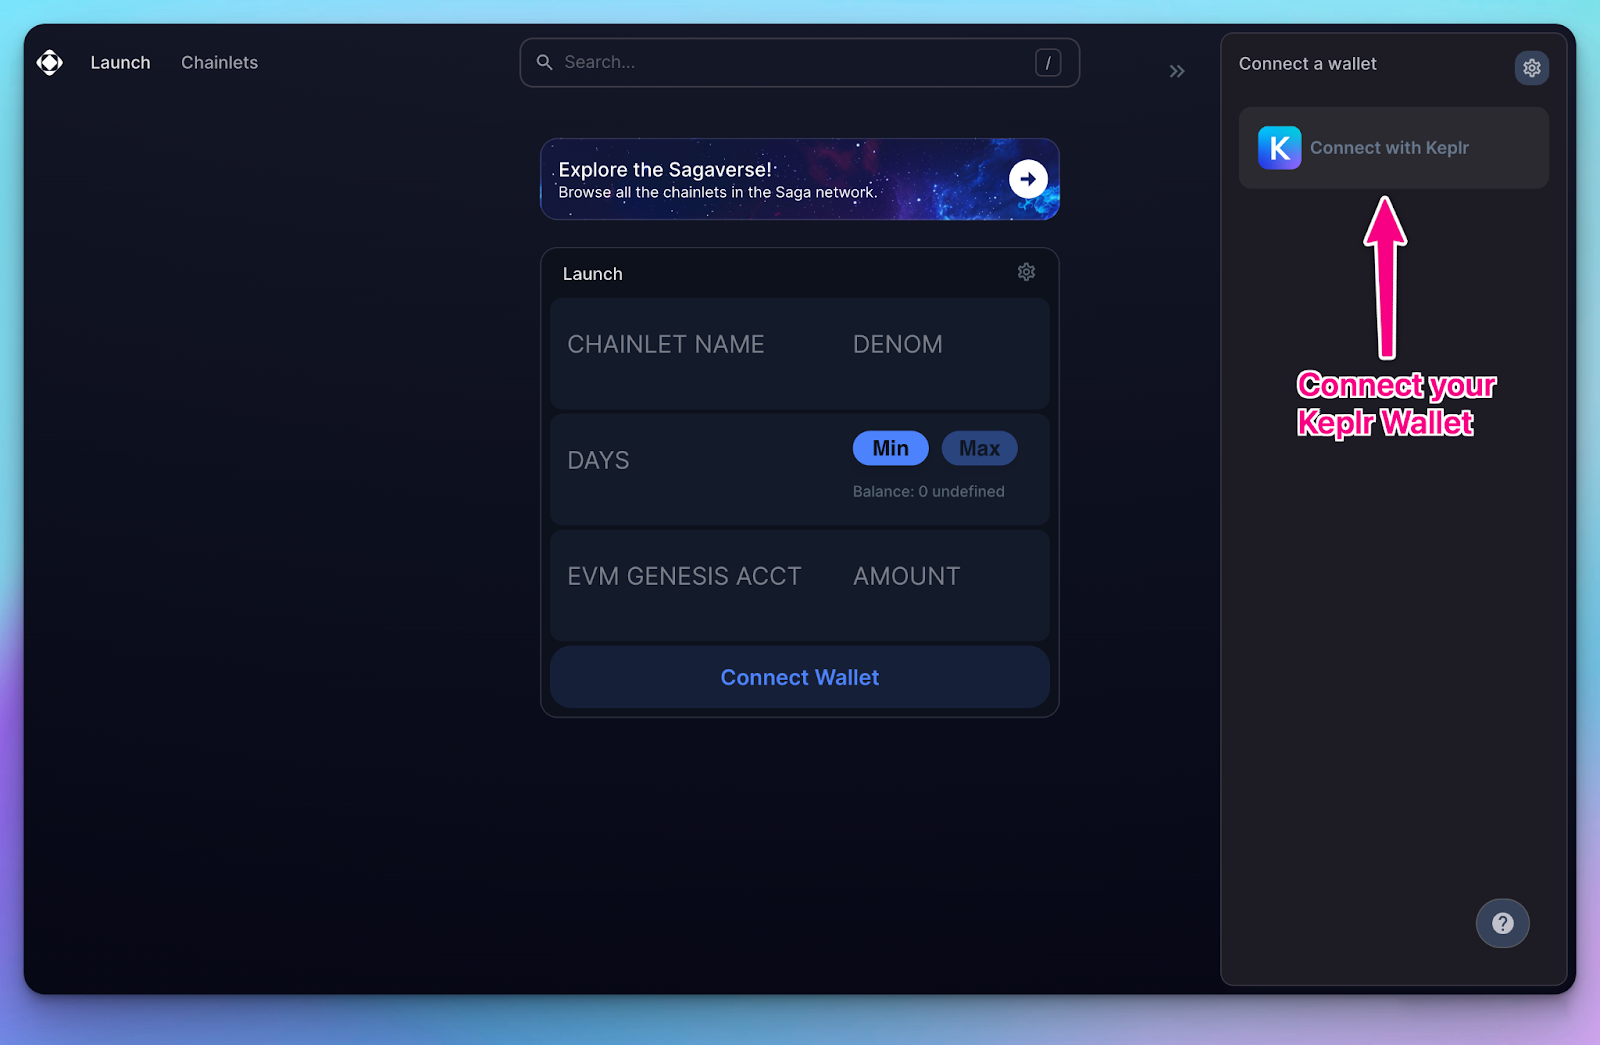
Choose the Connect with Keplr option. You will be asked to authenticate using your password.
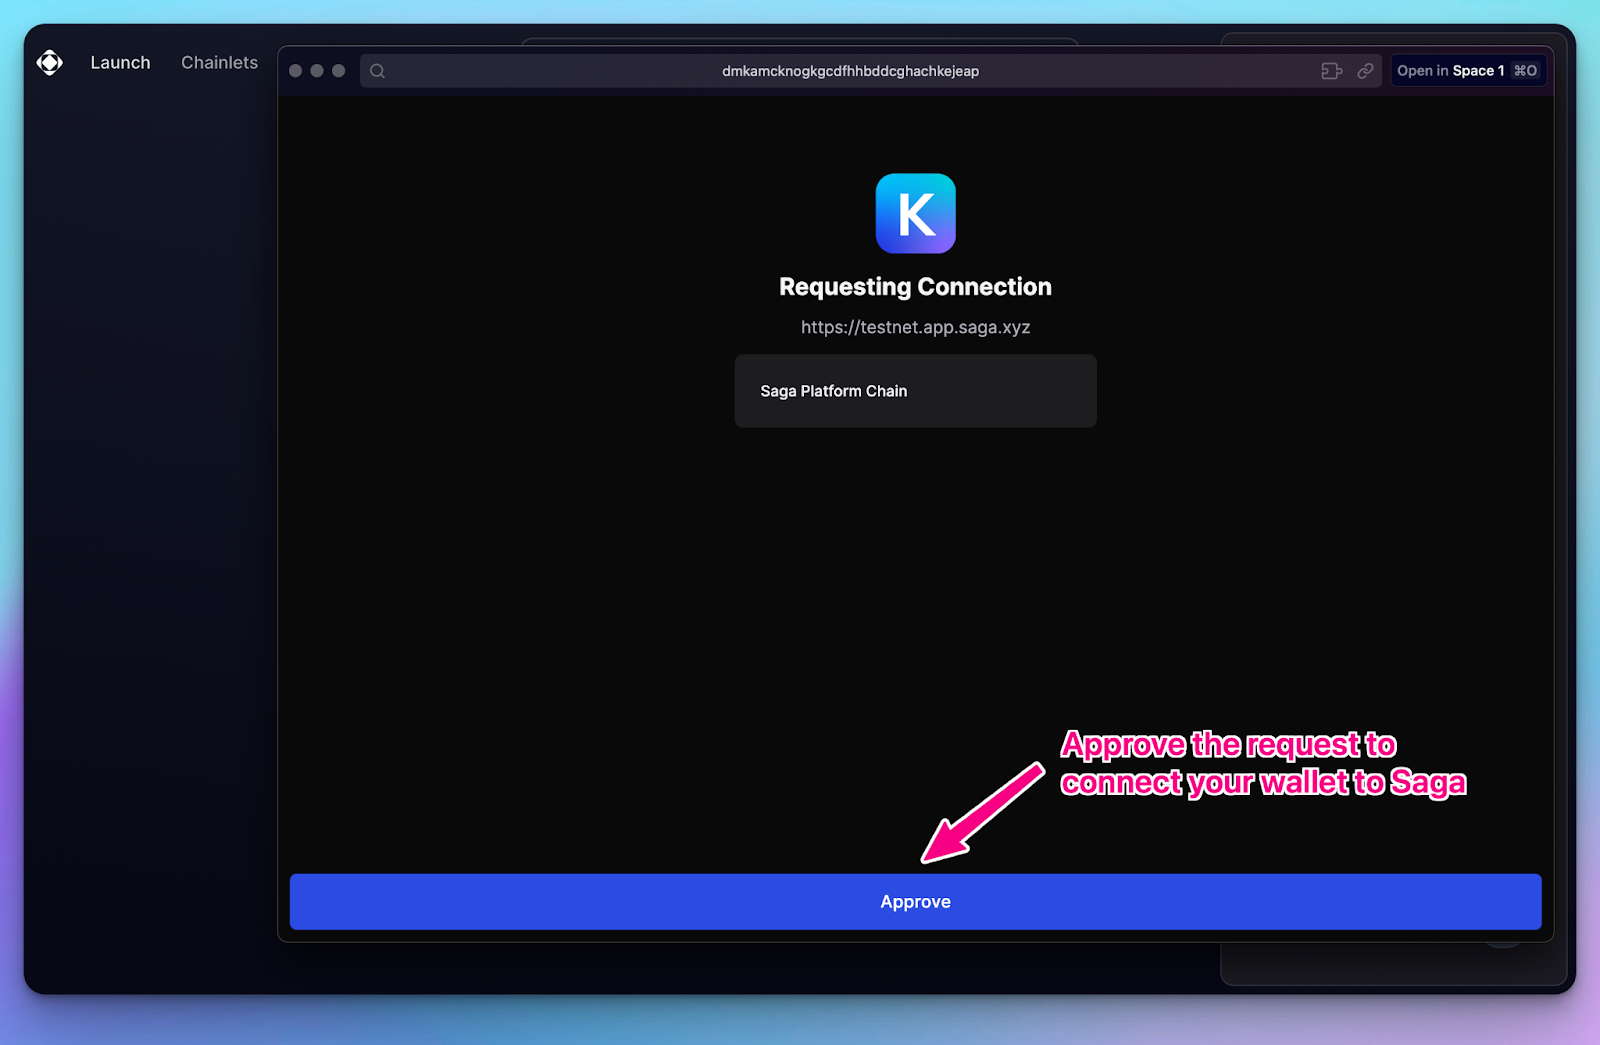
Once connected, approve the connection request that pops up after that.
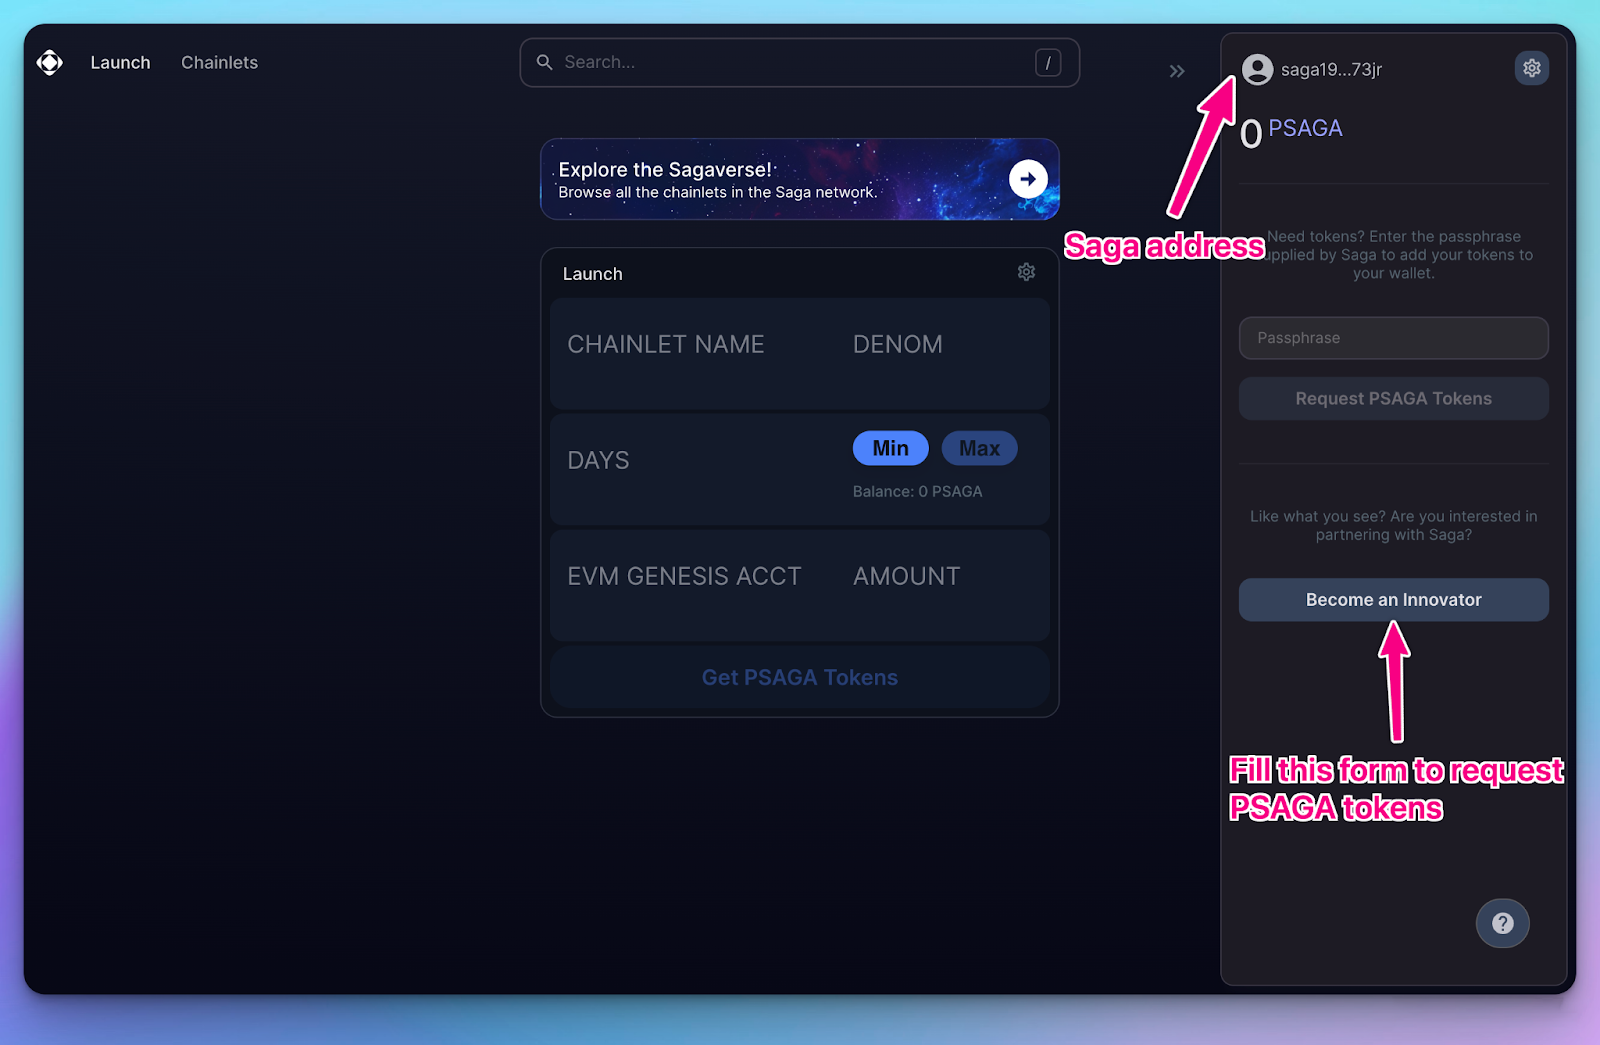
If everything worked correctly, you should see your wallet in the top right corner.
Get Access using Passphrase
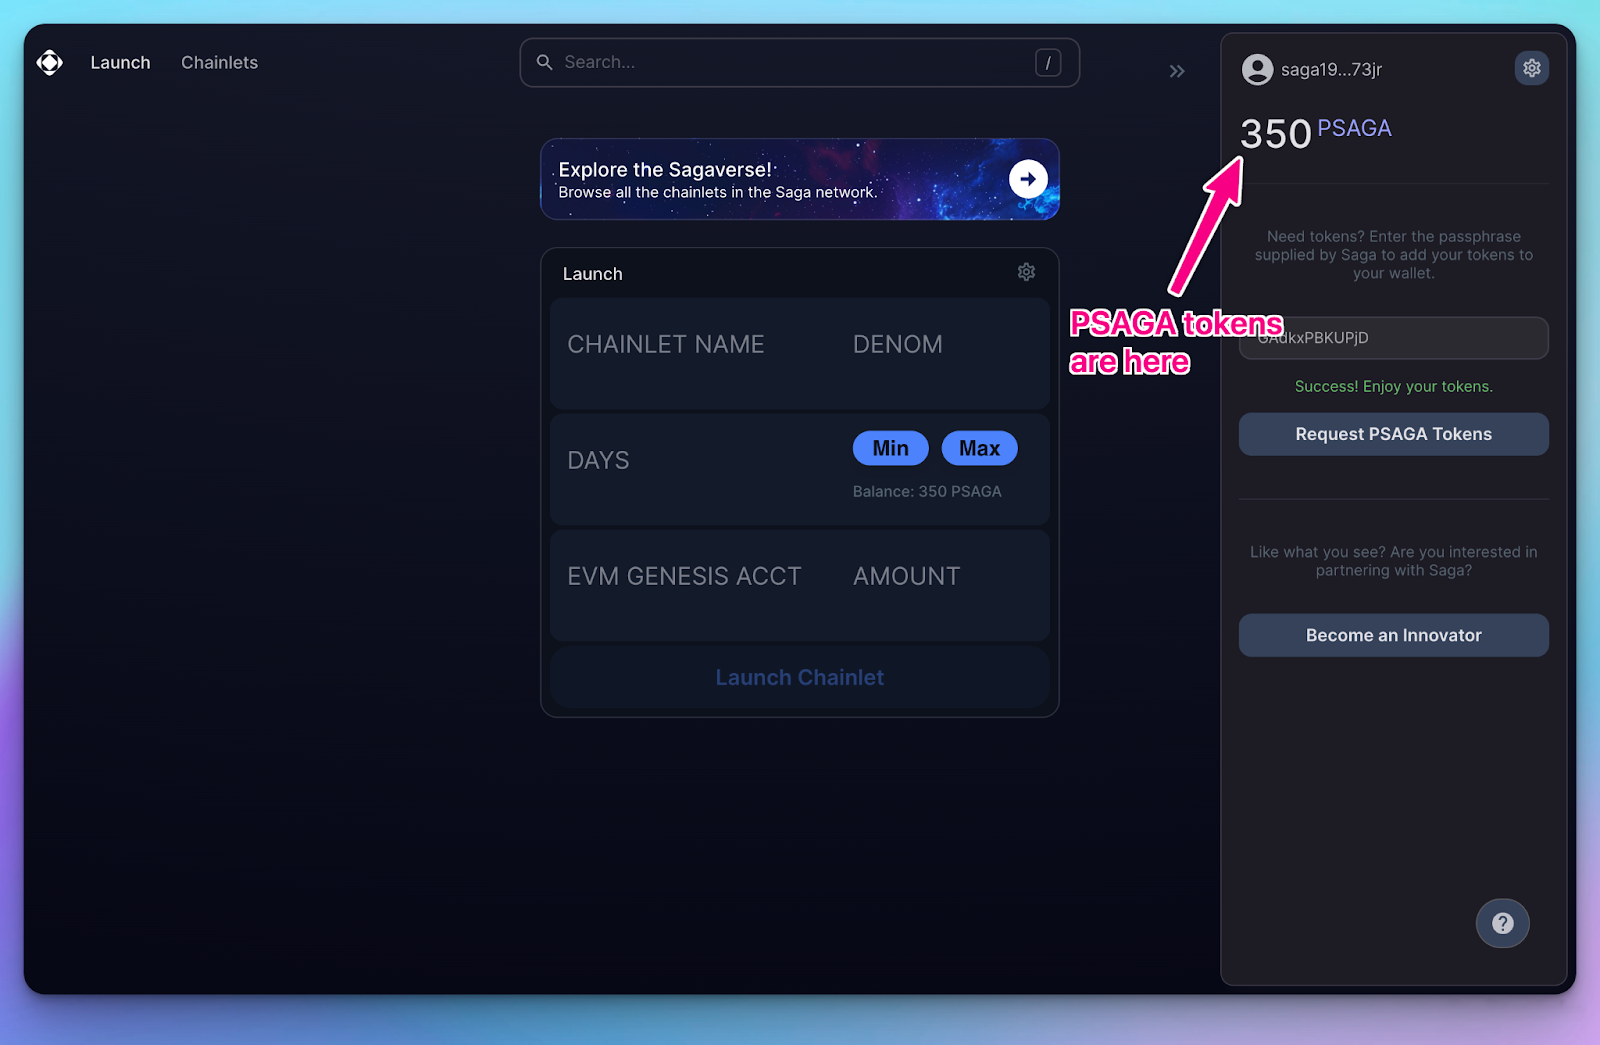
In the sidebar at the right, enter the passphrase and click Request PSAGA Tokens.
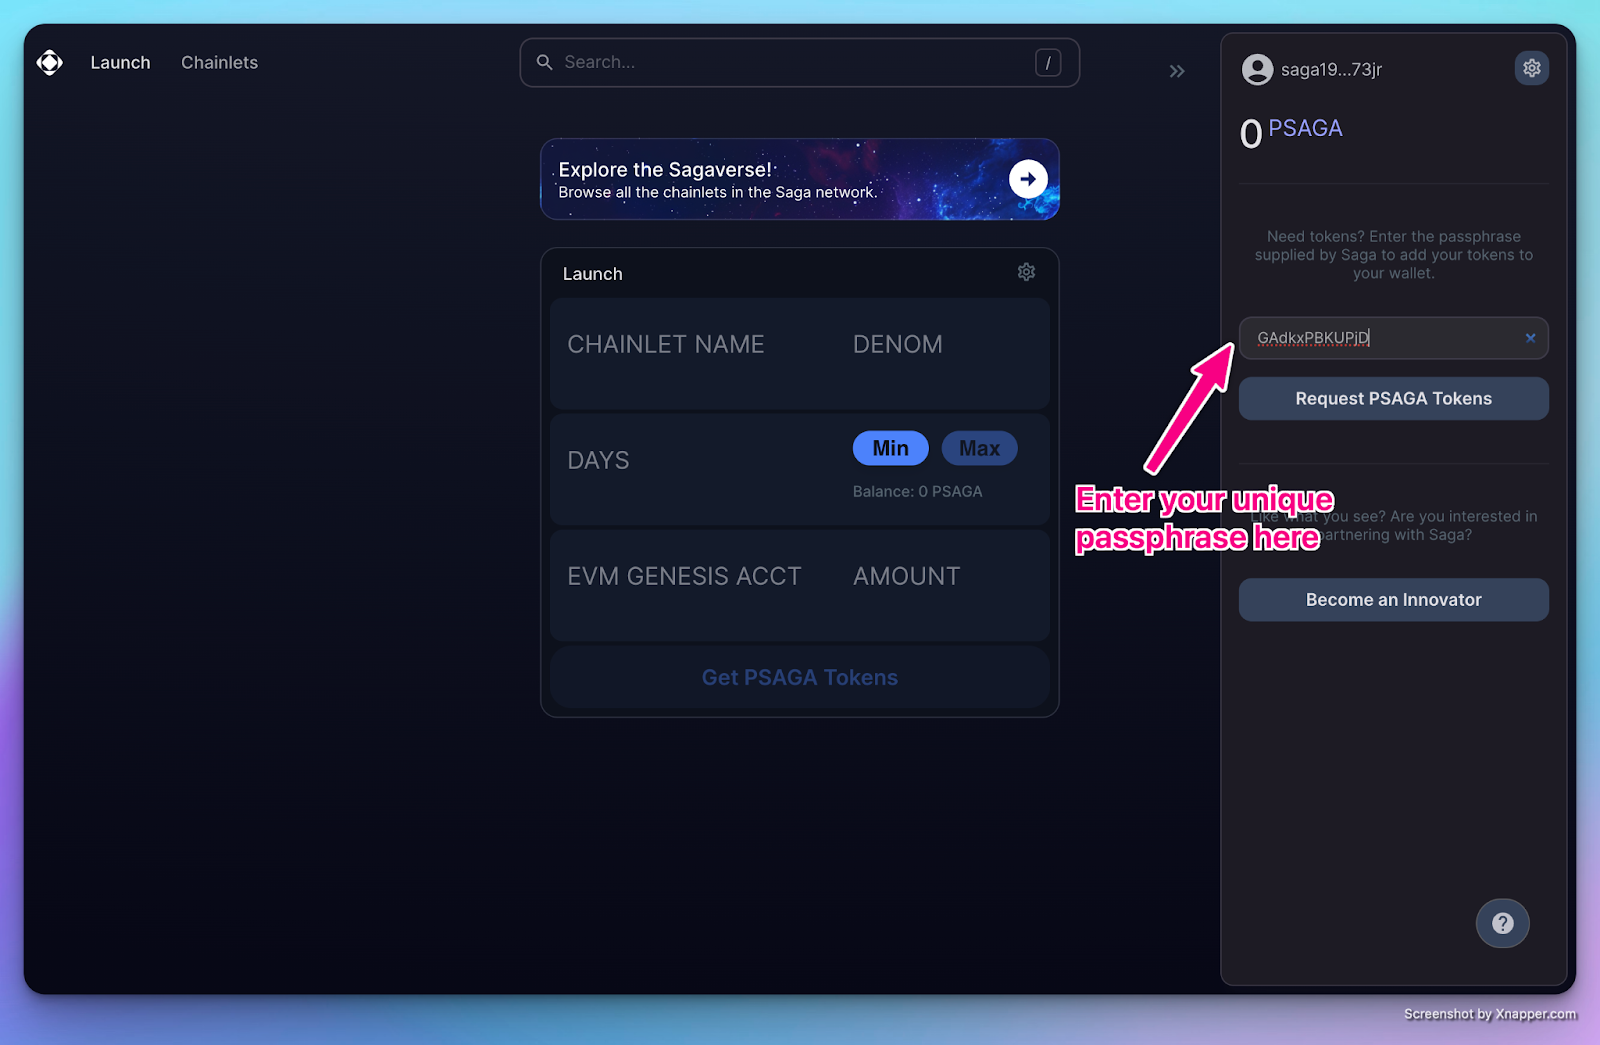
You should see the Saga tokens in your wallet now.
Launch your Chainlet
In the top left corner, make sure you are in the Launch tab. In the Launch window add the required details.
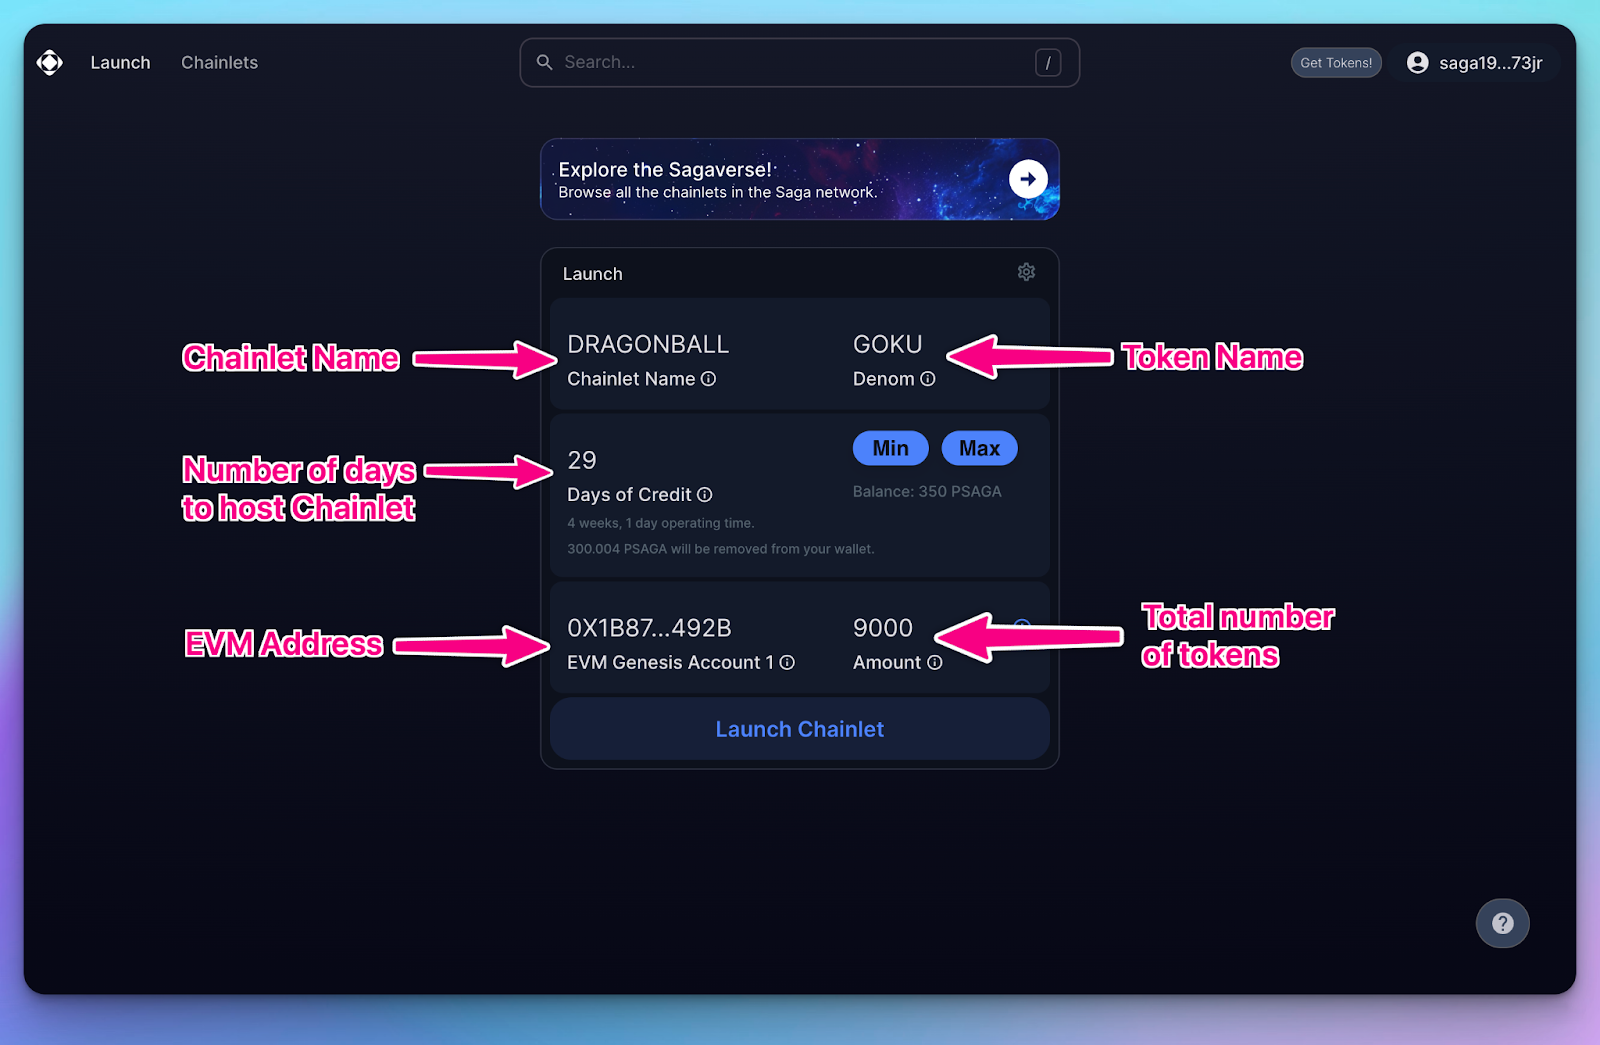
- Chainlet name: Name of your chainlet
- Denom: Description of your token
- Days: Number of days to host the chainlet. We recommend a minimum of 29 days.
- EVM Genesis Account: The EVM address used to create and manage the Chainlet. The tokens generated during the genesis will be available on this address.
- Amount: Total number of tokens you want to generate as the fee currency of your new chain. This amount cannot be changed after the chainlet is alive so choose the right amount carefully.
Click the Launch Chainlet button. You’ll again have to approve your transaction using the Keplr wallet.
Congratulations! You have successfully launched your chainlet.
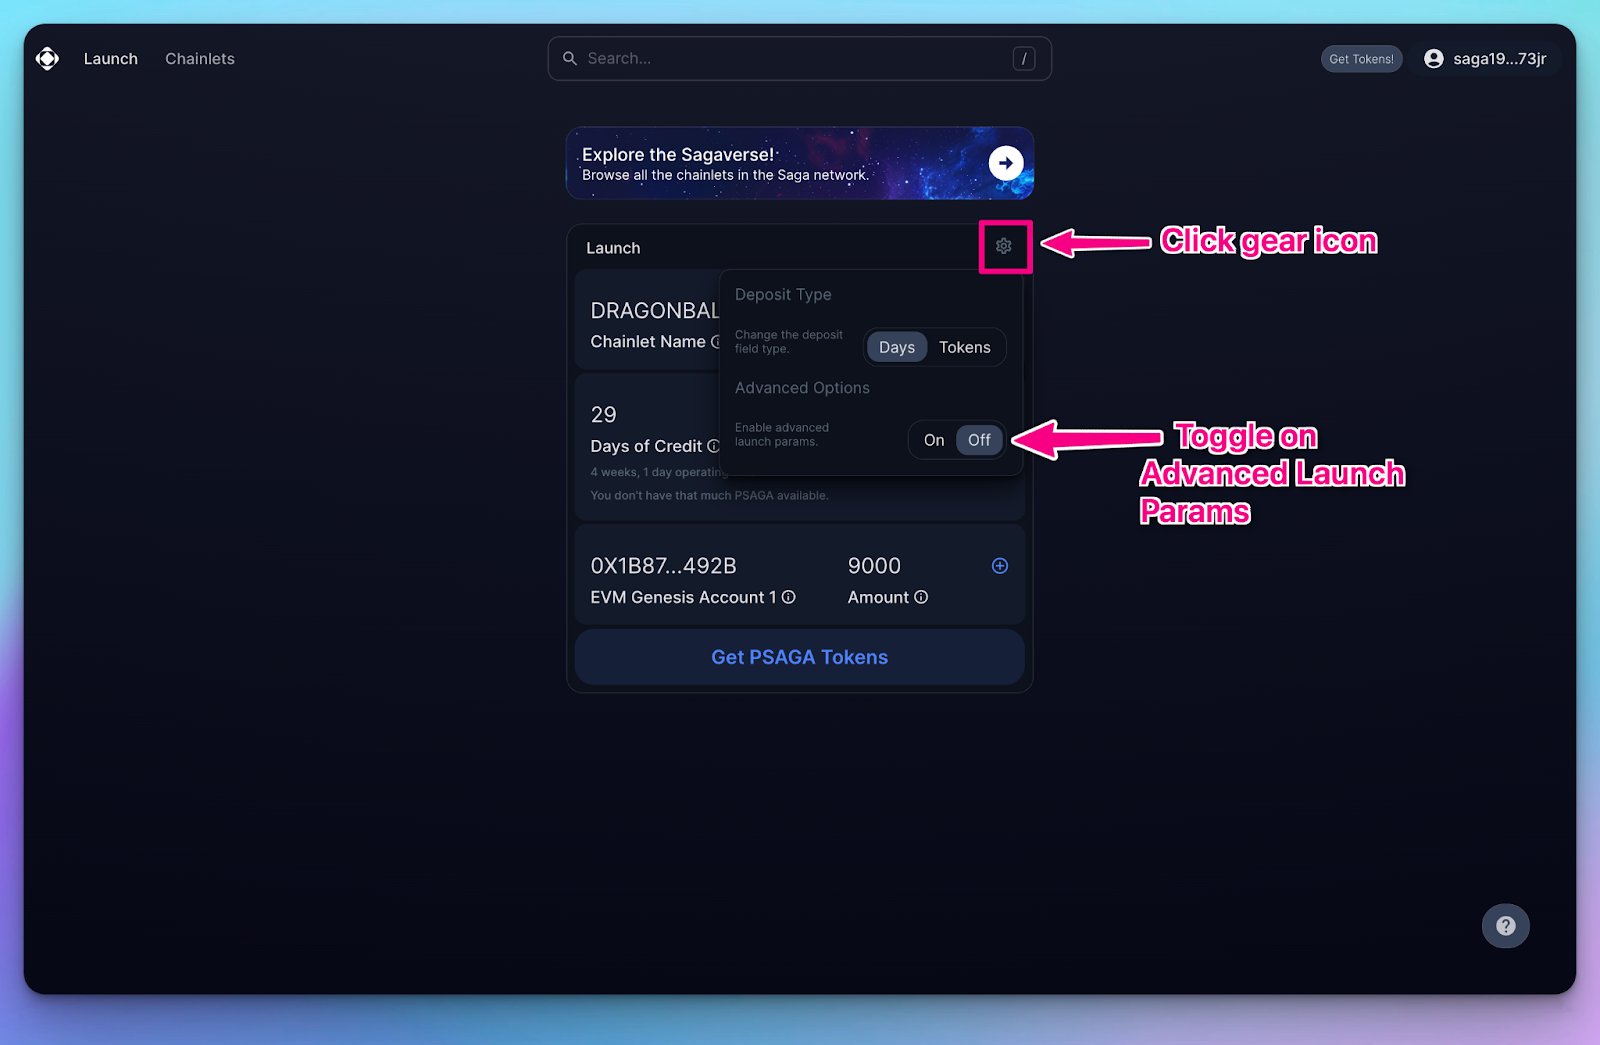
Advanced Launch Params:
Saga enables developers to set fixed base gas price. This option can be enabled by clicking on the gear icon on the Launch Chainlet window and toggling the Advanced Options button On.
You can now enter the Gas Return Account address and also set fixed base gas price.
The Fixed Base Gas price is the base gas price per unit of transaction gas. Saga lets you keep the price constant and provide users with the required amount of gas price. Once used the tokens are pushed to the Gas Return Account, thereby making the transaction cost zero for the end user.
Additionally, you can add collaborators/maintainers to the Chainlet by turning on the toggle and adding the EVM addresses. Please note that maintainers can only be added at the time of creating the chainlet.
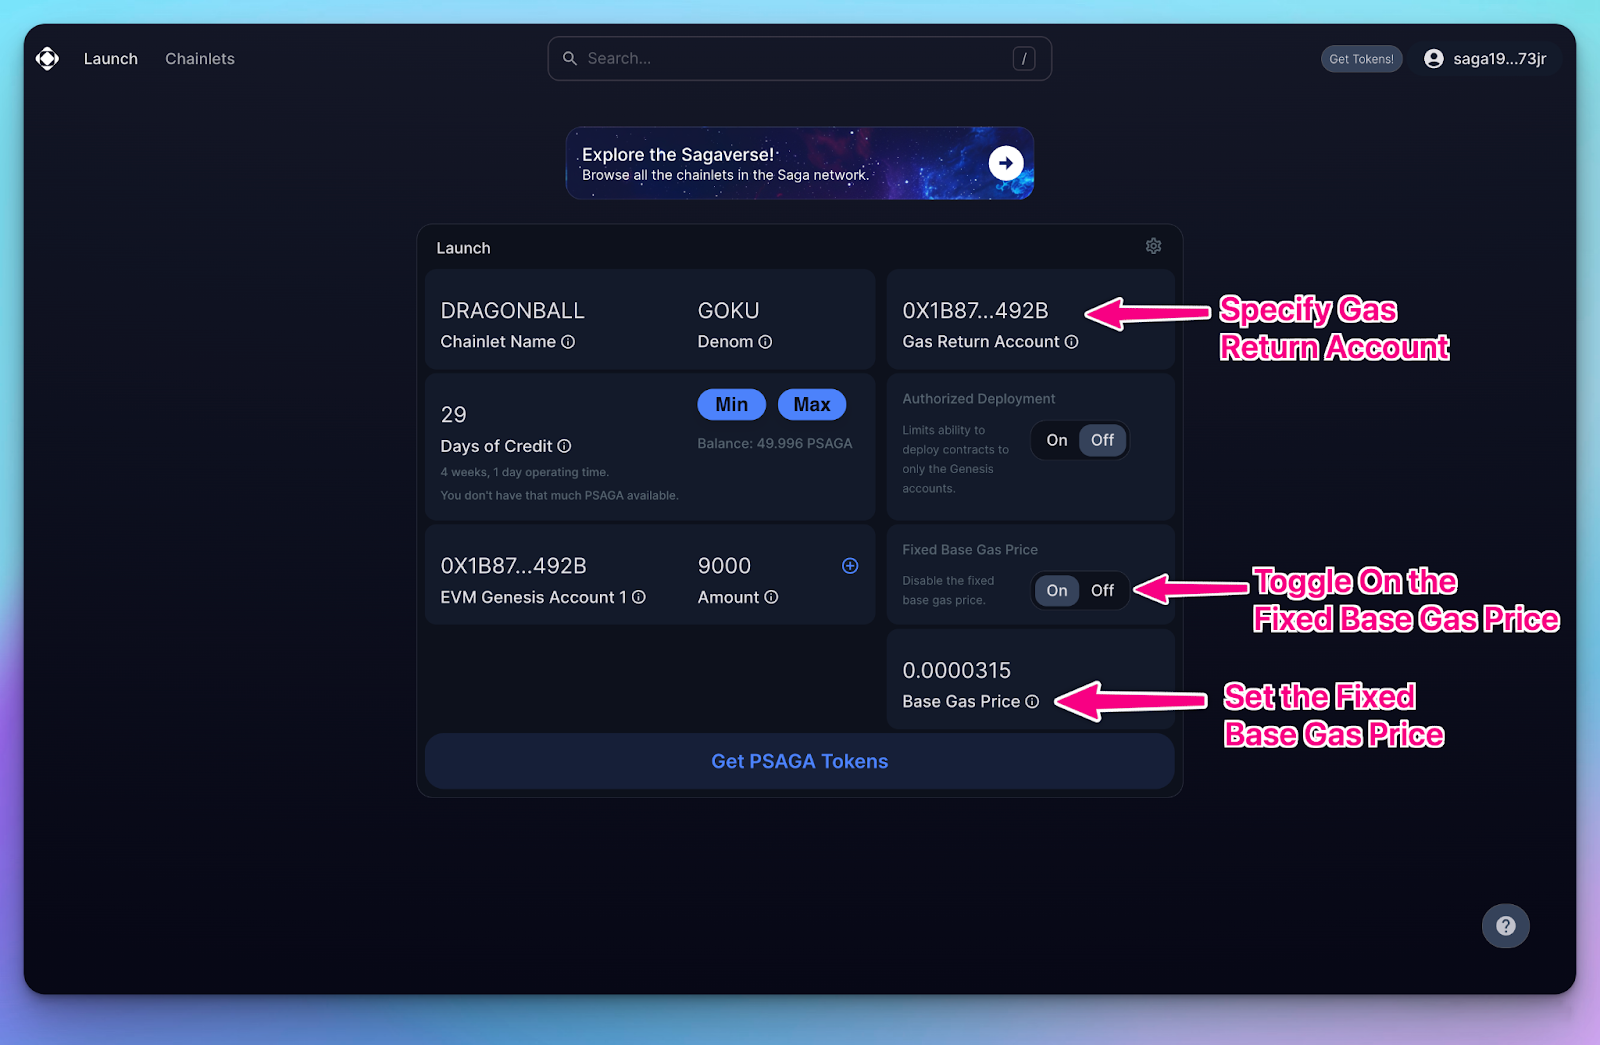
We recommend setting the price to greater than 0 to avoid your chainlet being subjected to potential spam attacks.
Accessing your Chainlet
Click on the Chainlet to open up your Chainlet dashboard.
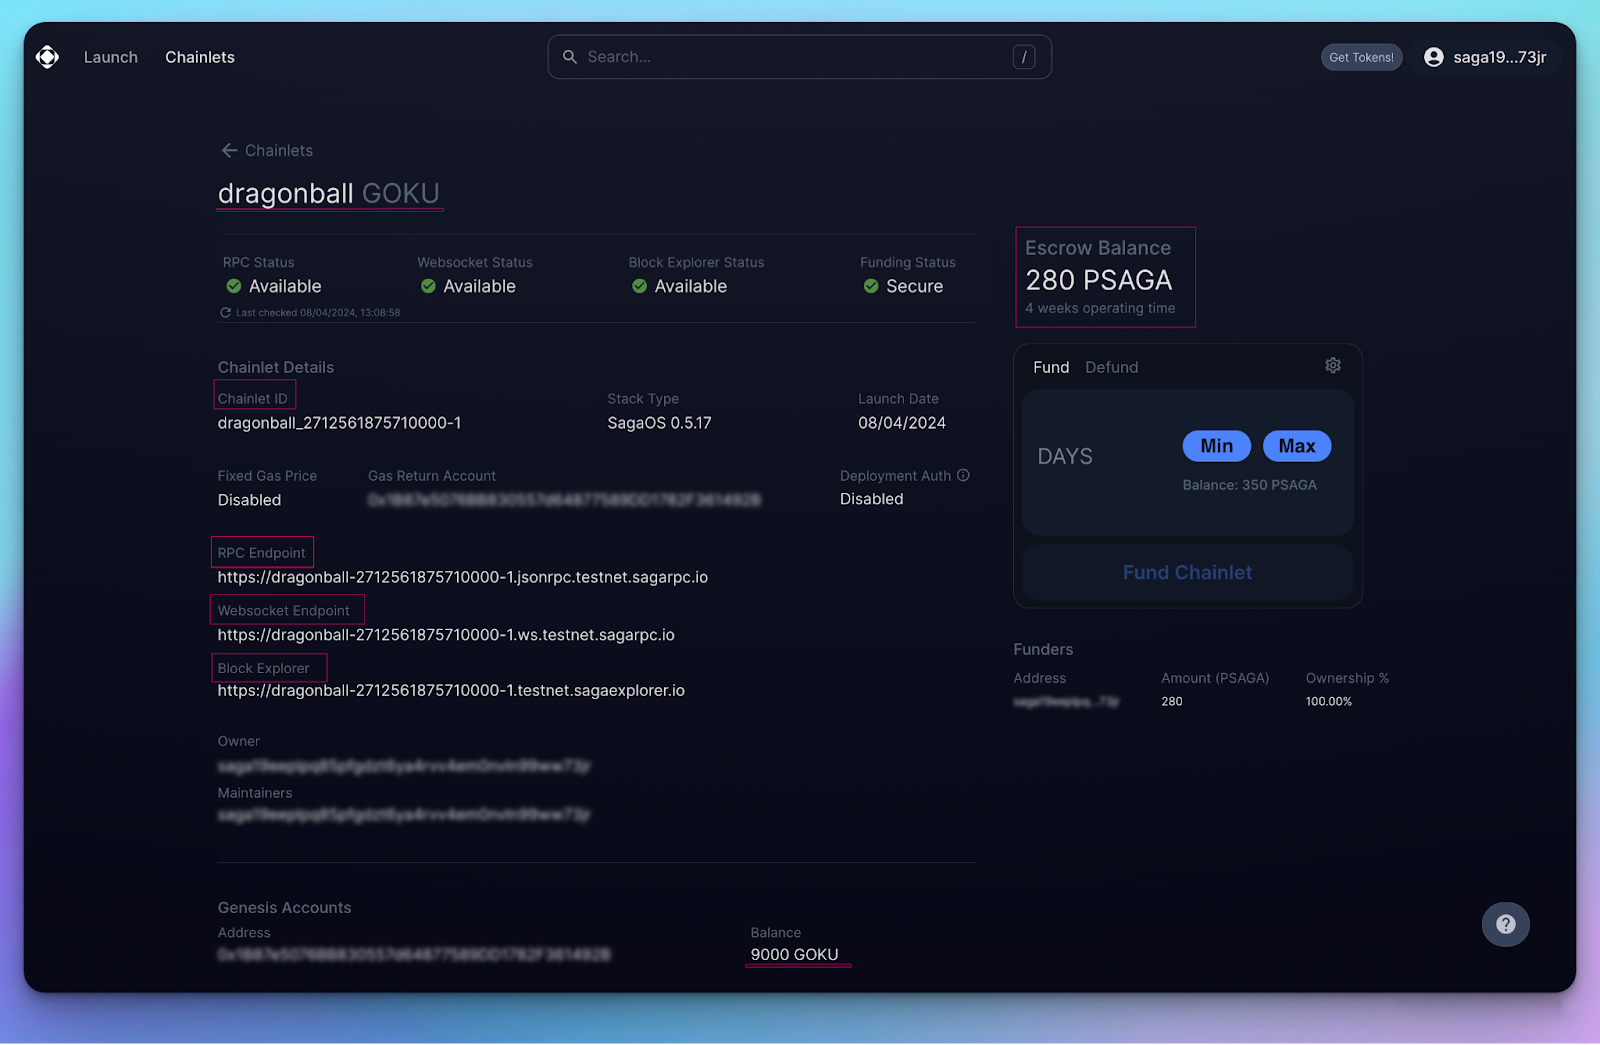
Here you will see the following Chainlet details:
- Chainlet ID: The unique Saga Chainlet identifier
- Fixed Gas price: Shows whether the Fixed Gas Price is enabled or disabled. It will also show the Gas Return Account
- RPC Endpoint: Used to communicate between your dapp and the chainlet created by you.
- Websocket Endpoint: Endpoint which can be used to connect to another service.
- Block Explorer: Provides real-time and historical information about your Chainlet. It includes data related to blocks, transactions, addresses, and more.
- Escrow Balance: Shows the amount of funding available for your chainlet. Your Chainlet will be inoperational if this goes to 0.
Connecting to Wallet
If you are using the Metamask Wallet, open the block explorer and scroll down till you see the ‘Add to Metamask’ button. Click it and your network will automatically get added to your Metamask wallet.
If you are using other wallets, go to ‘Add Network’ and fill in the RPC URL and the chain ID from your chainlet dashboard.
Support
If you are stuck and need help with launching your chainlet, please reach out to the Saga team on Telegram or create a ticket in Discord or drop a note to support@saga.xyz