
Terminology for KNP User Guide
Feb 24, 2023
Purpose of the Terminology Tool for KNP 2
Source Term & Translation Guidelines 3
Accessing and Onboarding to KNP Projects 3
Managing terms and translations 9
Reporting Issues and Tool Support 20
Overview
This document serves as a guide to the Terminology tool for Key Names and Phrases (KNP).
Purpose of the Terminology Tool for KNP
Our new Terminology Tool simplifies how we manage Key Names and Phrases (KNP), ensuring consistency across all Netflix content like subtitles, UI, and marketing. It centralizes terms, translations, and discussions into one database, making the localization process smarter, more efficient, and more scalable.
For troubleshooting issues within the Terminology tool & support; see here.
If you are a subtitler and would like to reference this article in CLQ - see here.
Expectations for Linguists
All linguists should actively use the KNP during localization tasks.
- Template and Dialog list creators must add source terms and definitions as per the Guidelines.
- Subtitle and Dubbing translators should consult the KNP to maintain consistency and provide translations where necessary, following the "Rule of the First."
KNP Guidelines
Work must be performed in the KNP directly and translations are to be provided concurrently with the translations of the assets and tasks assigned. This article serves as an overview of the tool and its utility vs. in-depth guidelines; the below sections provide links to get further context:
Source Term & Translation Guidelines
The Source Term lists are being created by the Template or Dialog List Creators unless otherwise instructed. If you are creating a source term list, please refer to the KNP Source Term Creation Guidelines. Translators are not permitted to add any source terms and source term creators likewise shouldn’t add or change any translations.
Episode and Main Titles
Episode and main titles are automatically populated and locked in the KNP within the Terminology view. For specific guidelines about when to implement episode and main titles into your translations, please refer to the article Episode & Main Title Translation in Subs and Dubs.
Tool Overview
The following section provides in-depth guidance on using the Terminology tool for KNP management.
Accessing and Onboarding to KNP Projects
- KNP linguists automatically access specific title KNP through their Originator or Authoring tool tasks.
- External partners not using Netflix tools can gain access via Starship.
- All work must be done directly in the KNP; uploading or downloading terms is prohibited.
- We recommend onboarding translators and script adapters as "KNP editors" through Starship to ensure they have timely access to the latest translations and context.
Home Page
The Terminology homepage houses a search bar and all followed projects. Users may search for a project by title or movie ID (MID). When projects are followed, they appear bookmarked on the homepage.
Fig 1 Terminology Homepage

Project Page
Once granted access to a title, the user will be able to access the project page.
Fig 2 Project Page

- Redirect to Homepage
- Resources

- Raise a Support Request - users may submit a request for technical assistance
- Walkthroughs and Resources
- Step-by-step walkthroughs
- Training Documentation
- Terminology for KNP Management online course
- What’s New - Feature updates and rollout messages
- Title Information
- Title
- Movie ID
- Show or Standalone
- Original Language
- Year of release
- Follow - following a project bookmarks it to the user’s homepage.
- Check Completion - A list of all assigned languages and their completion status. Selecting a language allows users to show untranslated terms.
🚩To add languages, users must contact their Netflix representative.
Fig 3 Language Completion pane

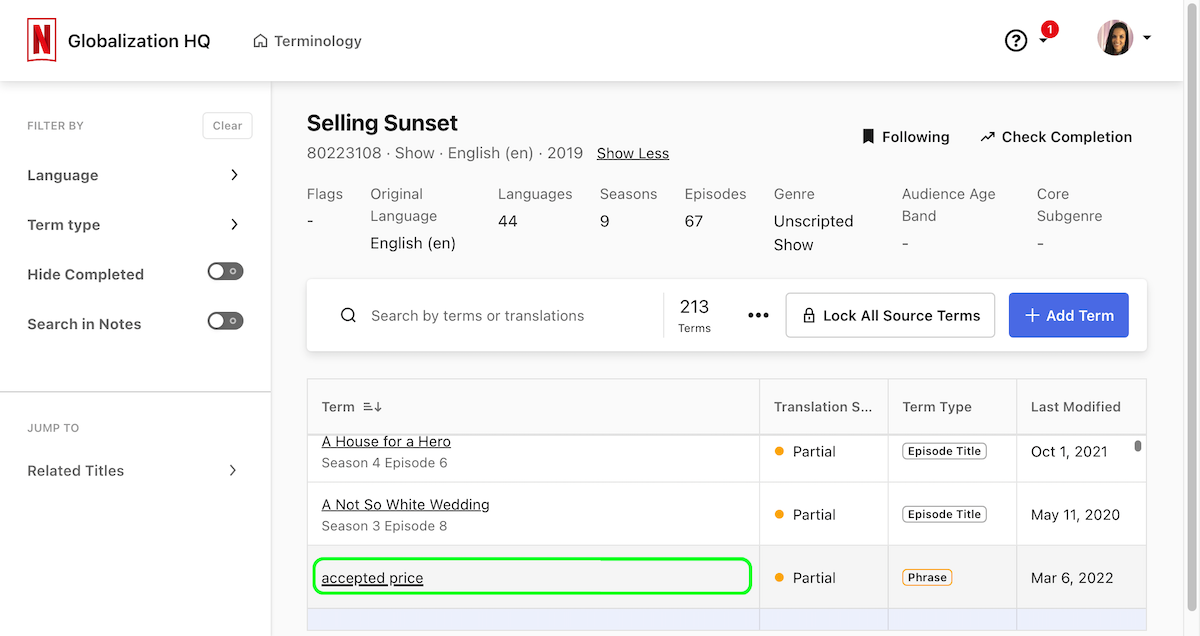
Search Terms
Users may search for specific terms in all assigned languages.
Fig 4 Search and list of terms

- Search Bar: Search by terms or translations.
- Terms: Number of displayed terms. The number will change depending on the selected filters.
- Term - Source Term definition and translation.
- Translation Status
- Completed
- Partial
- None
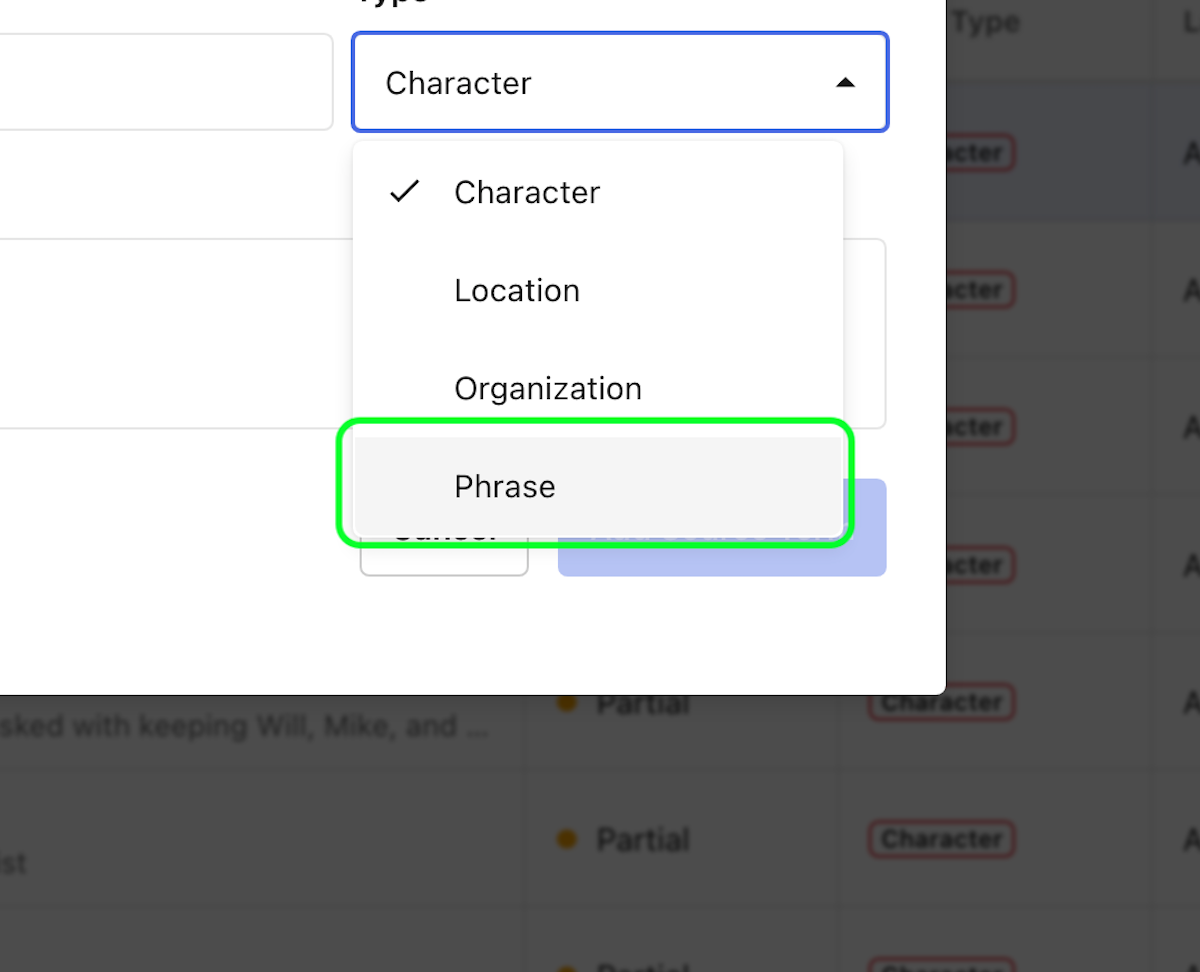
- Term Type
- Character
- Location
- Organization
- Phrase Main Title
- Episode Title
- Last Modified - displays date of added or edited term.
Filters
Users may search for terms using filters. Each column may be sorted alphabetically or numerically. This is useful for finding a term based on what it starts with and avoiding duplicate terms.
Fig 5 Filter window

- Language - Select language(s)
- Term type
- Character
- Location
- Organization
- Phrase Main Title
- Episode Title
- Hide completed - Selecting this toggle hides all completed translations.
- Search in Notes - When toggled on, the user may search for terms by notes in the search bar
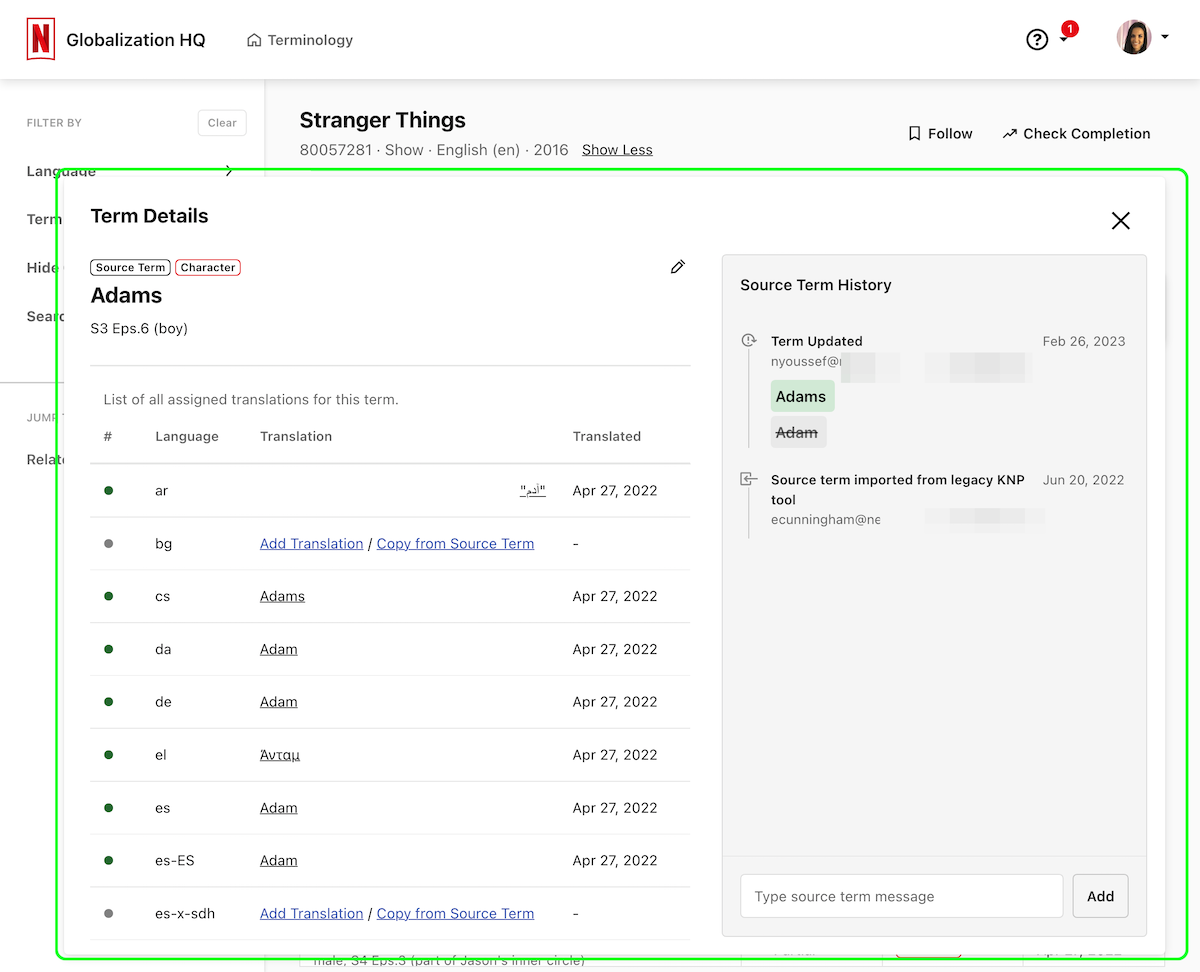
Term Details
When a term is selected, a window will slide open displaying details and translations. Refer to the KNP guidelines to reference how to correctly translate a source term and guidelines for what should and should not be added to a KNP.
Fig 6 Term Details window
- Details
- Tags
- Term
- Definition
- Edit Source Term - This is not available to translators.
- List of Translations
- Language code
- Translation
- Timestamp of translation
- Add Translation / Copy from Source Term
- Add Translation - a pop-up window appears where the user can type translations
- Copy from Source Term automatically sets the source term as the translation. For example, Michael is translated as Michael in French.
- Edit translation - Selecting a completed translation allows the user to edit the translation.
- Source Term History - Typing a message in the source term history field will not send notifications.
- Timestamp
- User email
- The term that was added
Managing terms and translations
Once source terms are completed, users can translate and edit the translation. Managing terms will be in the Term Details window.
To Add or edit source terms users must have the KNP Editor role.
Before adding source terms, refer to KNP Source Term Creation.
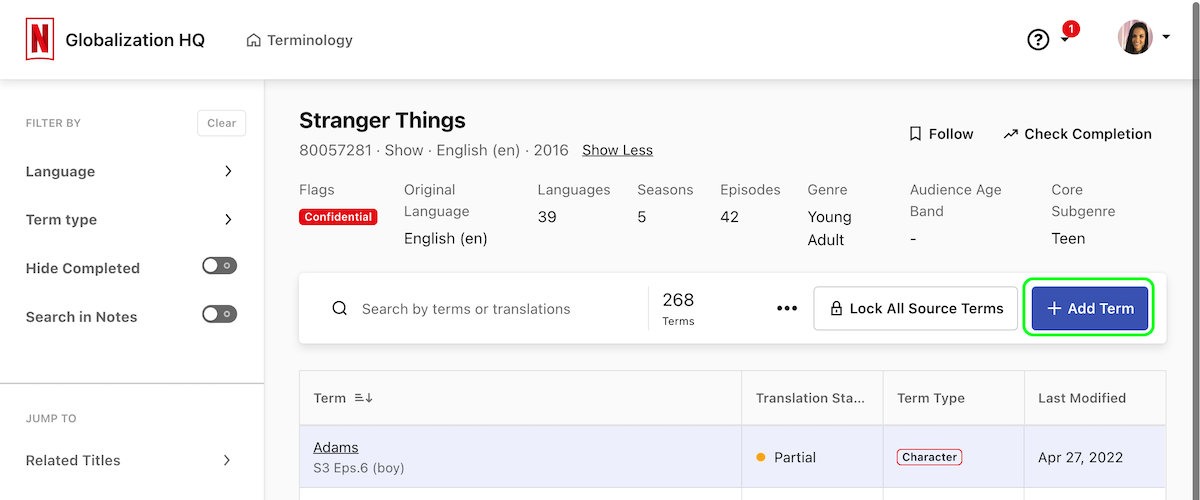
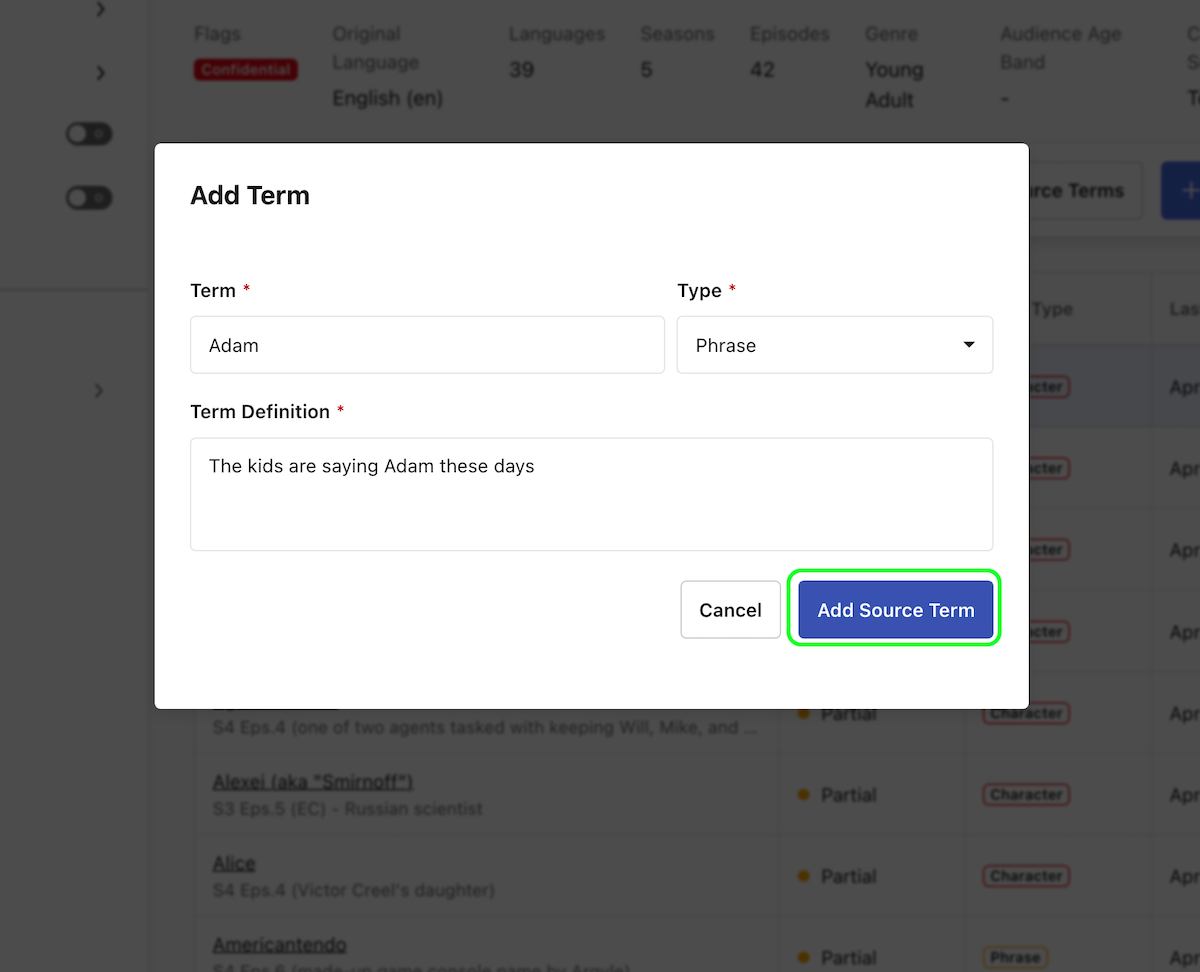
Add Source Term
- Select “Unlock All Source Terms”

- Select "+Add Term"
2. Type the source term.
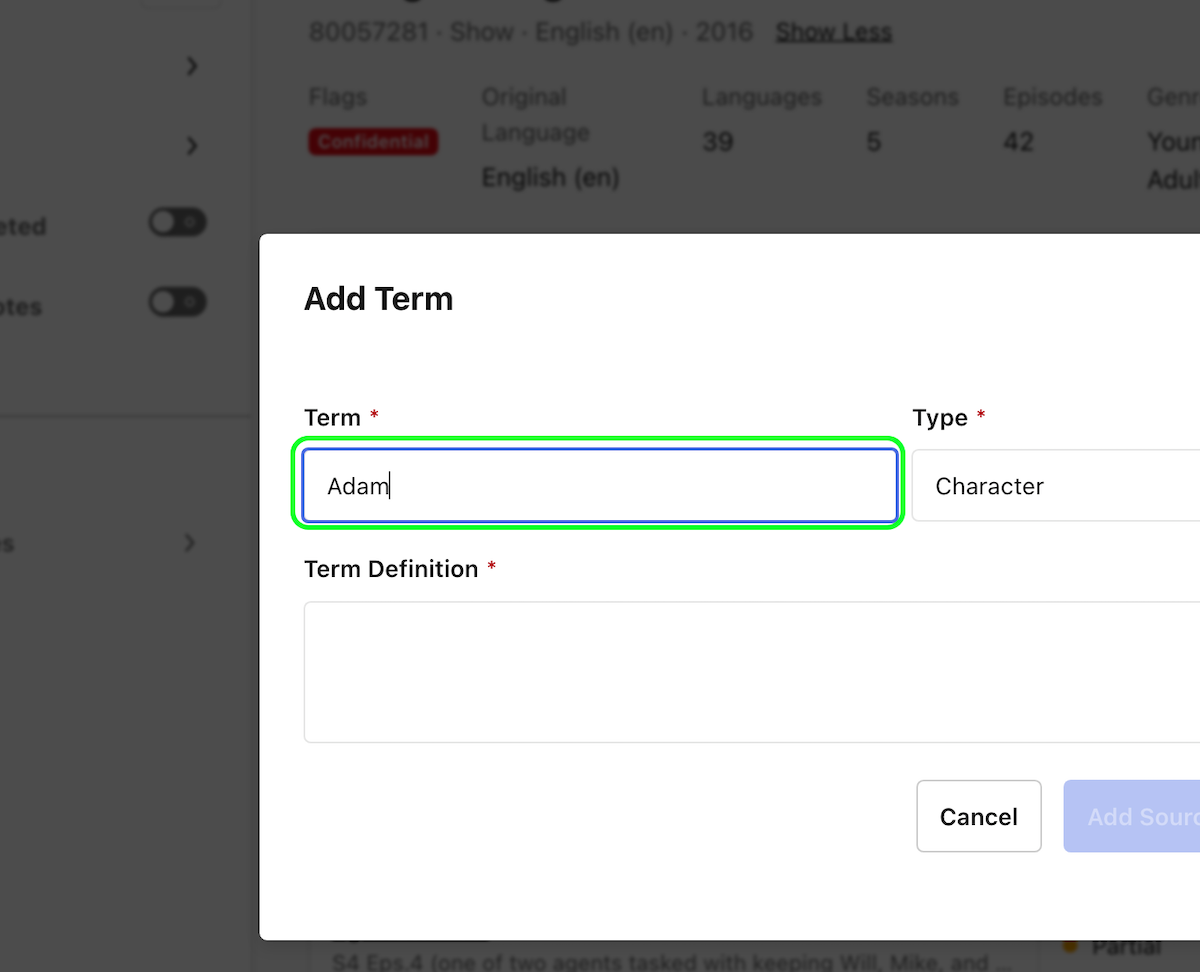
3. Select the option from "Type" dropdown.
4. Type the term definition.
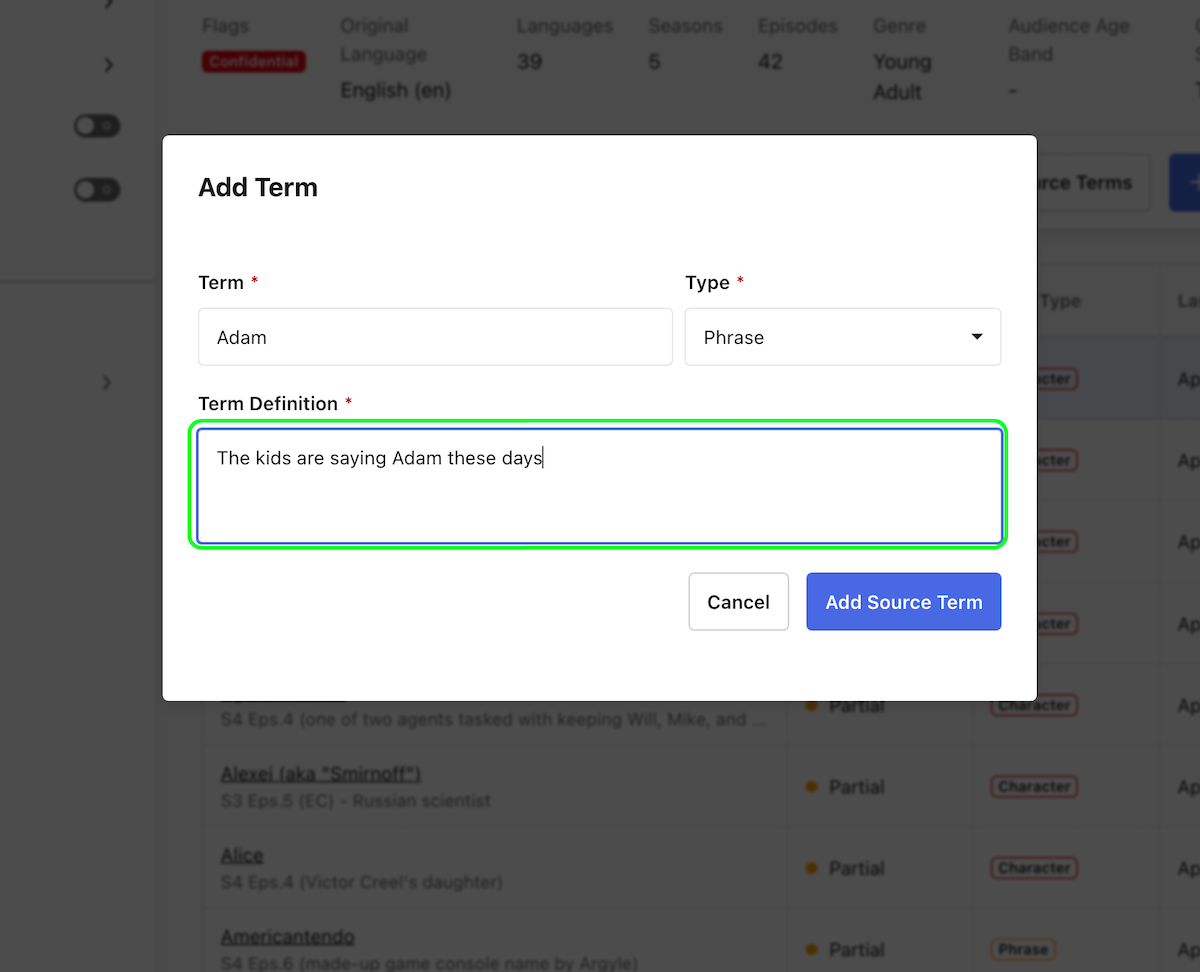
5. Select "Add Source Term"
Edit Source Term
1. Select "Edit Source Term."
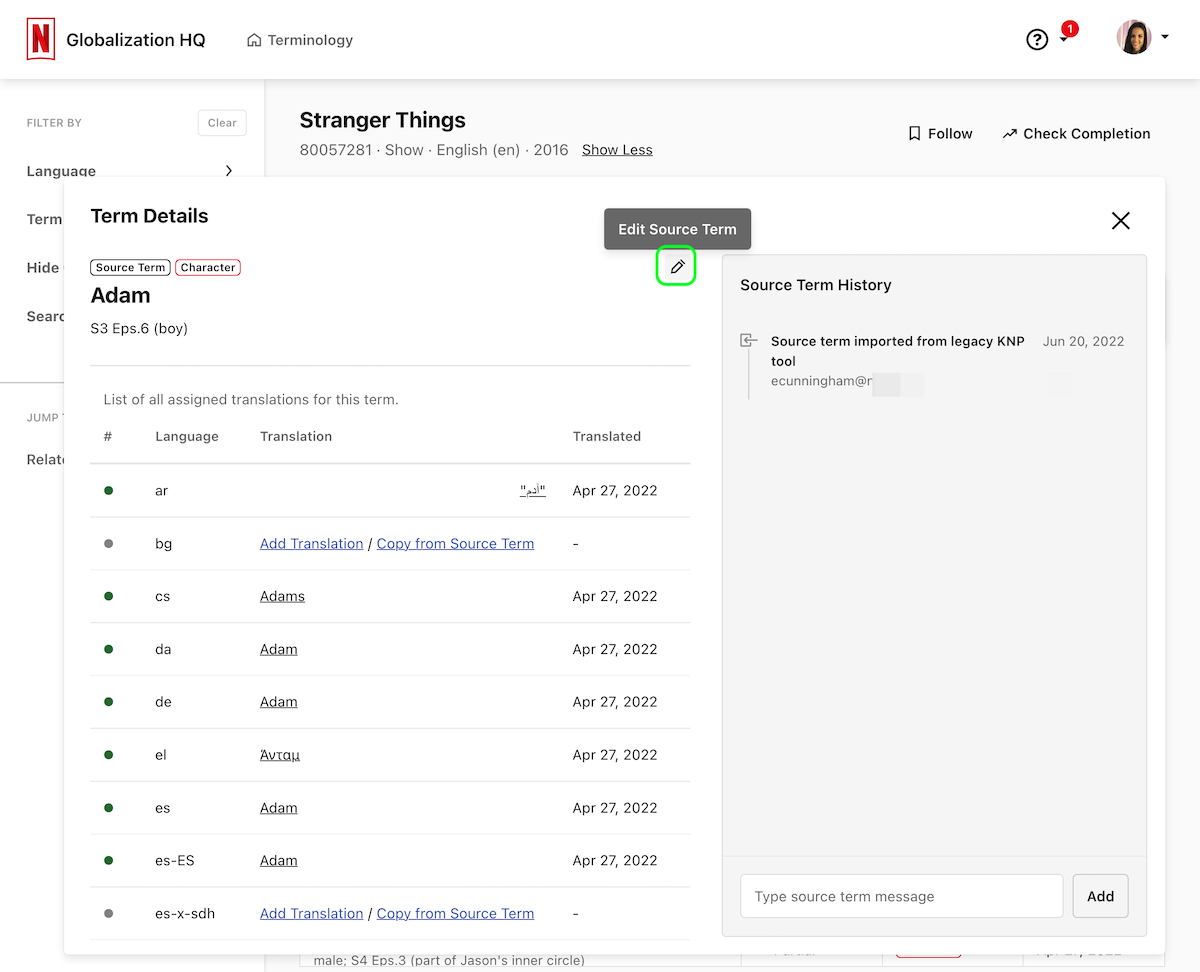
2. Type the new term in the “Term” text box.
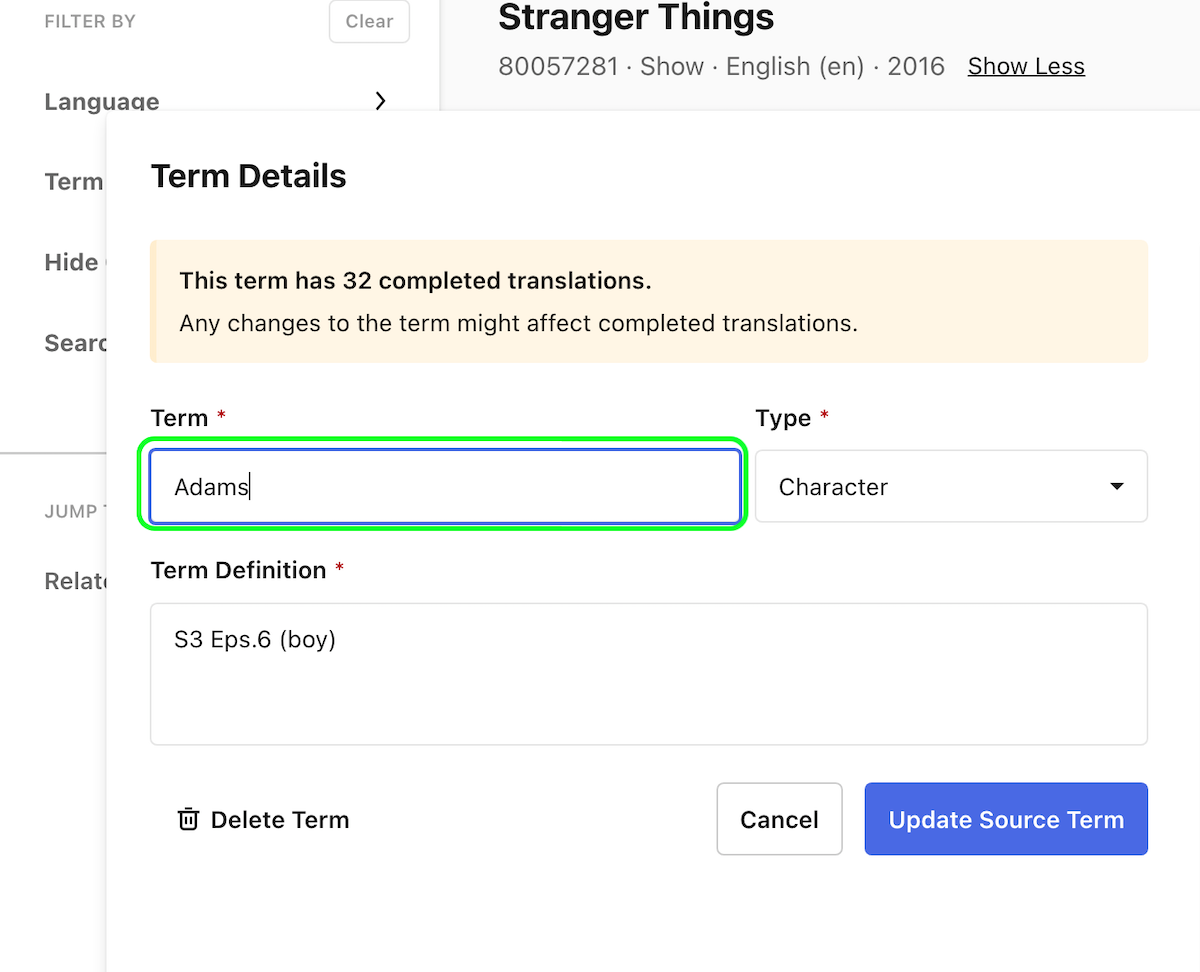
3. Select "Update Source Term."
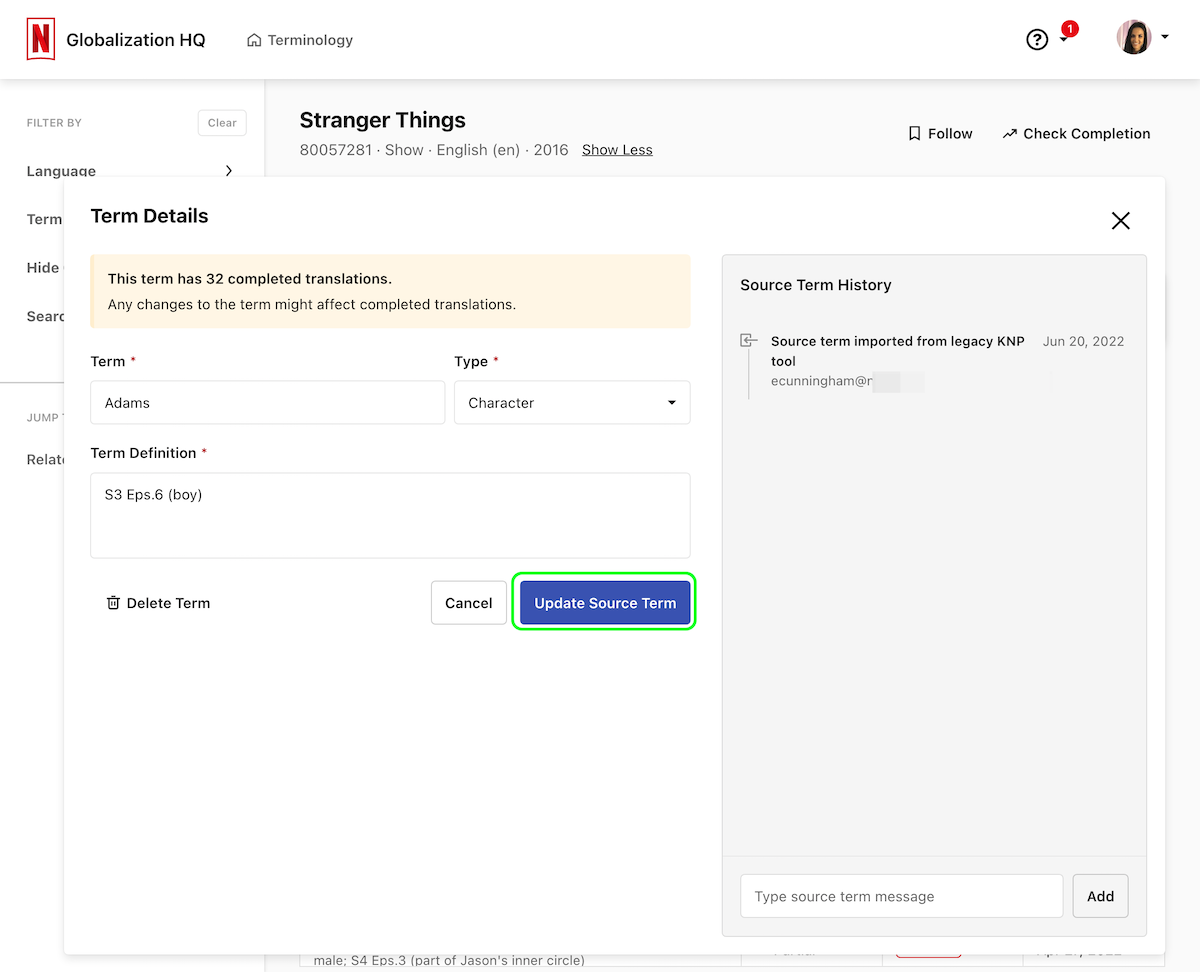
Result:
Add Translation
1. Select “Add Translation”
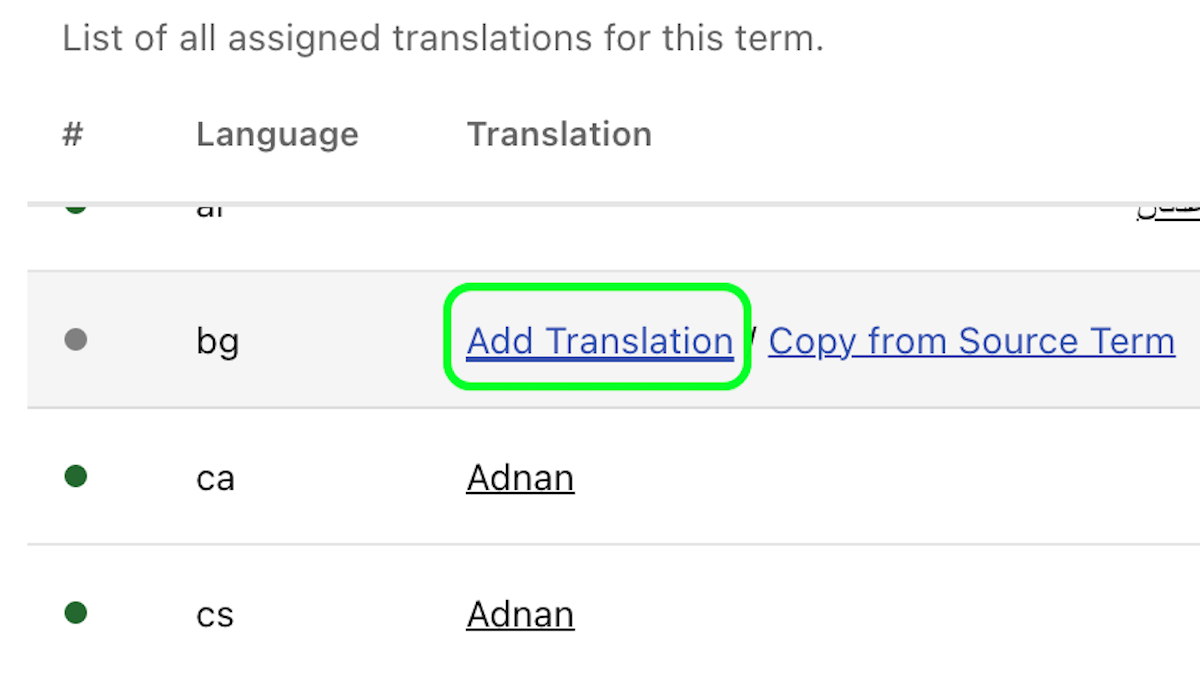
2. Type the translation in the Translation” field

3. Select “Add Translation”
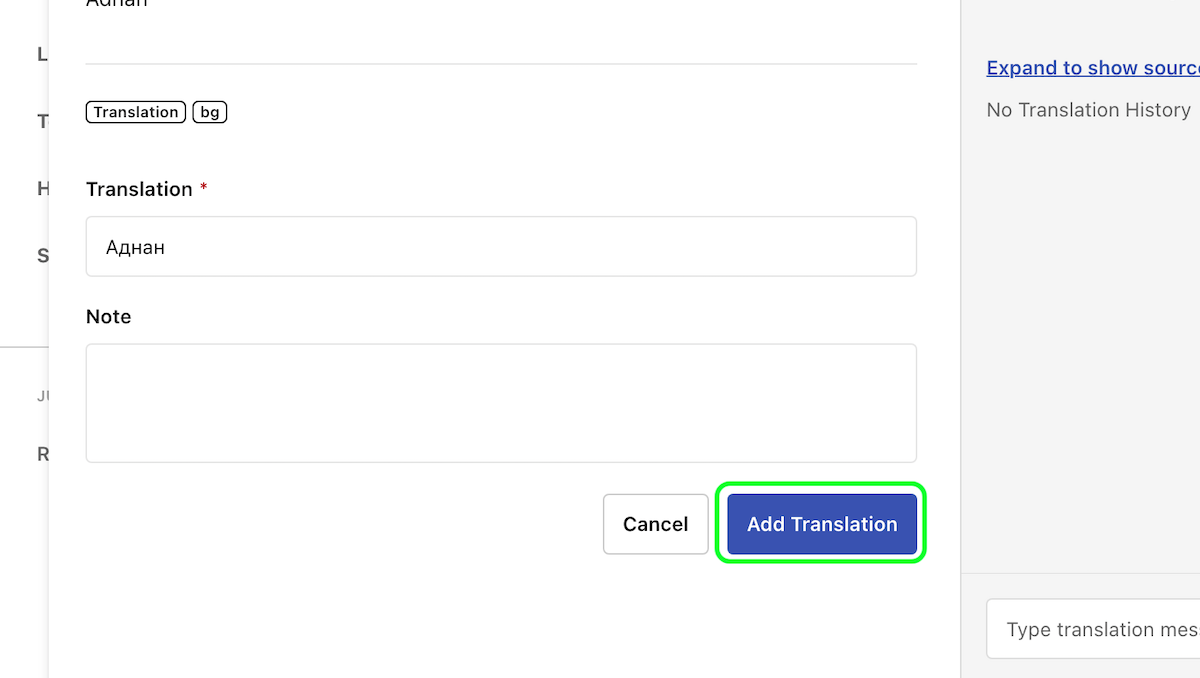
Result:

Copy from Source Terms
This option will copy the source term into the translation field to save time in one click.
1. Select the source term
2. Select “Copy from Source Term”
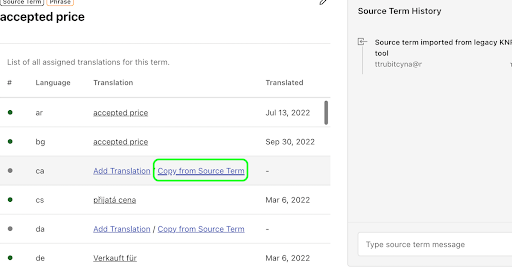
Result:

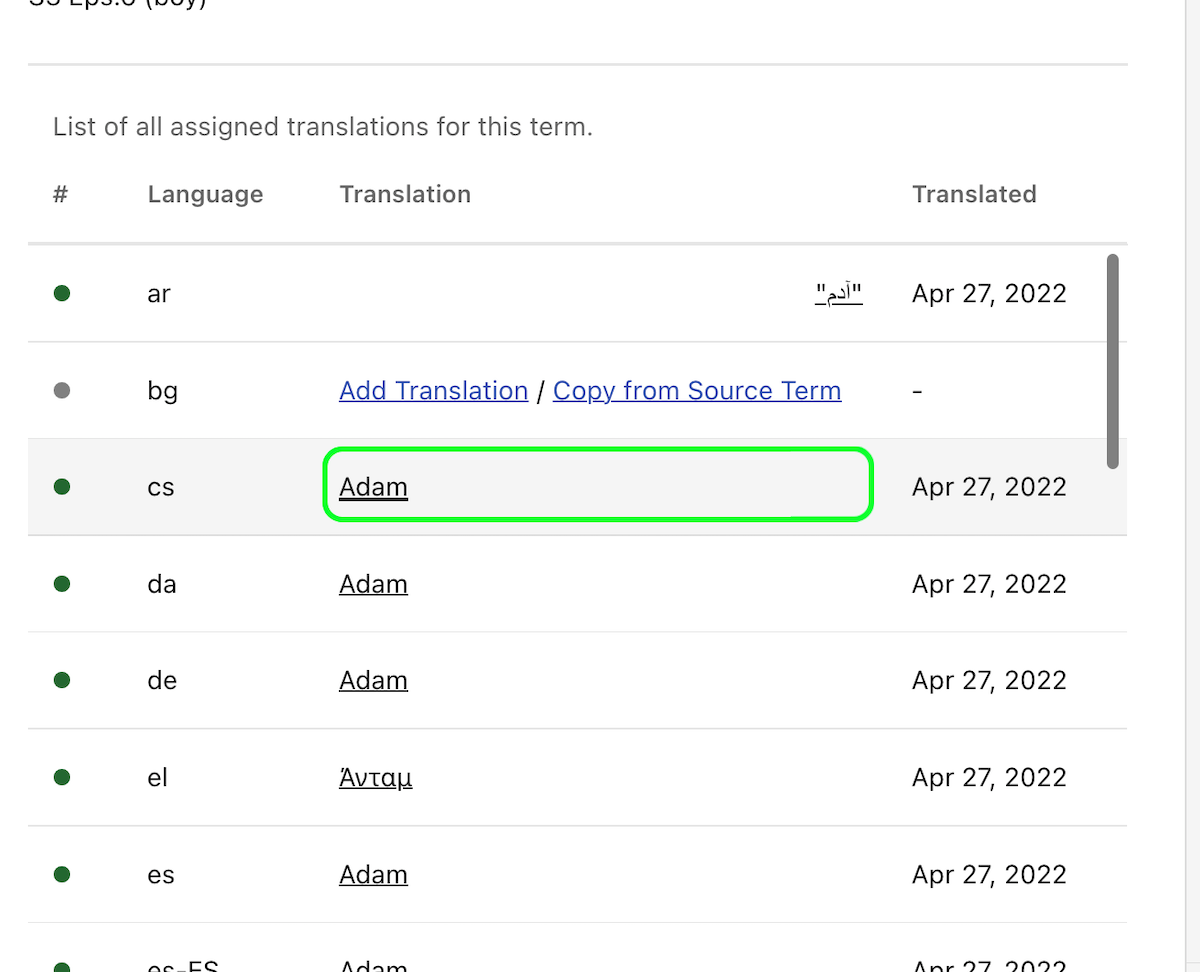
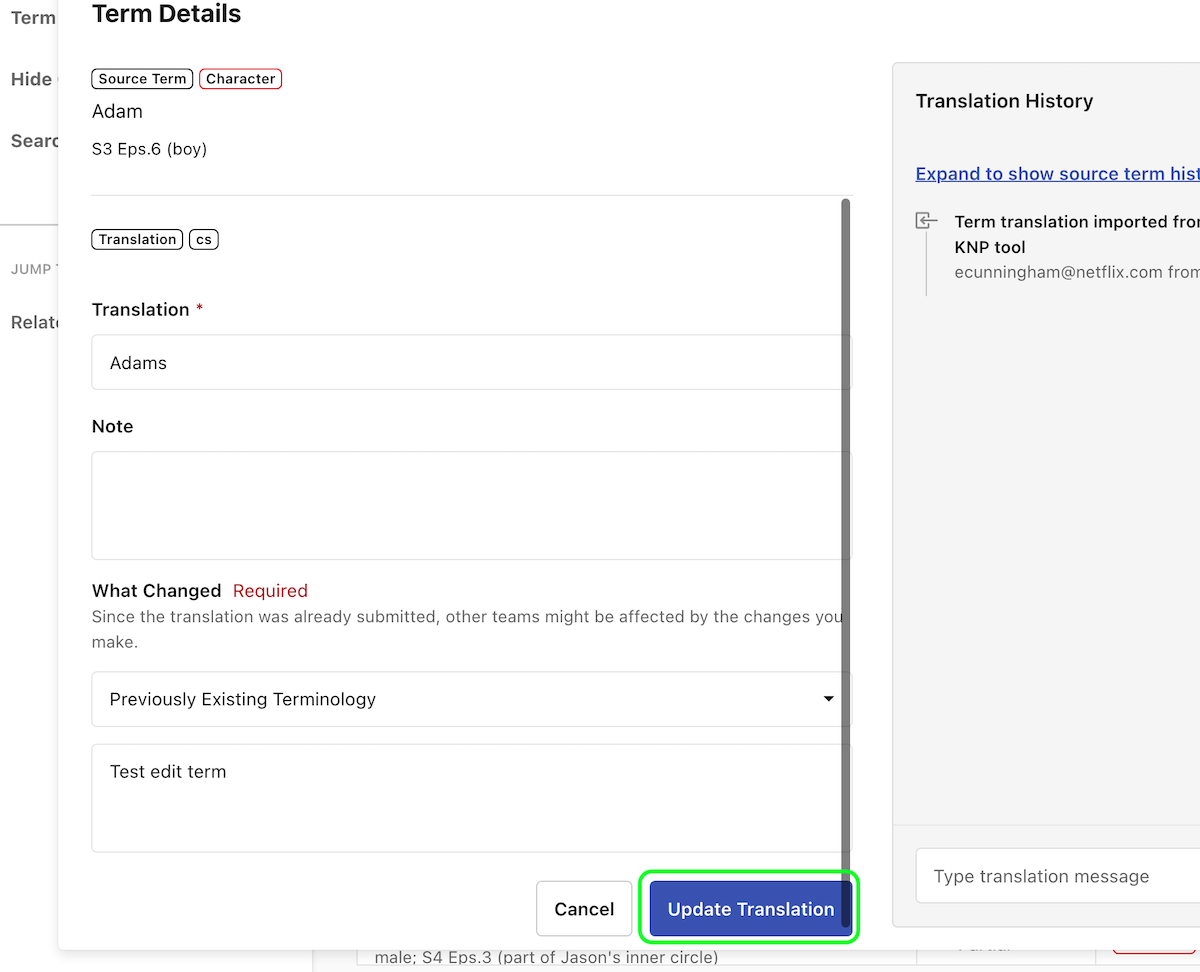
Edit Translation
Sometimes, translations already added to a title’s KNP may need to be changed for any number of reasons. If a change is needed, please follow the steps below and notify your Netflix contact (via your normal escalation and request path).
1. Select the translated term.
2. Select “Edit Translation.”
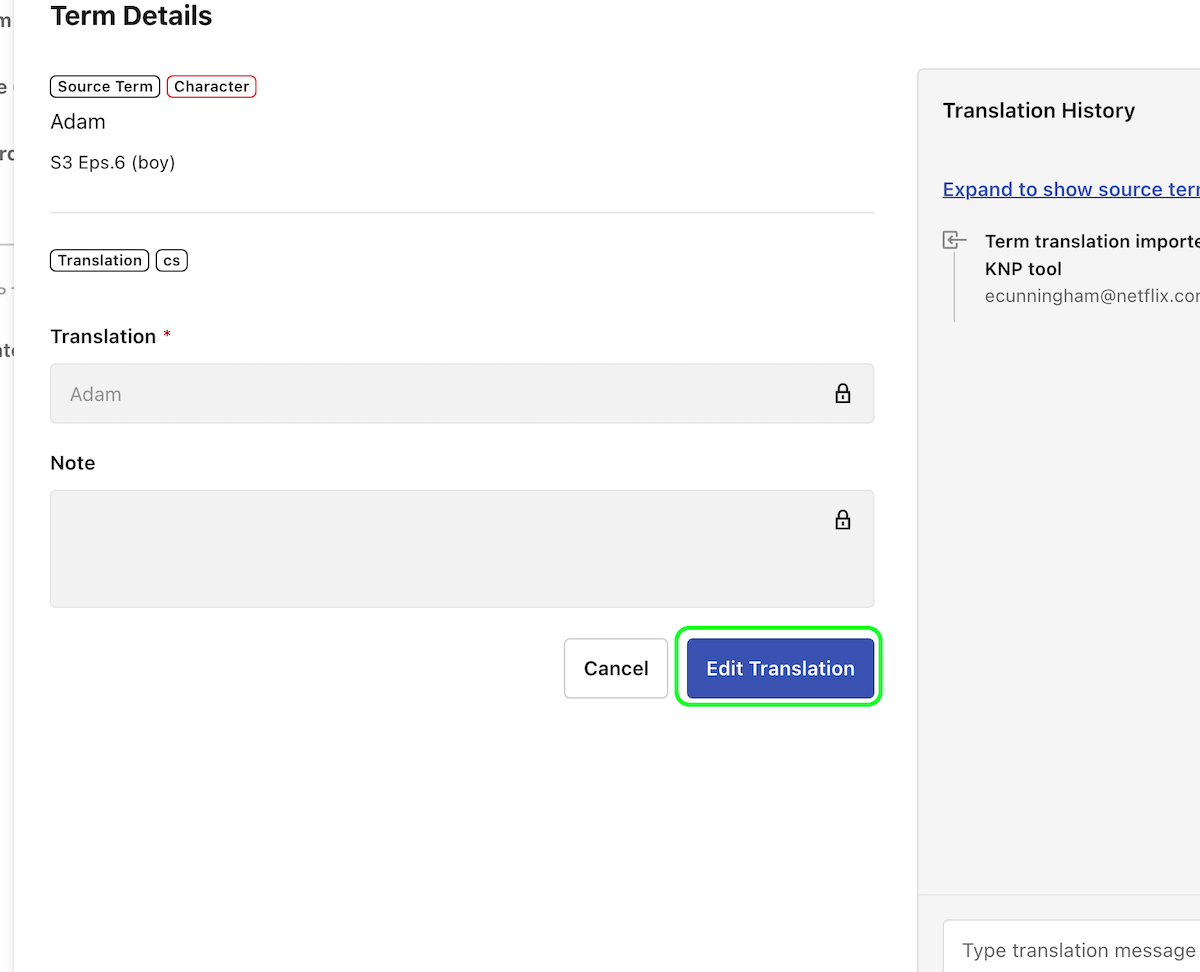
3. Type a new translation.
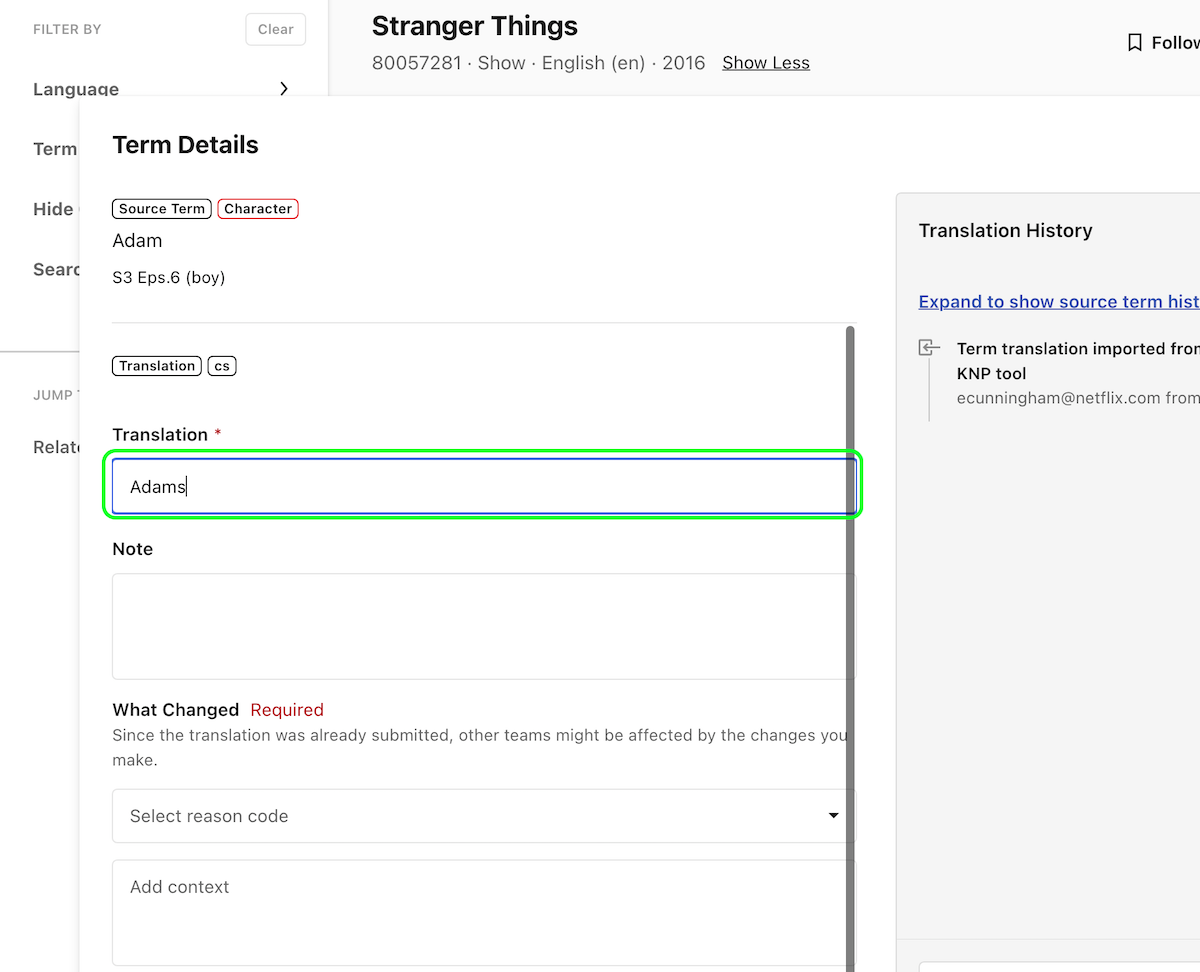
5. Select the reason code.
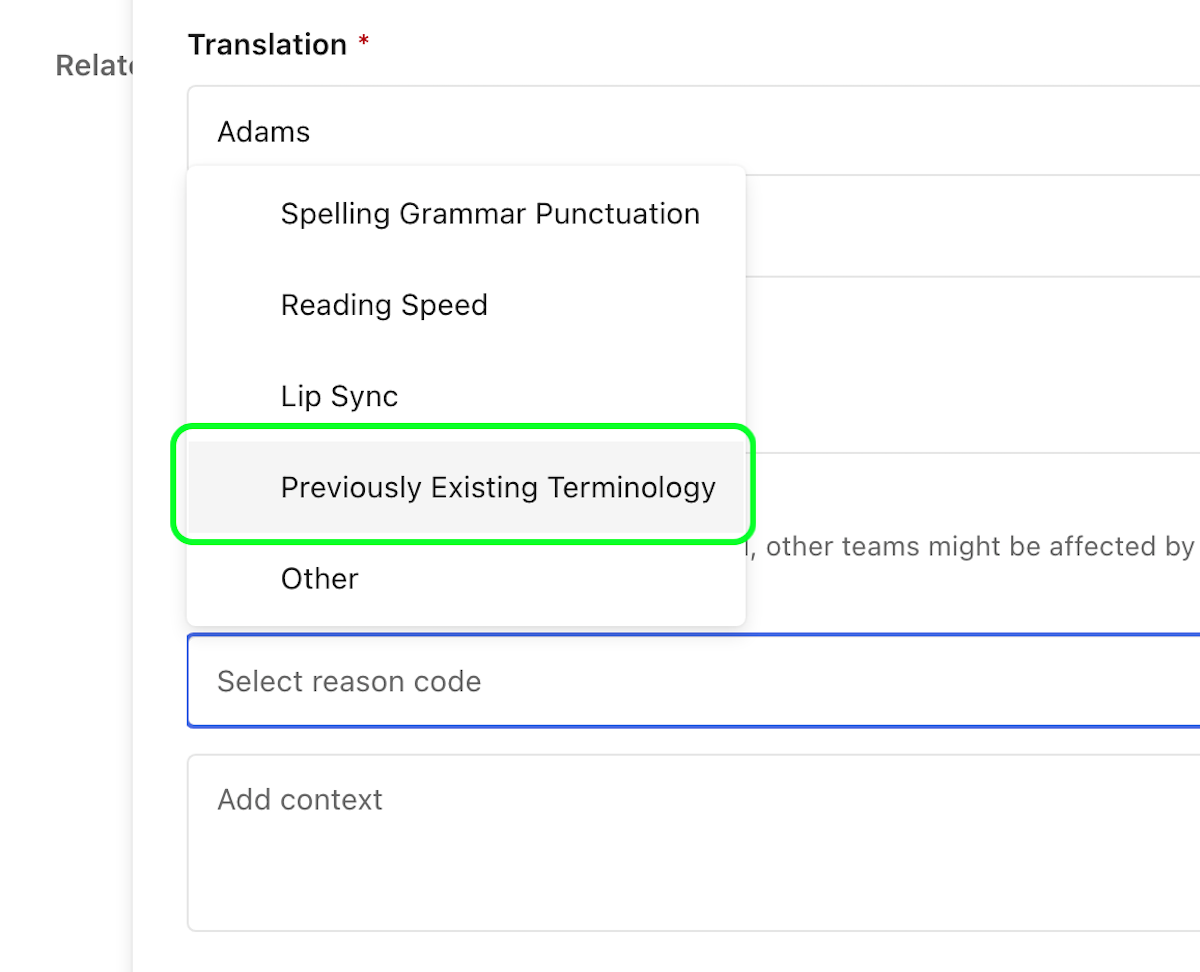
6. Type a note with context
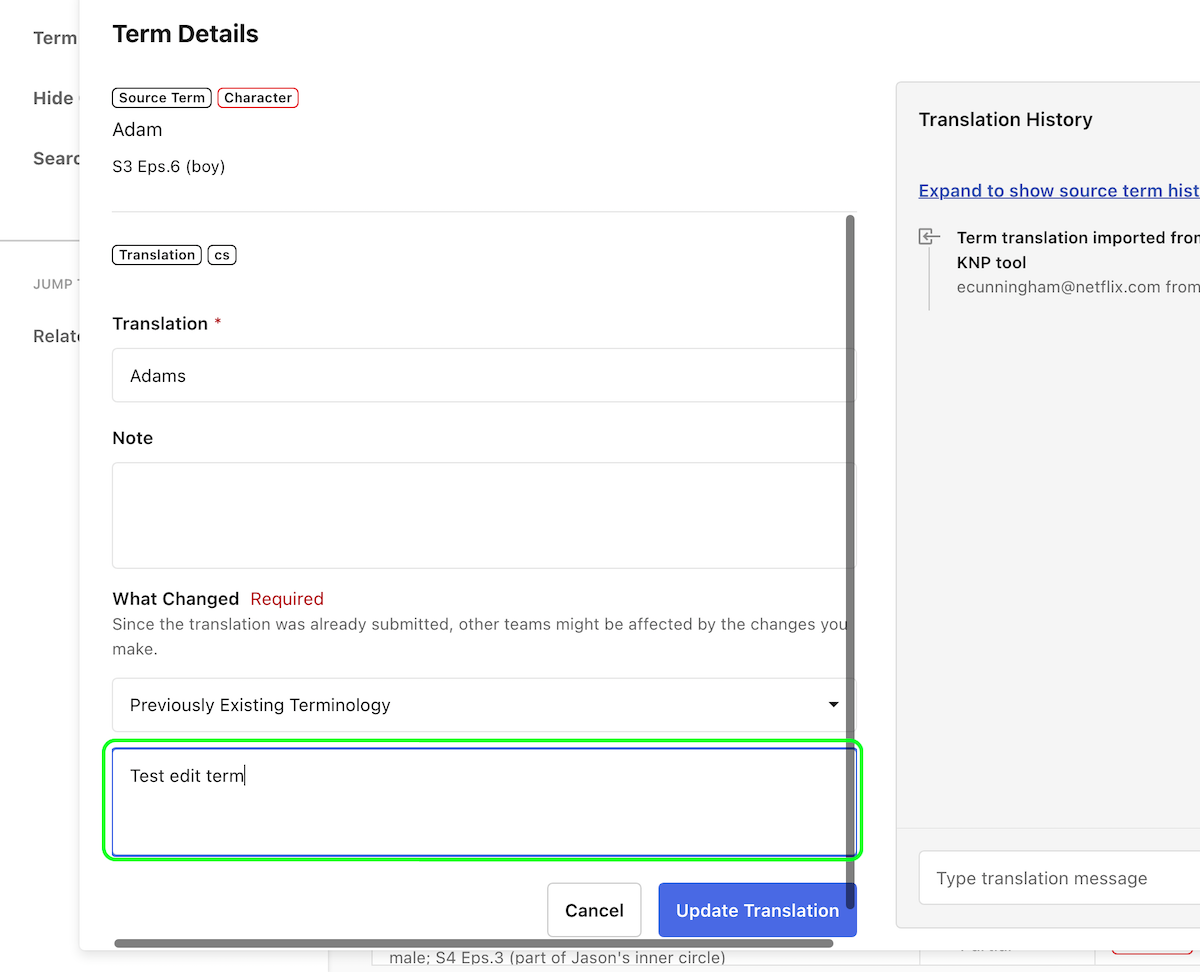
7. Select “Update Translation.”
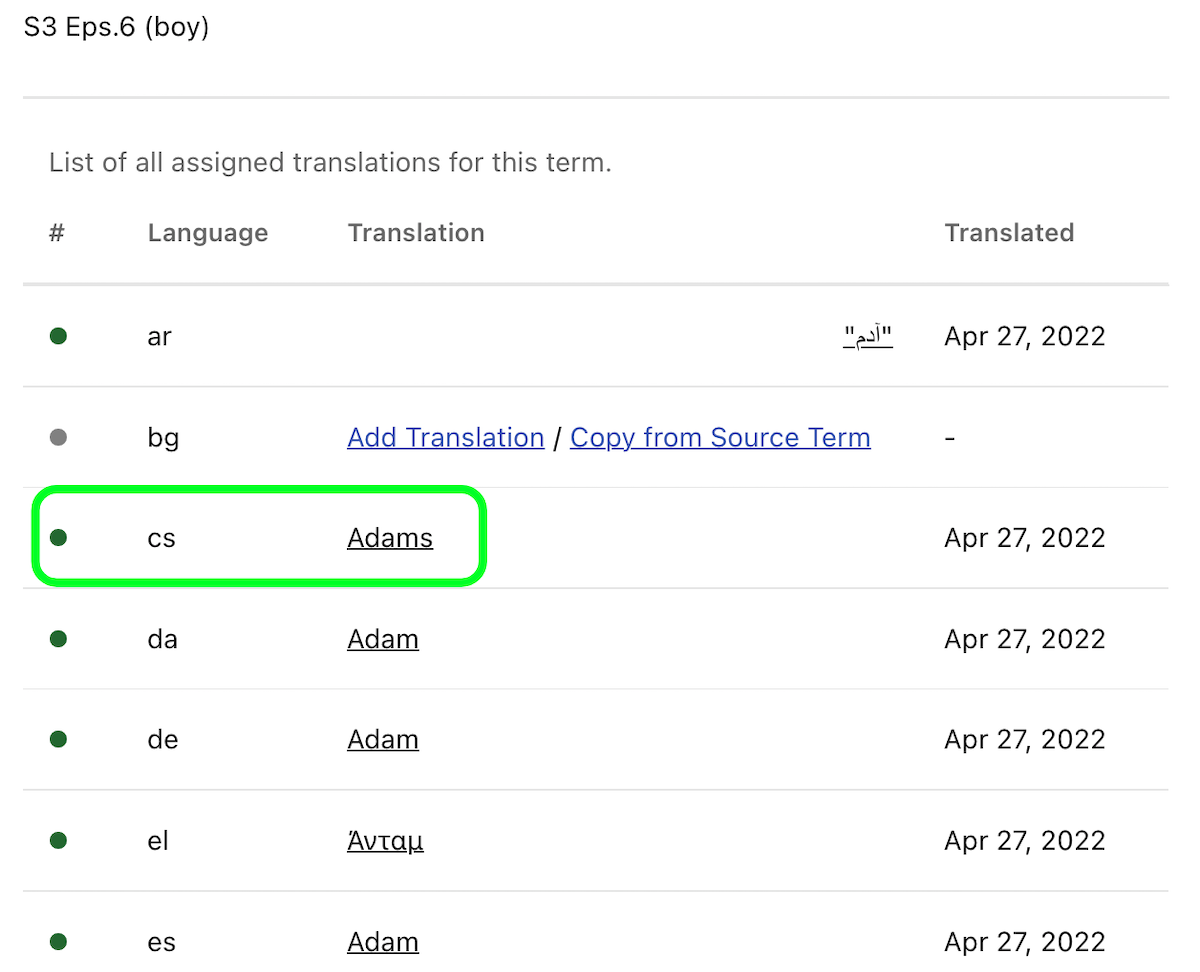
Result:
Upload and Download
Terminology supports upload and download of CSV and XLSX files by selecting the 3 dot menu and selecting “Download As” or “Upload terms.” in the dropdown
.Fig 7 Upload and Download options from the 3 dot menu

Format
CSV and XLSX files must be formatted with the first line of the file in the header row. Each row following the header row contains the term and its translations in different columns. Each row will always begin with the following columns.
Fig 8 Header row

During upload, the language code is required. However, the language name is optional. For instance, the column header could be either “ar(Arabic)” or just “ar”. Both options are accepted.
Fig 9 Column header

Upload Guidelines
Files must follow the guidelines below.
- Upload can only be used to add source terms or translations.
- If a source term text is updated, then the updated term is treated as a new term. The new term will be created.
- If a translation text is updated, then the file will be rejected with an error message.
- Updates to term definition or translation notes filed will be ignored.
- Term text values that are not updated are ignored.
- Only languages that have translations to be created can be included in the upload file. For instance, if a vendor only provided Korean translations, the file need not include language columns other than “kr”, “kr notes” and the mandatory first 6 columns.
- Source term text column cannot be empty for any row.
- There cannot be duplicate source terms in a file.
- Empty cells for translation text columns are ignored.
Reporting Issues and Tool Support
For tool support, please submit a ticket through the tool with the details of the issue encountered.

Please provide the following details:
- Screenshots of the issue (if applicable)
- Description of the issue (if applicable)
- Movie or Package ID affected (if applicable)
- Approximate date and time that the issue was encountered