Machining Wax Mold
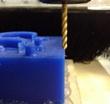
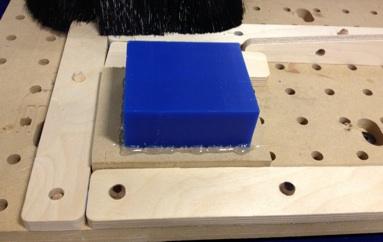
I. Secure Wax Block
- Glue (hot glue gun) the wax block onto wooden piece
- Screw into sacrificial layer.
- Make sure not to use screw so long that they'll hit the aluminum surface below the mdf.

II. Setting Orientate and Size of Model
III. Setting Material Size and Margins
- • On the computer navigate to Start → PartWorks3D
- • Select the “Load 3D File” button and load your file
- • “Orientate and Size Model” (see below)
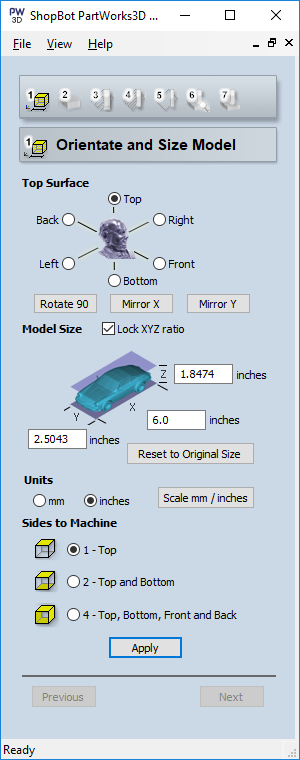
Select appropriate Ratio plus correctly orientate your model with the Rotate 90 /Mirror X / Mirror Y.
Enter in the size of your model
Click Apply
Click Next
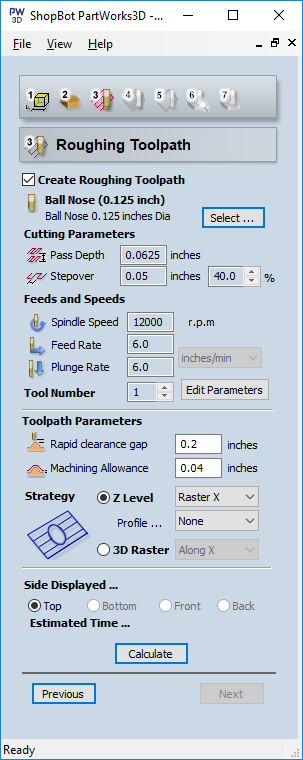
IV. Setting Roughing Toolpath
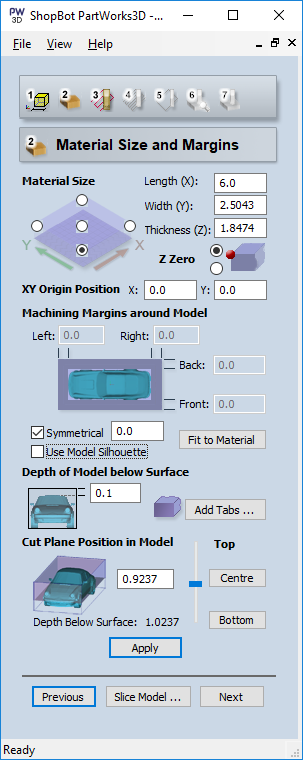
Enter in size of wax block
Note: I had to enter in 1.75 for my thickness because my model was incorrectly thicker than it should have been. But this should be 1.5”
Indicate block’s origin
Depending on your cad file:
A) only has the object
B) also has wax block modeled
If (A) set Symmetrical
margin of .2”
If (B) choose Fit to Material
You can always make adjustments to your margins, generate a path and then skip to the preview to see how it has changed your result. Having margins greater than or less than the tool diameter will affect your toolpath. For some models, if there isn’t sufficient margin the tool will not be able to carve all details around the perimeter of your model.
Set depth of model to .1
so bit hits all of the wax surface smoothly

Play with slider so the cut plane position of the model is where you want
Here for me
Click Apply
Click Next
V. Setting Finishing ToolPath
Select your end bit
.125” ball nose or flat for wax block
Cutting parameters
Stepover to be 40-50% should be fine
Note: changing spindle speed here doesn’t do anything, we will set manually later.
Toolpath parameters:
Under strategy select Z level, and make sure profile selection is None
Set to 0.01”
Click Calculate
Click Next
VI. Preview Toolpaths
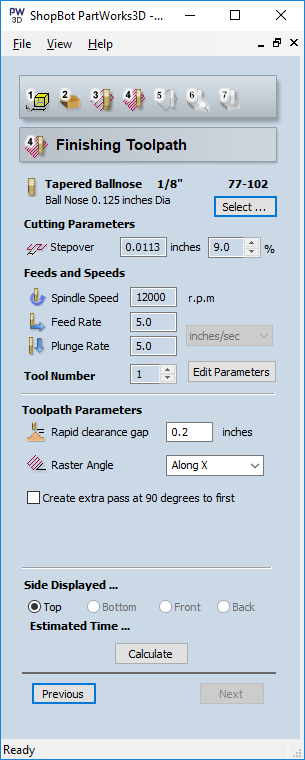
Select your end bit
.125” ball nose or flat for wax block
Select Edit Params
Change Stepover to be 10%
Click Calculate
Click Next
**SKIP the Cut Out Tool Path**
VII. Saving Files
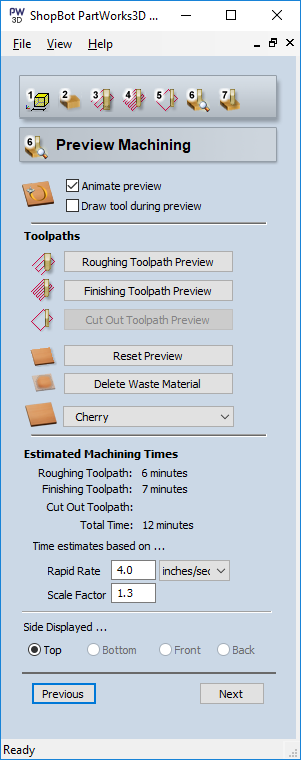
Preview Roughing
Preview Finishing
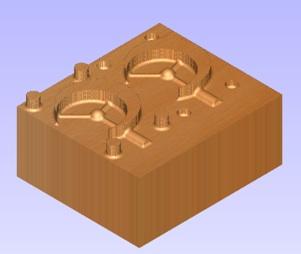
Make sure the end result is what you are expecting your mold to look like
Click Next
VIII. Inserting End Bit
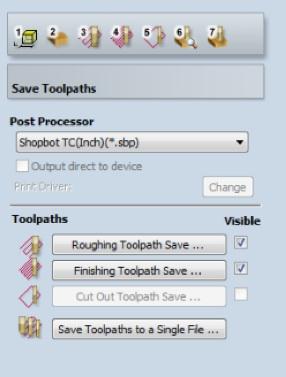
Save out roughing.sbp
- • Navigate to File → Save As → filename.v3d
- • Exit program
Save out finishing.sbp
IX. Zeroing XYZ on ShopBot
- • Navigate to Start → ShotBot3 software
Unlike the big ShopBot, the Desktop Shopbot has neither a blue nor green button that you must push for resetting the drivers and starting the spindle when prompted. The drivers will reset when the machine is turned on, and the spindle will start automatically when you run your toolpath.
- • Click the yellow KeyPad button, this will open the keypad
- interface. You can use the keyboard arrows and the
- page up and page down keys to move the shopbot.
- Move the shopbot using the keyboard to a position where you can easily access
- Grab the two wrenches nearby
- • To get the collar off the spindle, place the wrenches like the image below:
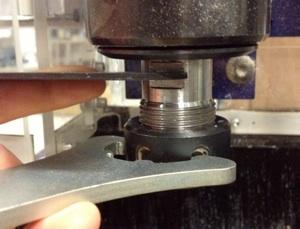
- • Pull the wrenches away from each other to loosen the collar off the spindle
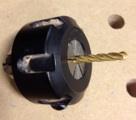
- • Insert the end bit into the collar. The tool that sticks out is the max
- depth that can drill into your piece
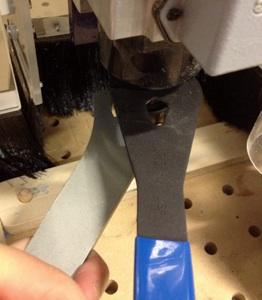
- • While keeping the end bit steady inside the collar, carefully screw
- the collar back onto the spindle using your finger. Tighten using the
- wrench but this time squeeze wrenches inward towards each other.


- • Use the keyboard/keypad to position the shopbot end bit
- so that it straddles the left-side top-edge of your wax block
- Navigate to [Z]ero → Zero [x] axis
- Position the shopbot end bit so that it now straddles the bottom-side top-edge of your wax block
- Navigate to [Z]ero → Zero [y] axis
X

Y
- • To zero the z-axis, Put the alligator clip onto the collar and
- Place the metal plate on top of the material.
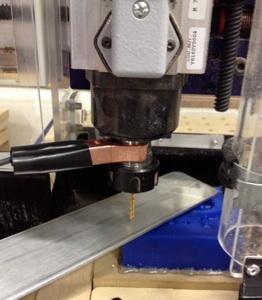
- • Navigate to [C]uts → C2 - Zero Z axis with Zzero plate
- • Put away the alligator clip and metal plate (don’t forget this..)
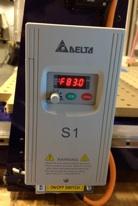
Setting Spindle Speed
- • Do math: Desired spindle speed / 60 hz = X
- For our wax material the desired spindle speed is 5000 / 60 hz = 83.3
- • On the side of the shopBot, turn the gray knob until it reads F83.0
XI. Running the Rough and Finish Toolpaths
- • Navigate to File → Part file load → load the ROUGHING file path first
- • Click Start
- • Make sure you watch the entire process. You cannot leave the shopbot alone.
- The E-stop button is on the bottom right of the shopbot
- • Once the roughing tool path is finished, vacuum the excess wax
- • Navigate to File → Part file load → load the FINISHING file path
- • Click Start
- • Once the finishing tool path is finished, vacuum the excess wax and
- Remove your wood + wax block and clean the station.
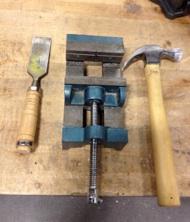
- • Use the tools seen below to help you remove the wax from the wooden block