Martin 242 Fleet One and Fleet Two Associations


M242 Deck Padding
The Pacific Northwest Regional Measurers (Ken Holland, Chris White, Ken Machtley, Jeremy Smith, Anthony Collett, Allan Strain, Tim Murphy, Jim Hyslop, Frank Rogers, and Michael Clements) proposed to allow M242 owners to experiment with deck padding in 2021 onwards with these goals in mind:
- To make the M242 more comfortable to race by eliminating the deck rail “bump” issue.
- To attract new owners and crew who will like the increased comfort.
During 2020 an experiment was done on one Vancouver boat in a wide range of wind conditions across ~30 races to collect data on how one such padding setup could be constructed and used, and the results were excellent. It’s a game-changer re crew comfort.
Other owners may come up with even more innovative solutions that are simpler, possibly cheaper, and more or equally effective: let the experimentation begin.
As Jeremy Smith said, “I always like thinking of how others have done things successfully, in this case other Class Associations. The Melges 24 Class is very strict about the actual rigging, but has allowed for all sorts of innovations on the comfort and tweaking side of things. There are entire businesses that provide various padding and add-ons for the Melges 24’s.
- Hutch invented the wider pad for the hiking lifeline from which you can dangle yourself, plus the modern companionway cover and mast pad (which some Martins have even used)
- Raptor invented the padded deck, etc. etc.
As always, you want to avoid a wallet arms race, especially in a successful little low-budget non-pro class like the Martins, but a little bit of innovation on the comfort and enjoyment that doesn’t change the boat can be a good thing.”
On November 25, the IMCA Technical Committee met via Zoom and agreed that:
- The deck padding concept had merit
- It did not affect the boat structurally
- It did not enhance performance
- It did provide a higher degree of comfort for skipper and crew
- It was inexpensive
- Other solutions may be developed. For example, Mike George suggested that he would contact someone in his area and see about a foam solution. Another idea proposed by Ken Machtley prior to the meeting was to use button snaps for snapping cushions onto the cockpit seating: one monolithic custom molded cushion on each side with 4-6 snaps for attachment.
- The Technical Committee will allow all owners & crew to conduct unrestricted experiments with deck padding in 2021 in order to develop the best solution(s) for the greater good (400-500+ minds on the issue are better than just a few)
- The IMCA Technical Committee will revisit this topic at the end of 2021 and determine if some Class Standards can be developed with regard to color and design
- If more time is required by the Technical Committee to evaluate the solution set(s) then it may decide to roll the decision process into 2022
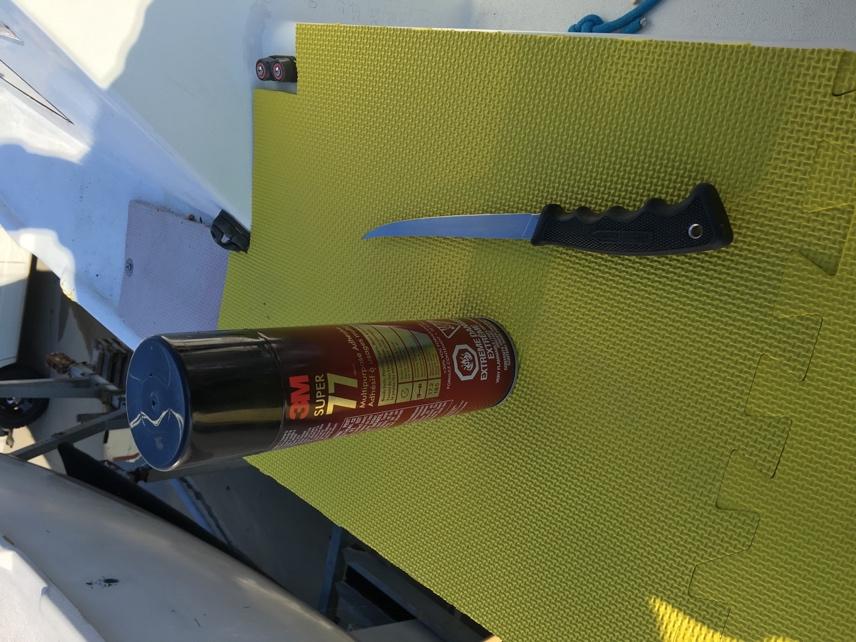
The test boat used the following materials to construct the padding that is seen in the following photos:
- $85 for 12 Interlock foam mats (they come in packs of 4 at Home Depot, Model # is 20009, SKU is 100811661)
- $10 for 5 feet of ¾’ width double-sided sticky Velcro (available on Amazon)
- Some duct tape
- $18 for a can of 3M Super 77 spray-on glue
- 2 long screws and washers
All of these items are available at Home Depot stores or Amazon. Total materials cost was about CDN$125.00
Installation Steps:
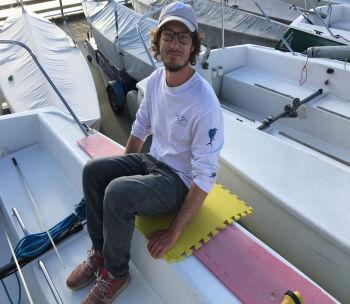
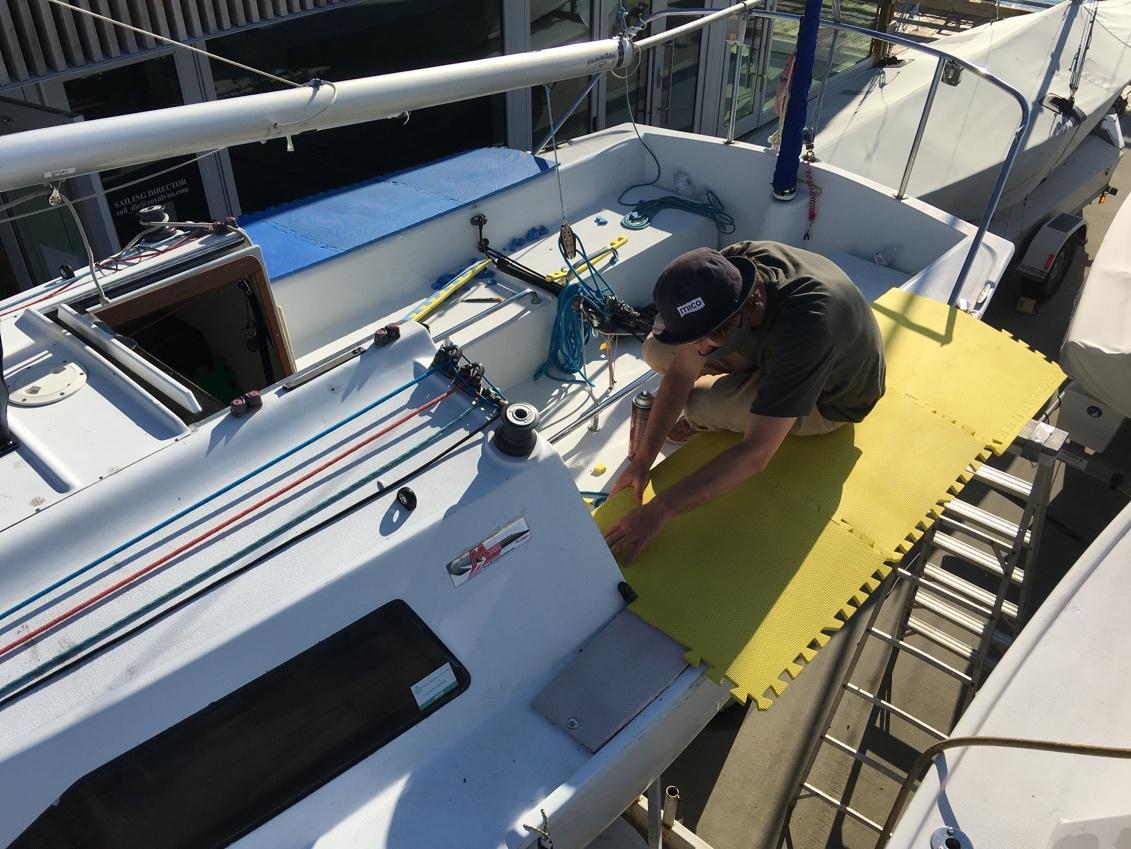
Step 1 was putting down a narrow base layer, as seen on the port side of this photo, and then gluing a secondary layer on top that was about 10” wide, per the 2nd photo. The deck is concave, so some degree of filling was needed.
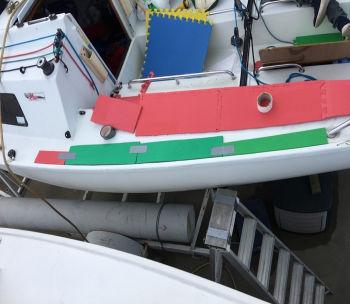
Duct tape was also used to hold the 2nd layer pieces together.
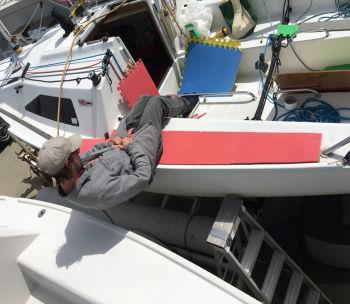
(Note: in the photo below, William has his toes under the rail solely because he did not have a jib sheet to hang on to…)
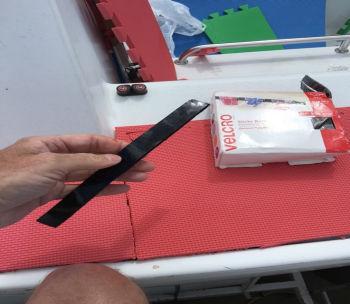
Velcro was used to hold the 2 lower layers together initially, followed by spraying on the glue when the 3rd layer was eventually added.
A small piece is used forward of the cabin face because some crew angle themselves forward. It still ends up being flush with the deck rail bump, so it is a big improvement for anyone who is “wrapped around” that corner like the forward crew sometimes find themselves....
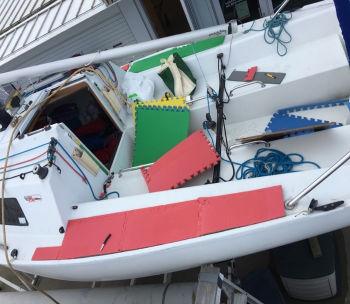
Velcro was used to hold the lowest layer to the deck in a few places.
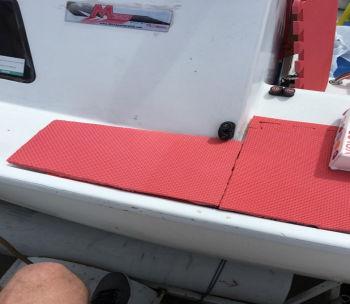
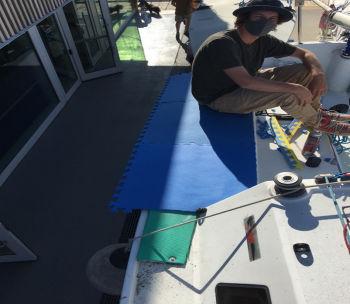
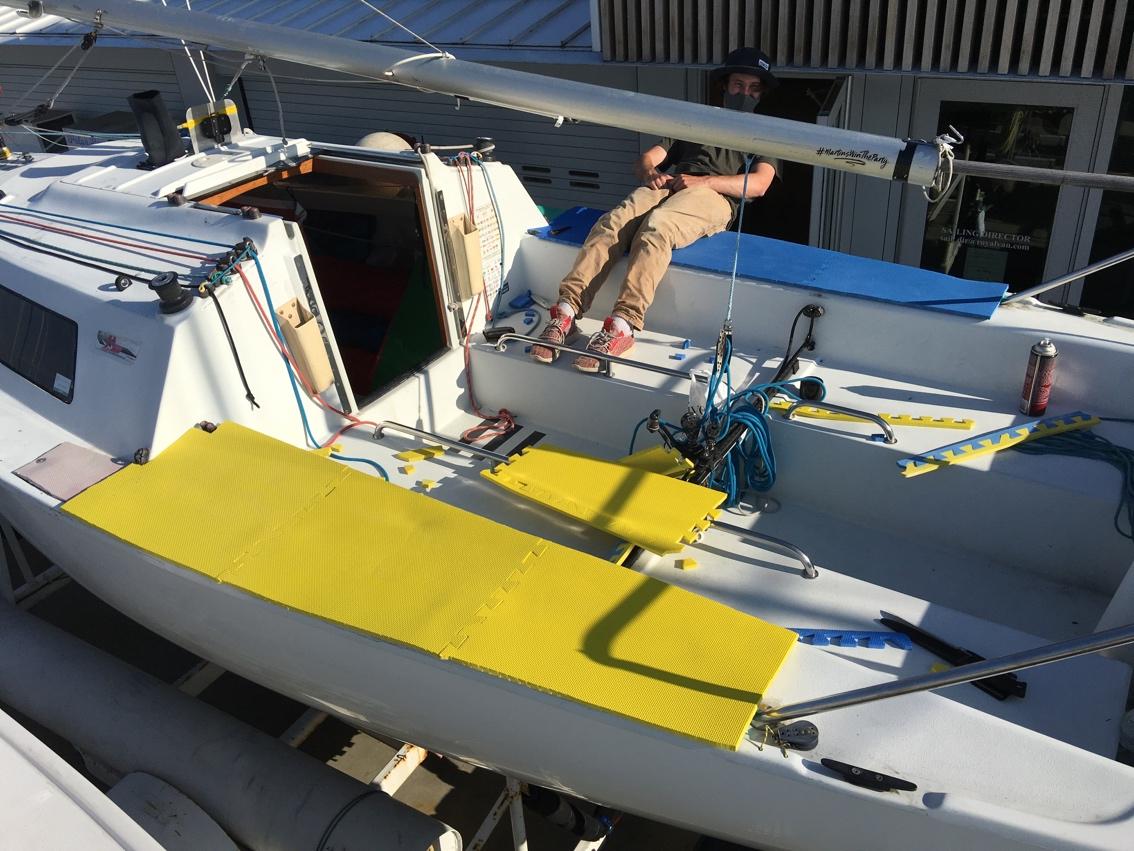
The finished product re the first 2 layers.

The preliminary feedback from the crew was that the first two layers of foam were an excellent addition.
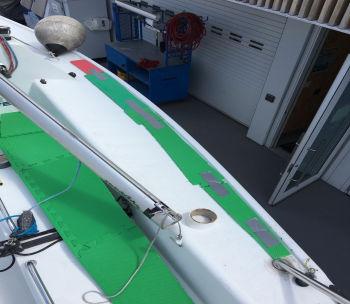
But after a few weeks with just two layers we decided that a 3rd layer was needed to totally cover the deck rail bump for an even better hiking experience.
The remaining concavity of the deck was totally filled in, and the “inner bump” of the deck (at the vertical seat face) is now fully padded also and much easier to sit on.
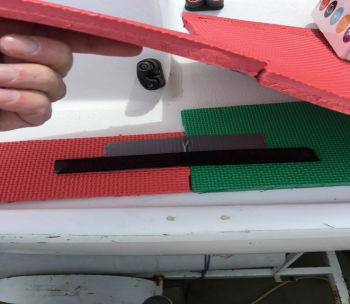
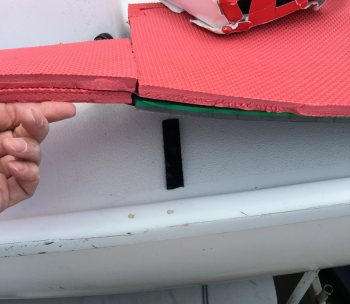
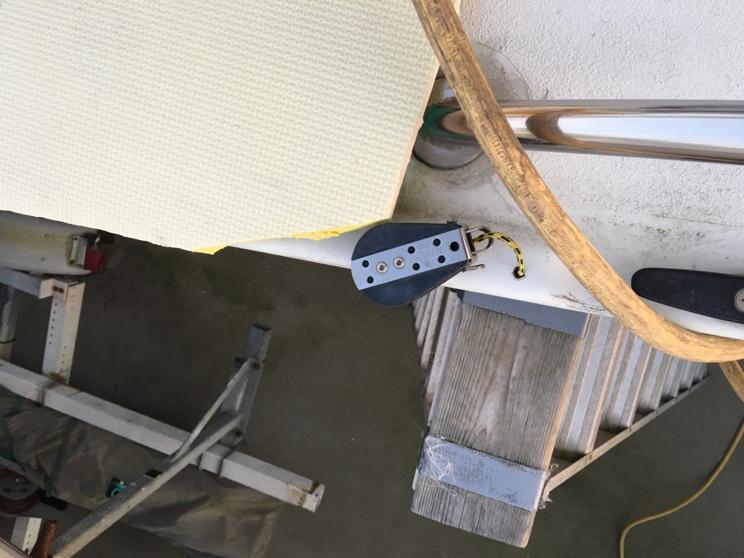
Note in the photo above that the leading edge of the 2nd layer is screwed into the deck with a washer on top to spread the load.
That leading edge piece is only two layers thick to enable a degree of tapering. Three layers all the way along is not desirable as it would be more likely for someone moving aft to trip on 3 layers instead of just 2.
And we could not see any way that just having Velcro at the leading edge would keep all the pads in place if the boat heeled over in heavy air and the deck got repeatedly slammed by big waves or if the boat broached downwind: the shearing action of the water would be quite intense.
Any alternate ideas re fastening down the leading edge are welcome.
At this time the aft edge is fine being held in place with just Velcro.
And we are also able to remove the pads now and then to clean underneath or remove them for winter, so a permanent deck adhesive would create a problem.
We cut the outside edges from below (the boat sits on a trailer) using a long fish filet knife so that we followed the curved edges fairly closely. It ended up being a perfect cut on both sides.
The inside cockpit edge was straight anyway, which made lining up that side first very easy.
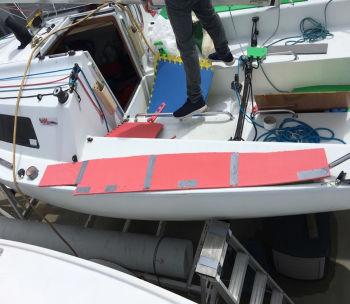
The deck rail bump is totally covered and was never felt again in any conditions. No need for padded hiking shorts (at $200 per crew member) or bike shorts ($40 each) any more.

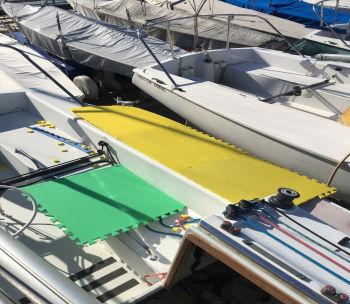
The finished product:
(Note: in the photo above, once again William has his toes under the rail solely because he did not have a jib sheet to hang on to…)
Through extensive subsequent usage we decided to cut a small angle in the aft outer corner of the foam on each side so that the spinnaker blocks would not catch underneath the foam.
The spin sheets will sometimes catch under the foam in windier conditions but they are very easy to clear.

So, to summarize the “gluing” and “Velcro” aspects:
1. The bottom layer has Velcro straps between it and the deck in 3 places plus the forward screw.
2. The bottom layer is glued to the middle layer
3. The middle layer in turn is glued to the top layer
As such there is no glue between the lowest foam layer and the deck, so to remove all the padding someone would just:
A) back out the forward screws and
B) carefully undo the 3 Velcro attachments holding the bottom layer to the deck. A 5-minute job at most, and all that would be left behind are 3 strips of Velcro attached to the deck. This was in fact proven to be the case when the test pads were removed in November for the winter.
Fun, Fast, Social, and Affordable Racing: One Design Sailing At Its Best