
Compliance Operating Procedures
Contents
Useful Tips for Getting Started 5
C1Risk Compliance Management Roles 6
C1Risk License Classifications 6
Navigating the Compliance Management Module 7
Compliance Management Features 9
How to add obligations from the C1Risk GRC Library 11
Create your Compliance Dashboard 12
Sample compliance dashboard 13
Statements of Applicability (SOA) / Requirement Scope 15
Write a unique SOA in the Control record. 19
How to Print the Statement of Applicability Report (ISO 27001, etc.) 20
How to Use the SOA Filter in the Control Library 22
Mapping Policies, Internal Controls and Evidence to prepare for audit 23
How to Map Policies to the Obligations 23
How to bulk import Internal Controls 26
How to Bulk create internal controls in the C1Risk Platform 26
How to write an Internal Control 29
How to Map Multiple Obligation Controls to a Single Internal Control 29
How to map (multiple) internal controls to a single obligation control 31
How to Map Evidence, IRL, “Provided by Client” Lists 33
Evidence Collection / Continuous Monitoring 34
How to Set-up and Launch the Evidence Collection Process 34
Mapping Evidence to your Regulation or Standard 34
Map Multiple Internal Controls to a Single Evidence Item 34
Map Multiple Evidence Items to a single Internal Control 36
View Evidence from the Control Library 37
The Evidence Collection Process 38
Populating the Evidence Record Fields 38
4. Setting the Evidence Start Date / End Date 40
5. Tips for Setting up the Start Date / End Date 41
6. Establishing the Frequency of Collection (Cadence) 43
8. How to Set up the Evidence Review Process (optional) 45
9. How to Bulk Update Evidence Records 47
How to Launch Evidence Collection 48
1. Launch Document Requests 48
2. Notification of Submitted Document Requests 51
3. Approve or Reject or Respond a Submitted Document Request 53
4. Why & what happens when a Document Request is rejected. 57
Continuous Compliance Monitoring on the C1Risk Platform 60
GRC Library/Compliance Dashboard 61
Reference Instruction Manuals: 62
3. External Auditor Training 62
4. SOC 2 Type 1 and 2 Training 62
7. Annual Internal Risk Assessment Training 63
Introduction
The Compliance management module in C1Risk enables customers to deliver and sustain year-round compliance with most global regulations and standards.
The
Useful Tips for Getting Started
- The GRC Library is used to launch Compliance Management with the relevant obligation (regulation or standard).
- You can download more than 100 obligations from our central GRC Library. If you don’t see the obligation that you are looking for in our central GRC library, please reach out to C1Risk and our support team will upload it for you. Our standard SLA for uploading new obligations is 7 business days.
- Your compliance dashboard can be found in the GRC Library in the relevant obligation record.
- Your Statement of Applicability report can be exported from the platform from the details section of the obligation.
- Your evidence collection can be fully automated in C1Risk
- Contact C1Risk for full set examples of internal controls, policies and evidence articles for many of obligations, including ISO 27001, SOC 2, PCI, CMMC and more.
- To conduct an internal audit or independent assessment to evaluate your readiness, contact C1Risk for assessment solutions, premium support, and managed service offerings.
Uploading Existing Data
- C1Risk provides Standard and Premium support options for uploading existing control data, evidence request lists, SOC reports, and other relevant data to kickstart the compliance process on the C1 platform. Contact your account manager for more information.
- C1Risk can receive data in .CSV documents for bulk upload. Data upload templates are provided here. Most data can also be bulk-formatted in the platform once uploaded.
- C1Risk has REST API functionality to enable data pull or push data to/from the platform. Contact your account manager for more detailed information on API integration.
C1Risk Compliance Management Roles
C1Risk License Classifications
Administrator |
|
Manager |
|
General User |
|
External Auditor |
|
Read Only |
|
C1Risk Compliance Roles
Compliance Role | Capability | C1Risk License |
Compliance Manager |
| Admin User |
Control Owner |
| Admin User |
Evidence Owner |
| General User |
External Auditor |
|
Navigating the Compliance Management Module
Filters
Filters can be found in the List Views for the GRC Library and Compliance Modules to help navigate and select information or specific records as follows:

Customize the List View
The List View can be customized to restrict or view all data fields, as follows:

Action Buttons
Use the Ellipses button to activate all possible tasks in the list view or record. Available actions will automatically highlight in the drop-down menu.

Compliance Management Features
- Compliance Dashboards
- Dashboards for all obligations
- Controls in scope
- Internal control readiness
- Internal control and evidence request frequency
- Document request status
- Audit observation/finding tracking
- Risk mitigation tracking
- Crosswalks
- Obligation crosswalks of former to current versions
- (EG ISO 27001:2013 > ISO 27001:2022)
- Obligation crosswalks (control mapping)
- (EG AICPA SOC 2 > ISO 27001)
*Crosswalks are created from authoritative sources. For a full list of available crosswalks, contact your account manager or submit a request: Submit a ticket : C1Risk Training Portal (freshdesk.com)
- Control Mapping
- Control requirements to policies.
- Control requirements to internal controls.
- Internal controls to policies.
- Internal controls to evidence checklist items.
- Test procedures to control requirements (internal audit).
- Test procedures to internal controls (internal audit).
- Automated Evidence Collection
- Continuous control monitoring.
- Establish document collection frequency.
- Assign multiple evidence owners.
- Review options
- Assign multiple reviewers.
- Structured review options
- At least one reviewer.
- Multiple reviewers with single authorization
- Multiple reviewers with all authorization in any order
- Ordered review (Jack then Jennie then Jane)

Getting Started
- The GRC Library
- Adding Obligations
- Establishing the Audit Period
- Statement of Applicability
- Mapping (Policies, Internal Controls and Evidence’)
The GRC Library
The C1Risk platforms provides customers with a pre-build, cross walked, library of more than 100 global regulations and standards (obligations) that can be added on an as-needed basis by the customer.
Customers may also choose to add additional obligaitons not available from the C1Risk GRC library. C1Risk supports the upload of additional obligations with a minimum 72 hours SLA. Contact your account manager or submit a ticket here with your desired obligation request. https://c1risk.freshdesk.com/support/tickets/new
How to add obligations from the C1Risk GRC Library
- Go to the GRC library Tab and click on it to open it
- Select the Obligations Tab
- Go to the ellipsis and select ‘look up’
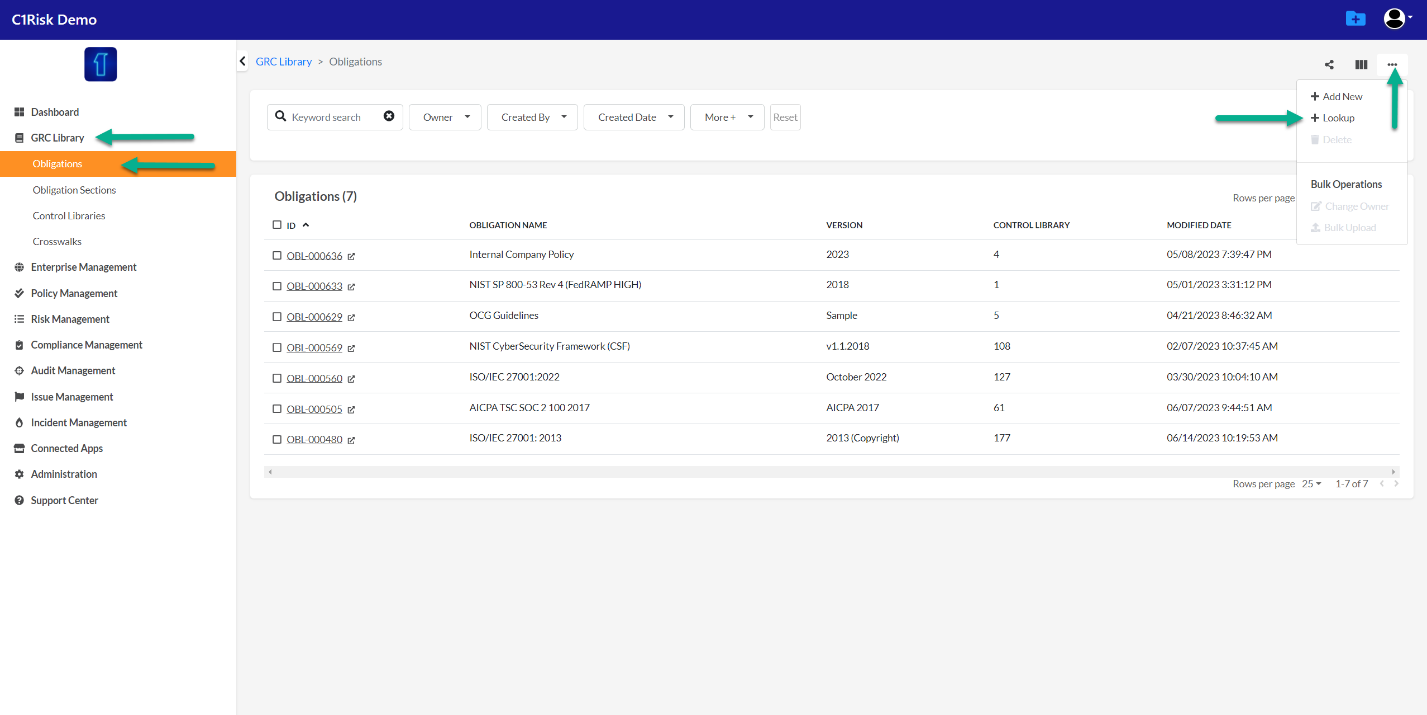
- Choose the appropriate obligations and add using the ‘Apply” button

Create your Compliance Dashboard
Your Compliance dashboard offer real-time monitoring of all compliance workflows and can be viewed in the relevant Obligation record. Follow the steps below and your dashboard will auto populate and update in real-time as actions are completed in the platform.
- Add your audit period (the dashboard will display data relevant to this period).
- Select applicable controls.
- Map policies, internal controls, and evidence records.
- Track and manage finding, observations and risk mitigation.
Sample compliance dashboard

Set your Audit Period
- Go to the Obligation in question and open the details tab.

- Click edit and modify the audit period as needed.
- Click Save

- Now the dashboard will reflect data from your chosen audit period.

Statements of Applicability (SOA) / Requirement Scope
- Whether or not your audit requires a statement of applicability, C1Risk allows you to select the control requirements that are applicable to your company.
- Where a statement of applicability is needed, that statement can be added in bulk (EG “In scope”) or in established as a unique statement in each control requirement.
- In the obligation record go the control library tab.
- Note that “applicability is displayed in the list view as “unknown”

- Select the controls that are applicable.
- Select all using the i.d. checkbox.
- Single select using the checkbox.
- Group select by holding the “Shift” key and mouse-click.
- Note the number of controls selected displays next to the i.d. box
Option i

Option ii

Option iii

- Go to the ellipsis drop down menu and select ‘Change SOA’

- Change the SOA (and add bulk SOA statement). Click ‘Save”

Note the Applicability list view is now updated

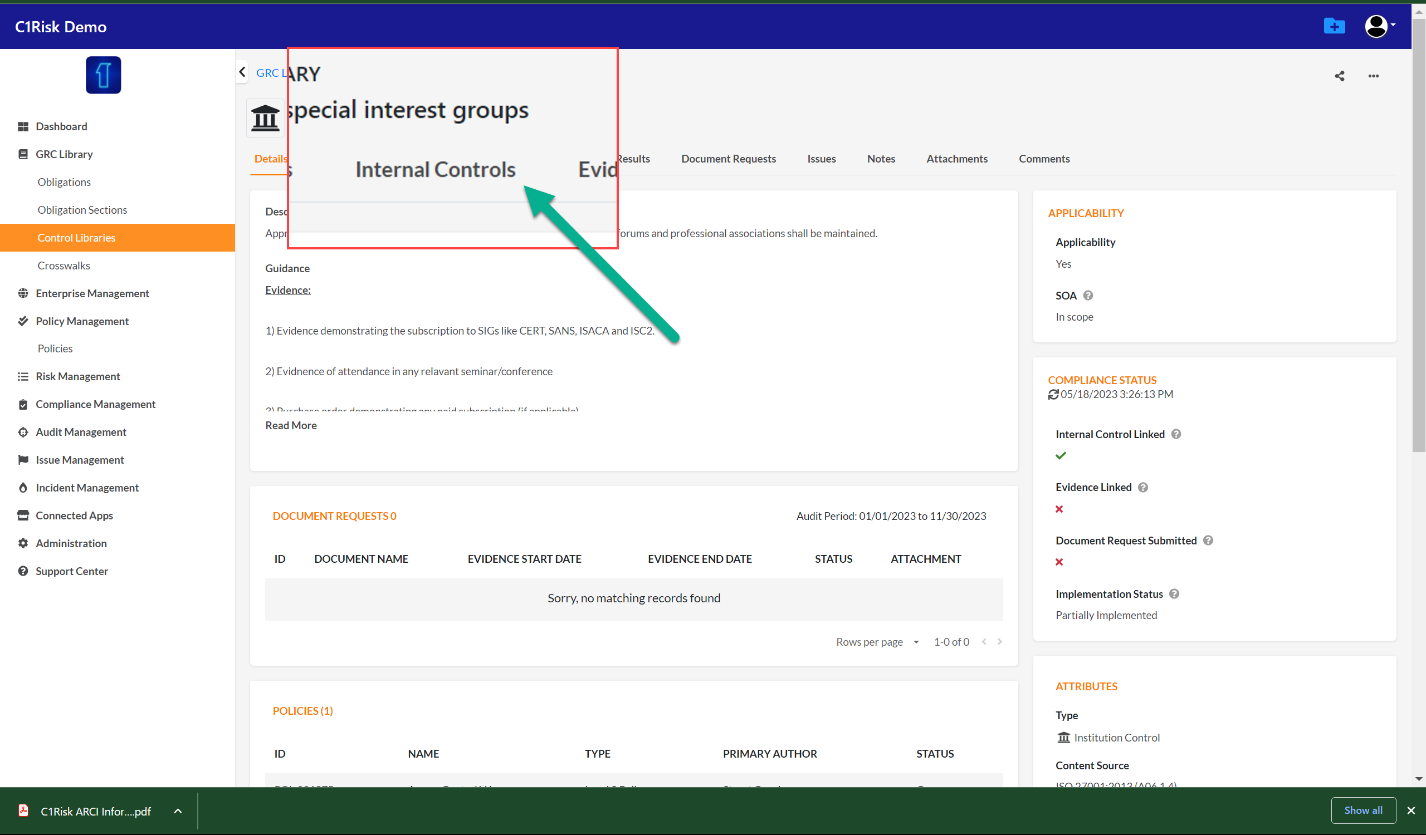
Write a unique SOA in the Control record.
- Go to the Obligation > Control Libraries tab,
- Click on the appropriate record, CTL i.d., to open it.

- Click ‘Change SOA’

- Update the SOA status and statement, then click ‘Save’.

How to Print the Statement of Applicability Report (ISO 27001, etc.)
- Go to the Obligation > Details tab.
- Use the drop-down menu to select ‘Export SOA Report to Excel

Sample SOA Report

How to Use the SOA Filter in the Control Library
You can apply the SOA filter in the Control Library section to filter and work on only controls ‘in scope’ or review and verify controls ‘not in scope’ for audit.
- In the Control Library, select the ‘Applicability’ Filter and choose the controls you wish to see.
Note, the internal control and evidence tabs will auto-filter to only show what is related to your chosen controls.


Mapping Policies, Internal Controls and Evidence to prepare for audit
Once you have itemized and defined your control set using the applicability tool, the next step is to bring in your policies, internal controls (SOC report etc., and evidence checklist (IRL, PBC list).
Once your mapping is complete and control > evidence collection cadence is established, your compliance workflow is ready to launch.
We recommend creating and mapping internal controls before mapping policies to take advantage of the policy mapping function. When internal controls are mapped to policies, any connected control library statements will automatically be mapped to policies (See Policy Operating Procedures or here below)
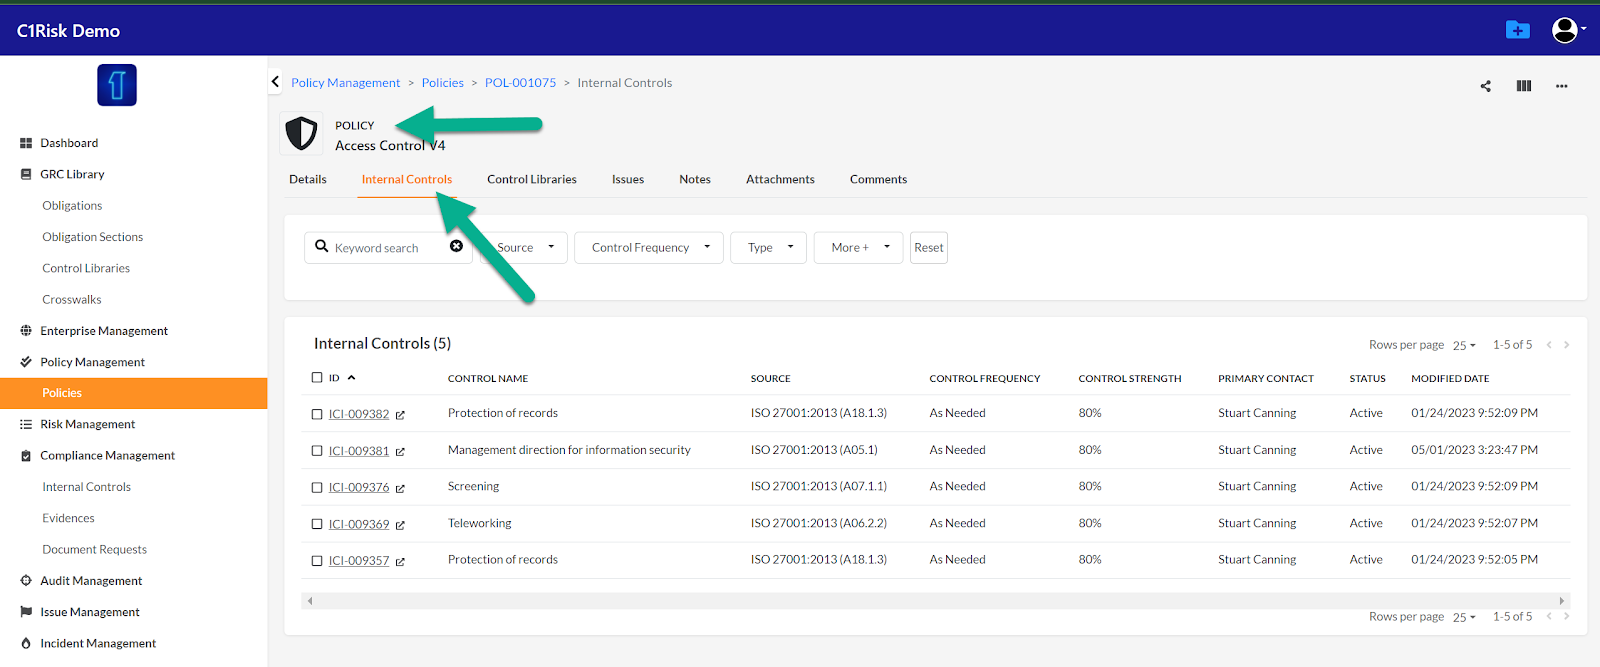
How to Map Policies to the Obligations
Internal Controls that have a connected or ‘mapped’ control library will automatically be populated when the control requirement is mapped to the policy record. Internal Controls may also be mapped independently to the policy record. NOTE: your policy must be in draft (open), or revision status.
- In the Policy Record, go to the Internal Controls Tab
- In the Internal Controls Tab, use the Ellipses drop-down menu and select Look Up to access your existing Internal Controls or Add New to add a new Internal Control. New Internal Controls will automatically be added to your Policy and the Internal Controls Library in your Compliance module.
- Your Internal Control Library will appear. Use the filters and keyword search to select the requirement(s) (obligation) and internal controls you wish to map.
- Select the controls using the checkbox (Use SHIFT + right click to select multiple controls).
- Click ‘Apply”
Now your internal controls are mapped, and any connected internal controls will also be mapped to your policy.
- This can be viewed in the policy record and/or in the control library list view and in the specific control.
Note in the policy record, filters are available to search for specific regulations and controls.
Policy record/Internal Control Tab
Internal Control List View
How to bulk import Internal Controls
Pre-existing internal controls and/or SOC reports can be uploaded into C1Risk via .CSV templates. Please contact your account manager to learn more or request an upload.
How to Bulk create internal controls in the C1Risk Platform
- Go to the Obligation > Control Library tab.
- Select the applicable controls using the Applicability filter.
- Select all the applicable controls using the select all function.
- Click on the drop down and select “Copy to IC”
- The platform will create a full copy of each of the selected controls in the Compliance Module > Internal Controls Tab.
Step 1.

Step 2.

- Note each Internal Control is automatically mapped to its corresponding Obligation Control Requirement. To view the mapping, go the appropriate tab in the control record.
From the Internal Control

From the Control Library

How to write an Internal Control
For information on how to write an effective internal control as well as populate an internal control record in the C1Risk platform, please watch the following video:
How to write an internal control
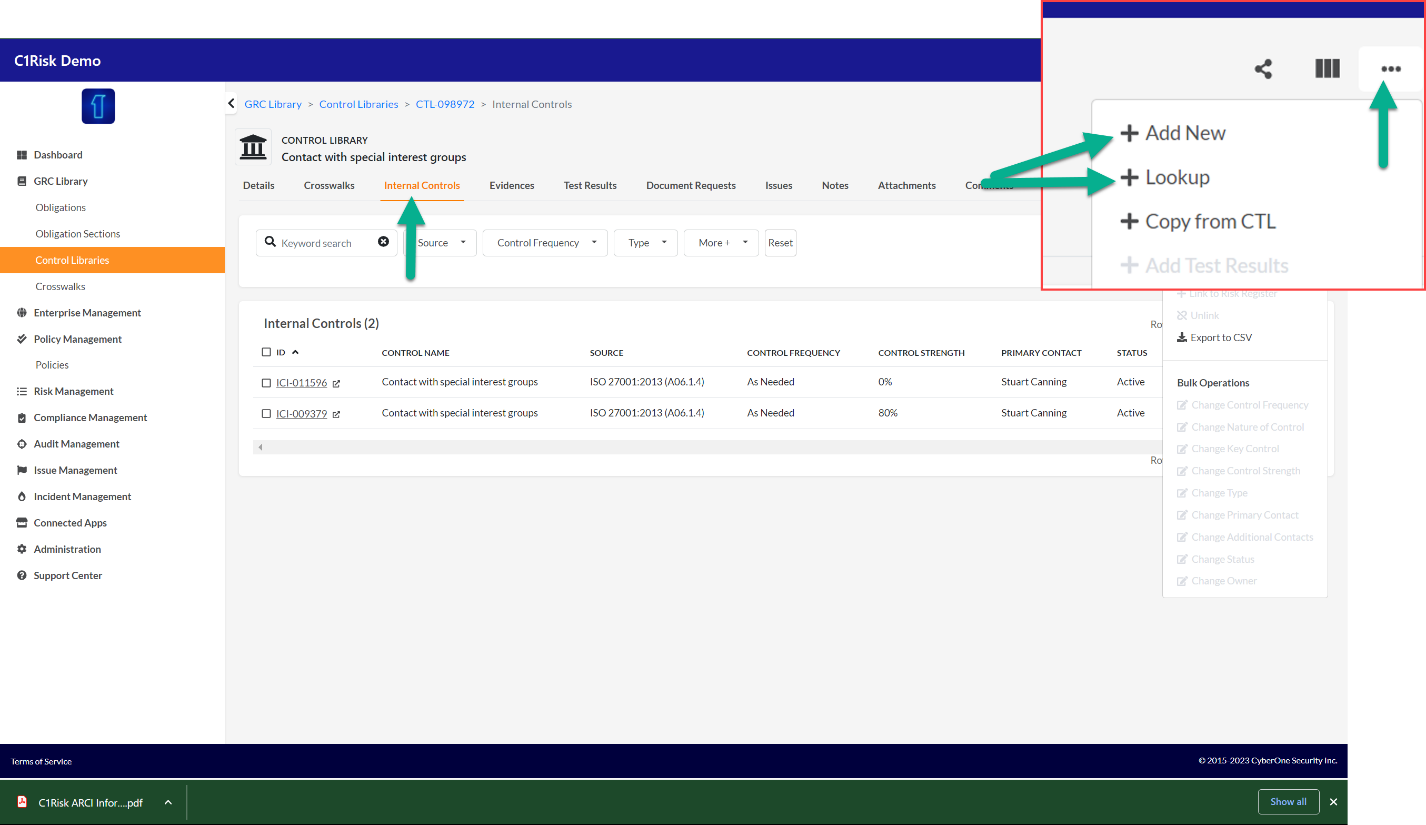
How to Map Multiple Obligation Controls to a Single Internal Control
- From the Control Library list view, select the controls you wish to map to an Internal Control.
- Use the drop-down menu and select “Link to IC”.

- Choose the Internal Control to map and click Apply to map.

- Note the Internal Control is visible in each Obligation Control record.

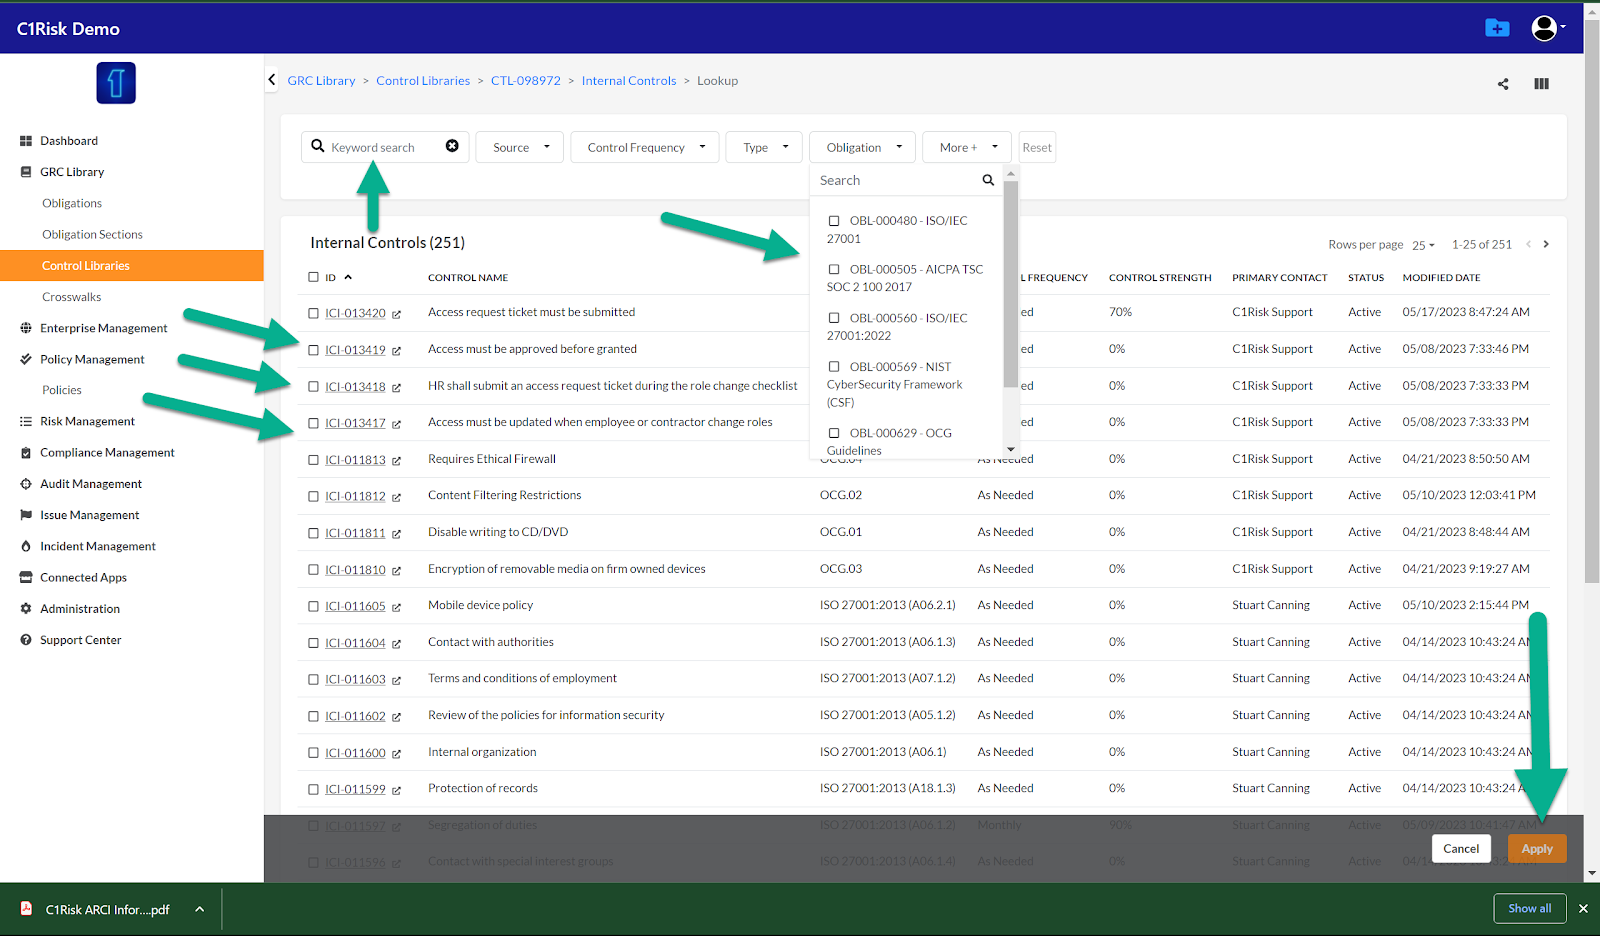
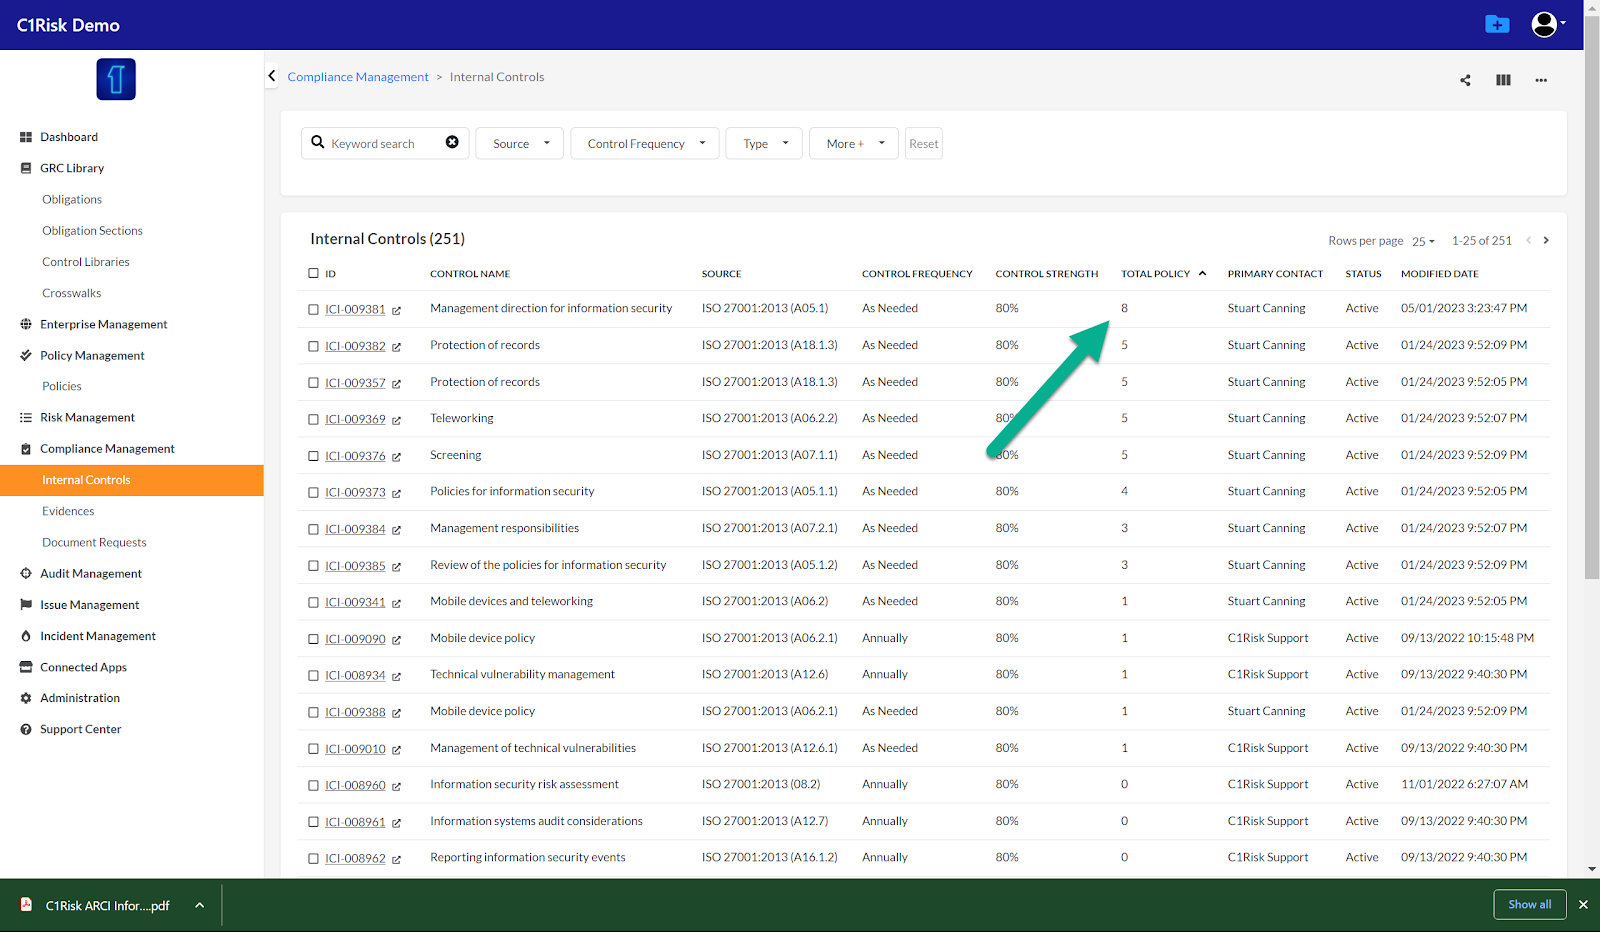
How to map (multiple) internal controls to a single obligation control
You may need multiple internal controls to deliver compliance for a single control requirement. You can always map many-to-one in C1Risk.
- Go to the Obligation Control Library Control record, internal controls tab.
- From the drop-down menu select ‘Look up’ to map one or more existing internal controls.

- Select the internal controls you wish to map and click apply. (Note: you can use the filters and key word search in this section to narrow your search)
- Note the full set of internal controls mapped now appears in the Obligation Control record.

- You can see internal controls > control library mapping from the list view in the Controls Library or Internal Control list view, or, in the individual record.
- C1Risk recommends using the tabs in the Obligation record to see which internal controls are linked to the relevant requirement.
Control Library Internal Controls tab list view

Control Library Record Internal Control Tab

Internal Controls List View

Internal Control Record Control Library Tab

Evidence Collection
How to Map Evidence, IRL, “Provided by Client” Lists
Evidence records can be associated to one or more internal controls in the C1Risk platform and are used to provide the documentation / evidence required by auditors to validate that the implementation of your compliance controls (internal controls) and compliance with the relevant regulatory requirement or standard.
For external audits, your auditor should provide a list of required documents and data to provide during audit. This list is often referred to as your IRL (Information Request List) or PBC List (Provided By Client). This list is also included in your SOC 2 Type 2 reports, along with the internal controls used to implement your SOC 2 Type 2 Certification. For more information on how/where to find your evidence list, contact C1Risk: Submit a ticket : C1Risk Training Portal (freshdesk.com)
Evidence Collection / Continuous Monitoring
Bulk Import Your Evidence Requirements to C1Risk using a .CSV template, or by providing your report to support. Submit a ticket here: Submit a ticket : C1Risk Training Portal (freshdesk.com)
How to Set-up and Launch the Evidence Collection Process
Evidence collection should be a year-round exercise to ensure that your controls are being implemented effectively across the organization. C1Risk enables continuous monitoring of controls via automated evidence collection.
Evidence Owners require only General User licenses on the C1Risk platform to enable anyone in the company who needs to provide evidence to access the platform. For more information on General User licenses and volume discounts, contact your account manager.
API Integration
Evidence can be collected by request of an evidence owner, or via API Integration.
Evidence owners can receive email notifications (white-labeled) or via integration with communication or productivity tools, such as JIRA or SLACK.
C1Risk is also a REST API platform, which enables data collection from most modern business systems via integration.
For more information on API integration, please contact your account manager.
Mapping Evidence to your Regulation or Standard
Once your evidence records have been created, you can map them to the Obligation via an internal control. C1Risk enables a “one to many” mapping option for both internal controls to evidence (map multiple internal controls to a single evidence request) or evidence items (map multiple evidence items to a single internal control).
Map Multiple Internal Controls to a Single Evidence Item
- From the list view of the Internal Controls tab in the Compliance Management module, select one or more internal controls that you wish to map to an evidence item.
- Click on the ellipsis drop down menu and select the “Link to Evidence” option

- Search and/or select the evidence item to map and click Apply.

Map Multiple Evidence Items to a single Internal Control
- From the list view in the Evidence tab in the Compliance Management module, select one or more evidence items that you wish to map.
- Click on the ellipsis drop down menu and select the “Link to Internal Control” Option.

- Search and/or select the internal control to map then click Apply.

View Evidence from the Control Library
Once your evidence is mapped to an internal control that is linked to your obligation, you can see the evidence record and its status in your Obligation record or in the dashboard. This is most helpful for audit purposes, where you can use the evidence tab in the control library to edit and manage any evidence records related to your specific audit.


The Evidence Collection Process
Evidence records are used to launch Document Requests, which notify evidence owners that they must provide information for compliance.
Notifications can be sent immediately, or scheduled for the future. An automated frequency can thereafter be established to send Document Requests to evidence owners:
- Daily
- Weekly
- Monthly
- Quarterly
- Semi Annually
- Annually
Notifications can be sent to a primary and multiple additional contacts (EG. The HR Director may be copied on a request to the HR Manager to ensure that leadership is aware of any data being provided to the compliance team).
A due date can also be established for the evidence to be provided. Escalation will occur in two forms past the due date.
- The Manager (where appropriate) will be notified.
- Notifications of expired requests will be sent to the evidence owner on a daily basis.
Populating the Evidence Record Fields
Evidence Name
Use a name that is familiar and consistent and helps the evidence owner easily identify the relevant information to provide.
Evidence Description
Similarly, the description is provided to the Evidence owner, so should be written as to assist the evidence owner in identifying the information necessary to provide.
Note also that the evidence description should not mention time specific time periods to avoid confusion or the need to update future document request notifications.

Asset/Internal Controls
Assets and (additional) Internal Controls can be mapped to evidence records here.
- Select the “+” sign to create a new Asset.
- Select the to look up an existing Asset or Internal Control


Setting the Evidence Start Date / End Date
The Evidence Start Date and End Date reflect the acceptable period (provided by the external auditor) for creation of the evidence.
Once you have established the Start / End Dates, the system will automatically launch a notification for evidence collection to the evidence owner(s) on the End Date selected.

Tips for Setting up the Start Date / End Date
Typically, your external auditor requires the latest version of a document and/or evidence to have been created within a certain timeframe to be acceptable for use as validation of an implemented control.
- The Start Date allows you to control and limit the period within which evidence must be created/produced. Typically, this does not extend prior to the year of the current Audit Period.
- The End Date ensures that the notification is sent in a timely manner and allows the evidence owner enough time to provide the required evidence, as well as for the compliance team to review and approve the evidence prior to providing it to an external auditor.
NOTE: For first-time users setting who are collecting evidence for the first time on the C1Risk platform, we recommend scheduling the END DATE in advance of your external audit period and create sufficient time to a) train end-user evidence providers to use the platform to provide evidence and b) provide the compliance team sufficient time to review and approve evidence and/or work with end-users to ensure the correct evidence is in place.

Establishing the Frequency of Collection (Cadence)
The initial Start Date /End Date might not be the same as the subsequent collection period. The Request Frequency automatically establishes the correct collection period based upon the initial End Date.
For example:
STEP ONE: Initial Set up
- Initial Start Date: January 01, 2023
- Initial End Date: June 30, 2023
- Collection Frequency: Quarterly
STEP TWO: After Automation (System will automatically change to)
- Start Date: July 01, 2023 (the day after the initial End Date)
- End Date: September 30, 2023 (Quarterly/3 months from the previous end date/new start date)
- The process will repeat on a quarterly basis.
Note: When establishing a frequency for evidence collection, the Start Date and End Date will automatically update based upon the frequency selected.

Adding Evidence Owners
- You can assign one or more team members to receive Document Request Notifications using the Primary Contact / Additional Contact fields. This enables you to copy leadership or provide groups/teams with the ability to collaborate on providing evidence for compliance.
- Note that you can add one a single Primary Contact (typically the person who is responsible for providing the evidence) and multiple additional contacts (team leaders, assistants, stakeholders).
- Primary and Additional Contacts can be Administration or General Users on the platform. To add Users at any time to the platform, contact support, please contact our support team: https://c1risk.freshdesk.com/support/tickets/new


How to Set up the Evidence Review Process (optional)
The final step in setting up the evidence collection process is to establish your desired review protocols.
While review is optional in the platform, C1Risk recommends adding review as a step to the process as it enhances the options to collaborate with evidence owners if/when supplemental evidence is needed or there are issues with the information provided.
The C1Risk platform always provides the following approval rule options:
Approval Rule Table
At least one must approve | Assign one or more reviewers. Any one reviewer can approve or reject. |
All must approve | Assign multiple reviewers. All must approve in any order. |
All must approve in order | Assign multiple reviewers and the order in which they each approve. All must approve. |
Contd.
- In the Evidence Record, in the Approval Process Section, choose ‘Yes’ for Approval Required.

- Add the reviewers using the drop-down menu.

- Choose the approval rule (see table above).

How to Bulk Update Evidence Records
Evidence can be set up for collection from the evidence record or in bulk from the list view using the Ellipsis drop-down menu and setting the following criteria using the menu options:
- Select the appropriate evidence records.
- Choose the desired function to edit:
- Change Request Frequency
- Change Evidence Start Date
- Change Evidence End Date
- Change Primary/Additional Contacts
- Change Reviewer (coming soon)
- Make the appropriate changes and click Apply or Save

How to Launch Evidence Collection
Launch Document Requests
The evidence collection process is launched by the system based upon the end date selected for each evidence record.
On the specified end date, a Document Request record will be auto-created in the system and a notification will be sent via email (unless API integration is in place) to the Primary Contact and any Additional Contacts Associated to the Evidence record.

For Audit Purpose, Document Request Status and records can be reviewed from the Obligation dashboard and tabs in the GRC Library. (1)
The Document Request can be seen in the Document Request Tab (2) in the Evidence Record and the Status monitored in the List View of the Evidence Collection (3) or Document Request (4) sections in the Compliance module.
(1a)

(1b)

(2)

(3)

(4)

Notification of Submitted Document Requests
When an evidence owner responds to a Document Request, the evidence record owner will be notified via email (1).
The owner will also receive an approval request in their Dashboard (2)
(1)

(2)

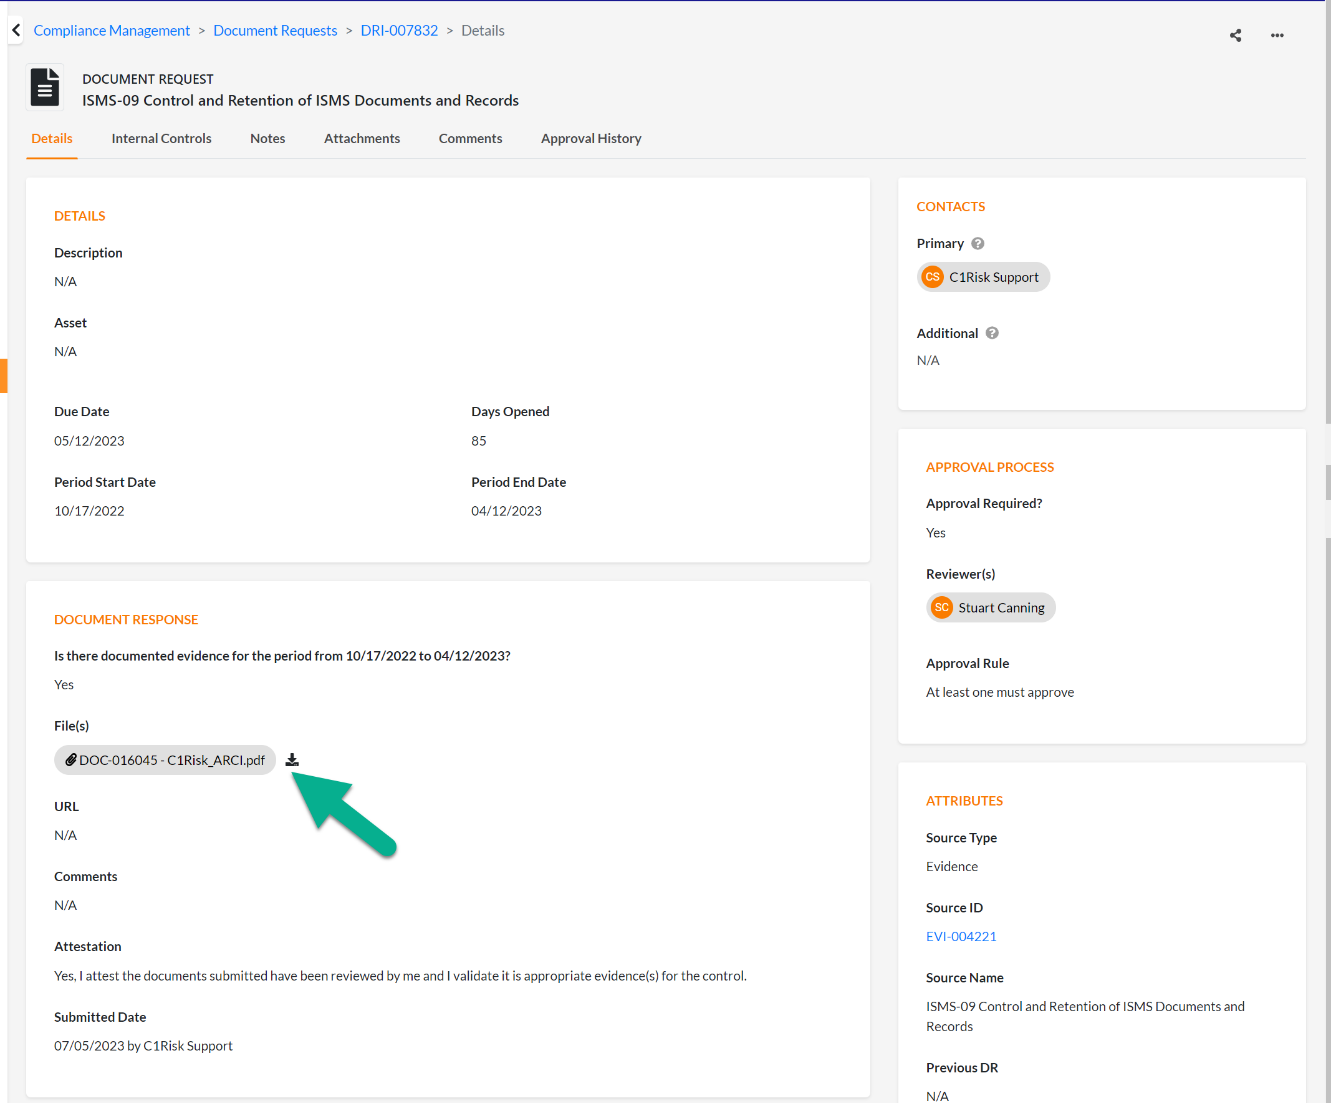
Approve or Reject or Respond a Submitted Document Request
Click on the link in the email notification or the link in your Dashboard to access the Document Request record that you need to approve.
The link will take you to the Document Request record.
- You can review the data/document/information provided in the Document Response Section (1).
- Click on the attachment or URL link to view/download.
(1)
- You have the option to respond by approving or rejecting the submission in the Approval Process section (2)
(2)

- You have the option to Comment, prior to Approving or Rejecting, or when approving or rejecting the Document.
- Prior to approval Use the Comment Section (3) to add a comment.
- Click on Add Comment
- Use “@” to bring up a list of users and select the appropriate user (4). The user will be notified via email and in their Dashboard and will be able to respond and provide attachments in the comments section.
Contd.
(3)

(4a)

4(b)

- Use the Comment box provided to comment when approving or rejecting evidence (5)

Why & what happens when a Document Request is rejected.
If the evidence owner response is incorrect or insufficient, new, or additional evidence can be requested by rejecting the Document Request.
- When rejecting a Document Request, be sure to comment to provide guidance why the document request was rejected and what the evidence owner needs to do to complete the transaction (i.e. what was wrong with the submitted evidence and what should the evidence owner provide to complete the process?).

- When a Document Request is rejected, the evidence owner is notified, and the comment provided.

- The evidence owner may now click on the link and, based on the comment, provide additional/supplemental evidence and re-submit.
- The status of the Document Request will show as “Re-open” in the record and all list views/dashboards.
- The rejection comment is also tracked and visible in the record.
Image below, contd.

Continuous Compliance Monitoring on the C1Risk Platform
Dashboard/Task List
Now that your process is set-up, you can monitor the lifecycle of your process on the platform from your task menu and from your dashboard.
- Requests to provide documentation (by you) will appear in your Task List (1).
- Documents submitted for review (by you) will appear in the Approval Section (2).
- Comments/questions for you will appear in the Comments Section (3).
- Click on the relevant links to respond accordingly.

GRC Library/Compliance Dashboard
Similarly, if you are managing compliance for a specific regulation, you can monitor progress from your GRC Library in the Obligation record. Your dashboard will auto-populate based on your assigned Audit Period.
- To set your audit period, go to the Details tab of your obligation record.

Now your dashboard will auto-populate the following data:
- Compliance Status: An overall snapshot of your readiness for Audit.
- What percentage of in-scope (applicable) regulatory requirements have internal controls in place.
- What percentage of mapped internal controls have evidence records mapped.
- What percentage of evidence requests have been fulfilled with submitted document requests.
- Implementation Status
- How many/percentage of control requirements are applicable and are being implemented by one or more internal controls.
- Internal Control Frequency
- The summary of testing cadence for your internal controls
- Evidence Request Frequency
- Cadence of Evidence Collection.
- Document Request Status
- Status of evidence collection (open, submitted, approved, etc.)
- Calendar of Evidence Collection
- Evidence Collection by month.
- Findings
- Observation/Finding management.
- Risk Mitigation Status
- Status of Finding mitigation.

Conclusion:
This concludes the compliance management training manual. Please see other instruction manuals and training manuals for further information on Compliance Management or contact C1Risk support with any questions: Submit a ticket : C1Risk Training Portal (freshdesk.com)
Reference Instruction Manuals:
Evidence Owner Training
Internal Audit Training
External Auditor Training
SOC 2 Type 1 and 2 Training
ISO 27001 Training
CMMC 2.0 Training
Annual Internal Risk Assessment Training