MUSIC MAKING AND YOU!
a beginner’s guide for visual artists who are interested in audio arts, by barbatus (im barbatus 🤓)
last updated 02.04.2024 @ 12:01AM EST
A QUICK FORWARD
im a guy who 100% Needs to listen to music every day or my day isnt complete - i know not everybody’s like that, but personally my brain runs best with music by its side. i always kinda idly wondered about Making music but the whole process seemed daunting as all hell, and frankly i didnt even know where to start. i had some musical theory training but that was decades ago & like tears in rain at that point, and the only tools available to me - digital tools - were completely alien. what the fuck’s a DAW, what’s a VST, what do you mean MIDI files are critical to the process, and so on.
i still consider myself very much a beginner at music, but im at the stage where ive Sort Of figured out enough to cobble songs together. i figured itd be handy to make a guide with the basic terminology + knowhow on some free tools to help you get over the learning curve (arguably the hardest part) & start making your own sounds too! as im predominantly a visual artist and most of my social circle is also made of visual artists, ill be writing this guide in visual artist terms to help conflate one concept with another in a way i think would make the most sense.
i hope this is helpful! im of the opinion that everybody should be able to make music & the tools should be as easy and fun to use as possible 👍🏻
BASIC TERMINOLOGY
(i tried to do this in alphabetical order but it didnt work out so just roll with it)
DAW
a DAW is an acronym that stands for Digital Audio Workstation, and it just means the program you use to make noise at all. in other words, a DAW is the exact same equivalent to your drawing program - like if you use Clip Studio Paint, thats your “DAW” if you were using it to somehow make music!
there are hundreds if not thousands of different DAWs the same way there are thousands of different drawing programs, and which one you use is entirely up to your discretion. theres no right answer & depends entirely on your preference. DarkAudacity (free) is technically a DAW thats about as complex as MSPaint - it’s not the most precise and you can only do so much with it, but it gets the job done. there are more beefy ones like FLStudio ($), Ableton ($), Cakewalk (Windows only, free), GarageBand (Mac only, free on iPad but limited capability. idk if it’s free on Mac im a windows user lol), and so on
personally my DAW of choice is Reaper - it’s incredibly powerful and works like WinRAR in that the trial period never ends, ie you never have to pay for it if you dont want to. Reaper’s something of a dinosaur & its learning curve is difficult at first, but once you get over the hump it levels out and becomes super easy to use - also out of all of the other DAWs, Reaper is the only one that ever made any sense to me lol. i like it!

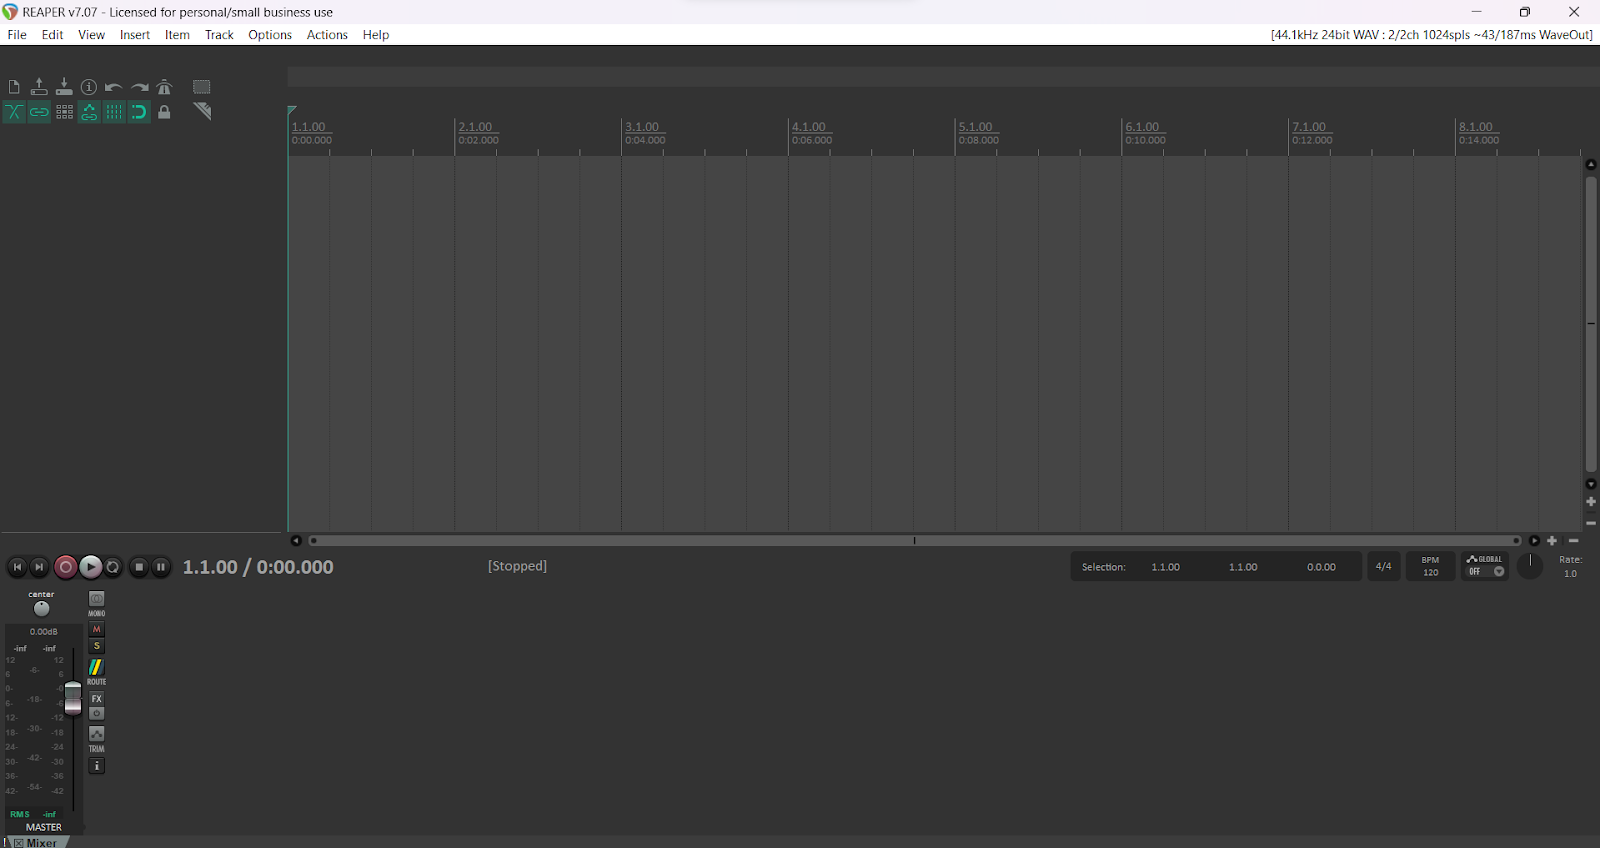
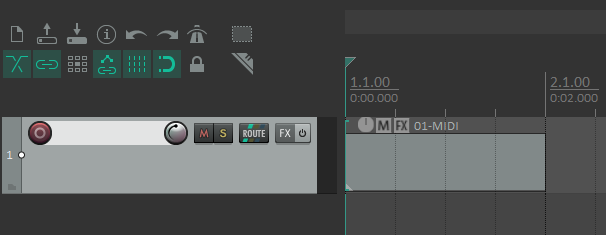
here is a screencap of a blank empty Reaper freshly opened up! the lighter gray area with the vertical lines are where the audio for my tracks (my layers) go, and at the bottom is volume control for each individual track. the lefthand darker gray side are where each individual track in my song will also sit, and i can tweak them all individually either on the left or on the bottom.

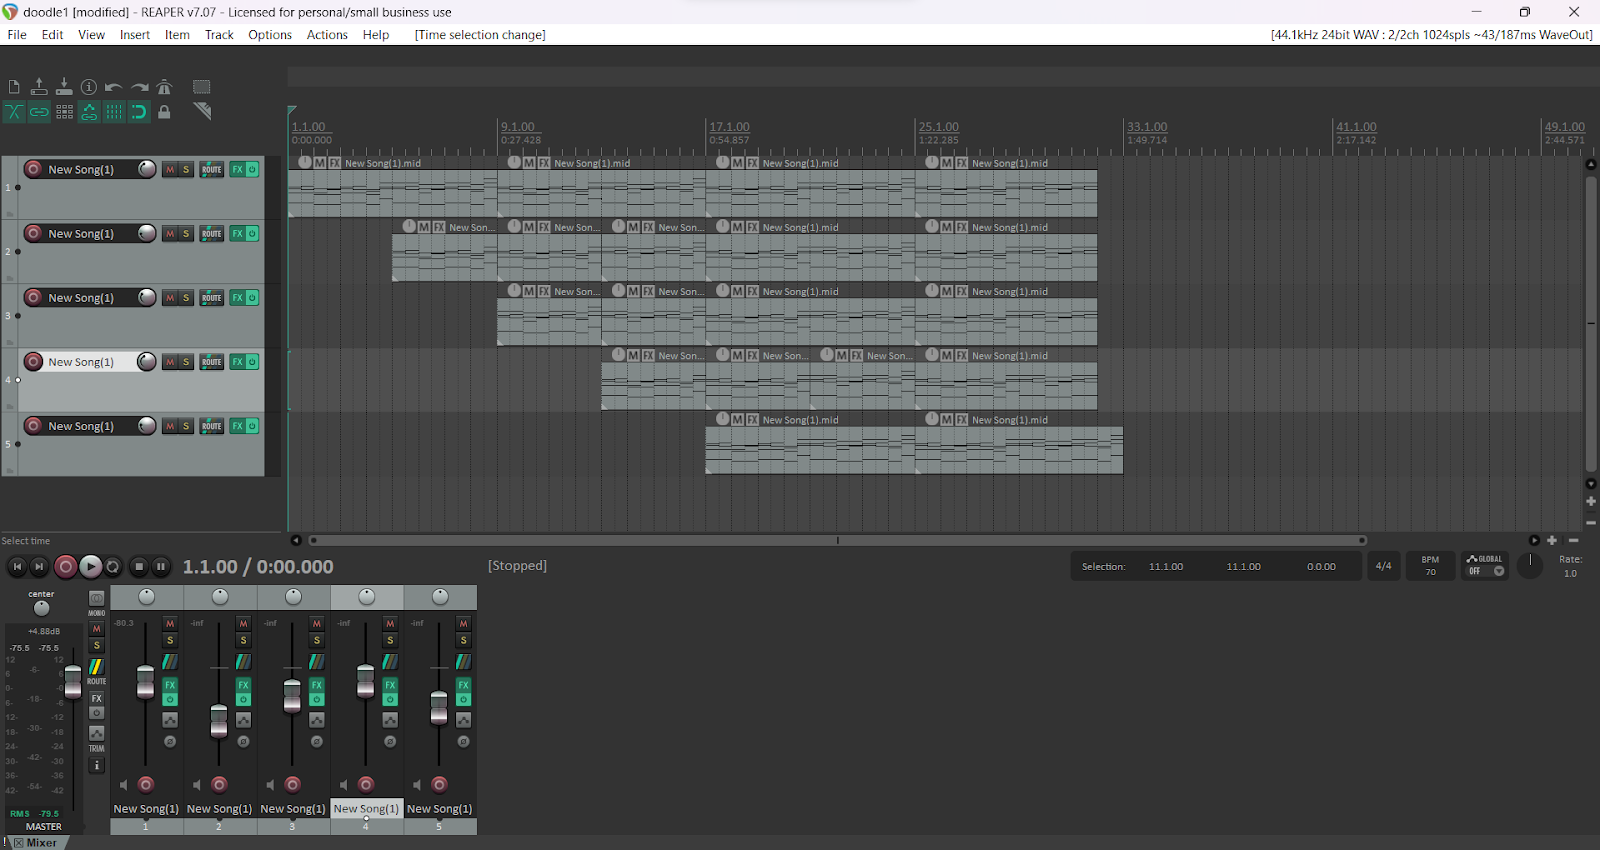
here’s Reaper again with a little “doodle” project opened up, so you can clearly see how everything looks with things in there. what you’re seeing opened up here are different tracks, which you can think about as literally layers in a drawing. the same way you have a layer for your sketch, inks, flats, shadows, and highlights, you’re gonna have different tracks for different components of your song - so you’ll have a track for drums, a track for bass, a track for piano, and so on with whatever instruments youre using.
unlike layers in a drawing program, it doesnt really matter what order you have your tracks in as shuffling them around doesnt affect the volume or anything - i just like to organize them by clicking & dragging in order of appearance in the song to make my life easier lol
VST
"VST" stands for Virtual Studio Technology which is a term from 1996 when they were first made lol. in the same way that a DAW is analogous to your drawing program, a VST is the same thing as your brush.
VSTs can do shitloads of different things depending on what any one VST in particular is programmed to do, the same way different brushes do different things depending on what they are. a VST can be an instrument, a type of distortion, a drum machine, a guitar pedal, a random sampler - basically anything you want to make the sound do, you apply a VST to it on its track (layer)
same as DAWs, there are billions of VSTs out there - many paid, and many powerful excellent ones for free. id recommend checking out Audio Plugins For Free and just browsing through - everything you see here is a VST, so you can get a full glimpse at what VSTs are and what they can do.
also there is a MASSIVE world on the internet of people making fucked up & buckwild VSTs dating all the way back to the 90s that are still available today! getting into music making turned out to be a really cool peek into the internet’s history, & a lot of the tools used in the old days are still readily employable in the present. i think thats awesome lol
so lets say i wanted to look at the VSTs in this doodle project in Reaper. i would pick a track (layer) and click the dark green FX button (located on the left; each individual track/layer has its own) and it would immediately open up the following:
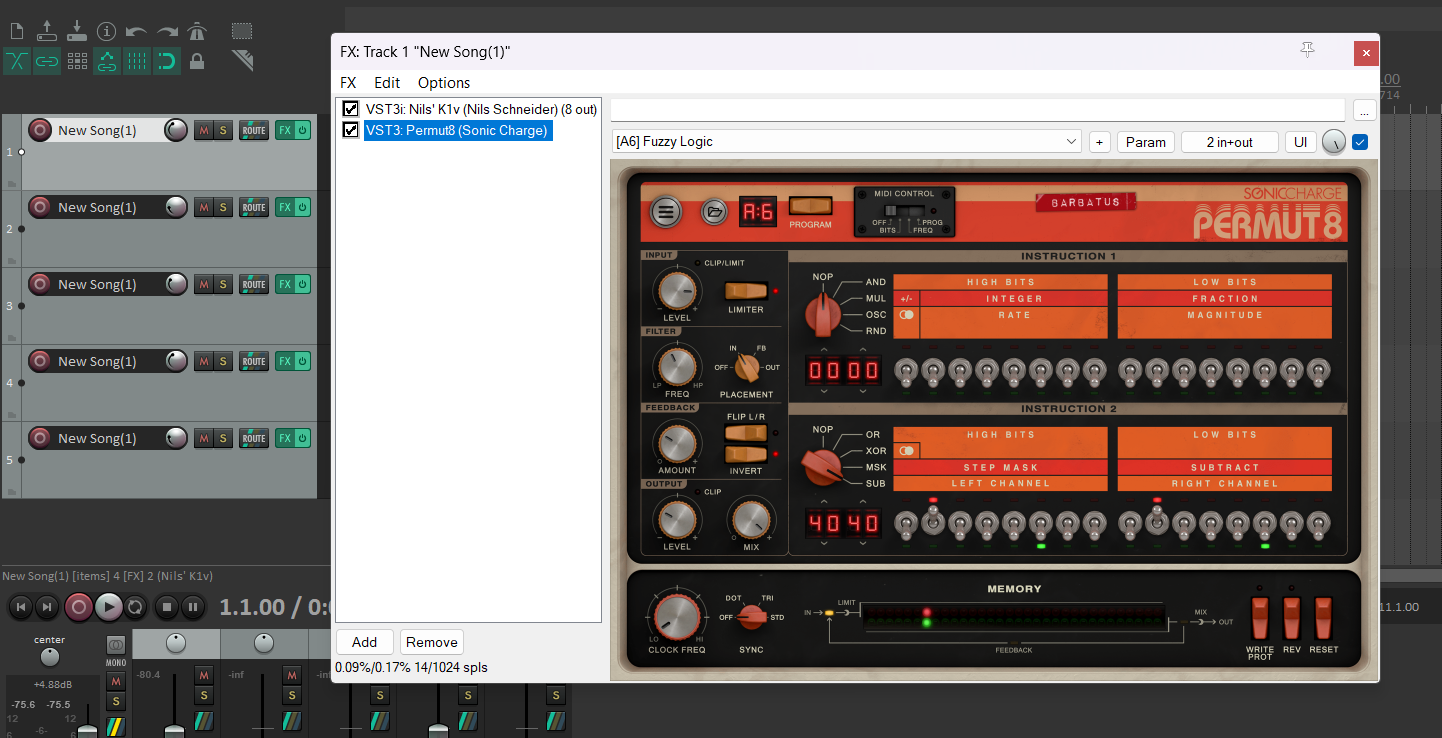
you can see here on track1 (layer1) i have 2 VSTs employed! the one on the bottom i have highlighted is Permut8, which cost a bit of money but is a tool i basically use on every single thing i make - it’s a monstrous delay/distortion/reverb/bitcrusher/what the fuck machine and i love it. the one on top is Nils’ K1v which is a free digital keyboard that has a pop-out interface like this:
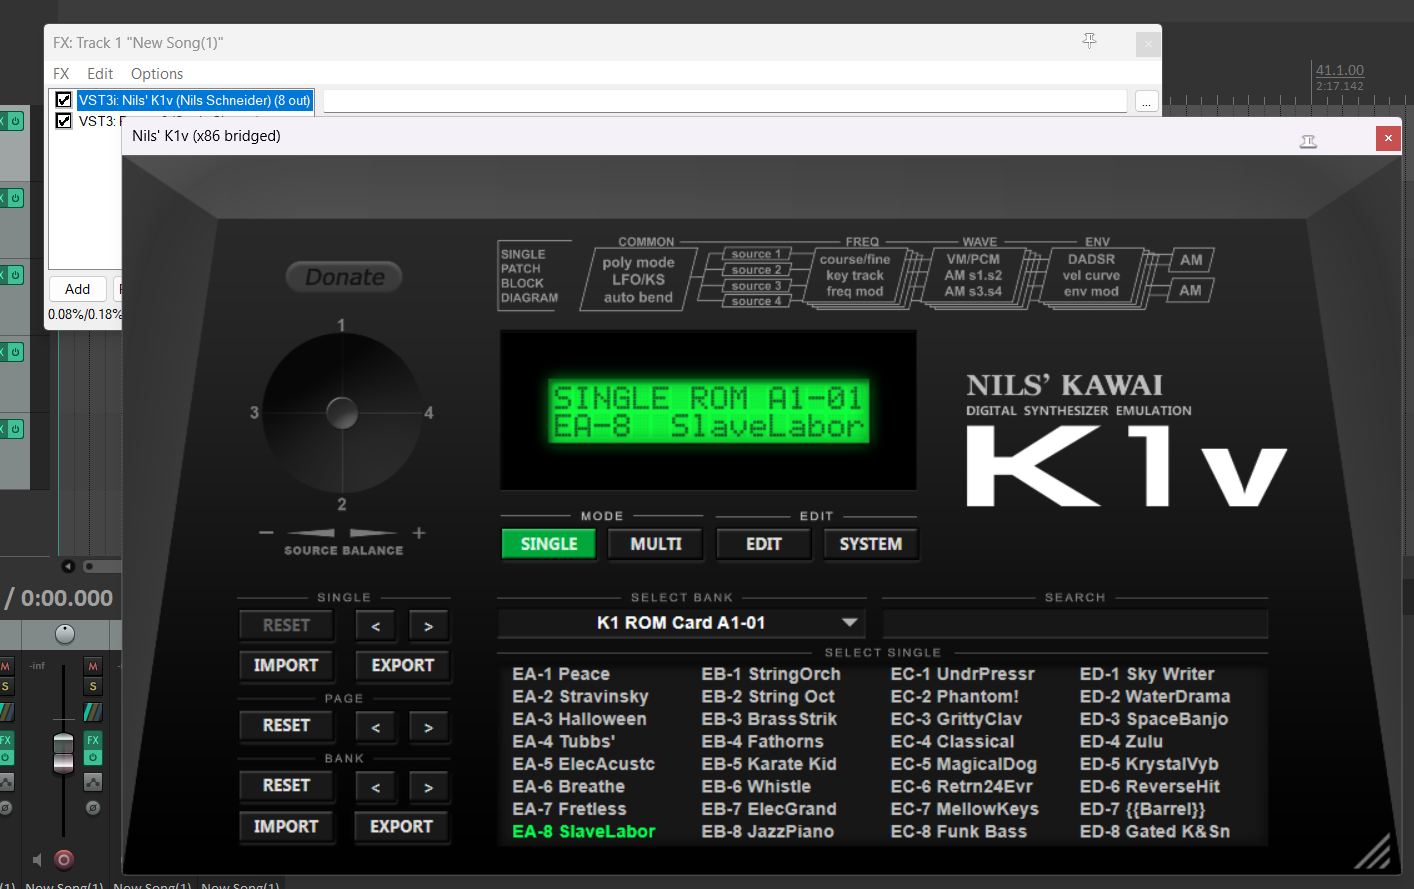
so basically what’s happening here is my 1st VST (K1v) is the tool thats making the actual keyboard noise (if i didnt apply a soundmaking VST to it, my track wouldnt make any sound). then below it, Permut8 is taking the keyboard sounds K1v is making and distorting them further. the 2 of them together make a strange doubled echoing effect that i really enjoyed!
and like i could keep layering VSTs in this one track (layer) forever until my computer crashed, theres no limit to how many effects you can pile up on one thing. think of it like you’re chaining guitar pedals together to further and further distort the sound. for your noisemaking, you may not want to chain a bunch of VSTs on one track and make a cacophony of noises, but if you want to you can lmao
(keep in mind also, VSTs work from bottom up, ie the bottom-most VST affects the ones on top of it, so be sure to organize them in that manner in your FX window)
MIDI
if you’re an older millennial like me you probably remember MIDI files from like angelfire websites from way back in the day lol. believe it or not MIDI is still alive and well & used regularly! what a MIDI files does is tell your VST what notes to activate, and your VST makes the sound in the pitch it was told to ping by the MIDI. think of it like, if you load up a VST (brush) for drums, like you boot one up onto your track (layer) that is Just drum noises right. then you throw your MIDI file that youve made onto your track (layer), and when you hit play, the VST will follow along and play the “notes” of the specific drums it’s being instructed to play by the MIDI.
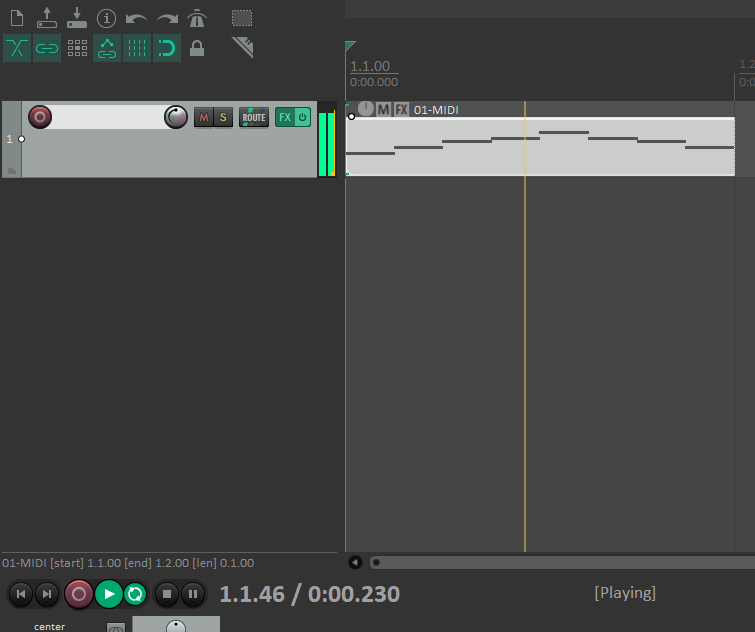
so going back to this again, in the vertical line portion there you can see those staggered light gray boxes - those literally are just MIDI files LOL i made them elsewhere & then dragged & dropped them right in from my desktop
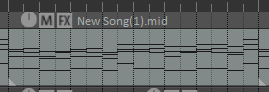
each black line there is actually an individual note thats being played! MIDI like this reads “sideways” in a way, because if i wanted to edit this MIDI right in my DAW, i could doubleclick this light gray box with notes in it & get to:
PIANO ROLL
the piano roll!
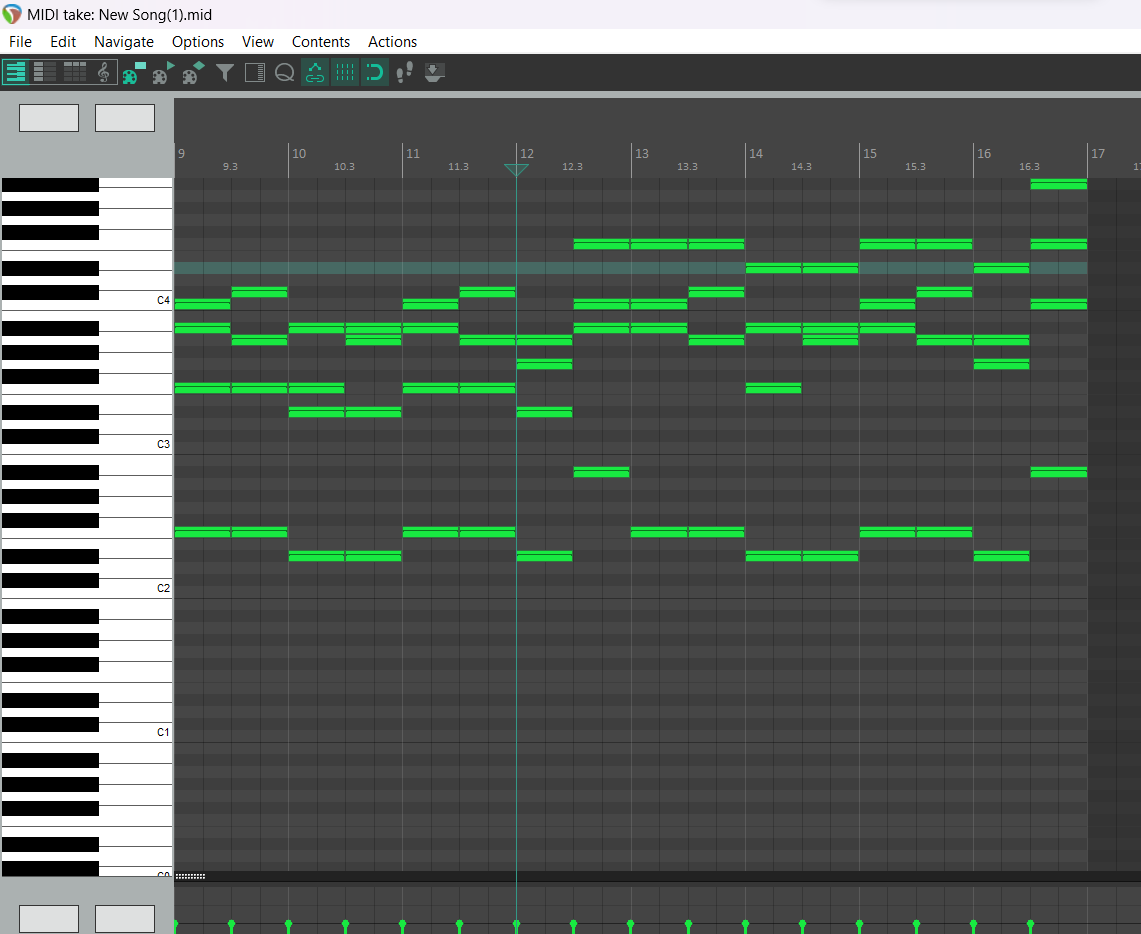
i dont have to make a MIDI in a different program if i dont want to, i can open this up & make MIDI right here! if you compare this big blown-out MIDI edit area to the tiny view:
you can see it’s the exact same notes, and they’re presented “sideways” because the piano roll is over on the left. like tilt your head way to the left and you can see what im talking about
so these are the super duper basic things to know:
DAW: your music making program
TRACK: your layer
VST: your brushes that let your MIDI make noise
MIDI: the thing that tells your VST (brushes) to make noise
PIANO ROLL: a super zoomed-in look at your MIDI where you can edit your MIDI however you see fit
HOW TO MAKE A SONG (IN REAPER)
we’ve got the terms down so if you wanna go download Reaper real quick, try following along with me and we’ll make a simple one-track song!
so here we are, a blank slate to make noises in. the first thing we have to do is add a track (layer) so we have something to “draw” on
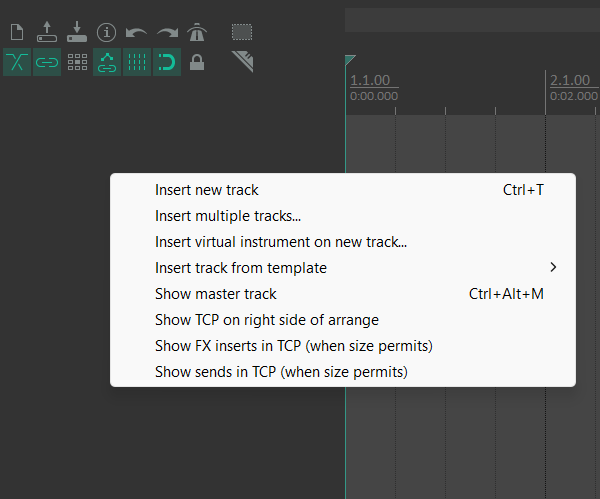
rightclick the dark gray area on the left so this pops up, select Insert new track (or just Ctrl+T once you get the hang of it)
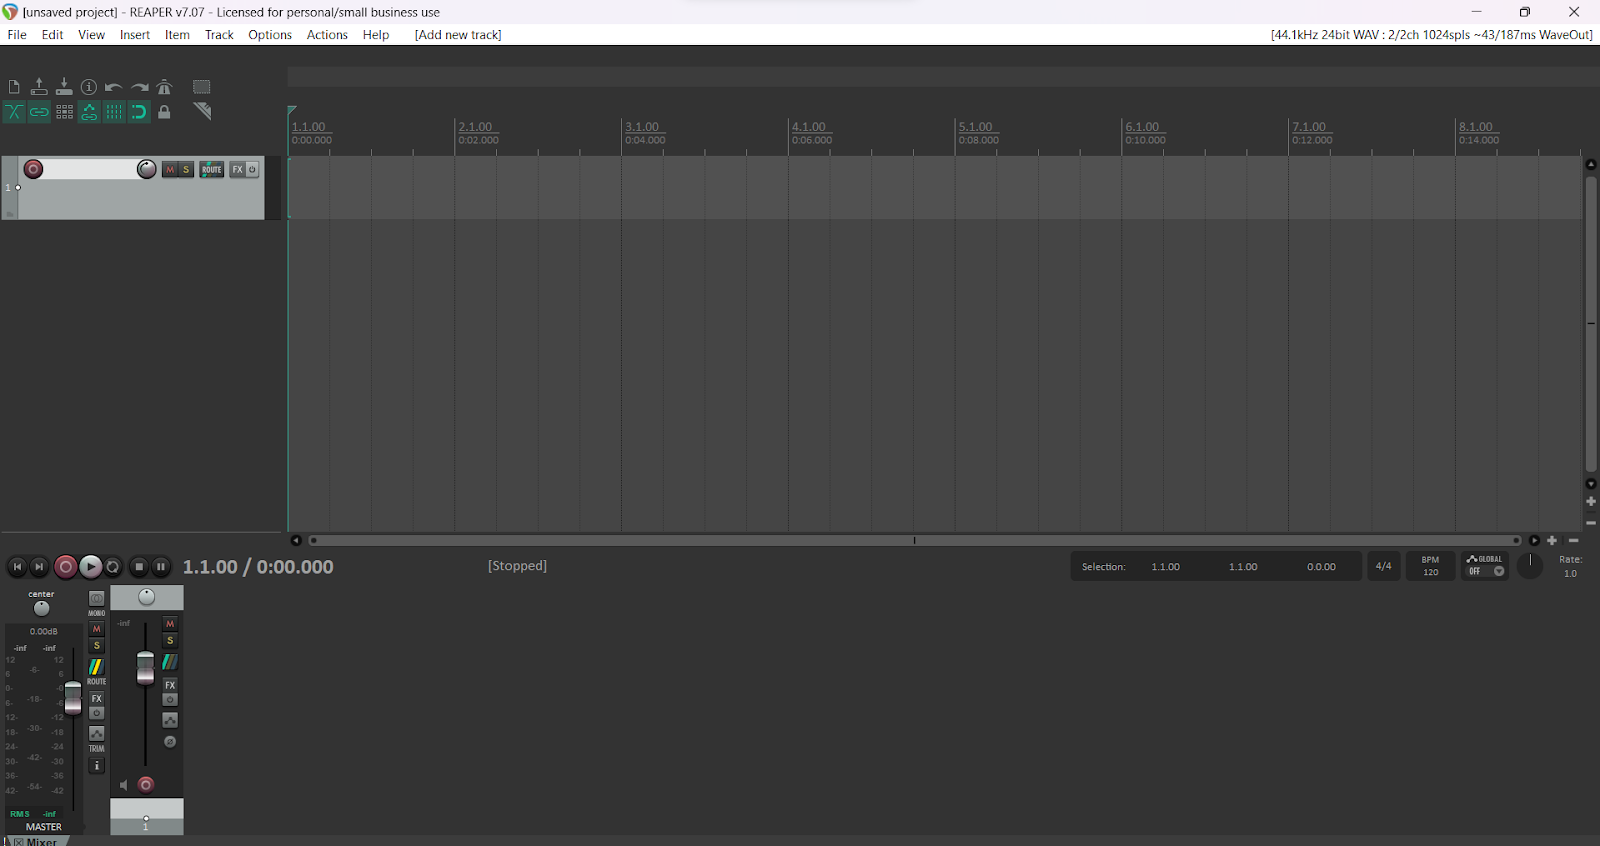
and here we go, now we have a track (layer) to draw on! we can put anything we like here. lets try putting some MIDI in. if you dont have a MIDI file on hand, thats OK we’re gonna just construct one super quick
in the vertical line area, hold down the Ctrl key (your cursor should turn into a pencil), click, and drag a bit
this will make a blank slate for MIDI! now you’d think we just go in and start making a MIDI, but NOT YET!
this track (layer) has no VST on it! if we tried putting any MIDI notes in now, we wouldnt be able to hear what we were doing, because the VST is the thing that tells the MIDI what to sound like. remember: no VST, no sound! so we gotta pop in a VST real quick so the MIDI can make noise.
Reaper by default comes preloaded with a shitload of effects and post-processing stuff but only comes with one instrument/“noisemaker” VST - but thatll be fine for our purposes right now, so lets get it loaded onto this track.
Click FX (on the right side of the track bar we made, next to the power button on your track)
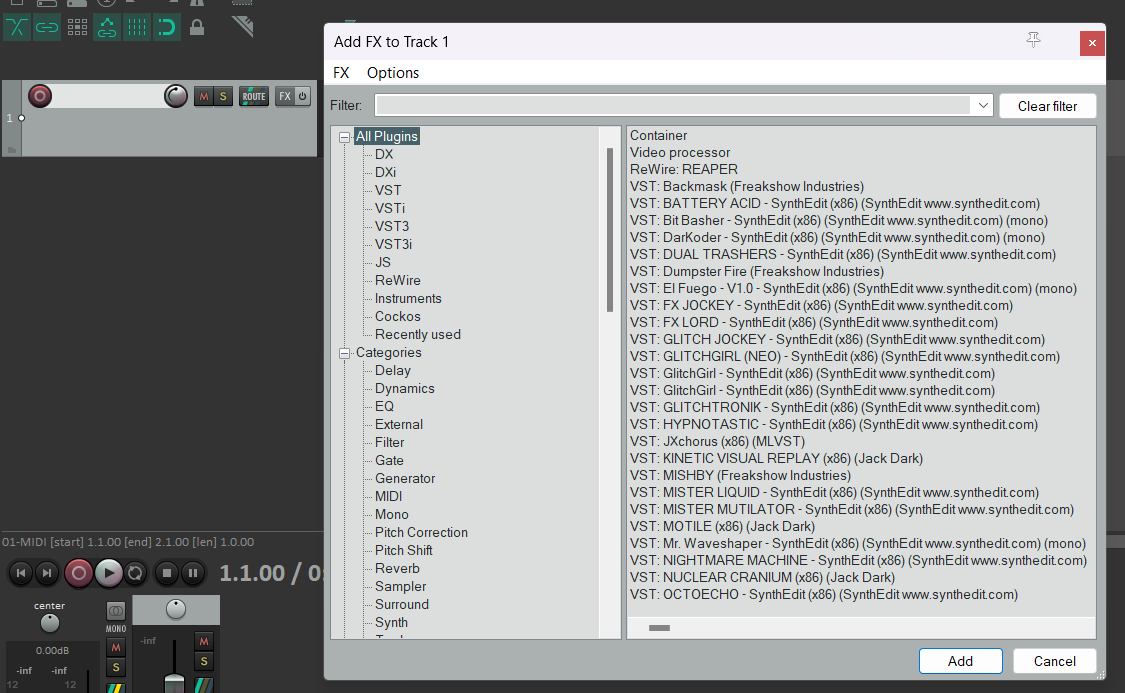
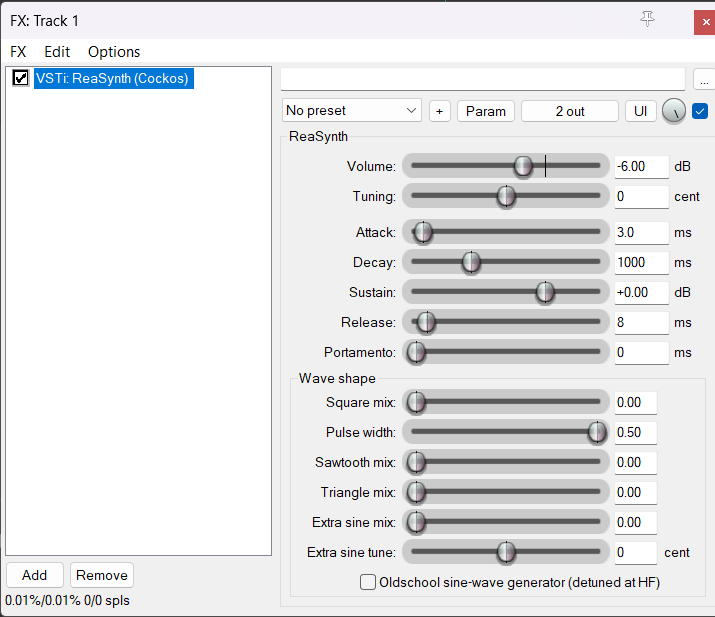
this will open up basically your VST finder! i have shitloads so my list is enormous please ignore them lol. since we’re working with Reaper fresh out of the box, make sure you’re selecting All Plugins, go to Filter uptop, and let’s find Reaper’s one instrument VST ReaSynth (you can just type it in lol)
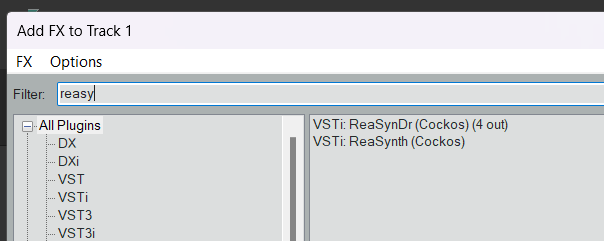
if you have 2 pop up like this, thats fine lol just select the one on the bottom
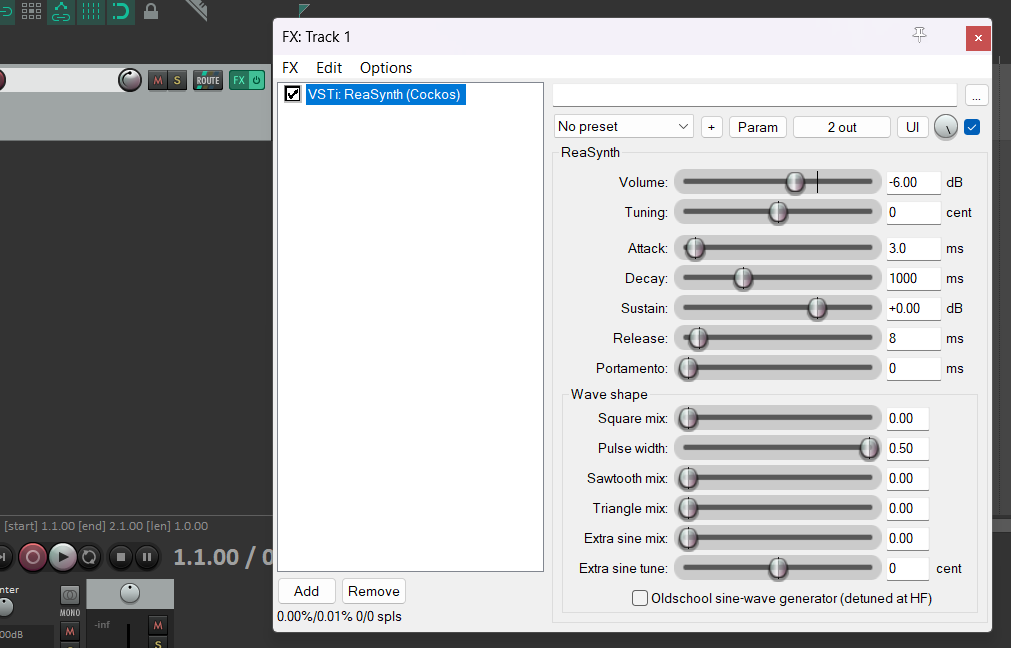
now we have the ReaSynth VST booted up onto our track! aka we have a brush to draw on the layer now. dont worry about all these knobs & sliders & stuff, theyre just to tweak your sound and we dont need them quite yet. you can think of knobs & sliders as your brush presets, in that messing with them here in Reaper will change the qualities of your sound the same way messing with them in CSP will change the qualities of your brush.
since we have it booted up now, we can close this window and go back to our main tracks area - once you load a VST to a track, it saves it there in place until you delete it, so youre safe to close the FX window whenever (and remember you can always get back to it by clicking the FX button)

so now we’re back here ready to put some MIDI in to tell the VST what to do! (you can also tell that youve just loaded a VST onto this track because the FX button is green now instead of dark gray)
SO: now that we’ve told the track that it’s gonna be making a noise, we’re gonna tell it what sequence of noises it needs to make. thats the purpose of MIDI!
doubleclick the light gray box on the right that we made before with Ctrl+clickdrag to open the Piano Roll
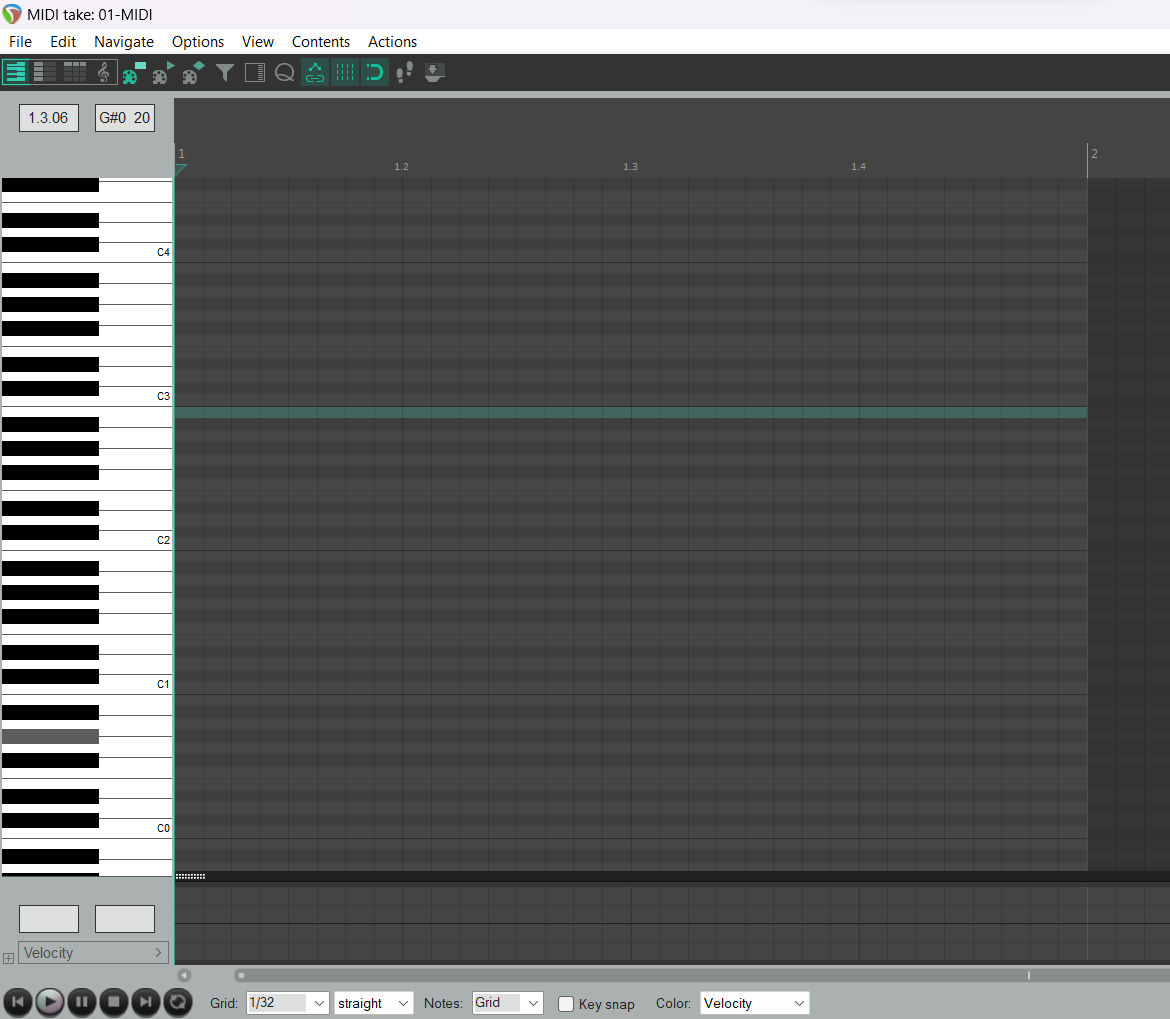
here we are again! this time it’s blank since it’s got no notes in it
now since we’ve loaded that instrument VST ReaSynth in too just before, try pressing some of the piano keys on the left - you’ll be able to hear the noise that we just loaded in. man ReaSynth sounds awful LOL my apologies ill show you folks how to put in nicer instruments in a bit.
now to add in notes, you’ll start doubleclicking spaces on the grid area. doubleclicking there will lay down a note basically:
like so! ive just made a super simple C to G here (if you dont know musical theory or note names thats OK, basically i just made a decent-sounding sequence of up and down notes) you can put down whatever you want here. you can even adjust the length of the note by zooming in with the mouse wheel, grabbing onto the very end of the note in question, and clicking+dragging out for as long as you want that note to be sustained
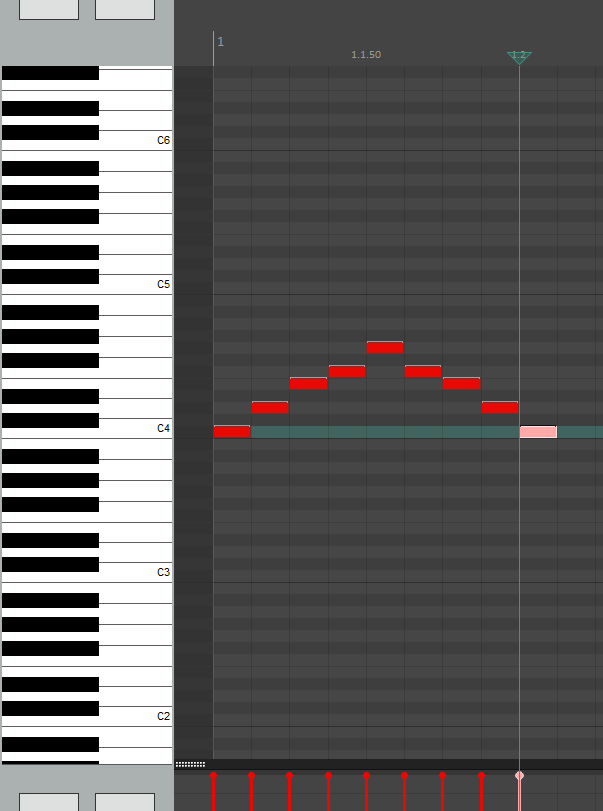
you can also adjust the volume of each individual note here with those red-colored vertical lines on the bottom! each one corresponds with the note theyre pointing up at, and you can click and drag them to adjust the volume of that one note. they’ll change color depending on the volume too, like red is the loudest and it goes down to blue tones for quieter.
now the Piano Roll is shaped like this because if we were to hit Play, that thin green line would run from left to right and literally play our notes. try slapping some notes in and hitting Play and youll see!
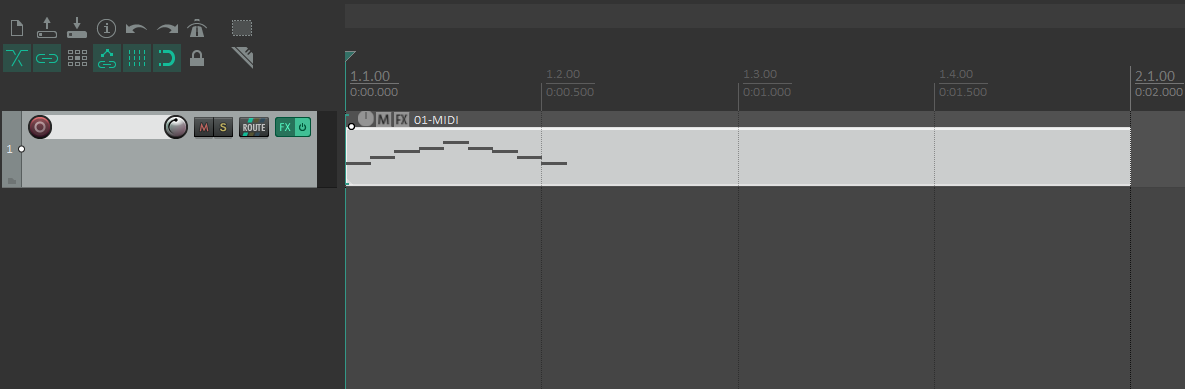
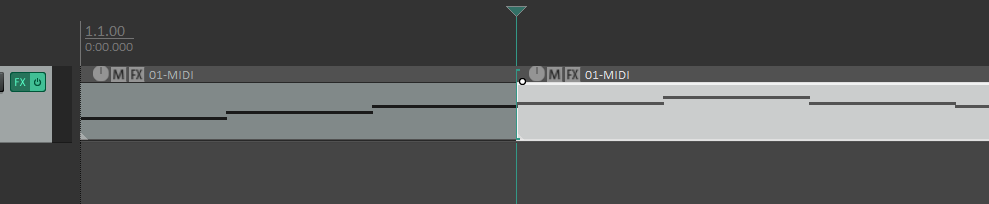
if we back out further too back to just our track area, you can also see the notes you just laid down. also you can physically grab the end of the MIDI box there and clickdrag it to shorten it or lengthen it if you like
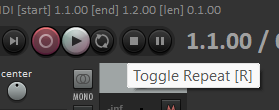
the same hotkeys as your art programs apply here, CtrlC CtrlP CtrlZ CtrlA and so on! your mouse wheel also works to zoom in and out of your track. also if you wanted to have it loop, you’d push the Repeat button next to the play button:
so like i could just assault myself in perpetuity with this C scale over and over forever if i wanted LOL. this function is super handy for longer songs if you want to just have it loop while you tweak VSTs so you can hear what they do in realtime
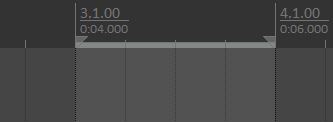
you can also set it to only loop a specific portion by going up above the track into the gray area with the timestamp numbers and clickdragging:
it’ll make this pale arrowed line here, and if you have Repeat selected it’ll just loop this one chunk you have selected forever until you clickdrag elsewhere again to get rid of it. very helpful if you’re trying to edit one tiny area without having to loop the entire song over & over!
i’ve clicked and dragged my MIDI bit to shorten it here as you can see, since there was all that empty space i didnt need.
so you may have some notes down now and you have it looping but it’s going Ultra fast & sounds horrible lol. if you want to change the tempo (speed) of your track, that function is over on the mid-right of the screen under BPM (beats per minute):
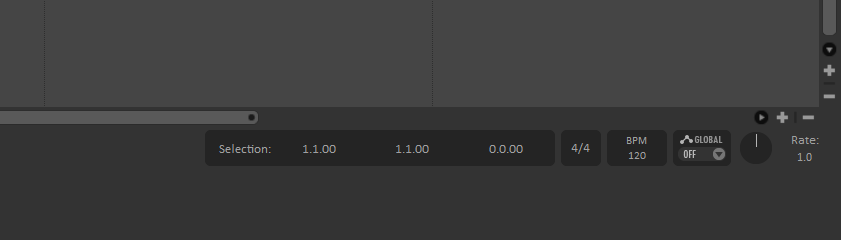
the one on the mid right! right now we’ve got this thing going at 120bpm which is way too fast, so you can just click it once and type in a new number even as your song is playing to change it in realtime. im taking this down to 40bpm just by typing in 40 and clicking out of it
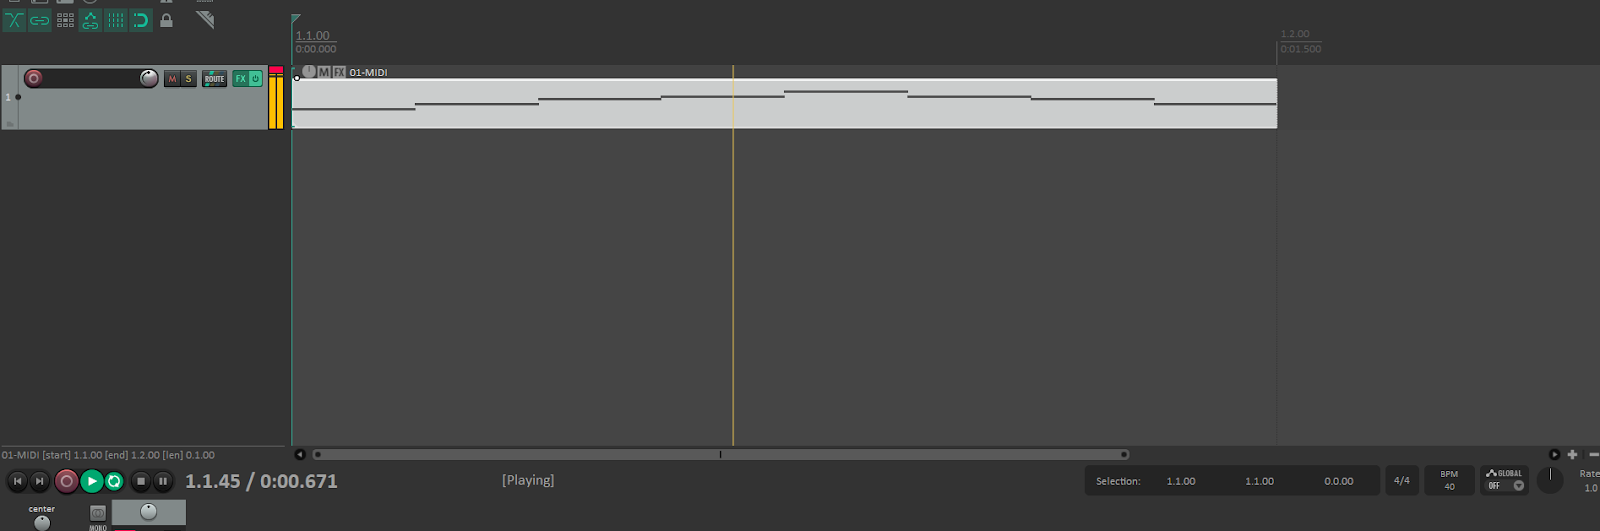
when you do this too youll see it also lengthens your track to reflect the change in speed to slower. if you were to make it faster, the opposite would happen and it would get shorter. either way, you can always use the mousewheel to zoom in and out no matter what your tempo is
ALSO few more hotkeys to know that are Reaper-specific but very important:
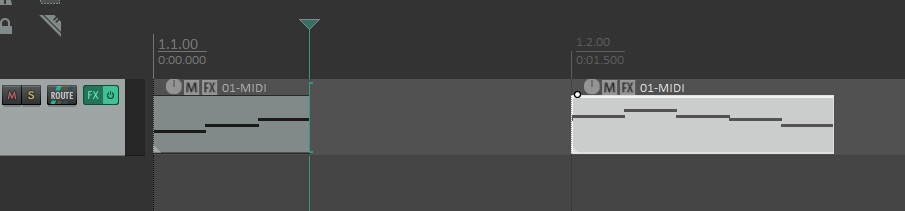
S: the S key is going to function as “Split,” as in if you wanted to chop that MIDI chunk up there into pieces for whatever reason. you get that vertical long colored line over where you want to chop, and tap S once to chop it like so:
this is now chopped into 2 and i can drag the 2 chunks around however i see fit
if i dont like my chop, just CtrlZ to undo it. also if ive chopped it and now time’s gone by and i wanna undo the chop 50 edits in, i can highlight both chunks (shiftclick), rightclick, and select Glue to stick them back together.
also youll notice that if you chop something and start moving chunks around, it’ll snap to those vertically lined timestamps up there - you can hold down Shift while clicking and dragging to avoid the snap and inch things along to wherever you want them. (this is super handy if you’re importing samples that you want pinging at weird times!)
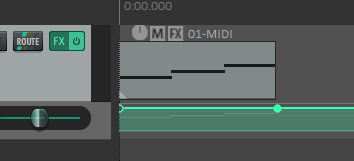
V: the V key is going to open your Volume on any given highlighted track like so:

this is how you fade tracks in and out if you like! get your cursor over the horizontal green line, hold Ctrl (your cursor should change into another shape again) and click. this is going to make a second “point” on the volume line (you can see the first point way on the left of the green line at the start of the track)
using this second point, i can grab my first point and drag it down to the bottom of the volume area, and what that’s going to do is manually create a fade-in:
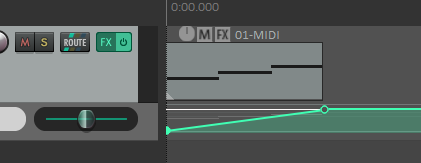
and like you can make as many points as you want and grab them and shuffle them around with just clicking and dragging. if you copy and paste an entire track too, it preserves these volume points you’ve made. you can push V again to hide the Volume area too if you dont wanna look at it. if you’d like to get rid of a volume point youve made, you can right click it and hit Remove
THAT IS LITERALLY IT now you just do this 5thousand times in one song and arrange them as you please!!! you can keep making tracks (layers), clicking and dragging them up and down to reorder them as you like, keep adding VSTs or even copying/cutting and pasting VSTs from one track to another, clicking and dragging around your MIDI track so it starts later or earlier, fucking around with your volume endlessly, whatever!
these are the core basics to know with Reaper. the rest IMO is the really really fun part ie VST Experimentation.
HOW TO ADD NEW VST’S
so Reaper by default only comes with that one instrument VST, ReaSynth. ReaSynth is ugly but it works and makes noise at the end of the day - but maybe you wanna do like a piano track, or an 80s synth track, or a synth orchestra or what have you. you gotta get yourself instrument VSTs for these specific noises and throw them into Reaper!
Reaper has a handy function where every time you boot it up, it scans a directory it’s made for added-in VSTs. adding a new VST is as simple as throwing it in Reaper’s scan directory.
first off lets get 2 free VSTs i adore:
1. Retroverse Lite - the free version of Retroverse, super solid 80s driving hotline miami shit. comes with tons of sounds to play with and is super versatile!
2. Solaris - this is a magnificent reverb (echo) that im shocked is free
Retroverse comes with its own installer, while Solaris you have to manually throw into your VST folder. before we do anything, we gotta locate where the VST folder is. Reaper will tell us!
In Reaper, go to Options > Preferences and scroll down until you see VST
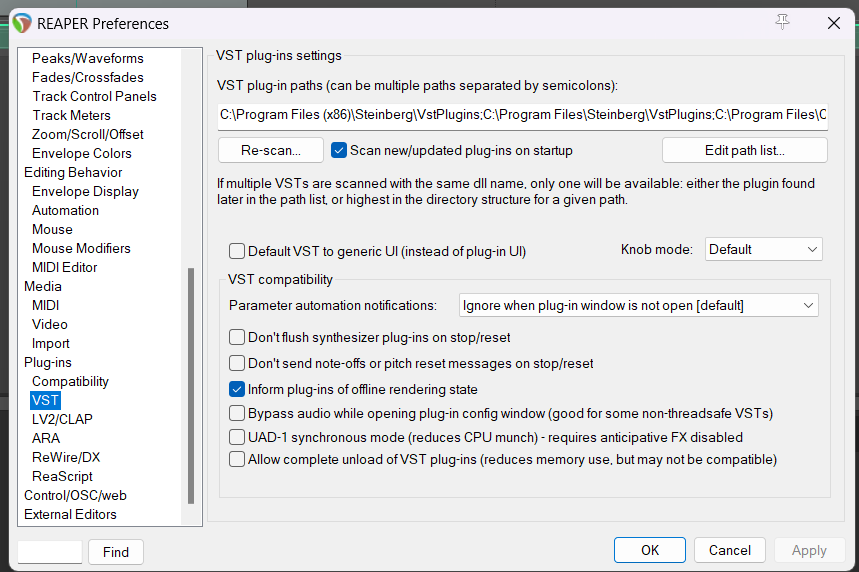
up there with the C:\Program Files yadda yadda are the directories where Reaper is going to scan to look for any VSTs you’ve added. you can also click Edit path list… and set it to scan specific folders where you want to put your collected VSTs, like if you just wanted to make a desktop folder or a folder on a thumb drive for them.
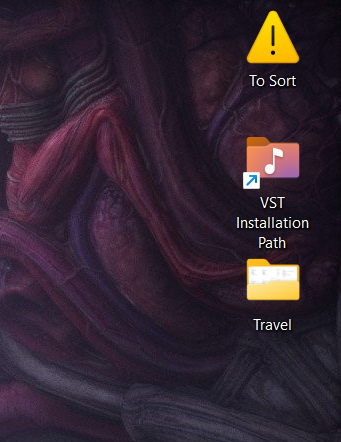
personally ive taken one of these pathways and made a shortcut directly on my desktop for ease of access so i can just chuck new VSTs in without having to hunt around
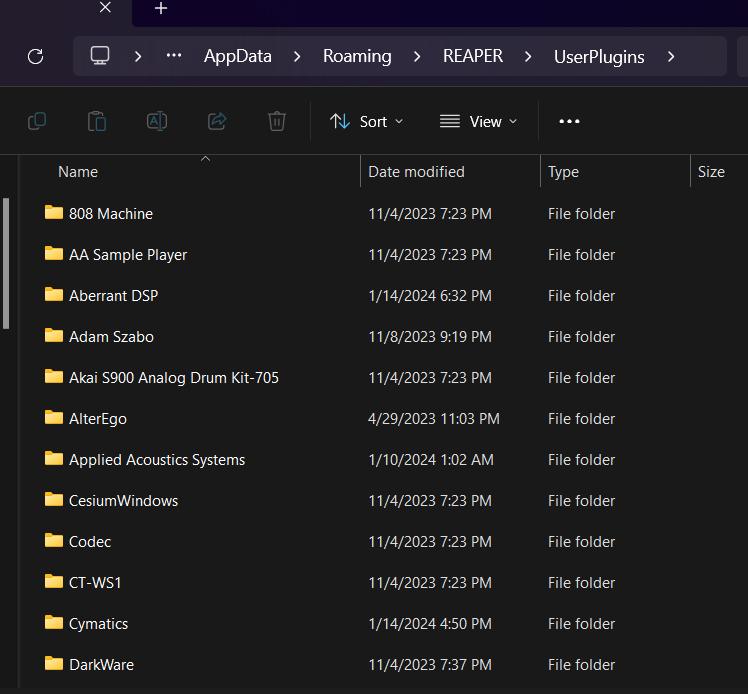
i like to organize everything into developer files like so just so i can keep everything in order cus if you get seriously into this your folder is very quickly gonna Explode with stuff lol
anyhoo now since we know where Reaper is gonna look for VSTs, go ahead and clickdrag Solaris’ stuff in there (make a Solaris folder in there just so you can find it later!) and run the installer for Retroverse, making sure that it installs to your VST directory of choice.
now that they’re in, we can either close Reaper and reopen to have the DAW program autoscan for these new VSTs, or we can go back into the VST preferences window (Options > Preferences, scroll down to VST) and hit Re-scan…
EITHER WAY NOW YOU GOT EM! lets try throwing them onto our MIDI track from before!

we’re going back to our track and clicking FX again to get back into our VSTs
i dont want ReaSynth anymore so im just gonna get rid of it by clicking Remove - dont worry about the MIDI notes you’ve laid down, by doing this you’re only getting rid of the VST not the MIDI you’ve made lol i promise the MIDI is safe and sound. basically we’re just changing our brush which leaves the layer contents completely alone.
now go ahead and click Add. we’re gonna go find the 2 new VSTs we just added in - add in Retroverse first! (make sure you have All Plugins selected and start typing in Retroverse)
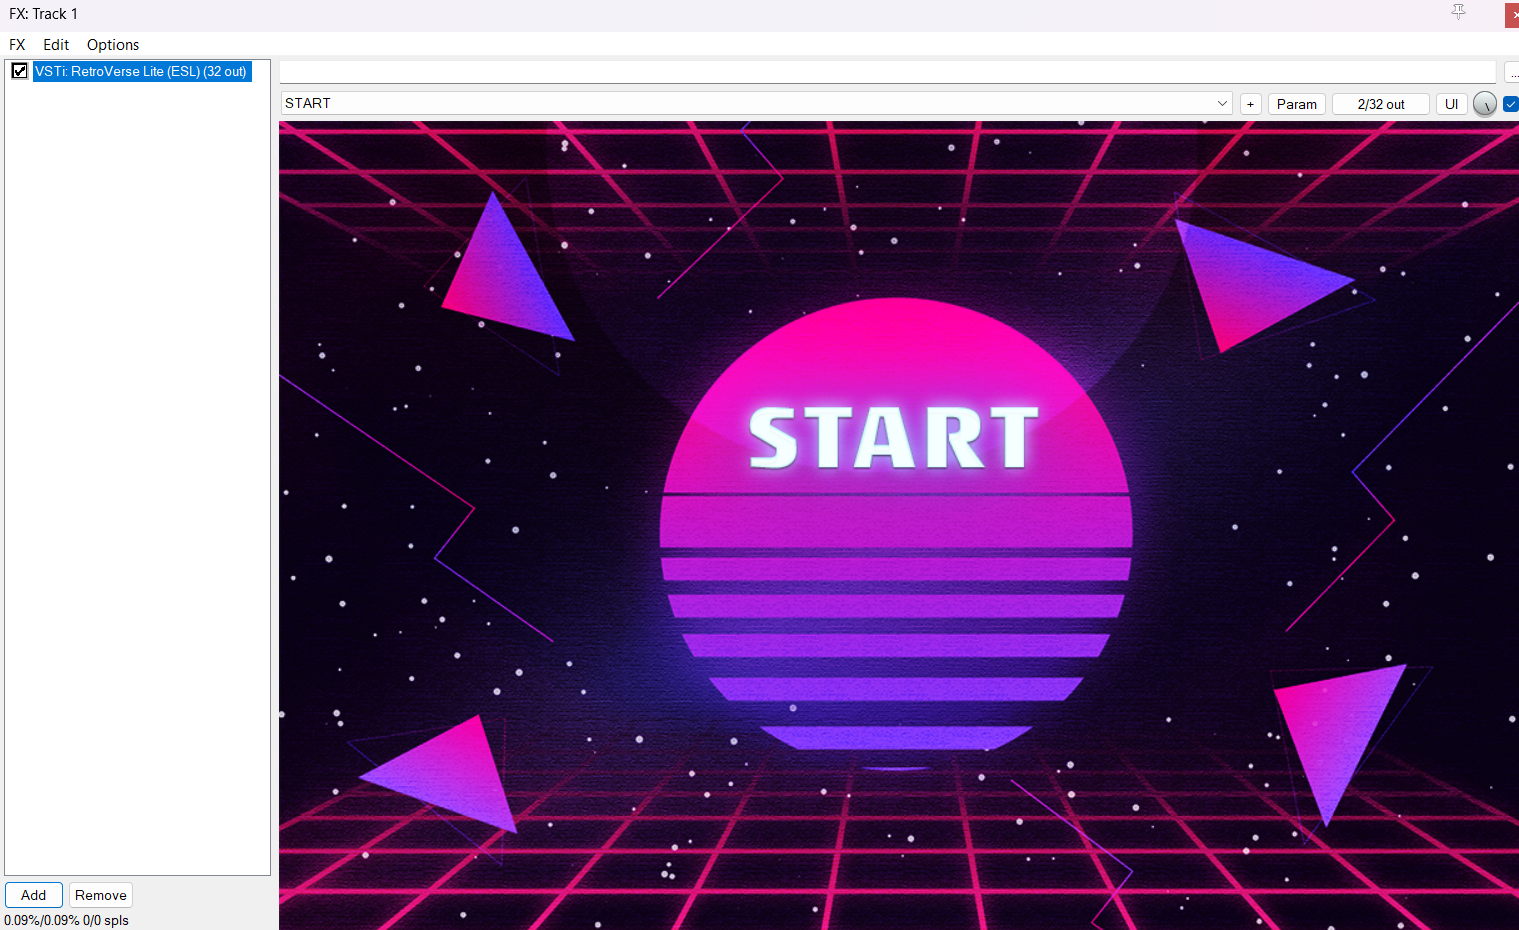
Retroverse wont activate unless you click the big white START there so like, click start lol

now we have access to the tons and tons of different noises that Retroverse can make! try plunking on the piano keys at the bottom and scrolling through the different presets at the top to see all the different sounds. click PLAY while you do this (make sure you have Repeat enabled) and you can get a live look at each sound as you scroll through them!
now lets layer Solaris on top of Retroverse to really fuck the track up. Click Add button again and hunt down Solaris the same way we added in Retroverse (make sure effect VST Solaris is sitting below instrument VST Retroverse so it knows to affect the VST right above it - an effect VST wont do anything to a VST sitting below it)
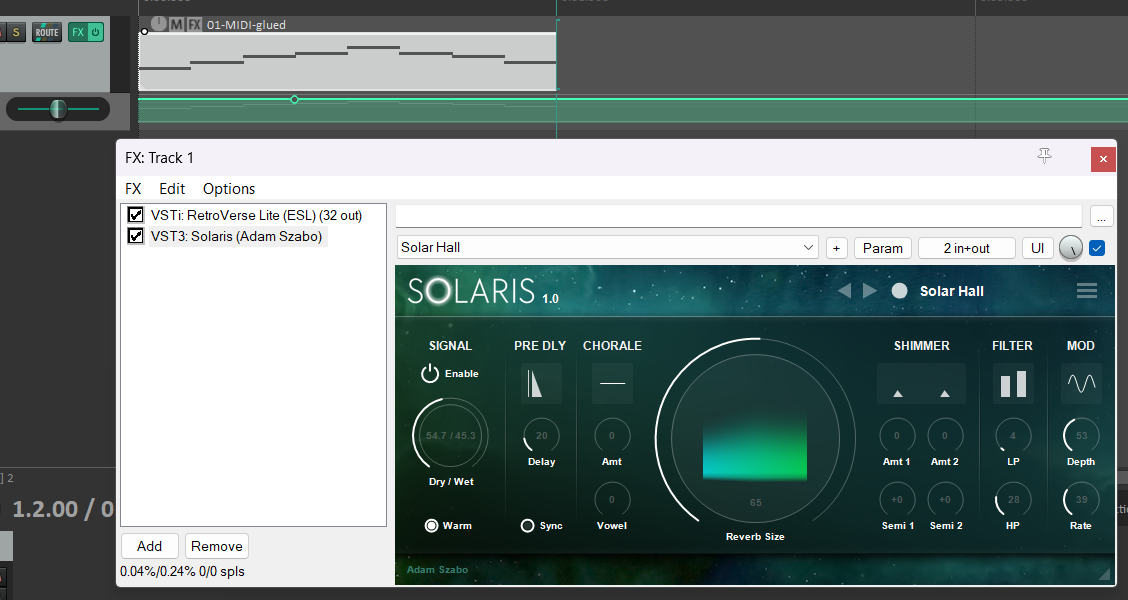
now ive got Retroverse as my main instrument VST, and i have Solaris as my reverb effect VST doing weird stuff to Retroverse. at this stage id highly recommend fiddling with all the knobs in both VSTs and seeing what kind of horrible sounds you can come up with!
these are the absolute basics of terminology and Reaper functionality! now it’s up to you to find VST instruments and effects you enjoy & make a fun sound with them. i hope this was in like Any way helpful lol. im including links below to where you can find shitloads of free excellent VSTs and Reaper tutorials.
if you found this tutorial through my tumblr, feel free to DM me with any questions! like i said im still a bit of a beginner myself, but if you get stuck on any of the basic outlined above id be happy to sit down and help walk you through wherever youre stuck. eventually id like to do like a fake discord seminar or something where i walk folks through the basics, so watch this space & ill update if i ever get around to that lol
HAPPY HUNTING! hunting? happy bangin around? you get me lol
LINKS & RESOURCES
REAPER FAQ
- User guide
- Reaper Resources (contains screencaps, different colored DAW themes for your viewing pleasure, how-to videos, looks at other people’s projects to help further familiarize yourself with workflow stuff + hotkeys, etc)
VST’S I PERSONALLY RECOMMEND
- Decent Sampler (compendium of free + $ plugins in one easy to use single-install VST. really solid answer to Spitfire Audio, who do make a good product but have revealed themselves to have had an openly transphobic co-founder. said spitfire founder has since resigned as of early to mid 2023, but all the same tread carefully with where you spend your time & money)
- Deelay
- Deja Vu
- Delay Lama (very strange Very old “vocal” synth, fun to play around with. if you listen to any susumu hirasawa at all you’ll recognize this sound!)
- DR-84 (80s drum machine)
- Electronik Sound Lab (this is where Retroverse Lite came from; this person’s made a ton of other VST instruments too and has Lite versions of them all up for you to sample for free)
- Freakshow Industries (!!!!!!!!!!!!!!!!!!!!!! please check these guys out their VSTs are all free-to-“steal” and you will get the most fucked up sounds imaginable)
- Lost Samplers (an effects VST for a lowfi feel!)
- Nils’ KV1 (instrument VST, digital dupe of the physical Kawai PH50 keyboard - check out this cool video from Hainbach to hear all the sounds it makes!)
- PaulXStretch
- Permut8 ($ but has a free trial)
- Ruina (effects VST that comes as part of a free bundle of stuff. complete signal destruction. this thing is evil 👹)
- Sitala (drum machine VST that lets you construct your own drum machines by plugging in drum sound .wav files - but you can put any sounds you like in here!)
- Solaris
- Synplant 2 ($ but has a free trial. absolutely fucking crazy synth that lets you “grow” your own instrument)
GENERAL SOUND RESOURCES
- Audio Plugins For Free (VST database)
- BBC Sound Effects (samples)
- CitizenDJ
- JSFXR
- Emma’s Homepage (videogame samples and homemade VST database)
- Flowstoners
MUSIC COMPOSITION AND MIDI MAKING
- Mindful Harmony (most powerful audio sketch tool ive ever found. $ for a subscription to download your MIDIs from here but this is the perfect browser-based tool for feeling your ideas out & familiarizing yourself with chord progression & general musical theory)
- OneMotion Chord Player/Drum Machine
- Acid Machine
- Autochords
- Drumbot