Controls
Edit Tools
Camera Options Panel

From left to right
- screenshot mode - hides most of the UI, no highlighting parts or placing
- orthographic mode - no 3D perspective
- walking mode
- third person mode
- minicopter mode
- camera speed toggle, mouse over to see options, changing this also uses F1-F3
Minicopter mode
- spawns you in a minicopter at terrain/building height below, no spin-up wait to fly
- hold left alt for mouse look, can be customized in the startup input panel
- hold left ctrl for ground movement
- works in multiplayer and raid mode
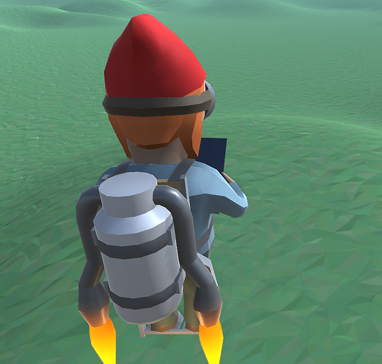
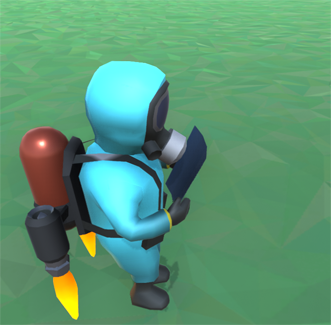
Third person mode, character can be changed under options with electric upgrade DLC.
Fortify Links - Discord Channel / Subreddit / Steam Community Hub
Fortify is developed by just one person so please share any bugs you find. Other feedback is always welcome.
Contents
Startup Problems and Crashes
RivaTuner is known to cause startup crashes.
Running Fortify as admin can sometimes solve issues.
There have been cases where you need to restart Steam after first installing Fortify for it to work.
Check this out if you’re still experiencing issues:
https://support.steampowered.com/kb_article.php?ref=6218-USFX-5568
Initial Settings
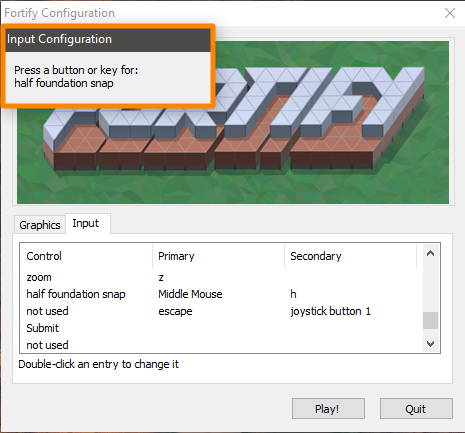
Some controls and shortcuts can be customized under the input tab.
Lower the graphics settings here if using an older computer or building a ridiculously large base.
The mouse cursor needs to go over the highlighted area to set a control to a mouse button.
Run Fortify in windowed mode if playing Rust on a second monitor to avoid it minimizing.
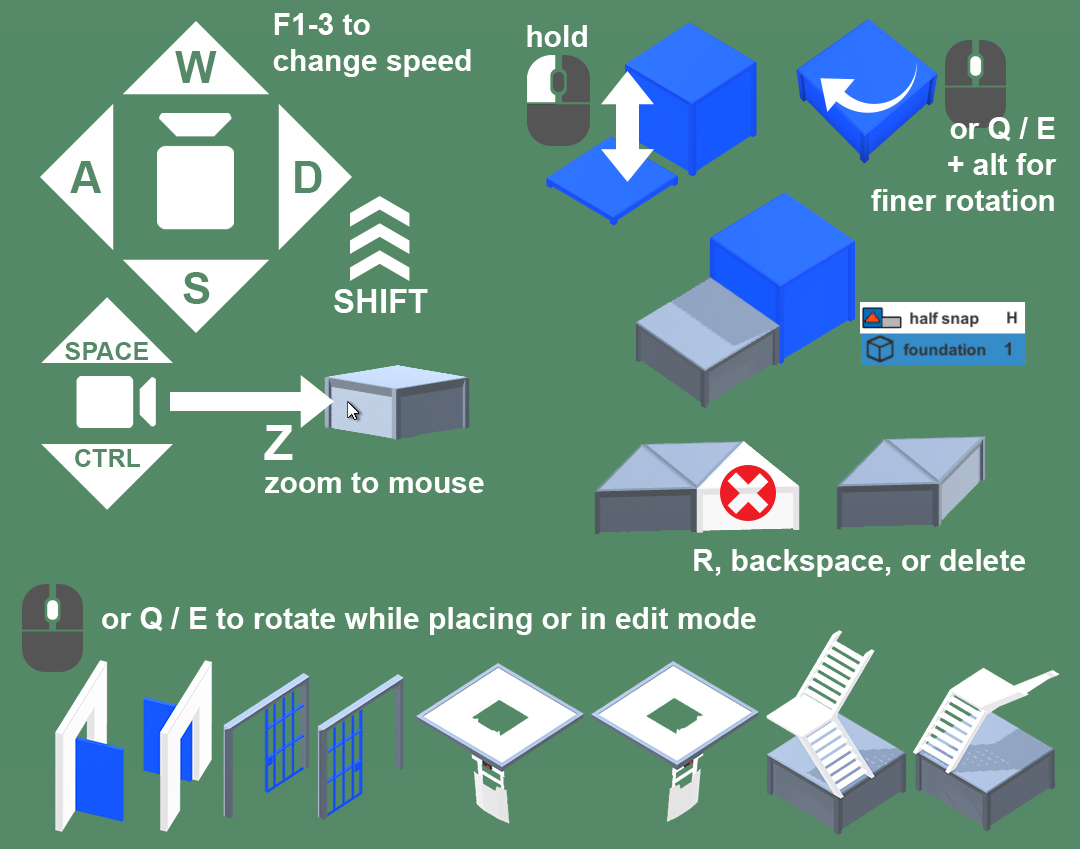
Controls
esc - open or close main menu
F12 - take a screenshot
Q / E / scroll wheel - rotate / flip parts while placing or when selected
Hold alt while rotating to rotate in smaller increments with scroll wheel
R, backspace, or delete - remove highlighted part
click doors/hatches/gates to open or close
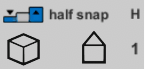
H or hold down the mouse wheel to half snap foundations
V - Wiring mode with electric upgrade
Camera Controls
Can be customized in initial settings for AZERTY keyboards
Invert Y-Axis is available under Options
W/S - forward and back, holding left alt will switch modes


default mode “level camera movement” in options
A/D - pan left and right
Hold right click to rotate the camera
Hold shift to speed up all camera movement
Space/left Ctrl - move the camera up and down
Z - zoom on object or terrain that the mouse is over
i - Interior Camera Mode - collides with parts and slows movement
General
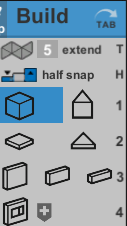
Tab switches between the Build and Place panel.
Changing Scenes
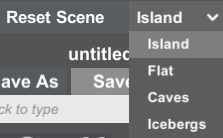

Pick from the list and reset.
Merge Saves

Copy contents from a file into the current scene.
Left click to place the contents, it can be rotated while moving around.
Be warned, merging in a huge design can be very laggy.
Removing Parts
Highlight part and press R, backspace, or delete. Same goes for selected parts in Edit mode.
Undo/Redo

Wired connections are saved in undo when deleting an electric part.
This does not undo a scene reset or loading a new file.
Include 10 saved states, including the following actions:
- placing/removal of individual parts and wires
- edit mode select deletion
- merging in other files
- actions like align, the copy/move tool, basically all the edit tools except selection changes
- overlap replacing
Info Spot

- clicking the red icon saves the current view and opens a panel to save a note about this location in the scene
- exit the panel to save the text, after you will see the info spot icon floating in the scene
- when opening a save the visibility toggle will be on if any info spots are included
- the character count is limited and ',.?! are the only extra characters allowed
- when publishing to the workshop it's possible to not include info spots

- use the top arrows to cycle through info spots
- the bottom arrow button allows for repositioning the info spot
Staging
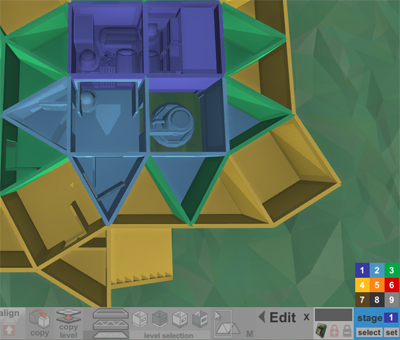
Plan your build expansion in stages. Click the panel to show stage colors.
Any new part will use the stage number displayed. Change selections to a certain stage with "set".
Using the select button and "selection only" in resource count is helpful.
Stability View

Displays stability materials on blocks that show what range it’s in.
Hide Floors / Hide Stages - Press F
Press the curved arrow to switch between modes.
Hidden floor parts still have active colliders to prevent overlapping.
Page up and down are the shortcuts to adjust the level.

Click the tab below the arrows to jump to the first floor/stage.
Click the gear icon to see the lower options.
When using half snapped foundations, the 0.5 toggle might be needed to help navigate up and down
or try “use height”, which is the old method of determining floors to hide before levels were stored on parts.
The roof button makes roof parts hide one level sooner.
Building Tiers

Toggle the tier used for new parts while in Build mode.
Select a tier to change current selection to while in Edit Mode.
Press mouse4 to quickly change tiers. Key can be customized.
Placement Options


hold LMB auto-place - Click down and drag over sockets to place any foundations, walls, floors immediately.
Tool Cupboard range


Includes modes to see the privilege area or the TC stacking block area.

This has to be toggled to click a structure to see the range.
Add Codes

Select doors while in Edit mode to use this. Multiple doors/hatches can be set at once.
Mousing over the door will show the code.
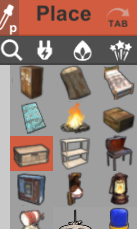
Place mode
Another reminder to hold alt while rotating to rotate in smaller increments with scroll wheel.

Click the item info star to add it as a favorite. Favorites are an option in the place menu filters.

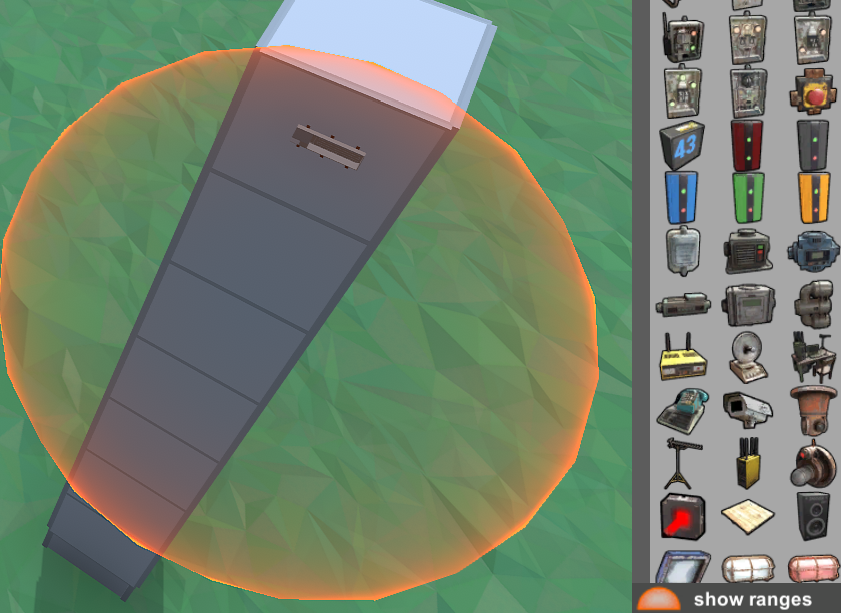
Visual Ranges
Enabled for certain deployables while placing. Can be toggled by double clicking after placement.
There is also the “show ranges” button that toggles all ranges (shown in the bottom right).
Build Mode
Foundations
- Hold down left click and move the mouse up and down to adjust the height (not the same as half snap).
- After placing the first foundation hold down left click (next to the first) to make placement continuous.
- Press H or mouse wheel down for half snap placement or use the toggle shown below. With this enabled the placing foundation snaps up or down depending on where the mouse is over the socket collider.
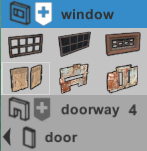
Wall parts can replace other walls without deleting (change a wall to a window).
Press 1-7 part shortcuts repeatedly to cycle through groups, like floor and floor tri.
Swapping between placing similar parts can also be done with mouse3.
Doors and roofs will flip sides while placing with Q / E or scroll wheel.
Stairs and Hatches can be rotated after placing with Q / E or scroll wheel.
Strong/Weak Side
All wall parts have a strong and weak side, use Q / E to flip while selected.
While placing press Q / E to change if the strong or weak is facing the camera.

weak strong
Extend Tool

Add multiple parts in one direction when placing. Works with all building blocks.
The tool does check for overlapping parts and if foundations are underground.
Symmetry Mode
Duplicates placed parts around the center while saving a connection so any changes affect the others while the mode is active. Works with edit mode tools like copy/move, align, level options, outline/honeycomb and selection edits.
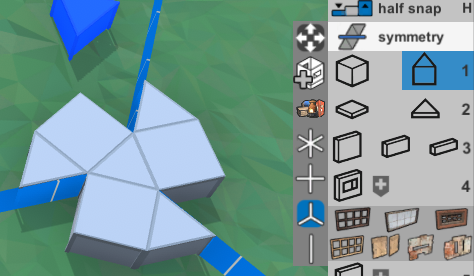
Place a foundation first to snap the symmetry guide onto.
While using symmetry mode, any added part is included unless the deployable option is disabled.
What doesn’t lose symmetry connections:
- turning the mode off temporarily
- entering raid mode
- adding a selection to symmetry
What does lose symmetry connections:
- moving symmetry center
- changing symmetry angle
- saving and re-opening
Use the “add selection” option to continue working on a symmetrical design after re-opening, the center data will be saved.
The selection can include the entire design, just make sure the center/angle is set properly first.
Included Parts
Adds related deployable to when placing a building part. Click to the plus icon to enable this.
Code locks
Click to disable adding code locks to every new door.

Edit Mode
MouseOver Selection
Default selection mode, left click to add to selection or hold mouse over parts while holding left click to add, hold alt to remove from selection.
Rectangle Selection
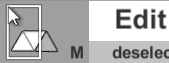
Press M or to toggle.
Hold down the mouse wheel to use this tool without having to toggle it.
Hold Alt or Ctrl - remove or add to the selection.
Disables up/down movement.
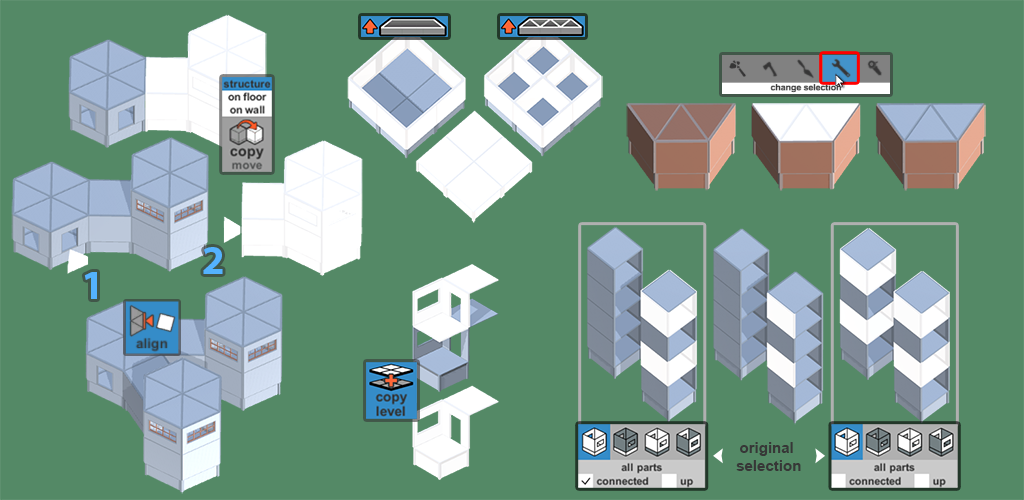
Selection Tools
Lower left button toggles deployable being included.

Select Structure - After enabled all connected parts will be added to selection when clicking on structure.
Press the minus toggle to allow for removing structures from selection.
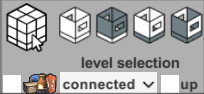
The other selection tools select more parts based on an initial part selection from the scene with the options below.
Modes included in the dropdown list:
- connected, adds connected parts on the same level as initial selection
- height, adds any part on the same level as initial selection
- scene, adds any part from the scene regardless of level
After the mode is set, these buttons will actually select and filter the additional parts.
Going left to right: any part, only floors, only wall parts, and only part types in the original selection.
Add Level

Select foundations or floors first. The top option outlines and the other honeycombs the selection with walls.
Floors will be placed above if the bottom “include floors” toggle is enabled (on by default).
Copy Level

Copies any selected building part (includes frame parts) one level up.
Copy / Move Tool

structure mode - Selection must contain a foundation. Height can be adjusted on placement click.
Including deployables for this and copy level can be toggled below it.
on floor/on wall mode - Allows for copying/moving selected deployables on floors or walls which includes any wires.
Filters out incompatible deployable types depending on mode.
Rotate with Q / E / scroll wheel.
Align

First select the structure you want to align/move (must contain a foundation).
Click on the target edge you want the parts aligned with.
Lastly choose the edge of the selection you want aligned to the target.
Align tool in action: https://imgur.com/E89CiMP
This tool doesn’t prevent overlapping where the two structures come together.
Mirror
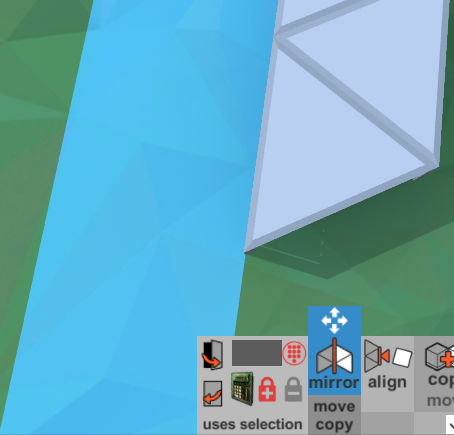
When the movement toggle is enabled the mirror plane will snap to foundation edges for proper alignment.
Use the mouse scroll wheel to rotate the mirror plane when moving over the ground.
Resource Count / Upkeep
Toggles resource panel shown below.
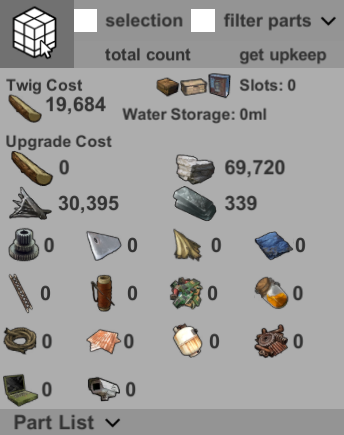
Will only show the count for floors not hidden and requires pressing “total count” or “get upkeep” to update count.
By default it doesn’t take into account if there’s separate structures (basically separate TCs) for upkeep.
Instead press the top left button for Structure Select mode.
After enabling, click a structure to get only that structure's count or upkeep, Click the panel or count button to recalculate.
Raid Mode
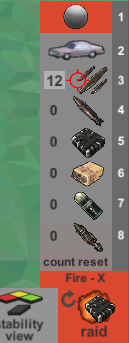
Raid Mode saves a temporary copy of your scene, this will reload when exiting this mode.
Not all deployables are visible in this mode. Press the arrow on the raid button to reset damage.
Mouse over parts while using it to see the health/stability.
Press X to launch explosives, parts can also be destroyed when pressing R when moused over.
Besides C4/satchels, explosives use splash damage that is very close to Rust but not perfect.
The cannon shell and sedan are fun options for blowing up large chunks of your design.
Saving and Sharing Designs
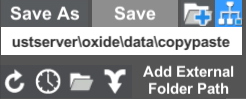
The Save button saves to wherever the file was loaded from.
Save As will save to whichever folder has been selected (orange icon).
Folder contents are now minimized by default, the arrow next to each folder icon controls this.
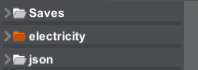
Subfolders can be added but the files need to be moved in your OS.
Click the Open Folder button to access the directory.
It’s a good idea to backup your saves folder occasionally.
Add an external folder to your list by pasting the path to it and clicking the highlighted button shown below.
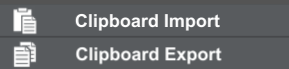
Clipboard Import/Export allows you to import/copy save data with your clipboard.
Some web services have a character limit which could result in incomplete save data if pasted into a message.
Quickly share exported save data with pastebin.com, more on that below.
Export Pastebin

Click this button and a link will be added below to share.
Alternatively, go to pastebin.com and paste the clipboard export data to create a link.
Import Pastebin
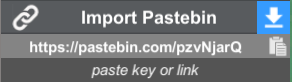
Switch to this mode with the down arrow button highlighted above.
Paste the whole address or just the key (in this example it’s pzvNjarQ) in the field below the button.
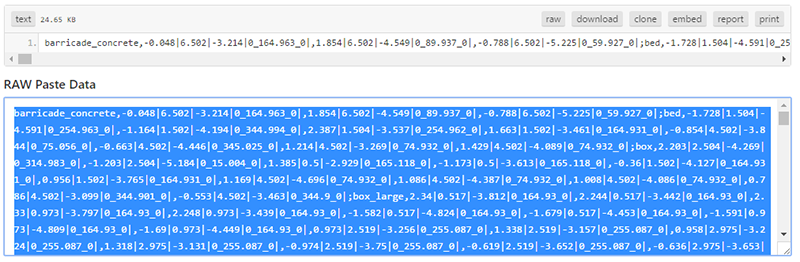
Alternatively, go to the provided pastebin address and copy the “RAW Paste Data” (Ctrl+A to select all) and then use Clipboard Import.
Cloud Saves
- DELETING on one computer will remove copies on other computers
- doesn't transfer copy-paste files
- will sync sub folders
- can be disabled in steam game properties
Steam Workshop - Link
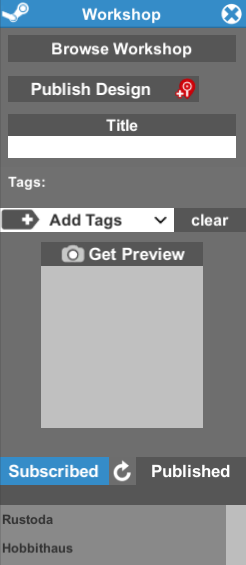
The workshop allows for a better system to organize, rate, browse and share designs with the Fortify community or friends.
- subscribed and published items are listed at the bottom of the panel
- click one of the listed items to download and open, this will replace the current scene
Publishing
- an eye button will show up after publishing that links to the item page
- adding a description and more screenshots is possible on that page
- items can be set to friends only on the item page
- update a published item with the arrow icon shown below, replaces data with current scene
- replace the preview image while updating using the toggle below

- tags can't be changed or added after publishing, not sure why steam limits this
Rust Import/Export
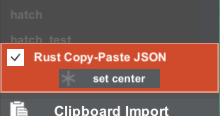
Fortify will only save and load .json files when toggling this on.
These files are compatible with the Copy-Paste plugin.
Try it out with your own server: Rust Server in 3 Clicks
Builder’s Sanctuary has an option to export this format.
Json files can also be imported into the map making tool RustEdit
Warning
There are some big differences with json files. Stages are not saved and the floor levels have to be recalculated every time the file is opened. Alternatively, Fortify saves will not include certain data (skin ids, ownership, stored items, etc.) that was in a json export from Rust. If using Hide Floors and parts are hidden at the wrong level try the “use height” option.
Set Center Button
After pressing, select the part you want to be located in the center of your view when pasting in Rust.
This center location is also stored in a Fortify save and only is visible when in copy-paste mode.
Pasting in Rust
Once your server is setup add the json files to the copypaste folder (you might need to create this folder):
server > "your server name" > oxide > data > copypaste > example_base.json
Then type in chat: /paste example_base
Filenames with spaces need to be in quotes: /paste "example base"
Undo placement: /undo
Adjust the height (1 is default): /paste example_base height 2
Copying in Rust
/copy example_base
The building part you are directly looking at will be at zero elevation in the save (so look at a foundation).
The file will end up in the location mentioned above. Copy the file to your Fortify saves location.
Click the menu folder icon above the file list to open the saves folder.
Opening in Fortify
Overwriting a Rust copy in Fortify will cause the loss of some data like chest contents and skin ID’s.
If the base loads partly underground use rectangle selection and the move tool (under copy) in edit mode.
Wires, Hoses, Pipes
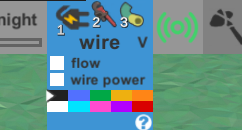
The upgrade is needed for placing/editing wires/hoses/pipes, setting values (timer, branch, etc.) and accessing the RF frequencies list.
Rust’s electrical system is fully simulated in Fortify but not the fluid or industrial system.
Opening and saving Fortify files with wired devices is the same for all users. Same goes for the copy-paste file format which will include circuits. Non-upgraded users can still toggle switches and timers, click to toggle.
While in Wiring mode a gear icon shows when mousing over certain devices.
Click these devices to open a panel that either allows for configuring values or showing info depending on the device.
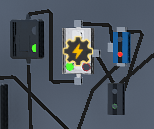
There are a couple Fortify only electric features like setting test generators to a higher output and seeing all the power a branch output circuit would need for connected devices.
Placing Wires/Pipes/Hoses
backspace - remove last joint while placing
delete / R - cancel while placing or remove connection while mousing over connected IO cube
Colors can be set before or after placing.
Click connected IO cubes for this panel:
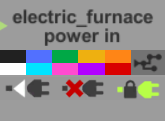
The bottom buttons from left to right:
- Disconnect the wire from that IO
- Remove entire wire
- Lock Highlight of connected wire
With this toggled, a color change will affect every wire downstream from it.

Multiplayer
Limited to 4 players for now and uses steamworks P2P networking.
Host and send invites to friends.
The host’s scene is sent to the joiner at the start. Save before joining.
- resetting the scene affects all users, same goes for loading a save
- the host leaving closes the connection for all users
- saving only saves to your computer
- leaving a session will not reset anything for the other user
- raid mode is disabled during a session
- hide floors can be synced
- with the DLC, time of day does not sync yet
If repeated connection attempts fail it might have to do with this: Required Ports for Steamworks P2P
Linux
If saves won’t open, users will need to add LC_ALL=C %command% to the launch options.
This is in Steam Library > Fortify (right click) > Properties > Set Launch Options.
This prevents decimals being replaced with commas in the save data.