
NFE Team Products Manual
nfeteam.org
Content:
1.1. Main ArcticFox differences 2
4. Description of the main features 8
7.2. Limitation of the battery charging current 16
7.3. Restore in the Safe Mode 16
7.5. Hardware version failure 17
1. Introduction
⚠ | REMOVING BATTERY WHILE CHARGING |
Never remove battery and even open slip-cover when device is charging or connected to a computer. This is leads to the combustion of several chips that are responsible for screen power and the drivers of transistors output DC-DC converter and charging module. |
🛈 | DISCLAIMER |
The firmware is distributed in the hope that it will be useful, but without any warranty. It is provided "as is" without warranty of any kind, either expressed or implied, including, but not limited to, the implied warranties of merchantability and fitness for a particular purpose. The entire risk as to the quality and performance of the firmware is with you. |
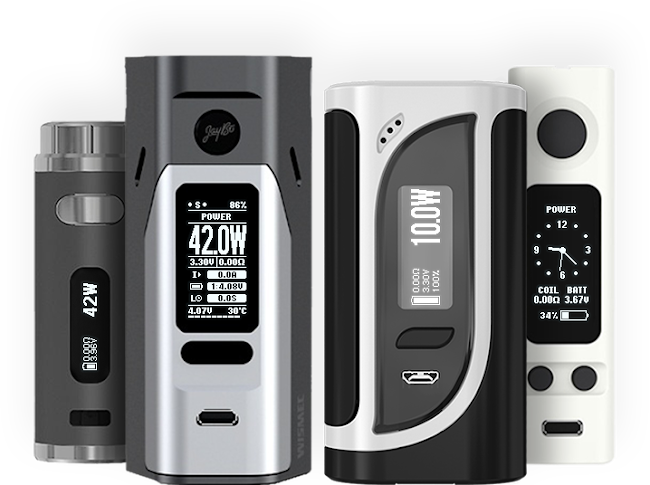
ArcticFox — third-party firmware by NFE Team for Joyetech, Eleaf, Wismec and co-branded devices.
NFE Tools — utilities set for flexible configuration, editing and firmware updates. The set includes:
- NToolbox — program for monitoring, updating and customizing ArcticFox firmware.
- NFirmwareEditor — program for editing and updating firmware.
1.1. Main ArcticFox differences
- Atomizer resistance: 0,05 — 3,5 Ω;
- 8 fully customizable profiles;
- Smart mode — automatic profile switching by resistance;
- Custom profile modes:
- VW — variable wattage mode, an atomizer is supplied with constant or predetermined by preheat power;
- TCR — temperature control mode by predetermined temperature coefficient;
- TFR — temperature control mode by predetermined temperature curve;
- Preheat;
- PI Regulator;
- Power Bank — use your device as a power source (limited to 2,1 A);
- Clock;
- Adjustable battery discharge curves;
- The main screen skins with customizable output in infolines;
- Custom timeouts for events and screen fading;
- Custom button actions and their shortcuts.
1.2. Technical limitations
- Minimal atomizer resistance 0,05 Ω;
- Output power (depending on the device);
- Maximum charging current (depending on the device);
- Maximum output current (depending on the device);
- Output voltage range (depending on the device);
- Maximum output current in Power Bank mode is 2,1 A.
"Depending on the device" means that each device has its own values, which are chosen by the manufacturer. You can find this values on the product page of your manufacturer's website.
2. Supported devices
ArcticFox - Main Nuvoton Branch
Joyetech: | Eleaf: | Wismec: | Co-branding: |
eVic VTC Mini | Aster | Reuleaux RX75 | VF Lite |
eVic VTC Dual | iStick Pico 75W | Reuleaux RX mini | VF Stout |
eVic VTwo Mini | iStick Pico 25 | Reuleaux RX200 | VF Classic |
eVic VTwo | iStick Pico 21700 | Reuleaux RX200S | BV Centurion |
eVic AIO | iStick Pico Mega 80W | Reuleaux RX2/3 | La Petite Box |
eVic Basic | iStick Pico Dual | Reuleaux RX GEN3 | VS Switchbox |
eVic Primo | iStick Pico RDTA | Reuleaux RX2 20700 | Twisp Vega |
eVic Primo 2.0 | iStick iPower 80W | Reuleaux RX2 21700 | Twisp Vega Mini |
eVic Primo Mini | iStick TC100W | Reuleaux RX300 | MyVapors myTri |
eVic Primo SE | iStick TC200W | Predator 228 | |
Cuboid Mini | iStick QC 200W | Presa TC75W | |
Cuboid | iStick Tria | Presa TC100W | |
Cuboid 200 | iKonn 220 | Sinuous P80 | |
eGrip II | Invoke | RX GEN3 Dual | |
eGrip II Light | iStick Pico S | CB-80 | |
Elitar Pipe | Pico Squeeze 2 | Active | |
eVic Primo Fit | Aster RT | Luxotic DF | |
Ultex T80 | iKuu i80 | Luxotic MF | |
Lexicon | Sinuous V80 | ||
Sinuous V200 | |||
ES300 |
ArcticFox - STM32 Branch
Joyetech: | Eleaf: | Wismec: | Co-branding: |
iStick Pico X | Sinuous V80 | ||
iStick Rim | Sinuous V200 | ||
iStick Rim C | R80 |
RedPanda
Joyetech: | Eleaf: | Wismec: | Co-branding: |
Espion | Ravage230 | ||
Cuboid Lite | |||
EKEE |
Builds can be found in Nightly branch
2.1. Version compatibility
NFE Tools and ArcticFox are related products, but can be published separately. Version compatibility is determined by the same version of the protocol.
The latest builds of NFE Tools and ArcticFox publishing on the forum with name of the
[PXX] {Product name} {Version}, where
- PXX — P means protocol and XX means version of the protocol, eg: P10;
- Product name – ArcticFox or NFE Tools;
- Version – YYMMDD, eg: 170822.
3. Installing
Download latest versions of ArcticFox firmware and NFE Tools, from suitable section on the official forum:
NFE Tools system requirements:
- Windows XP or higher;
- .NET Framework 4.0 or higher.
Installing:
The installation process is very simple and does not require special knowledge or skills.
- Unpack archive with NFE Tools.
- Connect your device to the PC via USB cable.
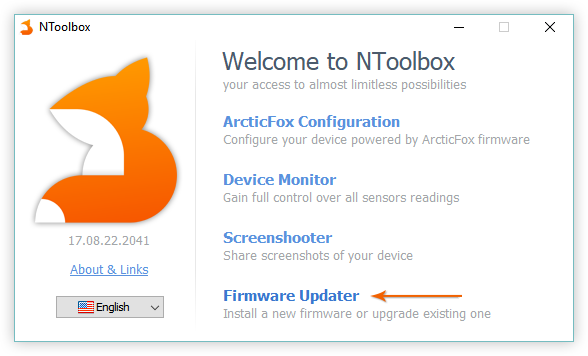
- Launch NToolbox.exe. In opened window choose «Firmware Updater»:
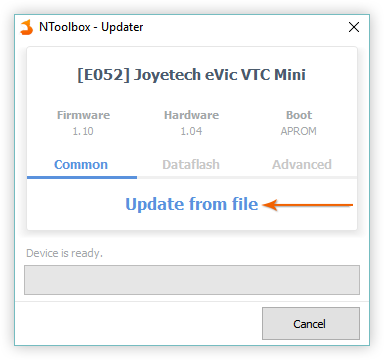
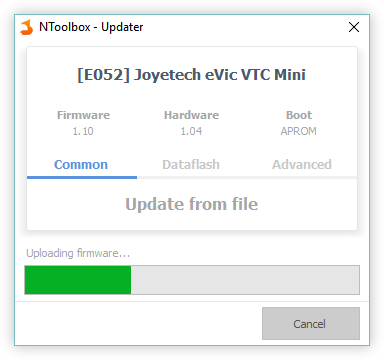
- Firmware Updater dialog will appear, you should click on the big button «Update from file»:
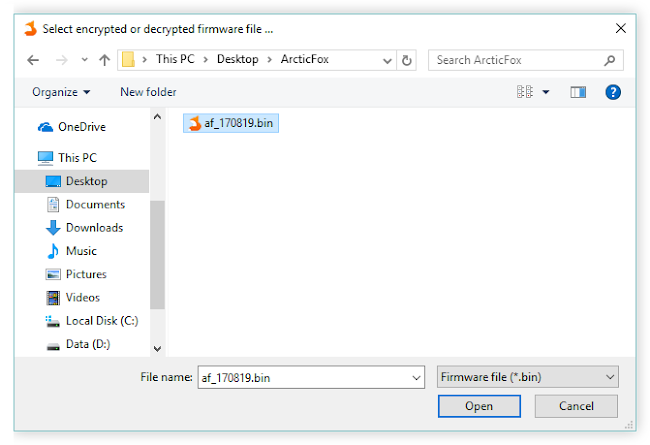
- Choose ArcticFox firmware .bin file, that you've downloaded earlier:
- Firmware installation process will be started immediately:
- After a few seconds you will see notification that firmware was successfully installed:
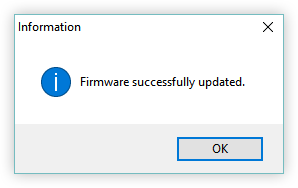
- You are done! Good job ;)
4. Description of the main features
4.1. Profiles
The main difference is the profile based user interface, so to say, the DNA-style, and the larger focus on customization than original Joyetech firmware. Profile is the set of parameters of used atomizer, such as coil material, resistance, power and temperature values. The user have 8 profiles which can be edited with NFE Toolbox, and which can be assigned to his favourite atomizers.
- Press 3 times (by default) to select the desired profile.

To edit the active profile:
- Hold + to access the main menu and press .

4.1.1. Preheat
Preheat — increasing supplied power to atomizer for the first seconds. Used for faster heating of tricky coils.
Can be set as a time and preinstalled power or percentage of power. Also available is a more advanced setting: a graph of power versus time.
Preheat delay — used for intensive coil heating at the first puff. The next power increase will happens after the set time.
Enabled preheat is warned by the letter "P", if the indicator is flashing - this means that the delay of the preheat is currently activated.
4.1.2. Temperature Control
There are 13 spiral materials: VW - working with the disconnected temperature control (normal variable wattage mode), Ni, Ti, SS, TCR - standard Joyetech materials, and 8 preset TFR materials, which can also be downloaded as CSV files from steam-engine.org.
Temperature control mode works in the same way as in the Joyetech firmware: you need to select the material of the coil, if this is not available, set the TCR or import TFR graph. After this, screw the room temperature (20 °C) atomizer and block the resistance. There are two ways to block resistance:
- Set the resistance block to a buttons shortcut in NToolbox;
- If the regular resistance is displayed on main screen, activate the editing mode of main screen (4 clicks by default), select resistance by button, and by or , toggle the lock.

You can reset or edit the saved profile resistance by two ways:
- Open Main Menu → Profile settings → Coil and edit manually, or hold down button, which will cause for a forced resistance override (or reset, if no atomizer is installed);
- To reset, enter the profile selection mode and hold down + (for eVic VTC/VTwo you can reassign shortcut in NToolbox).
Note: TCR coefficient for SS is changed from 120 to 92.
4.1.3. PI Regulator
To improve power and temperature stabilization in temperature control mode, the firmware implemented an actual PI controller. Detailed principles of working can be found in Google or on our forum, as their description will take a few more pages.
In a simplified sense PI controller has the following settings:
- Range — temperature range when PI regulation becomes active. 0 means that regulator is always on and controls power distribution from start of puff, 20% for example - PI regulator turns on when temperature of coil reached 20% range from profile settings.
- Р — proportional constant, the larger it is, the sharper the power changed. For example, on a simple coil better to increase this value, because they quickly losing their temperature, unlike more heavy coils.
- I — integral constant, the larger it is, the settled power distribution is smoother.
4.2. Smart Mode
Profiles can be switched automatically, based on saved coil resistance, and in manual mode. All you need to use the automatic switch is to enable "Smart" mode, install atomizer and assign them to the desired profile. You can also prepare profile using NToolbox.
When you re-install this atomizer later, assigned profile will be activated automatically. If resistance of installed atomizer is not found in profiles, you'll be prompted to select a new profile or re-assign existing.
When you switching manually to profile that have saved resistance mismatch, you'll be prompted to update or keep settings of selected profile.
4.2.1. Lazy mode
Profile switching happens only when atomizer is changed and only when device is active. If you change atomizer while device was in deep sleep or loaded a configuration from NToolbox, the profile will not be switched automatically.
4.3. Skins


There are 3 main screen skins in firmware: Foxy, Classic and Circle. For smaller screen you can set the font thickness for infolines.
Editing the main screen differs from the original Joyetech firmware. To edit infolines on the main screen, call the «edit main screen» action (4 clicks by default). Single click switch to the next editing item. Edit selected item by pressing / buttons. To exit edit mode hold button for about 1 second. Main screen can be also set up in NToolbox.

Note: to reset vape counter, choose counter in infoline and hold +.
4.4. Clock
Firmware supports time counting with hardware and without hardware support. For more convenient use, you can enable the time synchronization between device and PC. To do this, you need to right-click on the NToolbox icon in the tray (near the clock) and tick «Synchronize time when device is connected».
The clock can work in three modes of time counting:
LXT — RTC mode for devices with built-in 32768 Hz quartz resonator.
LIRC — default RTC mode for devices without quartz resonator. Time will be controlled by an internal LIRC oscillator in deep sleep mode. Time will be inaccurate due to the oscillator high noise. However, it is possible to assort an averaged frequency (LIRC Speed) in Settings → Clock. For each device, the value will be unique.
Assorting method: lower value by 100, leave device for 30 minutes, after, compare the time. Selection of the optimum value is possible only by trial and error, but it will not guarantee accurate clock movement. Also, you can turn on the LSL mode, then you don’t need to assort the frequency.
LSL — Light Sleep Mode. When you turn off the device goes to sleep, but not completely. The central processor remains, which ensures accurate clock movement, while the battery is discharged by about 0.1-0.2 volts per day on single-battery devices. With any other settings, the clock does not affect to the power consumption. The activated LSL mode is warned with by «!» right of battery indicator or by the letter «L» in the Foxy skin.
Note: after switching the RTC mode, disconnect USB and restart your mod, remove battery for about 30 seconds. If the RTC module fails to start in LXT mode, the mode will automatically switch to LIRC/LSL, which may indicate a hardware problem or the absence of a quartz resonator on your device board.
Warning: overdischarge protection is disabled while LSL is activated. For a long time in standby mode batteries may be discharged to critically low level. Always check battery level yourself when using LSL mode, we recommend to remove batteries if you are planned not to use box for a couple of days.
4.5. Power Bank
Support for Avatar RC adapter and similar. Provides charging devices with a voltage of 5 volts (can be changed to 5.25 V, see § 6.4.1.) and current up to 2,1 A. To start charging, put RC adapter on box, connect device and press button. Power Bank mode has auto-off feature when current drain is not exceed 50 mA (indicated by blinking label «On»).

To turn off the screen while charging, press .
To stop charging, press button.
To exit Power Bank mode press and hold button or regulatory / buttons simultaneously.


4.6. Stealth Mode
Supported devices are using LED displays, which are prone to burnout. To minimize risk of pixels burnout, there is a Stealth Mode. Activated by holding shortcut + (by default, can be reassigned in NToolbox). Screen is turned off in Stealth Mode by default. Press to turn the screen on. For holding button (puff) or at the end of the screen timeout, screen will be turned off again. Also, stealth mode doesn’t display the charging screen and screensaver by default, however they can be enabled in the «Stealth» section of the screen settings or in a similar section in NToolbox.
Note: backlight is off in devices with separate LED indicators (eGrip II/Light, eVic AIO, Pico RDTA, Sinuous P80) in stealth mode.
5. NToolbox
NToolbox — the utility included with NFE Tools. Provides huge opportunities to configure and monitor device from the computer. It is divided into 4 main components:
- ArcticFox Configuration — a configurator that allows you to fully set up your device from a computer, as well as reset settings or save their backup in configuration file. Some settings are available only in NToolbox.
- Device Monitor — tracking of all device sensors in real time. Allows you to record sensors and save them as .csv tables.
- Screenshooter — broadcasts a device screen to a computer, creates screenshots
- Firmware Updater — used to update the device software. Also shows the software and hardware version, allows you to reset and write Dataflash.
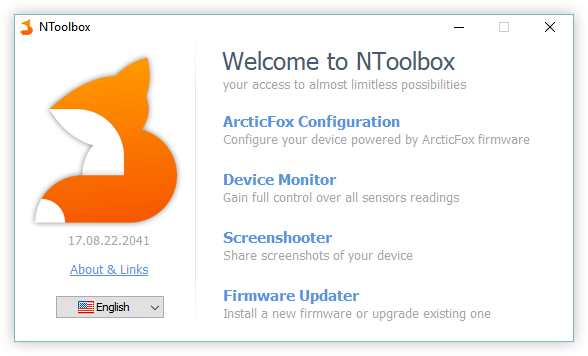
An example of the NToolbox main window.
6. ArcticFox
Third-party firmware developed by NFE Team. Currently supports 55 box-mods, working on boards of Joyetech and its subsidiaries. The firmware is created with the idea of safe device using with its maximum control. Provides a wide range of different settings:
6.1. Main Menu
![[IMG]](https://lh7-rt.googleusercontent.com/docsz/AD_4nXfjuXe9dvsMsFWdn9zZUMNHD2HlVLX6QB4Xl5hZwhWJC1Sav7cy9N0GmOq4M44UwPXd_BK9jOKmUkqbE_OUxqE1l_g4a8gVWemUfQNOb5O2LV5i2k8RRqzC7EbQJATgnrw-EPneGOg_eDnsCFBJ=s650?key=xyUip68G5kO-S4NX2bdwkg "Click this image to show the full-size version.")
Hold 1 second + (by default) to enter menu.
Hold + or + to return to the previous menu.

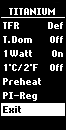
6.2. Profile Menu

![[IMG]](https://lh7-rt.googleusercontent.com/docsz/AD_4nXdE_jv9wGx34xBwsz7OUgZbJj17EyXCw9mD6xQ0e0x_SgojFQ6GgCftN_4wMfdPAB00wKYMEdcZDQ3QUgcJXODo24RPDUIlq_RlMftVZp5PLFNT-tXoODPATt4BP-9xh_l4UxtqB2sCN4K4_5Gf=s650?key=xyUip68G5kO-S4NX2bdwkg "Click this image to show the full-size version.")
![[IMG]](https://lh7-rt.googleusercontent.com/docsz/AD_4nXegPMpN1i19cHEF35jNM1un_vMV0D8i8gw9hnz8tS4YRtqbguDnQR_x145OuJuB9XpwvN7hxqaylmu32CitADVW1piZ-DuTU4C-LjRqtsCs63W4AtbfqUvyPHjl4NhZp_MGzm6SQhFYzPwzoJDg=s650?key=xyUip68G5kO-S4NX2bdwkg "Click this image to show the full-size version.")
![[IMG]](https://lh7-rt.googleusercontent.com/docsz/AD_4nXfn3jITabOiPT9LMUU8zeMC2EMkbYqg1SPKITg12ZtaWQ8D4jbGzqmGdZd9KPH4SeQ4EBq8ZUjnItLcrPOqhioIvCgfO8cDd_FCZfm67rvihwAN7SUUqzRZIx7sBPBl-2YuLR4DCmuJxi8S_oWV=s650?key=xyUip68G5kO-S4NX2bdwkg "Click this image to show the full-size version.")
- Wire — coil material, temperature control or not (VW);
- Coil — saved coil resistance;
- TCR — value can be edited when selected Joyetech TC algorithm with custom TCR;
- T. Dom — temperature-dominant regulation style;
- 1 Watt — increment/decrement power by 1 Watt;
- 1°C/2°F — increment/decrement temperature by 1 or 2 degrees;
- Preheat — power control, use preheat or power curve;
- PI-Reg — PI Regulator for TC mode, improves power and temperature stabilization.
6.3. Screen Menu
![[IMG]](https://lh7-rt.googleusercontent.com/docsz/AD_4nXcfi_PDxErvisin2W-1Qvs1OnDDr3Zk1n0HeFxVtv42BhGS-E6KEDbX2NJyCZFMPk8Jhcn9tC_WKBnKriANUQVFjJXWqSqg_LWzuyRje4nFX6CZ_76xU_YH7NxbV-_4E9dB7IZ1wvUnqKijChc=s650?key=xyUip68G5kO-S4NX2bdwkg "Click this image to show the full-size version.")
![[IMG]](https://lh7-rt.googleusercontent.com/docsz/AD_4nXeppSFaYvJUrGf0PAP7OynFNDfQxSbHx9bw4TdhEaOK23URcsxeRAN_Usq4bnF7Xlrp_v7PsxU_Z4nQcINbZnTGxzgTKW_EPpfRKDYupBAfBrz-t43NTf-z_8BsxzCnuLVtgXPVPXPWXkA30S9P=s650?key=xyUip68G5kO-S4NX2bdwkg "Click this image to show the full-size version.")
![[IMG]](https://lh7-rt.googleusercontent.com/docsz/AD_4nXeELD_mVpbfIwwcbOKCch4B4bD4lDpBii_yo3AfF7JEhUo6elU1FFTxWIbVyYYICiSxFvGniAhIPM51aONmgFOq3hzeEcebKNphTLplT9TCCbBb1dpgBB76ZU3u5iUls9gGozvtBOcEeCJngJsV=s650?key=xyUip68G5kO-S4NX2bdwkg "Click this image to show the full-size version.")

![[IMG]](https://lh7-rt.googleusercontent.com/docsz/AD_4nXcgCj5QYD7gr4s0J2b4O7TUmixPldXnjOMQOKBY7ClainA9GZ0xYE6ia8D2EM6tI86MeKr-ty77XW5vXidpQ_QqvFs16tTgAEgCWZRGQ4R6kkA7f_321oCaCBd_TE8B2snHjc6jshfcdh6XPurz=s650?key=xyUip68G5kO-S4NX2bdwkg "Click this image to show the full-size version.")
![[IMG]](https://lh7-rt.googleusercontent.com/docsz/AD_4nXe1C9uiOsm87_3Xvf7v8GAeLYII9cfEhOy78zhUzaZFU8fL_BSzEXab1OqXVFDzDW9ziqa4Kn7FMDkCJdDmasjxBd-ZLKd62LXt2Qut1IpTClTyO5S2bSbo4WuZnA1O0FlztWss487eJWthDP12=s650?key=xyUip68G5kO-S4NX2bdwkg "Click this image to show the full-size version.")
- Wake 🢐 🢒 — waking device up by pressing regulatory / buttons;
- Logo — showing custom logo on main screen;
- Clock
- Type — analog or digital;
- On Main — show clock on main screen;
- Saver — show clock in standby mode;
- Timeouts
- Dim — idle time before the screen turns off;
- Dim — idle time before the screen turns off in locked state;
- Charge — idle time before charging screen turns off, 0 - always on (the screen can be displayed by or buttons);
- Logo — idle time before displaying logo;
- Clock — idle time before displaying clock;
![[IMG]](https://lh7-rt.googleusercontent.com/docsz/AD_4nXfCZpr6xglHdpAH4h9h9cb1yMleYBoSytc3VC5aYmnFZbNrfubrXTYOP0Y-Wg8seCEgdeY5AdIL1OL6TJE9TcPJBGeDVyUDiXBMuly7Y_wXZFgR9NLwOO6K-zkOw_3F59Jt8QQ8J_Cby8I4AuvL=s650?key=xyUip68G5kO-S4NX2bdwkg "Click this image to show the full-size version.")

- Charge
- Type — charging screen type, standard or with additional information;
- Add. — extra item: clock or logo;
- Stealth — settings for screen in Stealth Mode:
- Charge — charging screen will be shown in Stealth Mode;
- Saver — screen saver will be shown in Stealth Mode;
- ClkOnF — if Clock on Main Screen is enabled, they’ll be shown by click;
- Contrast — adjust brightness of display;
- Skin — change main screen style.
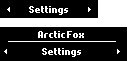
6.4. Settings Menu

![[IMG]](https://lh7-rt.googleusercontent.com/docsz/AD_4nXfTGHlzWFrcRLAgJOB0BvJj7aLc54_fR7vyJ3kbj0kXqZCTW6wwYmNFdvSlm_jWuiDI6Volcgat_22QbDE5ywpGZBxCMeSUOm7lqm5bMo86P9YRvGHEvnFAPxZgYqjP1BmSm6FMqtIGX_O57hA=s650?key=xyUip68G5kO-S4NX2bdwkg "Click this image to show the full-size version.")
- Puffs — counters settings:
- Counters — show counters;
- RCOBC — Reset Counters on Battery Change, clear vaping statistics;
- Cutoff — maximum puff time;
- Session — count puffs and vaping time while device in active state or use to limit puffs (chain vaping prevention);
- Limit — maximum puff count or time before device will lock/off (depends on 5 Clicks action), to switch units hold ;

- Clicks — actions assigned on
- 2/3/4 button clicks:
- None — not assigned;
- Main Menu — enter Main Menu, the same as +;
- Edit Main — Joyetech default 3-clicks action;
- Preheat — preheat settings for active profile;
- Edit Profile — enter in Profile Menu;
- Profiles — Profiles Selector;
- Reset Cnt. — show vape stats info with opportunity to reset counters;
- T. Dom — temperature-dominant on/off;
- Coil — switch coil resistance lock on/off (for TC modes);
- Coil — re-reading atomizer resistance;
- Smart — forced atomizer redefinition with a Smart call;
- Clock — show/hide clock on main screen;
- Info — show Info Screen;
- Bank — switch device into Power Bank mode;
- Stealth — switch Stealth Mode on/off;
- Smart — switch Smart Mode on/off;
- LSL — switch light sleep mode on/off;
- Key — switch Keylock on/off;
- Device — lock all buttons but leave mod powered on;
- On/Off — switch mod on/off;


![[IMG]](https://lh7-rt.googleusercontent.com/docsz/AD_4nXcrmbsvwgfenWtk7A8rfdgK9E8mB4UIE12nsh0Pr1YYzI4voixm4DIDaHi-ftjNahV9PgDmyOuc4KP0HRjZEFZdVFM1DoiQnN6jBnJ13MWvsPyWvyRL2XBqmdmfP3SQ6lbBhbmtb2pXiRriruM=s650?key=xyUip68G5kO-S4NX2bdwkg "Click this image to show the full-size version.")
- 5 button clicks:
- On/Off — switch mod on/off;
- Device — lock all buttons but leave mod powered on;
![[IMG]](https://lh7-rt.googleusercontent.com/docsz/AD_4nXfCvhPiHr6bVcyhuUuNZ43Q7KVeCNSmN_E21rrV6PucK6JYeQw-bjHXOPtQacSkm0upi3giomrjQ6QTEXaQy1WM3tX2k4MapGPLoDdoIrzESf9r_Aotbb-t4BAdSJsghRtWCqffGSyZnpFpLV_0=s650?key=xyUip68G5kO-S4NX2bdwkg "Click this image to show the full-size version.")
- Smart — automatic switching profiles settings:
- Off/On/Lazy — Smart Mode behavior setting;
- Range — resistance tolerance;
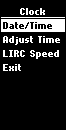
- Clock — realtime clock setup;
- Date/Time — set current date and time;
- Adjust Time — precise adjusting time by 1 second step;
- LIRC Speed — adjusting speed of internal imprecise oscillator (for LIRC RTC);
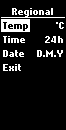
- Regional
- Temp — temperature in Celsius (° C) or in Fahrenheit (° F);
- Time — time in 24-hour or 12-hour format;
- Date — calendar date in the format DD.MM.YYYY or MM/DD/YYYY;
6.4.1. Advanced settings

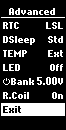


Advanced — settings section for expert users:
- USB — behavior while charging:
- NoSlp — do not enter deep sleep mode while connected to USB - may lead to self-discharging multi-cells boxes after charging stops;
- Charge — charging while connected to USB (for multi-cells devices only);
- Limit — charging current limitation (N/A — device can’t regulate charging process by hardware);
- BVO — batteries voltages offset;
- Shunt — Ohm-meter correction;
- BATT — battery discharge profile;
- RTC — Realtime Clock mode;
- DSleep — deep sleep (enter after 3 minutes of inactivity by default, delay can be set with NToolbox) mode:
- Std — standard deep sleep;
- — switch box to powered off state before going into deep sleep;
- — lock box before going into deep sleep;


- TEMP — board temperature sensor, Ext - thermistor, Int - MCU;
- LED — backlight control for eGrip II/Light, eVic AIO, Pico RDTA, Sinuous P80;
- Bank — applied voltage in Power Bank mode;
- R.Coil — (R means Real or Recent) allows to hold the last measured resistance of the atomizer on the screen, On = recent resistance while firing, Off = detected on installing atomizer, like before.
7. Solving Common Problems
7.1. BVO
Some devices have problems with an inaccurate voltage measurement on the batteries. There is a possibility to correct the device voltmeter, for proper voltage reading. It is named BVO — Battery Voltage Offset.
For example, you noticed unbalance of batteries charging in device: on one bank voltage at 100% 4.05 V another 4.10 V. However, measuring both batteries voltage by a tester or in an external charger gives same voltage: 4.05 V and 4.05 V. In this case, correction of BVO is necessary.
Note: many devices have a non-linear characteristic of the ADC, which leads to significant differences in the accuracy of measurements, which depended by voltage. Correctly choose battery voltage during calibration:
- if you charge batteries in devices, calibrate BVO with fully charged batteries (ideally - just removed from an external charger after the full charge is completed);
- if you want to use maximum of the battery capacity, calibrate the BVO with a battery voltage 3,3..3,5 volts.
7.2. Limitation of the battery charging current
The firmware have ability to adjust the battery current, as well as protect the external power source from overload. Works only on multi-battery devices and Pico 25. You can regulate current input in Advanced settings or in NToolbox.
Note: changes will take effect on next USB connection or charging starting.
7.3. Restore in the Safe Mode
Safe mode is a mode in which your device is booted in recovery mode. It is used for recovery after an unsuccessful firmware installation or for test the viability of the device. If you delve into the details, it is the boot loader. The boot loader is using to install firmware. Every device have own boot loader which we are not changing during firmware installation process.
Run Safe Mode:
- Unplug the USB cable if it was connected before;
- If your box has removable batteries:
- remove all batteries from device;
- press and hold button;
- connect device to PC;

- If your box has built-in battery:
- connect device to PC;
- press and hold button;
- click Reset button on device (refer user manual);
- Now you can release button.
If you did everything correctly, your device is in Safe Mode.
How to understand that the device is in Safe Mode?
- The screen is off;
- The device does not respond to button presses;
- The device will be detected by the PC;
- Firmware version displays as "0.00";
- If you are using NToolbox — Firmware Updater, you will see that the "Boot Mode: is set to LDROM.
7.4. Roll back
To roll back firmware, you need to download a binary firmware file from your device manufacturer's site and update device, using NToolbox.
7.5. Hardware version failure
In very rare cases, a hardware version may fail due to a failure of device update process. As a result, the device’s screen may not work or future device update can be crushed. In that case you need to start NToolbox, go to the Firmware Updater and in the «Expert» tab and set correct version of your hardware.
7.6. Extended Error Codes
Messages «Atomizer Low /x/» and «Atomizer Short /x/» have additional statuses (x is error code) that will help solve some problems yourself or facilitate diagnostics.
«Atomizer Low» error codes:
- 0 — atomizer is detected, but the resistance is below 0.05 Ohm, occurs when button is pressed in standby mode;
- L — resistance fell below 0.05 Ohm during the puff.

«Atomizer Short» error codes:
- E — estimated current for atomizer is exceeded. Can appear with incorrectly measured (overestimated) resistance when screwing atomizer, as well as with hardware problems (poor connections of the power section, insufficiently fastened coil, etc.). One of the symptoms leading to this error is the drop in the displayed coil resistance when is pressed and the increase in the standby mode;
- A — the current limit for coils with a resistance below 0.1 Ohm is exceeded, reduce the power;
- S — the resistance fell below 0.02 Ohm during the puff;
- P — coil resistance drops dramatically while puff (the measured resistance is below the fixed value by 4 times);
- X — most likely, the hardware part of the box is faulty: the resistance can not be measured correctly;
- 0 — occurs when button is pressed in the standby mode - it can signal the "bounce" of the contacts, because the atomizer resistance can be measured correctly, but the corresponding atomizer status is not set.
7.7. Force PID
A very small number of devices goes with a wrong bootloader from manufacturer. In this case, your device will be identified incorrectly in the NToolBox. Official firmware contains hardcoded code to support specified device and works fine on this kind of device. ArcticFox is a universal firmware for many devices and reads device identifier from bootloader and then decides how to work on device. If ArcticFox will be installed on device with a "bad" bootloader, device will not work properly or will not work at all. To provide an ability to use ArcticFox firmware even with a defective devices, you can overriding device identifier (PID).
If your device has “bad” bootloader, you can try to force PID:
- run NToolBox -> Firmware Updater and hold down CTRL+SHIFT+ALT while you are selecting firmware file, whereupon will appear a window with PID selection.
8. Credits
Our small but friendly NFE Team:
maelstrom2001
ReikoKitsune
Zinger
ArionWT
You always can find us on our official forum: https://nfeteam.org/forum.
8.1 Special Thanks
Special thanks is expressed ClockSelect for a wonderful project myEvic, which inspired us to create our own firmware and set of utilities to work with it.
8.2. Donations
If you like our project and you want to help in its development, you can donate us the amount of money you deem acceptable. All the details are on the official website.