Step 1: Get the Embed Code for a YouTube Video
Most videos you find on YouTube are accompanied by a bit of HTML code that can be copied and pasted into your Moodle site. You simply need to locate a line of code and select a few options that tailor it to suit your needs.
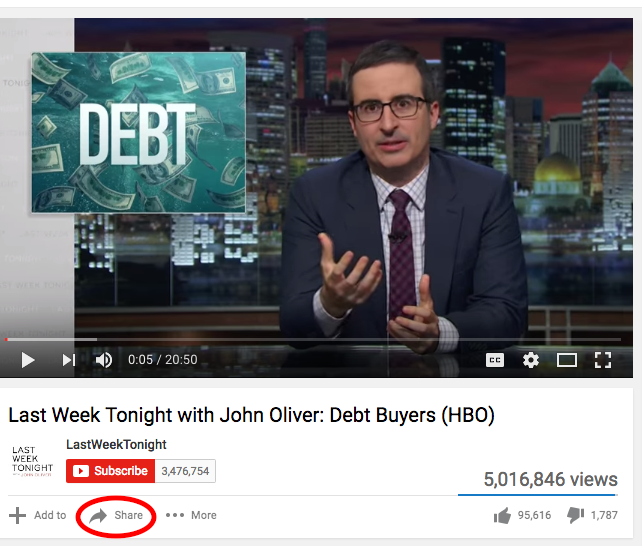
1. First, locate your video and click the “Share” button.
2. Next, click the “Embed” tab that appears below the “Share” button. This will generate the line of code that you’ll eventually paste into your Moodle page. But before you copy the code, select “Show More” (below the line of code), and choose the options that best suit your needs. These options include video size as well as controls or links that appear in/with the video. Changing any of these options automatically modifies the embed code. For minimal viewing distractions, you can deselect all. This said, you might want students to use the player controls to jump forward or backward in the video. Importantly, you can turn off the “Show Suggested Videos..” option.
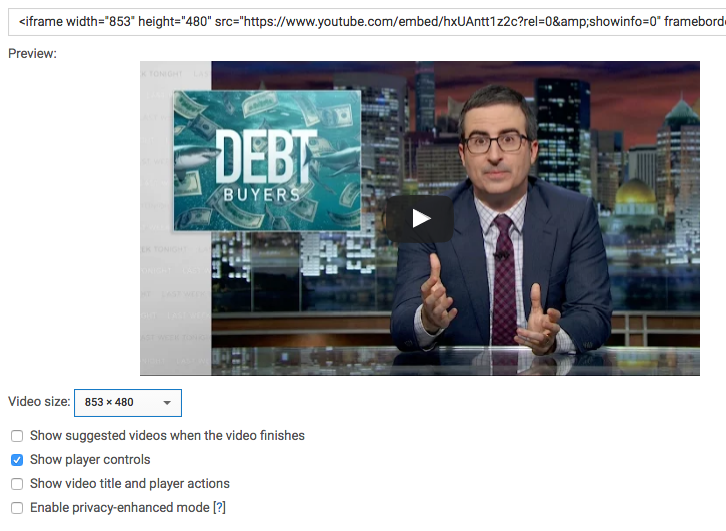
3. Highlight the line of code (beginning with “<iframe width=...”) and copy it to your clipboard.
Step 2: Paste the Embed Code into a Moodle Page
Ok, you’ve got the code. Your next step - getting the YouTube video to play in Moodle - is really no big deal. You can embed the code right on the main page of your course site, or you can create a separate page, perhaps as part of a course topic or subtopic, to display one or more relevant videos. The instructions that follow are tailored to the latter objective.
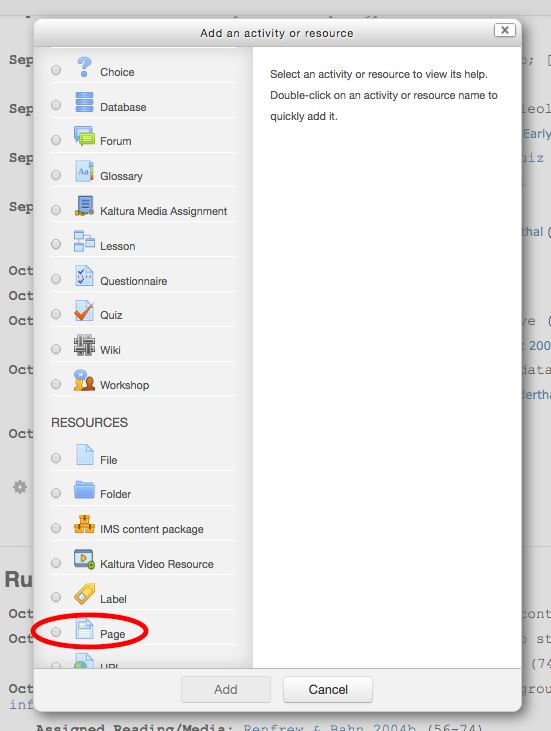
1. First, with page editing on, click on “Add an activity or resource” in the appropriate area of your Moodle site and select “Page” from the options.
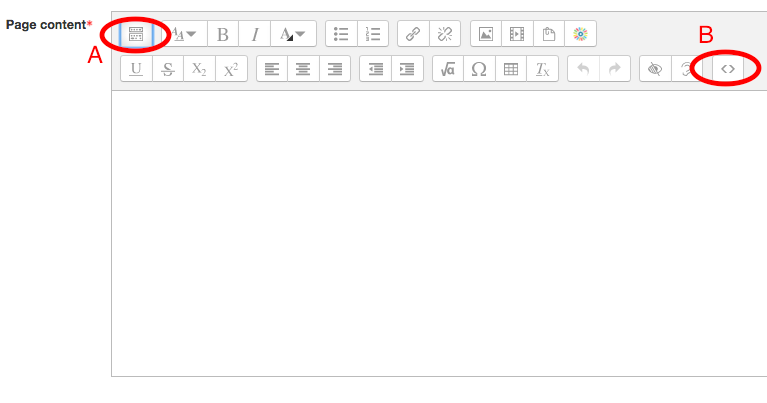
2. Give your page a name (a required field), and then scroll down to “Page Content”. In the upper left corner of the Page Content editing box, click the icon that looks like a couple of rectangles containing dots (labeled A, below). This expands the menu options so that you can see and select the “< >” button (labeled B, below) which, in turn, allows the editor to display and receive HTML code.
3. Next, paste your HTML embed code into the Page Content editor. Press the < > button again and you should see your video displayed in the editor box. Scroll down to the bottom of the page and select “Save and display” to see how the page looks for your students.

Embedding Video with Start and Stop Times
On occasion, you may want course participants to view only a segment and not the entirety of a video. At the time I tapped-out this post, YouTube wasn’t including these as selectable options for modifying embed codes, and so setting start and/or stop times requires a little manual tinkering.
First, identity the desired start and stop times on your YouTube video. Next, convert these times into seconds. (If the math is daunting, you might use a simple time code converter.)
As an example, let’s use the <iframe> code for the same John Oliver video. Keep in mind that this code reflects some of my earlier viewing preferences, such as the 853 x 480 size and only showing player controls:
<iframe width="853" height="480" src="https://www.youtube.com/embed/hxUAntt1z2c?rel=0&showinfo=0" frameborder="0" allowfullscreen></iframe>
Suppose we want students to watch 40 seconds of the video, starting at 05:10 and ending at 05:50. In seconds, this translates to a 310 start time and a 350 end time. We’re going to insert our specific start and end time commands after the “?rel=0&” but before the “showinfo=0" frameborder="0" allowfullscreen>” part of that this code. It’s a surgical insertion- give yourself some time to find the right place.
This part of the code tells YouTube where to start the video, as measured in seconds:
...1z2c?rel=0&start=310;end=350&”
And this part tells YouTube where to end the video, also as measured in seconds.
...1z2c?rel=0&start=310&end=350;”
The resulting code looks like this, with the new time code bolded:
<iframe width="853" height="480" src="https://www.youtube.com/embed/hxUAntt1z2c?rel=0&start=310;end=350;showinfo=0" frameborder="0" allowfullscreen></iframe>