Last Updated: 02/12/2025
Mabinogi Best in Slot Guide
Maintained by Cryozen7
See something that needs correcting, updating, or you have a useful tidbit/note to include? Let me know, @Cryozen or on the Official Mabinogi Discord @Newchar500/Cryozen.
This guide will go over the Best in Slot (BiS) Enchants, Weapons, and equipment/reforge recommendations for different types of builds. Additionally, this guide will cover BiS/Recommended Title information, Techniques, and other “equipment” that provide passive buffs to the player. Feel free to share this guide or offer suggestions to improve it.
If you’re looking for a different guide, I’ll direct you to my Mabinogi Guide to Guides.
The layout and design of this document was heavily inspired by the Dragonfable Best in Slot Gear Guide.
Color Legend:
Legendary Rarity - Cash Shop exclusives unlikely to return, Crossover Event rares, or abysmal material drop rates such as the Soluna Blade and Destruction Robe
Gacha Exclusive - Can only be obtained from gachapon
Event Rare - Dropped from an event that has not been established to be recurring or is not a recurring event reward
Recurring Event Drop - Dropped from an event that has been established as a recurring event or is an event reward that we generally see across multiple events
In Game Drop - Can be obtained as a drop or reward from in game systems
Unreleased - Items that have not yet been released on the NA server but are likely to be released soon.
Important Note - Higher Rarity does not always mean better. Rarity in this situation is in relation to availability rather than Equipment Tier. Refer to Weapon Archetype Tiering (Progression) for Equipment Tiers.
Recent Changelog
See Changelog for previous changes
Date | Comment |
01/17/2025 | -Added Royal Society Box item sets to various lists. -Expanded the General/Situational and Production Gear and Reforge sections to include Set Effect information -Minor Update 01/22/2025 -Fixed some typos with Deck Synergy (Control should be debuff duration) and an incorrectly listed synergy for a sample. I do later want to reformat this section to instead use screenshots and links that use Latharra’s Share tool as a template instead of what it currently is. -Added Master of Battle Astrology to title section as a sidegrade to Meteor Strike Master -Minor Update 01/23/2025 -Added Seraphic Cantabile Wig to Saint (Healer) for the Mana Reduction Effect. There are multiple ways to one piece a Healing Set, so you could free up the head slot for utility and QoL effects. -Minor Update 01/25/2025 -Added Rath Royal Castle Residents Doll Bag to Bag lists. This is the only bag that currently provides music buff effect at time of writing. -Extra Note: There are other bags that sidegrade currently listed bags in the gacha that released the Rath Castle Resident bag, but I haven’t added them to the list because I want to rework the formatting of the doll bag list. As is it’s just adding 3 new bags every few months that basically do the same thing. -Minor Update 01/28/2025 -Added the Cowena and Eochaid Homestead Figures to Homestead Figure lists (Max/Crit Damage and Music Buff Effect respectively) -Minor Update 02/10/2025 -Added a link to ndrr’s Homestead Stat Enhancers Google Sheet -Minor Update 02/12/2025 -Added link to nddr’s 2nd title google sheet -Fixed Ardent and Hatred’s positions being flipped on Magic Attack body enchants |
12/12/2024 | -Added Astrologer Equipment and Reforge recommendations -Added Celestial Conjunction, Hand of Destiny overviews, and Sample setup sections for these skills. -Added a section related to pages removed from the guide (either due to outdated, irrelevant, or incomplete/dissatisfied) -Minor Update 12/13/2024 -Added Weapon Enchants for Scythes. Also added Orbs to the Offhand Magic Attack section. There is currently a lack of Magic Attack enchants that can go on the Offhand slot, so options for the Orb are fairly limited -Minor Update 12/20/2024 -Fixed Astrologer Echostone rolls using unofficial translated skill names -Minor Update 12/28/2024 -Added a link to Latharra’s Celestial Conjunction Share Tool for the sample section. If you want to share your Conjunctions and Hand of Fate setups, you definitely should use this tool. -Minor Update 01/05/2025 -Added Katell’s Small Rock to Max Damage totem section |
Table of Contents
Maximum Damage Enchant Notes 13
Fragmentation and Alchemy Success Rate Enchants 19
Two Handed Weapons and High Piercing Lances 26
Weapon Exclusive Two-Handed Enchant Section 26
Close Combat Weapon Exclusive Section 26
Chain Blade Exclusive Section 26
Lances requiring Piercing Enchants 27
Shields/Physical Damage Off Hand 27
Spellbook/Astrologer Orb/Magic Attack Off Hand 29
Gear Suggestions and Reforges 31
General/Situational Reforges and Equipment 32
General/Situational Reforges and Equipment - Notes 33
Close Combat/Elemental Knight - Human - Final Hit 34
Close Combat/Elemental Knight - Human - Final Hit Notes 36
Final Hit Notes - Soluna Blade vs Nightbringer Warlord 36
Close Combat/Elemental Knight - Two-Handed Weapons 37
Close Combat/Elemental Knight - Dual Wielding 39
Close Combat/Elemental Knight - Sword and Shield 41
Close Combat - Giant - Wind Guard 43
Close Combat - Giant - Taunt 46
Close Combat - Giant - Taunt Notes 47
“Close Combat” - Giant - Throwing Attack 48
“Close Combat” - Giant - Throwing Attack Notes 49
Archery - Alchemic Sharpshooter 53
Archery - Alchemic Sharpshooter Notes 55
Magic/Dark Diviner/Harmonic Saint - Staff Generalist 64
Magic/Dark Diviner - Fire Magic 66
Magic/Dark Diviner/Harmonic Saint - Ice Magic 69
Magic/Dark Diviner - Lightning Magic 72
Magic/Dark Diviner - Fusion Bolt 76
Magic - Healing/Harmonic Saint 82
Magic - Harmonic Saint Notes 83
Tank - Harmonic Saint Notes 86
Alchemy - Fire Alchemy Notes 89
Alchemy - Water Alchemy Notes 91
Puppetry - Single Target/Boss Stuns 103
Chain Slash - Combat Notes 114
Sample Conjunction and Destiny Configurations 130
Pure DPS by Brahfizzle and their friend 133
Protection Notes - Armor Set Effects 140
Ceann Bliana Bulwark's Armor [A] 142
Ultimate Geas Edge Set [A] 144
Saint Guardian’s Full Armor [A] 148
Order of the Black Moon Earring [A] 160
Unfinished Reverie’s Diadem Halo [A] 160
Weapon Archetype Tiering (Progression) 165
Critical Hit Damage Figures 191
Redoubled Offensive (Reaper) 203
Phantasmal Sight (PS/Sight) 205
Dungeon Re:fine Update - Released 230
New Perseus Tier - Released 233
Nightbringer Assault Changes 234
Nightbringer Warlord Changes 235
Perseus Cleave Warrior Axe 237
Perseus Rending Chainblade 239
Perseus Mechanized Crossbow 241
Perseus Nightstorm Dual Guns 242
Perseus Forbidden Grimoire 243
Future Content Information 246
Enchant Preface Notes
This will not rank every enchant and will instead pick the 5 best enchants for a slot. Runner up enchants will be included in a different section. Weapon Enchants will also be included in a different section. Please make sure you Check the wiki link for additional stat info, enchant restrictions, and drop locations. Drop tables on wiki may not be fully updated.
Enchants with unreasonable restrictions (e.g must be below a 7k total) will be excluded. The rankings are based on the potential maximum. Tiebreakers are based on other factors such as music buff effect, availability, and roll.
Accessory Note: Some accessory enchants are impossible to make normally (e.g Fierce and Allegro) and are only obtainable from gachapons. While the enchant itself is obtainable in game, they have been marked as gachapon only in the Accessory section. Additionally, due to the general lack of enchants that can go on accessories, I will include the 6th best enchant for accessories on the primary Accessory list in the Max Damage enchant page.
Weapon Enchant Note: Two handed swords, Two handed Axes, Two handed Hammers, Lances, Knuckles, Dual Guns, Shurikens, and Chain Blades are classified as two handed weapons for enchant purposes. Control Bars, Bows, and Crossbows are classified as one handed weapons and cannot accept Two handed weapon enchants.
Maximum Damage Enchants
Please make sure you Check the wiki link for additional stat info, enchant restrictions, and drop locations. Drop tables on wiki may not be fully updated. Unless otherwise stated, numbers in this section are listed in terms of Max Damage. Rankings are based on potential Max Damage, but may sometimes factor in other variables.
*See Maximum Damage Enchant Notes for detailed information
Head - Prefix Head - Suffix
1: Longing (+20-25, 1: Abominable Rabbit (+24-28,
Marionette Max Damage +15-20) +Marionette Max +45)
2: Experienced (+14-17) 2: Resistance (+18)
3: Brainstorm (+8-17) 3: Reunion (+9-16, +40 Puppet Max)
4: Ingenious (+6-16) 4: Chorus (+13, +2-3 Music Buff)*
5: Dreamy (+7-15, +2-5 Magic Attack) 5: Pioneer (+5-15)
Body - Prefix Body - Suffix
1: Vanished (+50-55, Marionette Max Damage +10) 1: Trajectory (+50-55, Marionette Max
(Clothing/Light Armor) Damage +10) (Clothing/Light Armor)
2: Sunken (+35-40) (Heavy Armor) 2: Trail (+35-40)
(Heavy Armor)
3: Timid (+18-25) 3: Paradise (+18-25)*
4: Honest (+14-23) 4: Whisper (+10-22, +1-3 Music Buff)*
5: Pure (+12-20, +3-8 Music Buff)* 5: Heroic (+15-20)
Hand - Prefix Hand - Suffix
1: Fleeing (+22-26, Marionette Max Damage +15 -20) 1: Folach Catt (+22-26, Marionette Max
2: Brainstorm (+8-17) 2: Backbreaking (+8-15)
3: Resolution (+8-17) 3: the Maestro (+10-14, +1-2 Music Buff)*
4: Steel Needle (+12-16) 4: Sparkling (+10-13, +3-5 Attack Speed)
5: Technical (+8-15, +1-4 Music Buff)* 5: Symbolic (+10)
Feet - Prefix Feet - Suffix
1: Fleeing (+22-26, Marionette Max Damage +15 -20) 1: Folach Catt (+22-26, Marionette Max
2: Brainstorm (+8-17) 2: Proficient (+13-15)
3: Resolution (+8-17) 3: the Maestro (+10-14, +1-2 Music Buff)*
4: Technical (+8-15, +1-4 Music Buff)* 4: Nocturne (+10-14, +2-5 Alch Damage)
5: Midnight (+9-16) 5: Radiant (+9-12, +3-5 Attack Speed)
Accessory - Prefix Accessory- Suffix
1: Imprisoning (+20-24) 1: Haunted (+35-48)
2: Creepy (+15-20) 2: Fierce (+24)
3: Brainstorm (+8-17) 3: Birch Tree (+10-12)
4: Steel Needle (+12-16) 4: Urban Legend (+9-12)
5: Solar Eclipse (+11-16) 5: Avenger (+12)
6: Everlasting (+5-15) 6: Enigmatic (+6-8)
Wing - Prefix Wing - Suffix
1: Stork's (+2-8) 1: Selene (+3-5, +3 Music Buff Duration)
2: Aello (+5-7, +5 Music Buff)* 2: Ocypete (+3-5)
3: Icarus (+5, +2-5 Music Buff)* 3: Crest (+1-2)
4: 4:
5: 5:
Maximum Damage Runner Ups
Please make sure you Check the wiki link for additional stat info, enchant restrictions, and drop locations. Drop tables on wiki may not be fully updated.
Enchants with restrictions (e.g must be below a 7k total) will be excluded. The rankings are based on the potential maximum, but may sometimes factor in other variables. Tiebreakers are based on other factors such as music buff effect, availability, and roll.
Head - Prefix Head - Suffix
6: Amnesia (+10-13) 6: Tournai (+10-15) - Human/Giant Only
7: Fantastic (+8-15) 7: Researcher (+5-12)
8: Maddening/Edgy (+12) 8: Dexterity (+10)
9: Oblivion (+10) 9: Inspired (+9)
10: Allegory (+10) 10: Gladiator (+3-7)
11: Nostalgic (+5-9) 11: Ardent (+3-6, +2-4 MA)
Body - Prefix Body - Suffix
6: Superb (+10-20) 6: Saving (+12-19)
7: Sonata (+15-18, +4-6 Music Buff)* 7: Hatred (+16, +16 Marionette Max)
8: Long-Lasting (+18) 8: Daunting (+7-15)
9: Brainstorm (+8-17) 9: Champion (+10-15)
10: Stabbing (+15-20) - Human/Giant Only 10: Pitch Black (+5-15)
11: Encore (+10-15) 11: Avenger (+12)
12: Seething (+13) 12: Fortification (+5, Dampen Shock boost)
Hand - Prefix Hand - Suffix
6: Burlesque (+10-15) 6: Sandglass (+4-8, + 1 Time Shift Charge)
7: Solo (+10, +2 Music Buff Effect) 7: Teaching (+5-11)
8: Prominent (+5-15) 8: Camo (+3-9)
9: Amnesia (+10-13) 9: Monologue (+8, +10-15 Marionette
10: Versatile (+3-13) 10: Release (+5-8)
11: Maddening/Edgy (+12) 11: Ardent (+3-6, +2-4 MA)
Feet - Prefix Feet - Suffix
6: Burlesque (+10-15) 6: Symbolic (+10)
7: Solo (+10, +2 Music Buff Effect) 7: Aside (+8-10)
8: Fantastic (+8-15) 8: Butterfly (+7-12)*
9: Amnesia (+10-13) 9: Camo (+3-9)
10: Maddening/Edgy (+12) 10: Viscount (+8)
11: Oblivion (+10) 11: Release (+5-8)
Accessory - Prefix Accessory- Suffix
7: Fantastic (+8-15) 7: Star Cluster (+6-7, +10-15 Alchemy
8: Hideous (+7-14) 8: Successor (+6, +4 MA)
9: Amnesia (+10-13) 9: Ardent (+3-6, +2-4 MA)
10: Awakened (+12) 10: Golden (+5, +3 MA)
11: Maddening/Edgy (+12) 11: Gamer (+3-6)*
12: Oblivion (+10) 12: Swarming (+4)
Wing - Prefix Wing - Suffix
6: 6:
7: 7:
8: 8:
Maximum Damage Enchant Notes
Many enchants on Accessories marked as Gacha drops cannot be normally enchanted on the Accessory Slot. So despite being farmable in game, they are still treated as Gacha drops.
Enchant exception note: I placed Sandglass above Camo despite having 1 less potential max because Sandglass significantly affects the Technique Time Shift (+1 reset). Depending on the build you may pick Sandglass over several other enchants.
Music Buff Effect Note: We can consider Music buff effect to function as additional damage assuming you are soloing/the one providing buffs. If you are not gear swapping to buff, consider using Music Buff Effect enchants over pure max damage as it will provide a greater boost to maximum damage. These effects are amplified by normal/excellent/inspiring reforges/echostones. Refer to this comment by Momma Sophie for details.
Puppeteer Note: You might note a lack of a puppeteer section in this guide at present. This is largely because Puppeteers do benefit from Max Damage (specifically 70% of the player’s damage range). Additionally, Marionette Max Damage isn’t affected by Battlefield Overture. Max Damage Enchants combined with a high Battlefield Overture and Weapon Power Potion can provide more Puppetry Damage than a Marionette Max Damage enchant. We can calculate the damage conversion for Max Damage into Marionette Max Damage using the formula: 0.7 x (1+ Battlefield % * 1.2) * 1.2
Where 0.7 = Puppetry Max Damage Conversion
1.2 = Bone Chip/Weapon Power Potion
Do note that due to how the Max Damage formula works, weapon power potions are counted twice and affect the boost from Battlefield overture. Fateweaver works in a similar way when stacking with Battlefield.
So with a 50% BFO, our formula will be .07 x (1 + .5 * 1.2) * 1.2 = 1.31. Essentially at a 50% Battlefield Overture with Weapon Power potions, 1 Max Damage is equal to 1.31 Marionette Max Damage.
Even with a more conservative 30% BFO (which basically means you only have a Gloomy Sunday), 1 Max Damage would equal approximately 1.14 Marionette Max Damage.
Paradise Enchant Note: Paradise is in an awkward spot because it reduces your balance by 20. While this normally won’t be a big deal, there are certain low balance weapons which may drop below 80% balance when used alongside Paradise. This may force you to use upgrades, enchants or reforges to compensate for the lowered balance in order to reach the 80% balance cap. These weapons include the Divine Crossbow, Lances, and the Massive Despair Hammer. - Credit to Nerevarius on reddit for the information.
Gamer Enchant Note: While technically the 8th best option on accessories, it does increase repair costs by 100%. For accessories this can be significant as many 100% repairs cost 90k a point. 180k a point is pretty steep for an accessory repair considering it’s a fairly marginal boost over some of the lower enchants on the list.
Sparkling and Radiant note: Wow these are super strong enchants. 3-5 Attack Speed and decent Max Damage means you can save equipment slots.
Tournai Note: Tournai is useless on elves as elves are incapable of holding lances with their weak noodle arms.
Stabbing Note: Stabbing is useless on elves since elves are incapable of holding lances with their weak noodle arms, and it’s heavy armor only. For elves, look elsewhere for an enchant to put on your body. For Humans and Giant, only use this on specialized heavy armors that will never require Dex.
Magic Attack Enchants
Please make sure you Check the wiki link for additional stat info, enchant restrictions, and drop locations. Drop tables on wiki may not be fully updated. Unless otherwise stated, numbers in this section are listed in terms of Magic Attack.
*See Magic Attack Enchant Notes for details
Head - Prefix Head - Suffix
1: Thunderbird (+6-14, 1: Gwylllion (+12-15)
2: Desirous (+10-13) 2: Genius (+12)
3: Coma (+3-7) 3: Ardent (+2-4, +3-6 Max)*
4: Dreamy (+2-5, +7-15 Max) 4: Embracing (+3, +3 Max)*
5: Apathetic (+3-5) 5: Treasure (+2-3)
6: Soaked (+10)* 6:
7: Maddening (+5, +12 Max) 7:
Body - Prefix Body - Suffix
1: Cucullati (+7-18, 1: Trace (+15-20) (Clothing)
2: Covered (+15-20, +15 Max) (Clothing) 2: Sorcerer (+3-7, +4-8 Max)
3: Flying (+4-8) 3: Hatred (+5 MA, +16 Max)
4: Maddening (+5, +12 Max) 4: Ardent (+2-4, +3-6 Max)
5: Welcome (+3-5) 5: Embracing (+3, +3 Max)
Hand - Prefix Hand - Suffix
1: Onlooking (+10-13) 1: Snuggly Sneachta (+8-10)
2: Support (+4-7) 2: Barbegazi (+3-7,
3: Maddening (+5, +12 Max) 3: Ardent (+2-4, +3-6 Max)
4: Mana Hammer (+3-5) 4: Embracing (+3, +3 Max)
5: 5: Homestead (+2)
Feet - Prefix Feet - Suffix
1: Onlooking (+10-13) 1: Ifrit (+3-7,
2: Coma (+3-7) 2: Snuggly Sneachta (+8-10)
3: Maddening (+5, +12 Max) 3: Ardent (+2-4, +3-6 Max)
4: 4: Witch (+2-4)
5: 5: Embracing (+3, +3 Max)
6: 6: White Tiger (+2)
Accessory - Prefix Accessory- Suffix
1: Eerie (+18-28) 1: Spooky (+12-22)
2: Immovable (+14-15) 2: Tide (+14-17)
3: Chilling (+5-12) 3: Nebula (+8-10)
4: Lunar Eclipse (+6-9) 4: Terror (+9)
5: Awakened (+6) 5: Fantasy (+6)
6: Maddening (+5, +12 Max) 6: Successor (+4, +6 Max)
7: Dynamic (+2-4) 7: Golden (+3, +5 Max)
Wing - Prefix Wing - Suffix
1: Diana (+3-5) 1: Celaeno (+3-6)
2: 2:
Magic Attack Enchant Notes
Magic Enchant note: This list only includes Magic Attack enchants. There are cases where you may prefer to use max damage enchants with magic as some spells, namely bolts, do benefit from Max Damage enchants, Battlefield Overture and Weapon Power Potions. Check the magic damage formula for details.
Soaked Enchant Note: While Soaked does provide the most Magic Attack for the head slot, it requires you to be under a rain casting cloud. This can be very limiting as you will need to constantly maintain your cloud and insure you are under it.
Embracing Enchant Note: Embracing is called on the wiki and Master Plan Splash page Inclusive. In game, however, it is called Embracing.
Music Buff Effect
Please make sure you Check the wiki link for additional stat info, enchant restrictions, and drop locations. Drop tables on wiki may not be fully updated. Unless otherwise stated, numbers in this section are listed in terms of Music Buff Effect. You should use the Category: Music Skills page on the wiki for the widget to help calculate how strong your buffs will be.
Head - Prefix Head - Suffix
1: 1: Chorus (+2-3)
2: 2:
3: 3:
4: 4:
5: 5:
Body - Prefix Body - Suffix
1: Pure (+3-8) 1: Whisper (+1-3)
2: Sonata (+4-6) 2:
3: Encore (+3) 3:
4: 4:
5: 5:
Hand - Prefix Hand - Suffix
1: Technical (+1-4) 1: the Maestro (+1-2)
2: Solo (+2) 2:
3: 3:
4: 4:
5: 5:
Feet - Prefix Feet - Suffix
1: Technical (+1-4) 1: the Maestro (+1-2)
2: Solo (+2) 2:
3: 3:
4: 4:
5: 5:
Accessory - Prefix Accessory- Suffix
1: Allegro (+3) 1: Cadenza (+1)
2: Dynamic (+1-2) 2:
3: Andante (+1) 3:
4: 4:
5: 5:
Wing - Prefix Wing - Suffix
1: Alleo (+5) 1:
2: Icarus (+2-5) 2:
3: 3:
4: 4:
5: 5:
Instrument - Prefix Instrument - Suffix
1: Ensemble (+5) 1: Chord (+1)
2: Allegro (+3) 2:
3: Moderato (+2) 3:
4: Andante (+1) 4:
5: 5:
Fire Alchemy Enchants
Please make sure you Check the wiki link for additional stat info, enchant restrictions, and drop locations. Drop tables on wiki may not be fully updated. Unless otherwise stated, numbers in this section are listed in terms of Fire Alchemy Damage. Due to the lack of Fire Damage enchants currently, you may want to fill slots or substitute enchants with Max Damage enchants. Treat Fire Damage Enchants as x5 their listed value when making comparisons to Max Damage. I believe Battlefield does affect Alchemy so you may also wish to factor that into Max Damage, though you may use Vivace instead.
Head - Prefix Head - Suffix
1: Wishing (Elemental Alchemy Damage +25-30) 1: Gwyllgi (Alchemy Damage +10-15)
2: Synastry (+10-20, +10-20 Water) 2: Flame (+6)
3: 3: Frozen (+3-5)
4: 4:
5: 5:
Body - Prefix Body - Suffix
1: Covered (+15-20, +15 Max) (Clothing) 1: Trace (+10-15) (Clothing)
2: Seething (+5-7, +10-15 Water, +13 Max Damage) 2: Steel (+6-10 Alchemy Damage)
3: Explosive (+6) 3: Hatred (+7 Fire/Water/Wind/Earth Damage)
4: 4:
5: 5:
Hand - Prefix Hand - Suffix
1: Rotating (Alchemy Damage +25-30) 1: Frostwork (Alchemy Damage +10-12,
1: Various (+10-20, +10-20 Water) 1: Mimic (+4*, +4 Water)
2: Spark (+5) 2:
3: 3:
4: 4:
Feet - Prefix Feet - Suffix
1: Rotating (Alchemy Damage +25-30) 1: Frostwork (Alchemy Damage +10-12,
2: Various (+10-20, +10-20 Water) 2: Nocturne (+2-5 Alch Damage, +10-14 Max)
3: Hot Foot (+8) 3: Cowboy (+4, +6 Water)
4: 4: White Tiger (+4)*
5: 5:
Accessory - Prefix Accessory- Suffix
1: Frostbitten (Alchemy Damage +12-15) 1: Mirror (Alchemy Damage +17-20)
2: Galactic (+4-9 Alchemy Damage) 2: Star Cluster (+10-15 Alchemy Damage,
3: Heated (+6) 3:
4: 4:
5: 5:
Wing - Prefix Wing - Suffix
1: 1:
2: 2:
3: 3:
4: 4:
5: 5:
*See Alchemy Enchant Notes for Details
Water Alchemy Enchants
Please make sure you Check the wiki link for additional stat info, enchant restrictions, and drop locations. Drop tables on wiki may not be fully updated. Unless otherwise stated, numbers in this section are listed in terms of Water Alchemy Damage. Due to the lack of Water Damage enchants currently, you may want to fill slots or substitute enchants with Max Damage enchants. Treat Water Damage Enchants as x5 their listed value when making comparisons to Max Damage. I believe Battlefield does affect Alchemy so you may also wish to factor that into Max Damage, though you may use Vivace instead.
Head - Prefix Head - Suffix
1: Wishing (Alchemy Damage +25-30) 1: Gwyllgi (Alchemy Damage +10-15)
2: Synastry (+10-20, +10-20 Fire) 2: Frozen (+7-10)
3: 8th Anniversary Water Drop (+8) 3: Ripple (+7)
4: 4:
5: 5:
Body - Prefix Body - Suffix
1: Covered (+15-20, +15 Max) (Clothing) 1: Trace (+10-15) (Clothing)
2: Seething (+10-15, +5-7 Fire, +13 Max Damage) 2: Steel (+6-10 Alchemy Damage)
3: 8th Anniversary Water Drop (+8) 3: Hatred (+7 Fire/Water/Wind/Earth Damage)
4: 4: Ripple (+7)
5: 5:
Hand - Prefix Hand - Suffix
1: Rotating (Elemental Alchemy Damage +25-30) 1: Frostwork (Elemental Alchemy Damage
Various (+10-20, +10-20 Water) 1: Ripple (+7)
2: 8th Anniversary Water Drop (+8) 2:
3: 3:
4: 4:
5: 5:
Feet - Prefix Feet - Suffix
1: Rotating (Elemental Alchemy Damage +25-30) 1: Frostwork (Elemental Alchemy Damage
2: Various (+10-20, +10-20 Water) 2: Ripple (+7)
3: 8th Anniversary Water Drop (+8) 3: Cowboy (+6, +4 Fire)
4: 4: Nocturne (+2-5 Alch Damage, +10-14 Max)
5: 5:
Accessory - Prefix Accessory- Suffix
1: Frostbitten (Alchemy Damage +12-15) 1: Mirror (Alchemy Damage +17-20)
2: Transparent (+9) 2: Star Cluster (+10-15 Alchemy Damage)
3: Galactic (+4-9 Alchemy Damage) 3: Tidal (+10)
4: 8th Anniversary Water Drop (+8) 4: Ripple (+7)
5: 5:
Wing - Prefix Wing - Suffix
1: 1:
2: 2:
3: 3:
4: 4:
5: 5:
*See Alchemy Enchant Notes for Details
Fragmentation and Alchemy Success Rate Enchants
Please make sure you Check the wiki link for additional stat info, enchant restrictions, and drop locations. Drop tables on wiki may not be fully updated. Enchants here will be listed as Fragmentation (Frag Success) or Alchemy Success Rate (Alch Success) Enchants. Due to the relatively low (not 99%) success rate of Fragmentation for Divine Mineral Fragments and Divine Magic Powder, you will want as many success rate boosts as possible.
Head - Prefix Head - Suffix
1: 1: Created (+2-4% Alch Success)
2: 2: Fragmentation (+3% Frag Success)
3: 3:
4: 4:
5: 5:
Body - Prefix Body - Suffix
1: Key (+2-4% Alch Success) 1: Scholar (+2% Frag Success)
2: 2:
3: 3:
4: 4:
5: 5:
Hand - Prefix Hand - Suffix
1: Tripod (+2-4% Alch Success) 1: Fragment (+1% Frag Success)
2: 2:
3: 3:
4: 4:
5: 5:
Feet - Prefix Feet - Suffix
1: Tripod (+2-4% Alch Success) 1: Fragment (+1% Frag Success)*
2: Division (+2% Frag Success) 2:
3: 3:
4: 4:
5: 5:
Accessory - Prefix Accessory- Suffix
1: 1:
2: 2:
3: 3:
4: 4:
5: 5:
Wing - Prefix Wing - Suffix
1: 1:
2: 2:
3: 3:
4: 4:
5: 5:
Alchemy Enchant Notes
Royal Alchemist Enchants: I’m excluding these enchants because they only go on the Royal Alchemist Robe and Shoes. While they are strong enchants, you miss out on the Cressida set which is more important. You also would need to maintain your Royal Alchemist Status.
Fire Alchemy Enchants Mimic and White Tiger: These enchants require you to have a pet summoned to activate the Fire Alchemy portion of the Enchant.
Fragment cannot normally be enchanted onto shoes, but you can get is as a pre-enchanted drop from Offering (Adv/Hard), Sulfur Spider (Basic-Hard), and The Other Alchemists (Basic-Hard).
*Update Galactic with wiki link when available
Defensive Enchants
Enchants for boosting your Defensive Stats, namely Protection. If you want to stack defensive stats, chances are you’ll want to boost your Protection with enchants. Not a massive number of them though, and some have awful activation conditions. Unless otherwise stated, the stats listed are in terms of Protection.
Head - Prefix Head - Suffix
1: Burgundy Bear (+1) 1:
2: 2:
3: 3:
4: 4:
5: 5:
Body - Prefix Body - Suffix
1: Sunken (+4-5, +34-40 Max) (Heavy Armor) 1: Saving (+1-4. +12-19, +50 HP)
2: Vanished (+3, +50-55 Max) (Clothing/Light Armor) 2: Hatred (+2, +5 MProt)
3: Honest (+2-4, +14-23 Max, +50 HP) 3: Fortification (+70 Defense, +30 Magic
4: Refined (+3) 4: Steel (+2, +6-10 Alchemy Damage)
5: Reactive (+1-3) 5: Imp (+2)/Otter (+2) - Heavy Armor
6: Flying (+2, +4-8 MA) 6: Lively (+2) - Light Armor
7: Burgundy Bear (+1) 7:
8: 8:
Hand - Prefix Hand - Suffix
1: Burgundy Bear (+1) 1:
2: 2:
3: 3:
4: 4:
5: 5:
Feet - Prefix Feet - Suffix
1: Burgundy Bear (+1) 1:
2: 2:
3: 3:
4: 4:
5: 5:
Off Hand- Prefix Off Hand - Suffix
1: Burgundy Bear (+1) 1: Colonel’s (+2)
2: 2: Guardian (+1, Attack Speed +1-3)
3: 3: General (+1)
4: 4:
5: 5:
Accessory - Prefix Accessory- Suffix
1: Burgundy Bear (+1) 1: Taurus (+3)
2: 2: Clover (+2)
3: 3: Cadenza (+1)
4: 4:
5: 5:
Wing - Prefix Wing - Suffix
1: 1:
2: 2:
3: 3:
4: 4:
5: 5:
Attack Speed Enchants
Enchanting for attack speed costs a lot of enchant slots and you generally should try to make an attack speed set without sacrificing damage enchants. But if you think you can afford to sacrifice one enchant to complete an attack speed set, you may consider it for the short term. Unless otherwise stated enchants here are listed in terms of Attack Speed set bonus points. You must have 10 points in a set bonus in order to activate it. The Attack Speed set bonus only affects normal attacks.
Head - Prefix Head - Suffix
1: 1: Hummingbird (+2-3)
2: 2: Baron (+1-3)
3: 3:
4: 4:
5: 5:
Body - Prefix Body - Suffix
1: 1:
2: 2:
3: 3:
4: 4:
5: 5:
Hand - Prefix Hand - Suffix
1: Marquis (+2-4, +10 Max Damage) 1: Sparkling (+3-5, +10-13 Max Damage)
2: 2: Owl (+1-3)
3: 3:
4: 4:
5: 5:
Feet - Prefix Feet - Suffix
1: 1: Radiant (+3-5,+9-12 Max)
2: 2: Hawk (+1-3, +5 Max Damage)
3: 3: Viscount (+1-2)
4: 4:
5: 5:
Accessory - Prefix Accessory- Suffix
1: 1:
2: 2:
3: 3:
4: 4:
5: 5:
Wing - Prefix Wing - Suffix
1: 1:
2: 2:
3: 3:
4: 4:
5: 5:
Production Enchants
Production Enchants will encompass two categories: Quality and Luck. Quality because duh, but Luck boosts the rate of Lucky Gathers without Phantasmal Sight. While there aren’t a lot of situations where you will need that, it is nonetheless information that may be useful.
Head - Prefix Head - Suffix
BiS Quality: Steady (+2 Quality) 1: Target (+25 Luck)
BiS Luck: Phoenix Blessing (+20 Luck, 2: Thief (+10 Luck)
+5-25 Luck while using The Phoenix's Witness)
2: Lucky (+15 Luck) 3: Bandit (+25 Luck)* - Impossible to use
3: Advantage (+14 Luck) 4:
4: 5:
Body - Prefix Body - Suffix
BiS Quality: Designer/Rocket Arrow BiS Quality: Daunting
(+3 Quality, +15 Luck) (+2 Quality, +15-25 Luck)
BiS Luck: Diligent (+25 Luck) - Clothing Only
2: Weekend (+60 Luck) - Saturday Only 2: Monster (+20 Luck) - Light Armor Only
3: Ancient (+20 Luck) - Leather Only 3: Dark Horse (+15 Luck)
4: 4: Thief (+10 Luck)
5: 5:
Hand - Prefix Hand - Suffix
1: Fortunate (+25-40 Luck) 1: Thief (+10 Luck)
2: Solo (+25 Luck) 2:
3: 3:
4: 4:
5: 5:
Feet - Prefix Feet - Suffix
1: Gathering (+20-35 Luck) 1: Thief (+10 Luck)
2: Technical (+30 Luck) 2:
3: Solo (+25 Luck) 3:
4: 4:
5: 5:
Accessory - Prefix Accessory- Suffix
1: Surprising (+25 Luck) 1: Enigmatic (+20 Luck)
2: Fixed (+15 Luck) 2: Thief (+10 Luck)
3: 3:
4: 4:
5: 5:
Wing - Prefix Wing - Suffix
1: Osprey’s (+10 Luck) 1: Ocypete (+10 Luck)
2: 2: Tail Feather (+6 Luck)
3: 3: Crest (+5 Luck)
4: 4:
5: 5:
*Bandit provides +25 luck, but only if you have r1 Evasion. Because Evasion is capped, this enchant cannot be used for luck.
Weapon Enchants
This list will be slightly longer and will try to include easy to acquire options. I’m excluding some enchants with easier to obtain alternatives. If there is a weapon/talent weapon exclusive enchant (e.g Speedy and Solitude) they will be mentioned before the rest of the list.
One Handed Melee
Listed in Max unless otherwise stated
Prefix Suffix
BiS: Spiraling (+15-39) BiS: Heavy Rain (+60-70)
Perseus Bar: Control (+23-38 Marionette Max
Pilgrim Sword: Dusk (+12-16) Divine Bastard Sword: Rift (+25-45)
1: Spiraling (+15-39) 1: Heavy Rain (+60-70)
2: 56th Floor (+20-35) 2: Blade (+30-40)
3: Destiny (+24-32) 3: Supernova (+20-39)
4: Climactic (+18-23) 4: 48th Floor (+28-35)
5: Deadly Blow (+18-23) 5: Absolute (+25-30)
6: 35th Floor (+15-20) 6: Black Fog (+20)
7: Respectful (+5-20) 7: Dominator (+8-15)
8: Nightmare (+18) 8: Horn (+12)
9: Admirable (+10-18) 9: Icicle (+10)
10: Fantastic (+8-15) 10: Spike (+10)
Control Bar
Listed in Max unless otherwise stated
Prefix Suffix
BiS: Curtain Call (+30 Marionette Max) BiS: Glowing Sky (+80 Marionette Max)
Perseus Bar: Control (+23-38 Marionette Max
1: Curtain Call (+30 Marionette Max) 1: Glowing Sky (+80 Marionette Max)
2: Carved (+20 Puppet Max) 2: Challenger (+35 Puppet Max)
3: 3: Colossus (+10-15 Marionette Max)
4: 4:
*Control Bar Note: 70% of your damage is added as Puppet Damage. I do not believe Marionette Max Damage is boosted by BFO, so when deciding which enchant to use, make sure you factor in your BFO when deciding between Max Damage and Puppet Max/ That said, Glowing Sky is at present the best option even with extremely high BFOs.
Two Handed Weapons and High Piercing Lances
Listed in Max unless otherwise stated
Prefix Suffix
BiS: Clashing (+15-32) BiS: Downburst (+65-70) or
1: Clashing (+15-32) 1: Meteoroid (+22-48, + 1-3 PL)
2: Conqueror +(20-25) 2: 67th Floor (+30-40, +3 PL)
3: Demi Lich (+20) 3: Downburst (+65-70)
4: Respectful (+5-20) 4: Corrib (+28-36, +1 PL)
5: Untamed (+16) 5: Girgashiy (+30-35)
6: 6: Crocodile (+29)
7: 7: Fierce (+24)
Weapon Exclusive Two-Handed Enchant Section
This Section very specifically is for notable Weapon Archetype exclusive enchants. The weapons listed are classified as Two-Handed Weapons for Enchant purposes, so cross-reference with the above Two-handed enchants
Close Combat Weapon Exclusive Section
Listed in Max unless otherwise stated.
Prefix Suffix
Fanatic Greatsword: Silence (+20-27) Divine Blade: Solitude (+25-50 Max, +1-3 PL)
Knuckle Exclusive Section
Listed in Max unless otherwise stated.
Prefix Suffix
Knuckles: Speedy (+17-25) Perseus Knuckle: Judgment (+27-42)
Knuckles: Lucky Punch (+24)
Dual Gun Exclusive Section
Listed in Max unless otherwise stated. Piercing Levels added through enchants are only active with a weapon that has innate piercing (e.g Nightbringer Vanquisher)
Prefix Suffix
Piercing Dual Guns: Fury (+20-45, +1-3 PL)
- Whirlwind (+18-25, +3-6 Attack - Sharpshooter (+20-35, +3-6 Attack
Speed) Speed)
Shuriken Exclusive Section
Listed in Max unless otherwise stated. Piercing Levels added through enchants are only active with a weapon that has innate piercing (e.g Nightbringer Infiltrator)
Prefix Suffix
Piercing Shurikens: Stellar (+20-50, +1-3 PL)
Chain Blade Exclusive Section
Listed in Max unless otherwise stated. Piercing Levels added through enchants are only active with a weapon that has innate piercing (e.g Nightbringer Wraith)
Prefix Suffix
Piercing Chain Blade: Inferno (+20-50, +1-3
Two Handed Enchant Notes
You generally only want to use Meteoroid and 67th floor on weapons with innate piercing (which means lances, the normal speed 2h swords, and Demolition/Ruination staves). Piercing from enchants will not activate unless the weapon already has piercing naturally or from upgrades. Corrib will likely be relatively easy to acquire, though gated at 3 Lords a day.
You might notice Downburst shares the BiS position with Meteoroid. This is largely because of the value of Piercing Enchants. However, if you are able to reach 9 piercing without enchants, this will be a better choice than Meteoroid or 67th Floor.
It’s been noted in the Archetype exclusive enchants that Piercing Levels from enchants only activate when the weapon has innate piercing, so do keep that in mind when deciding which enchant is most cost effective for you to use.
Lances requiring Piercing Enchants
Listed in Max unless otherwise stated
Prefix Suffix
BiS: Intense (+17, +3 PL) BiS: Pillar (+25-50, +1-3 PL) - Divine Only
Divine Short Lance: Pillar (+25-50, +1-3 PL)
1: Intense (+17, +3 PL) 1: Meteoroid (+22-48, + 1-3 PL)
2: Cartel (+10-15, +3 PL) 2: 67th Floor (+30-40, +3 PL)
3: Piercing (+7-14, +2 PL) 3: Lancia (+24-34, +3 PL)
4: Secret (+7, +2 PL) 4: Breakthrough (+18, +2 PL)
5: Siege (+6-14, +1 PL) 5: Penetrating (+16, +2 PL)
6: 6: Corrib (+28-36, +1 PL)
7: 7: Medal (+10-18, + 1 PL)
Note: PL = Piercing Level. Piercing level is capped at 9 so you may not need to max roll piercing on every enchant. Additionally, if you have items such as Destructive Robes and Irusan’s Bell, you can entirely forgo Piercing Enchants for Two Handed enchants that lack piercing like Downburst.
Shields/Physical Damage Off Hand
Listed in Max unless otherwise stated. If you want Protection Enchants, see Defensive Enchants
Prefix Suffix
BiS: Brainstorm (+8-17) BiS: Ardent (+3-6, +2-4 MA)
1: Brainstorm (+8-17) 1: Ardent (+3-6, +2-4 MA)
2: Fantastic (+8-15) 2: Gamer (+3-6)
3: Amnesia (+10-13) 3: Swarming (+4)
4: Maddening/Edgy (+12) 4: Embracing (+3, +3 MA)*
5: Oblivion (+10) 5: Wild Boar (+1-3)
6: Nostalgic (+5-9) 6: Kobold (+2)
*If you are using bolt magic, use Embracing or Ardent.
Bows and Crossbows
Listed in Max unless otherwise stated
Prefix Suffix
BiS: Pallid (+55-65, +2-3 Piercing) BiS: Last Breath (+20-36 Max,
+1 PL) - Ruin Only
Marksman (+18-25)
Salvation Bow: Starlight (+12-17)
Divine Crossbow: Novel (+25-40, +1-3 PL) Ruination Bow: Last Breath (+20-36 Max,
Salvation Bow: Starlight (+12-17) +1 PL)
1: Pallid (+55-65, +2-3 Piercing) 1: Marksman (+18-25)
2: Rocket (+10-20) 2: Paradox (+15-20)
3: Respectful (+5-20) 3: Sniping (+12-20)
4: Brainstorm (+8-17) 4: Wanderer (+10-15)
5: Admirable (+10-18) 5: Palm Tree (+12)
6: Nobility (+11-15) 6: Thorn Lotus (+12)
7: Robin Hood (+10-14) 7: Spike (+10)
8: Amnesia (+10-13) 8:
Wands
Listed in Magic Attack unless otherwise stated
Prefix Suffix
BiS: Scholarly (+4-8) BiS: Nightfall (+45-55)
Divine Tribolt: Roaring (+15-30)
1: Scholarly (+4-8) 1: Nightfall (+45-55)
2: Spiritual (+4-8) 2: Intuitive (+4-12)
3: Maddening (+5, +12 Max) 3: Supernatural (+5-7)
4: 4: Truthful (+4-12)
Staves
Listed in Magic Attack unless otherwise stated
Prefix Suffix
BiS: Arcane (+10-20, -20% Repair Cost) BiS: Meteoroid (+1-3 PL) - Piercing Staff Only
Ruination/Demolition: Meteoroid (+1-3 PL)
Ruination: Illusion (+20-34 MA, +1 PL)
1: Arcane (+10-20, -20% Repair Cost) 1: Nightfall (+45-55)
2: Strange (+10-20) 2: Foretold (+12-20)/Corrib (+1 PL)
3: Encyclopedic (+12-20) 3: Dreamlike (+8-16)
4: Scholarly (+4-8) 4: Truthful (+4-12)
5: Spiritual (+4-8) 5: Intuitive (+4-12)
6: 6: Supernatural (+5-7)
*The reason you want to use Meteoroid or 67th floor on the Ruination/Demolition Staves is because they have innate piercing. Piercing Levels do affect Magic Defense and Protection. The Ruination Staff can reach a potential Piercing Level of 5 while the Demolition Staff can reach a Piercing Level of 4 before the Destruction robe with these enchants. I’d recommend Meteoroid over Illusion because of the higher Piercing Level. But if you are able to clear Subject Theta with a Ruination Staff and you lack the funds to get Meteoroid, Illusion is still the 2nd BiS Ruination Enchant and technically easier to acquire. While Meteoroid is a very rare drop from Elite Tech Duinn and a Dungeon Boss, the Illusion enchant has a pity system associated with it.
*The actual impact from Corrib depending on enemy protection is probably not significantly different from Foretold or Dreamlike.
You may notice Meteoroid is sharing the BiS spot with Nightfall. They’re both strong enchants, though I think the Piercing is overall more impactful. That said, it also only works if the staff has innate Piercing (which isn’t a problem for our Demolition and Ruin staves).
Scythes - WIP
Listed in Magic Attack unless otherwise stated
Prefix Suffix
BiS: Pouring (+17-25, +80 MP, BiS: Stellar Shard (+35-45, +200 MP,
MP Usage Reduction +1-3) MP Usage Reduction +7)
1: Pouring (+17-25 +80 MP, 1: Stellar Shard (+35-45, +200 MP,
MP Usage Reduction +1-3) MP Usage Reduction +7)
2: Empty (+15-20 +100 MP, 2: Milky Way (+15-25, +80 MP)
3: Spreading (+10-20 +50 MP) 3: Orbital (+10-15 +50 MP)
4: Advancing (+10-15) 4:
*While Scythes are classified as Two-Handed weapons, they do not receive any Piercing of their own. The Piercing for the Nightbringer set is from the Nightbringer Vega (Orb). Orbs cannot receive Two-Handed Enchants, so Scythes generally don’t benefit from Piercing Enchants.
Spellbook/Astrologer Orb/Magic Attack Off Hand
Listed in Magic Attack unless otherwise stated.
Most Spellbooks cannot be enchanted, but the Perseus and Nightbringer Spellbooks can accept Shield applicable enchants (All, Shield). Bolts (especially fusion Bolt) can benefit from stacking Maximum Damage, so you can also reference the Shield/Off Hand section.
Prefix Suffix
BiS: Maddening (+5, +12 Max) BiS: Ardent (+3-6, +2-4 MA)
1: Maddening (+5, +12 Max) 1: Ardent (+3-6, +2-4 MA)
2: Edgy (+12 Max) 2: Embracing (+3, +3 Max)
General Alchemy
Prefix Suffix
BiS: Sage Stone (+10-14 Water, +10-14 Fire) BiS: Sunshower (+60-70 Water, +40-50 Fire)
Gospel Cylinder: Absolute (+14-17 Water, +14-17 Fire) Perseus: Doomed (+40-60 Water, +22-35 Fire)
1: Sage Stone (+10-14 Water, +10-14 Fire) 1: Sunshower (+60-70 Water, +40-50 Fire)
2: Synergy (+7-11 Water, +8-12 Fire) 2: Disaster (+30-50 Water, +15-25 Fire)
Water Alchemy
Prefix Suffix
BiS: Distilled (+20-30 Water) BiS: Sunshower (+60-70 Water, +40-50 Fire)
Perseus: Doomed (+40-60 Water, +22-35 Fire)
1: Distilled (+20-30 Water) 1: Sunshower (+60-70 Water, +40-50 Fire)
2: Moist (+27 Water) 2: Disaster (+30-50 Water, +15-25 Fire)
3: Sage Stone (+10-14 Water, +10-14 Fire) 3: Wave (+33-43 Water)
4: Synergy (+7-11 Water, +8-12 Fire)
Fire Alchemy
Prefix Suffix
BiS:Evaporated (+20-30 Fire Alchemy) BiS: Sunshower (+60-70 Water, +40-50 Fire)
Perseus: Doomed (+40-60 Water, +22-35 Fire)
1: Evaporated (+20-30 Fire Alchemy) 1: Sunshower (+60-70 Water, +40-50 Fire)
2: Sage Stone (+10-14 Water, +10-14 Fire) 2: Disaster (+30-50 Water, +15-25 Fire)
3: Synergy (+7-11 Water, +8-12 Fire) 3: Magma (+8-12 Fire)
Luck/Gathering Tools
Prefix Suffix
1: Duke (+15 Luck) 1: Rainbow (+15 Luck)
2: Magical (+10 Luck) 2: Thief (+10 Luck)
3: 3:
Don’t use Gathering Knives, use sickles. Every gathering tool except for gathering knives are Two-Handed Weapons, put those Downbursts and Meteoroids down you crazy people. Unless you were enchant burning.
Gear Suggestions and Reforges
This section is aimed at assisting with setting up your build with reforges and equipment for specific purposes within a talent. If you have a suggestion, a correction, or a note you think should be added, please let me know.
Do note these are guidelines. Something such as Abyss Dragon Horns on their own will provide less of an impact over a pre-reforged Final Hit Cooldown 20 headpiece. If you are on a budget, prioritize getting Pre 1 Equipment or pre-reforged gear and using Journeyman Reforges.
Pre 1 Equipment generally refers to equipment that already has a rank 1 reforge. Typically this has been found as gachapon drops. However, nowadays you can use Surging Hope Gems to automatically grant any piece of equipment a r1 reforging state.
Do note while I am including Elemental Reforges in some of the weapon reforges, they are ineffective in a lot of newer content since a lot of high level enemies have an immunity to elemental reforges. They will, however, help with dungeon content which is required for Celtic Weapons. If you’re big into Clobbermiester they will also help there.
Equipment Recommendations are just pieces of equipment you may find useful on your build. Do not treat the equipment recommendations as a definitive tier list with the exception of the weapon section. An Ultimate Geas Devastation piece for instance isn’t useful as a single item and requires you get the set bonus to activate. In this particular case you generally activate the set bonus by pairing a 5 roll Redoubled Offensive circlet and glove.
Each build is a theoretical dedicated build. You may want to mix and match parts to save money and gold. I also excluded some lower tier weapons. You really shouldn’t be investing reforges into something like a Pilgrim Sword. Something like a Fanatic Greatsword is fine to invest in though.
Priority Reforges are the ones you’ll want to keep an eye out for. You absolutely will want at least one of these. Multiple lines of these are better.
Secondary Reforges are the ones that are great to have but may not be your main focus. You might consider keeping these, but chances are you want to reroll for one of the priority reforges instead.
Tertiary Reforges will cover most other reforges. These can be utilities, a set effect if you’re missing a part, or something that just wasn’t good enough to be on the Secondary Reforge list. These are nice to have, but skippable if you don’t get them. That being said, if it is an important utility I will add a note to the build.
Skill based reforges and Echostone reforges do not stack. Generally keep the one with the higher numbers. This is especially important for accessories as Echostones do not stack with regular reforges including the accessory slot. However, accessories and other slot reforges generally do stack.
Set Effects are good to have, but if you’re on a budget Prioritize reforges. Generally Reforges will provide a wider range of benefits and boosts.
Skill based reforges generally only stack with the accessory slot. For instance, having Kunai Storm Attack Range 20 on your Shuriken and Gloves will not give you Kunai Storm Attack Range 40.
See the wiki's Reforge page and the Echostone page for details on what each reforge does and what is the level limit for each respective reforge. Do note some echostones exceed the cap regular reforges have, some echostone reforges are echostone exclusive, and some echostone reforges have a lower cap than their standard reforge variants. Some standard reforges are cap exceeding variants.
If you would like details on what part rolls what reforge, check out the Reforge by Equipment Type Section.
You can check out Echostone Rates on this google doc spreadsheet.
General/Situational Reforges and Equipment
This will cover most reforges that don’t specifically fall into one of the below talents, but still provide an useful utility that can make their way into specialized loadouts. Recommendations on this page are not combination recommendations due to the wide applicability or specific niche of each reforge/Gear.
General Equipment refers to equipment that can see use in practically every build but doesn’t provide a specific utility to said build. You may see some equipment repeated from above here.
Situational Equipment refers to equipment that is catered to a special purpose not listed in the above lists and does not directly benefit any of the above talents. Reference the reforges for the appropriate talent for reforge recommendations.
General Reforges are reforges that don’t specifically benefit a Talent, but can benefit any Talent they’re rolled on.
Situational Reforges are reforges that tend to be used for a very specific niche not listed in the above lists.
General Equipment | Situational Equipment | General Reforges | Situational Reforges | Set Effect Notes | |
Head | Awakening of Light Cooldown Decrease Fury of Light Cooldown Decrease | Redoubled Offensive Activation Boost (Strong): This is a nice set effect to have, though it does face more competition nowadays. Redoubled Offensive is an extremely potent Tech and is a mainstay on almost all Tech loadouts. Phantasmal Sight - Cooldown Reduction: Offensively, Phantasmal Sight is a decent Damage Amp. This set effect helps with maintaining its uptime. Judgment Blade Enhancement: Judgment Blade more or less sees the most use during Girgrishy and Hasidim. Dedicated Bladers don’t necessarily need them, but they help. Spellwalk Enhancement: It requires Spellwalk to be active, but it's a 15% speed boost. Eweca Movement Speed: Unlike the Ladeca Movement Speed buff, this is a fairly large 10% speed boost. Typically this set effect is found on Fleet Feet variants such as the Shooting Star Flying Shoes. Ladeca Movement Speed Boost (Shadow Reaper Boots): Unlike most other Ladeca Movement Speed Boosts, this one provides a 12% movement speed boost. | |||
Body | Special Royal Society Laboratory Outfit | Commerce Transport Speed* | |||
Hands | Mana Shield Damage Reduction Rate* | ||||
Feet | Forest Ranger Boots > Fleet Feet/Shooting Star Flying Shoes/Shooting Star Roller Skates | Movement Speed Increase* | |||
Robe | |||||
Accessories | Unfinished Reverie’s Diadem Halo > Irusan’s Bell | Maximum Attack Power | <Production Skill> Success Rate | ||
Weapon | Maximum Attack Power, Fire/Ice/Lightning* | Collection Quantity, Collection Speed, Collection Success Rate, <Production Skill> Success Rate, Cooking Quality Bonus | |||
Off Hand | Cooking Quality Bonus | ||||
Echostone | |||||
Various Slots | Skill Training EXP |
General/Situational Reforges and Equipment - Notes
If you are a Mage, Mana Shield Damage Reduction Rate will provide no benefit if you have more than 480 Magic Attack with your staff or wand. Mana Shield Efficiency is calculated as the higher of [(Magic Attack * .01) + Magic Weapon Bonus] + Healing Wand Bonus or [Mana Shield Rank Efficiency + Reforge Efficiency] + Healing Wand Bonus.
Magic Weapon Bonus for using a Wand or Staff is +1 Efficiency, nobody uses Healing Wands, rank efficiency for Mana Shield is 1.8 at r6, and a level 20 Mana Shield Damage Reduction Rate Reforge increases the efficiency by 4.
The Max effective Magic Attack the reforge and rank provides at the current cap is 580 Magic Attack worth of MA. Since equipping a Magic Weapon grants you an additional 1 efficiency (+100 effective Magic Attack), we only need 480 Magic Attack to render the Mana Shield Reforge useless while using a Magic Weapon.
Elemental Reforges are only effective up to Dungeon Content/Clobbermeister and cannot be rolled on Shurikens, Chain Blades, Dual Guns, Staves, or Wands. Post the Reforging Tool update (11/04/2021), Shurikens, Chain Blades, and Dual Guns can roll Elemental Reforges.
From what we know thus far about the Raid Update, Elemental Reforges may be effective there.
This would be a good reason to roll Elementals.
You want to try to roll Commerce Transport Speed on G15 NPC outfits. They will specifically be noted as (G15) outfits.
I really don’t think Movement Speed Increase is worth trying to roll for. Just get Shooting Star Shoes/Fleet Feet and a 16%+ Wave Sweeper if you need more movement speed. They’ll be cheaper than rolling for this reforge, and neither of those items are cheap. If you got nothing better to put on your feet it’s fine. But I’d look for it as a secondary roll.
Judgment Blade Armors tend to have limited use outside of Apostle Raids, but Judgment Blade can be useful generally. However, due to the large amount of AoE options, Judgment Blade has fallen somewhat out of favor for general combat compared to Shield of Trust. Shield of Trust provides a utility that is harder to activate (temporary Advanced Heavy Stander and Guarded Footsteps), so Shield of Trust tends to be used more for general combat.
Awakening of Light and Fury of Light Cooldown are good general reforges, especially since Pragarah use has risen due to Crom Bas. Since Pragarah requires Awakening of Light to be active, anything to reduce the cooldown will be valuable. While it doesn’t need to stay active, it’s still good to keep active for the extra move speed, passive regen, stun resist, and defensive demi skills. Fury of Light is just very effective crowd control in addition to abilities that can reset cooldowns from critical hits (Fighter, Ninja, Dual Gunner namely). They’re under situational because I’d recommend switching away from them after you use either skill. They only reduce the cooldown while equipped, and because we can read how much cooldown is left, you can just gearswap to them to reduce the cooldown, pop Demi or Fury of Light, then swap away. With a Uthaine, Goblet of Truth, and a maxed Awakening of Light Cooldown reforge, you can have about 290 seconds of Demigod Uptime with only 120 seconds of downtime.
Ultimate Geas Edge’s Defiance boost is approximately a 5% boost, bringing Defiance’s activation rate to 25%. This is a nice utility if you don’t have anything specific you want on your Head, Hand, or Feet slots. But try to minimize the slots used to 2.
Close Combat/Elemental Knight - Human - Final Hit
This build is centered around keeping as much uptime on Final Hit as possible. While most prefer to use Abyss Dragon Horns/Forest Ranger Wig and Hats, an Ultimate Geas Devastation Circlet and Ultimate Geas Devastation Gloves with a set bonus for Redoubled Offensive will also be effective if you do not notice a difference in attack delay reduction. However, you should make sure you can get the attack speed set effect so that you can have comparable speeds to fast weapons while using normal speed weapons.
Equipment Recommendations | Priority Reforges | Secondary Reforges | Tertiary Reforges | Set Effect Notes | |
Head | Ceann Bliana Skirmisher Circlet > Hyperion Eclipse Helionic Helm/Selenian Diadema Imperial Knight Royal Hat > Abyss Dragon Horns/Forest Ranger Wig and Hat Ultimate Geas Devastation Circlet Refined Dustin Silver Knight Helmet | Final Hit Cooldown - Mandatory | Sun and Moon: This is a pretty interesting conditional set effect. When landing a hit, you have a 5% chance to activate the Sun or Moon effect (60s). If both are active, you receive the Eclipse effect for 30 seconds (maintains the boost from Sun and Moon. Eclipse providing Bonus Damage makes it a very strong effect in addition to the rather large Damage/Magic Attack boost Sun: Max Damage +40, Max Hp +200 Moon: Magic Attack +60, Max MP +200 Eclipse: Bonus Damage +5%, Max Stamina +200 Assassin’s Advantage: Because this item has a 20 up 90 down for Active/Cooldown time and a 5% chance to activate on critical hits, it’s not as consistent as Increased Critical Damage. If you can 1-2 piece a Increased Critical Damage set effect (which may require Set Effect Scrolls or specific weapons), it’s not a bad idea to slot this in or the extra burst of Critical Damage, Attack Delay reduction, and Movement Speed. Increased Critical Damage: This is generally a good set effect to consider since it’s always active. Attack Delay: This is generally nice to have for Final Hitting to increase how quickly you can hit things, stacking with Attack Speed (or specifically reducing the delay between attacks). Attack Speed: This is generally nice to have for Final Hitting to increase how quickly you swing your weapon. Redoubled Offensive Activation Boost (Strong): This is a nice set effect to have, though it does face more competition nowadays. Redoubled Offensive is an extremely potent Tech and is a mainstay on almost all Tech loadouts. Redoubled Offensive - Damage Boost: Redoubled Offensive is a very strong Tech, so if you’re building an Ultimate Geas Devastation set, this isn’t a bad option. Exploit Weakness Enhancement: It’s an extra 3% to Exploit Weakness which is already a useful Offensive tech. Good if you regularly use Exploit, less if you just use Fateweaver. Max Damage Increase: There are 3 variants of this set effect currently,one from the Skirmisher (+50), one from the Bulwark (+25), and one from Gacha equipment (+10). Gacha max pieces tend to be on the Body Slot while the Skirmisher and Bulwark normally require you to use the Head, Gloves, and Feet slots. These Effects do not stack and only the strongest effect applies. Final Hit Enhancement: There’s not much to say besides it increases Final Hit damage. It’s only found on the Weapon Slot. Ladeca Movement Speed Boost (Shadow Reaper Boots): Unlike most other Ladeca Movement Speed Boosts, this one provides a 12% movement speed boost. | ||
Body | Special Hyperion Eclipse Full/Light Chiton Ceann Bliana Skirmisher Cuirass > Special Forest Ranger Outfit > Saint Guardian's Leather Armor Special Imperial Knight Royal Uniform Special Royal Society Field Outfit Refined Dustin Silver Knight Armor | Final Hit Duration - Mandatory | |||
Hands | Ceann Bliana Skirmisher Gloves Ultimate Geas Devastation Gloves | Combat Mastery Max Damage, Sword Mastery Max Attack Power | Attack Speed | ||
Feet | Elemental Harmony Shoes > Shadow Reaper Boots > Forest Ranger Boots > Fleet Feet/Shooting Star Flying Shoes/Shooting Star Roller Skates | Final Hit Teleport Distance | |||
Robe | Special Ancient Dragon Guardian Wings > Special Draconian Wings > Enchantable Wings* | ||||
Accessories | Unfinished Reverie’s Diadem Halo > Irusan’s Bell | Combat Mastery Max Damage, Sword Mastery Max Damage, Attack Speed* | Shieldless Charge* | ||
Weapon | Soluna Blade* = (?) Nightbringer Warlord* > Perseus Monumental Blade > Celtic Errant Blade+Signet > Divine Blade+Signet > Frosted Borealis Blade = Fanatic Greatsword Nightbringer Assault > Perseus Steeled Sword > Bastard Sword+Signet > Celtic Royal Knight Swords+Signet | Max Attack Power | Elemental Reforges (Fire, Ice, Lightning) | Smash Damage, Attack Speed | |
Echostone | Fill with missing a reforges | Rage Impact Cooldown Reduction |
Close Combat/Elemental Knight - Human - Final Hit Notes
Yes I know the Soluna Blade can be acquired from in-game crafting, but before the dungeon drop event we had November- December 2020 we had two (both on Nao), and that was after a server merge AND a drop rate boost event. It might as well only exist in legends despite being more common now. Same with Destructive Robe.
Enchantable wings only apply if you have the Wing Enchants.
You don’t specifically need Shieldless Charge because you should just be teleporting everywhere, but it can help if you can’t find something to wack with your giant stick and you need to close distance.
Nightbringer Warlord may beat out the Soluna Blade in terms of Final Hit damage due to the set effect and it can reach a higher piercing (I think). But the Soluna Blade has a significantly higher Raw Max Damage.
Nightbringer Assaults do have a Final Hit set bonus, but it's still hard to recommend them or Dual Wielding Final Hit, especially due to the lack of piercing.
Elemental Knight’s Instill Thunder and Flame skills are extremely useful for Final Hit, providing increased Min-Max and other effects for either Single Target or AoE DPS. Instill Thunder provides extra Defense/Protection Ignore alongside ignoring one level of Heavy Stander. It will also stun enemies for longer. Instill Flame on the other hand increases the AoE range and damage, allowing for Elemental Knights lacking Erg 2h Swords to still have a wide AoE radius.
If using a non-attack speed body, consider rolling two Attack Speed accessories.
From what information we have, it appears the Final Hit Enhancement is a Final Damage Multiplier. Because of this, the Soluna Blade’s higher raw damage allows it to deal
Final Hit Notes - Soluna Blade vs Nightbringer Warlord
See BiS Math Sample for details.
Close Combat/Elemental Knight - Two-Handed Weapons
The goal is to boost your Dynavolt Smash, Shattering Windmill, and Blazing Assault Slash damage. We also want to take certain utility reforges like Assault Slash Range for Blazing Assault Slash, though if you do not intend to use Elemental Knight, you can skip these reforges.
For Elves that want to pursue EKnight with Two-Handed Weapons, your weapon pool is quite a bit more limited. Elves can typically only use Two-Handed Axes/Hammers and the Soluna Blade.
Equipment Recommendations | Priority Reforges | Secondary Reforges | Tertiary Reforges | Set Effect Notes | |
Head | Ceann Bliana Skirmisher Circlet > Hyperion Eclipse Helionic Helm/Selenian Diadema Ultimate Geas Devastation Circlet | Charge - Allows Usage Without Shield (Human/Elf) | Sun and Moon: This is a pretty interesting conditional set effect. When landing a hit, you have a 5% chance to activate the Sun or Moon effect (60s). If both are active, you receive the Eclipse effect for 30 seconds (maintains the boost from Sun and Moon. Eclipse providing Bonus Damage makes it a very strong effect in addition to the rather large Damage/Magic Attack boost Sun: Max Damage +40, Max Hp +200 Moon: Magic Attack +60, Max MP +200 Eclipse: Bonus Damage +5%, Max Stamina +200 Assassin’s Advantage: Because this item has a 20 up 90 down for Active/Cooldown time and a 5% chance to activate on critical hits, it’s not as consistent as Increased Critical Damage. If you can 1-2 piece a Increased Critical Damage set effect (which may require Set Effect Scrolls or specific weapons), it’s not a bad idea to slot this in or the extra burst of Critical Damage, and Movement Speed. Increased Critical Damage: This is generally a good set effect to consider since it’s always active. Redoubled Offensive Activation Boost (Strong): This is a nice set effect to have, though it does face more competition nowadays. Redoubled Offensive is an extremely potent Tech and is a mainstay on almost all Tech loadouts. Redoubled Offensive - Damage Boost: Redoubled Offensive is a very strong Tech, so if you’re building an Ultimate Geas Devastation set, this isn’t a bad option. Exploit Weakness Enhancement: It’s an extra 3% to Exploit Weakness which is already a useful Offensive tech. Good if you regularly use Exploit, less if you just use Fateweaver. Max Damage Increase: There are 3 variants of this set effect currently,one from the Skirmisher (+50), one from the Bulwark (+25), and one from Gacha equipment (+10). Gacha max pieces tend to be on the Body Slot while the Skirmisher and Bulwark normally require you to use the Head, Gloves, and Feet slots. These Effects do not stack and only the strongest effect applies. Imperial Knight Gloves: I’m 50% sure this is an additive boost to Rage Impact’s Melee Damage buff, but I don’t have one of these to test that. Even so it fits a lot of useful set effects onto the Glove slot. Smash/Windmill/Assault Slash Damage: They’re not the largest boots to your Dynavolts, Shattering Windmills, and Blazing Assault Slashes, but a damage buff is a damage buff. Spellwalk Enhancement: It requires Spellwalk to be active, but it's a 15% speed boost. Eweca Movement Speed: Unlike the Ladeca Movement Speed buff, this is a fairly large 10% speed boost. Typically this set effect is found on Fleet Feet variants such as the Shooting Star Flying Shoes. Ladeca Movement Speed Boost (Shadow Reaper Boots): Unlike most other Ladeca Movement Speed Boosts, this one provides a 12% movement speed boost. | ||
Body | Special Hyperion Eclipse Full/Light Chiton Special Imperial Knight Royal Uniform Special Royal Society Field Outfit Ceann Bliana Skirmisher Cuirass | Assault Slash Damage | |||
Hands | Refined Majestic Knight Gauntlets Ceann Bliana Skirmisher Gloves Ultimate Geas Devastation Gloves | Combat Max Mastery, Blunt Mastery Max Damage | Windmill Attack Range | ||
Feet | Ultimate Geas Devastation Boots Elemental Harmony Shoes > Shadow Reaper Boots > Forest Ranger Boots > Fleet Feet/Shooting Star Flying Shoes/Shooting Star Roller Skates | Assault Slash Range | |||
Robe | Special Ancient Dragon Guardian Wings > Special Draconian Wings > Enchantable Wings | ||||
Accessories | Unfinished Reverie’s Diadem Halo > Irusan’s Bell | Smash Damage, Windmill Damage, Shieldless Charge | Max Attack Power, Combat Mastery Max Damage, Blunt Mastery Max Damage | ||
Weapon | Soluna Blade* > Nightbringer Warlord > Perseus Monumental Blade > Celtic Errant Blade > Divine Blade > Frosted Borealis Blade = Fanatic Greatsword Nightbringer Berserker > Perseus Cleaving Warrior Axe > Celtic Royal Warrior Axe >= Celtic Royal Warrior Hammer > Celtic Warrior Axe >= Celtic Warrior Hammer | Smash Damage, Windmill Damage | Max Attack Power, Elemental Reforges (Fire, Ice, Lightning) | ||
Off Hand |
Close Combat/Elemental Knight - Dual Wielding
Dual Wielding generally has had a harder time matching two-handed weapons, but it’s still something you can build for. The Cooldown aspect of Erg will primarily be used to reduce our Rage Impact cooldown. Giants can do this better with a -50% Close Combat CD reduction on dual 1h hammers, but Humans can achieve a -30% Close Combat CD reduction while dual wielding.
That aside, Dual Wielding is deceptively durable, with a single Erg A50/S50 weapon providing 18/25 protection, making two of them as tanky as an Erg A50/S50 2h sword. It does, however, cost twice as much since you are Erging two weapons. This protection bonus is the same between 1h swords and 1h hammers.
Equipment Recommendations | Priority Reforges | Secondary Reforges | Tertiary Reforges | Set Effect Notes | |
Head | Ceann Bliana Skirmisher Circlet > Hyperion Eclipse Helionic Helm/Selenian Diadema Ultimate Geas Devastation Circlet | Stampede Cooldown - Giant only | Charge - Allows Usage Without Shield (Human/Elf) | Sun and Moon: This is a pretty interesting conditional set effect. When landing a hit, you have a 5% chance to activate the Sun or Moon effect (60s). If both are active, you receive the Eclipse effect for 30 seconds (maintains the boost from Sun and Moon. Eclipse providing Bonus Damage makes it a very strong effect in addition to the rather large Damage/Magic Attack boost Sun: Max Damage +40, Max Hp +200 Moon: Magic Attack +60, Max MP +200 Eclipse: Bonus Damage +5%, Max Stamina +200 Assassin’s Advantage: Because this item has a 20 up 90 down for Active/Cooldown time and a 5% chance to activate on critical hits, it’s not as consistent as Increased Critical Damage. If you can 1-2 piece a Increased Critical Damage set effect (which may require Set Effect Scrolls or specific weapons), it’s not a bad idea to slot this in or the extra burst of Critical Damage, and Movement Speed. Increased Critical Damage: This is generally a good set effect to consider since it’s always active. Redoubled Offensive Activation Boost (Strong): This is a nice set effect to have, though it does face more competition nowadays. Redoubled Offensive is an extremely potent Tech and is a mainstay on almost all Tech loadouts. Redoubled Offensive - Damage Boost: Redoubled Offensive is a very strong Tech, so if you’re building an Ultimate Geas Devastation set, this isn’t a bad option. Exploit Weakness Enhancement: It’s an extra 3% to Exploit Weakness which is already a useful Offensive tech. Good if you regularly use Exploit, less if you just use Fateweaver. Max Damage Increase: There are 3 variants of this set effect currently,one from the Skirmisher (+50), one from the Bulwark (+25), and one from Gacha equipment (+10). Gacha max pieces tend to be on the Body Slot while the Skirmisher and Bulwark normally require you to use the Head, Gloves, and Feet slots. These Effects do not stack and only the strongest effect applies. Imperial Knight Gloves: I’m 50% sure this is an additive boost to Rage Impact’s Melee Damage buff, but I don’t have one of these to test that. Even so it fits a lot of useful set effects onto the Glove slot. Smash/Windmill/Assault Slash Damage: They’re not the largest boots to your Dynavolts, Shattering Windmills, and Blazing Assault Slashes, but a damage buff is a damage buff. Spellwalk Enhancement: It requires Spellwalk to be active, but it's a 15% speed boost. Eweca Movement Speed: Unlike the Ladeca Movement Speed buff, this is a fairly large 10% speed boost. Typically this set effect is found on Fleet Feet variants such as the Shooting Star Flying Shoes.. Ladeca Movement Speed Boost (Shadow Reaper Boots): Unlike most other Ladeca Movement Speed Boosts, this one provides a 12% movement speed boost. | |
Body | Special Hyperion Eclipse Full/Light Chiton Special Royal Society Field Outfit Ceann Bliana Skirmisher Cuirass | Assault Slash Damage | |||
Hands | Refined Majestic Knight Gauntlets Ceann Bliana Skirmisher Gloves Ultimate Geas Devastation Gloves | Combat Mastery Maximum Damage, Blunt/Sword Mastery Maximum Damage | Windmill Attack Range | ||
Feet | Ultimate Geas Devastation Boots Elemental Harmony Shoes > Shadow Reaper Boots > Forest Ranger Boots > Fleet Feet/Shooting Star Flying Shoes/Shooting Star Roller Skates | Assault Slash Range | Charge Minimum Range | ||
Robe | Special Ancient Dragon Guardian Wings > Special Draconian Wings > Enchantable Wings | ||||
Accessories | Unfinished Reverie’s Diadem Halo > Irusan’s Bell Pre r1 Equipment | Smash Damage, Windmill Damage | Max Attack Power, Combat Mastery Max Damage, Blunt Mastery Max Damage | ||
Weapon | Nightbringer Enforcer > Perseus Brutal Warhammer > Frosted Borealis Hammer - Giant Nightbringer Assault > Perseus Steeled Sword > Divine Bastard Sword+Signet > Celtic Royal Knight Swords+Signet - Human | Smash Damage, Windmill Damage | Max Attack Power, Elemental Reforges (Fire, Ice, Lightning) | ||
Off Hand | Frosted Borealis Hammer - Giant Nightbringer Assault > Divine Bastard Sword+Signet > Celtic Royal Knight Swords+Signet - Human | See Weapon | See Weapon | ||
Echostone | Fill with issing Reforges Rage Impact Cooldown |
Close Combat/Elemental Knight - Sword and Shield
Humans and Elves should disregard any Giant exclusive reforge. Shields increase the effectiveness of Dauntless Defense and provide damage reduction while the Defense skill is loaded. This damage reduction is based on shield size. Previously Large Shields could completely negate damage with defense loaded, but this has since changed.
Additionally, some shields have a passive ‘Damage Reduction Rate’ effect. These will be noted (In parentheses).
Equipment Recommendations | Priority Reforges | Secondary Reforges | Tertiary Reforges | Set Effect Notes | |
Head | Ceann Bliana Skirmisher Circlet > Hyperion Eclipse Helionic Helm/Selenian Diadema Ultimate Geas Devastation Circlet | Final Strike Cooldown, Wind Guard Cooldown, Stampede Cooldown - Giant | Sun and Moon: This is a pretty interesting conditional set effect. When landing a hit, you have a 5% chance to activate the Sun or Moon effect (60s). If both are active, you receive the Eclipse effect for 30 seconds (maintains the boost from Sun and Moon. Eclipse providing Bonus Damage makes it a very strong effect in addition to the rather large Damage/Magic Attack boost Sun: Max Damage +40, Max Hp +200 Moon: Magic Attack +60, Max MP +200 Eclipse: Bonus Damage +5%, Max Stamina +200 Assassin’s Advantage: Because this item has a 20 up 90 down for Active/Cooldown time and a 5% chance to activate on critical hits, it’s not as consistent as Increased Critical Damage. If you can 1-2 piece a Increased Critical Damage set effect (which may require Set Effect Scrolls or specific weapons), it’s not a bad idea to slot this in or the extra burst of Critical Damage, and Movement Speed. Increased Critical Damage: This is generally a good set effect to consider since it’s always active. Redoubled Offensive Activation Boost (Strong): This is a nice set effect to have, though it does face more competition nowadays. Redoubled Offensive is an extremely potent Tech and is a mainstay on almost all Tech loadouts. Redoubled Offensive - Damage Boost: Redoubled Offensive is a very strong Tech, so if you’re building an Ultimate Geas Devastation set, this isn’t a bad option. Exploit Weakness Enhancement: It’s an extra 3% to Exploit Weakness which is already a useful Offensive tech. Good if you regularly use Exploit, less if you just use Fateweaver. Max Damage Increase: There are 3 variants of this set effect currently,one from the Skirmisher (+50), one from the Bulwark (+25), and one from Gacha equipment (+10). Gacha max pieces tend to be on the Body Slot while the Skirmisher and Bulwark normally require you to use the Head, Gloves, and Feet slots. These Effects do not stack and only the strongest effect applies. Imperial Knight Gloves: I’m 50% sure this is an additive boost to Rage Impact’s Melee Damage buff, but I don’t have one of these to test that. Even so it fits a lot of useful set effects onto the Glove slot. Smash/Windmill/Assault Slash Damage: They’re not the largest boots to your Dynavolts, Shattering Windmills, and Blazing Assault Slashes, but a damage buff is a damage buff. Spellwalk Enhancement: It requires Spellwalk to be active, but it's a 15% speed boost. Eweca Movement Speed: Unlike the Ladeca Movement Speed buff, this is a fairly large 10% speed boost. Typically this set effect is found on Fleet Feet variants such as the Shooting Star Flying Shoes.. Ladeca Movement Speed Boost (Shadow Reaper Boots): Unlike most other Ladeca Movement Speed Boosts, this one provides a 12% movement speed boost. | ||
Body | Special Hyperion Eclipse Full/Light Chiton Special Imperial Knight Royal Uniform Special Royal Society Field Outfit Ultimate Geas Devastation Chestplate Ceann Bliana Skirmisher Cuirass | Final Strike Duration - Giant Assault Slash Damage | |||
Hands | Ceann Bliana Skirmisher Gloves Ultimate Geas Devastation Gloves Refined Majestic Knight Gauntlets | Combat Mastery Max Sword/Blunt/Axe Mastery Max Wind Guard Duration - Giant | Windmill Attack Range | ||
Feet | Ultimate Geas Devastation Boots Elemental Harmony Shoes > Shadow Reaper Boots > Forest Ranger Boots > Fleet Feet/Shooting Star Flying Shoes/Shooting Star Roller Skates | Assault Slash Range | Final Strike Teleport Distance - Giant | Charge Minimum Range | |
Robe | Special Ancient Dragon Guardian Wings > Special Draconian Wings > Enchantable Wings | ||||
Accessories | Unfinished Reverie’s Diadem Halo > Irusan’s Bell Pre r1 Equipment | Smash Damage | Max Attack Power, Combat Mastery Max Damage, Sword Mastery Max Damage, Windmill Damage | ||
Weapon | Soluna Blade > Nightbringer Warlord > Perseus Monumental Blade > Celtic Errant Blade > Divine Blade+Signet = Bhafel Slayer = Massive Despair Blade > Frosted Borealis Blade > Fanatic Greatsword - Giant Nightbringer Assault > Perseus Steeled Sword > Divine Bastard Sword+Signet > Celtic Royal Knight Swords+Signet - Human/Elf Nightbringer Enforcer > Perseus Brutal Warhammer > Frosted Borealis Hammer - Human/Elf Celtic Royal Battle Axe+Signet > Celtic Battle Axe+Signet - Human/Elf | Smash Damage, Windmill Damage | Max Attack Power, Elemental Reforges (Fire, Ice, Lightning), Final Strike Max Damage, Windmill Damage | ||
Off Hand | Nightbringer Vanguard (30%) > Perseus Vigilant Shield (20%) > Divine Shield (15%) > Demonic Fear Shield > Shield of Avon - All Massive Despair Shield (18%) > Frosted Borealis Shield (14%) > Vales Shield - Giant | Max Damage - Cooking Pot only | Protection Increase | ||
Echostone | Fill with missing reforges Rage Impact Cooldown |
Close Combat - Giant - Wind Guard
This build is centered around Giant Full Swing Spam , which means making sure you have as much Wind Guard uptime as possible.
Equipment Recommendations | Priority Reforges | Secondary Reforges | Tertiary Reforges | Set Effect Notes | |
Head | Ceann Bliana Skirmisher Circlet > Hyperion Eclipse Helionic Helm/Selenian Diadema Ultimate Geas Devastation Circlet | Wind Guard Cooldown - Mandatory | Stampede Cooldown | Charge Cooldown, Final Strike Cooldown | Sun and Moon: This is a pretty interesting conditional set effect. When landing a hit, you have a 5% chance to activate the Sun or Moon effect (60s). If both are active, you receive the Eclipse effect for 30 seconds (maintains the boost from Sun and Moon. Eclipse providing Bonus Damage makes it a very strong effect in addition to the rather large Damage/Magic Attack boost Sun: Max Damage +40, Max Hp +200 Moon: Magic Attack +60, Max MP +200 Eclipse: Bonus Damage +5%, Max Stamina +200 Assassin’s Advantage: Because this item has a 20 up 90 down for Active/Cooldown time and a 5% chance to activate on critical hits, it’s not as consistent as Increased Critical Damage. If you can 1-2 piece a Increased Critical Damage set effect (which may require Set Effect Scrolls or specific weapons), it’s not a bad idea to slot this in or the extra burst of Critical Damage, and Movement Speed. Increased Critical Damage: This is generally a good set effect to consider since it’s always active. Redoubled Offensive Activation Boost (Strong): This is a nice set effect to have, though it does face more competition nowadays. Redoubled Offensive is an extremely potent Tech and is a mainstay on almost all Tech loadouts. Redoubled Offensive - Damage Boost: Redoubled Offensive is a very strong Tech, so if you’re building an Ultimate Geas Devastation set, this isn’t a bad option. Exploit Weakness Enhancement: It’s an extra 3% to Exploit Weakness which is already a useful Offensive tech. Good if you regularly use Exploit, less if you just use Fateweaver. Max Damage Increase: There are 3 variants of this set effect currently,one from the Skirmisher (+50), one from the Bulwark (+25), and one from Gacha equipment (+10). Gacha max pieces tend to be on the Body Slot while the Skirmisher and Bulwark normally require you to use the Head, Gloves, and Feet slots. These effects do not stack and only the strongest effect applies. Giant Full Swing Enhancement: Its a damage boost to your Giant Full Swing. This is only found on weapons. Spellwalk Enhancement: It requires Spellwalk to be active, but it's a 15% speed boost. Eweca Movement Speed: Unlike the Ladeca Movement Speed buff, this is a fairly large 10% speed boost. Typically this set effect is found on Fleet Feet variants such as the Shooting Star Flying Shoes.. Ladeca Movement Speed Boost (Shadow Reaper Boots): Unlike most other Ladeca Movement Speed Boosts, this one provides a 12% movement speed boost. |
Body | Special Hyperion Eclipse Full/Light Chiton Special Imperial Knight Royal Uniform Special Royal Society Field Outfit Ultimate Geas Devastation Chestplate | Final Strike Duration | |||
Hands | Ceann Bliana Skirmisher Gloves Ultimate Geas Devastation Gloves | Wind Guard Duration - Mandatory | Combat Max Mastery, Axe Mastery Max Damage, Blunt Mastery Max Damage | ||
Feet | Elemental Harmony Shoes >Shadow Reaper Boots > Forest Ranger Boots > Fleet Feet/Shooting Star Flying Shoes/Shooting Star Roller Skates | Giant Full Swing Exclusive Weapon Range | Charge Minimum Range | ||
Robe | Special Ancient Dragon Guardian Wings > Special Draconian Wings > Enchantable Wings | ||||
Accessories | Unfinished Reverie’s Diadem Halo > Irusan’s Bell | Giant Full Swing Exclusive Weapon Damage | Combat Max Mastery, Blunt Mastery Max Damage, Axe Mastery Max Damage, Giant Full Swing Exclusive Weapon Range | ||
Weapon | Nightbringer Berserker > Perseus Cleaving Warrior Axe > Celtic Royal Warrior Axe+Signet >= Celtic Royal Warrior Hammer+Signet > Celtic Warrior Axe+Signet >= Celtic Warrior Hammer+Signet > Massive Despair Hammer | Giant Full Swing Exclusive Weapon Damage | Max Attack Power, Elemental Reforges (Fire, Ice, Lightning) | ||
Echostone | Fill with missing reforges |
Close Combat - Giant - Taunt
The S4 renovation changes to Taunt make it a good utility roll and further cements Giants as the Tank.
I wouldn’t specifically build for Taunt, but there is a setup you can aim for if you really want to make an ultra-chonk tank. When making a tanking setup, cross reference with Protection Stacking to maximize your defensive stats.-
Equipment Recommendations | Priority Reforges | Secondary Reforges | Tertiary Reforges | Set Effect Notes | |
Head | Wind Guard Cooldown | Stampede Cooldown, Taunt Duration | Defiance Activation Boost (Strong): Defiance is the best tech in the game. Ok serious now, Defiance works as a second deadly and full heal that can even save you from certain instant death mechanics. For a defensive setup or if you just want to boost your survivability this is worth having. Absorption Enhancement: This is a 10% chance to reduce incoming damage to 1. It’s a pretty strong effect if you need to facetank a lot of hits. Unshakable Will: It prevents stuns/knockdowns and reduces incoming damage by 50% on a 10 up and 30 down on Active/Cooldown time. It's a good defensive set effect but you’re more likely to want it on an offensive set for extra bulk and sustained damage cycles. What distinguishes it from Absorption is that Absorption does not have a cooldown and only works on one attack per activation. Piercing Resistance: Some Enemies in Glen Bearna do have Piercing Levels which negates defensive stat stacking. It’s recommended to have large amounts of protection in Glen Bearna and the presence of this set effect suggests going forward more enemies will have Piercing Levels. Spellwalk Enhancement: It requires Spellwalk to be active, but it's a 15% speed boost. Eweca Movement Speed: Unlike the Ladeca Movement Speed buff, this is a fairly large 10% speed boost. Typically this set effect is found on Fleet Feet variants such as the Shooting Star Flying Shoes.. | ||
Body | Special Imperial Knight Royal Uniform Ceann Bliana Bulwark Armor > Saint Guardian Full Armor > Colossal Valiance Armor | Taunt Range | |||
Hands | Ceann Bliana Bulwark Gauntlets Colossal Valiance Gauntlets >= Saint Guardian Gauntlets | Wind Guard Duration, Taunt Maximum Lured Monsters | |||
Feet | Colossal Valiance Greaves > Saint Guardian Boots Elemental Harmony Shoes > Shadow Reaper Boots > Forest Ranger Boots > Fleet Feet/Shooting Star Flying Shoes/Shooting Star Roller Skates | Taunt Minimum Lured Monsters | |||
Robe | |||||
Accessories | Pre r1 Equipment | ||||
Weapon | Pre r1 Equipment | Taunt Defense and Magic Defense increase per enemy provoked | |||
Off Hand | Nightbringer Vanguard (30%) > Perseus Vigilant Shield (20%) > Divine Shield (15%) > Demonic Fear Shield > Shield of Avon Massive Despair Shield (18%) > Frosted Borealis Shield (15%) > Vales Shield | Protection Increase | |||
Echostone | Fill with missing reforges |
Close Combat - Giant - Taunt Notes
It’s important to note that Glen Bearna has Set Scrolls in the Hard version drop tables. It should be possible in the future to have the Absorption Set Bonus, the Unshakable Will set bonus, and Defiance Set bonus active at the same time. I would think you would go for the Colossal Valiance Circlet, the Billian Ender (NA translation pending) Durable Guard Body, and Ultimate Geas Edge Gauntlets and Greaves. Piercing Resistance can help mitigate enemy Piercing due to the high damage output enemies that do have Piercing tend to have.
“Close Combat” - Giant - Throwing Attack

Instead of Archery, Giants get Throwing Attack. With the Season 4 Renovation Giants can half the cooldown of Throwing Attack, allowing them to spam Javelins. Spirit Atlatls also add 20% of the Atlatl’s damage in a moderately sized AoE, allowing for decent lower difficulty AoE damage.
Equipment Recommendations | Priority Reforges | Secondary Reforges | Tertiary Reforges | Set Effect Notes | |
Head | Ceann Bliana Skirmisher Circlet > Hyperion Eclipse Helionic Helm/Selenian Diadema Ultimate Geas Devastation Circlet | Sun and Moon: This is a pretty interesting conditional set effect. When landing a hit, you have a 5% chance to activate the Sun or Moon effect (60s). If both are active, you receive the Eclipse effect for 30 seconds (maintains the boost from Sun and Moon. Eclipse providing Bonus Damage makes it a very strong effect in addition to the rather large Damage/Magic Attack boost Sun: Max Damage +40, Max Hp +200 Moon: Magic Attack +60, Max MP +200 Eclipse: Bonus Damage +5%, Max Stamina +200 Assassin’s Advantage: Because this item has a 20 up 90 down for Active/Cooldown time and a 5% chance to activate on critical hits, it’s not as consistent as Increased Critical Damage. If you can 1-2 piece a Increased Critical Damage set effect (which may require Set Effect Scrolls or specific weapons), it’s not a bad idea to slot this in or the extra burst of Critical Damage, and Movement Speed. Increased Critical Damage: This is generally a good set effect to consider since it’s always active. Redoubled Offensive Activation Boost (Strong): This is a nice set effect to have, though it does face more competition nowadays. Redoubled Offensive is an extremely potent Tech and is a mainstay on almost all Tech loadouts. Redoubled Offensive - Damage Boost: Redoubled Offensive is a very strong Tech, so if you’re building an Ultimate Geas Devastation set, this isn’t a bad option. Exploit Weakness Enhancement: It’s an extra 3% to Exploit Weakness which is already a useful Offensive tech. Good if you regularly use Exploit, less if you just use Fateweaver. Max Damage Increase: There are 3 variants of this set effect currently,one from the Skirmisher (+50), one from the Bulwark (+25), and one from Gacha equipment (+10). Gacha max pieces tend to be on the Body Slot while the Skirmisher and Bulwark normally require you to use the Head, Gloves, and Feet slots. These Effects do not stack and only the strongest effect applies. Spellwalk Enhancement: It requires Spellwalk to be active, but it's a 15% speed boost. Eweca Movement Speed: Unlike the Ladeca Movement Speed buff, this is a fairly large 10% speed boost. Typically this set effect is found on Fleet Feet variants such as the Shooting Star Flying Shoes.. Ladeca Movement Speed Boost (Shadow Reaper Boots): Unlike most other Ladeca Movement Speed Boosts, this one provides a 12% movement speed boost. | |||
Body | Special Hyperion Eclipse Full/Light Chiton Special Imperial Knight Royal Uniform* Special Royal Society Field Outfit Ceann Bliana Skirmisher Cuirass | ||||
Hands | Ceann Bliana Skirmisher Gloves > Imperial Knight Gloves Ultimate Geas Devastation Gloves | Throwing Attack Damage | |||
Feet | Ultimate Geas Devastation Boots Elemental Harmony Shoes > Shadow Reaper Boots > Forest Ranger Boots > Fleet Feet/Shooting Star Flying Shoes/Shooting Star Roller Skates | ||||
Robe | Special Ancient Dragon Guardian Wings > Special Draconian Wings > Enchantable Wings | ||||
Accessories | Unfinished Reverie’s Diadem Halo > Irusan’s Bell | Throwing Attack Damage | |||
Weapon | Throwing Attack - Cooldown Reduction* | Effective Range | |||
Off Hand | Long Javelin (Jousting) >= Long Javelin LT > Bundle of Long Javelins (2000 - Cash Shop 150 NX) > Bundle of Long Javelins (50) | ||||
Echostone | Throwing Attack Damage |
“Close Combat” - Giant - Throwing Attack Notes
The Throwing Attack Cooldown reforge cannot appear on Echostones.
I think the 400 damage added after multipliers from the Jousting Javelin is still more than the 10 extra Max damage you get from crafting the Long Javelin LTs. However, Jousting Javelins have a very small stack size and not many players like Jousting. If you are able to mass a large number of Jousting Javelins, I would recommend getting a Javelin Bag. Wiki states the last time they were available was from the Eweca Orb Gacha which has long since been discontinued. If anyone remembers if it was rereleased, do let me know.
Lance
The goal is to boost your Lance Charge damage. Lance Charge is very powerful, but you need some specialized gear to make it work. Humans are also able to buff their own Lance Charge with support shot for an additional multiplicative damage boost. You ideally will want at least a level 21 spirit lance, but level 63 is preferred.
As of the Season 5 Renovation, you no longer need a pet to maximize the power of Lance Charge due to Lance Impact.
Equipment Recommendations | Priority Reforges | Secondary Reforges | Tertiary Reforges | Set Effect Notes | |
Head | Ceann Bliana Skirmisher Circlet > Hyperion Eclipse Helionic Helm/Selenian Diadema Ultimate Geas Devastation Circlet | Lance Charge Cooldown | Sun and Moon: This is a pretty interesting conditional set effect. When landing a hit, you have a 5% chance to activate the Sun or Moon effect (60s). If both are active, you receive the Eclipse effect for 30 seconds (maintains the boost from Sun and Moon. Eclipse providing Bonus Damage makes it a very strong effect in addition to the rather large Damage/Magic Attack boost Sun: Max Damage +40, Max Hp +200 Moon: Magic Attack +60, Max MP +200 Eclipse: Bonus Damage +5%, Max Stamina +200 Assassin’s Advantage: Because this item has a 20 up 90 down for Active/Cooldown time and a 5% chance to activate on critical hits, it’s not as consistent as Increased Critical Damage. If you can 1-2 piece a Increased Critical Damage set effect (which may require Set Effect Scrolls or specific weapons), it’s not a bad idea to slot this in or the extra burst of Critical Damage, and Movement Speed. Increased Critical Damage: This is generally a good set effect to consider since it’s always active. Redoubled Offensive Activation Boost (Strong): This is a nice set effect to have, though it does face more competition nowadays. Redoubled Offensive is an extremely potent Tech and is a mainstay on almost all Tech loadouts. Redoubled Offensive - Damage Boost: Redoubled Offensive is a very strong Tech, so if you’re building an Ultimate Geas Devastation set, this isn’t a bad option. Exploit Weakness Enhancement: It’s an extra 3% to Exploit Weakness which is already a useful Offensive tech. Good if you regularly use Exploit, less if you just use Fateweaver. Max Damage Increase: There are 3 variants of this set effect currently,one from the Skirmisher (+50), one from the Bulwark (+25), and one from Gacha equipment (+10). Gacha max pieces tend to be on the Body Slot while the Skirmisher and Bulwark normally require you to use the Head, Gloves, and Feet slots. These Effects do not stack and only the strongest effect applies. Imperial Knight Gloves: I’m 50% sure this is an additive boost to Rage Impact’s Melee Damage buff, but I don’t have one of these to test that. Even so it fits a lot of useful set effects onto the Glove slot. Spellwalk Enhancement: It requires Spellwalk to be active, but it's a 15% speed boost. Eweca Movement Speed: Unlike the Ladeca Movement Speed buff, this is a fairly large 10% speed boost. Typically this set effect is found on Fleet Feet variants such as the Shooting Star Flying Shoes.. Ladeca Movement Speed Boost (Shadow Reaper Boots): Unlike most other Ladeca Movement Speed Boosts, this one provides a 12% movement speed boost. Horseback Lance Charge Enhancement: This is just a placeholder description. The Perseus update we should be getting later this month will be adding a +20% Lance Charge Damage basic effect to the Spearhead Lance Charge Enhancement: It increases Lance Charge damage and is found on the weapon slot. | ||
Body | Special Hyperion Eclipse Full/Light Chiton Special Imperial Knight Royal Uniform* Special Royal Society Field Outfit Ceann Bliana Skirmisher Cuirass Ultimate Geas Devastation Chestplate - Magic Armor Upgrade - Weiss’s Armor Enhancement | Balance Increase* | |||
Hands | Ultimate Geas Devastation Gloves Ceann Bliana Skirmisher Gloves > Imperial Knight Gloves | Lance Charge Damage | Lance Mastery Max Attack Power, Combat Mastery Max Damage | ||
Feet | Elemental Harmony Shoes > Shadow Reaper Boots > Forest Ranger Boots > Fleet Feet/Shooting Star Flying Shoes/Shooting Star Roller Skates | Lance Charge Horseback Charge Additional Distance of Charge | Lance Charge Max Distance* | ||
Robe | Special Ancient Dragon Guardian Wings > Special Draconian Wings > Enchantable Wings | ||||
Accessories | Unfinished Reverie’s Diadem Halo > Irusan’s Bell Pre r1 Equipment | Lance Charge Damage | Lance Mastery Max Attack Power | ||
Weapon | Nightbringer Spearhead > Perseus Tempestuous Lance > Celtic Clashing Lance+Signet = Divine Short Lance+Signet | Lance Charge Horseback Damage, Lance Charge Main Target Damage | Max Attack Power, Elemental Reforges (Fire, Ice, Lightning) | ||
Off Hand | Cooking Pot - Giant Only | ||||
Echostone | Fill with missing reforges. |
Lance - Notes
Lance Charge Max Distance does boost mounted range, but it does not offer a damage boost. Essentially Lance Charge Max Distance is purely a utility reforge.
Balance Increase is a good reforge choice for the body slot if you are lacking a max Balance Roll Divine Lance or if you are aiming to put the Paradise Enchant on your body. Because Paradise lowers Balance by 20, you may be unable to hit 80 Balance depending on other factors.
Of course the Ultimate Geas Devastation armor is good because of their Redoubled Offensive set bonus, but Weiss’s Armor Enhancement also adds 8 Balance. Since Lances can potentially miss the 80 Balance mark, this is a good upgrade to have.
If you can achieve 80 Balance without Weiss’ Armor Enhancement, The Special Imperial Knight Royal Uniform would be a better choice. This may be through enchants or reforges.
It’s a bit harder to recommend the Divine Lance now that you can get the Celtic Clashing Lance and Perseus . The Celtic Clashing Lance is functionally as strong as the Divine Lance, but does not get access to Pillar. Pillar while an excellent enchant is quite a bit harder to acquire than enchants such as Penetrating and Corrib. While the Divine Lance is by technicality still the overall stronger weapon compared to the Celtic Clashing Lance, realistically your funds are best spent elsewhere.
The Perseus lance itself can completely ditch the suffix enchant, instead able to use a Max Damage Enchant such as Girgrishy or Downburst (with Girgrishy being from VHM Girg and Downburst not requiring the Mokku Raid).
Archery - Alchemic Sharpshooter
Alchemic Sharpshooter is generally still standard Archery, but with extra skills to provide additional high powered multi-hit burst damage. A greater emphasis is placed on reforges that will boost Sharpshooter skills as a result. Of course, you should still make your standard Archery Kit functions so you don’t just wait for your rather long cooldowns to finish cycling.
Once you have a Demolition Bow + Arrow or Ruination Bow + Arrow, you will no longer need the Bohemian set as these weapons provide the Magnum set bonus when used together.
Equipment Recommendations | Priority Reforges | Secondary Reforges | Tertiary Reforges | Set Effects | |
Head | Ceann Bliana Skirmisher Circlet > Hyperion Eclipse Helionic Helm/Selenian Diadema Ultimate Geas Devastation Circlet | Crash Shot Fragment Range | Sun and Moon: This is a pretty interesting conditional set effect. When landing a hit, you have a 5% chance to activate the Sun or Moon effect (60s). If both are active, you receive the Eclipse effect for 30 seconds (maintains the boost from Sun and Moon. Eclipse providing Bonus Damage makes it a very strong effect in addition to the rather large Damage/Magic Attack boost Sun: Max Damage +40, Max Hp +200 Moon: Magic Attack +60, Max MP +200 Eclipse: Bonus Damage +5%, Max Stamina +200 Assassin’s Advantage: Because this item has a 20 up 90 down for Active/Cooldown time and a 5% chance to activate on critical hits, it’s not as consistent as Increased Critical Damage. That said, Sharpshooters will normally get Increased Critical Hit Damage from Demolition and Ruination bows. The extra movement speed is nice to have though. Unshakable Will: It prevents stuns/knockdowns and reduces incoming damage by 50% on a 10 up and 30 down on Active/Cooldown time. It's a good defensive set effect to add some extra bulk in sustained damage cycles. The stun/knockdown resistance can help you recover from messy situations. Increased Critical Damage: Sharpshooters will get this set effect from Demolition and Ruination bows. Redoubled Offensive Activation Boost (Strong): This is a nice set effect to have, though it does face more competition nowadays. Redoubled Offensive is an extremely potent Tech and is a mainstay on almost all Tech loadouts. Redoubled Offensive - Damage Boost: Redoubled Offensive is a very strong Tech, so if you’re building an Ultimate Geas Devastation set, this isn’t a bad option. Exploit Weakness Enhancement: It’s an extra 3% to Exploit Weakness which is already a useful Offensive tech. Good if you regularly use Exploit, less if you just use Fateweaver. Max Damage Increase: There are 3 variants of this set effect currently,one from the Skirmisher (+50), one from the Bulwark (+25), and one from Gacha equipment (+10). Gacha max pieces tend to be on the Body Slot while the Skirmisher and Bulwark normally require you to use the Head, Gloves, and Feet slots. These Effects do not stack and only the strongest effect applies. Effective Range Boost: It does increase your targeting range, but it’s not the largest boost in the world. You can skip this set effect if you don’t care to squeeze every bit of aim speed out of the game. Spellwalk Enhancement: It requires Spellwalk to be active, but it's a 15% speed boost. Eweca Movement Speed: Unlike the Ladeca Movement Speed buff, this is a fairly large 10% speed boost. Typically this set effect is found on Fleet Feet variants such as the Shooting Star Flying Shoes.. Ladeca Movement Speed Boost (Shadow Reaper Boots): Unlike most other Ladeca Movement Speed Boosts, this one provides a 12% movement speed boost. Magnum Shot Damage: This set can be obtained from several sources, so you aren’t restricted to using the Bohemian set. Urgent Shot Cost Reduction: Urgent Shot can be resource intensive to spam, but it’s not especially hard to play around. This set effect is fine as a slot filler but I doubt it’s all that noticeable given our plethora of HP and Stamina regen sources. Fire/Water/Earth/Wind Alchemy Mastery Enhancements: These provide a 1% boost to their respective Alchemic Mastery which does affect Sharpshooter’s Tri Assault. It’s good to have, but likely less important than reaching 9 Piercing. | ||
Body | Special Hyperion Eclipse Full/Light Chiton Ceann Bliana Skirmisher Cuirass > Special Forest Ranger Outfit Special Royal Society Field Outfit Ultimate Geas Devastation Chestplate Special Imperial Knight Royal Uniform | Ranged Attack Max Damage Crash Shot Max Fragments - Prefer Echostone for increased limit | Final Shot Duration | ||
Hands | Ceann Bliana Skirmisher Gloves > Imperial Knight Gloves Ultimate Geas Devastation Gloves Hyperion Eclipse Wrist Torques > Shadow Reaper Gloves/Forest Ranger Gloves* | Magnum Shot Damage | Crash Shot Fragment Damage Bow/Crossbow Mastery Max Damage | ||
Feet | Elemental Harmony Shoes > Shadow Reaper Boots > Forest Ranger Boots > Fleet Feet/Shooting Star Flying Shoes/Shooting Star Roller Skates | Fire Alchemy Efficiency Water Alchemy Efficiency | |||
Robe | Harmonious Yantra of Clarity (Enchantable) > Harmonious Yantra of Stoicism > Harmonious Yantra of Tranquility/Solitude Special Ancient Dragon Guardian Wings > Special Draconian Wings > Enchantable Wings | ||||
Accessories | Unfinished Reverie’s Diadem Halo > Irusan’s Bell | Magnum Shot Damage | Max Attack Power, Bow/Crossbow Mastery Max Damage, Ranged Attack Max Damage | ||
Weapon | Bow of Ruination > Demolition Breaker Bow > Nightbringer Rogue > Nightbringer Predator > Perseus Dynamic Crossbow > Divine Crossbow+Signet > Celtic Royal Crossbow +Signet > Perseus Voiceless Bow > Celtic Ancient Bow+Signet = Bhafel Hunter = Salvation Bow > Crossbow of Blooming Memories | Effective Range | Max Attack Power, Bow/Crossbow Mastery Max Damage, Elemental Reforges (Fire, Ice, Lightning) | ||
Off Hand | Arrow of Ruination > Demolition Breaker Arrow > Nightbringer Huntsman > Perseus Voiceless Arrow > Bhafel Huntress - Magic Arrows must be paired with their respective bow Piercing Forest Arrows > Sharp Arrows = Special Arrows = Forest Ranger Arrows > Solid Bone Arrow | ||||
Echostone | Fill with missing reforges, namely Crash Shot Fragment Damage and the opposite of the Efficiency Reforge on your Feet slot (baring dual rolls) | Crash Shot Max Fragments |
Archery - Alchemic Sharpshooter Notes
Crash Shot Fragment Count note:, An Alchemic Sharpshooter in an AoE situation may still use Crash Shot, especially since Crash Shot is quite strong with a Ruin Bow. Alchemic Stinger’s CDs are still a fair bit longer than your standard Archery Rotation, so depending on your available slots, you may still get some mileage out of Crash Shot Fragments.
For the most part, Sharpshooter will overlap with both regular Archery builds. The other two builds will remain since NA Saints may still utilize Archery for DPS in Glen Bearna.
The Perseus
Archery - Magnum
The goal is to maximize our Magnum damage and ability to hit things. If you’re a human who wants to do archery just remove any elf exclusive reforge and Erg A50 the Bow of Ruination.
Once you have a Demolition Bow + Arrow or Ruination Bow + Arrow, you will no longer need the Bohemian set as these weapons provide the Magnum set bonus when used together.
Equipment Recommendations | Priority Reforges | Secondary Reforges | Tertiary Reforges | Set Effect Notes | |
Head | Ceann Bliana Skirmisher Circlet > Hyperion Eclipse Helionic Helm/Selenian Diadema Ultimate Geas Devastation Circlet | Final Shot Cooldown | Sun and Moon: This is a pretty interesting conditional set effect. When landing a hit, you have a 5% chance to activate the Sun or Moon effect (60s). If both are active, you receive the Eclipse effect for 30 seconds (maintains the boost from Sun and Moon. Eclipse providing Bonus Damage makes it a very strong effect in addition to the rather large Damage/Magic Attack boost Sun: Max Damage +40, Max Hp +200 Moon: Magic Attack +60, Max MP +200 Eclipse: Bonus Damage +5%, Max Stamina +200 Assassin’s Advantage: Because this item has a 20 up 90 down for Active/Cooldown time and a 5% chance to activate on critical hits, it’s not as consistent as Increased Critical Damage. That said, Sharpshooters will normally get Increased Critical Hit Damage from Demolition and Ruination bows. Unshakable Will: It prevents stuns/knockdowns and reduces incoming damage by 50% on a 10 up and 30 down on Active/Cooldown time. It's a good defensive set effect to add some extra bulk in sustained damage cycles. The stun/knockdown resistance can help you recover from messy situations. Increased Critical Damage: Sharpshooters will get this set effect from Demolition and Ruination bows. Redoubled Offensive Activation Boost (Strong): This is a nice set effect to have, though it does face more competition nowadays. Redoubled Offensive is an extremely potent Tech and is a mainstay on almost all Tech loadouts. Redoubled Offensive - Damage Boost: Redoubled Offensive is a very strong Tech, so if you’re building an Ultimate Geas Devastation set, this isn’t a bad option. Exploit Weakness Enhancement: It’s an extra 3% to Exploit Weakness which is already a useful Offensive tech. Good if you regularly use Exploit, less if you just use Fateweaver. Max Damage Increase: There are 3 variants of this set effect currently,one from the Skirmisher (+50), one from the Bulwark (+25), and one from Gacha equipment (+10). Gacha max pieces tend to be on the Body Slot while the Skirmisher and Bulwark normally require you to use the Head, Gloves, and Feet slots. These Effects do not stack and only the strongest effect applies. Effective Range Boost: It does increase your targeting range, but it’s not the largest boost in the world. You can skip this set effect if you don’t care to squeeze every bit of aim speed out of the game. Spellwalk Enhancement: It requires Spellwalk to be active, but it's a 15% speed boost. Eweca Movement Speed: Unlike the Ladeca Movement Speed buff, this is a fairly large 10% speed boost. Typically this set effect is found on Fleet Feet variants such as the Shooting Star Flying Shoes.. Ladeca Movement Speed Boost (Shadow Reaper Boots): Unlike most other Ladeca Movement Speed Boosts, this one provides a 12% movement speed boost. Magnum Shot Damage: This set can be obtained from several sources, so you aren’t restricted to using the Bohemian set. Urgent Shot Cost Reduction: Urgent Shot can be resource intensive to spam, but it’s not especially hard to play around. This set effect is fine as a slot filler but I doubt it’s all that noticeable given our plethora of HP and Stamina regen sources. | ||
Body | Special Hyperion Eclipse Full/Light Chiton Ceann Bliana Skirmisher Cuirass > Special Forest Ranger Outfit Special Royal Society Field Outfit Ultimate Geas Devastation Chestplate Special Imperial Knight Royal Uniform | Ranged Attack Max Damage Final Shot Duration | |||
Hands | Ultimate Geas Devastation Gloves Ceann Bliana Skirmisher Gloves > Imperial Knight Gloves Hyperion Eclipse Wrist Torques > Shadow Reaper Gloves/Forest Ranger Gloves* | Magnum Shot Damage | Bow/Crossbow Mastery Max Damage | ||
Feet | Elemental Harmony Shoes > Shadow Reaper Boots > Forest Ranger Boots > Fleet Feet/Shooting Star Flying Shoes/Shooting Star Roller Skates | Ranged Attack Max Damage | |||
Robe | Special Ancient Dragon Guardian Wings > Special Draconian Wings > Enchantable Wings | ||||
Accessories | Unfinished Reverie’s Diadem Halo > Irusan’s Bell | Magnum Shot Damage | Max Attack Power, Bow/Crossbow Mastery Max Damage, Ranged Attack Max Damage | ||
Weapon | Bow of Ruination > Demolition Breaker Bow > Nightbringer Rogue > Nightbringer Predator > Perseus Dynamic Crossbow > Divine Crossbow+Signet > Celtic Royal Crossbow +Signet > Perseus Voiceless Bow > Celtic Ancient Bow+Signet = Bhafel Hunter = Salvation Bow > Crossbow of Blooming Memories | Effective Range | Max Attack Power, Bow/Crossbow Mastery Max Damage, Elemental Reforges (Fire, Ice, Lightning) | ||
Off Hand | Arrow of Ruination > Demolition Breaker Arrow > Nightbringer Huntsman > Perseus Voiceless Arrow > Bhafel Huntress - Magic Arrows must be paired with their respective bow Piercing Forest Arrows > Sharp Arrows = Special Arrows = Forest Ranger Arrows > Solid Bone Arrow | ||||
Echostone | Fill with missing reforges | Crash Shot Max Fragments, Urgent Shot Cooldown Decrease, Urgent Shot Effect Duration |
Archery - Magnum Notes
The addition of Ruination and Demolition equipment has opened a lot of slots for archery. Bohemian Wear is no longer mandatory because Ruination/Demolition Bows+Arrows provide a Magnum set bonus. As a result, we can now slot in Geas Devastation Gear and the Forest Ranger Gloves.
The Forest Ranger Gloves may be noteworthy because their set bonus increases your Effective Range, though I’ve heard that the range increase is only 50 units which may be insignificant.
If you’re using a Divine Crossbow for actual archery and not as a weapon for Judgement Blade, you’ll still need a Bohemian Set.
The Body and Feet slots for Ranged Attack Max Damage do not stack.
Archery - Crash Shot
The goal is to maximize our Crash Shot Damage for extremely high damage against a single target. This is most effective against bosses/minibosses with high amounts of minions (e.g Kraken’s Soaring Legs and the Revived Illusion Gaeta). We can also look at boosting our AoE damage to deal with mooks. Again, if you’re a human archer just remove any elf exclusive reforges. Elves and Humans want an Erg S50 bow for the Crash Shot Cooldown reduction (though elf archers should still at least Erg A50 bow for mag anyways).
Equipment Recommendations | Priority Reforges | Secondary Reforges | Tertiary Reforges | Set Effect Notes | |
Head | Ceann Bliana Skirmisher Circlet > Hyperion Eclipse Helionic Helm/Selenian Diadema Ultimate Geas Devastation Circlet | Crash Shot Fragment Range | Final Shot Cooldown | Sun and Moon: This is a pretty interesting conditional set effect. When landing a hit, you have a 5% chance to activate the Sun or Moon effect (60s). If both are active, you receive the Eclipse effect for 30 seconds (maintains the boost from Sun and Moon. Eclipse providing Bonus Damage makes it a very strong effect in addition to the rather large Damage/Magic Attack boost Sun: Max Damage +40, Max Hp +200 Moon: Magic Attack +60, Max MP +200 Eclipse: Bonus Damage +5%, Max Stamina +200 Assassin’s Advantage: Because this item has a 20 up 90 down for Active/Cooldown time and a 5% chance to activate on critical hits, it’s not as consistent as Increased Critical Damage. That said, Sharpshooters will normally get Increased Critical Hit Damage from Demolition and Ruination bows. Unshakable Will: It prevents stuns/knockdowns and reduces incoming damage by 50% on a 10 up and 30 down on Active/Cooldown time. It's a good defensive set effect to add some extra bulk in sustained damage cycles. The stun/knockdown resistance can help you recover from messy situations. Increased Critical Damage: Sharpshooters will get this set effect from Demolition and Ruination bows. Redoubled Offensive Activation Boost (Strong): This is a nice set effect to have, though it does face more competition nowadays. Redoubled Offensive is an extremely potent Tech and is a mainstay on almost all Tech loadouts. Redoubled Offensive - Damage Boost: Redoubled Offensive is a very strong Tech, so if you’re building an Ultimate Geas Devastation set, this isn’t a bad option. Exploit Weakness Enhancement: It’s an extra 3% to Exploit Weakness which is already a useful Offensive tech. Good if you regularly use Exploit, less if you just use Fateweaver. Max Damage Increase: There are 3 variants of this set effect currently,one from the Skirmisher (+50), one from the Bulwark (+25), and one from Gacha equipment (+10). Gacha max pieces tend to be on the Body Slot while the Skirmisher and Bulwark normally require you to use the Head, Gloves, and Feet slots. These Effects do not stack and only the strongest effect applies. Effective Range Boost: It does increase your targeting range, but it’s not the largest boost in the world. You can skip this set effect if you don’t care to squeeze every bit of aim speed out of the game. Spellwalk Enhancement: It requires Spellwalk to be active, but it's a 15% speed boost. Eweca Movement Speed: Unlike the Ladeca Movement Speed buff, this is a fairly large 10% speed boost. Typically this set effect is found on Fleet Feet variants such as the Shooting Star Flying Shoes.. Ladeca Movement Speed Boost (Shadow Reaper Boots): Unlike most other Ladeca Movement Speed Boosts, this one provides a 12% movement speed boost. Urgent Shot Cost Reduction: Urgent Shot can be resource intensive to spam, but it’s not especially hard to play around. This set effect is fine as a slot filler but I doubt it’s all that noticeable given our plethora of HP and Stamina regen sources. | |
Body | Special Hyperion Eclipse Full/Light Chiton Ceann Bliana Skirmisher Cuirass > Special Forest Ranger Outfit Special Royal Society Field Outfit Ultimate Geas Devastation Chestplate Special Imperial Knight Royal Uniform | Ranged Attack Max Damage* Crash Shot Max Fragments - Prefer Echo Final Shot Duration | |||
Hands | Ceann Bliana Skirmisher Gloves Ultimate Geas Devastation Gloves Hyperion Eclipse Wrist Torques > Shadow Reaper Gloves/Forest Ranger Gloves | Bow/Crossbow Mastery Max Damage, Crash Shot Fragment Damage | |||
Feet | Elemental Harmony Shoes > Shadow Reaper Boots > Forest Ranger Boots > Fleet Feet/Shooting Star Flying Shoes/Shooting Star Roller Skates | Ranged Attack Max Damage | |||
Robe | Special Ancient Dragon Guardian Wings > Special Draconian Wings > Enchantable Wings | ||||
Accessories | Unfinished Reverie’s Diadem Halo > Irusan’s Bell | Crash Shot Fragment Damage | Bow/Crossbow Mastery Max Damage, Ranged Attack Max Damage | ||
Weapon | Bow of Ruination > Demolition Breaker Bow > Nightbringer Rogue > Nightbringer Predator > Perseus Dynamic Crossbow > Divine Crossbow+Signet > Celtic Royal Crossbow +Signet > Perseus Voiceless Bow > Celtic Ancient Bow+Signet = Bhafel Hunter = Salvation Bow > Crossbow of Blooming Memories | Effective Range | Max Attack Power, Elemental Reforges (Fire, Ice, Lightning) | ||
Off Hand | Arrow of Ruination > Demolition Breaker Arrow > Nightbringer Huntsman > Perseus Voiceless Arrow > Bhafel Huntress - Magic Arrows must be paired with their respective bow Piercing Forest Arrows > Sharp Arrows = Special Arrows = Forest Ranger Arrows > Solid Bone Arrow | ||||
Echostone | Crash Shot Max Fragments** |
Archery - Crash Shot Notes
The echostone for Crash Shot Max Fragments caps at 10 while the body reforge caps at 5, which makes the echostone the more desirable slot to put Crash Shot Max Fragments on.
The Forest Ranger Gloves may be noteworthy because their set bonus increases your Effective Range, though I’ve heard that the range increase is only 50 units which may be insignificant.
The Body and Feet Slots for Ranged Attack Max Damage do not stack.
Archery - Support Shot
Aim for the Support Shot set effect, slap on the Support Shot Master title (mostly if you’re buffing somebody else’s support shot) and Stormborne title and you’re good to go.
Support Shot when geared for will increase all melee damage type attacks by up to 19.5% (Need to verify glyph), stacking with other forms of damage amplification such as Death Mark.
Humans are able to almost cycle Support Shot’s cooldown (perfectly with Erg), making them superior at its application than Elves.
Giants of course don’t have access to this, so Giants may want to instead look at building for Rage Impact cooldown.
Equipment Recommendations | Priority Reforges | Secondary Reforges | Tertiary Reforges | Set Effect Notes | |
Head | Support Shot: This set effect is multiplicative to Support Shot, resulting in a rather small boost. | ||||
Body | |||||
Hands | |||||
Feet | |||||
Robe | |||||
Accessories |
Magic/Dark Diviner/Harmonic Saint - Staff Generalist
Magic has a rather large number of skills, even though on a day to day basis you are likely to focus on a specific offensive spell. This main section will focus on a more generalist/complete listing of magic reforges, with subsections focusing on specific elements and use cases/gear swaps.
Mix and match where appropriate and gearswap as needed. See individual Magic Element pages for specific notes on each. You don't need to cram everything onto one build if you are not using certain elements offensively.
Equipment Recommendations | Priority Reforges | Secondary Reforges | Tertiary Reforges | Set Effect Notes | |
Head | Ceann Bliana Scholar’s Hairpin Ultimate Geas Devastation Circlet Hyperion Eclipse Helionic Helm/Selenian Diadema | Ice Mastery Damage, Lightning Mastery Damage, Fire Mastery Damage | Act 6: Crisis Radius on Yellow Echostone or Headgear | Awakening of Light Cooldown* | Sun and Moon: I wouldn’t prioritize this over Tri-Element Boost, but Bonus Damage is a very good stat. This is a pretty interesting conditional set effect. When landing a hit, you have a 5% chance to activate the Sun or Moon effect (60s). If both are active, you receive the Eclipse effect for 30 seconds (maintains the boost from Sun and Moon. Eclipse providing Bonus Damage makes it a very strong effect in addition to the rather large Damage/Magic Attack boost Sun: Max Damage +40, Max Hp +200 Moon: Magic Attack +60, Max MP +200 Eclipse: Bonus Damage +5%, Max Stamina +200 Magic Element Mastery Damage: This is more or less a staple in Magic setups nowadays. It’s a strong Tri-Element boost stacking with our Demolition and Ruination staves. Advanced/ Magic Set Effects:These are from the Demolition/Ruination Staves. They’re generally damage boosts, though the Lightning Rod Set effect reduces the charge time of Lightning Rod by 1 second. Eternal Prayer: When casting Magic or Harmonic Saint spells, you have a 5% chance to activate this effect. This increases your Magic Attack by 100 for 30 up and 100 down Active/Cooldown time. I wouldn’t sacrifice Magic Element Mastery Damage for this, but you can make the set effect without the Body slot. Lightning Rod Enhancement: Very specifically from Lord of the Seas, this increases the damage of Lightning Rod. Assassin’s Advantage: Because this item has a 20 up 90 down for Active/Cooldown time and a 5% chance to activate on critical hits, it’s not as consistent as Increased Critical Damage. If you can 1-2 piece a Increased Critical Damage set effect (which may require Set Effect Scrolls or specific weapons), it’s not a bad idea to slot this in or the extra burst of Critical Damage, Attack Delay reduction, and Movement Speed. Unshakable Will: It prevents stuns/knockdowns and reduces incoming damage by 50% on a 10 up and 30 down on Active/Cooldown time. It's a good defensive set effect to add some extra bulk in sustained damage cycles. The stun/knockdown resistance can help you recover from messy situations. Increased Critical Damage: This is generally a good set effect to consider since it’s always active. Redoubled Offensive Activation Boost (Strong): This is a nice set effect to have, though it does face more competition nowadays. Redoubled Offensive is an extremely potent Tech and is a mainstay on almost all Tech loadouts. Redoubled Offensive - Damage Boost: Redoubled Offensive is a very strong Tech, so if you’re building an Ultimate Geas Devastation set, this isn’t a bad option. Exploit Weakness Enhancement: It’s an extra 3% to Exploit Weakness which is already a useful Offensive tech. Good if you regularly use Exploit, less if you just use Fateweaver. Spellwalk Enhancement: It requires Spellwalk to be active, but it's a 15% speed boost. Eweca Movement Speed: Unlike the Ladeca Movement Speed buff, this is a fairly large 10% speed boost. Typically this set effect is found on Fleet Feet variants such as the Shooting Star Flying Shoes. Ladeca Movement Speed Boost (Shadow Reaper Boots): Unlike most other Ladeca Movement Speed Boosts, this one provides a 12% movement speed boost. Fire/Ice/Lightning Mastery Enhancement: Because of our access to Lords of Ruination Staves, we are able to reach 9 Piercing without the use of a Destructive Robe on Staves (LoRS + Meteoroid + Mana Pierce + Diviner lvl 10). This does mean the Yantras end up providing more benefits as long as you can keep Mana Pierce up. |
Body | Special Hyperion Eclipse Full/Light Chiton Special Seraphic Harmony/Symphony Attire Ceann Bliana Scholar’s Halfrobe > Special Elemental Harmony Suit Special Imperial Knight Royal Uniform Special Royal Society Field Outfit Ultimate Geas Devastation Chestplate | Hailstorm Range | |||
Hands | Ceann Bliana Scholar’s Ringband > Weaving Gloves* - Weaving Gloves Unrepairable Rosemary Gloves* - For Ice Magic | Ice Spear Explosion Radius* Magic Attack - Weaving Gloves Only | Spinning Slasher Effective Range* | ||
Feet | Elemental Harmony Shoes > Shadow Reaper Boots > Forest Ranger Boots > Fleet Feet/Shooting Star Flying Shoes/Shooting Star Roller Skates | Shadow Bind Duration | |||
Robe | Infernal Yantra of Clarity (Enchantable) > Infernal Yantra of Stoicism > Infernal Yantra of Wrath/Tranquility/Detachment Special Ancient Dragon Guardian Wings > Special Draconian Wings > Enchantable Wings | ||||
Accessories | Unfinished Reverie’s Diadem Halo > Irusan’s Bell | Ice Spear Explosion Range Ice Mastery Damage Lightning Mastery Damage Fire Mastery Damage | Magic Attack | ||
Advanced Magic Weapon | Lord of Ruination Staff > Demolition Deepglow Staff > Nightbringer Inquisitor > Perseus Mystic Staff > Celtic Druid Staff+Signet | Magic Attack | Hail Storm Damage | ||
Intermediate Magic Weapon | Lord of Ruination Staff >= Nightbringer Inquisitor > Demolition Deepglow Staff > Perseus Mystic Staff > Celtic Druid Staff+Signet | Magic Attack | Fireball Damage Casting Speed | ||
Utility Weapon | Shadow Bind Duration* - prefer Silver Echostone Dorcha Gain | ||||
Echostone/ Additional Equipment | Yellow Echostone/Extra Equipment Slot - Headgear* | Magic Attack, Lightning Rod Cooldown*, Lightning Rod Charged Damage Hydra Transmutation Magic Protection Reduction on Black Echostone | Fill with missing reforges |
Magic/Dark Diviner - Fire Magic
Dark Mages have extremely strong Fire Magics with Fireball, Explosive Lunge, and Meteor Strike. There aren't many useful utility effects in a pure Fire Mage as a result. Casting Speed, however, can be used to rapidly drop Time Shifted Meteor Strikes to wipe waves of enemies or bosses.
It is worth noting that with the Dark Arts update, Fireball has had its Spell Constant reduced, causing a 15.5% damage drop. While Fireball is still a strong skill, it does face more competition from Thunder now.
Equipment Recommendations | Priority Reforges | Secondary Reforges | Tertiary Reforges | Set Effect Notes | |
Head | Ceann Bliana Scholar’s Hairpin Ultimate Geas Devastation Circlet Hyperion Eclipse Helionic Helm/Selenian Diadema | Fire Mastery Damage | Act 6: Crisis Radius on Yellow Echostone or Headgear | Sun and Moon: I wouldn’t prioritize this over Tri-Element Boost, but Bonus Damage is a very good stat. This is a pretty interesting conditional set effect. When landing a hit, you have a 5% chance to activate the Sun or Moon effect (60s). If both are active, you receive the Eclipse effect for 30 seconds (maintains the boost from Sun and Moon. Eclipse providing Bonus Damage makes it a very strong effect in addition to the rather large Damage/Magic Attack boost Sun: Max Damage +40, Max Hp +200 Moon: Magic Attack +60, Max MP +200 Eclipse: Bonus Damage +5%, Max Stamina +200 Magic Element Mastery Damage: This is more or less a staple in Magic setups nowadays. It’s a strong Tri-Element boost stacking with our Demolition and Ruination staves. Advanced/ Magic Set Effects:These are from the Demolition/Ruination Staves. For Fire Magic specifically, the Demolition/Ruination Staves increase the damage of Meteor Strike by 30% Intermediate Magic Damage: This isn’t a set effect, but it is a special trait some staves have. Depending on the weapon tier (Nightbringer, Perseus), the magnitude of this buff increases. Eternal Prayer: When casting Magic or Harmonic Saint spells, you have a 5% chance to activate this effect. This increases your Magic Attack by 100 for 30 up and 100 down Active/Cooldown time. I wouldn’t sacrifice Magic Element Mastery Damage for this, but you can make the set effect without the Body slot. Assassin’s Advantage: Because this item has a 20 up 90 down for Active/Cooldown time and a 5% chance to activate on critical hits, it’s not as consistent as Increased Critical Damage. If you can 1-2 piece a Increased Critical Damage set effect (which may require Set Effect Scrolls or specific weapons), it’s not a bad idea to slot this in or the extra burst of Critical Damage, Attack Delay reduction, and Movement Speed. Unshakable Will: It prevents stuns/knockdowns and reduces incoming damage by 50% on a 10 up and 30 down on Active/Cooldown time. It's a good defensive set effect to add some extra bulk in sustained damage cycles. The stun/knockdown resistance can help you recover from messy situations. Increased Critical Damage: This is generally a good set effect to consider since it’s always active. Redoubled Offensive Activation Boost (Strong): This is a nice set effect to have, though it does face more competition nowadays. Redoubled Offensive is an extremely potent Tech and is a mainstay on almost all Tech loadouts. Redoubled Offensive - Damage Boost: Redoubled Offensive is a very strong Tech, so if you’re building an Ultimate Geas Devastation set, this isn’t a bad option. Exploit Weakness Enhancement: It’s an extra 3% to Exploit Weakness which is already a useful Offensive tech. Good if you regularly use Exploit, less if you just use Fateweaver. Spellwalk Enhancement: It requires Spellwalk to be active, but it's a 15% speed boost. Eweca Movement Speed: Unlike the Ladeca Movement Speed buff, this is a fairly large 10% speed boost. Typically this set effect is found on Fleet Feet variants such as the Shooting Star Flying Shoes. Ladeca Movement Speed Boost (Shadow Reaper Boots): Unlike most other Ladeca Movement Speed Boosts, this one provides a 12% movement speed boost. Fire/Ice/Lightning Mastery Enhancement: Because of our access to Lords of Ruination Staves, we are able to reach 9 Piercing without the use of a Destructive Robe on Staves (LoRS + Meteoroid + Mana Pierce + Diviner lvl 10). This does mean the Yantras end up providing more benefits as long as you can keep Mana Pierce up. | |
Body | Special Hyperion Eclipse Full/Light Chiton Special Seraphic Harmony/Symphony Attire Ceann Bliana Scholar’s Halfrobe > Special Elemental Harmony Suit Special Imperial Knight Royal Uniform Special Royal Society Field Outfit Ultimate Geas Devastation Chestplate | ||||
Hands | Ceann Bliana Scholar’s Ringband > Weaving Gloves* - Weaving Gloves Unrepairable | Ice Spear Explosion Range Magic Attack - Weaving Gloves Only | Spinning Slasher Effective Range* | ||
Feet | Elemental Harmony Shoes > Shadow Reaper Boots > Forest Ranger Boots > Fleet Feet/Shooting Star Flying Shoes/Shooting Star Roller Skates | Shadow Bind Duration | |||
Robe | Infernal Yantra of Clarity (Enchantable) > Infernal Yantra of Stoicism > Infernal Yantra of Wrath Special Ancient Dragon Guardian Wings > Special Draconian Wings > Enchantable Wings | ||||
Accessories | Unfinished Reverie’s Diadem Halo > Irusan’s Bell | Fire Mastery Damage | Magic Attack | ||
Advanced Magic Weapon | Lord of Ruination Staff > Demolition Deepglow Staff > > Nightbringer Inquisitor > Perseus Mystic Staff > Celtic Druid Staff+Signet | Magic Attack, Fireball Max Damage | Casting Speed | ||
Intermediate Magic Weapon | Lord of Ruination Staff >= Nightbringer Inquisitor > Demolition Deepglow Staff > Perseus Mystic Staff > Celtic Druid Staff+Signet | Magic Attack, Fireball Max Damage | Casting Speed | ||
Utility Weapon | Shadow Bind Duration* - prefer Silver Echostone or Shoe | ||||
Echostone/ Additional Equipment | Yellow Echostone/Extra Equipment Slot - Headgear* | Magic Attack Hydra Transmutation Magic Protection Reduction on Black Echostone | Fill with missing reforges |
Magic/Dark Diviner/Harmonic Saint - Ice Magic
With Ice Magic, you’re likely going to be fighting with Hailstorm. Ice Spear in certain situations can even be used to perform Crowd Control and DPS, though these situations tend to be limited in practice. Dark Mage’s Snowstorm uniquely scales its attack radius and damage on Ice Spear’s attack radius (3m +30% of IS) and damage. This does make Ice Spear Explosion Radius an important Dark Mage reforge.
Harmonic Saints choosing to use magic may want to utilize Hailstorm over Fireball. Not only will Saints lack the +2 Intermediate Magic Chain Casting Diviners will get, but Fireball during the Dark Arts update had its Spell Constant nerfed.
Equipment Recommendations | Priority Reforges | Secondary Reforges | Tertiary Reforges | Set Effect Notes | |
Head | Ceann Bliana Skirmisher Circlet Ultimate Geas Devastation Circlet Hyperion Eclipse Helionic Helm/Selenian Diadema | Ice Mastery Damage | Act 6: Crisis Radius on Yellow Echostone or Headgear | Sun and Moon: I wouldn’t prioritize this over Tri-Element Boost, but Bonus Damage is a very good stat. This is a pretty interesting conditional set effect. When landing a hit, you have a 5% chance to activate the Sun or Moon effect (60s). If both are active, you receive the Eclipse effect for 30 seconds (maintains the boost from Sun and Moon. Eclipse providing Bonus Damage makes it a very strong effect in addition to the rather large Damage/Magic Attack boost Sun: Max Damage +40, Max Hp +200 Moon: Magic Attack +60, Max MP +200 Eclipse: Bonus Damage +5%, Max Stamina +200 Magic Element Mastery Damage: This is more or less a staple in Magic setups nowadays. It’s a strong Tri-Element boost stacking with our Demolition and Ruination staves. Advanced/ Magic Set Effects:These are from the Demolition/Ruination Staves.. For Ice Magic specifically, the Demolition/Ruination Staves increase the damage of Hailstorm by 15%. Intermediate Magic Damage: This isn’t a set effect, but it is a special trait some staves have. Depending on the weapon tier (Nightbringer, Perseus), the magnitude of this buff increases. Eternal Prayer: When casting Magic or Harmonic Saint spells, you have a 5% chance to activate this effect. This increases your Magic Attack by 100 for 30 up and 100 down Active/Cooldown time. I wouldn’t sacrifice Magic Element Mastery Damage for this, but you can make the set effect without the Body slot. Assassin’s Advantage: Because this item has a 20 up 90 down for Active/Cooldown time and a 5% chance to activate on critical hits, it’s not as consistent as Increased Critical Damage. If you can 1-2 piece a Increased Critical Damage set effect (which may require Set Effect Scrolls or specific weapons), it’s not a bad idea to slot this in or the extra burst of Critical Damage, Attack Delay reduction, and Movement Speed. Unshakable Will: It prevents stuns/knockdowns and reduces incoming damage by 50% on a 10 up and 30 down on Active/Cooldown time. It's a good defensive set effect to add some extra bulk in sustained damage cycles. The stun/knockdown resistance can help you recover from messy situations. Increased Critical Damage: This is generally a good set effect to consider since it’s always active. Redoubled Offensive Activation Boost (Strong): This is a nice set effect to have, though it does face more competition nowadays. Redoubled Offensive is an extremely potent Tech and is a mainstay on almost all Tech loadouts. Redoubled Offensive - Damage Boost: Redoubled Offensive is a very strong Tech, so if you’re building an Ultimate Geas Devastation set, this isn’t a bad option. Exploit Weakness Enhancement: It’s an extra 3% to Exploit Weakness which is already a useful Offensive tech. Good if you regularly use Exploit, less if you just use Fateweaver. Spellwalk Enhancement: It requires Spellwalk to be active, but it's a 15% speed boost. Eweca Movement Speed: Unlike the Ladeca Movement Speed buff, this is a fairly large 10% speed boost. Typically this set effect is found on Fleet Feet variants such as the Shooting Star Flying Shoes. Ladeca Movement Speed Boost (Shadow Reaper Boots): Unlike most other Ladeca Movement Speed Boosts, this one provides a 12% movement speed boost. Fire/Ice/Lightning Mastery Enhancement: Because of our access to Lords of Ruination Staves, we are able to reach 9 Piercing without the use of a Destructive Robe on Staves (LoRS + Meteoroid + Mana Pierce + Diviner lvl 10). This does mean the Yantras end up providing more benefits as long as you can keep Mana Pierce up. | |
Body | Special Hyperion Eclipse Full/Light Chiton Special Seraphic Harmony/Symphony Attire Ceann Bliana Scholar’s Halfrobe > Special Elemental Harmony Suit Special Imperial Knight Royal Uniform Special Royal Society Field Outfit Ultimate Geas Devastation Chestplate | Hailstorm Range | |||
Hands | Rosemary Gloves* (Ice Magic) | Ice Spear Explosion Radius* | |||
Feet | Elemental Harmony Shoes > Shadow Reaper Boots > Forest Ranger Boots > Fleet Feet/Shooting Star Flying Shoes/Shooting Star Roller Skates | ||||
Robe | Infernal Yantra of Clarity (Enchantable) > Infernal Yantra of Stoicism > Infernal Yantra of Tranquility Special Ancient Dragon Guardian Wings > Special Draconian Wings > Enchantable Wings | ||||
Accessories | Unfinished Reverie’s Diadem Halo > Irusan’s Bell | Ice Spear Explosion Range Ice Mastery Damage | Magic Attack | ||
Advanced Magic Weapon | Lord of Ruination Staff > Demolition Deepglow Staff > > Nightbringer Inquisitor > Perseus Mystic Staff > Celtic Druid Staff+Signet | Magic Attack, Hail Storm Damage | |||
Intermediate Magic Weapon | Lord of Ruination Staff >= Nightbringer Inquisitor > Demolition Deepglow Staff > Perseus Mystic Staff > Celtic Druid Staff+Signet | Magic Attack, Hail Storm Damage | |||
Utility Weapon | Magic Attack, Ice Spear Max Damage | Casting Speed | |||
Echostone/ Additional Equipment | Yellow Echostone/Extra Equipment Slot - Headgear* | Magic Attack Hydra Transmutation Magic Protection Reduction on Black Echostone | Fill with missing reforges |
Magic/Dark Diviner - Lightning Magic
Lightning Magic has never had the raw per hit firepower of Fire magic, but it does make up for it in being the best magic for peeling with Pragarah.
Dark Diviners may want to also consider using Thunder as one of their primary DPS spells. With generous amounts of piercing and defensive stat cleaving, Death Mark + Thunder is a good way to group up and kite enemies. Lightning Rod also contains a large amount of power, so you may not want to discount it completely.
As a side note, Thunderblight increases damage based on Lightning Bolt’s damage at 5 charges. The reason it specifies full charge is because at full charges, Lightning Bolt increases its damage by 26%. This does lead us to a situation where a Lightning Bolt Max Damage reforge does provide some form of benefit for a Dark Mage’s offensive kit. I’m not entirely sure I would recommend actively looking for it, but I would need some time with Dark Mage to test the impact of the reforge on Thunderblight.
Equipment Recommendations | Priority Reforges | Secondary Reforges | Tertiary Reforges | Set Effect Notes | |
Head | Ceann Bliana Scholar’s Hairpin Ultimate Geas Devastation Circlet Hyperion Eclipse Helionic Helm/Selenian Diadema | Lightning Mastery Damage | Act 6: Crisis Radius on Yellow Echostone or Headgear | Awakening of Light Cooldown* | Sun and Moon: I wouldn’t prioritize this over Tri-Element Boost, but Bonus Damage is a very good stat. This is a pretty interesting conditional set effect. When landing a hit, you have a 5% chance to activate the Sun or Moon effect (60s). If both are active, you receive the Eclipse effect for 30 seconds (maintains the boost from Sun and Moon. Eclipse providing Bonus Damage makes it a very strong effect in addition to the rather large Damage/Magic Attack boost Sun: Max Damage +40, Max Hp +200 Moon: Magic Attack +60, Max MP +200 Eclipse: Bonus Damage +5%, Max Stamina +200 Magic Element Mastery Damage: This is more or less a staple in Magic setups nowadays. It’s a strong Tri-Element boost stacking with our Demolition and Ruination staves. Advanced/Intermediate Magic Set Effects: These are generally from the weapon slot. For Lightning Magic specifically, the Demolition/Ruination Staves decreases the charge time of Lightning Rod by 1 second. Intermediate Magic Damage: This isn’t a set effect, but it is a special trait some staves have. Depending on the weapon tier (Nightbringer, Perseus), the magnitude of this buff increases. Eternal Prayer: When casting Magic or Harmonic Saint spells, you have a 5% chance to activate this effect. This increases your Magic Attack by 100 for 30 up and 100 down Active/Cooldown time. I wouldn’t sacrifice Magic Element Mastery Damage for this, but you can make the set effect without the Body slot. Lightning Rod Enhancement: Very specifically from Lord of the Seas, this increases the damage of Lightning Rod. Assassin’s Advantage: Because this item has a 20 up 90 down for Active/Cooldown time and a 5% chance to activate on critical hits, it’s not as consistent as Increased Critical Damage. If you can 1-2 piece a Increased Critical Damage set effect (which may require Set Effect Scrolls or specific weapons), it’s not a bad idea to slot this in or the extra burst of Critical Damage, Attack Delay reduction, and Movement Speed. Unshakable Will: It prevents stuns/knockdowns and reduces incoming damage by 50% on a 10 up and 30 down on Active/Cooldown time. It's a good defensive set effect to add some extra bulk in sustained damage cycles. The stun/knockdown resistance can help you recover from messy situations. Increased Critical Damage: This is generally a good set effect to consider since it’s always active. Redoubled Offensive Activation Boost (Strong): This is a nice set effect to have, though it does face more competition nowadays. Redoubled Offensive is an extremely potent Tech and is a mainstay on almost all Tech loadouts. Redoubled Offensive - Damage Boost: Redoubled Offensive is a very strong Tech, so if you’re building an Ultimate Geas Devastation set, this isn’t a bad option. Exploit Weakness Enhancement: It’s an extra 3% to Exploit Weakness which is already a useful Offensive tech. Good if you regularly use Exploit, less if you just use Fateweaver. Spellwalk Enhancement: It requires Spellwalk to be active, but it's a 15% speed boost. Eweca Movement Speed: Unlike the Ladeca Movement Speed buff, this is a fairly large 10% speed boost. Typically this set effect is found on Fleet Feet variants such as the Shooting Star Flying Shoes. Ladeca Movement Speed Boost (Shadow Reaper Boots): Unlike most other Ladeca Movement Speed Boosts, this one provides a 12% movement speed boost. Fire/Ice/Lightning Mastery Enhancement: Because of our access to Lords of Ruination Staves, we are able to reach 9 Piercing without the use of a Destructive Robe on Staves (LoRS + Meteoroid + Mana Pierce + Diviner lvl 10). This does mean the Yantras end up providing more benefits as long as you can keep Mana Pierce up. |
Body | Special Hyperion Eclipse Full/Light Chiton Special Seraphic Harmony/Symphony Attire Ceann Bliana Scholar’s Halfrobe > Special Elemental Harmony Suit Special Imperial Knight Royal Uniform Special Royal Society Field Outfit Ultimate Geas Devastation Chestplate | ||||
Hands | Ceann Bliana Scholar’s Ringband > Weaving Gloves* - Weaving Gloves Unrepairable | Ice Spear Explosion Range Magic Attack - Weaving Gloves Only | Spinning Slasher Effective Range* | ||
Feet | Elemental Harmony Shoes > Shadow Reaper Boots > Forest Ranger Boots > Fleet Feet/Shooting Star Flying Shoes/Shooting Star Roller Skates | Shadow Bind Duration | |||
Robe | Infernal Yantra of Clarity (Enchantable) > Infernal Yantra of Stoicism > Infernal Yantra of Detachment Special Ancient Dragon Guardian Wings > Special Draconian Wings > Enchantable Wings | ||||
Accessories | Unfinished Reverie’s Diadem Halo > Irusan’s Bell | Lightning Mastery Damage | Magic Attack Death Mark Duration - Gearswap | ||
Advanced Magic Weapon | Lord of Ruination Staff > Demolition Deepglow Staff > > Nightbringer Inquisitor > Perseus Mystic Staff > Celtic Druid Staff+Signet | Magic Attack | Casting Speed | Lightning Bolt Max Damage | |
Intermediate Magic Weapon | Lord of Ruination Staff >= Nightbringer Inquisitor > Demolition Deepglow Staff > Perseus Mystic Staff > Celtic Druid Staff+Signet | Magic Attack, Thunder Max Damage, | Casting Speed | Lightning Bolt Max Damage | |
Utility Weapon | Shadow Bind Duration* - prefer Silver Echostone Dorcha Gain | ||||
Echostone/ Additional Equipment | Yellow Echostone/Extra Equipment Slot - Headgear* | Magic Attack, Lightning Rod Cooldown*, Lightning Rod Charged Damage Hydra Transmutation Magic Protection Reduction on Black Echostone | Fill with missing reforges |
Magic - Staff Notes
Lord of the Seas is an event rare and has not returned since. Given the scarcity, you may wish to use Geas gear if you cannot find an outfit box for sale as the outfit itself cannot be traded even with a trade unlock.
Ice Spear Explosion Radius is an important reforge for Dark Mages as it boosts the range of your Polar Vortex. Even outside of that, it’s a good utility for Ice Spear.
Ice Spear with an Explosion Radius Reforge is typically best used in places where there are a lot of enemies that respawn, you are not required to be killed to progress, and are affected by Ice Spear’s freezing such as Kraken Soaring Legs (again) and the Kraken Jrs.
Following the buff to the Ice Spear Spell Coefficient, you can even use it effectively in content where enemies don’t freeze but respawn rapidly such as in 7N or the Revived Illusion Hallway. But as always, coordinate with your team. You should keep in mind Ice Spear can still be disruptive if your team isn’t expecting it, especially if you suddenly cause 20+ explosions to happen at the same time, disrupting framerates (come home UE update)
When Shadow Bind is available, you can prevent enemies from being knocked back by Hailstorm and Lightning Rod.
Act 6: Crisis is also part of Shadow Bind. Basically you use Act 6: Crisis -> Shadow Bind -> Snap Cast Hailstorm. You can substitute the Yellow Echostone with extra equipment slots and a reforged headpiece. Shadow Bind can be substituted with Fynni Friend summons/summon spam of Immobilization Summon Pets or Elemental Wave Frozen Blast.
I’m including the Geas Edge set parts because of Iron Will. Iron Will and Wings of Eclipse will greatly benefit your Hailstorm up time. You will, however, need 3 parts to activate the Iron Will set effect. That being said, you may still want to prioritize using other pieces as Lord of the Sea and Ultimate Geas Devastation will more directly contribute to your damage. Although the Spellwalk change has greatly improved Hailstorm’s sustainability, you may still want to have Iron Will in case you get knocked down.
You can substitute Spinning Slasher for Act 6: Crisis. It will not knock down and the stun will be less, but it will activate faster.
Lightning Rod Cooldown on Echostones is capable of lowering the cooldown to 11 seconds, further reduced with the use of Demolition or Ruination Staves. You can more easily spam Lightning Rod which can speed up the looping process of a Lightning Rod Combo Card.
The Awakening of Light Cooldown reforge can be used to partially mitigate the down-time on the Technique Pragarah. Pragarah has a cooldown of 10 mins, but because AoL has a 14 minute cooldown, the actual amount of downtime is longer.
While Elemental Wands do gain a damage bonus for casting Intermediate Magic of their respective element, it isn’t as effective as Chain Casted Int Magic which is why they remain excluded from the weapon list.
Special Seraphic Cantabile Attire: It has a 30 Second Up time and a 100 Second Down time on its +100 Magic Attack Boost. It would be the best option when it activates (5% or about 9.75% with Fusion Bolt), but I wouldn’t go replacing your Special Elemental Harmonies if you don’t have a 2 piece Ceann Bliana for the Elemental Damage set effect. You also may want to use LotS with a 2 piece Ceann Bliana as LotS provides a damage boost to L-rod.
Special Seraphic Cantabile Prayer Triggers
As a side note, the effect remains even if you switch off of the SCO, meaning you could gearswap to another outfit like SEH. However it may be somewhat clunky due to the low duration on Prayer.
-Triggered when casting and using Healing. I believe if you want to force it to trigger, this is the way to go.
-Triggered when loading Party healing.
-Triggered from loading Fusion Bolt (Ice Fire)
-Triggered from Fireball load. Need to test more if it was from firing. Likely just loading but need to confirm.
-Triggered off of loading Hailstorm. Still haven’t managed a trigger from throwing the ice rock so it may just be from loading Hailstorm
Magic/Dark Diviner - Fusion Bolt
This is all about fusion bolt spamming. Fire Lightning will be preferred for clearing groups, but Ice Fire is ok for single targets. Ice Lightning is good for lower level content. You will need a level 63 spirit wand.
Equipment Recommendations | Priority Reforges | Secondary Reforges | Tertiary Reforges | ||
Head | Ceann Bliana Scholar’s Hairpin Hyperion Eclipse Helionic Helm/Selenian Diadema Ultimate Geas Devastation Circlet | Fusion Bolt Damage | Bolt Mastery Damage, Fire Mastery Damage, Lightning Mastery Damage | Ice Mastery Damage, Awakening of Light Cooldown* | Sun and Moon: I wouldn’t prioritize this over Tri-Element Boost, but Bonus Damage is a very good sta. Not to mention Fusion Bolt benefits from Max Damage and Magic Attackt. This is a pretty interesting conditional set effect. When landing a hit, you have a 5% chance to activate the Sun or Moon effect (60s). If both are active, you receive the Eclipse effect for 30 seconds (maintains the boost from Sun and Moon. Eclipse providing Bonus Damage makes it a very strong effect in addition to the rather large Damage/Magic Attack boost Sun: Max Damage +40, Max Hp +200 Moon: Magic Attack +60, Max MP +200 Eclipse: Bonus Damage +5%, Max Stamina +200 Magic Element Mastery Damage: This is more or less a staple in Magic setups nowadays. It’s a strong Tri-Element boost stacking with our Demolition and Ruination staves. Fusion Bolt Damage: This isn’t a set effect, but it is a special trait some Wands have. Depending on the weapon tier (Nightbringer, Perseus, Divine), the magnitude of this buff increases. Eternal Prayer: When casting Magic or Harmonic Saint spells, you have a 5% chance to activate this effect. This increases your Magic Attack by 100 for 30 up and 100 down Active/Cooldown time. I wouldn’t sacrifice Magic Element Mastery Damage for this, but you can make the set effect without the Body slot. Assassin’s Advantage: Because this item has a 20 up 90 down for Active/Cooldown time and a 5% chance to activate on critical hits, it’s not as consistent as Increased Critical Damage. If you can 1-2 piece a Increased Critical Damage set effect (which may require Set Effect Scrolls or specific weapons), it’s not a bad idea to slot this in or the extra burst of Critical Damage, Attack Delay reduction, and Movement Speed. Unshakable Will: It prevents stuns/knockdowns and reduces incoming damage by 50% on a 10 up and 30 down on Active/Cooldown time. It's a good defensive set effect to add some extra bulk in sustained damage cycles. The stun/knockdown resistance can help you recover from messy situations. Increased Critical Damage: This is generally a good set effect to consider since it’s always active. Redoubled Offensive Activation Boost (Strong): This is a nice set effect to have, though it does face more competition nowadays. Redoubled Offensive is an extremely potent Tech and is a mainstay on almost all Tech loadouts. Redoubled Offensive - Damage Boost: Redoubled Offensive is a very strong Tech, so if you’re building an Ultimate Geas Devastation set, this isn’t a bad option. Exploit Weakness Enhancement: It’s an extra 3% to Exploit Weakness which is already a useful Offensive tech. Good if you regularly use Exploit, less if you just use Fateweaver. Spellwalk Enhancement: It requires Spellwalk to be active, but it's a 15% speed boost. Eweca Movement Speed: Unlike the Ladeca Movement Speed buff, this is a fairly large 10% speed boost. Typically this set effect is found on Fleet Feet variants such as the Shooting Star Flying Shoes. Ladeca Movement Speed Boost (Shadow Reaper Boots): Unlike most other Ladeca Movement Speed Boosts, this one provides a 12% movement speed boost. Fire/Ice/Lightning Mastery Enhancement: While you could use Fusion Bolt with a Lord of Ruination Staff, you’re likely better off using a wand for the higher casting output. Wands don’t get access to piercing enchants so the only source of Piercing for Wand Fusion Bolt is the Destructive Robe, Grumpy Cat Marble, a future item from Glen Bearna, and Mana Pierce. |
Body | Special Hyperion Eclipse Full/Light Chiton Special Seraphic Harmony/Symphony Attire Ceann Bliana Scholar’s Halfrobe > Special Elemental Harmony Suit Special Imperial Knight Royal Uniform Special Royal Society Field Outfit Ultimate Geas Devastation Chestplate | ||||
Hands | Ceann Bliana Scholar’s Ringband > Weaving Gloves* - Weaving Gloves Unrepairable Ultimate Geas Devastation Gloves | Magic Attack - Weaving Gloves Only | Max Damage - Weaving Gloves Only | ||
Feet | Elemental Harmony Shoes > Shadow Reaper Boots > Forest Ranger Boots > Fleet Feet/Shooting Star Flying Shoes/Shooting Star Roller Skates | ||||
Robe | Infernal Yantra of Clarity (Enchantable) > Infernal Yantra of Stoicism > Infernal Yantra of Wrath/Tranquility/Detachment Special Ancient Dragon Guardian Wings > Special Draconian Wings > Enchantable Wings | ||||
Accessories | Unfinished Reverie’s Diadem Halo > Irusan’s Bell | Fusion Bolt Damage | Bolt Mastery Damage, Fire Mastery Damage, Lightning Mastery Damage, Magic Attack | Ice Mastery Damage | |
Weapon | Nightbringer Elementalist > Perseus Arcane Wand > Divine Tribolt Wand*+Signet = Celtic Tribolt Wand+Signet > Tribolt Wand of Blossoming Memories | Casting Speed | Magic Attack* | Firebolt Max Damage | |
Off Hand | Nightbringer Prophet > Perseus Forbidden Spellbook > Divine Spellbook+Signet > Holy Eagle Mask/ | Magic Attack - Spellbooks and Cooking Pots | Max Attack Power - Cooking Pot Only | ||
Echostone | Fill with missing reforges* |
Magic - Fusion Bolt Notes
A Hebona set costs a lot of slots and the Geas Devastation set may be more universally applicable. Additionally due to how the magic damage formula works, the set bonus for the hebona robe is added to your bolt mastery/elemental mastery/magic weapon mastery bonus rather than multiplied after other calculations like other skill set bonuses such as Smash or Magnum. So despite the numbers stating a 15% boost to Firebolt and Icebolt, you are actually getting a lower boost than advertised. If you would like to learn more about this I will recommend this video from a KR mage.
If you can acquire a Set Effect Firebolt Enhancement Scrolls, you can minimize the number of slots required for the Firebolt set effect by boosting the set effect of a Hebona part.
The Divine Tribolt while technically better than the Celtic is fairly cost inefficient compared to the Celtic. You may want to stop at the Celtic Tribolt and save your Divine materials for different weapons.
You Ideally want both Casting Speed and Magic Attack, but Casting speed takes priority on Fusion Bolt wands
Guard Cylinders upgraded with Stamina Consumption will slow the drain on spellwalk. While you generally won’t ever run out of stamina, it’s fine as a low budget option. Do note only the Rebis, Revenant, and Perseus guard cylinders have stamina consumption upgrades. Even so, a guard cylinder can provide you with additional utility.
The Awakening of Light Cooldown reforge can be used to partially mitigate the down-time on the Technique Pragarah. Pragarah has a cooldown of 10 mins, but because AoL has a 14 minute cooldown, the actual amount of downtime is longer.
Cooking Pots uniquely can roll Max Attack Power reforges as noted in the Giant Close Combat section. Due to the effects of Battlefield Overture and Weapon Power Potions on Bolt spells (they boost bolt damage), you may want to consider using a Cooking Pot instead of a spellbook/guard cylinder. Ideal Enchants for the Cooking Pot are max damage enchants that can go on shields such as Edgy Embracing
Special Seraphic Cantabile Attire: It has a 30 Second Up time and a 100 Second Down time on its +100 Magic Attack Boost. It would be the best option when it activates (5% or about 9.75% with Fusion Bolt), but I wouldn’t go replacing your Special Elemental Harmonies if you don’t have a 2 piece Ceann Bliana for the Elemental Damage set effect.
Magic/Dark Diviner - Blaze
Blaze is a fairly strong skill for mobbing, but you do need some additional setup. Once you can fill at least 35% of the knockdown gauge, Blaze can deal a large amount of damage.
Knockdown and knockback are both viable ways to prime enemies for Blaze. Wind Blast, Act 6: Crisis, Blow, and Shockwave are all skills with low ending lag that inflict knockback or knockdown. You can also use Windmill, though you may want to gearswap to a Close Combat weapon to Windmill. Alternatively, get a friend to set enemies up for you.
Equipment Recommendations | Priority Reforges | Secondary Reforges | Tertiary Reforges | Set Effect Notes | |
Head | Ultimate Geas Devastation Circlet Hyperion Eclipse Helionic Helm/Selenian Diadema | Act 6: Crisis Radius on Yellow Echostone or Headgear | Sun and Moon: This is a pretty interesting conditional set effect. When landing a hit, you have a 5% chance to activate the Sun or Moon effect (60s). If both are active, you receive the Eclipse effect for 30 seconds (maintains the boost from Sun and Moon. Eclipse providing Bonus Damage makes it a very strong effect in addition to the rather large Damage/Magic Attack boost Sun: Max Damage +40, Max Hp +200 Moon: Magic Attack +60, Max MP +200 Eclipse: Bonus Damage +5%, Max Stamina +200 Eternal Prayer: When casting Magic or Harmonic Saint spells, you have a 5% chance to activate this effect. This increases your Magic Attack by 100 for 30 up and 100 down Active/Cooldown time. Blaze doesn’t use Elemental Mastery in its calculation, so you don’t particularly need the Magic Element Mastery Damage set effect on a Blaze setup. Assassin’s Advantage: Because this item has a 20 up 90 down for Active/Cooldown time and a 5% chance to activate on critical hits, it’s not as consistent as Increased Critical Damage. If you can 1-2 piece a Increased Critical Damage set effect (which may require Set Effect Scrolls or specific weapons), it’s not a bad idea to slot this in or the extra burst of Critical Damage, Attack Delay reduction, and Movement Speed. Increased Critical Damage: This is generally a good set effect to consider since it’s always active. Redoubled Offensive Activation Boost (Strong): This is a nice set effect to have, though it does face more competition nowadays. Redoubled Offensive is an extremely potent Tech and is a mainstay on almost all Tech loadouts. Redoubled Offensive - Damage Boost: Redoubled Offensive is a very strong Tech, so if you’re building an Ultimate Geas Devastation set, this isn’t a bad option. Exploit Weakness Enhancement: It’s an extra 3% to Exploit Weakness which is already a useful Offensive tech. Good if you regularly use Exploit, less if you just use Fateweaver. Spellwalk Enhancement: It requires Spellwalk to be active, but it's a 15% speed boost. Eweca Movement Speed: Unlike the Ladeca Movement Speed buff, this is a fairly large 10% speed boost. Typically this set effect is found on Fleet Feet variants such as the Shooting Star Flying Shoes. Ladeca Movement Speed Boost (Shadow Reaper Boots): Unlike most other Ladeca Movement Speed Boosts, this one provides a 12% movement speed boost. | ||
Body | Special Hyperion Eclipse Full/Light Chiton Special Seraphic Harmony/Symphony Attire Special Imperial Knight Royal Uniform Special Royal Society Field Outfit Ultimate Geas Devastation Chestplate | Blaze Explosion Radius | |||
Hands | Ceann Bliana Scholar’s Ringband | Blaze - Damage | Spinning Slasher Effective Range* | ||
Feet | Elemental Harmony Shoes > Shadow Reaper Boots > Forest Ranger Boots > Fleet Feet/Shooting Star Flying Shoes/Shooting Star Roller Skates | Wind Blast - Attack Radius | |||
Robe | Special Ancient Dragon Guardian Wings > Special Draconian Wings > Enchantable Wings | ||||
Accessories | Unfinished Reverie’s Diadem Halo > Irusan’s Bell | Blaze - Damage | |||
Weapon | Nightbringer Elementalist > Perseus Arcane Wand > Celtic Tribolt Wand > Savage Fire Wand/Savage Ice Wand/Savage Lightning Wand > Tribolt Wand of Blossoming Memories Lord of Ruination Staff > Demolition Deepglow Staff > > Nightbringer Inquisitor > Celtic Druid Staff > Celtic Guardian Staff >= Original Sin Staff | Blaze - Explosion Damage | Magic Attack | ||
Off Hand | Nightbringer Prophet > Perseus Forbidden Spellbook > Divine Spellbook > Holy Eagle Mask | Magic Attack - Spellbooks and Cooking Pots | |||
Utility Weapon | |||||
Echostone/ Additional Equipment | Yellow Echostone/Extra Equipment Slot - Headgear* | Magic Attack, Hydra Transmutation Magic Protection Reduction on Black Echostone | Fill with missing reforges |
Magic - Blaze Notes
Oddly, many staves for the purpose of Blaze calculations are treated as Combat Wands. This essentially means they boost Blaze’s damage by 20%. If you are looking to maximize Blaze Damage, I would still recommend using a Wand and Spellbook combination, but you can definitely get away with using a Staff if you want to incorporate Blaze into your standard Magic casting.
Guard Cylinders can be a good choice for Wind Blast -> Blaze. Since Wind Blast puts enemies in a knocked down state and maxes their Knockdown Gauge, it is an easy way to set up full powered Blazes.
Magic - Healing/Harmonic Saint
With a dedicated Healing Build, you can get some beefy healing numbers. Be sure to check the Healing Title section for the other important part of a Healer Build. To maximize heal output, pair Party Heal Master with a Healing 2nd Title. Keynote, what’s important is to just have Healing HP Recovery Reforges on your Trinity and accessories at any level. Healing gains the largest boost from reforges at lvl 1 (25 Additional HP healed), with additional ranks providing smaller benefits.
You can also use the Cucullati Body Prefix enchant to further boost your healing output.
That said, Harmonic Saint has more than just Healing/Overguard, Saints can provide a bit of damage, knockdown immunity and stun resistance, team damage negation, enemy debuffs, regeneration, a long ranged revive, extended bard buff duration, and support bard buffs in tandem with DPS bard buffs (Enduring Melody/March Song).
Equipment Recommendations | Priority Reforges | Secondary Reforges | Tertiary Reforges | Set Effect Notes | |
Head | Healing Enhancement: A very important and relatively easy to acquire part for a healing setup. Eternal Prayer: When casting Magic or Harmonic Saint spells, you have a 5% chance to activate this effect. This increases your Magic Attack by 100 for 30 up and 100 down Active/Cooldown time. Saints can benefit from the extra magic attack to bolster their heals, but it isn;t required (and more importantly requires a Healing Set Effect Scroll if you want Trinity Parts as well). Mana Usage Reduction: Saints generally can stay MP positive while casting heals with Echoes of Salvation and Purification Pulse, but the extra -10% reduction can be useful. Absorption: You’ll likely only see this set effect if you are using the Special Seraphic Harmony. Healing setups are understandably a bit more fragile than other builds due to the primary gear parts being clothing. The Cantabile set by contrast is a light armor set. Zone of Renewal - Radius Increase: Zone of Renewal is a decent source of passive healing and the radius boost can be useful. Zone of Renewal, however, is somewhat uncomfortable to use due to the long delay after casting. | ||||
Body | Special Seraphic Harmony/Symphony Attire | Healing Hp Recovery | |||
Hands | Ceann Bliana Scholar’s Ringbands > Weaving Gloves* - Unrepairable Trinity Gloves (Female Only) | Magic Attack - Weaving Gloves Only | |||
Feet | |||||
Robe | |||||
Accessories | Unfinished Reverie’s Diadem Halo | Healing Hp Recovery | Magic Attack | ||
Weapon | Pre-Spirit Ascension Tikka Wood Healing Wand Spirit/Pre-Spirit Ascension Tikka Wood Healing Wand Spirit* Lord of Ruination Staff > Celtic Guardian Staff* Healing Wand/Beginner Healing Wand/Carpinus Healing Wand/Panacea Healing Wand | Casting Speed, Party Healing HP Recovery | Magic Attack | ||
Off Hand | Nightbringer Prophet > Divine Spellbook+Signet > Holy Eagle Mask | ||||
Echostone | Fill with missing reforges* |
Magic - Harmonic Saint Notes
The Trinity Gloves can only be used by Female characters, but they only provide up to 1 Healing Enhancement. You can complete the Healing set without them.
If you have a Pre-Spirit Ascension Healing Wand, that would be the Best in Slot healing wand. But since you can’t get that anymore, it's kind of a moot point. Anyone who does still have one probably isn’t switching it baring a change to Healing Wand Egos because the Social level grants a percentage boost to healing.
The reason we prioritized Casting Speed over PH HP or Magic attack is so that we can start healing sooner. Faster Cast = more HPS.
Tikka Wood Healing Wands increase the effects of Healing by 5 points per charge and the effects of Party Healing by 20 points. The other healing wands only increase Healing by 5 points. Of them all, The Tikka Wood Healing Wand is the best choice due to most additional bonuses.
The Celtic Guardian Staff is one of the few weapons where you should go for Blue Special Upgrades for a particular build, in this case that build being a Healer Build. Healing Wands can’t be special upgraded and those that even have upgrades don’t get Magic Attack from their upgrades. However, the Celtic Guardian Staff lacks innate Heal and PH bonuses.
Mathwise, you can get up to 130 MA from upgrades on a Celtic Guardian (Max roll S7). Every 5 MA you get +1 HP healed on PH. Every 10 MA you get +1 HP healed on Healing. This translates into +26 more HP on Party Healing and 13 more HP on Healing. The tradeoff is you can’t get the Wand Casting Speed Reforge effect (applied twice on wands) on a Staff.
Between the Celtic Guardian and the Tikka Wood Healing Wand, I’d recommend the Tikka Wood. Wands benefit more from Casting Speed reforges than staves, and the Casting speed is more useful for healing. Also only Healing Wands can dual roll Casting Speed (the priority) and Party Healing Hp (more efficient than Magic Attack).
For a more offensive mix, you could also use the Lord of Ruination Staff. Granted if you’re using a Ruin Staff it’s likely for offense, but a Saint can avoid a gearswap by simply using their Ruin Staff instead. Thanks to increased Magic Attack, ability to cast Party Healing, and healing bonuses (needs verification).
Increasing your Healing and Party heal amounts boosts the amount healed by Hand of Restoration (Single Target Burst Heal) and Echoes of Salvation (Floor Targeted AoE heal.
Tank - Harmonic Saint
With Harmonic Saint now providing a very powerful Overguard, Saints have rocketed their way into being an incredibly potent support tank Arcana. With strong sustain and decent damage due to their high Magic Attack, they can help streamline your runs while also supplementing your team’s damage. While any talent can be paired with Saint (I myself use Fighter and Alchemy as a Saint), The offensive portions of this section are focused on Magic.
This setup also can be somewhat costly as an ideal setup will have Ceann Bliana Bulwark parts and a one piece Trinity Set (Healing Set Effect Scrolls). However, if you’re not using Magic for damage, you likely have more flexibility in your slot selection. Be sure to build sets for your purposes depending on cost and what you are looking to build for (Offenses, Defenses, Healing).
Equipment Recommendations | Priority Reforges | Secondary Reforges | Tertiary Reforges | Set Effect Notes | |
Head | Trinity Circlet (Healing) Ceann Bliana Scholar’s Hairpin > Ultimate Geas Devastation Circlet/Languhiris Chaser Circlet | Ice Mastery (Rosemary Gloves) Lightning Mastery | Fire Mastery Protection Defense | Healing Enhancement: While normally an easy to acquire part of a healing set, it’s a difficult part to force into a single piece. Even so, this is a significant boost for a Saint. Piercing Resistance: Outstanding defensive stats from the Ceann Bulwark aside, it’s very likely we’ll see more enemies that possess Piercing Levels in the future. If you want to tank, having Piercing Resistance will prevent enemies from bypassing your defenses. Absorption Resistance: A 10% chance to reduce damage to 1 is a powerful defensive set effect. Eternal Prayer Enhancement: A conditional buff that provides a large amount of Magic Attack. With how often a mage will be casting spells (Multi-Hit and spammable ones) and Saint spells, this buff can be up reliably. It also provides a boost to Mana Regen which can help sustain Mana Shield in combat. Unshakable Will: A rather strong defensive buff. While it won’t reduce damage by the same amount as Absorption, it does last for a longer period of time. Magic Element Mastery Damage: While this set effect is a mainstay of Diviner builds, it doesn’t provide any healing utility to a Saint. Spellwalk Enhancement: It requires Spellwalk to be active, but it's a 15% speed boost. Eweca Movement Speed: Unlike the Ladeca Movement Speed buff, this is a fairly large 10% speed boost. Typically this set effect is found on Fleet Feet variants such as the Shooting Star Flying Shoes. Ladeca Movement Speed Boost (Shadow Reaper Boots): Unlike most other Ladeca Movement Speed Boosts, this one provides a 12% movement speed boost. | |
Body | Ceann Bliana Bulwark Armor (Defensive) Special Seraphic Harmony/Symphony Attire (Offensive) Saint Guardian Full Armor > Special Imperial Knight Royal Uniform (Defensive) Special Elemental Harmony Suit (Offensive) Trinity Wear (Clothing) | Healing HP | Hailstorm Range | Protection Defense | |
Hands | Trinity Gloves (Female Only) (Healing) Ceann Bliana Bulwark Gauntlets Rosemary Gloves* (Ice Magic) Ceann Bliana Scholar’s Ringbands > Weaving Gloves (Offensive, Non Ice Magic) | Magic Attack (Weaving Gloves only) | Protection Defense | ||
Feet | Royal Society Shoes > Trinity Shoes (Healing) Ceann Bliana Bulwark Greaves (Defensive) Elemental Harmony Shoes > Shadow Reaper Boots > Forest Ranger Boots > Fleet Feet/Shooting Star Flying Shoes/Shooting Star Roller Skates (Speed) | Movement Speed | Protection Defense | ||
Robe | Special Ancient Dragon Guardian Wings > Special Draconian Wings > Enchantable Wings | ||||
Accessories | Unfinished Reverie’s Diadem Halo > Irusan’s Bell | Healing Hp Recovery | Magic Attack | ||
Weapon | (Offensive) Lord of Ruination Staff > Demolition Deepglow Staff > Nightbringer Inquisitor > Perseus Mystic Staff > Celtic Druid Staff+Signet (One-Handed) Nightbringer Elementalist > Perseus Arcane Wand > Divine Tribolt Wand*+Signet = Celtic Tribolt Wand+Signet > Tribolt Wand of Blossoming Memories | Magic Attack | Hail Storm Damage Thunder Damage | ||
Off Hand (Defensive) | Nightbringer Vanguard (30%) > Perseus Vigilant Shield (20%) > Divine Shield (15%) > Demonic Fear Shield > Shield of Avon - All Massive Despair Shield (18%) > Frosted Borealis Shield (14%) > Vales Shield - Giant | ||||
Echostone | Fill with missing reforges* |
Tank - Harmonic Saint Notes
At time of writing, this set is focused on Glen Bearna Hard. As a result, Piercing Resistance is emphasized a bit more.
Head: The Trinity Circlet does compete for the head spot with the Ceann Bulwark Circlet, with the Bulwark requiring at minimum a two piece set.
Body: While you could use the body for the Trinity Wear, you really should use Armor in this slot.
Gloves: If you are able to two piece a Bulwark for Piercing Resistance and One Piece a Trinity set for the Healing Enhancement, you could use the Glove Slot to further bolster your offenses.
Feet: Generally a good slot for a two piece Bulwark or to cover a two Piece Healing set. But if you have those covered elsewhere, you could use this slot for Movement Speed.
Fire Magic: Fire magic is great, but owes its absence on the reforge list due to the multi hit nature of Thunder. If you’re running Seraphic Cantabile, Thunder is more likely to trigger Eternal Prayer. You also don’t get +4 Chain Casting as a Saint, which pushes Hailstorm’s DPS over Fireball’s. Still, you could always have Fire Mastery for the occasional Pall of Ruination into Time Shift Meteor Strike. I would just make that a gear swap though.
Shields: Shields are potent defensive tools and can help you turtle through almost anything when paired with a Saint. However, this does come at the expense of your offensive capabilities. Your options for damage while using a shield are more severely constrained. Since this section is focused on Magic, it will assume you are planning on using Fusion Bolt.
Alchemy - Fire Alchemy
This is all about boosting your fire alchemy damage. Generally you’ll use Flame Burst, but Heat Buster is capable of fairly high damage. It is recommended to have an Erg 45-50 Cylinder.
Equipment Recommendations | Priority Reforges | Secondary Reforges | Tertiary Reforges | Status Effect Notes | |
Head | Ceann Bliana Scholar’s Hairpin Ultimate Geas Devastation Circlet* Hyperion Eclipse Helionic Helm/Selenian Diadema | Flame Burst Duration*, Act 6: Crisis Radius* | Sandburst Min Blindness | Flame Burst Enhancement: As your primary Alchemy AoE DPS skills, this set effect is pretty important to have. Ideally for Alchemy, you should aim to get the Water Cannon Enhancement as well, but if you do not intend to use Water Cannon at all, you can opt to skip that set effect. Sun and Moon: I would prioritize Cressida effects, but Bonus Damage is a very good stat. This is a pretty interesting conditional set effect. When landing a hit, you have a 5% chance to activate the Sun or Moon effect (60s). If both are active, you receive the Eclipse effect for 30 seconds (maintains the boost from Sun and Moon. Eclipse providing Bonus Damage makes it a very strong effect in addition to the rather large Damage/Magic Attack boost Sun: Max Damage +40, Max Hp +200 Moon: Magic Attack +60, Max MP +200 Eclipse: Bonus Damage +5%, Max Stamina +200 Alchemic Damage Increase: This is a useful set effect, but it shouldn’t be prioritized over the Cressida wear. If you’re in a position to 2 piece a Cressida, this is a good two piece set effect to pair with your Cressida. Assassin’s Advantage: Because this item has a 20 up 90 down for Active/Cooldown time and a 5% chance to activate on critical hits, it’s not as consistent as Increased Critical Damage. If you can 1-2 piece a Increased Critical Damage set effect (which may require Set Effect Scrolls or specific weapons), it’s not a bad idea to slot this in or the extra burst of Critical Damage, Attack Delay reduction, and Movement Speed. If you want this with the Cressida and Scholar set effects, you’ll need to be able to one piece the Cressida. Unshakable Will: It prevents stuns/knockdowns and reduces incoming damage by 50% on a 10 up and 30 down on Active/Cooldown time. It's a good defensive set effect to add some extra bulk in sustained damage cycles. The stun/knockdown resistance can help Increased Critical Damage: This is generally a good set effect to consider since it’s always active. Battle Alchemy Enchantment:: For Flame Burst, this increases the attack range, widens the attack angle, and decreases the delay between hits. Spellwalk Enhancement: It requires Spellwalk to be active, but it's a 15% speed boost. Eweca Movement Speed: Unlike the Ladeca Movement Speed buff, this is a fairly large 10% speed boost. Typically this set effect is found on Fleet Feet variants such as the Shooting Star Flying Shoes. Life Drain Enchantment: It certainly is a set effect. Life Drain is just not a very good skill at present, so you can skip this set effect baring a buff. Fire Alchemic Mastery Enhancement: The Harmonious Yantras are best used on Alchemic Sharpshooter, but they are still providing a boost to standard Alchemy. | |
Body | Special Hyperion Eclipse Full/Light Chiton - Requires 1-2 Piece Cresida Ceann Bliana Scholar’s Halfrobe - Requires 1-2 piece Cressida Shadow Reaper/Phantom Wear - Requires 1-2 Piece Cresida Special Imperial Knight Royal Uniform - Requires 1-2 piece Cressida | ||||
Hands | Ceann Bliana Scholar’s Ringband - Requires 1-2 piece Cressida | Flame Attack Burst Range | Heat Buster Max Damage | ||
Feet | Cressida Shoes/Flamerider Boots Ceann Bliana Scholar’s Shoes - Requires 1-2 piece Cressida | Fire Alchemy Efficiency, Flame Burst Stun Duration | |||
Robe | Harmonious Yantra of Clarity (Enchantable) > Harmonious Yantra of Stoicism > Harmonious Yantra of Tranquility | ||||
Accessories | Unfinished Reverie’s Diadem Halo > Irusan’s Bell | Fire Alchemy | |||
Weapon | Nightbringer Technician > Perseus Tyrannus Cylinder > Revenant Insight Cylinder > Celtic Tetra Cylinder+Signet > Hellfire Cylinder* > Cylinder of Blossoming Memories | Fire Alchemy, Flame Burst Damage | |||
Utility Weapon | - | ||||
Off Hand | Perseus Tyrannus Guard Cylinder > Revenant Insight Guard Cylinder > Guard Cylinders | Protection, Luck | |||
Echostone | Fill with missing reforges above Flame Burst Duration - Caps at 20 Hydra Transmutation Magic Protection Reduction |
*See Alchemy - Fire Alchemy Notes
Alchemy - Fire Alchemy Notes
Flame Burst Duration works as follows. Every 1 second, Flame Burst inflicts a Damage Tic. At certain ranks of Flame Burst and with the Flame Burst Duration Reforge, it is possible to increase the duration by a fraction of a second (e.g lvl 14 Flame Burst Duration provides 2.8 seconds of duration). If the duration would have otherwise ended on a non whole second, an additional damage tic will still be applied with reduced damage. In this lvl 14 Flame Burst Duration situation, you will have 7 full damage tics with the 8th (last) tic being reduced to 80% damage. This makes Flame Burst Duration 1-4, 6-9, and 11-14 significantly more valuable as you typically cancel before the last hit in order to prevent knockback.
As far as I am aware, the last time the Flamerider set was available in a gachapon was in 2017. Before that was from Flame Mare’s giftboxes from purchasing a Flamemare (newer Flamemares don’t award the outfit box) or winning one from the OX event. It seems fairly unlikely to return anytime soon so for now I have marked it as perma-rare. Nevermind.
If you can get your hands on some Set Effect Flame Burst Enhancement Scrolls, you can minimize the number of parts required for the Flame Burst set effect. This can free up slots for equipment such as Ultimate Geas Devastation gear.
The Hellfire Cylinder does have a higher Fire Alchemy Cylinder Modifier than the Celtic, but it has significantly worse other Alchemy Elemental modifiers. Alchemy is very strong when used with both Fire and Water Alchemy so you shouldn’t hobble one element.
Remember to reload your Revenant and Perseus Guard Cylinders. While you have crystals stored inside these guard cylinders, your alchemy skills will load faster. You can only manage crystals once every 60 seconds.
Yes Act 6: Crisis is a puppetry reforge. However, it is an extremely powerful utility for Flame Alchemy. You may want this on a different headgear, but if you roll this on a head slot, it is worth keeping. You will, however, still want to keep an eye out for Flame Burst Duration.
Though exceedingly rare, Flame Burst Duration can cap at 20 for Echostones and Hats as a limit-break reforge.
The Cylinder of Blossoming Memories is a super strong base cylinder, though as with all Alchemy you require Erg to make Alchemy truly shine which is where the CoBM starts to fall off due to the inability to be Erged. The CoBM has +30% cylinder multipliers for all elements making it an extremely flexible all-rounder cylinder.
Important note for the Ultimate Geas Devastation equipment and the Special Imperial Knight Royal Uniform. Sacrifice a Cressida or Flamerider piece to use either (or two pieces if you want to have Ult Devastation and Special Imperial Knight). This means making use of Set Effect Enhancement Scrolls. This is a fairly expensive prospect, so I wouldn’t recommend it for most prospective alchemists.
Alchemy - Water Alchemy
This is all about boosting your Water Cannon damage. It is recommended to have an Erg 45-50 cylinder. A level 63 spirit cylinder will be required for the reduced delay on Water Cannon.
Equipment Recommendations | Priority Reforges | Secondary Reforges | Tertiary Reforges | Status Effect Notes | |
Head | Ceann Bliana Scholar’s Hairpin Ultimate Geas Devastation Circlet* Hyperion Eclipse Helionic Helm/Selenian Diadema | Sandburst Min Blindness | Water Cannon Enhancement: As your primary Alchemy Single Target DPS skills, this set effect is pretty important to have. Ideally for Alchemy, you should aim to get the Flame Burst Enhancement as well. Flame Burst tends to see more use in Alchemy, especially for Pragarah peeling. Sun and Moon: I would prioritize Cressida effects, but Bonus Damage is a very good stat. This is a pretty interesting conditional set effect. When landing a hit, you have a 5% chance to activate the Sun or Moon effect (60s). If both are active, you receive the Eclipse effect for 30 seconds (maintains the boost from Sun and Moon. Eclipse providing Bonus Damage makes it a very strong effect in addition to the rather large Damage/Magic Attack boost Sun: Max Damage +40, Max Hp +200 Moon: Magic Attack +60, Max MP +200 Eclipse: Bonus Damage +5%, Max Stamina +200 Alchemic Damage Increase: This is a useful set effect, but it shouldn’t be prioritized over the Cressida wear. If you’re in a position to 2 piece a Cressida, this is a good two piece set effect ot pair with your Cressida. Assassin’s Advantage: Because this item has a 20 up 90 down for Active/Cooldown time and a 5% chance to activate on critical hits, it’s not as consistent as Increased Critical Damage. If you can 1-2 piece a Increased Critical Damage set effect (which may require Set Effect Scrolls or specific weapons), it’s not a bad idea to slot this in or the extra burst of Critical Damage, Attack Delay reduction, and Movement Speed. If you want this with the Cressida and Scholar set effects, you’ll need to be able to one piece the Cressida. Unshakable Will: It prevents stuns/knockdowns and reduces incoming damage by 50% on a 10 up and 30 down on Active/Cooldown time. It's a good defensive set effect to add some extra bulk in sustained damage cycles. The stun/knockdown resistance can help Increased Critical Damage: This is generally a good set effect to consider since it’s always active. Rain Casting Casting Time Decease: This can allow for near instant deployment of a Rain Cloud. It’s generally better used as a gear swap though. Spellwalk Enhancement: It requires Spellwalk to be active, but it's a 15% speed boost. Eweca Movement Speed: Unlike the Ladeca Movement Speed buff, this is a fairly large 10% speed boost. Typically this set effect is found on Fleet Feet variants such as the Shooting Star Flying Shoes. Life Drain Enchantment: It certainly is a set effect. Life Drain is just not a very good skill at present, so you can skip this set effect by baring a buff. Water Alchemic Mastery Enhancement: The Harmonious Yantras are best used on Alchemic Sharpshooter, but they are still providing a boost to standard Alchemy. Rain Casting - Cooldown Decrease: Rain Casting has a rather long cooldown, but this set effect at best will let you reposition a cloud slightly earlier. Rain Cloud duration already exceeds the cooldown. | ||
Body | Special Hyperion Eclipse Full/Light Chiton - Requires 1-2 piece Cressida Ceann Bliana Scholar’s Halfrobe - Requires 1-2 piece Cressida Shadow Reaper/Phantom Wear - Requires 1-2 piece Cressida Special Imperial Knight Royal Uniform - Requires 1-2 piece Cressida | Rain Casting Water Cannon Damage | |||
Hands | Ceann Bliana Scholar’s Ringband - Requires 1-2 piece Cressida Ultimate Geas Devastation Gloves Royal Society Gloves - Gearswap Recommended | Rain Casting Cloud Range | Water Cannon Range | ||
Feet | Ceann Bliana Scholar’s Shoes - Requires 1-2 piece Cressida Cressida Shoes/Flamerider Boots | Rain Casting Cooldown Decrease | Water Cannon Efficiency | ||
Robe | Harmonious Yantra of Clarity (Enchantable) > Harmonious Yantra of Stoicism > Harmonious Yantra of Solitude | ||||
Accessories | Unfinished Reverie’s Diadem Halo > Irusan’s Bell | Water Alchemy | |||
Weapon | Nightbringer Technician > Perseus Tyrannus Cylinder > Revenant Insight Cylinder > Celtic Tetra Cylinder+Signet > Abyss Cylinder* > Cylinder of Blossoming Memories | Water Cannon Max Damage | Water Alchemy | Rain Casting Cloud Duration | |
Off Hand | Perseus Tyrannus Guard Cylinder > Revenant Insight Guard Cylinder > Guard Cylinders | Protection, Luck | |||
Echostone | Fill with missing reforges Hydra Transmutation Magic Protection Reduction |
Alchemy - Water Alchemy Notes
Same with the Hellfire Cylinder, the Abyss Cylinder has a higher Water Alchemy Cylinder Modifier than the Celtic but hobbles all other Alchemy Elements. This is especially problematic as the Abyss Cylinder only boosts Rain Casting duration by 12% due to the wind and clay alchemy penalty. On the other hand, a Celtic cylinder and Cylinder of Blossoming Memory boosts Rain Casting Duration by 90%. Revenants and Perseus Cylinders double Rain Casting duration.
If you can get your hands on some Set Effect Water Cannon Enhancement Scrolls, you can minimize the number of parts required for the Water Cannon set effect. This can free up slots for equipment such as Ultimate Geas Devastation gear.
Remember to reload your Revenant and Perseus Guard Cylinders. While you have crystals stored inside these guard cylinders, your alchemy skills will load faster. You can only manage crystals once every 60 seconds.
The Cylinder of Blossoming Memories is a super strong cylinder, though as with all Alchemy you require Erg to make Alchemy truly shine. The CoBM has +30% cylinder multipliers for all elements making it an extremely flexible all-rounder cylinder. The CoBM can’t receive Erg which does make it fall off.
Important note for the Ultimate Geas Devastation equipment and the Special Imperial Knight Royal Uniform. Sacrifice a Cressida piece to use either (or two pieces if you want to have Ult Devastation and Special Imperial Knight). This means making use of Set Effect Enhancement Scrolls. This is a fairly expensive prospect, so I wouldn’t recommend it for most prospective alchemists.
Alchemy - Support
This is focused on using Alchemy as a utility to supplement your primary damage talent. Alchemy has quite an extensive support arsenal, though with varying degrees of usefulness. These are nice to have and can be plenty useful, though you’ll need extra equipment slots to get the most out of them. Some of these reforges may appear in the Fire and Water Alchemy sections, but are listed here because they provide utility beyond an Alchemy skill set.
Equipment Recommendations | Crowd Control and Stuns | Debuffing and Grouping | Efficiency Boosts and Other Effects | Set Effect Notes | |
Head | Sandburst Min Blindness, Shock Duration | Rain Casting - Casting Time Decease: This can allow for near instant deployment of a Rain Cloud. Rain Casting - Cooldown Decrease: Rain Casting has a rather long cooldown, but this set effect at best will let you reposition a cloud slightly earlier. Rain Cloud duration already exceeds the cooldown. Battle Alchemy Enchantment:: This set effect does a variety of things for support alchemy. If you would like full details, I would check out the Stats/Status Effects wiki page. Hero Alchemy Enchantment: This is less useful. You rarely leave Golden Time active since Golden Time typically is used to either immediately prime Elemental Wave or Alchemic Sharpshooter’s Tri-Assault. Transmutation Enhancement: It certainly is a set effect. Fire/Water/Earth/Wind Alchemic Mastery Enhancement: The Harmonious Yantras are best used on Alchemic Sharpshooter, but they are still providing a boost to standard Alchemy. The Yantras are in this section as a formality, you do not need them for support alchemy as the bonuses they provide would be minimal. | |||
Body | Shock Stun Duration* | Life Drain Life Absorbed | |||
Hands | Rain Casting Cloud Range, Shock Range* | ||||
Feet | Flame Burst Stun Duration, Rain Casting Cooldown Decrease | Wind Blast Range | Water Alchemy Efficiency, Wind Alchemy Efficiency | ||
Robe | Harmonious Yantra of Clarity (Enchantable) > Harmonious Yantra of Stoicism > Harmonious Yantra of Tranquility/Solitude | ||||
Accessories | |||||
Weapon | Frozen Blast Duration - Hurricane, Rain Casting Cloud Duration | ||||
Off Hand | |||||
Echostone | Hydra Transmutation Magic Protection Reduction |
Support Alchemy Notes
While the Revenant Insight Cylinder is listed here, you shouldn’t go out of your way to get one as a support tool, unless Misty Red prices continue to tank. The set effects for Revenant and Perseus Cylinders do provide a noticeable boost to multiple alchemy skills, but it would generally be a waste to roll support effects on Revenant/Perseus Cylinders.
The notable support Alchemy boosts are Shock Duration (+10 seconds) and Flame Burst Hit Cycle (-.3 seconds per cycle). Naturally the Flame Burst one is also important for Damage Fire Alchemy. Sand Blind Duration is also boosted with the Set Effect on top of the 30% Clay Alchemy Efficiency from the Revenant Cylinder.
The Hurricane is one of the few instances where you will opt for Blue upgrades over Red upgrades.
Shock Range only applies while equipped. Shock Duration on the other hand applies when cast.
I don’t have Shock Stun Duration, but I don’t think it’s that useful anyways. Shock already can stunlock efficiently enough and where it can’t stunlock, Shock wasn’t going to save you anyways.
Combine Wind Blast with Death Mark to group enemies up.
Fighter
This is about increasing Fighter Damage and sometimes boosting the utility abilities of Fighter. I would avoid investing reforges into knuckles that are not Revenants or Perseus. You ideally want to be at Erg 45-50 for the extra combo damage and cooldown reduction, but even at Erg 35 you’ll see a decently high amount of damage since Revenants and Perseus knuckles have innate combo damage bonuses.
There are a lot of reforges you want to keep an eye out for since you practically use every fighter skill. Almost every reforge will grant a noticeable benefit. If you think some reforges should be lower priorities than others here, let me know.
Equipment Recommendations | Priority Reforges | Secondary Reforges | Tertiary Reforges | Set Effect Notes | |
Head | Ceann Bliana Skirmisher Circlet > Hyperion Eclipse Helionic Helm/Selenian Diadema Ultimate Geas Devastation Circlet Imperial Knight Royal Hat > Abyss Dragon Horns/Forest Ranger Wig and Hat | Charging Strike Cooldown, Spinning Uppercut Cooldown, Dropkick Cooldown, | Shieldless Charge, Focused Fist Charge Time Reduction | Pummel Cooldown Decrease* Fury of Light Cooldown*, Awakening of Light Cooldown* | Sun and Moon: This is a pretty interesting conditional set effect. When landing a hit, you have a 5% chance to activate the Sun or Moon effect (60s). If both are active, you receive the Eclipse effect for 30 seconds (maintains the boost from Sun and Moon. Eclipse providing Bonus Damage makes it a very strong effect in addition to the rather large Damage/Magic Attack boost Sun: Max Damage +40, Max Hp +200 Moon: Magic Attack +60, Max MP +200 Eclipse: Bonus Damage +5%, Max Stamina +200 Assassin’s Advantage: Because this item has a 20 up 90 down for Active/Cooldown time and a 5% chance to activate on critical hits, it’s not as consistent as Increased Critical Damage. If you can 1-2 piece a Increased Critical Damage set effect (which may require Set Effect Scrolls or specific weapons), it’s not a bad idea to slot this in or the extra burst of Critical Damage, and Movement Speed. Unshakable Will: It prevents stuns/knockdowns and reduces incoming damage by 50% on a 10 up and 30 down on Active/Cooldown time. It's a good defensive set effect to add some extra bulk in sustained damage cycles. The stun/knockdown resistance can help you recover from messy situations. Increased Critical Damage: This is generally a good set effect to consider since it’s always active. Redoubled Offensive Activation Boost (Strong): This is a nice set effect to have, though it does face more competition nowadays. Redoubled Offensive is an extremely potent Tech and is a mainstay on almost all Tech loadouts. Redoubled Offensive - Damage Boost: Redoubled Offensive is a very strong Tech, so if you’re building an Ultimate Geas Devastation set, this isn’t a bad option. Exploit Weakness Enhancement: It’s an extra 3% to Exploit Weakness which is already a useful Offensive tech. Good if you regularly use Exploit, less if you just use Fateweaver. Max Damage Increase: There are 3 variants of this set effect currently,one from the Skirmisher (+50), one from the Bulwark (+25), and one from Gacha equipment (+10). Gacha max pieces tend to be on the Body Slot while the Skirmisher and Bulwark normally require you to use the Head, Gloves, and Feet slots. These Effects do not stack and only the strongest effect applies. Spellwalk Enhancement: It requires Spellwalk to be active, but it's a 15% speed boost. Eweca Movement Speed: Unlike the Ladeca Movement Speed buff, this is a fairly large 10% speed boost. Typically this set effect is found on Fleet Feet variants such as the Shooting Star Flying Shoes. Ladeca Movement Speed Boost (Shadow Reaper Boots): Unlike most other Ladeca Movement Speed Boosts, this one provides a 12% movement speed boost. |
Body | Special Hyperion Eclipse Full/Light Chiton Special Imperial Knight Royal Uniform Ceann Bliana Skirmisher Cuirass > Special Forest Ranger Outfit Special Royal Society Field Outfit Ultimate Geas Devastation Chestplate | Spinning Uppercut Damage | Focused Fist Damage, Spinning Uppercut Defense/ Protection reduction Chance | ||
Hands | Ceann Bliana Skirmisher Gloves Ultimate Geas Devastation Gloves | Combo Mastery Damage | Knuckle Mastery Max Damage, Combat Mastery Max Attack Power, Spinning Uppercut Protection Reduction | Rain Casting Cloud Range* | |
Feet | Elemental Harmony Shoes > Shadow Reaper Boots > Forest Ranger Boots > Fleet Feet/Shooting Star Flying Shoes/Shooting Star Roller Skates | Drop Kick Damage | Charging Strike Range, Somersault Kick Damage* | ||
Robe | Special Ancient Dragon Guardian Wings > Special Draconian Wings > Enchantable Wings | ||||
Accessories | Unfinished Reverie’s Diadem Halo > Irusan’s Bell | Max Attack Power, Shieldless Charge | |||
Weapon | Nightbringer Vagabond > Perseus Tormented Knuckle > Revenant Splinter Knuckle | Charging Strike Damage | Max Damage, Focus Fist Damage | Pummel Damage | |
Utility Weapons | |||||
Echostone | Fill with missing reforges Combat Mastery Damage Max Attack Power on Red Stone |
Fighter Notes
Somersault Kick is generally used to help reset cooldowns rather than for damage, though this does depend on your combo card. It’s nice to have but you should prioritize Charging Strike Range or Dropkick Damage over it.
Pummel is not a bad skill, it’s actually very strong. The problem with building for Pummel is that most boss enemies have advanced heavy stander which makes them immune to Pummel. Barring a change to Pummel that allows you to mount advanced heavy stander enemies, I’d look for dropkick reforges first.
It can be difficult to get a perfect combo card with Focus Fist, Somersault Kick, or Drop Kick. Of those three skills, I would prioritize searching for a high damage Drop Kick combo card as it is more applicable to all combat situations over Pummel. Focus Fist and Somersault Kick are good to have in your combo and can be worth keeping if you find any with them. However, with Erg 50 Perseus Knuckles, you may want to prioritize higher damage combos over combos that can rotate through all Fighter Skills. Because it is relatively easy to get Charging Strike and Spinning Uppercut combos (advancement test), Focus Fist and Somersault Kick are in the Secondary Reforge section.
Fury of Light and Awakening of Light can be useful reforges for Fighter. Fury of Light is a homing AoE skill that can score critical hits, which means you can score combo resets off of those while it is active. I wouldn’t put it on your primary Fighter headgear, but if you are fine with some gear swapping, this would be nice to have. Demigod also doesn’t consume EXP anymore (THANK YOU), so there’s no need to be conserative about its use.
While I’m not including it on the BiS list because I think it’s too niche (and honestly probably not worth the reforge investment unless they’re pre-r1), you can use the Nuadha Set to boost the duration of Awakening of Light by 1 minute. This can give you some extra up-time on Fury of Light.
Did you know Rain Casting Cloud's Lightning can land critical hits? Well it can for a glorious 1 damage. But the important thing is it can land Critical Hits and they count as your critical hits. You will want a lvl 21 Spirit Cylinder (budget wise I recommend the Cylinder of Blossoming Memories) for the reduced Rain Cast cast time. Expanding the coverage of Rain Casting can increase the chance the lightning strikes a mob. Use Shield of Trust before casting as hit-stun will cancel Rain Casting, eating the cooldown.
Bard
As a bard you support allies, harm (debuff) enemies, harm allies, and support enemies. This generally means using Battlefield Overture to boost your team’s damage, using Lullaby to give your team a chance to set up, and Fantastic Chorus to create a slow field. If you want to min-max bard buffs you will want to make a dedicated bard set, but you can always mix and match parts for convenience and cost saving. It certainly helps that some of the best damage enchants are also the best Music Buff Effect enchants. You should use the Category: Music Skills page on the wiki for the widget to help calculate how strong your buffs will be.
Troubadour BFO and Cantabile BFO set effects do not stack. You do not need both of them.
Equipment Recommendations | Priority Reforges | Secondary Reforges | Tertiary Reforges | Set Effect Notes | |
Head | Troubadour's Wig and Chapeau/Hat* | Battlefield Overture Effect Radius | Fantastic Chorus Enhancement: As with most set effects that influence the same thing, the stronger effect applies. This means the Seraphic Cantabile Boots offer a stronger Fantastic Chorus buff than the Troubadour Wig and Hat (30 vs 20). Either is still a massive improvement to Fantastic Chorus though. Battlefield Overture Buff Effect: Again, as with most set effects that influence the same thing, the stronger effect applies. In this respect, the Seraphic Cantabile Bangles are stronger than the Special Troubadour Coat and they will not stack. Music Buff Duration Enhancement: In absence of a Harmonic Saint for buffs, getting more buff duration can be useful, especially when extending the buffs with Tuan pets. Harvest Song Enchantment: You don’t necessarily need this for a gathering buff set, but it’s nice to have. Lullaby Enhancement: Lullaby is generally unused due to enemy immunity to it. | ||
Body | Battlefield Overture Duration Lullaby Duration | Vivace Duration | |||
Hands | |||||
Feet | Vivace Attack Speed | Vivace Magic Charging Speed/ Vivace Alchemy Charging Speed | |||
Robe | |||||
Accessories | Normal/Excellent/ Inspiring Performance Effect | Battlefield Overture Duration Lullaby Duration Excellent/Inspiring Performance Rate | |||
Weapon | Normal/Excellent/ Inspiring Performance Effect, Playing Instrument Effect* | Excellent/Inspiring Performance Rate | |||
Echostone | Playing Instrument Effect* | Fill with Missing Reforges* |
Bard Notes
Although you will generally fill the echostone slot with missing reforges, Playing Instrument Effect on your Echostone Slot can be extremely useful despite its rarity. This is because you can roll Normal/Excellent/Inspiring Performance Effect on Accessories which will stack with the Instrument slot. Playing Instrument Effect has no such accessory equivalent reforge. If you get PE on your Gloomy though, it’s still a good roll and there isn’t a real need to replace it if you’re satisfied.
The Rose Couples Bracelet requires you to be in the same map area as the character who has the other bracelet in order to activate the bonuses. The effect will be active regardless if the Bracelet is in the Gear or Style Tab.
See Music Buff Effect Enchants for the enchants that should go on Enchantable Wings
The Special Troubadour’s Coat +3 Music Buff Effect for BFO Seraphic Cantabile Bangle provides +5.
The Troubadour Hat or the Seraphic Cantabile Boots on the other hand is a significant boost to Fantastic Chorus. The slow and HP recovery of Fantastic Chorus is boosted significantly. The Seraphic Cantabile Boots also provide the Fantastic Chorus Boost Effect, but take up the Shoe Slot instead of the Head Slot (opening up bards to use the elusive Fleur’s Grass Tiara). The Cantabile is a bit stronger than the Troubadour Wig as well (Troub +20, Cantabile +30).
Between the Troubadour and Cantabile, Cantabile provides a higher bonus. Most of the time for set effects, the higher value effect applies, and I believe that is the case for these items.
The Troubadour’s Gloves are only here for completeness. This is honestly the most skippable part of the set because the Harvest Song set effect does not boost success rate and I couldn’t be bothered to even test what the Enduring Melody set effect does. Probably a miniscule amount of Mana and Stam regen.
Puppetry - Crowd Control
Puppetry tends to be used as support talent rather than a primary damage talent, even though it still can be a very potent damage talent when geared for. Puppetry for basic crowd control is fairly affordable, though it shines with Grade S Erg 50.
You will ideally want Revenant/Perseus/Nightbringer control bars, the Fallen Pierrot Figure (essentially a Revenant), Erg 45-50, and a level 63 spirit control bar. If you intend on just using puppetry for grouping, a level 63 spirit control bar will be useful though not required.
Equipment Recommendations | Priority Reforges | Secondary Reforges | Tertiary Reforges | Set Effect Notes | |
Head | Act 6: Crisis Radius | Act 7: Climatic Crash Radius | Spellwalk Enhancement: It requires Spellwalk to be active, but it's a 15% speed boost. Eweca Movement Speed: Unlike the Ladeca Movement Speed buff, this is a fairly large 10% speed boost. Typically this set effect is found on Fleet Feet variants such as the Shooting Star Flying Shoes. Ladeca Movement Speed Boost (Shadow Reaper Boots): Unlike most other Ladeca Movement Speed Boosts, this one provides a 12% movement speed boost. Puppets do inherit your movement speed, so move speed boosts can help with repositioning the puppet. Marionette Stun Resistance: It adds +75% stun resistance, which is very useful when the puppet starts taking hits. Puppetry Skill Cooldown: This is probably the most important set effect for Control Bars and the main reason you at the very least want a Revenant Lunatic bar. The cooldown reduction stacks with Control Marionette and Erg, allowing a puppeteer to spam skills faster than the base cooldown would suggest. | ||
Body | |||||
Hands | |||||
Feet | Elemental Harmony Shoes > Shadow Reaper Boots > Forest Ranger Boots > Fleet Feet/Shooting Star Flying Shoes/Shooting Star Roller Skates | Act 6: Crisis Casting Time Act 9: Invigorating Encore Duration | |||
Robe | Special Ancient Dragon Guardian Wings > Special Draconian Wings > Enchantable Wings | ||||
Accessories | Act 6: Crisis Radius | Act 7: Climatic Crash Radius | |||
Weapon | Nightbringer Trickster > Perseus Conflict Control Bar > Revenant Lunatic Control Bar > Celtic Control Bar+Signet >Control Bar of Blossoming Memories > Demonic Illusion Control Bar | ||||
Off Hand | |||||
Echostone | Fill with missing reforges |
Puppetry - AoE DPS
Puppetry can be potent as an AoE DPS talent. As an AoE talent, you’ll primarily be rotating between Act 6 for Group up, and Act 7 for damage. You can also make use of Act 4, though it isn’t as beefy as Act 7.
You will ideally want Revenant/Perseus/Nightbringer control bars, the Fallen Pierrot Figure (essentially a Revenant), Erg S45-50, and a level 63 spirit control bar.
Equipment Recommendations | Priority Reforges | Secondary Reforges | Tertiary Reforges | Set Effect Notes | |
Head | Ceann Bliana Skirmisher Circlet > Hyperion Eclipse Helionic Helm/Selenian Diadema Ultimate Geas Devastation Circlet | Act 6: Crisis Radius, Act 7:Climatic Crash Charge Width | Act 4: Rising Action Radius | Sun and Moon: This is a pretty interesting conditional set effect. When landing a hit, you have a 5% chance to activate the Sun or Moon effect (60s). If both are active, you receive the Eclipse effect for 30 seconds (maintains the boost from Sun and Moon. Eclipse providing Bonus Damage makes it a very strong effect in addition to the rather large Damage/Magic Attack boost Sun: Max Damage +40, Max Hp +200 Moon: Magic Attack +60, Max MP +200 Eclipse: Bonus Damage +5%, Max Stamina +200 Assassin’s Advantage: Because this item has a 20 up 90 down for Active/Cooldown time and a 5% chance to activate on critical hits, it’s not as consistent as Increased Critical Damage. If you can 1-2 piece a Increased Critical Damage set effect (which may require Set Effect Scrolls or specific weapons), it’s not a bad idea to slot this in or the extra burst of Critical Damage, and Movement Speed. Increased Critical Damage: This is generally a good set effect to consider since it’s always active. Redoubled Offensive Activation Boost (Strong): This is a nice set effect to have, though it does face more competition nowadays. Redoubled Offensive is an extremely potent Tech and is a mainstay on almost all Tech loadouts. Redoubled Offensive - Damage Boost: Redoubled Offensive is a very strong Tech, so if you’re building an Ultimate Geas Devastation set, this isn’t a bad option. Exploit Weakness Enhancement: It’s an extra 3% to Exploit Weakness which is already a useful Offensive tech. Good if you regularly use Exploit, less if you just use Fateweaver. Max Damage Increase: There are 3 variants of this set effect currently,one from the Skirmisher (+50), one from the Bulwark (+25), and one from Gacha equipment (+10). Gacha max pieces tend to be on the Body Slot while the Skirmisher and Bulwark normally require you to use the Head, Gloves, and Feet slots. These Effects do not stack and only the strongest effect applies. Spellwalk Enhancement: It requires Spellwalk to be active, but it's a 15% speed boost. Eweca Movement Speed: Unlike the Ladeca Movement Speed buff, this is a fairly large 10% speed boost. Typically this set effect is found on Fleet Feet variants such as the Shooting Star Flying Shoes. Ladeca Movement Speed Boost (Shadow Reaper Boots): Unlike most other Ladeca Movement Speed Boosts, this one provides a 12% movement speed boost. Marionette Stun Resistance: It adds +75% stun resistance, which is very useful when the puppet starts taking hits. Marionette Critical Damage: It used to be a stronger boost, but it’s still a sizable damage boost for puppets on crits. Puppetry Skill Cooldown: This is probably the most important set effect for Control Bars and the main reason you at the very least want a Revenant Lunatic bar. The cooldown reduction stacks with Control Marionette and Erg, allowing a puppeteer to spam skills faster than the base cooldown would suggest. | |
Body | Special Hyperion Eclipse Full/Light Chiton Special Imperial Knight Royal Uniform Ceann Bliana Skirmisher Gloves > Special Forest Ranger Outfit Special Royal Society Field Outfit | Marionette Maximum Damage | |||
Hands | Ceann Bliana Skirmisher Gloves Ultimate Geas Devastation Gloves | Control Marionette Linked Marionette Maximum Damage Bonus | Combat Mastery Max Damage | ||
Feet | Elemental Harmony Shoes > Shadow Reaper Boots > Forest Ranger Boots > Fleet Feet/Shooting Star Flying Shoes/Shooting Star Roller Skates | Act 7: Climatic Crash Casting Time, Act 6: Crisis Casting Time, Act 9: Invigorating Encore Duration | |||
Robe | Special Ancient Dragon Guardian Wings > Special Draconian Wings > Enchantable Wings | ||||
Accessories | Unfinished Reverie’s Diadem Halo > Irusan’s Bell Pre r1 Equipment | Act 7: Climatic Crash Damage Magnification Act 6: Crisis Radius | Act 7: Climatic Crash Casting Time, Act 6: Crisis Casting Time | ||
Weapon | Nightbringer Trickster > Perseus Conflict Control Bar > Revenant Lunatic Control Bar > Celtic Control Bar+Signet >Control Bar of Blossoming Memories > Demonic Illusion Control Bar | Act 7: Climatic Crash Damage Magnification | Max Damage, | ||
Off Hand | |||||
Echostone | Fill with missing reforges |
Puppetry - Single Target/Boss Stuns
Act 2: Threshold Cutter can disrupt the AI of several bosses, making it safer to deal damage if you have one or two puppeteers with Erg 45-50 Revenant Lunatic Control Bars. With Erg 50, you can also spam Act 1: Inciting Incident between Act 2s to pile on hits. Puppetry isn’t the best Single Target DPS talent, but it still brings useful tools to the table.
At present, it’s worth noting that Act 1 and Act 2 may not properly progress combo cards if you use these skills too quickly in succession.
Equipment Recommendations | Priority Reforges | Secondary Reforges | Tertiary Reforges | Set Effect Notes | |
Head | Ceann Bliana Skirmisher Circlet > Hyperion Eclipse Helionic Helm/Selenian Diadema Ultimate Geas Devastation Circlet | Sun and Moon: This is a pretty interesting conditional set effect. When landing a hit, you have a 5% chance to activate the Sun or Moon effect (60s). If both are active, you receive the Eclipse effect for 30 seconds (maintains the boost from Sun and Moon. Eclipse providing Bonus Damage makes it a very strong effect in addition to the rather large Damage/Magic Attack boost Sun: Max Damage +40, Max Hp +200 Moon: Magic Attack +60, Max MP +200 Eclipse: Bonus Damage +5%, Max Stamina +200 Assassin’s Advantage: Because this item has a 20 up 90 down for Active/Cooldown time and a 5% chance to activate on critical hits, it’s not as consistent as Increased Critical Damage. If you can 1-2 piece a Increased Critical Damage set effect (which may require Set Effect Scrolls or specific weapons), it’s not a bad idea to slot this in or the extra burst of Critical Damage, and Movement Speed. Increased Critical Damage: This is generally a good set effect to consider since it’s always active. Redoubled Offensive Activation Boost (Strong): This is a nice set effect to have, though it does face more competition nowadays. Redoubled Offensive is an extremely potent Tech and is a mainstay on almost all Tech loadouts. Redoubled Offensive - Damage Boost: Redoubled Offensive is a very strong Tech, so if you’re building an Ultimate Geas Devastation set, this isn’t a bad option. Exploit Weakness Enhancement: It’s an extra 3% to Exploit Weakness which is already a useful Offensive tech. Good if you regularly use Exploit, less if you just use Fateweaver. Max Damage Increase: There are 3 variants of this set effect currently,one from the Skirmisher (+50), one from the Bulwark (+25), and one from Gacha equipment (+10). Gacha max pieces tend to be on the Body Slot while the Skirmisher and Bulwark normally require you to use the Head, Gloves, and Feet slots. These Effects do not stack and only the strongest effect applies. Spellwalk Enhancement: It requires Spellwalk to be active, but it's a 15% speed boost. Eweca Movement Speed: Unlike the Ladeca Movement Speed buff, this is a fairly large 10% speed boost. Typically this set effect is found on Fleet Feet variants such as the Shooting Star Flying Shoes. Ladeca Movement Speed Boost (Shadow Reaper Boots): Unlike most other Ladeca Movement Speed Boosts, this one provides a 12% movement speed boost. Marionette Stun Resistance: It adds +75% stun resistance, which is very useful when the puppet starts taking hits. Marionette Critical Damage: It used to be a stronger boost, but it’s still a sizable damage boost for puppets on crits. Puppetry Skill Cooldown: This is probably the most important set effect for Control Bars and the main reason you at the very least want a Revenant Lunatic bar. The cooldown reduction stacks with Control Marionette and Erg, allowing a puppeteer to spam skills faster than the base cooldown would suggest. | |||
Body | Special Hyperion Eclipse Full/Light Chiton Special Imperial Knight Royal Uniform Ceann Bliana Skirmisher Cuirass > Special Forest Ranger Outfit Special Royal Society Field Outfit | Marionette Maximum Damage | |||
Hands | Ceann Bliana Skirmisher Gloves Ultimate Geas Devastation Gloves | Control Marionette Linked Marionette Maximum Damage Bonus | Combat Mastery Max Damage | ||
Feet | Elemental Harmony Shoes > Shadow Reaper Boots > Forest Ranger Boots > Fleet Feet/Shooting Star Flying Shoes/Shooting Star Roller Skates Pre r1 Equipment | Act 9: Invigorating Encore Duration | |||
Robe | Special Ancient Dragon Guardian Wings > Special Draconian Wings > Enchantable Wings | ||||
Accessories | Unfinished Reverie’s Diadem Halo > Irusan’s Bell Pre r1 Equipment | Act 2: Threshold Cutter Damage Boost, Act 1: Inciting Incident Damage Magnification | |||
Weapon | Nightbringer Trickster > Perseus Conflict Control Bar > Revenant Lunatic Control Bar > Celtic Control Bar+Signet >Control Bar of Blossoming Memories > Demonic Illusion Control Bar | Act 2: Threshold Cutter Damage Boost*, Act 1: Inciting Incident Damage Magnification | |||
Off Hand | |||||
Echostone | Fill with missing reforges |
Puppet Notes
I’ll be testing some things as I get the reforges for them. Specifically I’ll be looking frame by frame at load time reforges for Act 6 and 7, and radius reforges for Act 6 and 7. An individual brought up that for the reforges to activate, the cast range needs to be a round number.
Another individual has already provided me video of Act 6 with and without the Footwear, and I have already verified the results of a 6/6 Act 6: Cast Time. at 30 FPS there seems to be a 3 frame difference between Act 6 with and without the reforge.
Act 2: Threshold Cutter Damage can only be rolled up to 20 on the Weapon. Echostone Act 2 damage appears to be capped at lvl 3.
Dual Guns
You’ll want a pair of level 63 Spirit guns if you really want to use them. Having Erg will help a lot also, but may be less necessary for acceptable performance after Season 3 Renovations. The Spirit Ultimate grants you an effectively infinite magazine. Dual Gun is also being buffed on KR, Bullet Storm especially.
Even if you do not plan on using dual guns, you may want to consider using an Attack Speed set bonus with dual guns for specific purposes. While Attack Speed set bonuses do not affect Fast or Very Fast Melee weapons, they will boost the attack speed of Dual Guns. This can be useful for hit-count checks such as the Succubus Queen’s Sweet Illusion*, Girgrishy’s Grab, and Hasdim’s Purgatory (which you likely won’t see in most Hasidim raids).
Equipment Recommendations | Priority Reforges | Secondary Reforges | Tertiary Reforges | Set Effect Notes | |
Head | Ceann Bliana Skirmisher Circlet > Hyperion Eclipse Helionic Helm/Selenian Diadema Ultimate Geas Devastation Circlet Imperial Knight Royal Hat > Abyss Dragon Horns/Forest Ranger Wig and Hat Refined Dustin Silver Knight Helmet | Way of the Gun Duration, Way of the Gun Attack Speed | Attack Speed* | Sun and Moon: This is a pretty interesting conditional set effect. When landing a hit, you have a 5% chance to activate the Sun or Moon effect (60s). If both are active, you receive the Eclipse effect for 30 seconds (maintains the boost from Sun and Moon. Eclipse providing Bonus Damage makes it a very strong effect in addition to the rather large Damage/Magic Attack boost Sun: Max Damage +40, Max Hp +200 Moon: Magic Attack +60, Max MP +200 Eclipse: Bonus Damage +5%, Max Stamina +200 Assassin’s Advantage: Because this item has a 20 up 90 down for Active/Cooldown time and a 5% chance to activate on critical hits, it’s not as consistent as Increased Critical Damage. If you can 1-2 piece a Increased Critical Damage set effect (which may require Set Effect Scrolls or specific weapons), it’s not a bad idea to slot this in or the extra burst of Critical Damage, and Movement Speed. Unshakable Will: It prevents stuns/knockdowns and reduces incoming damage by 50% on a 10 up and 30 down on Active/Cooldown time. It's a good defensive set effect to add some extra bulk in sustained damage cycles. The stun/knockdown resistance can help Increased Critical Damage: This is generally a good set effect to consider since it’s always active. Redoubled Offensive Activation Boost (Strong): This is a nice set effect to have, though it does face more competition nowadays. Redoubled Offensive is an extremely potent Tech and is a mainstay on almost all Tech loadouts. Redoubled Offensive - Damage Boost: Redoubled Offensive is a very strong Tech, so if you’re building an Ultimate Geas Devastation set, this isn’t a bad option. Exploit Weakness Enhancement: It’s an extra 3% to Exploit Weakness which is already a useful Offensive tech. Good if you regularly use Exploit, less if you just use Fateweaver. Max Damage Increase: There are 3 variants of this set effect currently,one from the Skirmisher (+50), one from the Bulwark (+25), and one from Gacha equipment (+10). Gacha max pieces tend to be on the Body Slot while the Skirmisher and Bulwark normally require you to use the Head, Gloves, and Feet slots. These Effects do not stack and only the strongest effect applies. Spellwalk Enhancement: It requires Spellwalk to be active, but it's a 15% speed boost. Eweca Movement Speed: Unlike the Ladeca Movement Speed buff, this is a fairly large 10% speed boost. Typically this set effect is found on Fleet Feet variants such as the Shooting Star Flying Shoes. Ladeca Movement Speed Boost (Shadow Reaper Boots): Unlike most other Ladeca Movement Speed Boosts, this one provides a 12% movement speed boost. | |
Body | Special Hyperion Eclipse Full/Light Chiton Special Imperial Knight Royal Uniform Ceann Bliana Skirmisher Cuirass > Special Forest Ranger Outfit > Saint Guardian's Leather Armor Special Royal Society Field Outfit Refined Dustin Silver Knight Armor | Flash Launcher Damage, Bullet Slide Damage | |||
Hands | Ceann Bliana Skirmisher Gloves Ultimate Geas Devastation Gloves | Bullet Storm Damage per Shot | Bullet Storm Attack Spread | Attack Speed | |
Feet | Elemental Harmony Shoes > Shadow Reaper Boots > Forest Ranger Boots > Fleet Feet/Shooting Star Flying Shoes/Shooting Star Roller Skates | Shooting Rush Damage, Shooting Rush Attack Spread, Shooting Rush Attack Distance | Ladeca Movement Speed Boost (Shadow Reaper Boots): Unlike most other Ladeca Movement Speed Boosts, this one provides a 12% movement speed boost. | ||
Robe | Special Ancient Dragon Guardian Wings > Special Draconian Wings > Enchantable Wings | ||||
Accessories | Unfinished Reverie’s Diadem Halo > Irusan’s Bell | Shooting Rush Damage, Shooting Rush Attack Spread, Shooting Rush Attack Distance, Bullet Storm Damage per Shot | Max Attack Power, Flash Launcher Damage, Bullet Slide Damage | Attack Speed | |
Weapon | Nightbringer Vanquisher >Perseus Thundering Dual Guns > Divine Cinnsealach L2+Signet > Celtic Dowra Ace+Signet > Dual Guns of Blossoming Memories > Dowra SE | Dual Gun Maximum Damage, Max Attack Power, Bullet Storm Maximum Damage* | Bullet Storm Max Targets, Bullet Storm Attack Spread | Attack Speed | |
Echostone | Fill with missing reforges |
Dual Gun Notes
There is a build for Taunes that allows it to be stronger than the Divine Cinnsealach during Way of the Gun. However, it is a fairly specific setup. Even so, the Taunes will be a better option for Dual Gun skills as it can reach a higher max damage compared to the Divine Cinnsealach. The Divine Cinnsealach and Dowra line does boast better range than the Taunes which does make the Dowra line more efficient at speed clearing lower HP mooks with WotG.
Interestingly, Dual Gun Max Damage is not a skill reforge but rather a damage reforge specifically for dual guns. If you double or triple roll them on your guns they will stack. This is being removed in KR. Once this change hits NA this note is being removed. This has been removed as of 6/10/2021. If you previously had a dual roll, it’ll still apply, but I’ve removed it from the list to prevent confusion.
If you cannot make an attack speed set, consider using reforges to fill the gaps, though it would be more cost effective to just buy a Lang set.
I would not recommend you try to pass the Queen’s Sweet Illusion Hit-Count check the normal way. With NA lag being what it is, it is unlikely you would be able to clear it. You should instead cancel her Sweet Illusion with a Bone Dragon/Mir/Ceranus/Sheeptuplet or dodge the hit with a move that grants invincibility frames (Anchor Rush, Paper Airplane, Shylock’s Footsteps, Blaze?).
Bullet Storm Maximum Damage increases the multiplier limit.
Ninja - General Use
This will focus on building Ninja for general combat. Ninja has fairly strong damage, Smokescreen is an exceptional debuff that stacks with other defense/protection debuffs, and Shadow Bind is one of the strongest CC moves in the game (although a lot of newer content is immune to it). Kunai Storm is extremely spamable and has a very fast animation. You may want a level 21 spirit for the Kunai Storm cooldown rest on critical hits, but it is not required due to Kunai Storm’s low cooldown. Also consider an Attack Speed set effect for normal attacks (if you plan on using them to kill low level mooks) as Shurikens are ranged weapons and will benefit from Attack Speed set bonuses.
Equipment Recommendations | Priority Reforges | Secondary Reforges | Tertiary Reforges | Set Effect Notes | |
Head | Ceann Bliana Skirmisher Circlet > Hyperion Eclipse Helionic Helm/Selenian Diadema Ultimate Geas Devastation Circlet Imperial Knight Royal Hat > Abyss Dragon Horns/Forest Ranger Wig and Hat Refined Dustin Silver Knight Helmet | Smoke Screen Defense Reduction | Attack Speed | Sun and Moon: This is a pretty interesting conditional set effect. When landing a hit, you have a 5% chance to activate the Sun or Moon effect (60s). If both are active, you receive the Eclipse effect for 30 seconds (maintains the boost from Sun and Moon. Eclipse providing Bonus Damage makes it a very strong effect in addition to the rather large Damage/Magic Attack boost Sun: Max Damage +40, Max Hp +200 Moon: Magic Attack +60, Max MP +200 Eclipse: Bonus Damage +5%, Max Stamina +200 Assassin’s Advantage: Because this item has a 20 up 90 down for Active/Cooldown time and a 5% chance to activate on critical hits, it’s not as consistent as Increased Critical Damage. If you can 1-2 piece a Increased Critical Damage set effect (which may require Set Effect Scrolls or specific weapons), it’s not a bad idea to slot this in or the extra burst of Critical Damage, and Movement Speed. Unshakable Will: It prevents stuns/knockdowns and reduces incoming damage by 50% on a 10 up and 30 down on Active/Cooldown time. It's a good defensive set effect to add some extra bulk in sustained damage cycles. The stun/knockdown resistance can help Increased Critical Damage: This is generally a good set effect to consider since it’s always active. Redoubled Offensive Activation Boost (Strong): This is a nice set effect to have, though it does face more competition nowadays. Redoubled Offensive is an extremely potent Tech and is a mainstay on almost all Tech loadouts. Redoubled Offensive - Damage Boost: Redoubled Offensive is a very strong Tech, so if you’re building an Ultimate Geas Devastation set, this isn’t a bad option. Exploit Weakness Enhancement: It’s an extra 3% to Exploit Weakness which is already a useful Offensive tech. Good if you regularly use Exploit, less if you just use Fateweaver. Max Damage Increase: There are 3 variants of this set effect currently,one from the Skirmisher (+50), one from the Bulwark (+25), and one from Gacha equipment (+10). Gacha max pieces tend to be on the Body Slot while the Skirmisher and Bulwark normally require you to use the Head, Gloves, and Feet slots. These Effects do not stack and only the strongest effect applies. Spellwalk Enhancement: It requires Spellwalk to be active, but it's a 15% speed boost. Eweca Movement Speed: Unlike the Ladeca Movement Speed buff, this is a fairly large 10% speed boost. Typically this set effect is found on Fleet Feet variants such as the Shooting Star Flying Shoes. Ladeca Movement Speed Boost (Shadow Reaper Boots): Unlike most other Ladeca Movement Speed Boosts, this one provides a 12% movement speed boost. | |
Body | Special Hyperion Eclipse Full/Light Chiton Special Imperial Knight Royal Uniform Ceann Bliana Skirmisher Cuirass > Special Forest Ranger Outfit > Saint Guardian's Leather Armor Special Royal Society Field Outfit Refined Dustin Silver Knight Armor | Kunai Storm Damage | |||
Hands | Ceann Bliana Skirmisher Gloves Ultimate Geas Devastation Gloves | Kunai Storm Attack Range* | Attack Speed | ||
Feet | Elemental Harmony Shoes > Shadow Reaper Boots > Forest Ranger Boots > Fleet Feet/Shooting Star Flying Shoes/Shooting Star Roller Skates | Shadow Cloak Duration, Explosive Kunai Debuff Duration, Shadow Bind Duration | Ladeca Movement Speed Boost (Shadow Reaper Boots): Unlike most other Ladeca Movement Speed Boosts, this one provides a 12% movement speed boost. | ||
Robe | Special Ancient Dragon Guardian Wings > Special Draconian Wings > Enchantable Wings | ||||
Accessories | Unfinished Reverie’s Diadem Halo > Irusan’s Bell | Max Attack Power, Kunai Storm Damage | Shadow Bind Duration | Attack Speed, Shadow Cloak Duration | |
Weapon | Nightbringer Infiltrator > Perseus Swift Shuriken > Celtic Throwing Star+Signet > Anju’s Shuriken > Shuriken of Blossoming Memories | Shuriken Mastery Max Damage*, Max Attack Power | Explosive Kunai Quantity | Attack Speed, Shadow Cloak Duration, Shadow Bind Duration | |
Echostone | Fill with missing reforges |
Ninja - Sakura Abyss
Alternatively, you can build for Sakura Abyss. Sakura Abyss is currently the second hardest hitting burst damage nuke in the game (thanks Meteor). Combine with a level 63 spirit shuriken, and you can cast it instantly. Combine with Time Shift, and you can cast it 5-6 more times depending on if you have Sandglass enchanted.
Equipment Recommendations | Priority Reforges | Secondary Reforges | Tertiary Reforges | Set Effect Notes | |
Head | Ceann Bliana Skirmisher Circlet > Hyperion Eclipse Helionic Helm/Selenian Diadema | Sun and Moon: This is a pretty interesting conditional set effect. When landing a hit, you have a 5% chance to activate the Sun or Moon effect (60s). If both are active, you receive the Eclipse effect for 30 seconds (maintains the boost from Sun and Moon. Eclipse providing Bonus Damage makes it a very strong effect in addition to the rather large Damage/Magic Attack boost Sun: Max Damage +40, Max Hp +200 Moon: Magic Attack +60, Max MP +200 Eclipse: Bonus Damage +5%, Max Stamina +200 Assassin’s Advantage: Because this item has a 20 up 90 down for Active/Cooldown time and a 5% chance to activate on critical hits, it’s not as consistent as Increased Critical Damage. If you can 1-2 piece a Increased Critical Damage set effect (which may require Set Effect Scrolls or specific weapons), it’s not a bad idea to slot this in or the extra burst of Critical Damage, and Movement Speed. Increased Critical Damage: This is generally a good set effect to consider since it’s always active. Redoubled Offensive Activation Boost (Strong): This is a nice set effect to have, though it does face more competition nowadays. Redoubled Offensive is an extremely potent Tech and is a mainstay on almost all Tech loadouts. Redoubled Offensive - Damage Boost: Redoubled Offensive is a very strong Tech, so if you’re building an Ultimate Geas Devastation set, this isn’t a bad option. Exploit Weakness Enhancement: It’s an extra 3% to Exploit Weakness which is already a useful Offensive tech. Good if you regularly use Exploit, less if you just use Fateweaver. Max Damage Increase: There are 3 variants of this set effect currently,one from the Skirmisher (+50), one from the Bulwark (+25), and one from Gacha equipment (+10). Gacha max pieces tend to be on the Body Slot while the Skirmisher and Bulwark normally require you to use the Head, Gloves, and Feet slots. These Effects do not stack and only the strongest effect applies. Spellwalk Enhancement: It requires Spellwalk to be active, but it's a 15% speed boost. Eweca Movement Speed: Unlike the Ladeca Movement Speed buff, this is a fairly large 10% speed boost. Typically this set effect is found on Fleet Feet variants such as the Shooting Star Flying Shoes. | |||
Body | Special Hyperion Eclipse Full/Light Chiton Special Imperial Knight Royal Uniform Special Royal Society Field Outfit Ceann Bliana Skirmisher Cuirass > Special Forest Ranger Outfit | ||||
Hands | Ceann Bliana Skirmisher Gloves Ultimate Geas Devastation Gloves | Sakura Abyss Attack Range | |||
Feet | Elemental Harmony Shoes > Forest Ranger Boots > Fleet Feet/Shooting Star Flying Shoes/Shooting Star Roller Skates | Shadow Bind Duration, Shadow Cloak Duration | |||
Robe | Special Ancient Dragon Guardian Wings > Special Draconian Wings > Enchantable Wings | ||||
Accessories | Unfinished Reverie’s Diadem Halo > Irusan’s Bell | Sakura Abyss Attack Range, Max Attack Power | Shadow Bind Duration | Shadow Cloak Duration | |
Weapon | Nightbringer Infiltrator > Perseus Swift Shuriken > Celtic Throwing Star+Signet > Anju’s Shuriken > Shuriken of Blossoming Memories | Shuriken Mastery Max Damage*, Max Attack Power | Sakura Abyss Attack Range | Shadow Cloak Duration, Shadow Bind Duration | |
Echostone | Fill with missing reforges |
Ninja Notes
Ninja General Use
The Hagi tends to be used for normal attacks more due to its very fast attack speed. If you feel you don’t need the extra damage from the Anju/Celtic and would rather have the very fast attack speed utility, you may prefer to use the Hagi.
Skill reforges typically only stack with the Accessory slot. Having Kunai Storm Attack Range on your Hands and Weapons will not add them together and will instead pick the higher number. Accessory slots do not stack with Echostones.
The Shuriken Mastery Max Damage reforge is more efficient than Max Attack Power, but they do stack with each other.
Explosive Kunai is getting some significant changes during the S3 Renovation, but probably not enough to justify building for. Even so if you really wanted to use it and maximize its damage, you’ll likely want to go for more Kunai tags instead of more damage. Additional Kunai Tags expands your AoE range and will potentially allow more Kunais to hit the same target depending on how much the AoE is boosted by post patch (3m explosion radius on the test server currently).
Shadow Cloak following Season 3 renovation will provide a damage buff to Ninja Skills if you load a Ninja Skill inside Shadow Cloak. For general combat you may want to use Shadow Cloak -> Shuriken Charge for single targets.
Ninja Sakura Abyss
Sakura Abyss Attack Range on the Glove and Weapon slot do not stack.
The Shuriken Mastery Max Damage reforge is more efficient than Max Attack Power, but they do stack with each other.
Shadow Cloak following Season 3 renovation will provide a damage buff to Ninja Skills if you load a Ninja Skill inside Shadow Cloak. Sakura should benefit a lot from this.
Chain Slash - Combat
Chain Slasher’s bread and butter is Chain Sweep, so we want to make sure we can hit everything with Chain Sweep and that it does a lot of damage. We can also use Death Mark and Spinning Slasher to group enemies up. You may want to use an Attack Speed set effect as using Dorcha Snatch from further than half your max attack distance will result in a slower attack speed.
Equipment Recommendations | Priority Reforges | Secondary Reforges | Tertiary Reforges | Set Effect Notes | |
Head | Ceann Bliana Skirmisher Circlet > Hyperion Eclipse Helionic Helm/Selenian Diadema Ultimate Geas Devastation Circlet Imperial Knight Royal Hat > Abyss Dragon Horns/Forest Ranger Wig and Hat | Dorcha Mastery Dorcha Skill Damage | Chain Burst Duration | Attack Speed, Bachram Explosion Attack Range* | Sun and Moon: This is a pretty interesting conditional set effect. When landing a hit, you have a 5% chance to activate the Sun or Moon effect (60s). If both are active, you receive the Eclipse effect for 30 seconds (maintains the boost from Sun and Moon. Eclipse providing Bonus Damage makes it a very strong effect in addition to the rather large Damage/Magic Attack boost Sun: Max Damage +40, Max Hp +200 Moon: Magic Attack +60, Max MP +200 Eclipse: Bonus Damage +5%, Max Stamina +200 Assassin’s Advantage: Because this item has a 20 up 90 down for Active/Cooldown time and a 5% chance to activate on critical hits, it’s not as consistent as Increased Critical Damage. If you can 1-2 piece a Increased Critical Damage set effect (which may require Set Effect Scrolls or specific weapons), it’s not a bad idea to slot this in or the extra burst of Critical Damage, and Movement Speed. Increased Critical Damage: This is generally a good set effect to consider since it’s always active. Redoubled Offensive Activation Boost (Strong): This is a nice set effect to have, though it does face more competition nowadays. Redoubled Offensive is an extremely potent Tech and is a mainstay on almost all Tech loadouts. Redoubled Offensive - Damage Boost: Redoubled Offensive is a very strong Tech, so if you’re building an Ultimate Geas Devastation set, this isn’t a bad option. Exploit Weakness Enhancement: It’s an extra 3% to Exploit Weakness which is already a useful Offensive tech. Good if you regularly use Exploit, less if you just use Fateweaver. Max Damage Increase: There are 3 variants of this set effect currently,one from the Skirmisher (+50), one from the Bulwark (+25), and one from Gacha equipment (+10). Gacha max pieces tend to be on the Body Slot while the Skirmisher and Bulwark normally require you to use the Head, Gloves, and Feet slots. These Effects do not stack and only the strongest effect applies. Death Mark Damage Increase: It’s more important to have this on a Death Mark build, though it is an extremely useful part. Dorcha Snatch Leeching Rate: It’s fine. Nowadays we Chain Slash isn’t exactly used for offense, Dark Diviners have easier ways to gathering Dorcha, and A grade Chain Erg is plenty effective for Leeching. If you want the Special Eiren set, it should be for the Death Mark bonus. Spellwalk Enhancement: It requires Spellwalk to be active, but it's a 15% speed boost. Eweca Movement Speed: Unlike the Ladeca Movement Speed buff, this is a fairly large 10% speed boost. Typically this set effect is found on Fleet Feet variants such as the Shooting Star Flying Shoes. Ladeca Movement Speed Boost (Shadow Reaper Boots): Unlike most other Ladeca Movement Speed Boosts, this one provides a 12% movement speed boost. |
Body | Special Hyperion Eclipse Full/Light Chiton Special Imperial Knight Royal Uniform Special Eiren Chain Slasher Outfit Ceann Bliana Skirmisher Cuirass > Special Forest Ranger Outfit > Saint Guardian's Leather Armor Special Royal Society Field Outfit | Chain Sweep Attack Range | Spinning Slasher Damage | Bachram Explosion Damage* | |
Hands | Ceann Bliana Skirmisher Gloves Ultimate Geas Devastation Gloves | Spinning Slasher Effective Range - AoE Focus Death Mark Damage Amplification - Damage Focus | Chain Impale Damage* | Attack Speed | |
Feet | Elemental Harmony Shoes > Shadow Reaper Boots > Forest Ranger Boots > Fleet Feet/Shooting Star Flying Shoes/Shooting Star Roller Skates | Chain Sweep Damage | Anchor Rush Max Movement Range | ||
Robe | Special Ancient Dragon Guardian Wings > Special Draconian Wings > Enchantable Wings | ||||
Accessories | Unfinished Reverie’s Diadem Halo > Irusan’s Bell | Maximum Attack Power | Attack Speed | ||
Weapon | Nightbringer Wraith > Perseus Rending Chain Blade > Celtic Howling Chain Blade+Signet > Cutthroat Chain Blade > Chain Blade of Blossoming Memories | Chain Blade Mastery Max Damage*, Maximum Attack Power | Dorcha Snatch Dorcha Acquired | Attack Speed | |
Echostone | Fill with missing a reforges Rage Impact Cooldown Decrease* |
Chain Slash - Combat Notes
A rage Impact Echostone is very specific to using Rage Impact before Chain Sweep. Rage Impact -> Chain Sweep is a good damage boost so being able to pull it off more frequently is always helpful.
Not that I dislike Bachram Explosion, but it isn’t really efficient to build for. Bachram Explosion can only be primed once every 10 minutes and its damage isn’t as impressive as other burst damage nukes.
Chain Impale isn’t bad, but it really shouldn’t be your focus since there are better single target DPS talents. I’d get Death Mark Damage Amplification if you really want to boost your single target DPS.
Chain Blade Mastery Max Damage is more efficient than a Max Attack Power reforge, but they do stack.
The Memorial Flower Earrings cannot be enchanted or reforged, but they come preloaded with Dorcha Mastery Skill Damage 10. This is a fairly hefty damage boost for Chain Slash for what is essentially a free headpiece.
Chain Slash - Death Mark
This is honestly pretty simple: Make Death Mark make the target take more damage. You don’t have to fit this on your Chain Slash Set as this will benefit all damage. Like bard, this can warrant its own set, but you can also mix and match with other sets for convenience.
Equipment Recommendations | Priority Reforges | Secondary Reforges | Tertiary Reforges | Set Effect Notes | |
Head | Attack Speed | Death Mark Damage Increase: If you don’t have this, your Death Marks will still be effective. But if you’re running with somebody who does have this, you might want to let them Death Mark bosses. Dorcha Snatch Leeching Rate: It’s fine. Spellwalk Enhancement: It requires Spellwalk to be active, but it's a 15% speed boost. Eweca Movement Speed: Unlike the Ladeca Movement Speed buff, this is a fairly large 10% speed boost. Typically this set effect is found on Fleet Feet variants such as the Shooting Star Flying Shoes. Ladeca Movement Speed Boost (Shadow Reaper Boots): Unlike most other Ladeca Movement Speed Boosts, this one provides a 12% movement speed boost. | |||
Body | |||||
Hands | Death Mark Damage Amplification | Attack Speed | |||
Feet | Elemental Harmony Shoes > Shadow Reaper Boots > Forest Ranger Boots > Fleet Feet/Shooting Star Flying Shoes/Shooting Star Roller Skates | Anchor Rush Max Movement Range | |||
Accessories | Death Mark Duration | Attack Speed | |||
Weapon | Attack Speed | ||||
Echostone | Fill with missing a reforges |
Astrologer
Astrologer is a rather flexible talent depending on how you set up for it. It is capable of performing offensive duties, crowd control, and debuffs. You do, however, need to set up your Celestial Conjunction to support the type of playstyle you want to focus on.
*Note, update with weapon Wiki Links later
Equipment Recommendations | Priority Reforges | Secondary Reforges | Tertiary Reforges | Set Effect Notes | |
Head | (General Offense) Ultimate Geas Devastation Circlet Hyperion Eclipse Helionic Helm/Selenian Diadema | Meridian Sweep Cooldown Reduction | Starlight Veil Range | Sun and Moon: When landing a hit, you have a 5% chance to activate the Sun or Moon effect (60s). If both are active, you receive the Eclipse effect for 30 seconds (maintains the boost from Sun and Moon. Eclipse providing Bonus Damage makes it a very strong effect in addition to the rather large Damage/Magic Attack boost Offensive Astrologers in particular care about the Bonus Damage from Eclipse and the Magic Attack from Moon. Sun: Max Damage +40, Max Hp +200 Moon: Magic Attack +60, Max MP +200 Eclipse: Bonus Damage +5%, Max Stamina +200 Eternal Prayer: A little harder to trigger for Astrologer since, Astrology skills are not Magic or Harmonic Saint spells. However, this can be a very impactful set bonus with +100 Magic Attack. You can attempt to force proc it with Healing, though you may prefer to keep it as a gear swap. Assassin’s Advantage: Because this item has a 20 up 90 down for Active/Cooldown time and a 5% chance to activate on critical hits, it’s not as consistent as Increased Critical Damage. If you can 1-2 piece a Increased Critical Damage set effect (which may require Set Effect Scrolls or specific weapons), it’s not a bad idea to slot this in or the extra burst of Critical Damage, and Movement Speed. Increased Critical Damage: This is generally a good set effect to consider since it’s always active. Redoubled Offensive Activation Boost (Strong): This is a nice set effect to have, though it does face more competition nowadays. Redoubled Offensive is an extremely potent Tech and is a mainstay on almost all Tech loadouts. Redoubled Offensive - Damage Boost: Redoubled Offensive is a very strong Tech, so if you’re building an Ultimate Geas Devastation set, this isn’t a bad option. Exploit Weakness Enhancement: It’s an extra 3% to Exploit Weakness which is already a useful Offensive tech. Good if you regularly use Exploit, less if you just use Fateweaver. Card Draw Enhancement: This set effect lets you draw cards faster. It’s good to have so you can have more uptime on your Hand of Destiny boosts and nuking with Fate Foretold. Attack Speed/Vivace: Attack Speed and Vivace do influence Astral Reave, but I wouldn’t give up any equipment slots to build for Attack Speed. In practice, you’re only using Astral Reave to quickly pull a card. Vivace similarly can be useful for quickly pulling cards, but don’t overwrite your teammate’s Battlefield Overtures just to do that. | |
Body | (General Offense) Special Hyperion Eclipse Full/Light Chiton Special Seraphic Harmony/Symphony Attire Special Imperial Knight Royal Uniform Special Royal Society Field Outfit Ultimate Geas Devastation Chestplate | Orbital Pulse Attack Range | Nova Blast Damage | ||
Hands | (General Offense) Ceann Bliana Scholar’s Ringbands Ultimate Geas Devastation Gloves Weaving Gloves* - Unrepairable | Stellar Surge Damage | Nova Blast Attack Range | Magic Attack - Weaving Gloves Only* | |
Feet | Elemental Harmony Shoes > Shadow Reaper Boots > Forest Ranger Boots > Fleet Feet/Shooting Star Flying Shoes/Shooting Star Roller Skates | Meridian Sweep Damage | Nova Blast Reduced Cooldown | ||
Accessories | Unfinished Reverie’s Diadem Halo > Irusan’s Bell | Stellar Surge Damage | Fate Foretold Damage | ||
Weapon | Nightbringer Observer > Perseus Peregrine Scythe > Celtic Triplicity Scythe > Scythe of Blossoming Memories > Dispositor Scythe | Magic Attack | Stellar Surge Reduced Cooldown | Meridian Sweep Attack Range | |
Off Hand | Magic Attack | ||||
Echostone | Fill with missing Reforges Stellar Surge Damage | Nova Blast Range | Meridian Sweep Width |
Celestial Conjunction
Celestial Conjunction serves as the main method for how you alter Astrologer’s skills.
As you add effects, you change the Dominant Aspect of the skill and of the Configuration Overall. Certain boosts can only be activated when they match the Dominant Aspect of the Configuration.
In order to change or switch your active configuration, you must teleport to the Stellar Citadel.
These are not recommendations, they simply list where each boost can be slotted in and what kind of boost it is mechanically. See Sample Conjunction and Destiny Configurations for setups.
Skill | Effect Limit | Offense | Support | Control | Fortune |
Conjunction Core Boosts | 3 | -Astrology Skill Damage Boost Lv.1/Lv. 2 | -Buff Effect Duration Boost -HP Recovery Amount Boost | -Debuff Effect Duration Boost Lv. 1/Lv. 2 | -Critical Rate Boost |
Astral Reave | 4 | -Damage Boost Lv.1/Lv. 2/Lv. 3 -Range Increase Lv.1/Lv. 2 -Make Offensive Aspect | -Recover Party Member HP -Make Support Aspect | -Slow Enemy -Make Control Aspect | -Critical Damage Boost Lv. 1/ Lv. 2 -Quick Recovery -Make Fortune Aspect |
Nova Blast | 7 | -Cooldown Decrease -Damage Boost Lv.1/Lv. 2/Lv. 3 -Additional Attack -Range Increase Lv.1/Lv. 2 -Make Offensive Aspect | -Enemy Takes Boosted Damage -Recover Party Member HP -Make Support Aspect | -Pull Lv. 1/Lv. 2 -Lower Enemy Attack Lv. 1/Lv. 2 -Lower Enemy Defense and Protection Lv. 1/Lv. 2 -Slow Enemy -Make Control Aspect | -Critical Damage Boost Lv. 1/ Lv. 2 -Quick Recovery -Decrease Cooldown upon Critical Hit -Make Fortune Aspect |
Stellar Surge | 6 | -Cooldown Decrease -Damage Boost Lv.1/Lv. 2/Lv. 3 -Range Increase Lv.1/Lv. 2 -Width Increase -Make Offensive Aspect | -Charging Starting Range Increase -Enemy Takes Boosted Damage -Recover Party Member HP -Make Support Aspect | -Push -Lower Enemy Defense and Protection Lv. 1/Lv. 2 -Slow Enemy -Make Control Aspect | -Critical Damage Boost Lv. 1/ Lv. 2 -Quick Recovery -Decrease Cooldown upon Critical Hit -Make Fortune Aspect |
Meridian Sweep | 7 | -Cooldown Decrease -Damage Boost Lv.1/Lv. 2/Lv. 3 -Range Increase Lv.1/Lv. 2 -Width Increase -Make Offensive Aspect | -Recover Party Member HP -Make Support Aspect | -Push -Pull Lv. 1/Lv. 2 -Slow Enemy -Make Control Aspect | -Critical Damage Boost Lv. 1/ Lv. 2 -Quick Recovery -Decrease Cooldown upon Critical Hit -Make Fortune Aspect |
Orbital Pulse | 7 | -Cooldown Decrease -Range Increase Lv.1/Lv. 2 -Make Offensive Aspect | -Change Target -Enemy Takes Boosted Damage -Recover Party Member HP -Party Defense and Protection Boost Lv. 1/Lv. 2 -Party Physical Damage Boost Lv. 1/Lv. 2 -Party Magic Damage Boost Lv. 1/Lv. 2 -Party Alchemy Damage Boost Lv. 1/Lv. 2 -Make Support Aspect | -Repel -Lower Enemy Attack Lv. 1/Lv. 2 -Lower Enemy Defense and Protection Lv. 1/Lv. 2 -Make Control Aspect | -Quick Recovery -Decrease Cooldown upon Critical Hit -Make Fortune Aspect |
Starlight Veil | 7 | -Cooldown Decrease -Additional Attack -Range Increase Lv.1/Lv. 2 -Make Offensive Aspect | -Enemy Takes Boosted Damage -Recover Party Member HP -Party Defense and Protection Boost Lv. 1/Lv. 2 -Party Physical Damage Boost Lv. 1/Lv. 2 -Party Magic Damage Boost Lv. 1/Lv. 2 -Party Alchemy Damage Boost Lv. 1/Lv. 2 -Make Support Aspect | -Pull Lv. 1/Lv. 2 -Lower Enemy Attack Lv. 1/Lv. 2 -Lower Enemy Defense and Protection Lv. 1/Lv. 2 -Make Control Aspect | -Make Fortune Aspect |
Gravity Well | 7 | -Cooldown Decrease -Additional Attack -Range Increase Lv.1/Lv. 2 -Make Offensive Aspect | -Charging Starting Range Increase -Recover Party Member HP -Party Defense and Protection Boost Lv. 1/Lv. 2 -Party Physical Damage Boost Lv. 1/Lv. 2 -Party Magic Damage Boost Lv. 1/Lv. 2 -Party Alchemy Damage Boost Lv. 1/Lv. 2 -Make Support Aspect | -Pull Lv. 1/Lv. 2 -Repel -Make Control Aspect | -Make Fortune Aspect |
Fate Foretold | 5 | -Damage Boost Lv.1/Lv. 2/Lv. 3 -Range Increase Lv.1/Lv. 2 -Make Offensive Aspect | -Enemy Takes Boosted Damage -Make Support Aspect | -Lower Enemy Attack Lv. 1/Lv. 2 -Lower Enemy Defense and Protection Lv. 1/Lv. 2 -Slow Enemy -Make Control Aspect | -Critical Damage Boost Lv. 1/ Lv. 2 -Quick Recovery -Make Fortune Aspect |
Key
Offense

Support

Control

Fortune

The Aspect of a skill is determined by the most plentiful type of effects slotted into a skill. Each skill has a default Aspect set as their default, with one matching Aspect counter applied by default.
Most effects provide 2 Aspect counters.

Additionally, you can force change the Aspect of a skill by applying a Make <Type> Aspect boost to the skill.
In order to make an aspect the overall Dominant Aspect, that aspect must have the most effects slotted.
Effect Restrictions
-Conjunction Core Boosts may only be slotted once and in the center 3 slots. Different Levels are treated as different boosts.
-Astrology Skill Damage Boost Lv.2 requires the Dominate Aspect to be Offense
-Cooldown Decrease requires the Dominant Aspect to be Offense
-Buff Effect Duration Boost requires the Dominant Aspect to be Support
-Change Target requires the Dominant Aspect to be Support
-Debuff Effect Duration Boost Lv.2 requires the Dominant Aspect to be Control
-Lower Enemy Defense and Protection Lv.1/ Lv.2 requires the Dominant Aspect to be Control
-Critical Damage Boost Lv.1/ Lv.2 requires the Dominant Aspect to be Fortune
Notes:
Progressive Boosts (e.g Lv2) require the prior boost level to be slotted. You cannot only slot Astrology Skill Damage Boost Lv2, you must also slot the Lv1 variant.
-Additional Attack grants Starlight Veil and Gravity Well an Area of Effect (AoE) Damaging Hit-stun instance.
-Range Increases increase the linear (how far) AoE for Stellar Surge and Meridian Sweep. Width Increase increases how wide the AoE for Stellar Surge and Meridian Sweep are.
-Slotting Change Target for Orbital Pulse allows you to cast Orbital Pulse on a party member/pet/friendly NPC/yourself instead of auto casting on yourself.
-Party Defense and Protection Boost does include Magical Defense and Protection
-Pull Lv. 1/Lv. 2 is pretty much my personal favorite Control Effect. It allows Astrologer to have up to 4 AoE group up abilities. If you’re ever read a few things I’ve written, you might know that I often extol the benefits of grouping enemies up before you DPS.
-Push causes Stellar Surge to push enemies towards the end of the AoE range and Meridian Sweep to pull enemies with the user (similar to Climactic Crash and Shooting Rush). I don’t much like it on Nova Blast. It’s supposed to push everything towards the target.
-Repel: Ew
-Quick Recovery: Reduces ending delay for the skill. This is a very nice QoL effect.
Hand of Destiny
Hand of Destiny fuels powerful buffs by drawing cards from your Tarot deck. As you cast Astrologer skills, you build progress towards the next Tarot Card (Left to Right deck order). To draw a card, you must use an Astrologer skill who’s current Aspect matches the type of card that is ready to be drawn.
Card Synergies
If your deck composition matches a card synergy, you will gain passive buffs. Buff Tiers will stack with Eachother
2 Offensive Aspect Cards: Magic Attack +50
5 Offensive Aspect Cards: Magic Attack +150
2 Support Aspect Cards: Movement Speed +2%
5 Support Aspect Cards: Movement Speed +5%
2 Control Aspect Cards: Movement Speed +2%
5 Control Aspect Cards: Movement Speed +5%
2 Fortune Aspect Cards: Draw Count -1 (Skill uses to draw a card)
Template
Placeholder.png
Placeholder
Offensive/Support/Control/Fortune
Single Activation/Buff/Debuff -
Description:
Placeholder Description and Comments
Card Type | Card | Effect | Comments |
Offensive | Strength | Single Activation Increases the damage multiplier of the skill that activated the card. (Damage +n%) | |
Offensive | Single Activation Increases the critical damage of the skill that activated the card. (Critical Damage +n%) | ||
Offensive | The Empress | Single Activation The skill that activates this card ignores a portion of the enemy’s Magic Defense and Magic Protection. | Pseudo Piercing |
Offensive | The Sun | Single Activation Recovers HP upon Card Activation | |
Offensive | Justice | Buff Grants temporary Stun and Knockdown immunity after Card Activation | |
Offensive | Judgement | Buff Temporarily Increases the damage multiplier of Battle Astrology Skills when the card is drawn (Battle Astrology Talent Skill Damage +n%) | |
Support | The Hierophant | Single Activation Reduces the cooldown time for party member skills when the card is drawn. Battle Astrology Talent Skills are excluded. | |
Support | The High Priestess | Single Activation Restores HP, MP, and Stamina for yourself and party members when the card is drawn, | |
Support | The Lovers | Buff Increases the duration of active music buff effects applied to yourself and party members when card is drawn. | |
Support | The Chariot | Buff Temporarily increases movement speed of yourself and party members when card is drawn | |
Support | Buff Temporarily increases Damage, Magic Attack, and Alchemy Damage for yourself and party members when card is drawn. | ||
Support | The Tower | Buff Temporarily reduces incoming damage for yourself and party members when card is drawn. | |
Control | The Hanged Man | Debuff Enemies hit by the skill that draws this card take increased damage. | Functions similar to other damage amps such as Death Mark and Phantasmal Sight |
Control | Debuff Enemies hit by the skill that draws this card will be afflicted with a Damage Over Time and will be temporarily stunned. | ||
Control | Temperance | Debuff Enemies hit by the skill that draws this card will have their movement and casting speed reduced temporarily. | |
Control | The Hermit | Buff Applies a cloak when this card is drawn. | |
Control | Debuff Enemies hit by the skill that draws this card are frozen temporarily | ||
Control | Death | Debuff (Buff?) Increases the duration of Smoke Screen, Fateweaver, and Death Mark against targets hit by the skill that draws this card. | |
Fortune | The Fool | Buff Increases HP, MP, and Stamina recovery speed temporarily when this card is drawn | Mini-Whale pet/Mysterious Elixer |
Fortune | Single Activation The damage of the skill that draws this card is increased. Damage buff is based on a random interval (Damage +m-n%) | ||
Fortune | Wheel of Fortune | Single Activation When this card is drawn, immediately draw the next card in the deck with a chance to copy and stack that card’s effects. Effects with duration will have duration increased, cannot draw identical cards continuously. | |
Fortune | The Star | Buff Increases the activation rate of Stardust’s Veil, Flare, and Blast temporarily when this card is drawn. | This is a fairly powerful Stardust boost. |


Sample Conjunction and Destiny Configurations
Want your setup featured? Send me a DM with pictures/video/description/lists.
Preferably use Latharra’s Celestial Conjunction Share Tool. It’s very well made and you should check it out.
Template - Not an actual Configuration
Skill | Effect Limit | Offense | Support | Control | Fortune |
Conjunction Core Boosts | 3 | ||||
Astral Reave | 4 | ||||
Nova Blast | 7 | ||||
Stellar Surge | 6 | ||||
Meridian Sweep | 7 | ||||
Orbital Pulse | 7 | ||||
Starlight Veil | 7 | ||||
Gravity Well | 7 | ||||
Fate Foretold | 5 |
Template Deck Setup - Not a Proper Deck
Tarot Card 1 | Tarot Card 2 | Tarot Card 3 | Tarot Card 4 | Tarot Card 5 | Synergies |
The Fool | The Emperor | The Moon | The Tower | Death | 2 Offensive Aspect Cards: Magic Attack +50 5 Offensive Aspect Cards: Magic Attack +150 2 Support Aspect Cards: Movement Speed +2% 5 Support Aspect Cards: Movement Speed +5% 2 Control Aspect Cards: Debuff Duration +30% 5 Control Aspect Cards: Debuff Duration +100% 2 Fortune Aspect Cards: Draw Count -1 |
Comments:
This is a template for Conjunction and Tarot Decks. The Deck was selected entirely based on the card names and thus this Deck is absolutely subpar.
-Astrology Skill Damage Boost Lv.1/Lv. 2
-Cooldown Decrease
-Damage Boost Lv.1/Lv. 2/Lv. 3
-Additional Attack
-Range Increase Lv.1/Lv. 2
-Width Increase
-Make Offensive Aspect
-Buff Effect Duration Boost
-HP Recovery Amount Boost
-Charging Starting Range Increase
-Change Target
-Enemy Takes Boosted Damage
-Recover Party Member HP
-Party Defense and Protection Boost Lv. 1/Lv. 2
-Party Physical Damage Boost Lv. 1/Lv. 2
-Party Magic Damage Boost Lv. 1/Lv. 2
-Party Alchemy Damage Boost Lv. 1/Lv. 2
-Make Support Aspect
-Debuff Effect Duration Boost Lv. 1/Lv. 2
-Push
-Pull Lv. 1/Lv. 2
-Repel
-Lower Enemy Attack Lv. 1/Lv. 2
-Lower Enemy Defense and Protection Lv. 1/Lv. 2
-Slow Enemy
-Make Control Aspect
-Critical Rate Boost
-Critical Damage Boost Lv. 1/ Lv. 2
-Quick Recovery
-Decrease Cooldown upon Critical Hit
-Make Fortune Aspect
Pure DPS by Brahfizzle and their friend
*If you are Brah or said friend and you see this before I finish asking let me know who said friend is
Skill | Effect Limit | Offense | Support | Control | Fortune |
Conjunction Core Boosts | 3 | -Astrology Skill Damage Boost Lv. 1/Lv. 2 | -Critical Rate Boost | ||
Astral Reave | 4 | -Damage Boost Lv. 1/Lv. 2 -Range Increase Lv. 1 | -Quick Recovery | ||
Nova Blast | 7 | -Cooldown Decrease -Range Increase Lv. 1/Lv. 2 | -Pull Lv. 1/Lv. 2 | -Quick Recovery -Decrease Cooldown upon Critical Hit | |
Stellar Surge | 6 | -Damage Boost Lv. 1/Lv. 2/Lv. 3 -Cooldown Decrease | -Enemy Takes Boosted Damage | -Quick Recovery | |
Meridian Sweep | 7 | -Damage Boost Lv. 1/Lv. 2/Lv.3 -Cooldown Decrease | -Recover Party Member HP -Make Support Aspect | -Push -Pull Lv. 1 | -Quick Recovery |
Orbital Pulse | 7 | -Cooldown Decrease -Range Increase Lv. 1/Lv. 2 | -Party Magic Damage Boost Lv.1/ Lv. 2 | -Quick Recovery -Decrease Cooldown upon Critical Hit | |
Starlight Veil | 7 | -Additional Attack -Cooldown Decrease -Range Increase Lv. 1/Lv. 2 | -Enemy Takes Boosted Damage | -Pull Lv. 1/Lv. 2 | |
Gravity Well | 7 | -Additional Attack -Cooldown Decrease -Range Increase Lv. 1/Lv. 2 | -Party Magic Damage Boost Lv.1 | -Pull Lv. 1/Lv. 2 | |
Fate Foretold | 5 | -Damage Boost Lv. 1/Lv. 2/Lv.3 | -Enemy Takes Boosted Damage | -Quick Recovery |
Deck Setup - Pure DPS by Brahfizzle and their friend
Tarot Card 1 | Tarot Card 2 | Tarot Card 3 | Tarot Card 4 | Tarot Card 5 | Synergies |
Strength | The Emperor | The Empress | Justice | Judgement | 2 Offensive Aspect Cards: Magic Attack +50 5 Offensive Aspect Cards: Magic Attack +150 |


Comments:
As a pure Offensive Astrologer setup, this aims to maximize Astrologer’s skill availability and damage output. Pulls are taken to help keep Astrologer self contained and Quick Recovery is taken to minimize post skill delay.
The key reason to take 5 cards is to provide Fate Foretold 25% Bonus Damage and to activate the +200 Magic Attack synergy. Of the 6 Offensive cards, The Sun provides the least utility to a pure Offensive Astrologer.
Debuff/Support by Fierlyt
Created for use with Alchemic Sharpshooter
Skill | Effect Limit | Offense | Support | Control | Fortune |
Conjunction Core Boosts | 3 | -HP Recovery Amount Boost | -Debuff Effect Duration Boost Lv. 1/Lv. 2 | ||
Astral Reave | 4 | -Range Increase Lv. 1 | -Slow Enemy -Make Control Aspect | -Quick Recovery | |
Nova Blast | 7 | -Range Increase Lv.1/Lv. 2 | -Pull Lv. 1/Lv. 2 -Lower Enemy Defense and Protection Lv. 1 -Make Control Aspect | -Quick Recovery | |
Stellar Surge | 6 | -Charging Starting Range Increase | -Slow Enemy -Push -Lower Enemy Defense and Protection Lv. 1/Lv. 2 | -Quick Recovery | |
Meridian Sweep | 7 | -Range Increase Lv.1 -Width Increase | -Pull Lv. 1 -Push | -Quick Recovery -Decrease Cooldown upon Critical Hit -Make Fortune Aspect | |
Orbital Pulse | 7 | -Range Increase Lv.1/Lv. 2 | -Recover Party Member HP | -Lower Enemy Attack Lv. 1 -Repel -Lower Enemy Defense and Protection Lv. 1 | -Quick Recovery |
Starlight Veil | 7 | -Range Increase Lv.1 | -Recover Party Member HP -Enemy Takes Boosted Damage | -Lower Enemy Defense and Protection Lv. 1/Lv. 2 -Pull Lv. 1 | |
Gravity Well | 7 | -Range Increase Lv.1/Lv. 2 | -Recover Party Member HP -Charging Starting Range Increase | -Pull Lv. 1/Lv. 2 | |
Fate Foretold | 5 | -Slow Enemy -Lower Enemy Attack Lv. 1/Lv. 2 -Lower Enemy Defense and Protection Lv. 1 -Make Control Aspect |
Deck Setup - Support by Fierlyt
Tarot Card 1 | Tarot Card 2 | Tarot Card 3 | Tarot Card 4 | Tarot Card 5 | Synergies |
Wheel of Fortune | The Hanged Man | The Star | Death | The Moon | 2 Control Aspect Cards: Movement Speed +2% 2 Fortune Aspect Cards: Draw Count -1 |


Comments:
This setup has a few abilities that heal and a slew of AoE options. Debuffs are important selections for Conjunction configurations.
Wheel of Fortune assists with keeping a high uptime on The Hanged Man in addition to boosting its duration. The Star is a strong DPS boost for all Talents as it boosts the activation rate of Flare and Blast. Death helps maintain additional debuffs. The Moon boosts healing from Astrologer skills where applicable.
Protection Stacking
Up to 2023, it has always been advised to work on maximizing your damage or building towards utility. But with how oppressive Glen Bearna Hard can be in terms of enemy damage, the introduction of Grade A ergs (allowing for relatively cheap protection from Erg), and the future Guardian Arcana (Tank), it’s a good idea to consider the equipment that will let you Tank hits. Also Piercing Resistance. Because some of the Glen Bearna mobs have Piercing.
You can have all the damage in the world, but it doesn’t matter if you’re dead. Even if you don’t plan on taking on Glen Bearna, you might want a change of pace (or you’re a relatively new player trying to learn the ropes) and you want to make an Ultra Tank.
If an item has a [A] next to it, it can be worn by all Races/use the reforge
If an item has a [G] next to it, only Giants can wear it/use the reforge
If an item has a [H] next to it, only Humans can <Filler>
If an item has a [E] next to it, only Elves can <Filler>
Protection Notes - Armor Set Effects
This section will largely go over the specific status effects, passive defense, and effective protection of each armor listed.
Having Dan 3 Engineering will allow you to roll up to 105% of the maximum roll. This will be factored in below.
A Dan 3 Blacksmith with Blacksmithing as their active Talent that has the GM Blacksmithing Unique Effect Active and reaches a quality of 95 can add up to 6 protection to Armor. Dropping below quality 95 lowers the additional protection to 5.
A Dan 3 Blacksmith that reaches a quality of 80 adds 2 additional protection to Gauntlets. Dropping below a quality of 80 reduces the additional protection to 1.
A Dan 3 Blacksmith can add 1 additional protection to shields.
A Dan 2 Tailor can add +1
It’s not recommended to aim for 95+, though Grade A and A+ are consistent with Quality equipment and titles. It has been documented that the Blacksmithing and Tailoring Minigames cheat.
It is possible to hit 95+ with Production Enchants, +4 Gacha titles, Monday, and Sacrificing a goat to the Weird Cat. For good measure you can throw in production quality potions, but again it’s still not recommended to rely on getting 95+ quality due to the Smithing Minigame.
Many Heavy Armors also exhibit Auto Defense, reducing stun. In the case of Melee Auto Defense, it also reduces incoming damage by 50% when activated.
Race Specific Transformations provide Passive Defense, which reduces incoming damage based on the active Transformation Passive Defense.
Editor’s note: I don’t know how useful that will actually be in Glen Bearna since you lose access to Crisis Escape. But if Fateweaver and Shadow Cloak are enough and you need to further strengthen your defensive ability, I suppose this might be an option. Devcat this isn’t what I meant when Transformations need buffs.
Formatting Example:
Armor [A]
Yes that’s a png of the words Armor.png, sue me

Armor
Potential Base Protection
Base amount: Base amount
Maximum Additional Protection: Base Roll (105% roll if applicable)
Smithing Bonus: If applicable
Total:
Upgrade Path
Surface Enhancement 2: +1
Surface Enhancement 2: +1
Surface Enhancement 3: +1
Edern’s Heavy Armor Upgrade: +3
Weiss’ Armor Artisan: +10
Total from Upgrades: +16
Total Before Reforges:
Protection Reforge: Maximum (Limit Break)
Total After Reforges: Numbers (Limit Broke Number)
Additional Effects
Auto Defense
Auto Defense Melee:
Auto Defense Ranged:
Auto Defense Magic:
Set Effects
Other Part
Potential Base Protection
Base amount: Base amount
Maximum Additional Protection: Base Roll (105% roll if applicable)
Smithing Bonus: If Applicable
Total Before Reforges:
Protection Reforge: Maximum (Limit Break)
Total After Reforges: Numbers (Limit Broke Number)
Additional Effects
Set Effects
Ceann Bliana Bulwark's Armor [A]
Ceann Bliana Bulwark's Armor [A]
Potential Base Protection
Base amount: 11
Smithing Bonus: 5-6
Total: 16-17
Upgrade Path
Surface Enhancement 2: +1
Surface Enhancement 2: +1
Surface Enhancement 3: +1
Edern’s Heavy Armor Upgrade: +3
Weiss’ Armor Artisan: +10
Total from Upgrades: +16
Total Before Reforges: 32-33
Protection Reforge: 5 (7)
Total After Reforges: 37-38 (39-40)
Additional Effects
Auto Defense
Auto Defense Melee: 20%
Auto Defense Ranged: 20%
Auto Defense Magic: 5%
Set Effects
Increase Critical Damage: +4
Absorption Enhancement: +10
Piercing Resistance: +2-5
Ceann Bliana Bulwark's Circlet [A]
Potential Base Protection
Base amount: 3
Total Before Reforges: 3
Protection Reforge: 5 (7)
Total After Reforges: 8 (10)
Additional Effects
Set Effects
Increase Critical Damage: +3
Maximum Damage (+25): +4
Piercing Resistance: +2-5
Ceann Bliana Bulwark's Gauntlets [A]
Potential Base Protection
Base amount: 6
Smithing Bonus: +1-2
Total Before Reforges: 7-8
Protection Reforge: 5 (7)
Total After Reforges: 12-13 (14-15)
Additional Effects
Set Effects
Increase Critical Damage: +3
Maximum Damage (+25): +3
Piercing Resistance: +2-5
Ceann Bliana Bulwark's Greaves [A]
Potential Base Protection
Base amount: 7
Total Before Reforges: 7
Protection Reforge: 5 (7)
Total After Reforges: 12 (14)
Additional Effects
Set Effects
Increase Critical Damage: +3
Maximum Damage (+25): +3
Piercing Resistance: +2-5
Armor Overall Notes
Total Set Potential:
No Protection Reforges: 49-51
Full Protection Reforges: 69-71 (77-79)
The current BiS protection armor. And it comes with Piercing Resistance by 5, which right now is only useful in one place.
It also boosts your Maximum Damage by 25 and your Critical Hit damage by 7%
Finally it also has Absorption which has a 10% chance to reduce damage to 1.
Ultimate Geas Edge Set [A]
Yes that’s

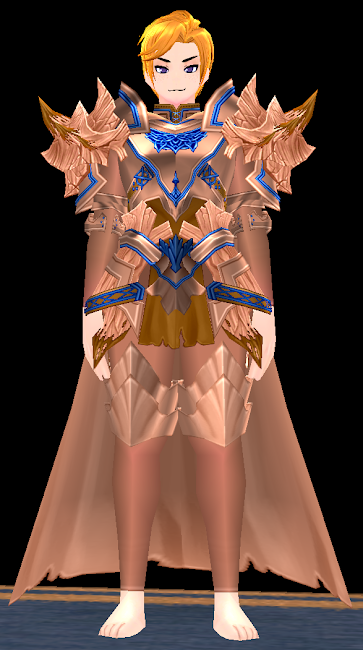
Potential Base Protection
Base amount: 6
Maximum Additional Protection: 6 (6.3)
Total: 12
Upgrade Path
Surface Enhancement 2: +1
Surface Enhancement 2: +1
Surface Enhancement 3: +1
Edern’s Heavy Armor Upgrade: +3
Weiss’ Armor Artisan: +10
Total from Upgrades: +16
Total Before Reforges: 28
Protection Reforge: 5 (7)
Total After Reforges: 33 (35)
Additional Effects
Auto Defense
Auto Defense Melee: 15%
Auto Defense Ranged: 20%
Set Effects
Defiance Activation Boost (Strong): +3-5
Iron Will Duration Boost (Strong): +2-4
Vital Surge Duration Boost (Strong): +1-3
Ultimate Geas Edge Circlet [A]
Potential Base Protection
Base amount: 1
Total Before Reforges: 1
Protection Reforge: 5 (7)
Total After Reforges: 6 (8)
Additional Effects
Set Effects
Defiance Activation Boost (Strong): +3-5
Iron Will Duration Boost (Strong): +2-4
Vital Surge Duration Boost (Strong): +1-3
Ultimate Geas Edge Gauntlets [A]
Potential Base Protection
Base amount: 3
Maximum Additional Protection: 3 (3.15)
Total Before Reforges: 6
Protection Reforge: 5 (7)
Total After Reforges: 11 (13)
Additional Effects
Set Effects
Defiance Activation Boost (Strong): +3-5
Iron Will Duration Boost (Strong): +2-4
Vital Surge Duration Boost (Strong): +1-3
Ultimate Geas Edge Greaves [A]
Potential Base Protection
Base amount: 2
Maximum Additional Protection: 3 (3.15)
Total Before Reforges: 5
Protection Reforge: 5 (7)
Total After Reforges: 10 (12)
Additional Effects
Set Effects
Defiance Activation Boost (Strong): +3-5
Iron Will Duration Boost (Strong): +2-4
Vital Surge Duration Boost (Strong): +1-3
Armor Overall Notes
Total Set Potential:
No Protection Reforges: 40
Full Protection Reforges: 60 (68)
It’s a bit expensive for newer players, but it’s a good in game armor to work towards. Beefy protection, Defiance boost (+5% proc rate) and you can have quite a bit of potential sustain. The Iron Will Duration Boost can also be situationally helpful.
I’m a bit less enthused with the Vital Surge Boost since it’s best used as an emergency heal and to try and survive certain high damage hits. Chances are Vital Surge isn’t lasting the full base duration, let alone an additional 30 seconds.
Colossal Valiance Set [G]
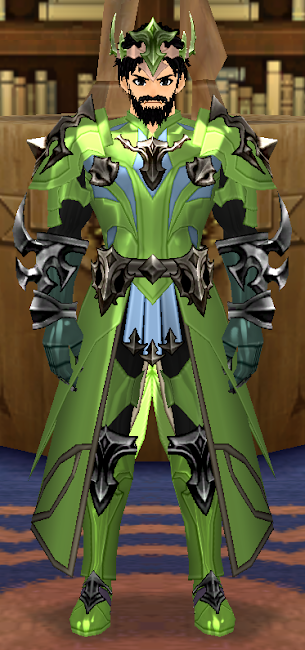

Potential Base Protection
Base amount: 3
Maximum Additional Protection: 7 (7.35)
Total: 10
Upgrade Path
Surface Enhancement 2: +1
Surface Enhancement 2: +1
Surface Enhancement 3: +1
Edern’s Heavy Armor Upgrade: +3
Weiss’ Armor Artisan: +10
Total Before Reforges: 26
Protection Reforge: 5 (7)
Total After Reforges: 31 (33)
Additional Effects
Auto Defense
Auto Defense Melee: 15%
Auto Defense Ranged: 15%
Auto Defense Magic: 10%
Set Effects
Absorption Enhancement: +2-4
Potential Base Protection
Base amount: 1
Total Before Reforges: 1
Protection Reforge: 5 (7)
Total After Reforges: 6 (8)
Additional Effects
Set Effects
Absorption Enhancement: +1-3
Colossal Valiance Gauntlet [G]
Potential Base Protection
Base amount: 1
Maximum Additional Protection: 4 (4.2)
Total Before Reforges: 5
Protection Reforge: 5 (7)
Total After Reforges: 10 (12)
Additional Effects
Set Effects
Absorption Enhancement: +1-3
Potential Base Protection
Base amount: 1
Maximum Additional Protection: 3 (3.15)
Total Before Reforges: 4
Protection Reforge: 5 (7)
Total After Reforges: 9 (11)
Additional Effects
Set Effects
Absorption Enhancement: +1-3
Armor Overall Notes
Total Set Potential:
No Protection Reforges: 36
Full Protection Reforges: 56 (64)
It’s a cheap armor to craft with some beefy base protection. Good for a new Giant Tank.
It also can get an Absorption Set Bonus which has a 10% chance to reduce damage to 1.
Saint Guardian’s Full Armor [A]


Saint Guardian’s Full Armor [A]
Potential Base Protection
Base amount: 25
Total: 25
Total Before Reforges: 25
Protection Reforge: 5 (7)
Total After Reforges: 30 (32)
Additional Effects
Auto Defense
Auto Defense Melee: 20%
Auto Defense Ranged: 20%
Set Effects
Attack Speed Increase: +10
Absorption Enhancement: +2-4
Potential Base Protection
Base amount: 1
Total: 1
Total Before Reforges: 1
Protection Reforge: 5 (7)
Total After Reforges: 6 (8)
Additional Effects
Set Effects
Ladeca Movement Speed Boost: +10
Saint Guardian's Gauntlets [A]
Potential Base Protection
Base amount: 4
Total: 4
Total Before Reforges: 4
Protection Reforge: 5 (7)
Total After Reforges: 9 (11)
Additional Effects
Set Effects
Absorption Enhancement: +2-4
Potential Base Protection
Base amount: 3
Total: 3
Total Before Reforges: 3
Protection Reforge: 5 (7)
Total After Reforges: 8 (10)
Additional Effects
Set Effects
Absorption Enhancement: +2-4
Armor Overall Notes
Total Set Potential:
No Protection Reforges: 33
Full Protection Reforges: 53 (61)
Like the Abyss Dragon Set, it’s Gacha Armor. Gacha Armor doesn’t need as much effort to craft and upgrade, but they undeniably have lower protection than crafted equipment.
Abyss Dragon Set [A]


Potential Base Protection
Base amount: 25
Total: 25
Total Before Reforges: 25
Protection Reforge: 5 (7)
Total After Reforges: 30 (32)
Additional Effects
Auto Defense
Auto Defense Melee: 20%
Auto Defense Ranged: 20%
Set Effects
Ladeca Movement Speed Boost: +10
Potential Base Protection
Base amount: 1
Total: 1
Total Before Reforges: 1
Protection Reforge: 5 (7)
Total After Reforges: 6 (8)
Potential Base Protection
Base amount: 4
Total: 4
Total Before Reforges: 4
Protection Reforge: 5 (7)
Total After Reforges: 9 (11)
Potential Base Protection
Base amount: 3
Total: 3
Total Before Reforges: 3
Protection Reforge: 5 (7)
Total After Reforges: 8 (10)
Armor Overall Notes
Total Set Potential:
No Protection Reforges: 33
Full Protection Reforges: 53 (61)
Like the Saint Guardian Set, it’s Gacha Armor. Gacha Armor doesn’t need as much effort to craft and upgrade, but they undeniably have lower protection than crafted equipment.
Shields
Large Shields [G]
Massive Despair Shield (18% DR) [G]
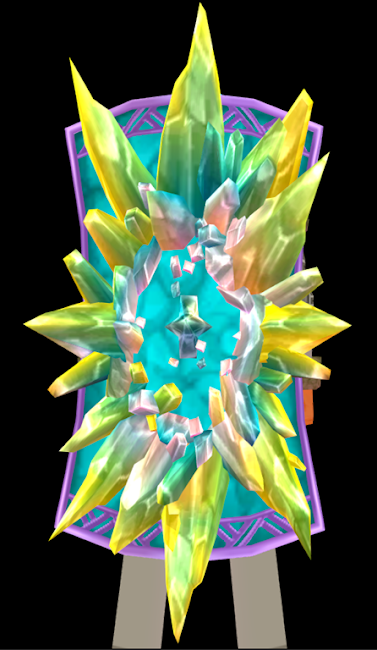
Potential Base Protection
Base amount: 3
Maximum Additional Protection: 4 (4.2)
Total: 7
Upgrade Path
Massive Despair Shield Special Upgrade: +5% Melee Auto Defense
Massive Despair Shield Special Upgrade: +5% Melee Auto Defense
Massive Despair Shield Unique Upgrade: +5% Melee Auto Defense
+5% Ranged Auto Defense
+5% Magic Auto Defense
Massive Despair Shield Special Upgrade: +5% Melee Auto Defense
Massive Despair Shield Special Upgrade: +5% Melee Auto Defense
Artisan Upgrade: +2
Total from Upgrades: 7 with 15% Melee Auto Defense
9 with 10% Melee Auto Defense
Total Before Reforges: 7 with 15% Melee Auto Defense
9 with 10% Melee Auto Defense
Protection Reforge: 5 (7)
Total After Reforges: 12 (16) with 15% Melee Auto Defense
14 (18) with 10% Melee Auto Defense
Additional Effects
Auto Defense
Auto Defense Ranged: 5% if Shield Unique Upgrade is taken
Auto Defense Magic: 5% if Shield Unique Upgrade is taken
Set Effects
Smash Enhancement: +5
Charge Enhancement: +10
Decreased Durability Loss: +5
Frosted Borealis Shield (14% DR) [G]
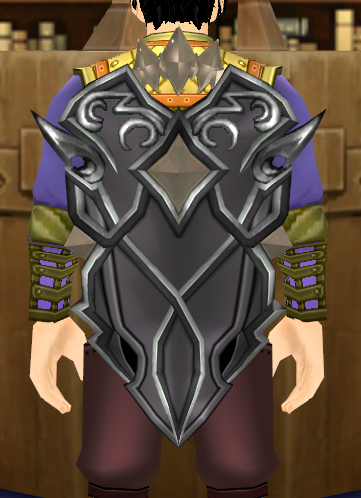
Potential Base Protection
Base amount: 2
Maximum Additional Protection: 1 (1.05)
Total: 3
Upgrade Path
Frosted Borealis Shield Special Upgrade: +5% Melee Auto Defense
Frosted Borealis Shield Special Upgrade: +5% Melee Auto Defense
Unique Upgrade for Frosted Borealis Shield: +5% Melee Auto Defense
+5% Ranged Auto Defense
+5% Magic Auto Defense
Frosted Borealis Shield Special Upgrade: +5% Melee Auto Defense
Frosted Borealis Shield Special Upgrade: +5% Melee Auto Defense
Artisan Upgrade: +2
Total from Upgrades: 3 with 15% Melee Auto Defense
5 with 10% Melee Auto Defense
Total Before Reforges: 3 with 15% Melee Auto Defense
5 with 10% Melee Auto Defense
Protection Reforge: 5 (7)
Total After Reforges: 8 (10) with 15% Melee Auto Defense
10 (12) with 10% Melee Auto Defense
Additional Effects
Auto Defense
Auto Defense Ranged: 5% if Shield Unique Upgrade is taken
Auto Defense Magic: 5% if Shield Unique Upgrade is taken
Set Effects
Smash Enhancement: +5
Charge Enhancement: +5
Vales Shield [G]
Potential Base Protection
Base amount: 2
Total: 2
Upgrade Path
Frosted Borealis Shield Special Upgrade: +5% Melee Auto Defense
Frosted Borealis Shield Special Upgrade: +5% Melee Auto Defense
Total Before Reforges: 2 with 10% Melee Auto Defense
Protection Reforge: 5 (7)
Total After Reforges: 7 (9) with 10% Melee Auto Defense
Large Shield Notes
The Massive Despair Shield gives a decent amount of extra protection and some useful set effects.
The Frosted Borealis Shield gives a bit less, but is also easier to craft.
The Vales Shield is very bargain bin.
The main benefit of Large Shields defensively comes from the Defense Skill. While Defense is loaded, all incoming damage is reduced by 100%. This bonus is sometimes reduced (Subject Theta).
Medium Shields [A]
Nightbringer Vanguard (30% DR) [A]
Potential Base Protection
Base amount: 9
Maximum Additional Protection: 6 (6.3)
Total: 15
Upgrade Path
N.B. Vanguard Special Upgrade 1: +8% Melee Auto Defense
N.B. Vanguard Special Upgrade 1: +8% Melee Auto Defense
N.B. Vanguard Unique Upgrade: +8% Melee Auto Defense
+8% Ranged Auto Defense
+8% Magic Auto Defense
N.B. Vanguard Special Upgrade 1: +8% Melee Auto Defense
N.B. Vanguard Special Upgrade 1: +8% Melee Auto Defense
Artisan Upgrade: +??
Gem Upgrade: +3
Total from Upgrades: 18 with 24% Melee Auto Defense
18 + ?? with 16% Melee Auto Defense
Total Before Reforges: 18 with 24% Melee Auto Defense
18 + ?? with 16% Melee Auto Defense
Protection Reforge: 5 (7)
Total After Reforges: 23 (25) with 24% Melee Auto Defense
23 + ?? (25 + ??) with 16% Melee Auto Defense
Additional Effects
Auto Defense
Auto Defense Ranged: 8% if Shield Unique Upgrade is taken
Auto Defense Magic: 8% if Shield Unique Upgrade is taken
Set Effects
Windmill Enhancement +5
Bash Enhancement: +10
Charge Enhancement: +10
Decreased Durability Loss: +10
Perseus Vigilant Shield (20% DR) [A]
Potential Base Protection
Base amount: 6
Smithed Additional Protection: 1:
Total: 7
Upgrade Path
Perseus Vigilant Shield Special Upgrade 1: +8% Melee Auto Defense
Perseus Vigilant Shield Special Upgrade 1: +8% Melee Auto Defense
Perseus Vigilant Shield Special Unique Upgrade: +8% Melee Auto Defense
+8% Ranged Auto Defense
+8% Magic Auto Defense
Perseus Vigilant Shield Special Upgrade 1: +8% Melee Auto Defense
Perseus Vigilant Shield Special Upgrade 1: +8% Melee Auto Defense
Artisan Upgrade: +1-2
Total from Upgrades: 7 with 24% Melee Auto Defense
9 with 16% Melee Auto Defense
Total Before Reforges: 7 with 24% Melee Auto Defense
9 with 16% Melee Auto Defense
Protection Reforge: 5 (7)
Total After Reforges: 12 (14) with 24% Melee Auto Defense
14 (16) with 16% Melee Auto Defense
Additional Effects
Auto Defense
Auto Defense Ranged: 8% if Shield Unique Upgrade is taken
Auto Defense Magic: 8% if Shield Unique Upgrade is taken
Set Effects
Enhanced Bash +10
Charge Enhancement: +10
Windmill Enhancement: +5
Decreased Durability Loss: +5
Divine Shield (15% DR) [A]
Potential Base Protection
Base amount: 3
Maximum Additional Protection: 3 (3.15)
Total: 6
Upgrade Path
Divine Shield Upgrade 1: +7% Melee Auto Defense
Divine Shield Upgrade 1: +7% Melee Auto Defense
Divine Shield Unique Upgrade: +7% Melee Auto Defense
+7% Ranged Auto Defense
+7% Magic Auto Defense
Divine Shield Upgrade 1: +7% Melee Auto Defense
Divine Shield Upgrade 1: +7% Melee Auto Defense
Artisan Upgrade: +1-2
Total from Upgrades: 6 with 21% Melee Auto Defense
8 with 14% Melee Auto Defense
Total Before Reforges: 6 with 21% Melee Auto Defense
8 with 14% Melee Auto Defense
Protection Reforge: 5 (7)
Total After Reforges: 11 (13) with 21% Melee Auto Defense
13 (15) with 14% Melee Auto Defense
Additional Effects
Auto Defense
Auto Defense Ranged: 7% if Shield Unique Upgrade is taken
Auto Defense Magic: 7% if Shield Unique Upgrade is taken
Set Effects
Charge Enhancement: +10
Critical Hit Enhancement: +5
Decreased Durability Loss: +5
Potential Base Protection
Base amount: 3
Maximum Additional Protection: 1 (1.05)
Total: 4
Upgrade Path
Fear Shield Special Upgrade 1: +5% Melee Auto Defense
Fear Shield Special Upgrade 1: +5% Melee Auto Defense
Fear Shield Special Upgrade 1: +5% Melee Auto Defense
Fear Shield Special Upgrade 1: +5% Melee Auto Defense
Fear Shield Special Upgrade 1: +5% Melee Auto Defense
Artisan Upgrade: +1-2
Total from Upgrades: 4 with 15% Melee Auto Defense
6 with 10% Melee Auto Defense
Total Before Reforges: 4 with 15% Melee Auto Defense
6 with 10% Melee Auto Defense
Protection Reforge: 5 (7)
Total After Reforges: 9 (11) with 15% Melee Auto Defense
11 (13) with 10% Melee Auto Defense
Shield of Avon [A]
Potential Base Protection
Base amount: 2
Maximum Additional Protection: 1 (1.05)
Total: 3
Upgrade Path
Avon Shield Special Upgrade 1: +5% Melee Auto Defense
Avon Shield Special Upgrade 1: +5% Melee Auto Defense
Avon Shield Special Upgrade 1: +5% Melee Auto Defense
Avon Shield Special Upgrade 1: +5% Melee Auto Defense
Avon Shield Special Upgrade 1: +5% Melee Auto Defense
Artisan Upgrade: +1-2
Total from Upgrades: 3 with 15% Melee Auto Defense
5 with 10% Melee Auto Defense
Total Before Reforges: 3 with 15% Melee Auto Defense
5 with 10% Melee Auto Defense
Protection Reforge: 5 (7)
Total After Reforges: 8 (10) with 15% Melee Auto Defense
10 (12) with 10% Melee Auto Defense
Additional Effects
Set Effects
Charge Enhancement: +10
Misc Parts [A]
Order of the Black Moon Earring [A]
Potential Base Protection
Base amount: 2
Total: 2
Notes
Yes, as far as I can tell, the Order of the Black Moon Earring is the 2nd BiS protection headpiece, beating the competition by a whopping 1 protection. It only loses to the Ceann Bliana items (which can get 3). I wouldn’t bend over backwards to get it. You should be able to get the pattern easily enough from 7n spam.
Dan 2 Tailored Robe [A]
Potential Base Protection
Base amount: 0
Dan 2 Tailoring Boost- 1
Total: 1
Notes
I didn’t make the rules, Dan 2 Tailoring adds 1 protection to robes.
Unfinished Reverie’s Diadem Halo [A]
Potential Base Protection
Base amount: 5
Total: 5
Veil of Life Damage Reduction: 10%
Notes
Functionally it’s an upgraded Irusan Bell. It has the added benefit of boosting Saint’s Veil of Life’s Damage Reduction.
Irusan's Bell [A]
Potential Base Protection
Base amount: 5
Total: 5
Notes
Irusan strikes again, having the best Offensive and Defensive Accessory. There are easier options, so I’d go for those first.
Ancient Horned Ring [A]
Potential Base Protection
Base amount: 1-4
Total: 1-4
Drosera [A]
Potential Base Protection
Base amount: 3
Total: 3
Ancient Horned Ring Drosera Notes
They’re pretty good accessories. The Ancient Horned Ring does require Suntouched Shyllien Crystals from Treasure Dungeons, so you may want to keep an alt rebirthed as a Treasure Hunter.
Droseras on the other hand are extremely easy to make.
The Reforge for Accs caps at 2, with a Limit Break at 3
Production
When gathering without Phantasmal Sight, you may want to use Production Enchants and Luck/Gathering Tools to maximize the chance of a Lucky Gather.
Equipment | Reforges | Set Effect Notes | |
Head | Magic Craft - Quality Boost: Quality boosts tend to be rare or single use items. For somebody looking to maximize their potential quality, you might consider using this. That said, typically a sufficient amount of Quality Potions and attempts is enough to get signatures (if not a bit pricey). Blacksmith Enhancement: Boosts the success rate of Blacksmithing. For lower success rate manuals this can help you save on attempts. Refining Enhancement: Most of the time, you can naturally (or with Rain Casting and production parties) reach a 100% success rate on Refining items. However, low success rate items such as Demonic ingots can benefit from this. | ||
Body | Special Royal Society Laboratory Outfit | ||
Hands | |||
Feet | |||
Robe | |||
Accessories | Various Skill Success Rate Boosts | ||
Weapon | Tailoring Quality Bonus Various Skill Success Rate Boosts Various Item Quantity Bonuses | ||
Misc Equipment | |||
Echostone | Fill With Missing |
Commerce
Commerce equipment is very focused on non-equipment items, so this list will be slightly different.
If you can farm Scatach Beach Golems for their Metallurgy drops, prioritize that. Otherwise you will want Commerce Enchant Accessories.
Commerce Equipment Recommendations | Reforges | Enchants | |
Head | |||
Body | William Preppy Commerce Outfit/Brielle's Outfit/Bassanio's Costume (G15)/Antonio's Costume (G15)/Shylock's Costume (G15)/Portia's Costume (G15) | Commerce Transport Speed* | |
Hands | |||
Feet | Erinn Merchants' Guild Premium Shoes (30 Days)* Fleet Feet/Shooting Star Flying Shoes/Shooting Star Roller Skates/Forest Ranger Boots | ||
Robe | Alpaca Robe - Does not stack with Commerce Transport Speed Reforge | ||
Accessories | Metallurgy Success Rate - Does not need to be on your Trustworthy/Trader accs | Prefix: Haggler/Trustworthy* Suffix: Trader* | |
Weapon | Metallurgy Success Rate Metallurgy Amount Gathered per Attempt | ||
Misc Equipment | Transport Speed Increase Potion - Does Stack with Commerce Transport Speed Reforge Movement Speed Potions/Hillwen Engineer’s Research Group (for 4) - Does not stack with Commerce Transport Speed Reforge |
*Yes the Erinn Merchants’ Guild Premium Shoes expire. The duration can be extended by purchasing an Erinn Merchants’ Guild Premium Shoes Extension Coupon (30 Days) for 5 million Seasonal Ducats (once per season). They can only be extended if less than one year has passed since acquisition of the shoes.
Commerce Notes
While the Metallurgy Sieve doesn’t appear to directly affect the act of commencing, having a maximized one can provide some of the best Commerce Trade Goods. By killing Scatach Beach Crystal/Amethyst Golems then using Metallurgy on their bodies, you can gather Crystal Columns, Black Crystals, and White Crystals. Crystal Columns are one of the most valuable Trade-in Items for commerce, so you’ll want to maximize your success rate and item gather quantity. Ideally you will dual roll Metallurgy Success rate (lvl 15+)and Item Gathering Quantity (lvl 3). Do note post The Great Era of Commerce Update, you can only barter up to 200 of each Scatach Beach good per week.
Trustworthy and Trader’s drop locations on the Wiki have not been updated, but you can farm them in game. Trustworthy drops from Peaca Basic and Intermediate (I think from the boss) while Trader drops from Coil Intermediate and Ciar Adv Hard (again I think from the boss).
The Hillwen Engineer’s Research Group (for 4) provides a 40% movement speed boost for 5 minutes, but requires you to sit for 2 minutes. It is reusable though. Movement Speed Potions on the other hand can be used without waiting and tend to last for a longer duration, but they’re harder to come by. However, neither stack with Commerce Transport Speed reforges.
Transport Speed Increase Potions do, however, stack with all other Commerce Transport Speed boosts.
Letters of Guarantee can be acquired from Festia, but higher grade letters tend to come in bulk from certain Gachapons. Gacha Letters are tradable, so you may find some on the Auction House.
Alpaca Robe does not stack with the Commerce Transport Speed Reforge.
Weapon Archetype Tiering (Progression)
Archetype meaning the weapon name prefix/material group the weapon comes from. Namely Perseus/Ruination, Nightbringer, and Celtic.
However, outside of certain exceptions (Nightbringer Staff and Bows), you can still treat the below lists as a progression tree.
Weapon Progression is fairly straightforward. The basic rule is as follows:
Perseus/Ruination > Revenant/Demolition > Massive Despair > Divine > Frosted Borealis = Celtic Suffix > Weapons of Blossoming Memory > Celtic > Apostle > Demonic > High Rank Crafted > Everything Else
*Treat “>” as a greater than sign rather than as a progression direction. Basically Thing 1 is better than Thing 2.
Celtic Suffix refers to Celtic weapons with a unique naming convention (e.g Celtic Howling). The Celtic Throwing Star and Celtic Control Bars are counted in this category despite not following the same naming convention.
There are, however, exceptions to the rule. See below for the Weapon Archetype Tiering for each talent.
Weapons of Blossoming Memory cannot be upgraded or reforged but instead come pre upgraded, enchanted, and reforged. You cannot upgrade them to r6, reroll the reforge to a stronger version, or Erg them. Because of this, they are for the most part rated above standard Celtic weapons but below Celtic Suffix.
There are a few exceptions such as with Ninja and Chain Slash where the 2nd or 3rd BiS weapon are likely to be step (R) 6/7 upgrade candidates and are thus rated higher. Blossoming Memory Weapons will be outdone by weapons you plan on Erging since as mentioned above, Blossoming Memory Weapons are not eligible for Erg.
Nightbringer weapons, while generally stronger than their Perseus/Ruination variants, are actually weaker for Staves and Bows. This is because KR has not released Demolition and Ruination weapons on their server, making Nightbringer the Best in Slot weapons for each Talent.
I’ve also excluded beginner weapons. As a general rule for beginner weapons, they’re fine starting out. The stronger you are, however, the more cost effective they will be at lower level content. You may want to keep them around as a cost saving measure. You don’t need to use a Conqueror Girgashiy Celtic Howling Chain on a Hard Shadow Wizard when you can get the same result with a Beginner Cardinal Chain.
Close Combat - Human
Soluna Blade > Nightbringer Warlord > Perseus Monumental Blade > Celtic Errant Blade+Signet > Divine Blade+Signet > Frosted Borealis Blade = Fanatic Greatsword
The Bhafel Slayer can provide a slightly higher piercing alternative to the Divine Blade, Frosted Borealis, and Fanatic two handed swords at the cost of attack speed. If you intend to primarily use Eknight skills, this may be an acceptable option. With Corrib you can reach lvl 3 Piercing while Meteorid/67th Floor can provide up to 5 Piercing.
Nightbringer Assault > > Divine Bastard Sword+Signet > Celtic Royal Knight Swords+Signet > Pilgrim Swords > Demonic Death Knight Swords
See this Reddit comment from u/knnisai for details on how dual wielded Erg 50 One-Handed Hammers with a Rage Impact cooldown echostone would work. The same applies to One-Handed Swords, but you will have a longer Cooldown on Rage Impact.
Nightbringer Enforcer > Perseus Brutal Warhammer > Frosted Borealis Hammer
Celtic Royal Battle Axe+Signet > Celtic Battle Axe+Signet
Close Combat - Elf
Nightbringer Berserker > Perseus Cleaving Warrior Axe >Celtic Royal Warrior Axe+Signet >= Celtic Royal Warrior Hammer+Signet > Celtic Warrior Axe+Signet >= Celtic Warrior Hammer+Signet > Massive Despair Hammer > Battle Hammer > Broad Axe
Nightbringer Enforcer > Perseus Brutal Warhammer > Frosted Borealis Hammer
Celtic Royal Battle Axe+Signet > Celtic Battle Axe+Signet
Elves while able to “function” as a Warrior/Elemental Knight, are not the best suited for it. The rather narrow (and frankly suboptimal) weapon selection makes it hard for an Elf to shine as a Warrior/Elemental Knight.
Close Combat - Giant
Soluna Blade > Nightbringer Warlord > Perseus Monumental Blade > Celtic Errant Blade+Signet > Divine Blade+Signet > Frosted Borealis Blade = Fanatic Greatsword
The Bhafel Slayer can provide a slightly higher piercing alternative to the Divine Blade, Massive Despair, Frosted Borealis, and Fanatic two handed swords.
The Nightbringer Warlord has Final Strike Rage Generation instead of Final Strike damage meaning it builds speed faster.
Nightbringer Berserker > Perseus Cleaving Warrior Axe >Celtic Royal Warrior Axe+Signet >= Celtic Royal Warrior Hammer+Signet > Celtic Warrior Axe+Signet >= Celtic Warrior Hammer+Signet > Massive Despair Hammer > Battle Hammer > Broad Axe
Nightbringer Enforcer > Perseus Brutal Warhammer > Frosted Borealis Hammer
See this Reddit comment from u/knnisai for details on how dual wielded Erg 50 One-Handed Hammers with a Rage Impact cooldown echostone would work.
Bone Atlatl > Feather Atlatl > Wood Atlatl
Long Javelin (Jousting) >= Long Javelin LT > Bundle of Long Javelins (2000 - Cash Shop 150 NX) > Bundle of Long Javelins (50)
Lance
Nightbringer Spearhead > Perseus Tempestuous Lance > Celtic Clashing Lance+Signet = Divine Short Lance+Signet > Lance of Blossoming Memories > Languhiris Bone-Breaker > Demonic Oculus Lance > Knight Lance
The Lance of Blossoming Memories cannot be upgraded, reforged, enchanted (which it doesn’t need anyways), or Erged. But it has 4 Piercing and comes pre-enchanted with Cartel and Penetrating (Piercing Level 9). Its inability to be reforged and upgraded excludes it from the Lance Gear and Equipment section, but this is an excellent budget Judgment Blade Lance if you lack a r6 Lance.
Archery
Bow of Ruination + Arrow of Ruination > Demolition Breaker Bow + Demolition Breaker Arrow > Nightbringer Rogue > Nightbringer Predator + Nightbringer Huntsman > Perseus Dynamic Crossbow > Divine Crossbow+Signet > Celtic Royal Crossbow +Signet > Perseus Voiceless Bow + Perseus Voiceless Arrow > Celtic Ancient Bow+Signet = Bhafel Hunter + Bhafel Huntress = Salvation Bow > Crossbow of Blooming Memories
Use with the following unless otherwise stated above:
Piercing Forest Arrows > Sharp Arrows = Special Arrows = Forest Ranger Arrows > Solid Bone Arrow
Sharp Bolts = Special Bolts > Sephirot Arrows
The Nightbringer Rouge and Predator + Huntsman are downgrades from the Demolition Breaker despite coming from more difficult content. They’re still decent bows, just not as good as the Demo. Similarly, the Perseus Bow and Crossbow, while not bad bows, are still not as effective as the Demolition Breaker Bow despite ostensibly coming from the same content level.
Magic - Staff
Advanced Magic
Lord of Ruination Staff > Demolition Deepglow Staff > Nightbringer Inquisitor > Perseus Mystic Staff > Celtic Druid Staff+Signet > Celtic Guardian Staff+Signet > Original Sin Staff > Hermit’s Staff > Trinity Staff
Intermediate Magic
Lord of Ruination Staff >= Nightbringer Inquisitor > Demolition Deepglow Staff = Perseus Mystic Staff > Celtic Druid Staff+Signet > Celtic Guardian Staff+Signet > Original Sin Staff > Hermit’s Staff > Trinity Staff
While the Nightbringer Inquisitor gets a hefty amount of bonus Intermediate Magic Damage (+35%), an impressive +15% Advanced Magic Damage, and an additional +45 Magic Attack to top it all off, it still ends up not reaching the same heights a Lord of Ruination Staff can due to lower Piercing (specifically no piercing without Seething Mana). It’s still a good staff, just not as strong as a Lord of Ruination.
The Perseus Mystic Staff probably isn’t worth springing for though. Again, it’s not a bad staff, just not as good as the Demolition Deepglow (lacks innate Piercing and isn’t as flexible because of the lack of Tri-Element boost and Adv magic set effects besides Hailstorm).
Magic - Fusion Bolt
Nightbringer Elementalist > Perseus Arcane Wand > Divine Tribolt Wand*+Signet > Celtic Tribolt Wand+Signet > Tribolt Wand of Blossoming Memories
Nightbringer Prophet > Perseus Forbidden Spellbook > Divine Spellbook+Signet > Holy Eagle Mask
Compared to the Celtic Tribolt, the Divine Tribolt provides a minimal power boost while costing significantly more. You may want to consider stopping at a Celtic Tribolt. The Divine Tribolt doesn’t even have the exclusive advantage of being the only wand that can cast all Int magic anymore. Even the Celtic Tribolt can do that now.
The Tribolt Wand of Blossoming Memories cannot be reforged, upgraded, or Erged. But it is an excellent wand otherwise.
Spell Books and Cooking pots can roll up to 20 Magic Attack and 20 Max Damage.
Magic - Blaze
Nightbringer Elementalist > Perseus Arcane Wand > Divine Tribolt Wand*+Signet > Celtic Tribolt Wand+Signet > Tribolt Wand of Blossoming Memories
Nightbringer Prophet > Perseus Forbidden Spellbook > Divine Spellbook+Signet > Holy Eagle Mask
Lord of Ruination Staff > Demolition Deepglow Staff > Nightbringer Inquisitor > Perseus Mystic Staff > Celtic Druid Staff+Signet > Celtic Guardian Staff+Signet > Original Sin Staff > Hermit’s Staff > Trinity Staff
The staves listed are treated as Combat Wands for the purpose of Blaze (would like to verify that for the Perseus Staff, but it probably also is considering Dark Diviner). The absence of the Combat Wand is because the Combat Wand cannot be Special upgraded.
Alchemy
Nightbringer Technician > Perseus Tyrannus Cylinder + Perseus Tyrannus Guard Cylinder > Revenant Insight Cylinder + Revenant Insight Guard Cylinder > Celtic Tetra Cylinder+Signet > Abyss/Hellfire Cylinder > Cylinder of Blossoming Memories > Tidal Wave/Volcano Cylinder
It’s worth noting that the jump from Revenant to Perseus is very minimal for Alchemy. The main upside is the rather mediocre Hero Alchemy set bonus. You may wish to use Kraken Heart drops on Knuckles where the power difference is more pronounced.
Hurricane Cylinders are powerful support tools. You’ll generally want one blue upgraded for Frozen Blast.
Fighter
Nightbringer Vagabond > Perseus Tormented Knuckle > Revenant Splinter Knuckle > Celtic Edge Knuckles+Signet > Knuckles of Blossoming Memories > Demonic Solitude Knuckles
I do not believe Fighter is worth pursuing without at least Revenants, but you need Celtic Edge Knuckles and Demonic Solitude Knuckles upgraded for Erg. So you can use Celtics and Demonics as a mid way point (just don’t Erg or reforge them).
Music
Demonic Gloomy Sunday > Lute of Blossoming Memories
The Lute of Blossoming Memories cannot be upgraded or reforged, but it is an ok instrument due to being pre-enchanted and pre-reforged.
Puppetry
Nightbringer Trickster > Perseus Conflict Control Bar + Fallen Pierrot Figure > Revenant Lunatic Control Bar + Fallen Pierrot Figure > Celtic Control Bar+Signet > Control Bar of Blossoming Memories > Demonic Illusion Control Bar
There are two important reasons to upgrade from a Revenant Lunatic Control Bar to a Perseus Control Bar: The 20% higher Rez chance and the extra puppet defensive stats (HP, Protection/Magic Protection). There’s also some nice extra damage.
The jump to Nightbringer, however, provides a large damage boost and +1 to Puppet Piercing.
Dual Guns
Nightbringer Vanquisher > Perseus Thundering Dual Guns > Divine Cinnsealach L2+Signet > Celtic Dowra Ace+Signet > Dual Guns of Blossoming Memories = Taunes MK3 = Dowra SE
The Taunes MK3 can reach similar attack speeds to the Dowra line under WotG with a combination of Attack Speed set effects, Relentless Assault, Attack Delay set effects, and Way of the Gun Attack Speed reforges. You will most likely hit the speed cap with three of these effects combined. However, you do suffer from reduced range when using the Taunes MK3 which does make it somewhat less efficient for WotG mob clearing. The Nightbringer Vanquisher, however, absolutely blows the Tarunes out the water.
Ninja
Nightbringer Infiltrator > Perseus Swift Shuriken > Celtic Throwing Star+Signet > Anju’s Shuriken > Shuriken of Blossoming Memories
Hagi's Shuriken has lower damage than Anju’s Shuriken, but it has a very fast attack speed. If you use shuriken normal attacks frequently and don’t mind losing the extra damage from the Anju/Celtic, this will be a good choice.
Chain Slash
Nightbringer Wraith > Perseus Rending Chain Blade > Celtic Howling Chain Blade+Signet > Cutthroat Chain Blade > Chain Blade of Blossoming Memories
Yes there are other chain variants, but the Cutthroat is so easily accessible I don’t think the rest are worth mentioning. You also get a very strong free Chain Blade from completing the Chain Slash Book IV memoirs. I would not overlook the Chainblade of Blossoming Memories despite the lack of upgrades, lack of reforgability, and the lack of Erg.
Astrologer
Nightbringer Observer > Perseus Peregrine Scythe > Celtic Triplicity Scythe > Scythe of Blossoming Memories > Dispositor Scythe
Nightbringer Vega > Perseus Arcturus Orb > Canopus Orb
As per usual, the Scythe of Blossoming Memories, while strong out the gate, cannot be upgraded.
Titles
If you need to know what primary title to use, it depends.
Star of the Dawn from completing g25 is currently the 4rd best Max Damage Title with +20 Max Damage. Before the Crom Bas and Glen Bearna Titles, this will likely be your go to title for Max Damage.
Meteor Strike Master/The Master of Battle Astrology are the best Magic Attack titles providing +50 Magic Attack. But as an overall title, I would say The Flame of the Icebound Reverie is better despite having 5 less Magic Attack.
The Light in the Abyss from clearing Crom Bas at 80% Dark Erg is currently the BiS Max Damage (for the general playerbase) Title with +25 Max, +200 HP, and +15 Protection and Magic Protection.
The Flame of the Icebound Reverie from clearing Glenn Bearna on the Hard difficulty might as well be tied with The Light in the Abyss providing +25 Max Damage. It also upgrades Usurper of the Abyssal Throne. With +45 Magic Attack, +15 Protection, and +15 Magic Protection. If you want a more hybrid Damage-Magic Damage title, this is a good go to.
The Uniter of Dusk and Dawn from defeating The Winter Tyrant in Primeval Winter without a single party death is the current BiS offensive title providing +27 Max Damage, +50 Magic Attack, +15 Protection, +15 Magic Protection, and +2% movement speed.
The Usurper of the Abyssal Throne is awarded for a 100% Crom clear and is more of a Magic-Max Damage Hybrid with 20 Max and 40 Magic Attack. It’s a good title and a worthwhile sidegrade to Light in the Abyss.
Shepherd of Lost Souls from completing the Subject Theta Raid is the 3nd BiS Max Damage Title with +22 Max and a large amount of protection (+12).
Master of Golden Time and Master of Alchemy are alchemy titles providing +10 Alchemic Damage (All elements).
The Royal Alchemist is the best water alchemy title providing +15 Water Alchemy damage, but only 100 people per server can use it for the week. Not that there are 100 alchemy mains anyways.
The Fashionable is only available to people who participate in the Fashion Contest Finals, but it is a very useful crafting title for making low success rate items such as Demonics. Blacksmithing, Refining, Tailoring, and Weaving success rates are boosted by 2%.
The Master of Battlefield Overture is the go to bard primary title because having it equipped means higher BFOs.
There are various other master titles you can use such as Charging Strike Master, Chain Sweep Master, and Master Chef. The common theme with these master titles is that they boost the damage multipliers or effects of the skill. If a master title provides a non primary stat benefit, see if it will significantly contribute to your damage in gameplay or if it provides a benefit that isn’t available anywhere else. Here’s the list of Master Titles I’d consider based on your situation.
Charging Strike Master: Multiplies the base multiplier by 1.3 making Charging Strike deal 520% damage
Master of Drop Kick: Increases Drop Kick damage by 10%. I’m not sure if it is additive or multiplicative, but Drop Kick is a very strong skill.
Chain Sweep Master: Increases Chain Sweep Damage by 20%. I’m not sure if it’s additive or multiplicative, but Chain Sweep is the most used Chain Slash skill for good reason.
Magic Weapon Master: Discount Meteor Strike Master. A lot easier to get but also half as strong.
Master of Shadow Bind: Boosts the blind duration of Shadow Bind by 5 seconds. If you don’t have the duration reforge for Shadow Bind and you want to stun vulnerable enemies for a bit longer, this is a good choice.
Hydra Transmutation Master: Boosts the duration of Hydra Transmutation by 20 seconds. This is huge since with a maxed wind marble you can effectively loop Hydra with very little downtime.
Take a deep breath. Calm your mind. You know what is best. What is best is you comply. Compliance will be rewarded. Are you ready to comply?
Chain Cylinder Master: -1 second to the cooldown on Chain Cylinder. It’s not much but if you don’t have high Erg and only Revenants it’s something.
Master of Support Shot: Boosts Support Shot’s melee damage bonus by 5% additively.
Master Chef: Cooking Quality Bonus. It helps but you’re going to need the quality reforges and/or Antique Cooking Knives/Ladles to get consistent 5 star dishes.
Master of Carpentry: Boosts Carpentry bow quality. You don’t get that many stats from quality but it’s nice to have.
Master of Fragmentation: You especially want this when fragmenting for Divine Magic Powder and Divine Mineral Fragments. The base success rates are abysmal, the drops are uncommon, and you need every percentage point to boost those success rates.
Master Engineer: Boosts quality from Hillwen Engineering. Considering Engineering is all roll based, anything to increase your chances of a good roll is useful.
Magic Artisan: Pretty sure it’s quality. Same reasoning as Master Engineer.
Master of Ingredient Hunting: Boosts Leather and Ingredient drop rates. Ingredients can be important for Catering, but you really want to use this title to boost Leather drop rates.
Master of Shields: This is fine as a protection title, especially early on when you may be lacking options. You probably won’t use it as you progress to harder content where damage is needed more
Master of Party Healing: BiS Healing Primary Title providing 20% more Healing and 10% wound cure. Also the only one.
The following lists are for 2nd titles. This list may be incomplete so if a Title is missing, let me know. These lists will also exclude certain limited titles, namely Fahames titles. Yes those would be BiS if you have them, but only a very limited number of people can have them.
You can check a complete list of 2nd titles compiled by ndrr here.
*Note - Need to update a lot of these enchants for the Refine update. If it's a character 2nd title, chances are you can farm it in the game now. See a complete list here
Max Damage
These titles are sorted by Max Damage first, then Bonus Damage/Critical Hit damage for organization purposes. DPS calculations may differ based on said secondary effects, but most of these titles should have similar overall performance.
Title Name | Max Damage Increase | Other Stats |
+30 | +20 Strength, +15 Defense, +10 Protection, Critical +12% | |
+30 Max Damage | Magic Defense + 10, Magic Protection +8, Max HP +50, Critical +12% | |
+28 | Critical +10%, Magic Defense +12, Magic Protection +8, and Max HP +50. | |
+28 | +1% Movement Speed | |
+26 | +3% Critical Hit Damage | |
+26 | +20 Dexterity, +3% Movement Speed | |
+25 | +2% Critical Hit Damage, +2% Movement Speed | |
+25 | +2% Critical Hit Damage | |
+25, +1% Bonus Damage | +10 Min, +15 Strength | |
+25 | Min Damage +25 Critical Damage +1% | |
+25 | +18 Magic Attack, +12 Defense, +8 Protection, +12 Magic Defense, +8 Magic Protection | |
+25 | Min Damage +25, Luck +25, and Movement Speed +3%. | |
+24 | +1% Bonus Damage, +13 Protection, +10 Magic Protection | |
Fodla*Situational | +15, Dual Gun Max Damage +20 | Movement Speed +1% |
Cunning Hunter's Might*Situational | +15 Max, +10 Chain Blade Max | Dorcha Snarch - Dorcha Acquired +8% |
Cunning Hunter’s Domination*Situational | +22 Max, +8 Marionette Max Damage | Act 6: Crisis Radius +0.3m |
+24 | Defense +12, Protection +12, Magic Defense +12, Magic Protection +9, Movement Speed +3% | |
+23, +1% Bonus Damage | Luck +20, Movement Speed +3% | |
+23 | Defense +6, Protection +6, and Movement Speed +1%. | |
+23 | Dexterity +25 Luck +25 Movement Speed +1% | |
+23 | Magic ATT +10, Magic Defense +12, Magic Protection +7, and Critical +3%. | |
+23 | M. ATT +16, M. DEF +14, and M. Protection +8. | |
+22 | Magic Attack +14, Defense +12, Protection +6, and Movement Speed +2%. | |
+22 | Defense +12, Protection +6, Magic Defense +8, Magic Protection +8, Movement Speed +3% | |
+22 | Dexterity +15, Critical +12%, Max HP +40, and Max Stamina +35. | |
+21 | Magic Attack +10, Critical +8%, Music Buff Skill Effect +2, Defense +5, and Protection +5. | |
+21 | Critical +5%, Defense +3, Protection +3, Magic Defense +5, and Magic Protection +5 | |
+21 | Critical +10%, Music Buff Skill Effect +2, Defense +10, And Movement Speed +1% | |
+20, +1% Bonus Damage | +1% Critical Hit Damage, +2% Movement Speed | |
+20 | +20 Magic Attack, +1% Movement Speed | |
+20 | Magic Attack +10, Magic Defense +10, Magic Protection +8, Critical +10%, and Movement Speed +3% | |
+20 | Magic Attack +16, Will +20, Luck +20, and Movement Speed +3% | |
+20 | Magic Attack +6, Alchemy Water/Fire/Wind/Earth Damage +8, Music Buff Skill Effect +2, Magic Defense +4, and Magic Protection +4 | |
+20 | Strength +30, Magic Defense +12, Magic Protection +8, and Max HP +50 | |
+20 | Strength +30, Magic Defense +12, Magic Protection +8, and Max Stamina +50 | |
+20 | Dexterity +30, Magic Defense +12, Magic Protection +8, and Max Stamina +50 | |
+20 | Strength +15, Intelligence +15, Magic Defense +12, Magic Protection +8, and Max Stamina +50 | |
+18 | Magic Attack +18 All Alchemy Damage +18 | |
+18 | +18 Alchemy Damage, +1% Movement Speed | |
+18 | Magic Attack +12 Music Buff Effect +4 | |
+18 | Critical +10%, and Max Stamina +30 | |
+17 | Magic Attack +17, Alchemic Damage +11, Movement Speed +1% | |
+16 | Magic Attack +16, Alchemic Damage +10, Strength +16, Intelligence +16, Dexterity +16, Will +16, Luck +16, Movement Speed +1% | |
+16 | Dexterity +10, Max Stamina +30 | |
+16 | Luck +10, and Max Stamina +30 | |
+16 | Will +10, and Max HP +30 | |
+16 | Strength +10, Max HP +30 | |
+15 | All Alchemy Damage +15 Crystal Making Success Rate +5% | |
Fourth Step* | +14 | Movement Speed +1% |
*No wiki link, available from the 4th dungeon guide box
*Yes Irusan, Folamh, and Gillach are technically obtainable in game, but why would you. You’re using Nightbringer materials for a high chance of minimal material refund or purely cosmetic wings for a title that is only slightly better than previous BiS titles, some of which can be obtained from Erinn Spirits. And as some extra salt in the wound, the material cost is the equivalent of about 5000 Adamantine Coins.
Crafting and Production
Title Name | Noteworthy bonus | Success Rate Bonuses |
+4 Smithing Quality | +4% Blacksmithing Success Rate, +4% Refining Success Rate, Production Success Rate +2% | |
+4 Smithing Quality | +4% Blacksmithing Success Rate, +4% Refining Success Rate | |
+3 Smithing Quality | +3% smithing and refining success rate | |
Production Quality +3 | Refining Success Rate +3% Blacksmithing Success Rate +3% | |
+2 Smithing Quality | Refining Success Rate +2% Blacksmithing Success Rate +2% | |
Increases Gathering Speed by 12% | +12% Gathering Success Rate | |
Gathering Speed +5% Increase Fish Catch Size | Gathering Success Rate +5% Increase Automatic Fishing Success Rate Increase Taming Rate by 25% Increase Transformation Collection Rate by 10% | |
When used with the Expert Engineer or the Magic Artisan, boosts quality. | +5% Production Success Rate | |
When used with the Expert Engineer or the Magic Artisan, boosts quality. | Production Success Rate +4% | |
When used with the Magic Artisan Title, boosts quality. | Production Success Rate +3% | |
Boosts the Effects of a Life Master Title by 20% | ||
When used with the Expert Engineer Master Title, boosts quality. | +3% Production success rate. | |
+3% smithing success rate, +2% refining success rate | ||
Glyph Design Minimum Quality Bonus +10 | ||
Glyph Design Minimum Quality Bonus +10 |
Magic Attack
These titles are sorted by Magic Attack first, then Magic Casting Speed for organization purposes. DPS calculations may differ based on said secondary effects, but most of these titles should have similar overall performance.
Title Name | Magic Attack | Other Stats |
+47 | Defense +10, Protection +6 | |
+46 | Max MP +80, +3% Movement Speed | |
+45 | Magic Casting Speed +5%., +3% Movement Speed | |
+45 | Magic Casting Speed +5% | |
+45 | +3% Bolt Magic Damage | |
+45 | Critical +15%, Movement Speed +3% | |
+45 | Critical +10%, Magic Defense +8, Magic Protection +8, and Movement Speed +1%. | |
+45 | ||
+44 | +3% Bolt Magic Damage, Magic Casting Speed +3%, +20 Intelligence | |
+43 | +5% Bolt Magic Damage, +3% Crit | |
+43 | Intelligence + 25 Movement Speed +1% | |
+42 | Defense +12, Protection +12, Magic Defense +12, Magic Protection +9 | |
+42 | Intelligence +30, Defense +12, Protection +8, and Max MP +50 | |
+42 | +3% Move Speed | |
+40* | Taming Success Rate +20%, +2% Bolt Magic Damage | |
+41 | Critical +5%, Music buff Effect +2, Max MP +150, Intelligence +15 | |
+39 | +2% Bolt Magic Damage, Movement Speed + 3% | |
+36 | Music Buff Effect +4 Movement Speed +1% | |
+36 | Critical +5%, Music Buff Skill Effect +3, Defense +10, And Movement Speed +1% | |
+32 | +2% Bolt Magic Damage | |
+32 | Critical +10%, Vivace Skill Effect +3, Defense +5, and Protection +5 | |
+32 | Intelligence +10, and Max MP +30 | |
+28 | Alchemic Damage +12, and Max MP +35 | |
+28 | Critical +10% | |
+24 | Bolt Magic Damage +5 | |
+24 | Max MP +10 | |
+20 | Max Damage +20, +1% Movement Speed |
*ALO Asuna is listed as +10 but it actually adds +40.
*Yes Birelle is technically obtainable in game, but why would you. You’re using Nightbringer materials for a high chance of minimal material refund or purely cosmetic wings for a title that is only slightly better than previous BiS titles, some of which can be obtained from Erinn Spirits. And as some extra salt in the wound, the material cost is the equivalent of about 5000 Adamantine Coins.
Bard
Title Name | Bard Buff Effect | Other Stats |
+11 | +10 Buff Duration, +24 Dexterity | |
+11 | +10 Buff Duration, +20 Dexterity | |
+10 | +15 Buff Duration +4% Movement Speed | |
+10 | +13 Buff Duration, +3% Movement Speed | |
+10 | +15 Buff Duration | |
+9 | +10 Music Buff Duration, Max Damage +15 | |
+9 | Max Damage +14, +2% Movement Speed | |
+9 | ||
+8 | +15 Buff Duration | |
Music Buff Effect +8 | Max Damage +10 Movement Speed +2% | |
+8 | +10 Max Damage | |
+8 | Movement Speed +2% | |
+4 | +18 Max Damage +12 Magic Attack |
Alchemy
Title Name | Alchemy Damage | Other Stats |
+23 | +32 Magic Attack | |
+18 | +18 Max Damage +18 Magic Attack | |
+18 | +18 Max Damage, +1% Movement Speed | |
+15 Alchemic Damage | +20 Max Damage, M. DEF +12, and M. Protection +8. | |
+15 Alchemic Damage | +15 Max Damage Crystal Making Success Rate +5% | |
+12 Alchemic Damage | Magic Attack +28, Max MP +35 | |
+12 Alchemic Damage | Magic Attack +15, Magic Defense +6, Magic Protection +6 | |
+11 Alchemic Damage | Max Damage +17, Magic Attack +17, Movement Speed +1% | |
+10 | Max Damage +16, Magic Attack +16, Strength +16, Intelligence +16, Dexterity +16, Will +16, Luck +16, Movement Speed +1% | |
+10 Alchemic Damage |
Healing
Title Name | Healing Bonuses | Other Stats |
Healing Effect +18%, Cures wounds at 5% of Healing Effect | Max MP +110 | |
Healing Effect +18%, Cures wounds at 5% of Healing Effect | Max MP +100 | |
Healing Effect +17%, Cures wounds at 5% of Healing Effect | ||
Healing Effect +17%, Cures Sounds at 5% of Healing Effect | +2% Movement Speed | |
+15% Healing Effect, Cures wounds at 5% of Healing Effect | Int +15, Max MP +30 | |
+10% Healing Effect, Cures Wounds at 3% of Healing Effect | ||
+10% Healing Effect | +1% Movement Speed, Max Mp + 35% | |
Protection Titles
These titles contain special effects that boost Physical Protection. For the sake of my own sanity, I have only included titles that have at least 7 protection.
Title Name | Protection | Other Stats |
+12 | Magic Attack +42, Defense +12, Magic Defense +12, Magic Protection +8 | |
+12 | Max Damage +24, Defense +12, Magic Defense +12, Magic Protection +9, Movement Speed +3% | |
+12 | Max HP +100, Defense +12, Magic Defense +6, Magic Protection +6, Movement Speed +2% | |
+10 | Melee Damage Taken -3%, Defense +10 | |
+10 | Defense +12, Magic Defense +14, Magic Protection +8, Movement Speed +3% | |
+9 | Defense +9, Max MP +10 | |
+8 | Maximum Damage +22, Defense +12 , Movement Speed +1% , Critical +8% | |
+8 | Magic Attack +42, Max MP +50, Int +30, Defense +12 | |
+8 | Defense +8, Stamina +10 | |
+8 | Defense +8, Critical +5% | |
+8 | Defense +8, Critical +3% | |
+7 | Defense +7, Magic Defense +7, Magic Protection +7 |
Special Effect Titles
These titles contain special effects that boost certain aspects of a talent or skills within a talent..
Title Name | Special Effect | Other Stats |
Cunning Hunter’s Domination | Act 6: Crisis Radius +0.3m | +22 Max, +8 Marionette Max Damage |
Dorcha Snarch - Dorcha Acquired +8% | +15 Max, +10 Chain Blade Max | |
Boosts Effects of respective Talent Master Titles by 20% |
Passive Buff Equipment
Passive Buff Equipment tends to encompass Totems, Homestead items (Figures and Pet Houses), and Doll Bags. They can be an important part of Min-Maxing, but the individual bonuses may vary in their actual impact on your combat efficiency.
Doll Bags
If you don’t have the set Doll bags, you can acquire their effects by summoning the individual dolls that make up that group. For instance, if you have a Tarlach, Mari, and Ruairi Doll Bag but you do not have the Heroes of the Goddess Doll Bag, summoning the Tarlach, Mari, and Ruairi doll bags will grant you the Heroes of the Goddess Doll Bag bonuses despite the individual bags not providing stats that add up to the Heroes of the Goddess Doll Bag.
You can only have 3 Dolls summoned at a time. While some bags have 4 dolls, they simply count as the max possible Doll bags summoned possible. Far Darrig Doll Bags are not affected by the summon limit and pick up Phantasmal Remnants.
A few Doll bags have compact versions. They are functionally the same, but they take up less basic inventory space and have an additional Collection Category Add-on slot.
Be sure to refer to the Doll Bag Storage Item Listing on the wiki, or the relevant news post from the Mabinogi website (will be linked in lieu of a wiki link).
Default Item Collection
Doll Bags have items they can pick up by default, but you can also assign them to pick up additional categories with Collection Category Add-on slots. The number of categories available is dependent on the number of dolls summoned and if a bag is classified as a Compact bag or not.
Summary Table
Doll Bag | Damage | Magic Attack | Protection | Other Significant Attributes | Default Item Collection |
- | - | - | +10 Luck, Does not take up a Summon Slot | Phantasmal Remnants | |
+24 Max, +21 Min | +9 MA | +5 Prot | +1 Music Buff Effect | Gold, Ore, Gems, Weaving/Sheep Shearing, Tailoring Materials, Artifacts, Shyllien Ecology, Rare Mineralogy, Fynni Gems, Herbs, Commerce | |
+24 Max, +21 Min | +9 MA | +5 Prot | +2% Critical Hit Damage | Gold, Ore, Gems, Weaving/Sheep Shearing, Tailoring Materials, Artifacts, Shyllien Ecology, Rare Mineralogy, Fynni Gems, Herbs, Commerce | |
+21 Max, +20 Min | +5 MA | +2 Prot | +1% Critical Hit Damage | Gold, Shyllien Crystals, Hillwen Ore Fragments, Fynni Gems | |
+21 Min, +17 Max | +3 MA | +5 Prot | +1% Critical Hit Damage | Gold, Shyllien Ecology, Herbs, Fynni Gems, Artifacts, Commerce | |
+22 Max, +20 Min | - | +6 Prot | +1% Movement Speed | Gold, Weaving Materials, Tailoring Materials, Ores, Ore Fragments, Gems, Artifacts, Equipment | |
+20 Max, +20 Min | - | +5 Prot | +1% Movement Speed | Gold, Weaving Materials, Tailoring Materials, Ores, Ore Fragments, Artifacts, Equipment | |
+20 Max, +18 Min | +8 MA | +2 Prot | +12% Combat Exp | Gold, various ores, gems, Fynni Gems, herbs, weaving and tailoring items, large nails, firewood | |
+20 Max, +15 Min | +2 MA | +2 Prot | +2% Attack Speed | Gold, Various Ore, Gems, Equipment | |
+18 Max, +18 Min | - | +5 Prot | +10% Combat Exp | Gold, Herbs, Potions, Ores, Ore Fragments, Gems, Equipment | |
+18 Max, +18 Min | - | +5 Prot | +10% Combat Exp | Gold, Weaving Materials, Tailoring Materials, Artifacts, Firewood Varieties, Large Nails | |
+18 Max, +17 Min | +5 MA | +2 Prot | +4% Gathering Speed | Gold, Ore, Shyllien Ecology, Rare Mineralogy, Herbs, Weaving/Sheep Shearing, Tailoring Materials, Large Nails, Firewood | |
+18 Max | - | +5 Prot | - | Gold | |
+17 Max, +17 Min | - | +4 Prot | +2% Movement Speed | Gold, Shyllien Crystals, Weaving and Tailoring Materials, Ores, Relics, Gems, Bandit Badges | |
Allies of the Goddess Doll Bag | +17 Max | - | +4 Prot | - | Gold |
+17 Max | - | +4 Prot | - | Gold | |
+17 Max, +17 Min | - | +2 Prot | +9% Combat Exp | Gold, Fynni Gem, Bundles of Flowers, Fresh Grass, Four-Leaf Clovers. | |
+17 Max, +17 Min | - | - | +9% Combat Exp | Gold, Fynni Gems | |
+16 Max, +15 Min | - | +2 Prot | +3% Gathering Speed | Gold, Weaving and Tailoring Materials, Large Nails, Firewood | |
+15 Max, +14 Min | +6 MA | +3 Prot | +6 Music Buff Duration | Gold, Ore, Gems, Tailoring Materials, Weaving/Sheep Shearing, Rare Mineralogy | |
+15 Max, +14 Min | +2 MA | - | +1% Critical Hit Damage | Gold, various ores, gems, Fynni Gems, herbs | |
+15 Max (Both must be summoned to activate) | - | +3 Prot | - | Gold | |
+14 Max, +14 Min | +5 MA | - | +50% Pet Combat Exp | Gold, Hillwen Ore Fragments, cooking ingredients | |
+14 Max, +14 Min | - | +4 Prot | +2% Movement Speed | Gold, Shyllien Crystals, Weaving and Tailoring Materials, Bandit Badges | |
+14 Max, +14 Min | - | +2 Prot | +9% Combat Exp | Gold, Bundles of Flowers, Fresh Grass, Four-Leaf Clovers, Weaving and Tailoring materials | |
+10 Max, +10 Min | +5 MA | +4 | +9 Combat Exp | Gold, Various Ores, Gems, Relics, Bandit Badges | |
+10 Max | - | +1 Prot | - 25 Luck | Gold, Weaving Materials, Tailoring Materials, Herbs Potions, Ores, Ore Fragments, Gems | |
+9 Max, +9 Min | - | +2 Prot | - | Gold, Shyllien Crystals | |
+7 Max, +7 Min | - | - | - | Gold, Various Ores, Gems | |
+7 Max, +6 Min | - | - | - | Gold, Fynni Gems, Herbs | |
- | +4 MA | - | - | Gold, Minerals, Gems | |
+1 Max, +1 Min | +3 MA | - | - | Gold, Hillwen Ore | |
+5 Max | - | - | - | Gold | |
- | - | +2 | +1% Attack Speed | Gold and Equipment |

Homestead Figures
ndrr's Homestead Stat Enhancers Listing
For the most part, just throw whatever figures you have onto your homestead if you have space. It’s free stats. For this list I’ll only focus on Max Damage, Magic Attack, Critical Damage, and other unique effects.
I will also note if a figure is a sequel figure or not. Homestead Figures with the same bonuses normally do not stack their bonuses, with only the highest amount of a specific bonus applying. However, Sequel Figures will stack their bonuses with non-sequel Figures.
The below lists are brief summaries. If you would like more detailed lists, I would recommend the above links.
Physical Damage Figures
Figure | Damage | Other Effects | Sequel Figure (Y/N) |
+2% Bonus Damage | - | ? | |
+1% Bonus Damage, +8 Max | |||
+1% Bonus Damage (Enhancement Required) | +10 HP +6 Will (Enhancement Required) +6 Luck (Enhancement Required) +8 MP (Enhancement Required) +1% Movement Speed (Enhancement Required) | Y | |
+1% Bonus Damage (Final Damage), +5 Max | +7 Str | N | |
+1% Bonus Damage (Final Damage) | +5 Magic Attack, +3% Critical Hit Damage | N | |
Abyssal Orb Figure | +1% Bonus Damage (Final Damage) | +2% Critical Hit Damage, +7 Will | N |
+9 Max | +7% Critical Hit Damage | N | |
+8 Max | +10 HP | N | |
+8 Max | - | N | |
+7 Max | +8 Str | N | |
+7 Max | +4 Will | N | |
+7 Max | - | N | |
+6 Max (Each part of the set provides 3) | +6 Magic Attack (Each set item provides 3) | ? | |
+5 Max | +5 Magic Attack, +2% Critical Hit Damage | N | |
+5 Max | +3 Str | N | |
+5 Max | +3 Str | N | |
+4 Max | +3 Str | N | |
+4 Max | +10 Int | N | |
+4 Max | +3 Dex | N | |
+4 Max | +3 Int | N | |
+4 Max | - | Y | |
+3 Max (Enhancement Required) (Verification on buff amount needed) | +10 SP +6 Dex (Enhancement Required) +8 HP (Enhancement Required) +4 Music Buff Effect (Enhancement Required) +2% Movement Speed (Enhancement Required) | Y | |
+3 Max (Enhancement Required) (Verification on buff amount needed) | +5 Luck +6 Str (Enhancement Required) +8 HP (Enhancement Required) +2 Critical Damage (Enhancement Required) +1% Movement Speed (Enhancement Required) | Y | |
+3 Max | - | Y | |
+3 Max | +3 Will | N | |
+3 Max | +1 Will | N | |
+3 Max | +3 Int | N | |
+3 Max | +5 Luck | N | |
+3 Max | +3 Luck | N | |
+3 Max | +8 Str | N | |
+2 Max | +2 Magic Attack, +2% Critical Hit Damage | Y | |
+1 Max | - | Y |
Magic Damage Figures
Figure | Damage | Other Effects | Sequel Figure (Y/N) |
+8 Magic Attack | +10 MP | N | |
+7 Magic Attack | - | ? | |
+2% Bonus Damage | - | ? | |
+5 Magic Attack, +1% Bonus Damage (Final Damage) | +3% Critical Hit Damage | N | |
+1% Bonus Damage (Final Damage) | +2% Critical Hit Damage, +7 Will | N | |
+6 Magic Attack (Each part of the set provides 3) | +6 Max (Each set item provides 3) | ? | |
+6 Magic Attack | +11 Int | N | |
+6 Magic Attack | +5 Int | Y | |
+5 Magic Attack | +5 Max, +2% Critical Hit Damage | N | |
+5 Magic Attack | +2 Music Buff Effect | N | |
+5 Magic Attack | +1 Music Buff Effect, +3 Int | N | |
+5 Magic Attack | +5 Int, +10 Luck | N | |
+5 Magic Attack | +8 Int, +8 MP | N | |
+5 Magic Attack | - | Y | |
+6 Magic Attack (Enhancement Required) | +10 MP +6 Int (Enhancement Required) +8 SP (Enhancement Required) +2 Critical Damage (Enhancement Required) +1% Movement Speed (Enhancement Required) | Y | |
+3 Magic Attack | +6 Int | N | |
+2 Magic Attack | +2 Max, +2% Critical Hit Damage | Y |
Music Buff Effect Figures
Figure | Music Buff Effect | Other Effects | Sequel Figure (Y/N) |
+4 Music Buff Effect | N | ||
+3 Music Buff Effect | +10 Str | N | |
+3 Music Buff Effect | +10 Int | N | |
+3 Music Buff Effect | - | N | |
+3 Music Buff Effect | - | N | |
+4 Music Buff Effect (Enhancement Required) | +10 SP +6 Dex (Enhancement Required) +8 HP (Enhancement Required) +3 Max (Enhancement Required) +2% Movement Speed (Enhancement Required) | Y | |
+2 Music Buff Effect | +5 Magic Attack | N | |
+2 Music Buff Effect | +13 HP | Y | |
+1 Music Buff Effect | +9 Dex, +9 Int, +10 Luck, +20 MP | ? | |
+1 Music Buff Effect | +5 Magic Attack, +3 Int | N | |
+1 Music Buff Effect | - | Y |
Critical Hit Damage Figures
Figure | Critical Damage | Other Effects | Sequel Figure (Y/N) |
+7% Critical Hit Damage | +9 Max | N | |
+6% Critical Hit Damage | +10 Luck | N | |
+6% Critical Hit Damage | - | N | |
+5% Critical Hit Damage | Water Gathering Point | N | |
+3% Critical Hit Damage | +1% Bonus Damage (Final Damage), +5 Magic Attack | N | |
+3% Critical Hit Damage | +15 HP | Y | |
Abyssal Orb Figure | +2% Critical Hit Damage | +1% Bonus Damage (Final Damage), +7 Will | N |
+3% Critical Hit Damage | +6 Int | Y | |
+2% Critical Hit Damage | +5 Max, +5 Magic Attack | N | |
+2% Critical Hit Damage | +2 Max, +2 Magic Attack | Y | |
+2% Critical Hit Damage | - | Y | |
+2 Critical Damage (Enhancement Required) | +5 Luck +6 Str (Enhancement Required) +8 HP (Enhancement Required) +3 Max (Enhancement Required) +1% Movement Speed (Enhancement Required) | Y | |
+2 Critical Damage (Enhancement Required) | +10 MP +6 Int (Enhancement Required) +8 SP (Enhancement Required) +3 Magic Attack (Enhancement Required) +1% Movement Speed (Enhancement Required) | Y | |
+1% Critical Hit Damage | - | Y |
Critical Limit Figures
Figure | Critical Limit | Other Effects | Sequel Figure (Y/N) |
+1% | N | ||
Pet Houses
Homestead Pet Houses will stack their effects with Homestead Figures. However, if two pet houses provide the same type of stat boost (e.g Stage 4 Cat Tower and Medium Pet Pasture both provide Critical Hit Damage), only the highest bonus will be applied.
There are so few varieties of Pet Houses that I’ll just go over each house individually.
Cloud Cushion


A pet house for small type pets. At stage 4, a pet in the 4th slot provides +1 Music Buff Effect.
Medium Pet Pasture

A pet house for Medium type pets. At stage 4, resting a pet in the right slot provides +1% Critical Hit Damage.
Cat Tower


A pet house for Small Cat type pets (no Ceranus allowed). At stage 4, resting a pet in the 4th slot will provide +2% Critical Hit Damage.
Stable

A pet house for Horse type pets (no Deer allowed). At stage 4, resting a pet in the 4th slot will provide +5 Magic Attack.
Large Pet Pasture

A pet house for Large type pets. At stage 2, resting a pet in the 2nd slot will provide +3 Max Damage.
Totems
Totems can be significant boosts to your damage, though they tend to be exclusively from events. We generally see totems return regularly. Additionally, there are three totem types that can be acquired in game at all times by running specific content.
Generally only one totem of the same type can be activated alongside each other. This means you cannot stack multiple Max Damage Totems together. However, Max Damage totems will stack with Eweca-Ladeca Amulets and Alban Knight Emblems. Additionally, Max Damage Totems will stack with Bonus Damage (Final Damage) totems and the Royal Society Coin.
Totems tend to have randomized stats across a wide range.
Physical Damage Totems
Totem | Effect |
.1-1% Bonus Damage (Final Damage) | |
+1-20 Min, +1-20 Max, Stacks with Max Damage Totems (?) | |
+1-10 Min, +1-10 max, Does not Stack with Royal Society Coin | |
+5-32 Max Damage | |
+1-32 Max Damage | |
Kyle's Fountain Pen/Party Hat Panda Coin/Frosty Goodbye/Third Compass Fragment | +1-28 Max Damage |
+1-26 Max Damage | |
+1-25 Max Damage | |
+1-24 Max Damage |
Magic Attack Totems
Totem | Effect |
.1-1% Bonus Damage (Final Damage) | |
Royal Society Coin (Int/Magic Attack) | +1-20 Magic Attack +1-20 Int |
+1-22 Magic Attack | |
+1-15 Magic Attack | |
Royal Jousting Coin (Int/Magic Attack) | +1-10 Magic Attack +1-10 Int Does not appear to stack with other Magic Attack totems |
Onyx Amulets


Eweca-Ladeca Amulet/Wanderer's Amulet/Detective's Journal Amulet
These totems/Amulets can be used alongside the above totems but not with each other. Additionally, they can roll weapon specific damage boosts such as Shuriken Max Damage. For Max Damage and Magic Attack they range from +1-10 while for weapon specific boosts they range from +1-20.
Alban Knight Emblem

These cannot be used alongside a Commander’s Emblem.
Alban Knight Emblems can be acquired by running the Alban Knight Training behind Nerys’ Blacksmith shop. The key boosts to keep an eye out for are Maximum Damage, Critical Hit Damage, and Magic Attack. The remaining bonuses are somewhat lackluster.
At level 5, you can gain 25 Maximum Damage or 5% critical hit damage from Runes of Sharpness, and 25 Magic Attack from Runes of Mana. However, attempting to add more than 3 categories or raising the level of any category beyond 3 may destroy the emblem.
You raise the level of your emblem by “synthesizing” them with other Alban Knight emblems. This does not mean you use the Synthesis skill, put that Dry Oven down. By right clicking the Emblem, you will see an option labeled as “Synthesis.” This will allow you to use another Emblem to combine their stats or to raise the level of a like stat by 1. You cannot Synthesize Alban Knight Emblems with Commander Emblems.
Commander’s Emblem

These cannot be used alongside an Alban Knight Emblem.
Commander Emblems can be acquired by killing Mimics in the mission Awakened Abyssal Lord (Kraken) or by reaching the boss room in Kraken (Rune of Command Box). The two key Runes you will be likely to use are Fateweaver and Phantasmal Sight. Tree of Renewal is ok but the remaining ones are lackluster.
At level 5, you can gain +10 seconds to your Fateweaver casts and 2% more bonus damage to Phantasmal Sight. As with Alban Knight Emblems, boosting past level 3 will destroy your emblem if you fail to synthesize them successfully and attempting to add more than 3 boosts may also destroy your emblem.
You raise the level of your emblem by “synthesizing” them with other Commander emblems. This does not mean you use the Synthesis skill, I told you to put that Dry Oven down. By right clicking the Emblem, you will see an option labeled as “Synthesis.” This will allow you to use another Emblem to combine their stats or to raise the level of a like stat by 1. You cannot Synthesize Alban Knight Emblems with Commander Emblems.
Support Accessories
While Accessories are primarily used as a “vehicle” for enchants and reforges, some accessories also contain special effects. These can range from revealing Dungeon Maps, revealing correct orbs in dungeons/missions, providing unique stat boosts, or even having unique skills (of questionable use).
There are a few general types of support puppet categories, so to conserve space (and for my own sanity), I’ll be classifying the support puppets that are merely reskins as follows
Ancient Support Puppets are flying puppets with Dungeon Support Effects (Map Reveal, Orb Reveal, Magic Shields), but do not have a daily usage timer.
Support Puppets are flying puppets with Dungeon Support Effects but do have a daily usage timer.
Any flying puppet without the Ancient Support naming convention will be named individually.
Generally Ancient Support Puppets and Support Puppets are Gacha or Non-Recurring Event exclusive. Some are Crossover Event and Gacha Exclusive. I will list out Crossover exclusives and Non-Recurring Event Exclusives as these have the lowest chance of ever returning.
I don’t have a Commerce Puppet, so I’m not sure how it was affected after the Commerce Update. If you have one and can confirm that you can still enable them, I would be interested in knowing.
Hero Badges are technically not Gacha items, but are Cash Shop items nonetheless.
Puppet Type | Enchantment | Support Effects | ||||||
Enchant | Reforge | Map Reveal | Orb Reveal | Magic Shields | Skill/Special Stats | Commerce Puppet* | Infinite Duration | |
Ancient Iris Plus Support Puppet/Ancient Lapin Plus Support Puppet | ✔ | ✔ | ✔ | ✔ | ✔ | Automatic Potion Use | ✘ | ✔ |
✔ | ✔ | ✔ | ✔ | ✔ | ✘ | ✘ | ✔ | |
✔ | ✔ | ✔ | ✔ | ✔ | Automatic Potion Use | ✘ | ✘ | |
✔ | ✔ | ✔ | ✔ | ✔ | ✘ | ✘ | ✘ | |
✘ | ✘ | ✘ | ✘ | ✘ | Revives the user up to the listed amount of times before disappearing. | ✘ | N/A | |
✔ | ✔ | ✘ | ✘ | ✘ | Revives the user up to the listed amount of times. Does not disappear after revives are consumed | ✘ | N/A | |
✔ | ✔ | ✘ | ✘ | ✘ | Revives the user up to the listed amount of times. Does not disappear after revives are consumed | ✘ | N/A | |
✔ | ✔ | ✔ | ✔ | ✔ | Archer Strike Action | ✔ | ✔ | |
✔ | ✘ | ✔ | ✔ | ✔ | Yui Strike Action | ✔ | ✔ | |
✔ | ✔ | ✔ | ✔ | ✔ | Illya Strike Action | ✔ | ✔ | |
✔ | ✔ | ✔ | ✘ | ✔ | ✘ | ✘ | ✘ | |
✔ | ✔ | ✔ | ✘ | ✔ | Bolt Out of the Blue | ✘ | ✘ | |
✔ | ✔ | ✔ | ✔ | ✔ | Saber Strike Action | ✔ | ✔ | |
✔ | ✔ | ✔ | ✔ | ✔ | Rin Strike Action | ✔ | ✔ | |
✔ | ✔ | ✔ | ✔ | ✔ | ✘ | ✘ | ✘ | |
✔ | ✔ | ✔ | ✔ | ✔ | ✘ | ✘ | ✔ | |
✔ | ✔ | ✔ | ✔ | ✔ | Great Spirit Puck’s Support Attack | ✘ | ✘ | |
✔ | ✔ | ✘ | ✘ | ✘ | Increases Training EXP for the relevant Talents by 50% | ✘ | N/A | |
✔ | ✔ | ✘ | ✘ | ✘ | Can Summon Baltane Squires up to 3 times a day. | ✘ | N/A | |
✔ | ✔ | ✘ | ✘ | ✘ | +0-5 Defense | ✘ | N/A | |
✔ | ✔ | ✘ | ✘ | ✘ | +0-5 Defense +0-3 Protection | ✘ | N/A | |
✔ | ✔ | ✘ | ✘ | ✘ | +1-15 Luck | ✘ | N/A | |
✔ | ✔ | ✘ | ✘ | ✘ | +1-15 Luck +0-1 Defense | ✘ | N/A | |
✔ | ✔ | ✘ | ✘ | ✘ | +0-10 Str +0-10 Dex +0-10 Int +0-10 Will | ✘ | N/A | |
✔ | ✔ | ✘ | ✘ | ✘ | +0-10 Str +0-10 Dex +0-10 Int +0-10 Will +0-1 Protection | ✘ | N/A | |
✔ | ✔ | ✘ | ✘ | ✘ | +1 Piercing | ✘ | N/A | |
Techniques Overview
Techniques - Techs/Cards
Acquired by completing G23, these “Playing Cards” are a collection of passive and active abilities that can boost your combat efficiency and survivability. While technically a “skill,” they fall under the purview of this guide because your Card loadouts can be customized, they are essential to Min-Maxing, and newer content is being balanced around the use of them. Knowledge of which Techniques are worth your time and slots is important.
Active Techniques have their cooldowns tick down as soon as the Technique is used. Some Passive Techniques are always active while others activate at a set rate.
For the purposes of this guide, Techniques are assumed to be at level 10. If you would like rank specific information, check out the wiki link under each Technique section.
Mandatory
These (well this) Technique is required on all of your Technique Card loadouts except during certain exceptions.

Redoubled Offensive (Reaper)
Redoubled Offensive - Passive - 5%
Do not use this during Field Raids as you do not gain contribution for Redoubled Offensive and in the case of Avalon Raids, Reaper can break the raid for everyone if Reaper lands the Final Blow. I’m not sure this still applies.
Deals 200% True Damage based on the damage of the attack that proc’d Redoubled Offensive at a 5% rate. Having less than 10% of your max HP will boost the activation rate to 7.5%. This damage instance cannot score critical hits and does not inflict wounds.
Using a Geas Devastation Set for Redoubled Offensive (Weak) will boost the activation rate to 5.5% (8.25%).
Using an Ultimate Geas Devastation Set for Redoubled Offensive (Strong) will boost the activation rate to 6% (9%).
Using both (as they are different set bonuses) will boost the activation rate to 6.6% (9.9%) ? (Needs Verification) The description on Redoubled Set Effects state the higher effect will apply, so they do not stack.
What is True Damage?
True Damage is simply a term to refer to damage that is not reduced by defensive stats. Can also be called Pure Damage.
Usage Situation
Everywhere except for Field Raids. This is basically free damage and an extra critical hit that can trigger off of your critical hits. Despite the low activation rate, it’s a massive boost to your damage.
Reiterating - Don’t use this during Field Raids though as you do not gain contribution for Redoubled Offensive and in the case of Avalon Raids, Reaper can break the raid for everyone. I’m not sure this still applies
Offensive


Fateweaver (FW)
Fateweaver - Active - 1-3 Phantasmal Remnants
Input with the 1-5 keys. Lasts 30 seconds without a Commander Emblem built for Fateweaver. Fateweaver will remain active if you switch to another Technique Loadout.
Utilize combo 5231 on yourself or your allies for the highest Damage/Magic Attack boost with some defensive boosts, attack speed/magic charge speed /alchemy charge speed/movement speed boosts, and lifesteal. Will not stack with Exploit Weakness (EW) or Relentless Assault (RA). If you cast Fateweaver on yourself with EW or RA active, EW and RA will end prematurely. If an ally casts Fateweaver on you with EW or RA active, EW and RA will not be dissipated and you will not receive the Aspect of Might or Swiftness buffs. Aspect of Reversal will allow you to lifesteal up to 100 times.
Utilize sequence 25 on an enemy to decrease enemy protection and to cause ally attacks to inflict 3% more damage up to 100 times.
Utilize combo 42 or 3152 on an enemy to inflict an increased Protection debuff.
Use Aspect of Focus on yourself to drop aggression for 3 seconds (30 second reapply time). Can be used in conjunction with Shadow Cloak and Crisis Escape to loop Crisis Escape and Shadow Cloak
Use Aspect of Focus on an enemy to force them to lose aggression for 3 seconds. Enemies can only be afflicted by the Aspect of Focus up to 3 times.
What’s the difference between Combos and Sequences?
A combo means an effect may be boosted or decreased, providing a more specialized buff. 5231 for instance boosts the Aspect of Might at the cost of reducing the buff from Aspect of Fortification and Aspect of Swiftness.
On the other hand, the 25 sequence is not associated with a combo and receives no boosts or reductions.
Usage Situation
This is easily my most used Active Technique, though you’ll likely use 5231 the most. It’s got so many useful tools on a 0 second cooldown. You do need to pick up Phantasmal Remnants to fuel Fateweaver. Having a Far Darrig Doll Bag can help with passively picking up Phantasmal Remnants.
FW is strictly weaker than Exploit Weakness and Relentless Assault, but those have a long cooldown and are better suited for bossing.
I highly recommend making a Fateweaver and Phantasmal Sight Commander Emblem.

Phantasmal Sight (PS/Sight)
Phantasmal Sight - Active - 5 Minute Cooldown
Activates the Phantasmal Sight status effect for 2 minutes. Every 10 seconds, starting the moment Phantasmal Sight is activated, releases a pulse that affects all enemies and gathering points within 700 Units of the player. Enemies and gathering points must be hit by the pulse to be affected by Phantasmal Sight. Affected enemies and gathering points will be indicated by a red light above monsters, and a varying colored light above gathering points
Inflicts a 3% Damage Amplification on enemies indicated by a Red Effect. The Commander Emblem can increase the Damage Amplification by 2% for a total of 5%. The Damage Amplification stacks with other Damage Amplification sources (e.g Death Mark), but not with other Phantasmal Sights. Depending on enemy Max HP, Sighted enemies may drop a Phantasmal Remnant. Only 30 Phantasmal Remnants can drop per use of Phantasmal Sight.
Phantasmal Sight will also benefit production. Additionally some pets can be affected by Phantasmal Sight (White Sheep namely)
A Yellow Effect occurs at a 10% rate and will guarantee a Huge Lucky Gather. Stacking gathering speed can allow you to get multiple Huge Lucky Gathers in a row.
A Blue Effect will allow the gathering of a resource, even if the gathering point is depleted. This can be used to gather extra materials from depleted homestead props that only reset when the server resets each day (7:00 AM PST) and dungeon gathering points. Some Gathering Points such as Alpacas, Fractal Wells, and Gold Mushrooms will not allow for the unlimited gathering of the resource.
A Purple Effect will guarantee a 100% gathering success rate. Limited usefulness.
A Green Effect will increase the gathering speed at the affected Gathering Point. Ignore it.
Some items can only be crafted while Phantasmal Sight is active. The prime examples of this are Revenant/Demolition, Perseus/Ruination equipment, and Comprehensive Recovery Potions.
Phantasmal Sight can reveal Artifacts from L-rod Exploration, albeit less efficiently than Demigod.
Usage Situation
With 3 minutes of effective downtime and 2 minutes of up time, you can loop this Technique with 3 team members, and have only 1 min of down time with 2 team members. Against bosses and large waves of high HP mooks, it is especially valuable to coordinate the use of Phantasmal Sight.
I highly recommend making a Fateweaver and Phantasmal Sight Commander Emblem.


Time Shift (TS)
Time Shift - Active - 15 Minute Cooldown
For 40 seconds, grants 5 (6 with the Sandglass Enchant) charges of Time Shift. Each Charge allows you to ignore the cooldown of a skill. Time Shift Charges are consumed upon ignoring a skill cooldown and are not refunded when canceling the loaded skill.
As an example, you cast Sakura Abyss then use Time Shift. Bachram goes off right after you finish the Sakura Abyss Animation but before you load another Sakura Abyss. At this point you would still have 5 charges of Time Shift as no cooldowns were ignored by the use of Time Shift. The next 5 uses of Sakura Abyss would each consume a charge of Time Shift once loading begins. Canceling Sakura Abyss does not refund charges to Time Shift.
Usage Situation
Despite the long cooldown, this is one of the best Techniques in the game. It allows for the spamming of huge burst damage nukes such as Sakura Abyss/Meteor Strike or extremely fast single target burst damage skills like Charging Strike or Bullet Storm.

Exploit Weakness (EW)
Exploit Weakness - Active - 10 Minute Cooldown - Requires a Step 5 Special Upgraded Weapon
Increases damage by 15% and applies +1 Piercing Level for 3 minutes.
Exploit Weakness will not stack with Fateweaver’s Aspect of Might buff. Attempting to buff yourself with Fateweaver’s Aspect of Might while Exploit Weakness is active will prematurely end Exploit Weakness. If an ally tries to buff you with FW’s Aspect of Might, Aspect of Might will not be applied.
Usage Situation
A good Technique with 3 mins of up time and 7 mins of down time. Exploit Weakness a bit stronger than the 5231 Fateweaver buff and 1 Piercing, but also doesn’t stack with Aspect of Might. I primarily use EW for bossing.
Due to Power Pot/Bone Chip interactions with Fateweaver, the damage difference is a bit smaller than advertised.


Relentless Assault (RA)
Relentless Assault - Active - 10 Minute Cooldown
Reduces Attack Delay by 20%. Reduces the normal attack speed cap from 400ms to 300ms. Increases Archery Aim speed by 200% (does not stack with Vision of Ladeca). Increases Magic cast speed by 7%. Increases Alchemy load speed by 7%.
Relentless Assault will not stack with Fateweaver’s Aspect of Swiftness buff. Attempting to buff yourself with Fateweaver’s Aspect of Swiftness while Relentless Assault is active will prematurely end Relentless Assault. If an ally attempts to buff you with FW’s Aspect of Swiftness, Aspect of Swiftness will not be applied.
Usage Situation
The attack speed is nice, but the real prize is the reduction of the speed cap. Provided you aren’t too laggy, this is a large boost to Final Hit DPS, Fighter normal attacks for critical hit combo resetting, Brionac Protection shredding/Peeling, Dorcha Snatch speed, Way of the Gun speed, etc. You get the point. I primarily use this for Bossing, but not for Brionac Peeling usually. I’m an elf Fighter and if I’m peeling it’s because we didn’t bring enough hummus. B/Amphibia video of the Toads saying “Hummus” instead of “Human.”

Pragarah
Pragarah - Active - 10 Minute Cooldown, Effective 14 Minute Cooldown Without Demigod CD Gear
- Requires an Erg 25 Weapon
Reduces the Magic Defense and Protection of enemies hit while active by 3 per hit, similar to an Awakened Brionac. Requires Awakening of Light to be active to use. Lasts 3 minutes. Does not affect certain bosses. Certain bosses possess resistance to Brionac and Pragarah protection shredding.
Usage Situation
Primarily a bossing skill due to the limited duration and long cooldown, further constrained by the requirement to have Awakening of Light (Demigod) active though Pragarah will remain active if Awakening deactivates.
However, it’s very good at Magic Protection Shredding. Unlike the Brionac which requires a melee hit to reduce protection, Pragarah will reduce MProt with any attack making Dual Guns and High Hit-Count spells like Thunder exceptionally fast at peeling enemy Magic Protection.
In Crom Bas, you may want to have your team rotate Pragarah for dungeoning, and especially against the Melci Diafol in the boss room. Enemies have a very high amount of magic protection and mooks can be peeled by Pragarah. In general if enemies have high m-prot though, you can consider using Pragarah.
From preliminary testing, it takes about 50 hits to go from a 100 damage per tic Flame Burst to a 1700 damage per tic Flame Burst (non crit). This test was conducted on room one and they were more or less already dead after that. I’d recommend Death Mark -> Thunder or Death Mark -> Flame Burst. This will also peel through Frozen Cari Circles and will allow you to deal damage to overlapping Cari Circles.
You may want a Goblet of Truth and an Awakening of Light Cooldown Hat to decrease the down time on Pragarah.

Elemental Attunement
Elemental Attunement - Passive - Variable Activation Rate (?) - Requires an Elemental Enchanted Weapon
Do not use Fire Elemental Attunement during Field Raids though as you do not gain contribution for Bleed Damage and in the case of Avalon Raids, Bleed can break the raid for everyone if the Bleed effect lands the Final Blow. I’m not sure this still applies.
Fire Inflicts a 100% weapon damage bleed, dealing True Damage Over Time (DoT) bypassing passive defenses. May not bypass invulnerability. DoT is calculated immediately on being inflicted.
Ice Inflicts a 45% speed reduction for 12 (?) seconds
Lightning Grants the player a 50% reduction in knockdown gauge damage, increasing the number of hits required to knock an enemy down. Does not affect most skills as they either force knockdown or do not contribute to the Knockdown Gauge.
Usage Situation
A popular filler Technique for either extra damage, offensive utility, or defensive utility.
Fire is good for finishing off Deadly enemies or getting some extra damage due to the high proc rate. But turn this off for Field Raids because like Reaper, you don’t get contribution and it can break Avalon Raids.
Ice is nice on AoE heavy or high Hit-Count talents for crowd control such as Kunai Storm and Thunder.
Lightning is good for Fighter Normal Attacks for Critical Hit Combo Resets, Final Hit, and Dorcha Snatch as you can get more attacks in before you knock the enemy down.
Reiterating - Do not use Fire Elemental Attunement during Field Raids though as you do not gain contribution for Bleed Damage and in the case of Avalon Raids, Bleed can break the raid for everyone if the Bleed effect lands the Final Blow. I’m not sure this still applies.


Continuous Awakening
Continuous Awakening - Passive - 50% activation rate upon casting Spirit Awakening
Grants 50% chance to allow a Spirit Weapon Awakening to be used again.
Usage Situation
I guess you could use it for a chance at some extra burst damage off of the Spirit Weapon Awakening.
Spirit Awakenings are strong and worth using, but I’m not convinced this is worth dedicating a card slot to. Still, you can swap it in for the Awakening, then swap it out right afterwards.


Unified Might
Unified Might - Active - 15 Minute Cooldown - 3 Phantasmal Amalgams
Grants the Awakened status to party members. Awakened party members will deal 15% more damage. 10% of all Awakened party member’s damage will be stored in Unified Might, capped at 50000 damage.

Unified Might deals 10000 + (10 * Accumulated Damage) as Magic Damage in a 500 unit radius around the target zone, affected by Magic Defense and Protection.
Usage Situation
See here to read me explain why Unified Might is so bad.
But assuming you didn’t click the link.
Unified Might deals Magic Damage based on how strong your party is. If your party can deal 500000 damage in 10 seconds, then Unified Might before protection will deal an impressive 510000 damage. Which is reduced by Magic Defense, then Magic Protection, then Mana Deflector which is always active. Not as impressive anymore and also everything already died.
If you’re in a party with people who can deal 500k damage in 10 seconds, you probably would have been better off contributing DPS or Crowd Control instead of immobilizing yourself leaving yourself open to attack.
Even the 15% damage boost isn’t that useful. I don’t think I have even seen it used in Hasidim because it’s just too finicky to use on top of all of the other debuffs that need to be applied.
Heck I wouldn’t even use it in Feth Fiada’s Zombie Hallway. Either too many things could go wrong, eating the cooldown of Unified Might, or your efforts would be better served with Damage Amplification debuffs such as Support Shot.
Defensive

Dampen Shock
Dampen Shock - Passive - 150 Base Defense, 90 Base Magic Defense
Increases Defense by 315 and Magic Defense by 150.
Usage Situation
It’s good to have on most Tech Loadouts. Dampen Shock is a large boost to your survivability and can ensure you can take an extra hit. However, you do need to have a base Defense of 150 and base Magic Defense of 90. Generally you’ll be able to hit this unlinked and naked/wearing clothing at around a 25k total at level 200 (for elves a 30k total at level 200 due to the lower strength from skills). Upgraded armor (or armor with high base stats such as Forest Ranger Armor) makes this threshold significantly easier to hit since armor stats count towards base stats.
If you’re a mage or you are using a Mana Shield Damage Reduction Glove, you probably have Mana Shield always active. You won’t need Dampen Shock in most situations because Mana Shield will be taking the brunt of the incoming damage and Mana Shield is not affected by defensive stats currently.
Vital Surge Skill Icon.png

Vital Surge (Vital)
Vital Surge - Active - 10 Minute Cooldown
Fully heals you and grants 10000 Over-Health for 3 minutes. If you are afflicted by Poison Attack or Sulfur Poisoning, there is a chance that the cooldown of Vital Surge will be reset.
What is Over-Health?
This is HP that cannot be healed, but takes damage before your main health bar takes damage. Once used, you cannot regenerate it during that instance of Vital Surge. This is not to be confused with Over-Shields that you gain from using Shield of Trust while in Nascent Divinity.
Usage Situation
Use either preemptively to a scenario where you’ll be taking a lot of damage or in response to taking a large amount of damage. You can activate this Technique while in Hit-Stun and Knockdown which can grant you a chance to survive. If you have Mana Shield active, Mana Shield will deplete before Vital Surge does.

Iron Will (IW)
Iron Will - Active - 10 Minute Cooldown
Grants you Advanced Heavy Stander (AHS) and hit-stun immunity for 3 minutes. Will not prevent you from being frozen by Ice Spear or Frozen Blast
What is Advanced Heavy Stander?
Advanced Heavy Stander (AHS) is a state where a player or an enemy is immune to knockdown and usually Hit-Stun. Most AHS mobs have some form of Passive Defense.
Usage Situation
Generally use preemptively in a scenario where you can afford to tank a few hits and you need to keep sustained DPS up. Examples include Cethlenn’s Scythe summon, Kraken Rex’s Soaring Legs, the Revived Illusion Gaeta, and Balor’s Lava pits. There are other use cases.
Be aware that this can be a double edged sword against enemies with a high Hit-Count or a massive swarm of un-crowd-controled enemies as your immunity to knockdown means they can get more hits on you without knockdown invincibility frames triggering. You especially do not want to use this against the Feth Fiada Gaeta without Mana Shield as the Gaeta’s laser attacks deal continuous contact damage, meaning you can be killed very quickly. This is something you should keep in mind with Shield of Trust as well.
Defiance
Defiance - Passive - 20% Activation Rate
Upon taking lethal damage, has a 20% chance to prevent you from being incapacited, knocks enemies back, and fully heals you. Activation chance is boosted by the Geas Edge and Ultimate Geas Edge armors.
Usage Situation
You may consider pairing this with Mana Shield if you have 480+ Magic Attack with a Magic Weapon or in situations where the damage output is so extreme any basic hit or skill will likely be killed very quickly when taking damage. Defiance is a very good utility. The main places I’d recommend are Zebach, Feth Fiada’s Gaetas if you lack an Erg 50 Puppeteer, and Seven Nightmares due to the high damage-high spawn count of enemies, but you can also slot Defiance in as a substitute for Vital Surge if you want to preserve Vital for a boss fight or if Vital is on cooldown.
Blunting Field
Blunting Field - Passive - 5 Base Protection, 40 Base Magic Protection
Increases your Protection by 15 and your Magic Protection by 58.
Usage Situation
Due to the diminishing returns of the Protection stat, this has less of an impact the better the armor you wear and if you have other temporary protection buffs such as Caters and Wind Guard. However, this is still a good choice to pair with Dampen Shock as the damage reduction can be noticeable. If you are unarmored you may consider this to help mitigate damage.

Tenacious Taunt
Tenacious Taunt - Active - 1 Phantasmal Remnant
Redirects the aggression of up to 15 enemies within the Taunt’s range to the targeted individual for 25 seconds. Can be canceled by pressing a button that appears over your head.
Usage Situation
This is one of my favorite Techs despite the uncomfortably long load time and short duration. I almost always use it when I’m running Crom Bas. The aggression redirect when applied to a Divine Linked pet prevents enemies from retaliating against your attacks. It also does a great job of keeping enemies set up for Crowd Control and AoE group up attacks.
If you are a giant, use this alongside Taunt to gain 30% more HP and 10% more Protection/Magic Protection.
It can be used for luring enemies to your pet and it does have use against Subject Theta. If you are bringing a Tank (Guardian Dynamis), the Tank in Subject Theta should keep this active at all times to redirect Theta’s normal attacks to them.

Zone of Renewal
Zone of Renewal - Active - 3 Phantasmal Remnants
Creates a healing zone restoring 2% of your Max HP, MP, SP, and Wounds per second for 25 seconds for a total of a 50% heal. Will cleanse Poison Attack, and Sulfur Poisoning after you are healed 5 times by the tree. Multiple Zones do not stack, with the strongest effect applying.
Usage Situation
Generally this won’t be used on active Offensive Technique sets, but it can find use in 7N where you lack access to pets in a high spawn wide agro range environment. Combining this with Glyph usage can mitigate the need for Recovery Potions.
Incorrect in-Game Description
The game states you use 3 Phantasmal Amalgams when they actually consume Phantasmal Remnants. Currently Amalgams are only used for Unified Might.

S.H.I.E.L.D
Shield - Active - 5 Minute Cooldown
For 10 seconds, provides up to 520% of the player’s max HP as Over-Shield. Can protect up to 5 players within 900 units.
Usage Situation
This Technique is pretty bad. If the cooldown were shorter (1-2 minutes at most), the duration longer, and health higher (25-30 Seconds and 1000%) it could feasibly be useful.
As is it fails to even challenge Vital Suge’s spot on the throne of Over-Health by having a pathetic 10 second duration.
It then fails to be comparable to Nascent Divinity’s Shield of Trust Overshield which provides 200% of the player’s max health as Over-Shields on a 20 second cooldown while in Nascent Divinity (36 minutes after Nascent Ends).

Protective Touch
Protective Touch - Active - Spirit Weapon Awakening Status

Increases Defense by 84, Protection by 5, Magic Defense by 39, Magic Protection by 22. Lasts for the duration of the Spirit Awakening Status effect.
Usage Situation
It’s not great, but you could use it if you were trying to stack defensive stats.
It has an effective 15 minute cooldown without the Awakening Ultimate which pushes it down to 7 minutes which also doesn’t solve anything. You get 5 charges but you have to be actively in combat with the Spirit equipped in order to charge the Awakening. Finally, if you have 5 Awakening Buff Spirit to reduce the charging down time, you’re sacrificing the greater utility the Attack or Exclusive trees have.
There are better options to out there.
Recommended Combinations
These are combinations that I use and have been suggested by other players. If you have a suggestion, let me know along with your reasoning.
Denotes a Free Slot that you can use based on your preferences.

I have placed the most important Techniques for a specific Loadout on the left side while more flexible Technique selections are on the right side.
Burst Damage
My Loadout:


Possible Alterations:

This Loadout is built around Time Shift in order to quickly deal a high amount of Burst Damage.
Redoubled Offensive is mandatory on all non Field Raid loadouts.
Use Either Exploit Weakness or Fateweaver to boost your damage, though I use Fateweaver then switch to my Burst Damage Card set if I’m trying to preserve Exploit Weakness.
Phantasmal Sight boosts the damage of our Burst Damage skill.
The Final Slot can be flexible based on your preferences. I personally use Dampen Shock so I don’t get surprise one shot while using TS Sakura or TS Charging Strike. You may also consider Defiance so you can get a chance to avoid wasting Time Shift if you eat a surprise OHKO.
Offensive Mobbing
My Loadout:

Possible Alterations:
This Loadout is built around progressing through a mission with an offensive focus on Technique selection.
Redoubled Offensive is mandatory on all non Field Raid loadouts.
Fateweaver is picked because it serves as a consistent damage boosting Technique while progressing through the mission. It also provides some defensive stats, lifesteal, and aggression disruption making it a versatile utility.
Phantasmal Sight boosts the damage we deal against waves of enemies. Use liberally due to the low cooldown, but try to coordinate with team members to loop the effect.
Tenacious Taunt is an excellent way to redirect aggression when paired with a Divine Linked pet. It effectively prevents enemies from retaliating against you, allowing you to act more aggressively.
The Final Slot can be flexible based on your preferences. I personally use Dampen Shock so I don’t get surprise one shot.
I previously Elemental Attunement as my 4th slot for the utility Lightning Elementals provide for the extra damage Fire’s bleed deals. But I’ve since switched it out for Tenacious Taunt as the aggression redirection is extremely useful (and allows me to avoid pet summon spam).
Defensive Mobbing
My Loadout:


Possible Alterations:

This Loadout is built around progressing through a mission with a defensive focus on Technique selection.
Redoubled Offensive is mandatory on all non Field Raid loadouts.
Fateweaver is picked because it serves as a consistent damage boosting Technique while progressing through the mission. It also provides some defensive stats, lifesteal, and aggression disruption.
I use Defiance since I usually end up saving my Vital Surge for use in key moments rather than as a panic button. Though only a 20% activation chance, it’s a better defensive use for me than Vital since I have noticed I don't use Vital in a reactionary manner most of the time. However, Vital Suge would still be a good technique for a defensive loadout as it can serve as an emergency heal with a relatively low down-time. You can substitute this slot for a more damaging Technique like Phantasmal Sight.
Dampen Shock is used to boost our ability to tank.
Tenacious Taunt is an excellent way to redirect aggression when paired with a Divine Linked pet. It effectively prevents enemies from retaliating against you, allowing you to act more aggressively. I don’t use it on this set, but I would consider it.
You can use Zone of Renewal to help keep yourself topped off and above the 50% Health Gate, but it does have a long cast time. You can also use Blunting Field (my preference now) to boost your ability to tank. Alternatively you can switch it or Vital Surge out for a more damage boosting Technique like Phantasmal Sight, though I use this Technique slot for when Phantasmal Sight is on Cooldown.
Knockdown Immunity
My Loadout:

Possible Alterations:

This Loadout is built around Iron Will’s knockdown immunity for high damage situations that are difficult to fight around such as the Revived Illusion Gaeta, Balor’s lava pits, or Cethlenn’s Scythe phase. Despite having 3/5 defensive Techniques, this should be treated as a very Offensive Focused Technique loadout as you have a limited amount of time to make use of Knockdown Immunity.
Redoubled Offensive is mandatory on all non Field Raid loadouts.
Fateweaver or Phantasmal Sight is picked because it serves as a consistent damage boosting Technique while progressing through the mission. Coordinate with your team to determine who will be buffing with Fateweaver and who will be using Phantasmal Sight.
Fateweaver also provides some defensive stats, lifesteal, and aggression disruption. Aggression Disruption can especially help deal with a large quantity of attacking enemies. The person in charge of FW may want to keep this in mind in order to alleviate incoming damage.
Exploit Weakness is not a bad choice to take instead of Fateweaver as you would not need to worry as much about rebuffing. The duration of Exploit Weakness lines up with Iron Will and Vital Surge.
Vital Surge temporarily boosts our ability to tank and helps manage the additional attacks we will be receiving due to Iron Will. You may also consider the use of Defiance if Vital Surge is on Cooldown or is completely consumed.
Dampen Shock is used to boost our ability to tank. Because Vital Surge is affected by Dampen Shock, I’d recommend keeping Dampen Shock on.
Priority Targeting
My Loadout:

Possible Alterations:


This Loadout is built around Exploit Weakness for fighting a Boss Type Enemy or a large group of priority targets. While I have a fairly mixed Offensive-Defensive set of techniques, you may want to focus more on Offense or Defense depending on how much damage you are taking and how quickly you want to end the fight.
Say it with me now: Redoubled Offensive is mandatory on all non Field Raid loadouts.
Relentless Assault is useful for Human Final Hitters and Fighters, but it can be replaced with a Defensive Technique like Defiance and Blunting Field, or an Offensive Technique like Phantasmal Sight. Replace as you see fit.
Vital Surge is used as a HP buffer while dealing damage, but it can be replaced with other Defensive and Offensive Techniques as you see fit.
Dampen Shock is used to help manage incoming damage while dealing damage but it can be replaced with other Offensive and Defensive Techniques as you see fit.
It doesn’t have to go on this loadout specifically, but Mages and Alchemists may want to have a Tech set that has Pragarah on it. Since Pragarah is generally a bossing Tech, you may want to slot it in whichever setup you plan to fight bosses with or on a separate setup which you can switch to for peeling. I also have Tenacious Taunt on my Pragarah set to help prevent enemy groups from spreading out or targeting me.
Field Raid
Possible Loadout:
Possible Alterations:
Repeat after me: I will not use Redoubled Offensive or Fire Elemental Attunement during Field Raids that have a damage based contribution system. This might no longer apply, Redoubled away unless it somehow breaks the new raids. Even so, consider keeping it off to avoid wasting contribution.
Pragarah can be useful if there are not a lot of people and you are a mage as field bosses can be peeled. However Field Bosses will recover from Peeling.
Fateweaver and Phantasmal Sight boost your damage enabling you to earn more contribution per hit.
Vital Surge, Zone of Renewal, Defiance (to a lesser extent) can serve as healing if you take too much damage during the Raid. Impending Death is a high damage DoT that kills, so healing techs won’t really save you.
Exploit Weakness and Relentless Assault are usually good for a singular fight against boss type enemies, which Field Raids are.
Iron Will can help with gaining contribution due to AoE knockdown attacks
Time Shift and Continuous Awakening can be useful for some quick burst damage in the raid.
Dampen Shock and Blunting Field can mitigate some damage, though you may want to focus more on damage due to the nature of Contribution.
Stardust Overview
The Stardust is an upgradable piece of equipment to boost your damage or survivability. They appear in the form of small Orbiters behind the player character, though the Null form cosmetic will hide them. You must have a total level of 3k in order to obtain a Stardust.
The Stardust does not have durability and cannot break, though it can be blessed. It also cannot be enchanted. Stardusts can be upgraded up to level 15. Stardust support effects can be upgraded up to level 10. As the main Stardust ranks up, you will gain more Orbiters. At level 15, you will have 5 Orbiters.
As you upgrade your Stardust, you will be required to sacrifice certain items acquired from the Royal Society Sponsorship Quests. Materials are consumed regardless if you pass or fail, though only support effects have a chance to fail. The main Stardust will always succeed in upgrading. Materials for Stardust do not consume inventory space and instead are tracked in the Stardust UI. You can store up to 1000 of each material.
You will also have to pay a gold fee while upgrading. The gold costs increase the higher the level of the Stardust with costs on the main stardust as high as 1m at level 9-10 and 5m at level 14-15.
Stardusts
Will update for percentages later.
Blast
Passive Stardust
Initially unlocked
Deals additional damage at a low rate for single target skills based on skill damage that triggers Blast.
Sub Effects
Smart Blast (Stardust Rank 6): Increases the activation rate of Blast
Power Blast (Stardust Rank 11): Increases the damage of Blaster
Flare
Passive Stardust
Unlocks at Stardust Rank 2
Deals additional damage at a low rate for AoE skills based on the skill damage.
Sub Effects
Smart Flare (Rank 7): Increases the activation rate of Flare
Power Flare (Rank 12): Increases the damage of Flare
Blow
Active Stardust - Hidden Tab
Unlocks at Stardust Rank 3
Deals AoE damage and knocks enemies back. Has a cooldown. May trigger Veil,
Smart Blow (Stardust Rank 8): Reduces Cooldown of Blow and increases the chance Veil will activate
Power Blow (Stardust Rank 13): Increases the damage of Blow and increases the knockback range
Chaser
Active Stardust - Hidden Tab
Unlocks at Main Stardust lvl 4
Deals low AoE damage and inflicts stun when attacking an enemy for the duration of the Orbiter. Has a cooldown. Target count is based on the number of Stardusts you possess (high rank = more?)
Smart Chaser (Stardust Rank 9): Increases the damage of Chaser and reduces the cooldown
Power Chaser (Stardust Rank 14): Increases the damage of Chaser’s final hit and increases the AoE radius
Veil
Passive Stardust
Unlocks at Main Stardust lvl 5
Reduces incoming damage for a short duration and gain damage reflection at a set rate.
Smart Veil (Stardust Rank 10): Increases the duration of Veil and increases the reflect damage
Power Veil (Stardust Rank 15): Increase activation rate of Veil and increase the damage reduction of Veil
Stardust Quests
View a brief summary over at my Content Guide or the wiki page for the Royal Astronomy Society Sponsorship Quests.
Pet Compendium
If you want to know which pets will be most worth your time, check out my Pet Compendium. I have categorized the pets within the Compendium into specific niches that a player may find useful. You can also find a brief summary of their stats, special abilities, and my thoughts on each pet.
Consumable Guide
If you would like to know what consumables to use/keep an eye out for check out my Consumable Guide.
Other Guides
Check out my Mabinogi Guide to Guides. If you would like to suggest a guide or section to add to this guide, let me know.
Misc Information
Information here may not yet be on the wiki and will remain here for the time being for completeness. As information is added to the wiki I’ll likely remove them from this section (if I remember to).
Dungeon Re:fine Update - Released
Titles
Hoo boy, there’s a lot and they’re all farmable. They’re all very comparable or stronger than current BiS gacha titles as well. Except for Bhatair. I don’t see a situation where you’d use a prot title over a Max Damage title. Well egg on my face, now I want to think about prot stacking.
Benimarch
Max Damage +28
Movement Speed +1%
Piran
Gathering Success Rate +5%
Gathering Speed +5%
Increase Automatic Fishing Success Rate
Increase Fish Catch Size
Increase Taming Rate by 25%
Increase Transformation Collection Rate by 10%
Marleid
Music Buff Effect +8
Music Buff Duration +15
Cethlenn
Magic Attack +45
Bolt Magic Damage +3%
Vayne
Max Damage +20
Magic Attack +20
Movement Speed +1%
Murielle
Magic Attack +36
Music Buff Effect +4
Movement Speed +1%
Bhatair
Defense +12
Protection +10
Magic Defense +14
Magic Protection +8
Movement Speed +3%
Tanilliem (Tani?)
Refining Success Rate +3%
Blacksmithing Success Rate +3%
Production Quality +3
Talek
Max Damage +15
All Alchemy Damage +15
Crystal Making Success Rate +5%
Morfyrianas
Max Damage +18
All Alchemy Damage +18
Movement Speed +1%
Manannan Banannannanan
Max Damage +18
Magic Attack +18
All Alchemy Damage +18
Eiren
Max Damage +23
Dexterity +25
Luck +25
Movement Speed +1%
Sera
Min Damage +25
Max Damage +25
Critical Damage +1%
Incubus King
Max Damage +24
Movement Speed +3%
Fodla
Max Damage +15
Dual Gun Max Damage +20
Movement Speed +1%
Deirbhile
Magic Attack +43
Intelligence + 25
Movement Speed +1%
Etain
Min Glyph Quality +10
Intelligence +20
Enya
Max Damage +18
Magic Attack +12
Music Buff Effect +4
Melwyn
Max Damage +10
Music Buff Effect +8
Movement Speed +2%
Hector
Hillwen Engineering and Magic Craft Quality increase when combined with Expert Engineer/Magic Artisan titles,
Production Success Rate +4%
Blaanid
Cures wounds at 5% of Healing Effect
Healing Effect +17%
New Perseus Tier - Released
First Chronicle Update Page NA
Since this has now been released, I’ll be removing this section in a few weeks. For the time being it’ll remain for ease of access since Wiki links are still being updated.
Enchants
As with previous Piercing Enchants, the weapon must have innate piercing (base or upgrades) in order for Piercing from Enchants to take effect. This effectively means only Nightbringer Guns/Chains/Shurikens will have access to the piercing from these enchants.
Fury
Dual Guns
Suffix r4
Max Damage 20-45
Piercing Level 1-3
+40 Int
+5% Balance
+200% Repair Fee
Stellar
Shurikens
Suffix r4
Max Damage 25-50
Piercing Level 1-3
+20 Will
+5% Critical Rate
+200% Repair Fee
Inferno
Chain Blades
Suffix r4
Max Damage 20-45
Piercing Level 1-3
+12 Dex
+20 Luck
+5% Critical Rate
+200% Repair Fee
Equipment
Close Combat Weapons
Perseus Tempered Blade
One-Handed Sword
Set Effects
Final Hit Damage (10%) 5/10
Windmill Damage (10%) 5/10
Perseus Sentinel Shield
One-Handed Sword
Stats
21 Defense
10 Protection
15 MDefense
10 MProtection
16% Melee Auto Defense
Artisan Upgrade
+4 Defense, +2 Protection, +20 Will, +6 SP
Set Effects
Bash Damage (10%)
Windmill Damage (10%)
Charge Damage and Max Distance (15%)
Durability Consumption (-30%)
Nightbringer Assault Changes
One-Handed Sword
Stat Changes
Maximum Damage +16
Piercing Level +1
Basic Effect
+5% Smash Damage
Comments
For Dual Wielding Piercing, the weapon with the higher piercing level applies and they will not stack. This is not yet relevant on the KR (or NA server) due to a lack of 1h piercing enchants, but as a heads up, enchants for one handed dual wield should have one weapon enchanted with Piercing, and the other enchanted for pure Max.
Celtic Knight Blade
Two-Handed Sword
Piercing Level 2
Set Effects
Assault Slash Damage (+15%) 10/10
Symbol Effect
Final Hit Damage +8%
Final Strike Rage Generation +8%
Perseus Titan Blade
Two-Handed Sword
Piercing Level 3
Set Effects
Final Hit Damage (10%) 10/10
Final Strike Rage Generation (10%) 10/10
Windmill Damage (10%) 10/10
Nightbringer Warlord Changes
Two-Handed Sword
Stat Changes
Maximum Damage +22
Basic Effect
+15% Smash Damage
Comments
Soluna Blade Changes
Two-Handed Sword
Stat Changes
Maximum Damage +50
Minimum Damage +50
Set Effects
Windmill Final Damage (15%) 10/10
Removed Old Windmill Damage (30%)
Basic Effect
+25% Smash Damage
Comments
Perseus Brutal War Hammer
One-Handed Blunt
Set Effects
Bash Final Damage (10%) 5/10
Windmill Damage (10%) 5/10
Nightbringer Enforcer
One-Handed Blunt
Upgraded stats Stats
Max Damage 155
Piercing Level 1
Set Effects
Bash Final Damage (15%) 5/10
Windmill Damage (15%) 5/10
Comments
For Dual Wielding Piercing, the weapon with the higher piercing level applies and they will not stack. This is not yet relevant on the KR (or NA server) due to a lack of 1h piercing enchants, but as a heads up, enchants for one handed dual wield should have one weapon enchanted with Piercing, and the other enchanted for pure Max.
Perseus Cleave Warrior Axe
Two-Handed Axe
Set Effects
Giant Full Swing Final Damage (10%) 10/10
Stampede Bonus (7%) 10/10
Smash Damage (10%) 10/10
Nightbringer Berserker
Two-Handed Axe
Stat Changes
Piercing Level 1
Basic Effect
Smash Damage (+15%)
Comments
Important note, Elves can use the Nightbringer Berserker, meaning Elves will have access to a Piercing weapon that isn’t the Soluna Blade, closing the gap for Elf Eknights.
Lances
Celtic Ingot Lance
Lance
Piercing Level 5
Set Effects
Mounted Lance Charge Final Damage (+10%) 10/10
Perseus Gale Lance
Lance
Piercing Level 6
Set Effects
Lance Charge Damage (+15%) 10/10
Symbol Effect
Maximum Damage +10
Nightbringer Spearhead
Lance
Stat Changes
Minimum Damage +10
Maximum Damage +33
Set Effect
Lance Charge Damage +20%
Removed Lance Charge Mounted Final Damage +15%
Comments
Chain Blades
Perseus Rending Chainblade
Chain Blade
Set Effects
Chain Impale Final Damage (10%) 10/10
Spinning Slasher Final Damage (10%) 10/10
Nightbringer Phantom
Chain Blade
Stat Changes
Piercing Level 1
Maximum Damage +13
Comments
Bows
Celtic Fast Bow
Bow
Piercing Level 2
Set Effects
Crash Shot Final Damage (10%) 10/10
Final Shot Ranged Skill Damage (5%) 10/10
Perseus Whispering Bow
Bow
Piercing Level 2
Other Effects
Aim Correction +10%
Symbol Effects
Crash Shot Final Damage (8%)
Final Shot Ranged Skill Damage (5%)
Nightbringer Predator
Bow
Stat Changes
Minimum Damage +8
Maximum Damage +42
Other Effect
+20% Aim Adjustment
Comments
Perseus Whispering Arrow
Arrow
+20% Damage
Nightbringer Huntsman
Arrow
Stat Changes
Maximum Damage +15
Comments
Perseus Mechanized Crossbow
Crossbow
Piercing Level 4
Other Effects
Aim Correction +10%
Set Effects
Crash Shot Final Damage (10%) 10/10
Final Shot Ranged Skill Damage (7%) 10/10
Nightbringer Rogue
Crossbow
Stat Changes
Minimum Damage +9
Maximum Damage +60
Other Effect
+20% Aim Adjustment
Comments
Dual Guns
Perseus Nightstorm Dual Guns
Dual Gun
Set Effects
Way of the Gun Normal Attack Damage (15%) 10/10
Shooting Rush Final Damage (10%) 10/10
Nightbringer Vanquisher
Dual Gun
Stat Changes
Piercing Level 1
Minimum Damage +10
Maximum Damage +37\
Basic Effect
Bullet Storm Damage +15%
Comments
Shurikens
Perseus Swift Shuriken
Shuriken
Set Effects
Sakura Abyss Final Damage (10%) 10/10
Shuriken Charge (10%) 10/10
Nightbringer Infiltrator
Shuriken
Stat Changes
Piercing Level 1
Minimum Damage +12
Maximum Damage +37
Basic Effect
Shuriken Charge Damage +15%
Explosive Kunai Damage +15%
Comments
Magic Weapons
Perseus Mystic Staff
Staff
Set Effects
Hailstorm Final Damage (10%) 10/10
Intermediate Magic Final Damage (10%) 10/10
Other Effects
Magic Attack +55
Nightbringer Inquisitor
Staff
Stat Changes
Magic Attack +45
Advanced Magic Damage +15%
Comments
Perseus Arcane Wand
Wand
Set Effects
Fusion Bolt Final Damage (10%) 10/10
Other Effects
Magic Attack +55
Casting Speed +7%
Nightbringer Elementalist
Wand
Stat Changes
Magic Attack +45
Comments
Perseus Forbidden Grimoire
Spellbook
Set Effects
Magic Attack +20
Nightbringer Prophet
Wand
Stat Changes
???
Comments
Cylinder
Nightbringer Technician
Cylinder
Stat Changes
Piercing Level 1
Other Effect
+50 Alchemic Damage
Comments
Control Bar
Nightbringer Trickster
Control Bar
Stat Changes
Minimum Damage +9
Maximum Damage +22
Other Effect
+100 Marionette Min Damage
+100 Marionette Max Damage
+1 Marionette Piercing
Comments
Knuckle
Nightbringer Vagabond
Knuckle
Stat Changes
Drop Kick Splash Width +20%
Combo: Pummel Damage +80%
Combo Damage 35% -> 40%
Will +70
Comments
Archived Guide Pages
For one reason or another due to the scale and scope of this guide, I might cut some pages. This could be because it’s no longer relevant information, extra facts, I haven’t had time to finish writing it (and don’t expect to have time soon), or I’m dissatisfied with how said pages were turning out. I’ll probably keep them for posterity, but sequester them to individual documents.
A sample calculation to give an idea of how various sources of damage come together
A writeup explaining why a certain reforge was removed from the Crash Shot section
Future Content Information
Unlike the Unreleased Content designation (which requires an item be in the game files/searchable via the auction house indicating they are soon to be released), this section will mostly consist of information that we are at least several months out from getting such as new BiS enchants, new armors and weapons, or new equipment types.
Changelog
Date | Comment |
01/17/2025 | -Added Royal Society Box item sets to various lists. -Expanded the General/Situational and Production Gear and Reforge sections to include Set Effect information -Minor Update 01/22/2025 -Fixed some typos with Deck Synergy (Control should be debuff duration) and an incorrectly listed synergy for a sample. I do later want to reformat this section to instead use screenshots and links that use Latharra’s Share tool as a template instead of what it currently is. -Added Master of Battle Astrology to title section as a sidegrade to Meteor Strike Master -Minor Update 01/23/2025 -Added Seraphic Cantabile Wig to Saint (Healer) for the Mana Reduction Effect. There are multiple ways to one piece a Healing Set, so you could free up the head slot for utility and QoL effects. -Minor Update 01/25/2025 -Added Rath Royal Castle Residents Doll Bag to Bag lists. This is the only bag that currently provides music buff effect at time of writing. -Extra Note: There are other bags that sidegrade currently listed bags in the gacha that released the Rath Castle Resident bag, but I haven’t added them to the list because I want to rework the formatting of the doll bag list. As is it’s just adding 3 new bags every few months that basically do the same thing. -Minor Update 01/28/2025 -Added the Cowena and Eochaid Homestead Figures to Homestead Figure lists (Max/Crit Damage and Music Buff Effect respectively) -Minor Update 02/10/2025 -Added a link to ndrr’s Homestead Stat Enhancers Google Sheet -Minor Update 02/12/2025 -Added link to nddr’s 2nd title google sheet -Fixed Ardent and Hatred’s positions being flipped on Magic Attack body enchants |
12/12/2024 | -Added Astrologer Equipment and Reforge recommendations -Added Celestial Conjunction, Hand of Destiny overviews, and Sample setup sections for these skills. -Added a section related to pages removed from the guide (either due to outdated, irrelevant, or incomplete/dissatisfied) -Minor Update 12/13/2024 -Added Weapon Enchants for Scythes. Also added Orbs to the Offhand Magic Attack section. There is currently a lack of Magic Attack enchants that can go on the Offhand slot, so options for the Orb are fairly limited -Minor Update 12/20/2024 -Fixed Astrologer Echostone rolls using unofficial translated skill names -Minor Update 12/28/2024 -Added a link to Latharra’s Celestial Conjunction Share Tool for the sample section. If you want to share your Conjunctions and Hand of Fate setups, you definitely should use this tool. -Minor Update 01/05/2025 -Added Katell’s Small Rock to Max Damage totem section |
11/06/2024 | -Added the Unfinished Reverie’s Diadem Halo to equipment lists. -Added shields to the Harmonic Saint (Tank) section for players who want a more defensive focus -Added The Uniter of Dawn and Dusk to Title list -Added Primeval Winter Enchants to BiS list -Minor Update 11/14/2024 -Fixed Trail incorrectly listing +20 MA instead of -20 MA -Minor Update 12/05/2024 -Added Phoenix Blessing as BiS Luck Prefix |
10/14/2024 | -Added Tank section for Harmonic Saints. This section is also using an extra bit of formatting to denote a one-word summary of the purpose of each gear item (Offensive/Defensive/Healing). |
07/23/2024 | -Added Hyperion Eclipse items to equipment lists -Minor Update 09/05/2024 -Rearranged the position of the Imperial Knight Gloves in light of their nerf. Rage Impact is still worth throwing around, it’s just that the extra 2% probably isn’t going to make or break you. -Minor Update 09/07/2024 -Added Hatred to various enchant lists. For a free enchant from completing G26, it’s a very good and versatile body suffix. Bit late on the update but been busy and haven’t finished g26 at time of writing -Removed Invincible (+6-16) from Max Damage lists. We have comparable and better options that are not event exclusive/are obtainable from relatively easy sources -I probably won’t lower Rage Impact CD on Echostones from current positions because I think having the option for more consistency in maintaining a high Up/Low Down time is nice. It’s definitely not mandatory (and arguably never was post Spirit Ascension), but still a good option. Some of the “Fill with Missing Reforge” notes for close combat/Eknight were in the secondary section, so I’ve moved those to the Priority section instead. |
06/15/2024 | -Added Naraka Inferno Box items to equipment lists -Minor Update 06/28/2024 -Added Damage Reduction Rate values to Sword and Shield lists and updated the Sword and Shield description. -Added Future Content Information for the Primeval Winter update -Added Shield Damage Reduction Rate values and Perseus Vigilant Shield to Protection Stacking Section |
04/30/2024 | -Added Florist Box Gacha’s titles to Max, Bard, and Alchemy title lists |
02/01/2024 | -Added Circus Troupe Magic Attack/Elemental Damage enchants to Magic enchant lists. -Minor Update 02/04/2024 -Added Lord of Ruination Staff to Healing/Harmonic Saint equipment section -Minor Update 02/11/2024 -Fixed Star Fishing 2023 Event totems being misnamed. Also fixed Luna Sequel Totem’s Magic Attack listing to properly indicate it is a +6 boost. -Minor Update 03/07/2024 -Renamed Off Hand/Shields to Shields/Physical Damage Off Hand and added a Spellbook/Magic Attack Off Hand section. -Minor Update 03/27/2024 -Added 16th Anniversary Second Title to title lists. -Corrected Starlet being improperly named Scarlet |
01/18/2024 | -Added new Perseus and Celtic weapons to equipment and Archetype tierling lists. -Added a new Two-Handed Weapon Archetype Exclusive enchant list. Will likely add another one for One-Handed weapons (1h Close Combat, Control Bars) later down the line. -Added the new Enchants (Fury, Stellar, Inferno) to the Two-Handed Archetype Exclusive section. -Moved the Perseus Weapon future content information to Misc Information. Once wiki links are up and running, I’ll be removing/Archiving this specific section. -Minor Update 01/29/2024 -Added Elite White Healer to Healing titles. |
01/04/2024 | -Added a column to detail useful set effects and to briefly go over them and use case when appropriate. -Added Thames Plate equipment to Elemental Knight lists -Changed Giant- Dual Wield section to just be Dual Wielding and Giant - SnS to just SnS. Though 1h swords don’t get as much CD reduction on Erg 1h swords, they do still get that CD reduction. They do get the same +25 Protection though. For SnS, KR does appear to be trying to buff non giant SnS, so for organization purposes and to save time later, I’m just going to add the equipment a Human/Elf using SnS might want. -Because of this, I’ve moved the 1h sword line out of the general Elemental Knight section and into the new Dual Wielding section. Similarly I moved the 1h sword and axe lines into the SnS section. -Moved Windmill Attack Range to Secondary Reforges. It’s just not noticeable enough. -Updated several links (namely Ceann Bliana equipment) with their wiki links. -Added Special Shadow Reaper equipment to lists. Minor Edit 01/01/2024: -Added Special Imperial Knight to Sharpshooter lists. The defensive boost from Unshakable Will can help get a Sharpshooter out of messy situations, especially since Sharpshooter skills force aggression. Also added some notes for Unshakable Will to some of the other talents, largely depending if they can benefit from it significantly or if they lack a form of Super Armor/Poise/Knockdown Resist in their skills. |
12/22/2023 | -Based on my testing (at time of writing editing a test video), the Support Shot Set Effect is Multiplicative to the base boost. This means it provides a comparatively small boost to what is stated. The Master Title is still providing an additive 5% boost though. As of right now I haven’t verified the Glyph yet, though most glyphs have been additive to their skills. -Also updated the Title Section for Support Shot to reflect the changes to it. |
12/14/2023 | -Several updates to equipment sections -Added Alchemic Sharpshooter section and converted Magnum and Crash Shot sections to subsections -Updated Support Shot descriptions to reflect the changes to support shot. -Changed Magic -Staff to Magic/Dark Diviner/Harmonic Saint - Staff Generalist and converted each element into their own sections. Also updated Fusion Bolt and Blaze’s section header to also be Magic/Dark Diviner -Fire and Thunder are listed as Magic/Dark Diviner while Ice is listed as Magic/Dark Diviner/Harmonic Saint. Since Fireball was nerfed, Harmonic Saint mages may want to use Hailstorm over Fireball. |
11/21/2023 | -Added Winter Specialist Doll Bags to Doll Bag section -Adjusted titling on item pickup to indicate default item pickup categories. -Added a note on default item pickup and Collection Add-on slots -Minor Update 11/28/2023 Added NB Berserker to Human/Elf Close Combat/Eknight weapon lists -Minor Update 12/11/2023 Added Special Ancient Dragon Guardian Wings to equipment lists |
09/07/2023 | -Added some future content information on the new Celtics and Perseus weapons. Also added information on the Nightbringer buffs -Added Royal Jousting Coins and updated Royal Society Coin names -Minor Update 09/25/2023 Made a few updates regarding the new Piercing Enchants for Guns/Chains/Shurikens, and updated some of the new effects on the NB weapons and Perseus weapons -Minor Update 11/14/2023 Updated 2nd magic title section to include Toothache Fixed Music Homestead Figures incorrectly having Captain Altam listed instead of Inquisitor Derbhile |
07/28/2023 | -Added Iris and Lapin Support Puppets to Support Acc list -Added a sample calculation section to help visualize how all the various sections end up interacting -Minor Update 07/31/2023 and 08/01/2023 -Added Shieldless Charge to Eknight Human -Fixed Selene being incorrectly listed as a prefix enchant -Minor Update 08/09/2023 -Fixed Act 2: Threshold Cutter improperly being listed as a Glove Reforge. Also added a note to indicate that it cannot roll beyond lvl 3 on Echostones. -Minor Update 09/04/2023 -Made a note that Act 1/Act 2 may not properly progress combo cards if used too rapidly. |
07/18/2023 | -Reorganized the Weapon Enchants to better indicate which enchant is BiS. I think it’s important to include weapon exclusive enchants, but they really do throw off immediate visual detection. Enchants from Crom (and also Glen Bearna) do outperform Apostle, Divine, Perseus, and Ruination enchants. -Reorganized Puppetry sections to separate Crowd Control, AoE DPS, and Single Target DPS. Also added Act 9: Invigorating Encore Duration to all 3 sections. -Minor Edit 07/28/2023 -Moved Soluna in Final Hit section to be >= Nightbringer Warlord. -The Soluna Blade’s insanely high raw Max helps push it ahead of the Warlord. Based on testimony from somebody with a Soluna, it seems to be that the Final Hit Bonus Damage is a Final Multiplier after defensive calculations, which means it may end up providing less overall damage. Edit+ note: Math currently suggests that the Warlord still comes slightly ahead. However, I would say the Soluna is still overall the better weapon due to the higher raw max since it allows you to have meaty Eknight attacks. |
07/15/2023 | -Added Protection gear section featuring Armor, Shields, and Accs. -Fixed Irusan’s Bell having the incorrect link. -Minor Update 07/17/2023 - Fixed every instance of Edern being misspelled as Erden. |
07/12/2023 | -Updated some missing Homestead figure links -Added a Protection section for Secondary Titles -Rearranged a few Max Damage titles. They should for the most part now be sorted by pure Maximum Damage first, then Bonus Damage/Critical Hit Damage. This change is more for consistency in future updates to the list than a definitive “which title is the absolute best DPS boost”. A lot of the top titles are frankly close to each other in performance anyways. -Similar deal for Magic Attack. Magic Attack first, then Casting Speed. -Added a Protection Enchant section. There aren’t that many, but if you’re stacking defensive stats better go all in. Minor Update 07/13/2023: - Added Seraphic Cantabile items to Magic and Bard sets -Specific note for the Special Seraphic Cantabile Attire: It has a 30 Second Up time and a 100 Second Down time on its +100 Magic Attack Boost. It would be the best option when it activates (5% or about 9.75% with Fusion Bolt), but I wouldn’t go replacing your Special Elemental Harmonies if you don’t have a 2 piece Ceann Bliana for the Elemental Damage set effect. -The Seraphic Cantabile Wig was added to the General/Situational section. It’s not a bad set effect, but I don’t think it’s worth much more than a utility gear swap. -Switched Ceann Bliana equipment from Unreleased to In Game Drop |
07/06/2023 | -Updated Glen Bearna item names to NA localization. Added Glen Bearna Hard title to primary title list. |
07/06/2023 | -Added Bhafel Slayer to Eknight lists and human Close Combat Weapon Archetypes. -For Human (if you’re an elf just pretend they still don’t exist), added as a different weapon archetype. Even though they’re both 2h swords, many humans still use Final Hit with Eknight, especially with Lightning Infusions. Because of this, the lower Attack Speed may make this not as valuable a choice despite the relatively low cost to create. -For Giants who don’t need attack speed, I placed it on the same level as the Divine Blade and Massive Despair Blade. The extra piercing level and relative cost to these two weapons make it worth considering for an Eknight. Massive Despair gear really can't catch a break. -Added Glenn Bearna equipment to all gear sections as unreleased gear. This will be updated once the update lands. -Generally I’ve situated them on the top of the list, but in reality use your best judgment when making builds. 50 Max from the Intense set is good, but it requires 3 pieces to activate. This might mean giving up other utilities you have in your build such as higher Redoubled Offensive chance (which people say is about the same as adding 30 Max damage) or certain set effects. -Updated future content description for the Intense Set to indicate that it will not stack with other Max Damage set effects. Only the highest value is applied, similar to the interaction between Geas and Ultimate Geas. -Fixed the “Close Combat” - Throwing Attack section erroneously having armor that provided no benefits to throwing attack (Refined Majestic Knight). |
06/08/2023 | -Added Magic - Blaze section. Blaze has always hit hard, but it was hard to draw out its full power. With the recent Blaze changes, though we lost the Invincibility Frames from Blaze, it has become significantly easier to use in combat. -Added Blaze weapon progression section -Added “Close Combat” - Giant - Throwing Attack section. I didn’t bother making a Throwing Attack section before, but the S4 renovation and the future Erg update should solidify Throwing Attack’s weird niche of an ‘aggressively ok’ ranged option for Giants. -Added Atlatl weapon progression section -Added Close Combat - Giant - Taunt section. For the giants who really want to make an ultra chonk 3000+ Defense build for reasons. I don’t have enchants set up for defensive stats, but I’m putting that off for a bit. -Updated Urgent Shot Aim Speed bonus to Urgent Shot Effect Duration -Added Star Fishing Event Homestead Sequel Figures -Added Open Ocean Box Titles Edit: 06/12/2023: With further testing (still ongoing), Celtic Tribolts and the Tribolt Wand of Blossoming Memory appear to be treated as Combat Wands. When testing a Clean Celtic Tribolt (+19 MA) with a Clean Savage Fire, they reached similar damage outputs against Tech Normal and Adv (Revived Illusion) enemies. The Tribolt Wand of Blossoming Memories achieved similar non-critical results and higher Critical results, indicating that it is also classified as a Combat Wand. I don’t have a Divine Tribolt, but I suspect it also is treated as a Combat Wand as a result. I won’t add it to the BiS guide unless I can get concrete proof, but frankly Divine Tribolts aren’t exactly great investments anyways. Similarly I don’t have a Nightbringer wand to test that, but I do suspect it is also treated as a Combat Wand. You probably want to build a NB wand for Fusion Bolt anyways. But once again, if anyone can provide damage test numbers for NB and Divine wands, much appreciated. Added additional note regarding Guard Cylinders and Blaze (Wind Blast synergy). Edit: 06/15/2023 Fixed duplicate Special Luminous Cosmos Milky Way. One should have been Special Call of Fragrant Flowers. Fixed Beimnech title spelling Have not done yet, but I’m planning on cleaning up some title sorting consistency issues. Max damage titles have particularly egregious consistency issues for the stronger titles. |
04/13/2023 | -A few weapons are shuffling due to the Signet update. Also added a lot of+Signet suffixes to keep it clear that ideally these weapons should be upgraded with their respective signets. - Added Divine Bastard Sword to Human - With the Symbol Update, it and the CRKS can get some extra Final Hit damage - Moved Massive Despair Hammer Down. It doesn’t get Giant Full Swing Damage while the Celtic 2h Hammers and Axes do. - Moved Massive Despair Blade down. Considering the relative ease Divine Blades have to acquire Solitude for Piercing and Divine Blades can get Final Strike Rage Generation (like Nightbringer Warlord), there are fewer reasons to go for the Massive Despair Blade which only offers a bit more damage on Final Strike and innate Smash set effects. - Moved Celtic Royal Crossbow and Celtic Crossbow up. While still close to the Bhafel HunterxHuntress (ergo still equal to Bhafel in the Magnum section), Crash Shot Final Damage likely pushes it ahead of the Bhafel. No movement on Divine though, that still doesn’t come close to the Demolition Staff. - No movement in the Magic section. Celtic and Nightbringer are still worse than the Demolition Staff. But it is a bit more competitive if you can dump the signets into it. - Almost the same deal with the Wand section, though there’s no Demolition/Ruination wand equivalent. Divine Spellbook has moved up due to the Magic attack signet -No movement on Alchemy, Puppet, or Fighter sections. You’re probably better off just making Revenants in the first place. - No Movement on Dual Guns Ninja and Chain Slash, but the signets do help bridge the gap between Celtic, Divine (when applicable), and Nightbringer. - Updated Weapon Archetype Tiering to reflect changes as well. - Minor Update 04/25/2023: Moved Act 6 Casting Time and Act 7 Casting time up on the Accessory section for puppetry. After doing a side by side analysis, the difference, while small, is noticeable and can make your puppetry smoother. -Minor Update 04/25/2023: Added Performance Rate reforges to Secondary Reforges in the Bard section. They can be useful if you can dual roll it alongside the respective MK effect boost, but they won’t be a Bard’s priority |
03/09/2023 | -Added Edern to Crafting Title lists |
02/26/2023 | -Added Homestead Blooming Romance Decorations to Physical and Magic Attack Lists |
02/06/2023 | -Added Imperial Knight Greaves to Elemental Knight gear lists. Testing performed by other players suggests it’s approximately a 3% boost to Blazing Assault Slash. It’s not a lot since it’s only affecting the damage boost from Assault Slash, but a boost is a boost. -Removed most Misc information sections. Pretty sure most of the wiki articles (and links in the BiS guide) have been updated and are no longer needed in the guide. -Added Glen Verna equipment and reward information to Future Content section |
01/08/2023 | -Removed Blade from Control Bar Suffixes. Blade cannot be applied to Control Bars. -Added Elemental Harmony Shoes to most gear sections. They were already in the general gear section, so this is more of a consistency thing as all other move speed shoes are listed in multiple gear sections -Special Imperial Knight Equipment -Special Imperial Knight Royal Uniform - Added to most gear slots. -Giant Dual Wield and Archery were excluded as you get the same Critical Hit set effect from Dual Frosted Borealis Hammers or Demolition/Ruination bows. A note for Human Final hit and non giant Elemental Knight was added as Celtic Royal Knight Swords also provide the Critical Hit set effect. -This isn’t to say they’re bad choices on any of these if you’re looking to use the Special Imperial Knight defensively. But generally you want to avoid tanking hits. -Imperial Knight Gloves - Added to most physical damage talents. -This is mostly for the Rage Impact enhancement, but the Max Damage set effect on the glove slot is pretty nice. I see this more as a gear-swap for many talents as you’d want to boost Rage Impact before a high multiplier hit, but it’s flexible. -Imperial Knight Royal Hat - Added to most gearslots that have Attack Delay hats and Magic -To be clear though, this is not technically better than Ult Geas/Lang Circlet for Magic Attack. The set effect only provides 10 Magic Attack. - Moved the ordering of Attack Delay hats in most sections that contain them. They’re still good options. It’s mostly an organization thing since you may want the Ult Geas over Attack Delay for most not Final Hit talents. It depends how you want to build (e.g WotG spam, normal attack resets, speed clearing trash mobs with norm attack) -Imperial Knight Boots - Not added to lists yet. -I am 90% (Ferghus approved) sure the Assault Slash set bonus doesn’t affect Blazing Assault Slash, which would be the main reason to use these shoes. This is likely because Elemental Knight on the whole is likely not affected by Set Effects as those do not directly increase the Close Combat version multipliers in the same way Reforges do. But if you have evidence that your Blazing Assault Slashes are 15% stronger with the set effect, let me know/show damage comparisons and I’ll add it. Otherwise I’ll get around to testing it with a Bhafel set Later. -You might be wondering why it isn’t added for the Move Speed set effect, and that’s because it’s the same as the Saint Guardian’s Helmet and provides 1% movement speed. 01/09/2023 Update: Added a few filler items to gear lists and added a Support Shot section -Added Saint Guardian Helmet to a few sections. Despite being only a 1% move speed boost, it’s still an option you can mix and match With, especially if you’re building for budget (like mostly pre-r1 gear). -Added direct reference to Pre-r1 gear for most slots that contain reforges. This is mainly to help emphasis the importance of using gear slots as a vehicle for reforges (and not just set effects) -Support Shot section is fairly straightforward. No relevant reforges to aim for, no need to worry about missing your support shots. Though depending on what you want to gearswap to, range is still Useful. 01/13/2023 Update: Added link to the Reforge by Equipment type section on the reforge Page under the gear summary. Also added the Echostone rate spreadsheet to the gear summary. |
12/18/2022 | -Added a section for Support Accessories (Suggestion by Bronzebreak) -Corrected several sections which had Geas misspelled as Geass. -Minor Update: 12/19/2022: moved Forest Ranger Boots to be “higher” than other move speed shoes (Fleet Feet variants) as the Forest Ranger Boots have higher defensive stats. -Minor Update 01/01/2023: Happy New Year. Added Corrib to the Staff Suffix Section as a sidegrade to Foretold. They’re close enough in performance and Corrib is fine as a discount(ish) staff suffix. |
12/13/2022 | -WIP on Arcana updates - For the most part, builds shouldn’t change. Close Combat has been renamed to Close Combat/Elemental Knight, Magic - Healing has been renamed to Magic - Harmonious Saint - Moved Party Healing HP Recovery to Priority Reforge on Wands. Some Arcana Skills scale on Party healing heal amount - Removed Assault Slash Cooldown. The reforge does not affect Blazing Assault Slash and there is no reason to use normal Assault Slash over BAS. - Under Giant sections, moved Assault Slash Damage and Windmill Radius up as these reforges affect Elemental Knight skills. |
11/21/2022 | -Added Maddening to prefix enchant lists -Reclassified some Master Plan enchant rarities. -I don’t remember if Ardent or Embracing have shown up since their debut Master Plans, so they’re being moved to Event Rares -Minor update 12/09/2022: Added Crash Shot Fragment Damage to the Archery - Crash Shot acc slot. Its exclusion was an oversight. Added Dark Moon wing enchants to Max Damage and Magic Attack lists. |
11/03/2022 | -Updated HS Figure list to include items from the Classic Maid Box |
10/22/2022 | -Updated Tech lists -Rewrote the Tenacious Taunt section slightly. It’s a very useful Tech and I use it fairly frequently on my Corgi. -Protective Touch has been updated to reflect that we have 5 Spirit Weapon slots -Updated my Tech Loadout recommendations with Tenacious Taunt suggestions. -Added the Trinity Staff to the Weapon Tiering section for Staff Magic. For 70k you get a staff that really isn’t much worse than a Hermit. It’s a good way for new mages to get their hands on a staff. |
10/16/2022 | -Added Cunning Hunter titles to 2nd title list. -Added a new 2nd title section for 2nd titles that provide special effects beyond stat increases |
09/23/2023 | -Slight updates to Tech sections. Namely for Redoubled Offensive, Elemental Attunement, and the Field Raid suggestion section. I’m pretty sure Redoubled is fine to use now. Haven’t seen a raid boss break from it yet (though if you have, do let me know) |
08/17/2022 | -Updated Title section for Regal Retreat titles -Added Assault Slash Range reforges to most Close Combat sections. I think most of the relevant reforges affect Arcana skills and Fire Leap is a nice utility. -Added Commerce Companions Doll Bags -Removed Doll Bag detail section and added links to the wiki’s storage bag listing (and notes on where else the information may be listed). The Doll Bag list was getting too long. That said let me know if you’d prefer to have the Doll Bag entries still listed. Also added pickup information to the table. -Minor Update 09/01/2022: Added Rua to Magic 2nd title list |
07/06/2022 | -Changed the name for the Weapon Progression section to Weapon Archetype Tiering (Progression) and added some notes. The Nightbringer Inquisitor, Rouge, and Predator come from content more difficult than Tech Duinn, which should make them the next progression step. But these three weapons are downgrades to their Ruination variants. -Added Enchants from the Erinn Merchants’ Guild Souvenir Box to enchant lists. -Added Erinn Merchants' Guild Premium Shoes (30 Days) and the William Preppy Commerce Outfit to the Commerce gear lists. -Added Transport Speed Increase Potions to the Commerce Misc equipment list. Also added notes on speed stacking -07/18/2022 Minor Update: Moved some reforges around on the Close Combat - Giant Sword and Shield section. Assault Slash is still likely a filler skill at best while Stampede is an all around strong utility for any giant. -07/21/2022 Minor Update: We have a little more Information on Arcana. The main possible change build wise is likely going to be slight adjustments for Human and Elf Close Combat to favor Smash and Windmill boosts over pure Max Damage. I don’t see Healer builds changing at all. |
06/17/2022 | -Added several titles to BiS lists (Titles from Hydrangea box) and HS figures from Guardian of the Divine Beast box. -Added Special Draconian Wings to Robe Lists -Removed Enchantable Wings from Alchemy Robes. There aren’t any Alchemy Damage Wing Enchants and the Max Damage from Wing Enchants isn’t going to be that significant for Alchemy -06/26/2022 Minor Update: Updated links for Corrib, Sparkling, and Radiant enchants |
04/18/2022 | Fixed Sorcerer incorrectly being listed as +5-7 MA when it should be +3-7 Also Fixed Support incorrectly being +5-7 instead of +4-7. Whoopsie. Updated the Lance Gear and Reforge section.
I’ve removed most of the Nightbringer Gear from the Misc Information list. This information is now available on the wiki and I’ve updated the links. Except for Vanguard. Nightbringer Vanguard is bad and should feel bad. And Huntsman, can’t find the wiki link for that. - 04/25/2022 Minor Update: Fixed some more enchants - Created has been updated to properly indicate it is a 2-4% Alchemy Success rate roll -Weekend was added to the Production/Luck enchant list with the caveat that it is only active on Saturday -Bandit was moved down and slashed out to indicate that the +25 Luck it has is unusable due to the r6 cap on Evasion. |
04/13/2022 | -Added Special Elemental Harmony Suits to Magic Gear pages. -Added Elemental Harmony Shoes to the General Gear page. |
03/29/2022 | -Added Fleet Feet to Commerce Feet Gear. Also added a note that Alpaca Robes do not stack with Commerce Transport Speed Reforges -03/30/2022 Minor Update: Made a small adjustment to the Healing and Puppetry page descriptions regarding the Healing Reforge and Puppet Erg. |
03/27/2022 | -Separated Control Bar enchants from One-Handed Weapon enchants. Control Bars cannot accept One-Handed Melee Weapon enchants which is what most of that category consists of. They can, however, accept One-Handed Weapon enchants -Updated several Enchants with Wiki Links -Added wiki links for Nightbringer Weapons -Added 14th Anniversary Fantasia to 2nd Title lists |
02/10/2022 | -Moved Shadow Cloak Duration to Priority Reforges and added Explosive Kunai Debuff Duration to Priority Reforges for the Ninja - General Use section. -Shadow Cloak is an exceptionally strong aggression dropping tool, but the short duration can be limiting. Shadow Cloak Duration can add up to 10 additional seconds, allowing players to effectively loop Crisis Escape. -Explosive Kunai has an exceptionally strong movement speed debuff, which is an incredibly useful tool in Crom Bas (though it also can have useful applications in Tech Duinn). However the short base duration and lack of AoE limits its usefulness. The Ninja buffs we will be getting will fix the AoE problem, but the Reforge boosts the slow duration to 23 seconds. If you need to lure a boss that has a lot of adds that have a stupidly high amount of Magic Protection and the adds don’t respawn (yes I’m talking about Glas), this is a good tool for keeping Glas occupied. You can also use it to play keepaway with the Dark enemies who are resistant to stuns but not slows. -02/13/2022 Update: Moved Shadow Bind to Priority as well. I’m starting to think I just never read up on how Shadow Bind actually worked and kept running out of the tiny area you’re supposed to stand in. -02/18/2022 Update: Added Usurper of the Abyssal Throne to Title List |
02/08/2022 | -Updated Alban and Commander Totem wording. Previously it implied attempting to raise a stat beyond 3 (or adding more than 3 attributes) would destroy the totem when it only is a chance to destroy the totem. -Forgot to previously move Nightbringer to Misc Information. Moved now. |
01/10/2022 | -Updated Gear and Weapon Progression listings for Nightbringer equipment. Currently marked as Unreleased -Added Crom Bas Fused Erg Sealing Box 2nd Titles to lists. Currently marked as Unreleased. -01/13/2022 Update: Changed Nightbringer Weapons to In Game Drop. -Changed Fused Erg Sealing Box 2nd Titles to Legendary Rarity. The material requirements are unreasonably high, you’re not guaranteed the reward you want, and they’re only slightly better (or more likely sidegrades) to current BiS titles. -Added The Light in the Darkness as BiS (for the general playerbase) Primary Title |
1/03/2022 | -So apparently you can roll Magic Attack on Cooking Pots up to level 20. Updated Magic - Fusion Bolt page to reflect this. Also Wot. -Spellbooks can also roll up to 20 Magic Attack now which makes reparable options such as Divine Spellbooks and the Holy Eagle Mask significantly better options. It also firmly places the Nightbringer Spellbook as the BiS Off Hand for Fusion Bolt (assuming part 2 ships with the Magic Attack set effect) |
1/1/2022 | -Added a Commerce Section to Gear Suggestions. Happy New Year. -Added Production Sections to Enchants and Gear. |
12/19/2021 | -Finished Healing sections -Changed Irusan’s Bell to Legendary Rarity. You need 30 of them and they don’t seem to have a very high drop rate. |
12/18/2021 | -Added Blessed Ornament Box titles to Title lists |
12/11/2021 | -Added Crom Bas celebration event HS figures to lists |
12/08/2021 | -Updated Pragarah recommended use cases to include high protection situations such as Crom Bas. -Added Crom Bas enchants to weapon lists. Currently marked as Unreleased. -12/09/2021 Changed to released -Added Irusan’s Bell to Accs for most equipment recommendations. Currently marked as Unreleased. -12/09/2021 Changed to released, depending on rarity may change to Legendary Rarity -Added Awakening of Light and Fury of Light Cooldown to the General/Situational Reforge section under Situational reforges. -Added Nuadha Set parts to the General/Situation Reforge section under Situational gear. -Moved General/Situational reforges and equipment to appear first in the list for better flow. -Added Ultimate Geas Edge Circlet, Greaves, and Gauntlets to General/Situational under General Equipment. |
11/25/2021 | -Fixed the Support enchant (Magic Attack) being incorrectly marked as BiS suffix Feet instead of BiS Prefix Hand |
11/19/2021 | -Updated Title sections for ReFine titles and Erinn Spirit availability. -Added WIP Healing Section to Gear Recommendation and Titles. I’ll get around to it later, Healing at present doesn’t have a lot of uses. -Moved some Info-dumps to a Misc Information section from the Future Content section. |
11/13/2021 | -Removed incorrect note on the Steel Enchant for alchemy. Credit Deathgrip635 for spotting the error. -11/17/2021 Minor Update - Made some proofreading changes to various sections and added the Detective Journal Amulet to the Totem section. Also renamed Eweca-Ladeca/Wander amulet section to Onyx Amulets |
11/04/2021 | -Changed General/Situational Reforge notes to indicate that Elemental Reforges can now be rolled on Shurikens, Chain Blades, and Dual Guns. |
10/28/2021 | -Updated Dual Gun and Ninja - Speed Running pages to reflect future updates to the talents. -Dual Guns have primarily been changed to suggest Bullet Storm more, though Bullet Slide has also been added to the lists. -11/04/2021 note: Bullet Storm on the KR test server was nerfed quite a bit, but with a lvl 10 Bullet Storm Glyph you can still reach 100% damage per bullet on a single target. If you have a maxed Bullet Storm Damage per Bullet reforge, this is about 2880% total damage on a single target. Not as nuts as before but likely still usable. -Ninja - Speed Running was Renamed to Ninja - General Use. More Ninja skills should be more usable in higher difficulty content since they adjusted how Defense and Protection was calculated (Multi Hit skills will only count Defense and Protection Once, Dual Guns and Puppets also will have this change). -For both Ninja pages added/moved Shadow Cloak Duration to Secondary Reforges. It’s a very nice QoL to have, but far from needed and you may even cancel it early. The buff post S3 Renovation to Shadow Cloak doesn’t really benefit from an extended duration either, but it could be nice to have. |
10/14/2021 | -Updated Homestead Figure list for several more recent figures and figures I missed |
10/04/2021 | -Added Reunion update enchants to main BiS list for Max Damage, Magic Attack, and Alchemy lists. Currently marked as Unreleased but will update them to In Game after maintenance. -Added Refined Majestic Knight and Refined Dustin Silver Knight pieces to a couple gear recommendations (also currently marked as unreleased) -Dustin Silver Knight pieces were added to Human Final Hit, Dual Guns, and Ninja Speed Running as they do regularly use normal attacks (Final Hit, WotG, mook killing with normal attack) -Added Refined Majestic Knight pieces to Giant Sword and Shield and Giant Dual Wielding. Technically you don't need it for SnS, but it benefits Dual Wielding immensely since Giant Windmill Cooldown with Dual Erg 50 1h blunts is practically 0. I may add a Human non final hit Close Combat gear recommendation, which would recommend Majestic Knight pieces. -10/07/2021 update: Updated previously Unreleased Refine enchants to In Game Drops -Updated Brainstorm, Resolution, and Enigmatic to be In Game Drops -10/08/2021 Update - Added a section for Humans not using Final Hit in case somebody really wanted to know recommendations. -Moved Stampede Cooldown for Close Combat - Giant - Wind Guard to Secondary and Close Combat - Giant - Dual Wield to Priority. It is that useful of a mobbing skill that you should try to reduce the cooldown as much as possible. |
10/01/2021 | -Made some edits to Alchemy sections to clarify how Flame Burst Duration works and to explain the Crystal Storage mechanic |
09/28/2021 | -Fixed Various being improperly categorized as a Body Enchant instead of Hands and Feet. |
09/23/2021 | -Updated Subject Theta Perseus/Ruination exclusive enchants. Added Subject Theta Titles to the Primary and Secondary Title lists. |
09/13/2021 | -Added the Royal Teacup Box 2nd Titles to their respective lists - No Wiki links yet -09/16/2021 Minor Update - Added a note regarding Maximum Damage on Puppeteers for the Maximum Damage Enchant Note section. Essentially Puppeteers may want to use Max Damage enchants instead of Marionette Max Damage enchants because of the effects of Battlefield Overture and Weapon Power potions. -Moved Flame Burst Max Damage from Secondary to Primary -09/17/2021 Minor Update - Added Special Floral Fairy Walk to the 2nd Title list. |
09/12/2021 | -Updated the Magic - Staff section to reflect the Magic skill buffs. -Moved Lightning Mastery Damage to Priority head and Acc. Added Fire Mastery Damage to Priority Head and Acc. Ruination and Demolition Staves can make extensive use of Lightning Rod. If you are building towards Lightning Rod, you’ll want more Lightning Mastery Damage. Fire Mastery was added to Priority Reforges because Fireball received a large boost to its Spell Coefficient and Meteor Strike has face melting levels of damage, especially with Demolition and Ruination staves. -Added Fireball, Ice Spear, and Thunder Max damage to Tertiary Weapon Reforges. The Int Magics were buffed, so if you were building specifically for one of these spells you might want them, but you really should prioritize Magic Attack and hope to roll one of those. -Made some formatting adjustments for all Alchemy Gear sections -Updated the Puppetry section to reflect Puppetry skill changes. Puppetry primarily received damage buffs and some QoL changes, so some of these changes might have been made anyways. -Moved Act 2: Threshold Cutter to Priority Weapon Reforges. The change to AoE has made Threshold Cutter a good option to follow Act 6: Crisis with. It also just deals a lota damage now. -Moved Act 4: Rising Action to Secondary Weapon Reforges. This is less because it’s a worse reforge now and more because the other options are more useful now. Climatic Crash can more reliably hit 3 times, Threshold Cutter is just better now (and also an AoE), and Inciting Incident is for Erg 50 Combo Card spam. -Added Act 1: Inciting Incident to Priority Weapon Reforges. Ditto. -Added Act 6: Crisis Damage Magnification to Secondary Reforges. You probably will get more mileage out of Act 1, 2, or 7 Damage Magnification. But this can be good for speed running content that Crisis can come close to one shotting. -Added Act 1, 2, and 7 Damage Magnification to Acc Secondary Reforges. You still want to prioritize Act 6 range, but rolling these are nice to have. -Removed Shieldless Charge from Tertiary Reforges Accs. Just get on your pet. -Updated Close Combat - Giant SnS and Close Combat - Giant Dual Wield to reflect the skill changes to Close Combat -Added Assault Slash Damage to Body Priority Reforges. You can instantly follow up Smash with Assault Slash (provided you have a weapon with at least normal Attack Speed) making Assault Slash a good way to deal some bonus damage after a Smash. -Added Assault Slash Cooldown to Hats for SnS. Ditto, this just lets you use AS more. Dual Wield added AS Cooldown to Secondary Reforges because honestly, your Cooldown should be low enough with dual Erg 50 hammers. -Moved Final Strike Cooldown and Duration to Priority Reforges for SnS. I’m pretty sure most giants still don’t like Final Strike, but it’s still fine I think? It’s not like there’s much else you can put in the Head and Body slot. -Moved Stampede Cooldown to Secondary Reforges. Honestly I think this might warrant a bump up to primary, especially for Dual Wield. But I haven’t run with Close Combat Giants very much so I haven’t had a chance to see it in action. -Editor’s Note: No changes to the Human Section Close Combat section, but I am considering adding a non Final Hit Section for humans. It’s not as efficient as Giant non Final Close Combat, but presumably some human was looking for that advice. Or you know, just keep Ungabungaing. |
09/04/2021 | -Updated Gear for Alchemy - Frozen Blast to be Alchemy - Support and expanded upon it. Alchemy’s support functions go beyond just Frozen Blast and while much of it has ended up being negated by later game content, it still sometimes works. -09/10/2021 Minor update: Moved Act 6 Crisis Range from Fire Alchemy Secondary to Primary. It’s always been integral to Flame Burst’s combat style, and it got even better with the removal of Crisis I-Frames |
09/02/2021 | -Updated Attribute’s name to Synastry to reflect the in-game name. |
08/25/2021 | -Updated some enchant wiki links -Fixed Rocket and Marksman being switched (Rocket was previously marked as a suffix and Marksman was marked as a prefix when they are actually switched). -08/31/2021 update: Fixed Explosive being listed twice in Fire Alchemy Body Prefixes. Forgot to move Seething to the 2nd spot for Fire Alch which was why Explosive was listed twice |
08/21/2021 | -Replaced Fantastic with Stabbing. Fantastic was an event rare, and stabbing despite being heavy armor only is still useful on Warrior, Lance, and Ninja sets. |
08/19/2021 | -Added Fragment to Fragmentation and Alch Success Rate shoe suffixes since you can get it pre-enchanted as a drop from certain shadow missions. -Fixed Solitude being absent from 2h enchant suffixes for the Divine Blade. Must have accidentally deleted it while adding other enchants. |
08/14/2021 | -Moved Bolt Mastery Damage from priority to secondary reforges for Fusion Bolt. I’ll double check the math later, but I recall my guild member saying they had lower damage on Bolt Mastery damage reforges. It’s likely due to how weird and complicated the magic damage formula is with bolt mastery being added together with other mastery bonuses whereas Fusion Bolt is effectively a final damage multiplier. |
08/12/2021 | -Well, Flamerider was in the most recent Gacha at time of writing so it’s no longer categorized as perma-rare. -08/13 minor update - Added a bunch of reminders to add wiki links. Also fixed the wiki link for solo. |
08/06/2021 | -Added Elemental Reforges to Crash Shot Secondary Reforges -Moved Effective Range from Secondary Reforges to Primary Reforges -Removed Bow and Crossbow Mastery from weapon reforges as they can’t roll that -Moved Max Damage and Mastery Reforges from Secondary Accessory to Primary Accessory Reforges -Will be testing Crash Shot Projectile Damage later to confirm if it applies to the implosion. If it doesn’t, it will be removed from the list. -Update: Crash Shot Projectile Damage does indeed not affect implosion damage. Removing it from the list. -Switched Celtic Royal Warrior Axe and Hammer spots and made >=. Axe has slightly higher Max after upgrades and can inflict a small Prot debuff with Smash. You may want to work on Axe reforges in general anyways though since Nightbringer Berserker is an Axe. -Added Stardust Part 2 enchants to Future Content. Will move them to the main lists later. -Update: Added to main lists. Will keep the info in Future Content until the update. |
08/05/2021 | -Updated Nightbringer weapon information as several were buffed. |
08/03/2021 | -Edited Troubadour Note to reflect that the body adds +3 Music Buff Effect for Battlefield Overture -Added Combat Mastery Max Damage to Puppetry Glove Secondary Reforges as it does affect Puppets (albeit at a 70% efficiency) -Corrected Challenger for Control Bar Suffixes to +35 Marionette Max Damage -Added Hideous to the 7th slot for Max Damage Accs |
07/31/2021 | -Deleted Divine Spellbook from Fusion Bolt list. The cost of materials isn’t worth it. If you have gold to throw at a Divine Spellbook, make a r1 Cooking Pot or buy a Holy Eagle Mask. |
07/28/2021 | -Added more information on the Nightbringer weapons. -Added Wiki Links to the Stardust System page |
07/22/2021 | -Added some future content information on Crom Bas, the new enchants, and the new weapon tier. Will update as more information becomes available. -Moved Playing Instrument Effect for Instruments from Secondary to Primary reforges. While the absolute best combination would be PE on an Echostone, that’s exceedingly rare. On the Other hand, Dual Rolling PE and Normal/Excellent/Inspiring Performance Effects on a Gloomy is a lot easier (though still hard to do) and is worth keeping/selling. -Added a Field Raid Tech loadout page. |
07/17/2021 | -Finished editing the Stardust section. Added a link to the Mabi web-guide. |
07/15/2021 | -Added Awakening of Light Cooldown to Magic - Staff and Magic - Fusion Bolt Tertiary Head reforges as they can reduce the down-time on the Pragarah Technique. -Added the Troubadour set items to the Bard BiS section -Added Supernatural to Staff and Wand enchants -Added a note regarding the Troubadour’s buff to Fantastic Chorus. It’s significant. -Moved Battlefield Overture Radius to Tertiary Bard Reforges. I mean, you literally will never need this. I’m not even sure it’s worth keeping on the list. -Changed Stardust Enchants from Unreleased to In Game Drops and added additional enchants to the lists. Also readjusted several enchant positions to reflect the placement of the new enchants. |
07/14/2021 | -Took notes on the Stardust update patch. Will move relevant information to appropriate sections after the update notes drop. |
07/13/2021 | -Minor edits to the Technique section to clean up -Added Judgment Blade armors to the General/Situational Equipment section -Switched Tournai and Chorus’ places on the Max Damage head slot Suffix. While Chorus provides 2 less max than Tournai, it is not on a roll, provides Music Buff Effect and Music Buff Duration, and it’s not completely useless to elves who cannot activate Tournai because of the Lance Mastery requirement. Honestly the sum of the parts for Chorus make it overall a better enchant than Tournai. -Added Wiki links for Demolition and Ruination gear |
07/12/2021 | -Added large warning labels to Redoubled Offensive and Elemental Attunement for Field Raids. |
07/08/2021 | -Moved Stardust information to the main document from the Future Information section. Will be released next maintenance (07/15/2021) |
07/07/2021 | -Added Ardent to Max Damage runner up, Magic Attack, and Off-Hand enchant lists. -Added MA stat to Successor in Max Damage enchants and Max Damage stat to Successor in Magic Attack enchants. |
07/03/2021 | -Added a note about the Nuadha Set to Fighter Notes. For now I won’t place it in the Gear and Reforge suggestion table because I think the Demigod enhancement is too niche to warrant building for unless you happen to have a pre-r1 Nuadha Glove and Boots. |
07/01/2021 | -Added Rain Casting Cloud Range to Fighter Tertiary Gloves. Despite Rain Casting being effectively banned from most end game content as an agro management mechanic, it can land critical hits which means it can trigger Revenant and Perseus Knuckle cooldown resets. -Added the Cylinder of Blossoming Memories as a Utility Weapon for Fighter. See above. -Move Charging Strike Range from Primary to Secondary. It’s a really good QoL reforge and I highly recommend rolling it on your shoes or Echostones. But your priority should be Drop Kick Damage. -Moved Shieldless Charge from Fighter Head Primary to Secondary. Again, really good QoL, but your focus should be on the Cooldown reduction reforges. It’s also replaceable by equipping a shield in your off hand or extra equipment slots. If you can find it on an Accessory though, it’s still worth having. -Added Shieldless Charge to Accs for Close Combat - Final Hit and Puppetry tertiary reforges. It’s nice to have but you don’t need them in either of these combat styles. -Added a General/Situational Reforge section -While I am adding a couple General/Situational Reforges, the notable one added is Mana Shield Damage Reduction Rate to the General/Situational General Gloves Section -Added Technique Overview and Card Loadout recommendations |
06/25/2021 | -Added a future content section for items that will likely not arrive on NA servers for a couple months |
06/16/2021 | -Added Perseus and Ruination exclusive enchants. These will likely be released alongside the new Tech Duinn Raid -Added an Unreleased rarity grouping for items that will soon be implemented |
06/13/2021 | -Removed Double/Triple Roll note for Dual Gun Maximum Damage and added Maximum Damage to Dual Gun Priority Reforges. This appears to have been removed as of 06/10/2021 |
06/10/2021 | -Removed Kunai Storm Attack Range from Ninja - Speed Running's Weapon section. As of today’s patch you can no longer roll this on Shurikens -Removed Kunai Storm Damage from Ninja - Speed Running’s weapon section. Ditto -Added Ranged Attack Max Damage to Archery - Magnum and Archery - Crash Shot Body. As of today’s patch you can roll Ranged Attack Max Damage on Clothing, Light Armor, and Heavy Armor. However, it will not stack with the feet slot. |
06/09/2021 | -Finished work on the Passive Equipment Section -Added Doll Bag Summary Table and rearranged order of bags. -Slightly changed the Criteria for Event Rares and Recurring Event Drop to encompass items that may be recurring event drops -Added Homestead Figure stat boosts, some notes on Homestead Houses, and Totems -Added Far Darrig Doll Bags to the Doll Bag lists -Rearranged sections so there’s less scrolling to Gear recommendations -Added Footer that links back to the Table of Contents -Updated Weapon Progression rule of thumb to include Ruination and Demolition Tags/Tiers -Added Ultimate Geas Devastation Gear for Archery - Magnum and the Chestplate for Archery - Crash Shot. Because you no longer are restricted to the Bohemian set when using Demolition/Ruination gear, Archers can use Geas Devastation gear for the boosted Redoubled Offensive Proc Rate. Chestplate was added for Crash Shot because of Forest Ranger Gloves. -Added Special Forest Ranger Outfit to Archery - Magnum ad Archery - Crash Shot. Because Bohemian sets are not mandatory with Demolition and Ruination Bows+Arrows, you can open up slots of other equipment. -Added the Forest Ranger Gloves for Archery - Magnum and Archery - Crash Shot. The Forest Ranger Gloves are useful gloves for Archers to put in the hand slot now. Because you no longer are restricted to the Bohemian set while using Demolition/Ruination gear, Archers can use the Forest Ranger Gloves to boost their effective range. However, the range boost they provide may be negligible -Added Fleet Feet type shoes to Archery - Magnum. Again, Bohemian is no longer mandatory if you use Ruination or Demolition Bows+Arrows allowing Archers more flexibility in their gear. |
06/06/2021 | -Started work on a Passive Equipment section for Doll Bags, Homestead Figures, and Totems -Moved Doll Bags from the Consumable Guide to the Best in Slot guide. Will rearrange order later. |
05/27/2021 | -Added Demolition and Ruination equipment to the Gear Recommendation and Weapon Progression lists for Archery (Magnum and Crash) and Staff Magic. These do not have wiki links yet so for now they will link to the update page. I will replace them with actual wiki links once those are up and running. -Changed Weapon Progression Archery - Elf to just Archery. |
05/26/2021 | -Removed Hard Peaca from Runner up Feet Section. -Moved Thunderbolt to Runner Up 6th slot. It’s not as accessible as Symbolic and it is a very wide range roll while also requiring a bridge. Symbolic meanwhile can be enchanted without bridges and will always add 10 Max Damage. For that reason, I am leaving Symbolic in the top 5. -Added Radiant as the 3rd best Feet suffix for Max damage and the best Feet Suffix for Attack Speed. -Removed Gamer so I could move Teaching down to 6th in Max Damage Hand Suffixes. The Dice Battler enchants are kind of a pain to deal with because of their high repair costs, need for bridges, and limited availability. While some will remain on the list, they are going forward the most likely to be booted off of the list regardless of their position. -Added Sparkling as the 3rd best hand suffix for Max Damage and the best hand suffix for Attack Speed |
05/24/2021 | -Removed Dazed from Max Damage Headgear Runner Ups. Just use Dexterity. -Added Shadowy. It provides the same potential max as Gamer but lacks a roll and can be obtained fairly easily. |
05/22/2021 | -Changed Section Title Close Combat - Giant - Smash, Windmill, and Final Strike to Close Combat - Giant - Sword and Shield. Less wordy title and it conveys the specific weapons you should be using in the build. -Changed Section Title Close Combat - Giant - Smash Windmill but with Borealis Hammers to just Close Combat - Giant - Dual Wield. Less wordy Title, it gets the same message across. -Moved all Windmill Reforges for Close Combat - Giant - Dual Wield to Priority Reforges. Windmill is expected to be buffed significantly making Windmill good to build for. |
05/20/2021 | -Added Meteoroid and 67th Floor for the Ruination and Demolition Staves. Which are still a week out from release at time of writing. They will be added to Gear and Weapon progression lists upon release. |
05/19/2021 | -Updated Changelog formatting -Added Known Far and Wide to life 2nd titles -Added the Weapons of Blossoming Memory line of weapons to the Gear Recommendation and Weapon Progression lists. Despite being essentially free weapons, they are very good for when you are first entering Late Game content and can carry you for quite a long time. |
05/04/2021 | -Removed Elemental Reforges from Dual Guns, Puppets, and Ninja - Speed Running. Dual Guns, Control Bars, Shurikens, and Chain Blades cannot roll elemental reforges. |
04/30/2021 | -Added some notes regarding the Skill Set Effect Enhancement Scrolls for Fusion Bolt and Alchemy gear. If you get enough scrolls, you can limit the amount of slots dedicated to set bonuses allowing you to use other set effect equipment such as Geas Devastation or Fleet Feet. |
04/28/2021 | -Slashed out Weaving Glove Notes. It’s possible you can no longer use durability hammers on weaving gloves. |
04/26/2021 | -Added Fragmentation and Production Alchemy success rate enchants. Because of the need for Divine Mineral Fragments and Divine Magic Powder, Fragmentation has remained relevant. DMFs and Divine Powder don’t have maxed success rates with skills only, necessitating the use of success rate enchants to prevent the potential loss of valuable materials. -Added Death Mark Damage Amplification to Chain Slash - Combat. Honestly this is as good a reforge as Spinning Slasher range on a combat focused Chain Slasher build. Death Mark is a large damage boost and you’re likely going to incorporate Death Mark into your combat anyways. |
04/22/2021 | -Added Arcane to BiS Staff sections and corrected roll range for Strange. Arcane is a sidegrade to Strange and Strange is on a 10-20 roll, not 12-20. -Added Fury of Light and Awakening of Light cooldown reduction reforges to Tertiary Fighter Reforges. Fury of Light can score critical hits which can reset Fighter Skill Cooldowns when using Revenants or Perseus Knuckles. Cooldown reduction means more uptime on Fury of Light. However, I wouldn’t go out of my way to replace any of the Primary reforges with these, so put them on another headpiece and just switch it in when you are using Fury of Light. -Moved Focus Fist Charge time reduction to Secondary reforges in headgear. I like Focused Fist a lot, it’s got great damage and it’s just overall cool. But in practice I rarely fully charge Focused Fist despite having a max roll Focused Fist Charge time hat. It’s a huge QoL, but it isn’t as vital as Charging Strike Cooldown. |
04/19/2021 | -Lowered Rain Casting Duration in Alchemy Reforges to Tertiary and moved Water Cannon Max Damage to primary. Since you should be using Rain Casting with Revenant/Perseus cylinders, the duration will already exceed the cooldown length significantly especially when factoring in CD reduction from Wind Marbles and reforges. The extra 30 seconds on Rain Casting is overkill. Water Cannon Max is basically just more damage for your Water Cannon. |
04/09/2021 | -Corrected a note on Lightning Rod Cooldown. The Cooldown Echostone is not enough to completely negate the cooldown of L-rod. That being said, you should still get one anyways because the new staves that further reduce the cooldown of Lightning rod. The Shattered Overload Staff specifically will reduce L-rod’s cooldown by 5 seconds meaning you would be able to use L-rod every 6 seconds. |
03/30/2021 | -Added a few notes for the Tarunes MK3 and some of the weapon progression sections. |
03/25/2021 | -Added Caracal/Friends to BiS crafting table -Added Weaving Gloves to the Staff and Fusion Bolt gear list as they can add up to 60 Magic -Attack while having a roundabout method of repair involving Platinum or Crystal durability hammers. -Added a mention to “the Fashionable” in the title section as it can be a useful life skill title that isn’t a master title. -Added a couple recommendations for Master Titles that may see some use in certain situations. |
03/10/2021 | -Added a link to the Category: Music Skills page on the wiki to Music Buff effect and Bard reforge sections as it provides a music buff effect calculator -Changed Fleur’s Grass Tiara from Green - In Game Drop rarity to Red - Legendary Rarity to reflect the extreme scarcity of this item. Nobody runs Mag Mel and I’ve never seen somebody with this item, not to mention the thing is based on a 2-4 Music Buff Effect and 5-10 Music buff duration roll. -Added an additional note on the Hagi shuriken -Moved Focus Fist from Priority reforges to Secondary Reforges and added a note on combo cards. While a good reforge, it is harder to get a combo card for Focus Fist. Additionally, even with the Charge Time reforge 2 seconds is quite a bit of time to be not punching things. -Moved Lance Charge Max Distance to secondary reforges as it only applies when unmounted. |
03/01/2021 | -Added note for Close Combat - Giant Smash and WM with Frosted Borealis Hammers on the use of bash -Removed Destruction Robe from Lance Equipment section since it is easier to cap Piercing with lances. |
02/28/2021 | -Fixed Ultimate Geas Devastation Circlet improperly linking to Ultimate Geas Edge Circlet |
02/23/2021 | Removed Stormy and Artisan and replaced with Solo for hand and feet prefixes. Solo is easier to get (dungeon guide), is not on a roll, and provides music buff effect. Also rearranged the order slightly. |
02/20/2021 | -Added Milky Way Box production titles to the Production Title section -Added a section linking to my Consumable Guide -Added a section linking to my Guide to Guides -Corrected Forest Ranger Arrows being mislabeled as Event Rares when they are Gacha Exclusive drops |
02/16/2021 | -Removed the Pet Tier List and Useful Summon Effects and replaced with a link to my Pet Compendium. |
02/10/2021 | -Fixed Ocypete being incorrectly marked as a Prefix when it is actually a Suffix |
02/03/2021 | Added Pihne to the 2nd title list for Magic Attack. -Added a Shield/Off Hand section for Weapon enchants -Added a note for the title section to reflect the best primary titles -Added Attack Speed enchant list -Removed Inclusive/Embracing from Max damage runner up list and added Hawk -Switched Sundrop and Wild Boar. Sundrop technically requires premium so you can get the advanced play accessories. |
01/24/2021 | -Updated the Magic - Staff with auxiliary gear and a note regarding echostones. -Updated the Magic - Fusion Bolt section to include Cooking Pots to reflect that they can be used with Max Attack Power reforges to boost Fusion Bolt Damage. Reordered Wand reforges and added Firebolt Max Damage to the secondary reforge list for wands. -Changed Inclusive to Embracing to reflect the in-game name. -Added a note page for Magic enchants. -Cleaned up Magic and Bard 2nd Titles. Added Alchemy 2nd Title section. -Updated Alchemy enchant sections. -Updated color coding for Weapon Progression to be consistent with the rest of the document. -Fixed color coding of Chorus from Even Rare to In Game Drop |
01/17/2021 | -Removed Destruction from 2h weapon enchants and replaced with Fierce. While Fierce has 2 less max than a max roll Destruction, Fierce does not require a bridge and more importantly is not a roll. -Fixed Novel and Starlight being marked as event rare enchants when they are in fact in game drops -Switched Respectful and Brainstorm’s places on the Bow enchant list. -Renamed Gacha Rare to Legendary Rarity to better reflect the status of items that are cash shop/crossover exclusive items unlikely to ever return or items that are so difficult to acquire that the NA servers have had difficulty seeing them in numbers greater than single digits. |
01/08/2021 | -In the Magic Attack Headgear prefix section moved Coma to 1, Apathetic to 2, and Soaked to 3. Soaked does provide more Magic Attack than Coma and Apathetic, but it requires you to be under a Rain Casting Cloud which does hinder its activation. -Added wiki links for Aello, Ocypete, and Celaeno. -Added a secondary stat description for Sandglass to indicate that it provides an additional Time Shift Charge -Added a note and made adjustments to Bard reforges to reflect that you may prefer to get Playing Effect on the Echostone Slot instead of the instrument slot as Normal/Excellent/Inspiring performance reforges on the Echostone slot will not stack with the Accessory slot. -Added the Red Echostone to the Fighter Reforge section with the Combat Mastery Max Attack Power roll in Priority reforges. As a melee weapon, knuckles do benefit from Combat Mastery. |
01/01/2021 | -Removed Excellent from Max Damage Runner up and replaced with Seething. Seething has 2 less potential max, but does not require bridges and does not roll the max damage portion. It’s also readily available from the White Dragon Raid. -Fixed Backbreaking being marked as an Event Rare instead of In Game Drop |
12/30/2020 | -Removed Final Hit Max Damage from the hand slot as it cannot be rolled there. |
12/29/2020 | -Added Robe Section to all gear lists. |
12/27/2020 | -Moved Taunes Mk3 in the Gear suggestions and Weapon Progression to their own “category” to reflect that certain builds may prefer the use of them over the Dowra line -Removed Final Hit Max Damage from recommended Final Hit reforges. It is not affected by buffs or skill multipliers which lowers the potential damage increase compared to maximum damage reforges. |
12/26/2020 | Corrected Viscount incorrectly being in hand enchants and fixed link. Added Inclusive to Max Damage Runner ups for Hand enchants. |
12/23/2020 | -Added Ultimate Geas Edge gear to the recommended Mage Gear section for the increased Iron Will up time. -Added Massive Despair Blade to Giant Gear recommendations. -Added Elemental Reforges to the secondary reforge section for Dual Guns and Speed Run Ninja. These are things you may use in dungeons or shadow missions which are affected by Elemental Reforges, but there are reforges you should prioritize over them. |
12/22/2020 | -Added Gear and Reforge Suggestions for Fire Alchemy, Water Alchemy, Frozen Blast, Fighter, Bard, Puppetry, Dual Guns, Ninja, and Chain Slash. |
12/21/2020 | -Changed Color legend again per Fierlyt's suggestion to conform to modern looting color coding. -Added Gear and Reforge Suggestions for Close Combat: Final Hit, Wind Guard, Giant Smash, -Frosted Borealis Hammer Smash, Lance, Elf Magnum, Crash Shot, Staff Magic, and Fusion Bolt Magic. -Added Table of Contents -Added note to Bone Dragon’s in the summon effects that Devil Cry can interrupt Song of Grief’s attack patterns, namely her Invincibility frame AoE skill. -Reordered Max damage runner up page to be closer to the Max Damage Page |
12/18/2020 | -Switched the Color legend for Recurring Event Drops and In Game Drops to better fit the ROYGBIV format (with Y and I removed since Y kinda looks off and I is close enough to purple anyways). -Added note that the Patrasche cannot be Fyn Synced which does make it a lesser link pet. -Removed Magic and Music runner up pages as they are empty and it is unlikely they will be filled any time soon. Also slightly reformatted Weapon Enchant pages. -Removed Trader and added Enigmatic as Trader is only active while in commerce mode. -Added a note to the Max Damage Enchant section to explain why you may want to use Max Damage-Music Buff Effect hybrid enchants .Added additional notes for the Paradise Enchant in regards to the -20 balance. -Replaced Iron-Walled with Fortification. Although Fortification has a lower max damage potential, it provides a large amount of defense provided Dampen Shock is active. -Abbreviated Piercing level to PL. -Added note for how Echostone acc skills will not stack. -Added Divine Blade and Frosted Borealis Hammers to Giant weapon progression. -Added Hagi to Ninja weapon progression. |
12/17/2020 | Published for general use. Will update new enchants with wiki links after the wiki is updated. - Updated Witch (+2-4 Magic attack) to reflect that it is a roll. -Added some useful reforges to the list for General purpose, Magic, Alchemy, Fighter, Bard, Puppetry, Dual Guns, Ninja, and Chain Slash. Also cleaned up the sections. |