
MINI Gen 2
Vent Gauge Pod Installation Guide
Overview
Thank you for purchasing the MINI Gen 2 Vent Gauge Pod from CravenSpeed. This pod is designed to mount a gauge in your 2nd Gen MINI’s air vent without restricting airflow. The Vent Gauge Pod is made from the highest quality materials and is guaranteed to be free from defects.
NOTE: The installation of the pod should take no more than 60 minutes. The only tools required are a T25 Torx driver, an ⅛” Allen key, and a trim panel removal tool (you can use a screwdriver, but it may cause damage to the plastic pieces if you’re not careful)..
Parts included are:
1 ea Vent Gauge Pod
1 ea 52mm Backplate
1 ea Button Head Screws
1 ea Set Screw
2 ea Foam Bumpers
Part # CRMC-0028 is compatible with the 2nd Generation MINI Cooper and Cooper S.
Remove Tachometer and Dash Trim
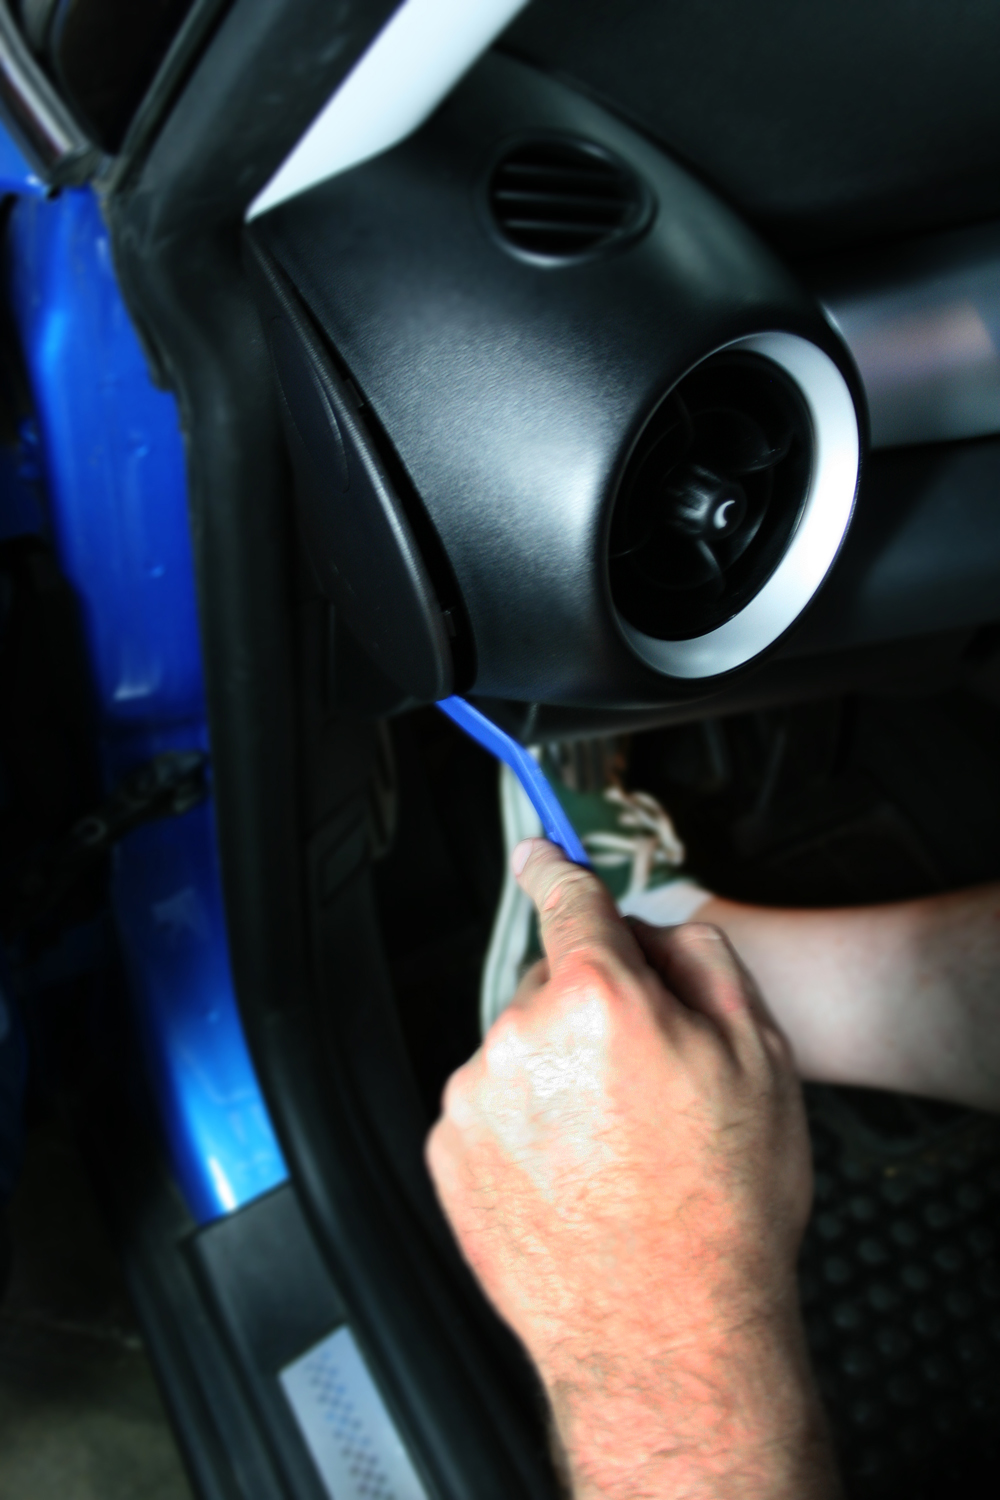
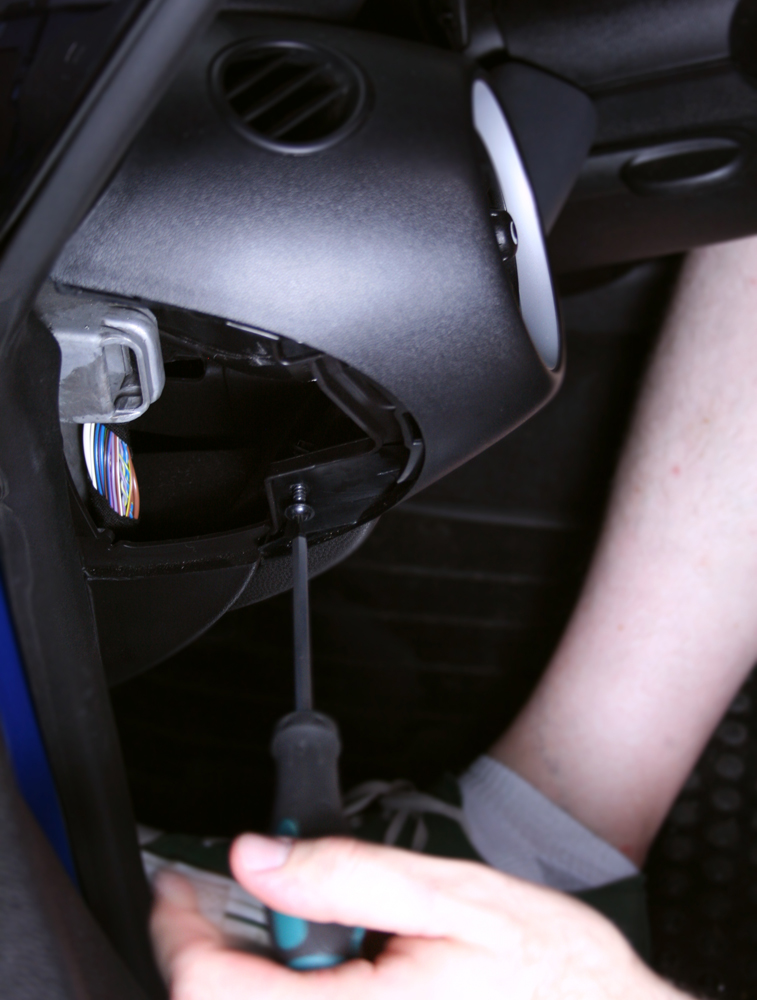
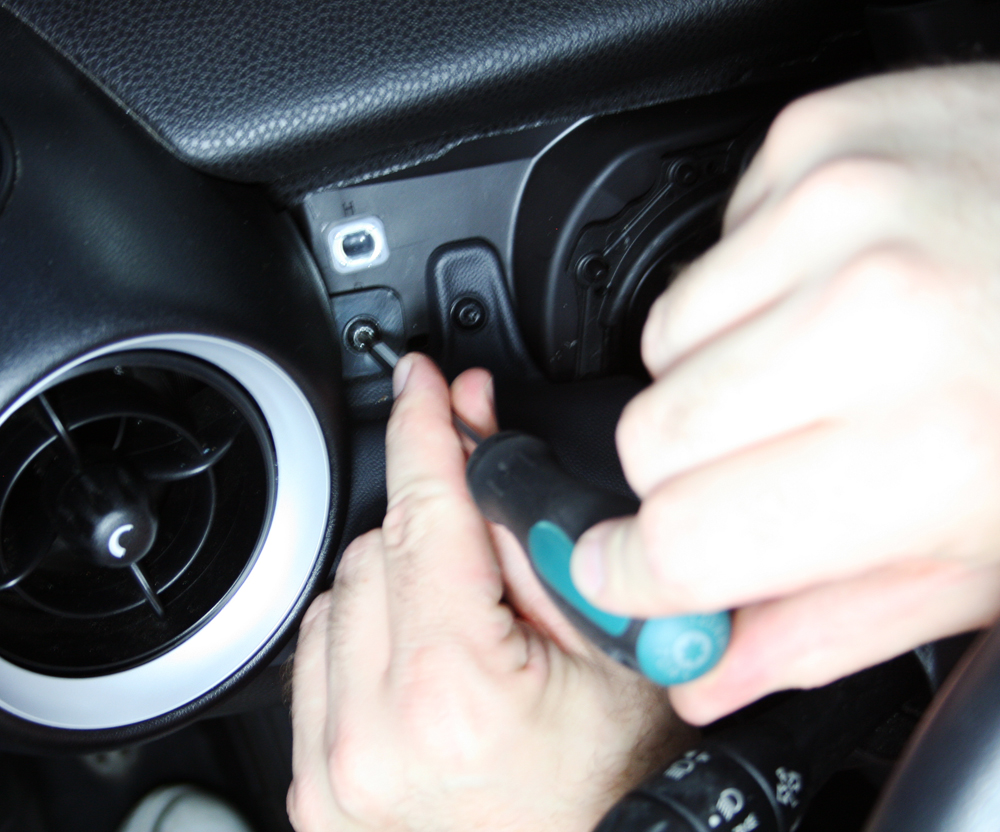
Remove Dash Side Panel
Using the trim panel removal tool, remove the plastic access panel on the driver’s side of the dash.
Remove Tachometer and Dash Trim
Using the T25 Torx driver, remove the two screws that hold down the tach.

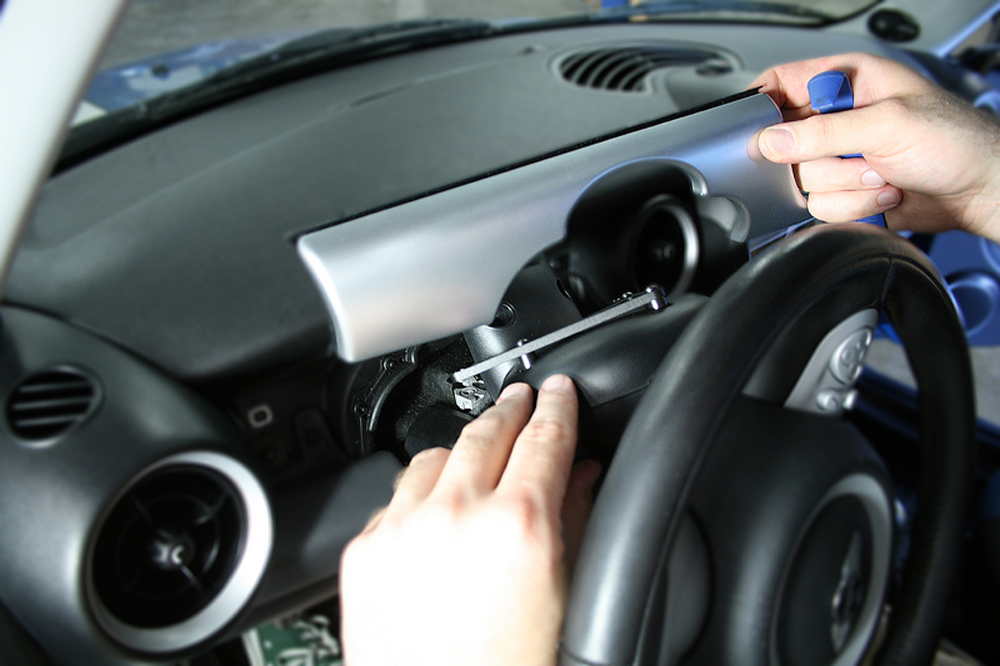
With the trim panel tool, remove dash trim by loosening and pulling forward.
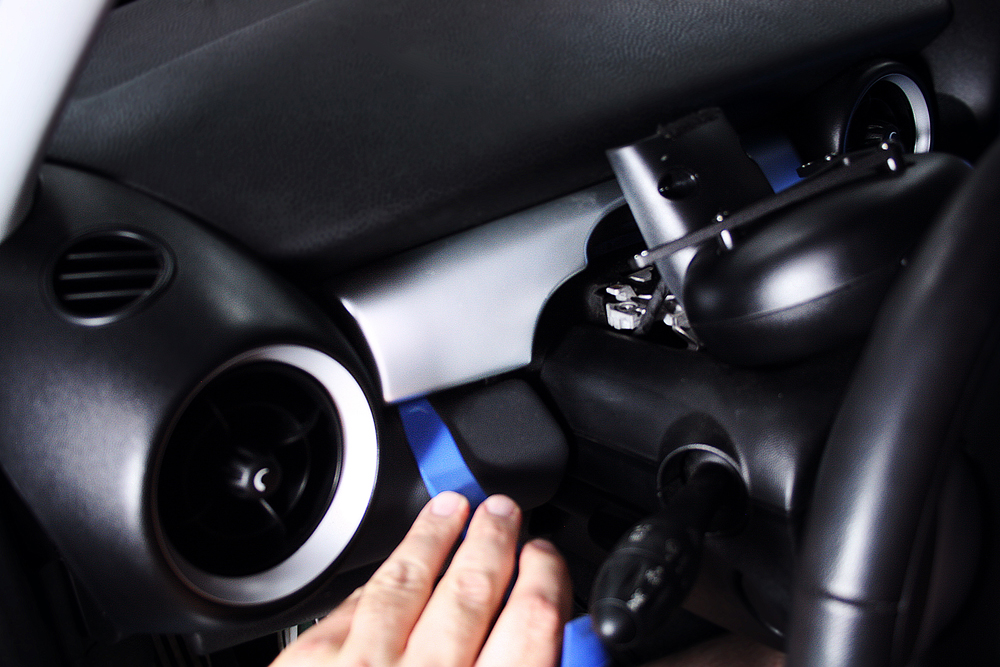
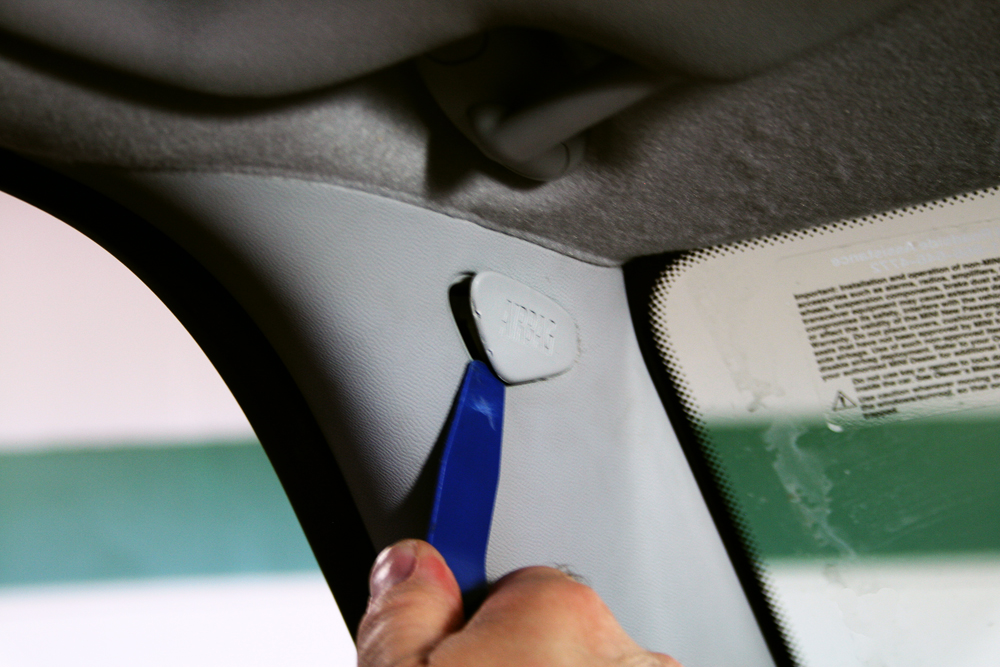
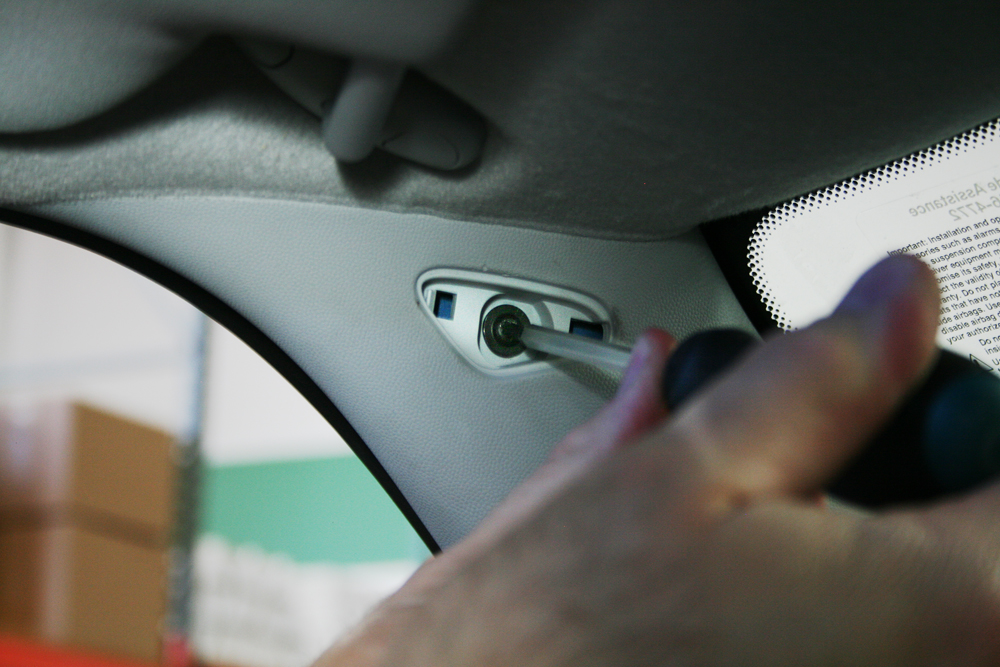
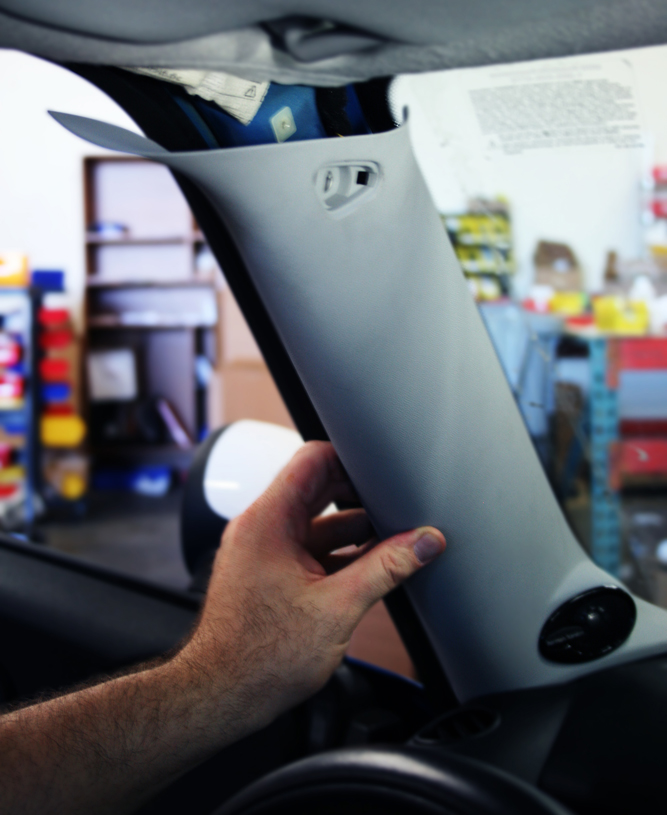
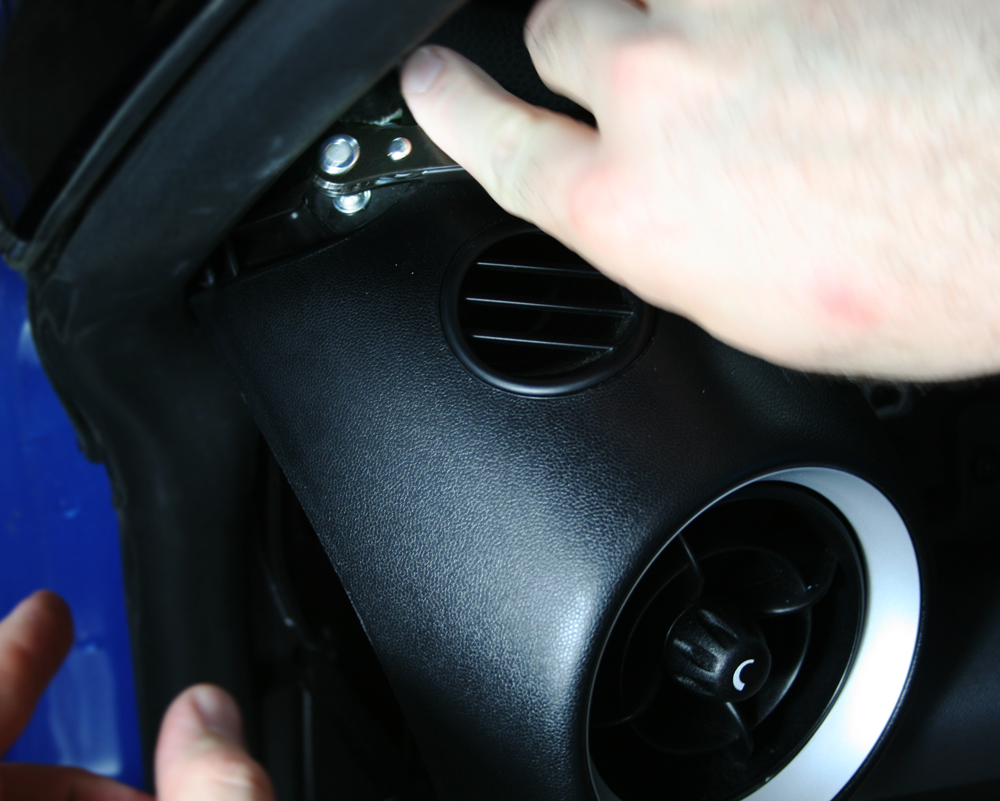
Remove A-Pillar
Using the trim panel tool, remove the plastic cap on the A-pillar that says “AIRBAG” on it. Push the pry bar underneath the cap from the front of the car and slide it toward the back and it should pop out. With the T25 driver remove the screw.
Pull the A-Pillar towards the center of the car and then towards the back. It is held in by clips.
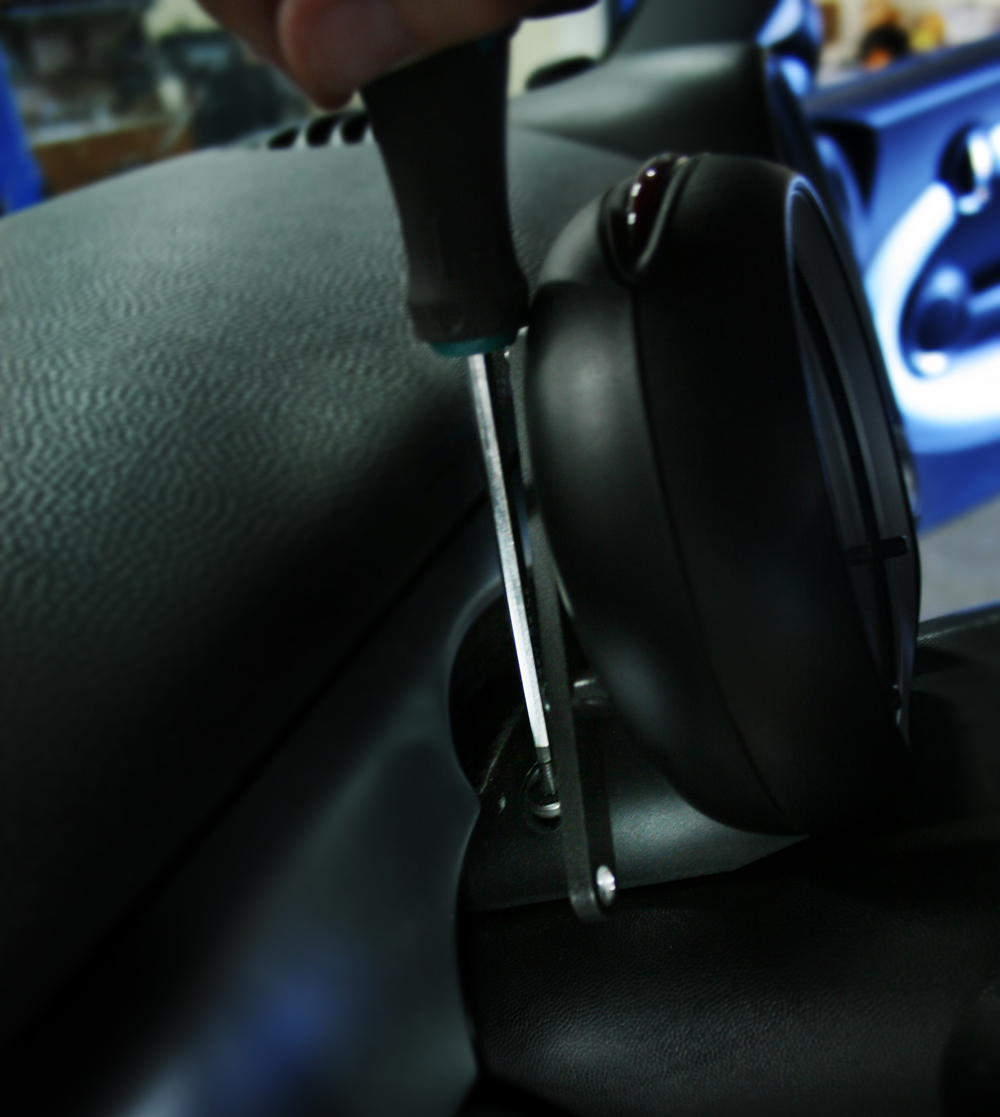
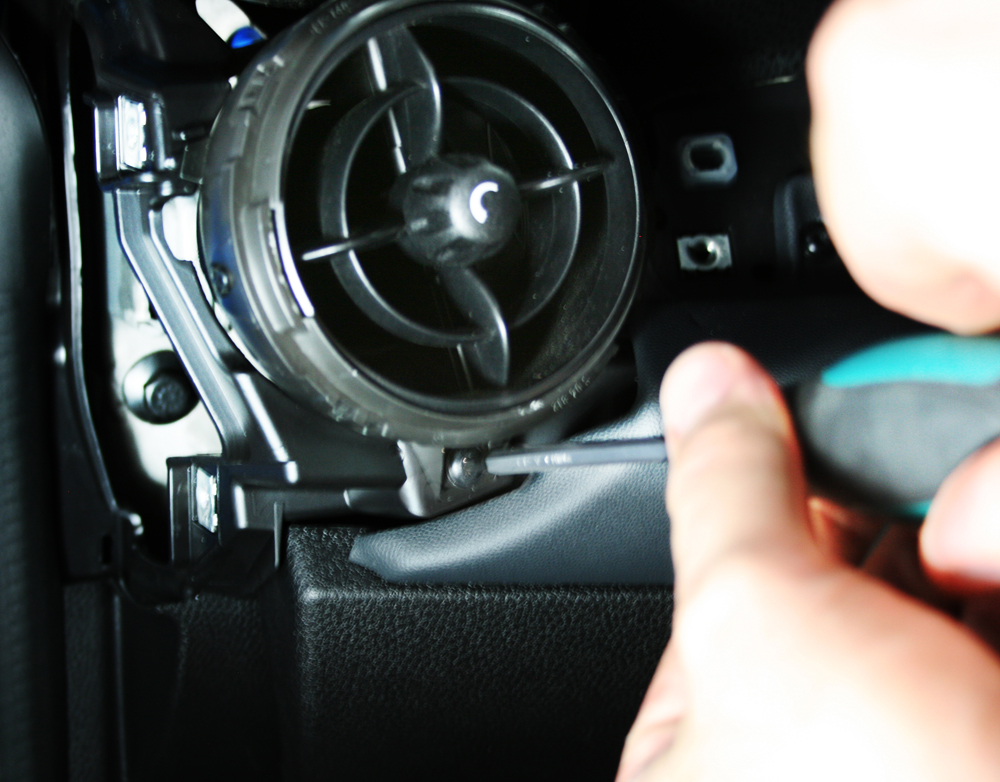
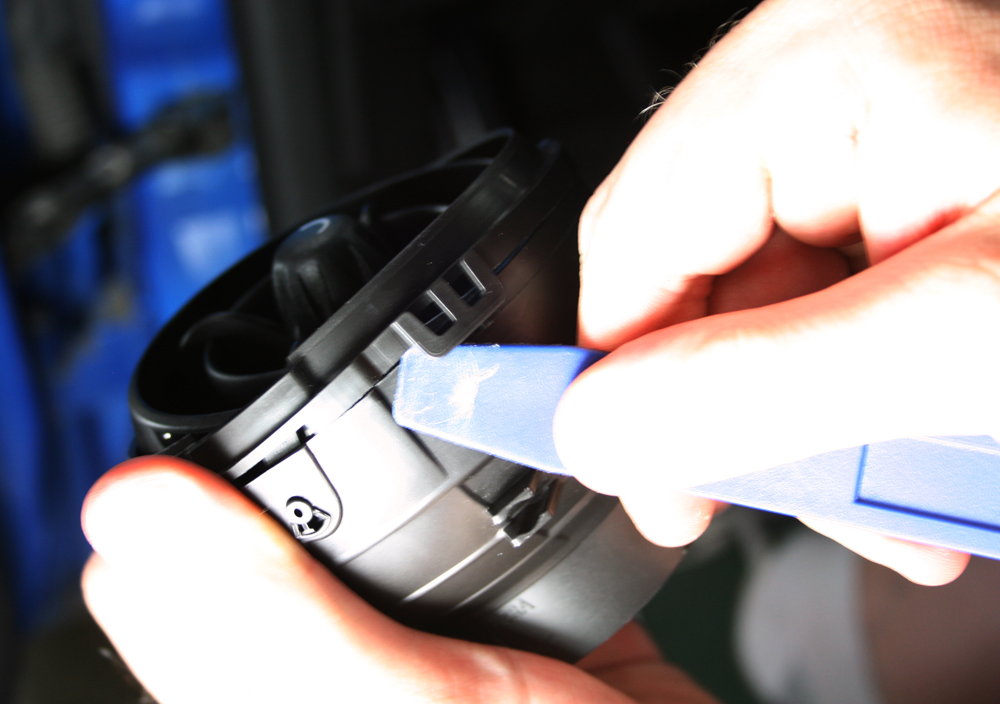
Remove Vent Cover
With the T25 driver remove the 2 screws from the side of the dash and the 1 screw from the front of the dash.
The next step most difficult part of the installation, removing the screw from the top of the vent cover. It is at an odd angle and very difficult to get to. We used a very small Torx bit on a little ratchet driver. Once the screw is out, the whole cover piece will slide right off.
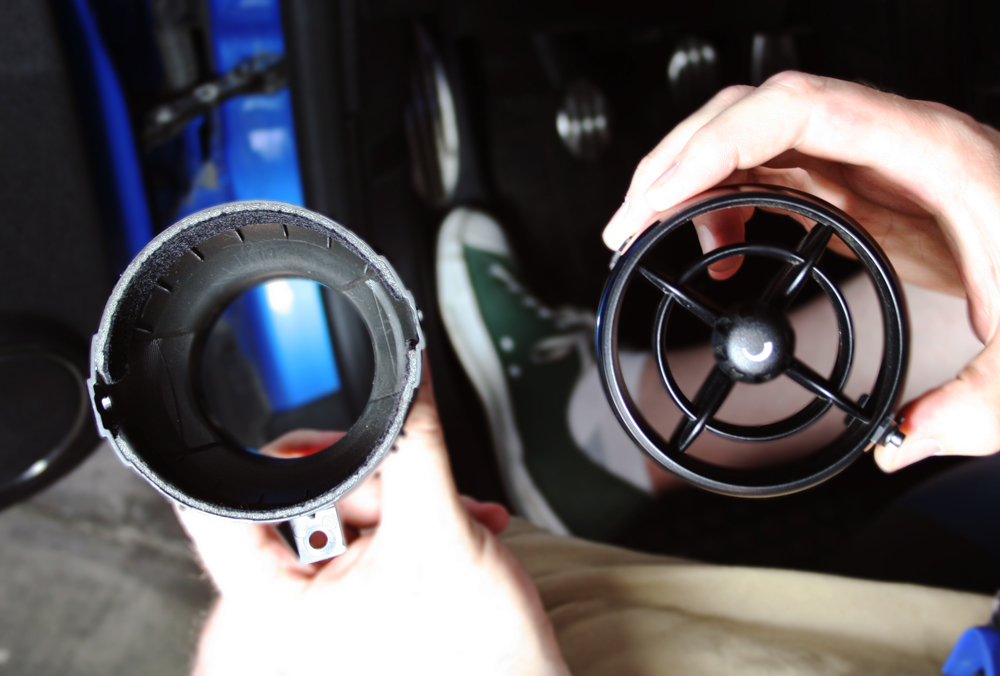
Remove Vent and Install Pod
Remove the Torx screw at the bottom of the vent and twist to the right to free the vent.
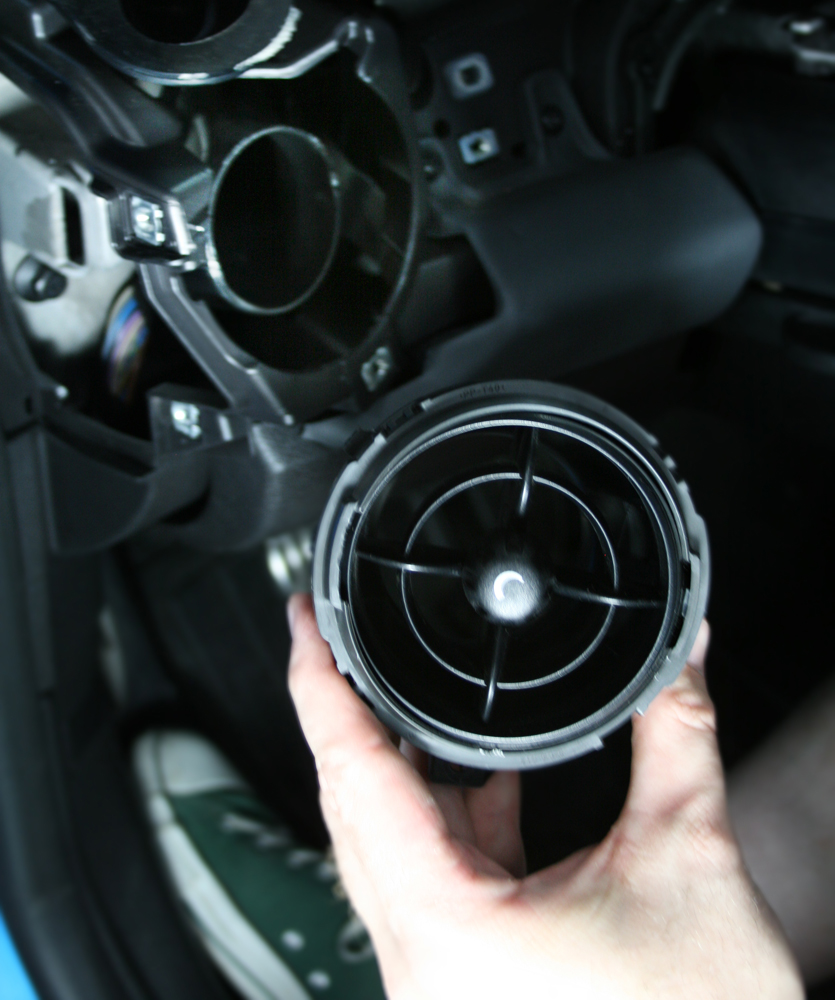
With the trim panel tool, remove the plastic ring that holds the vent assembly together.
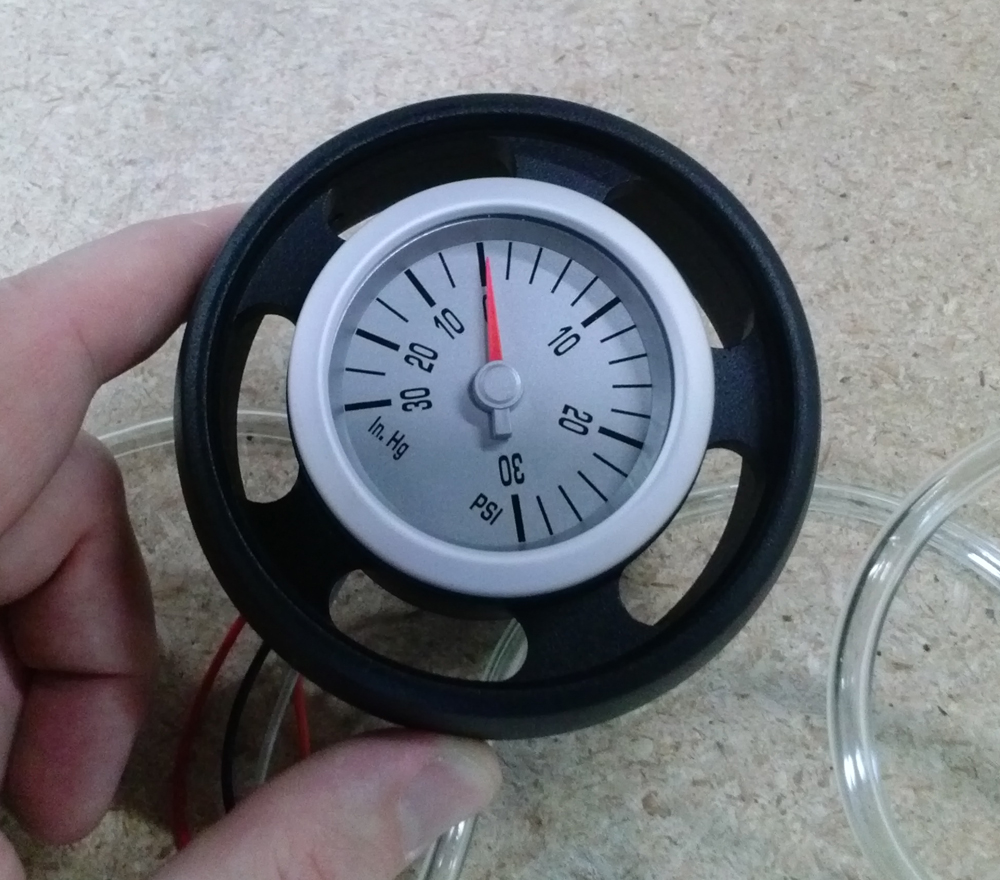
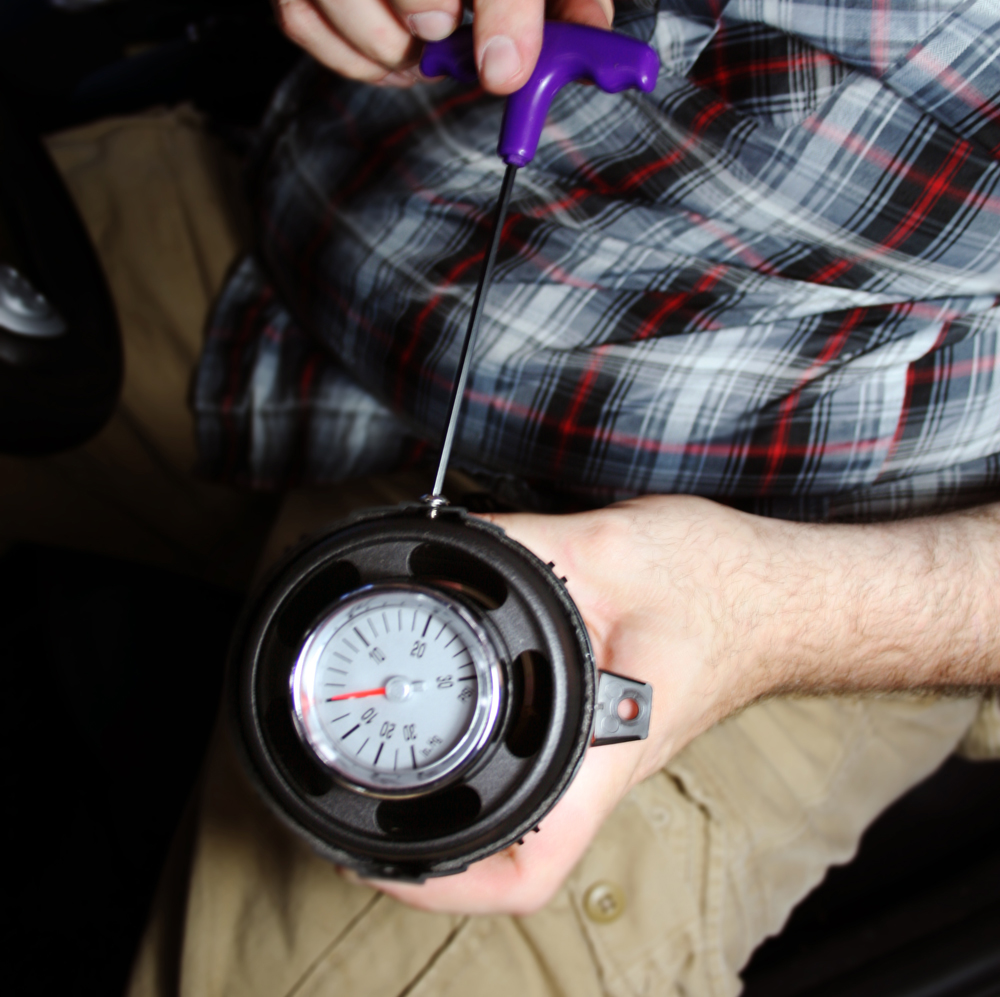
You can now mount your gauge into the pod. (Note: If you are installing a mechanical boost gauge, you may need to drill a small hole in the back of the assembly to run the tubing.) If necessary stick one or both of the foam bumpers on the inside of the center of the pod so the gauge will fit snugly. Place the gauge into the pod with the wires going out the back. Line up the backplate with the 2 studs on the back of the gauge and run wires through the cutout. Use washers and nuts supplied with gauge to secure it in the pod.
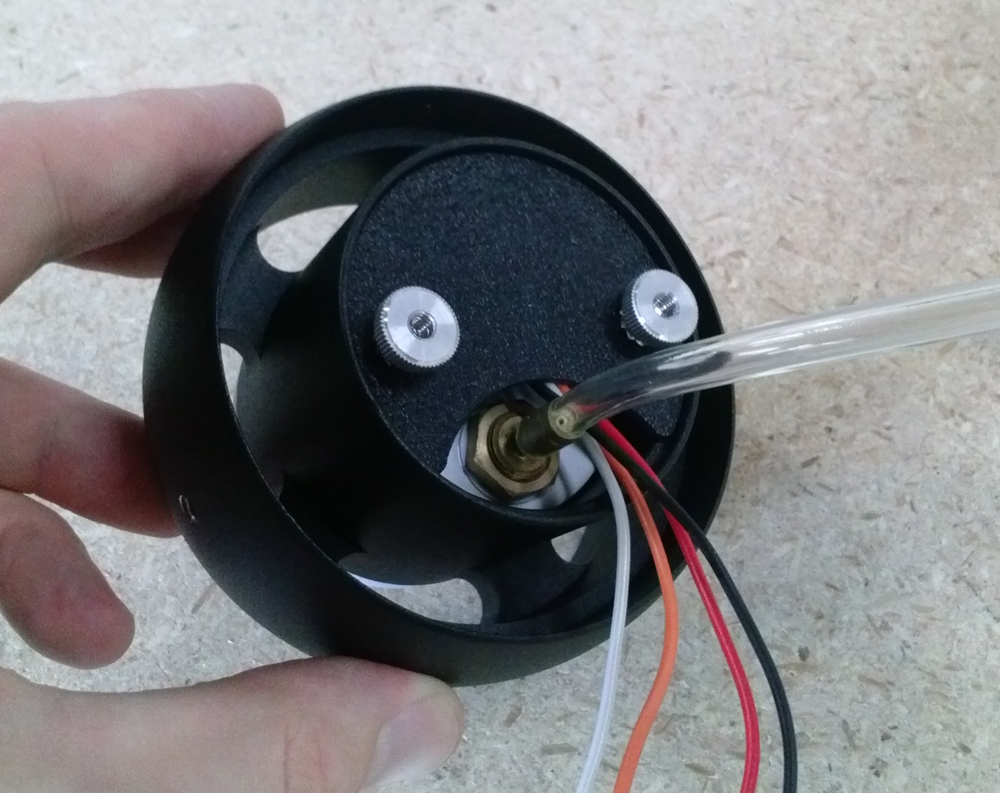
Screw the set screw about halfway into the hole on the right side of the Vent Gauge Pod (The center hole of the Vent Pod sticks a little farther out the back than the front). Enough of it needs to be sticking out for it to be supported by the vent assembly. Place the gauge pod in the vent assembly so the set screw will be pointed through the pivot hole towards the passenger side. Screw the button head screw in on the other side, but do not screw it down tight, It just needs to be in there well enough to hold the assembly together. Place the ring back on the assembly.
Now it is time to put the vent assembly back on your MINI. There will be enough room to run the gauge wires between where the vent assembly connects to the vent tube. Hold onto the wires and slide the assembly onto the tube. Twist the assembly to the left so it clips in and re-install the screw at the bottom.

Now it’s time to put everything back together. Place the vent cover back and replace all the screws. Replace the A-pillar by lining up the bottom with the little tab holes in the dash. Push it in until the clips catch. Use a plastic pry bar or other thin piece of plastic to straighten out the weatherstripping along the A-pillar. Replace the screw and the little plastic cap. Put the dash trim back on by gently pushing it in. Reattach the tachometer and clip the side panel of the dash back into place. You have now successfully installed the Vent Gauge Pod.

Install your Gauge
From here you can follow our gauge installation instructions which are located here for the MINI with the N14 engine and here for the MINI with the ‘Refresh’ N16 engine.
If you have any questions about this installation, please give us a call at (503)505-6886 from Monday - Friday between 8am and 4:30pm Pacific Time and we will be glad to give you a hand.
We love pictures too! If you have some nice photos of our products that you would like to share with us you can email them to: support@cravenspeed.com
CravenSpeed, 7337 Tech Center Drive, Portland, OR, 97223, 503.505.6886
www.cravenspeed.com
Page of