1) Create a 2D design file in Draftsight.
2) Save the file as “R2007-2009 Binary Drawing (*.dxf)”.
3) Copy the file to a thumb drive.
4) Go out to the router and power on router computer.
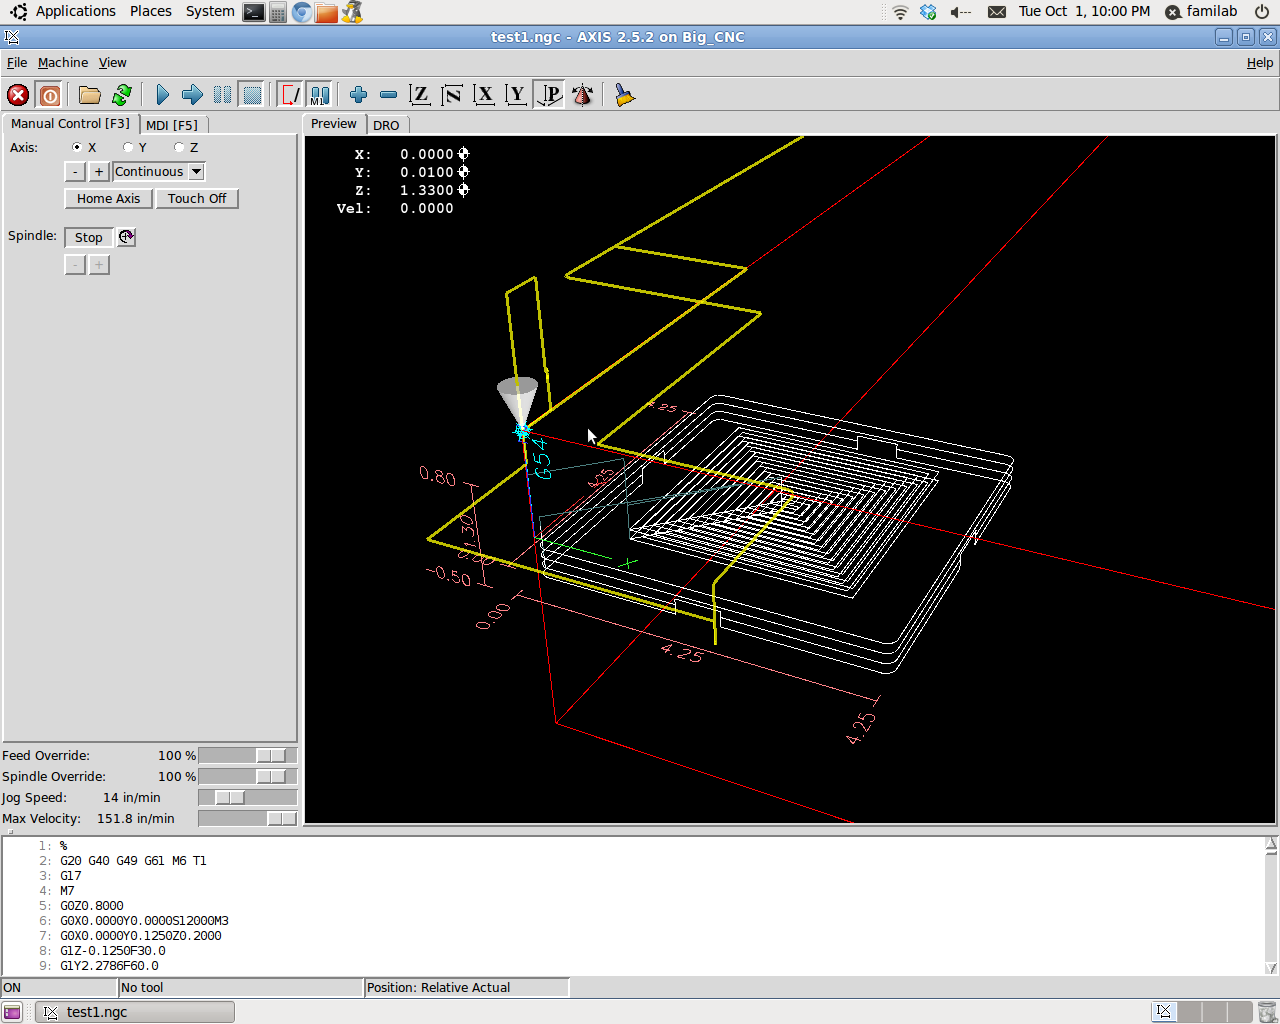
5) Open the file in Cut2d (the location for external media is: /media/YOUR_THUMBDRIVE/).
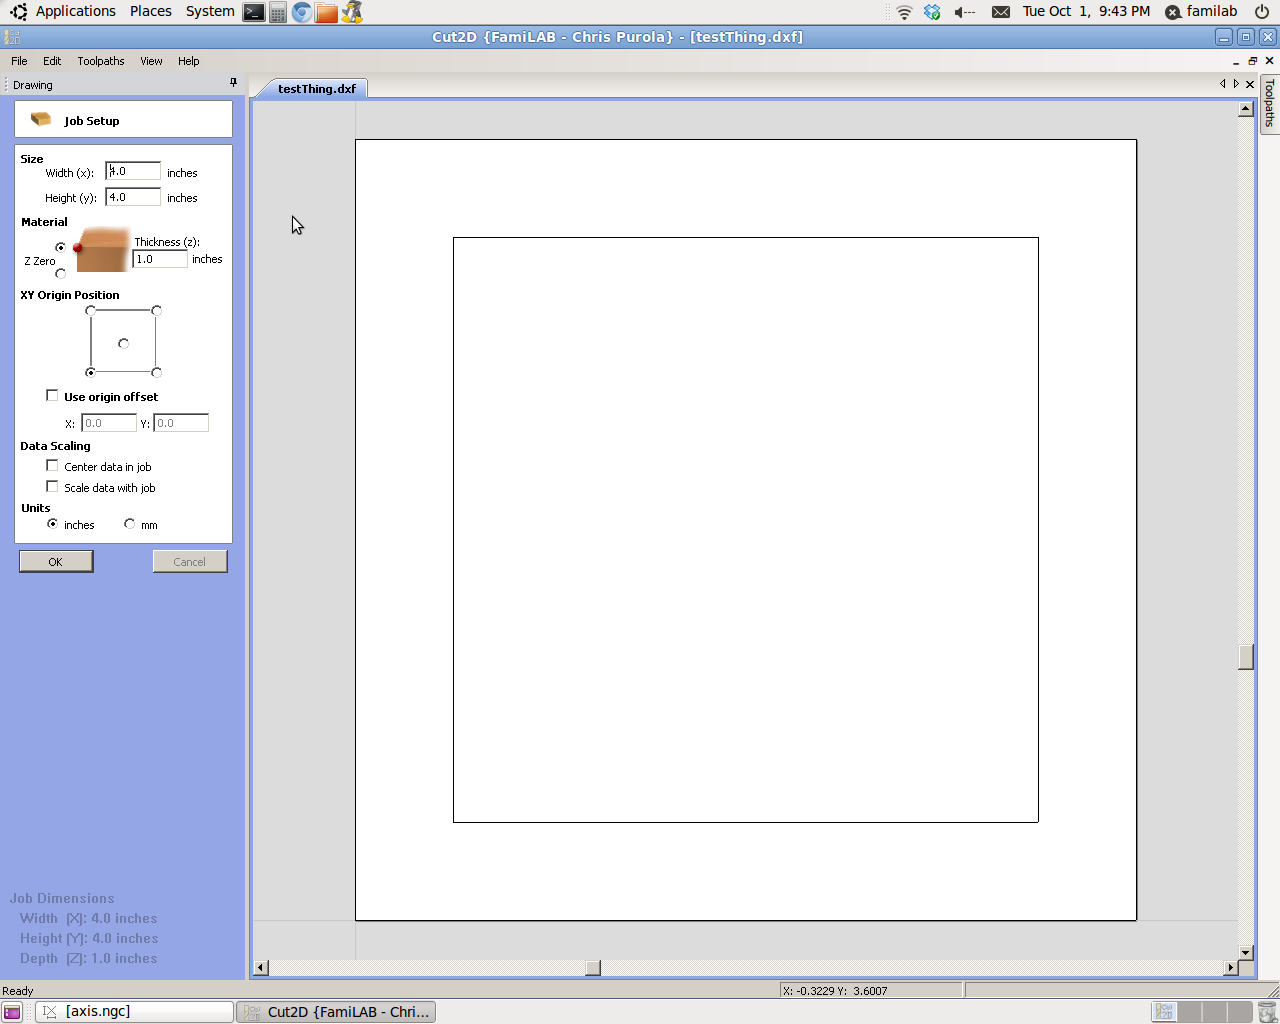
6) In the Job Setup bar (on the left side), set the job size units (imperial or metric) to match your file.
7) In the Job Setup bar, ensure the cut area width accommodates your planned bit width- add at least 0.5”/13mm space to each axis, then select “Center Data in Job”.
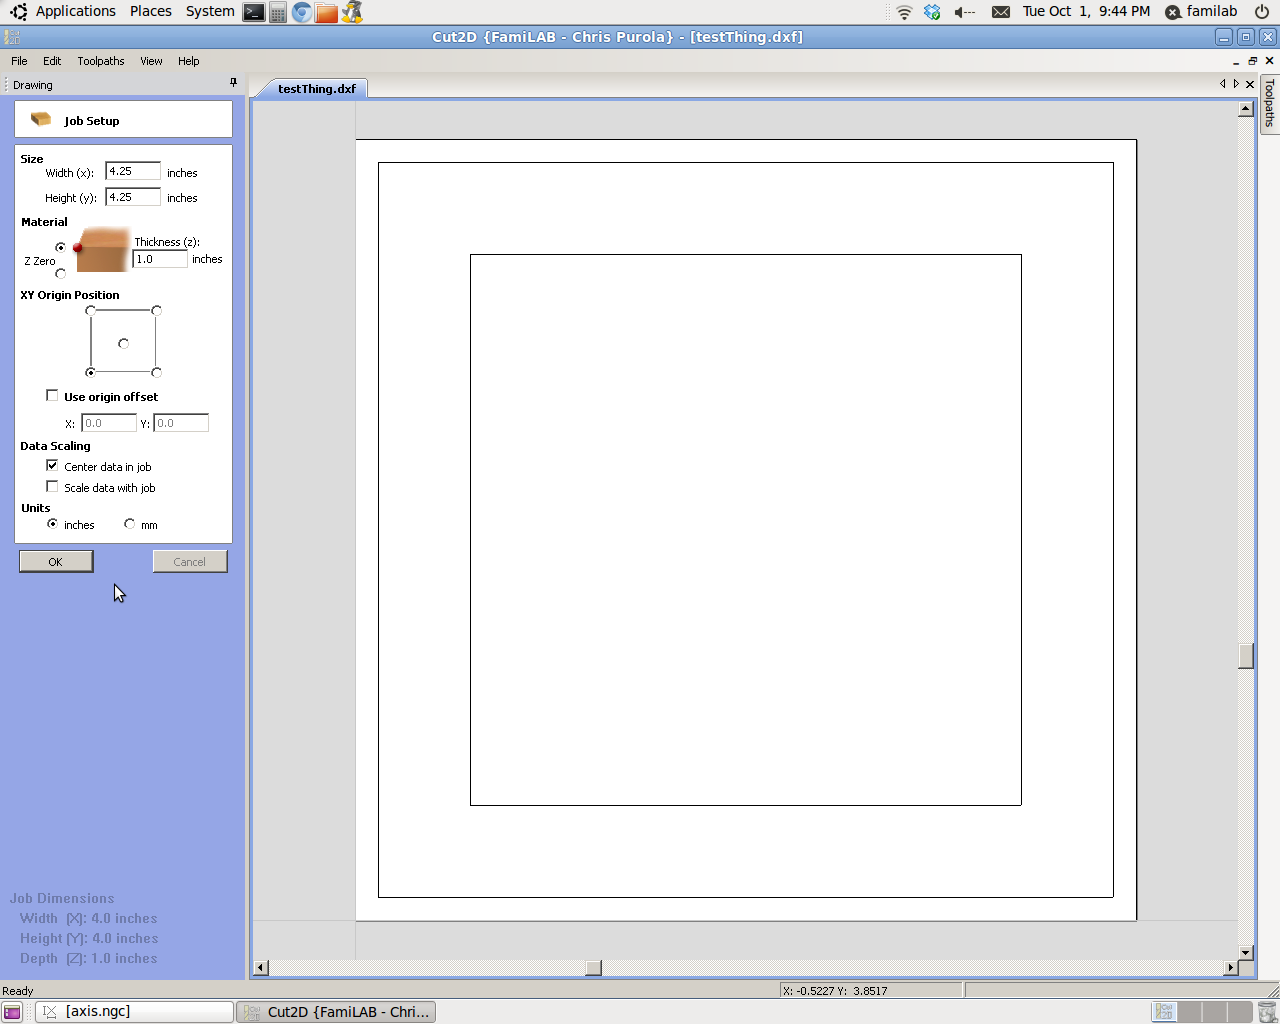
8) In the Job Setup bar, set the material thickness to match your material.
9) Make sure “Use origin offset” is not checked.
10) In the Job Setup bar, press ok.
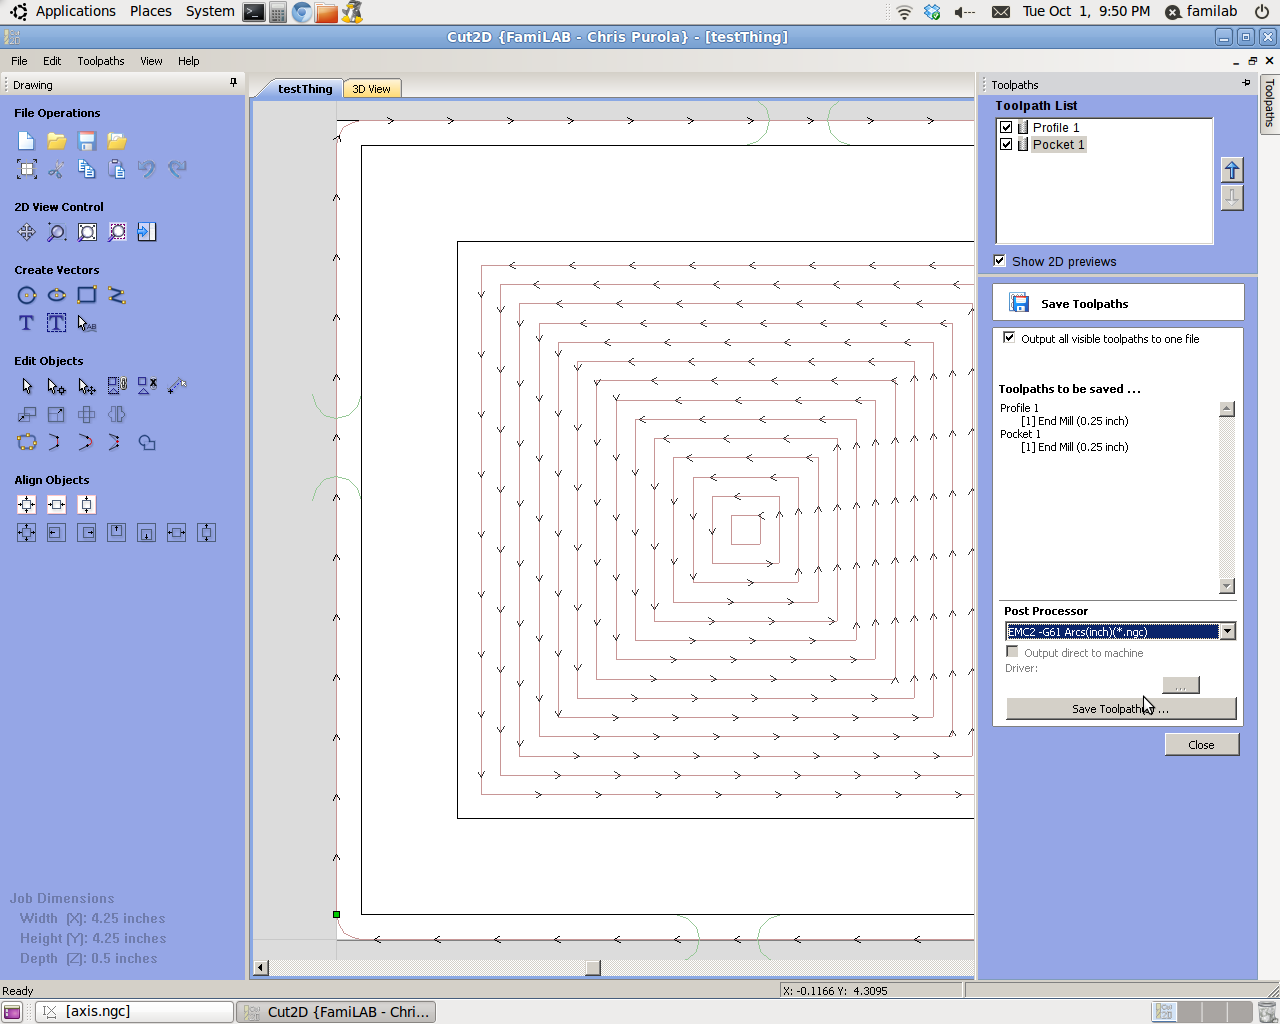
11) In the Toolpaths bar (on the right) (if it’s not shown, look for button on left bar), select a vector to cut (separate your cuts by cut type and depth), press “Create X Toolpaths”, where “X” is “Profile”, “Pocket”, or “Drilling”. “Profile” is a single line cut, “Pocket” cuts a fill in the given space (all of the area enclosed by a vector), and “Drilling” cuts a hole at the point of the vector.
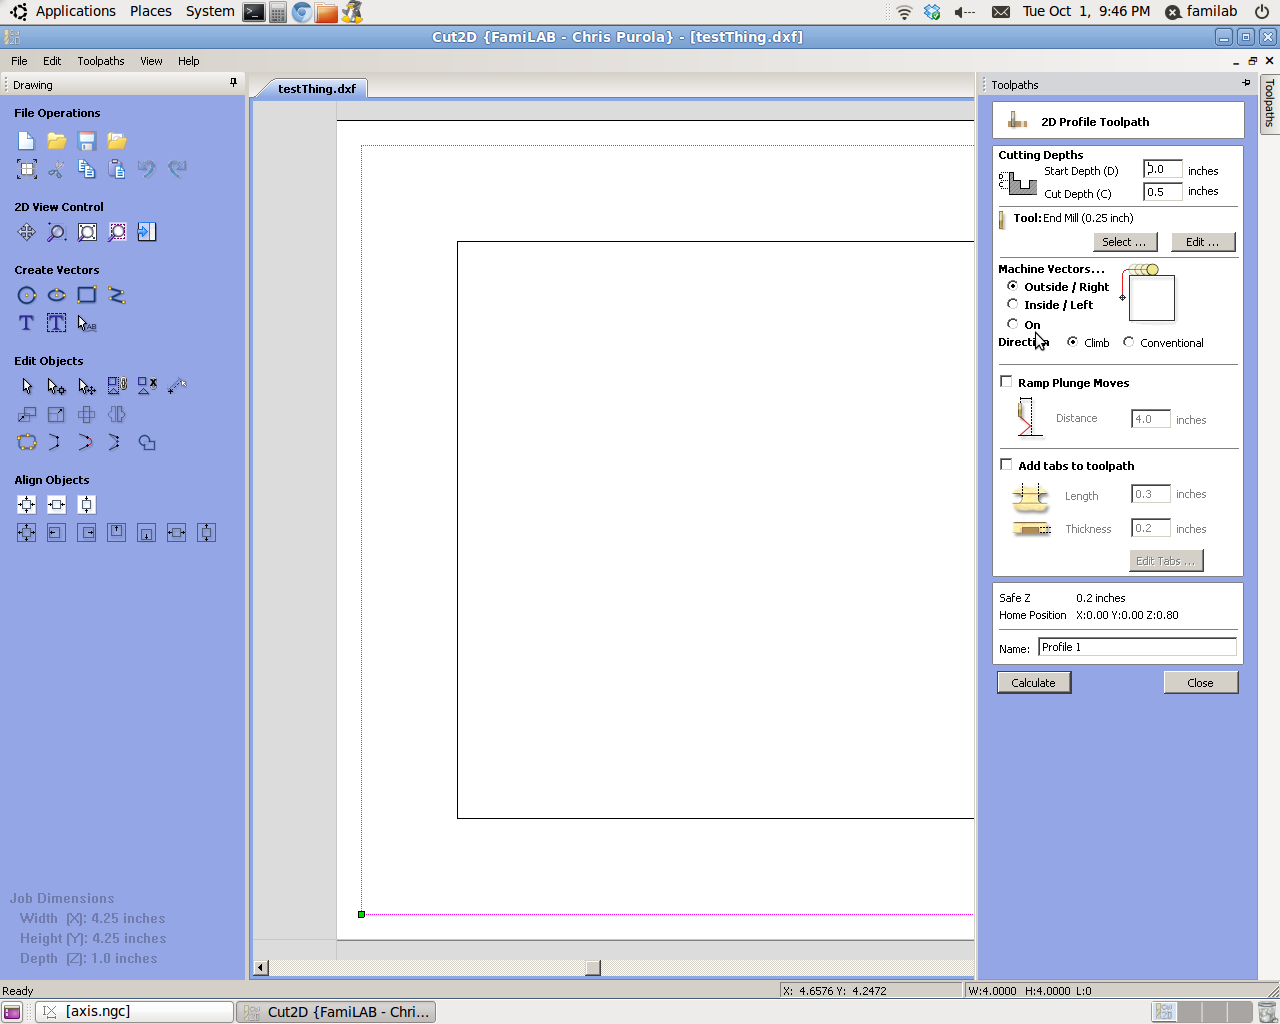
12) In the Toolpaths bar, in the 2D Profile Toolpath area, set the cut depth and whether to cut inside, outside, or right on the vector (keeping in mind that if you cut “inside” or “on”, the material remaining will be smaller than your design).
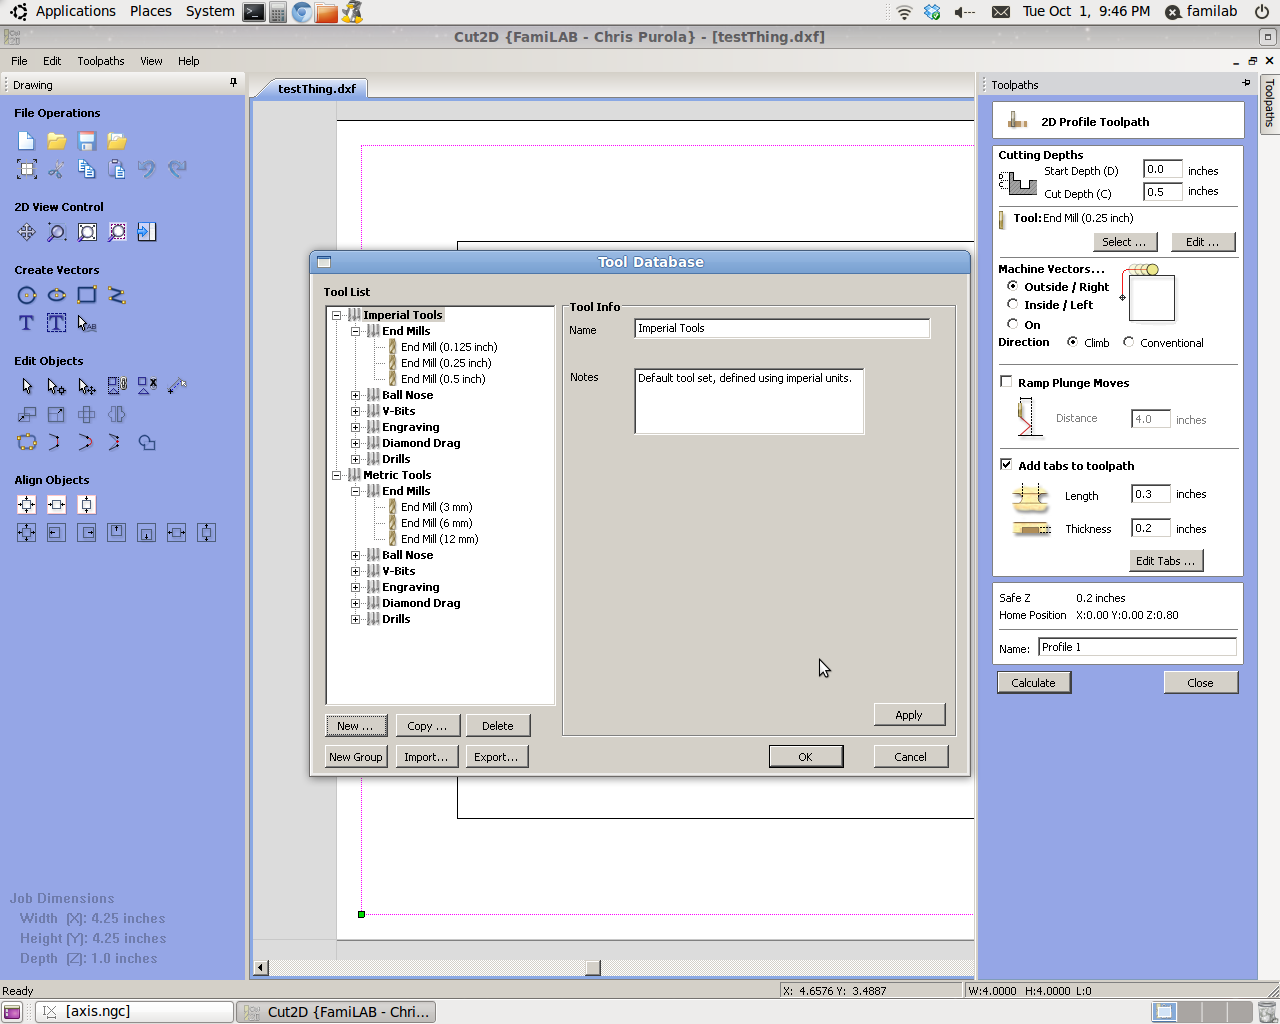
13) In the Toolpaths bar, in the Tool area, press “Select...” and choose the appropriate bit.
14) In the Toolpaths bar, select “Add Tabs to Toolpath”. One sets tabs so that piece doesn’t fly out of base material when the cut is finished.
15) In the Toolpaths bar, press “Edit Tabs”.
16) Add tabs appropriately- a tab to each of four sides if 4-sided; at least half of the sides if there are more than four sides, at least three if a circle.
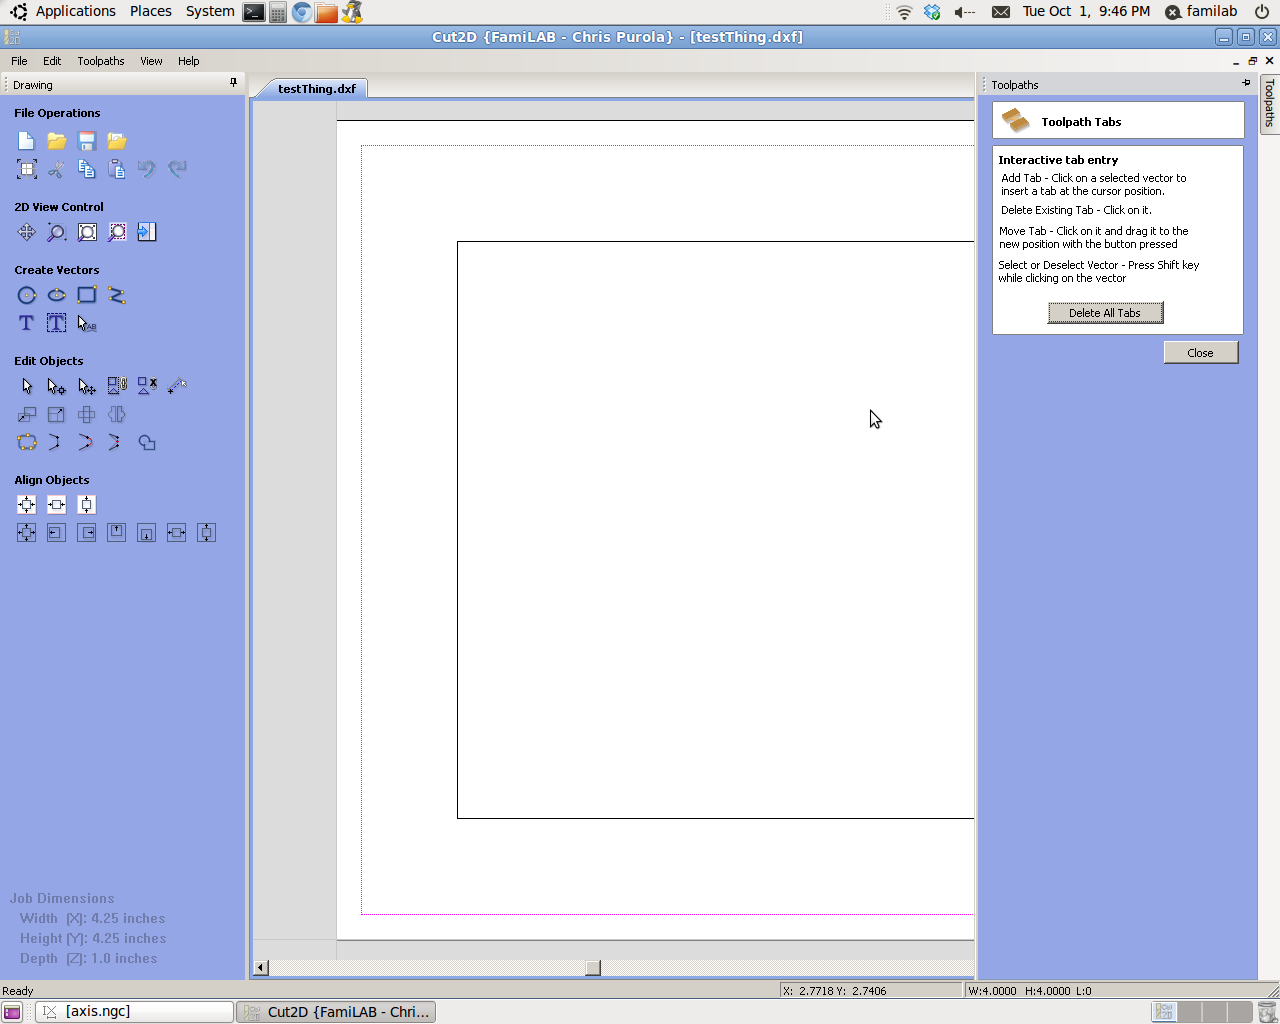
17) Press close.
18) In the Toolpaths bar, press “Calculate”. Pay attention to the warning if you’re cutting through the material, but make sure that there’s a sacrificial piece under your work before you cut (this is done in step 33).
19) Press close.
20) Switch back to the non-3D view and repeat toolpathing as necessary (go to step 11).

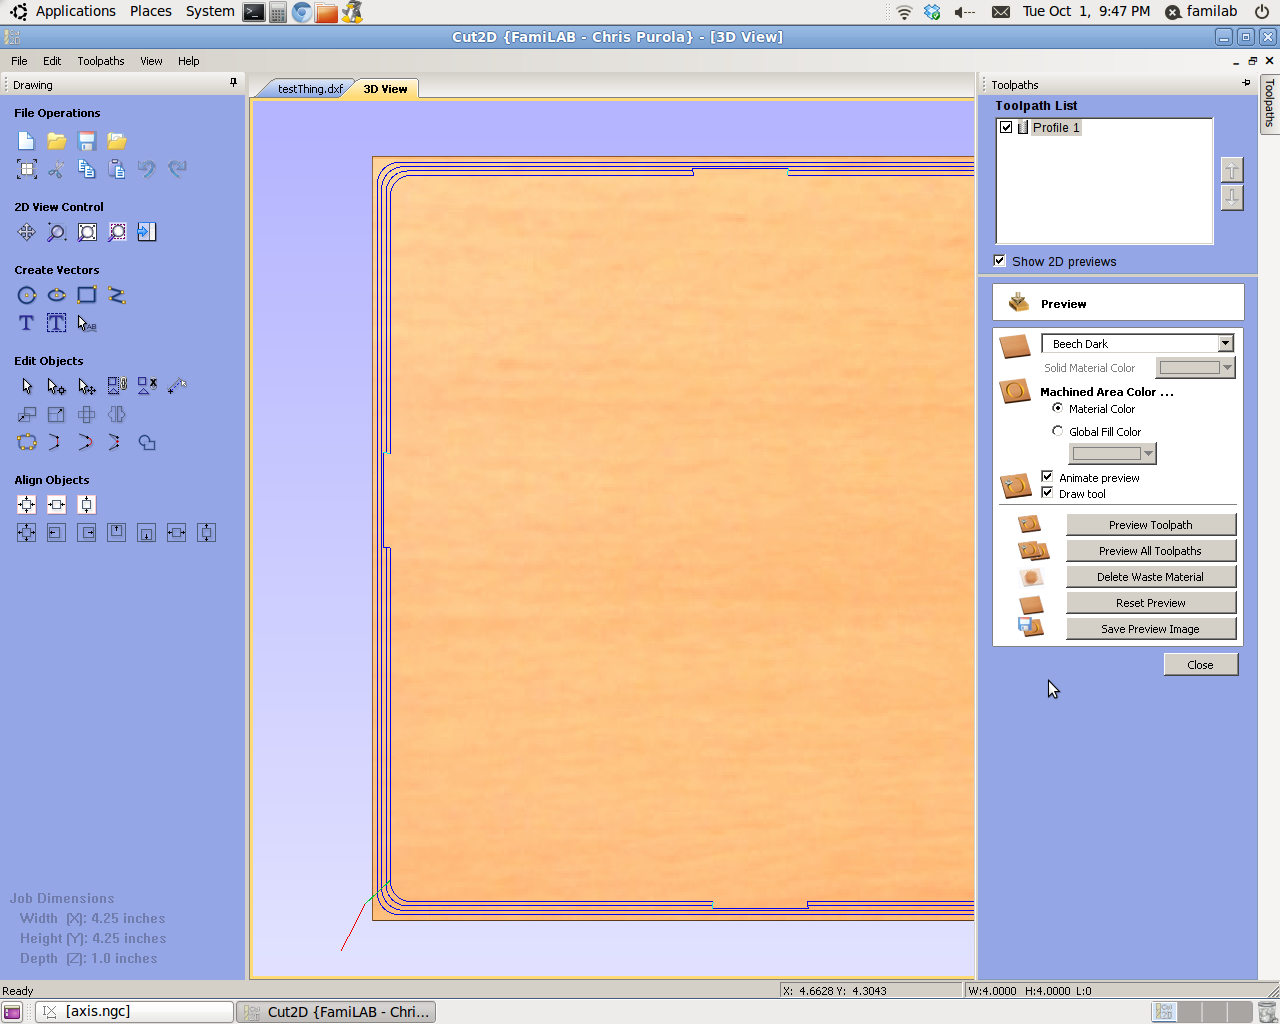
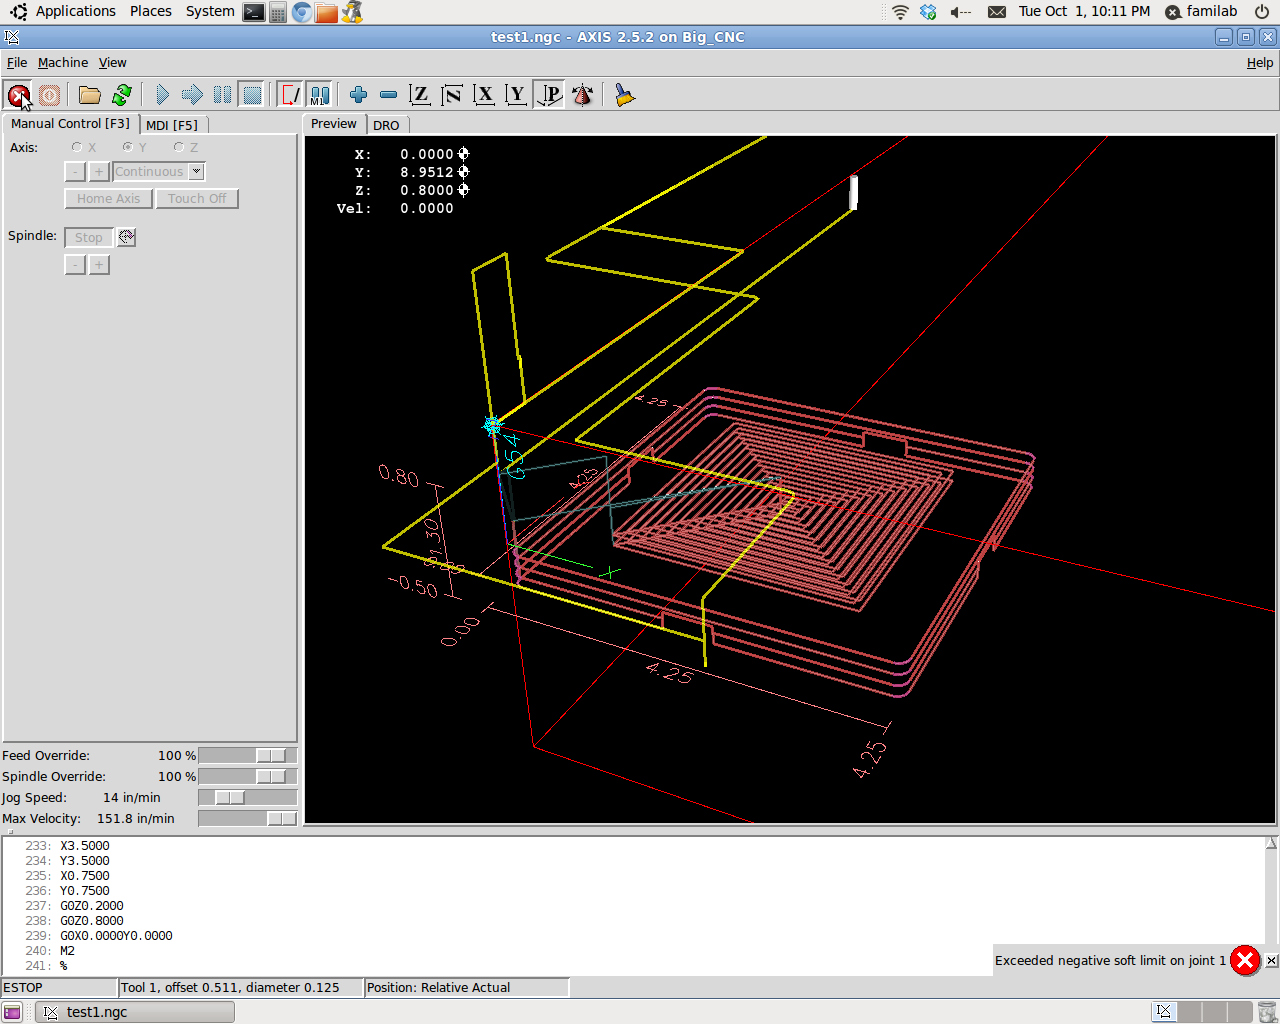
21) In the Toolpaths bar, press “Preview All Toolpaths” to view the order in which your cuts will be done and how the cuts are done.
22) In the Toolpaths bar, check off all toolpaths from the toolpath list that you want to use (if you made any toolpaths that are incorrect/you aren’t going to use, not selecting them will exclude them from the router instruction set)
23) If you wish to edit this file later, click “File -> Save”.
24) To generate the router instruction set, in the Toolpaths bar, click “Save Toolpath”.
25) In the Toolpaths bar, check “Output All Visible Toolpaths to One File”.
26) In the Toolpaths bar, select the post processor: “EMC2 -G61 Arcs (inch)”. Select this processor even if your file is in metric! Our router is in imperial.
27) In the Toolpaths bar, press “Save Toolpaths”.
28) Close the Cut2D program.
29) Open LinuxCNC.
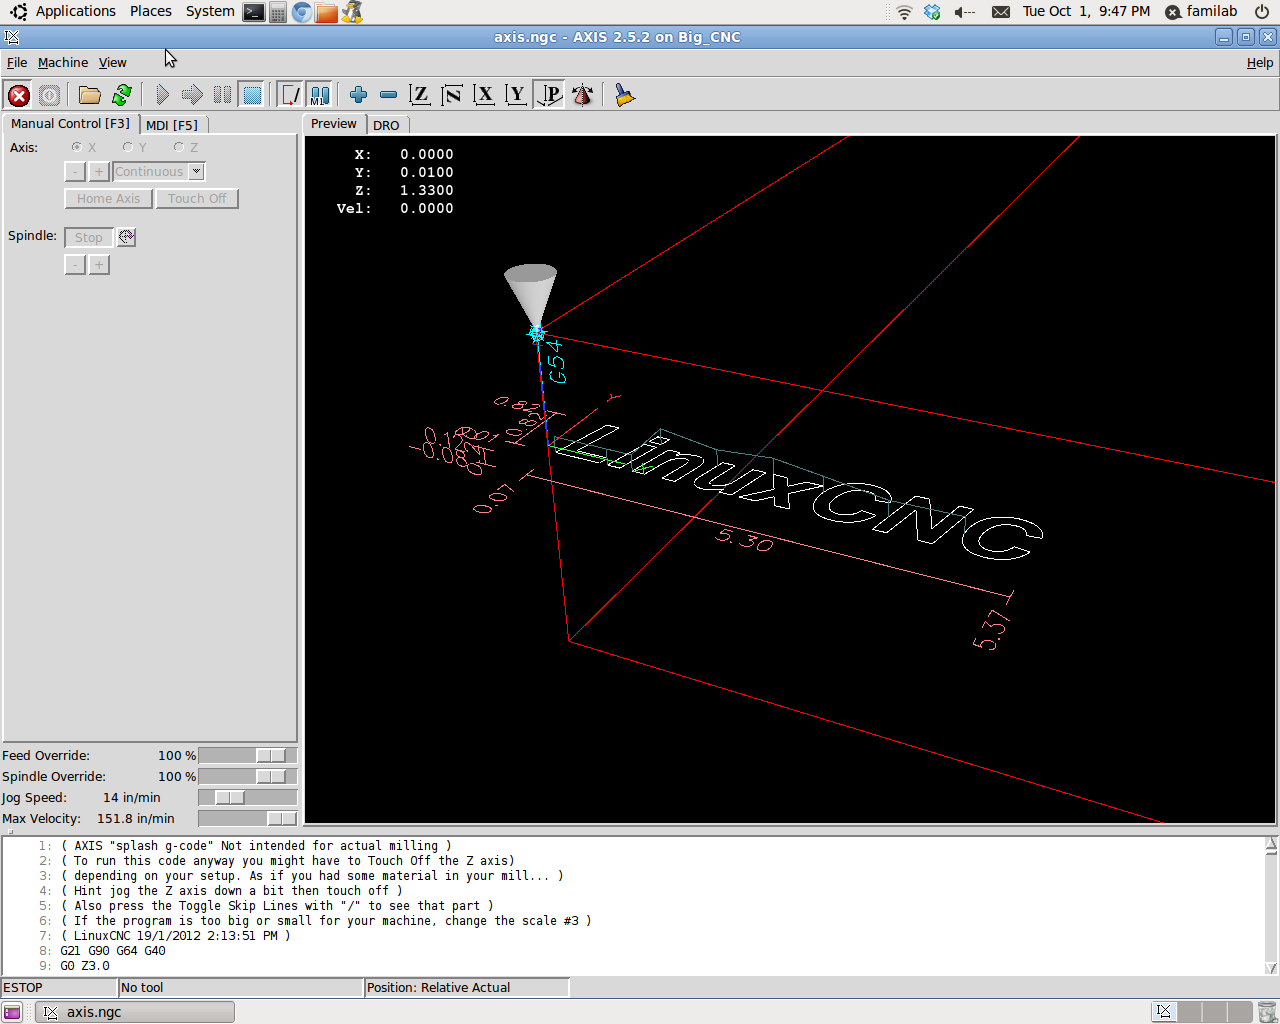
30) Open your file from Cut2D.
31) Press estop (toggle it on) if it is not already selected.
32) Clean the bed of any sawdust; extraneous sawdust can make your piece slip while cutting.
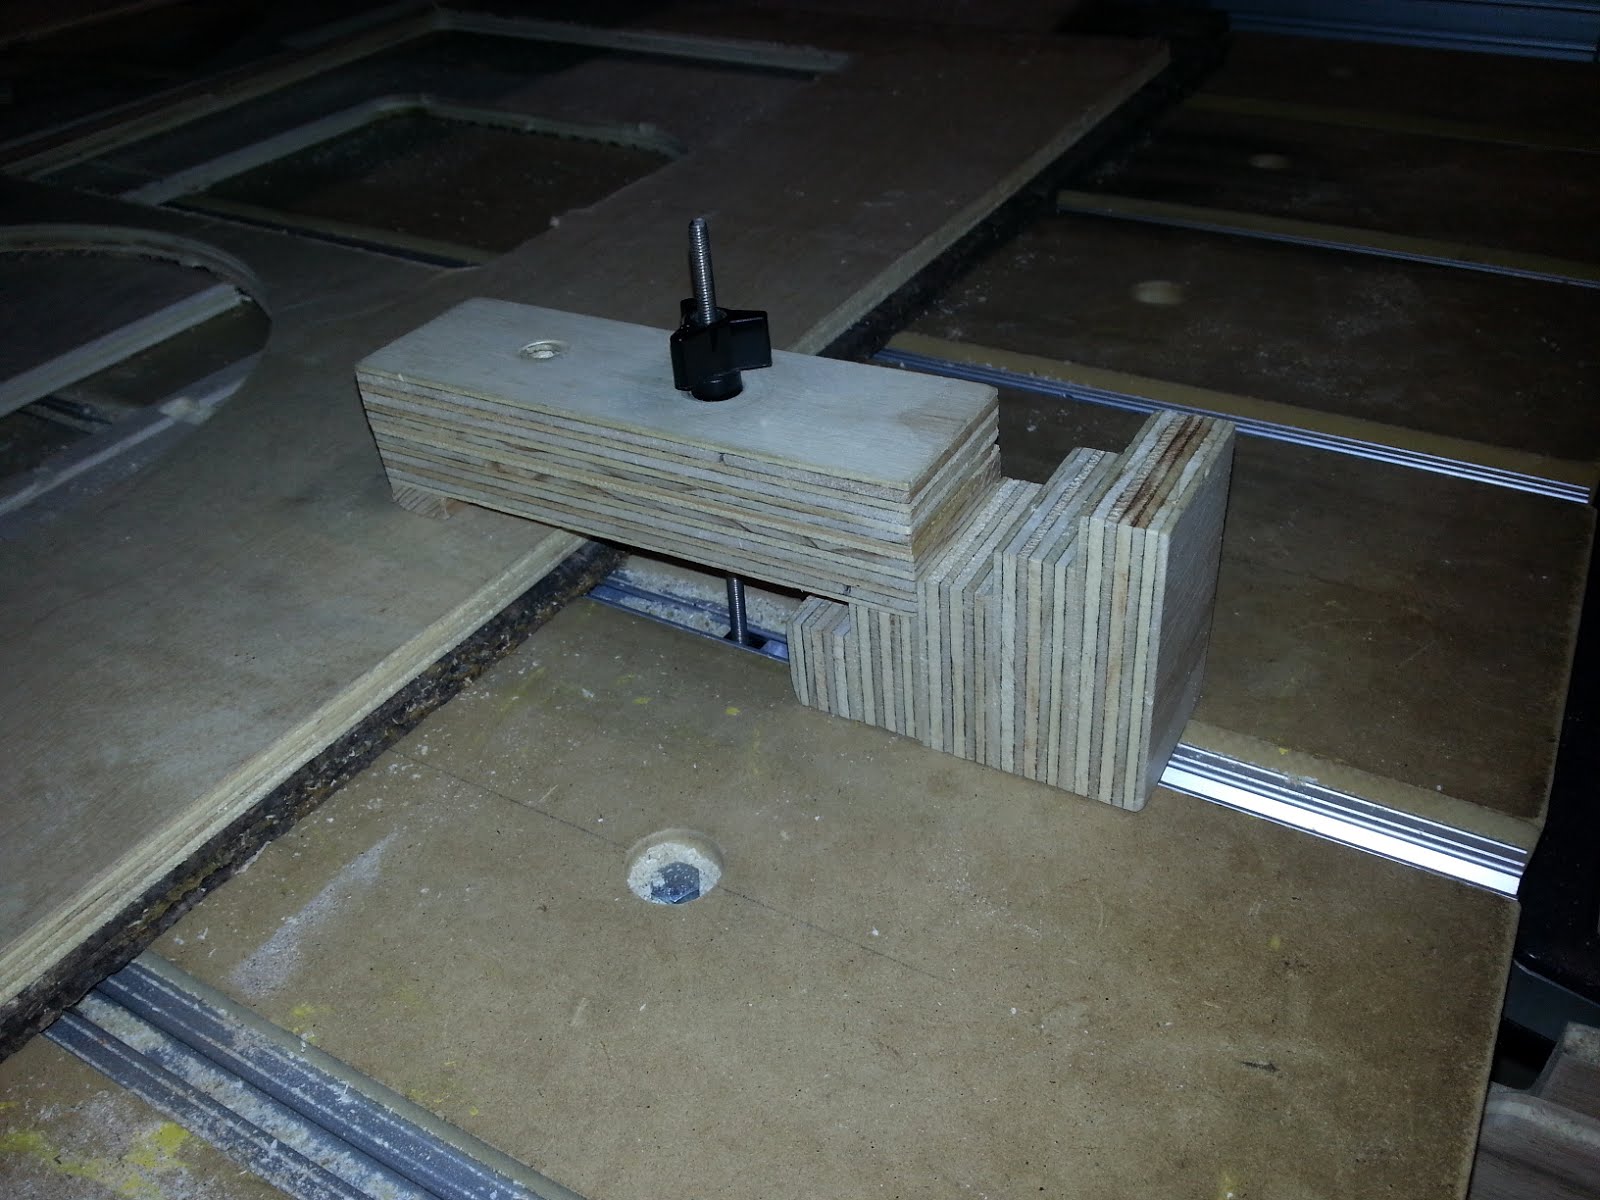
33) Place a sacrificial piece of scrap wood under your material to hold your work up from the CNC board bed; otherwise the cutter will cut into the bed. Make sure that piece under yours is roughly the same size; that way when you clamp it, your piece will not bow up (which changes the depth required to cut your piece).
34) Place your material/piece on the router bed and clamp it down. Tighten the clamps very tightly, as tightly as you can finger-tighten them without damaging your material.

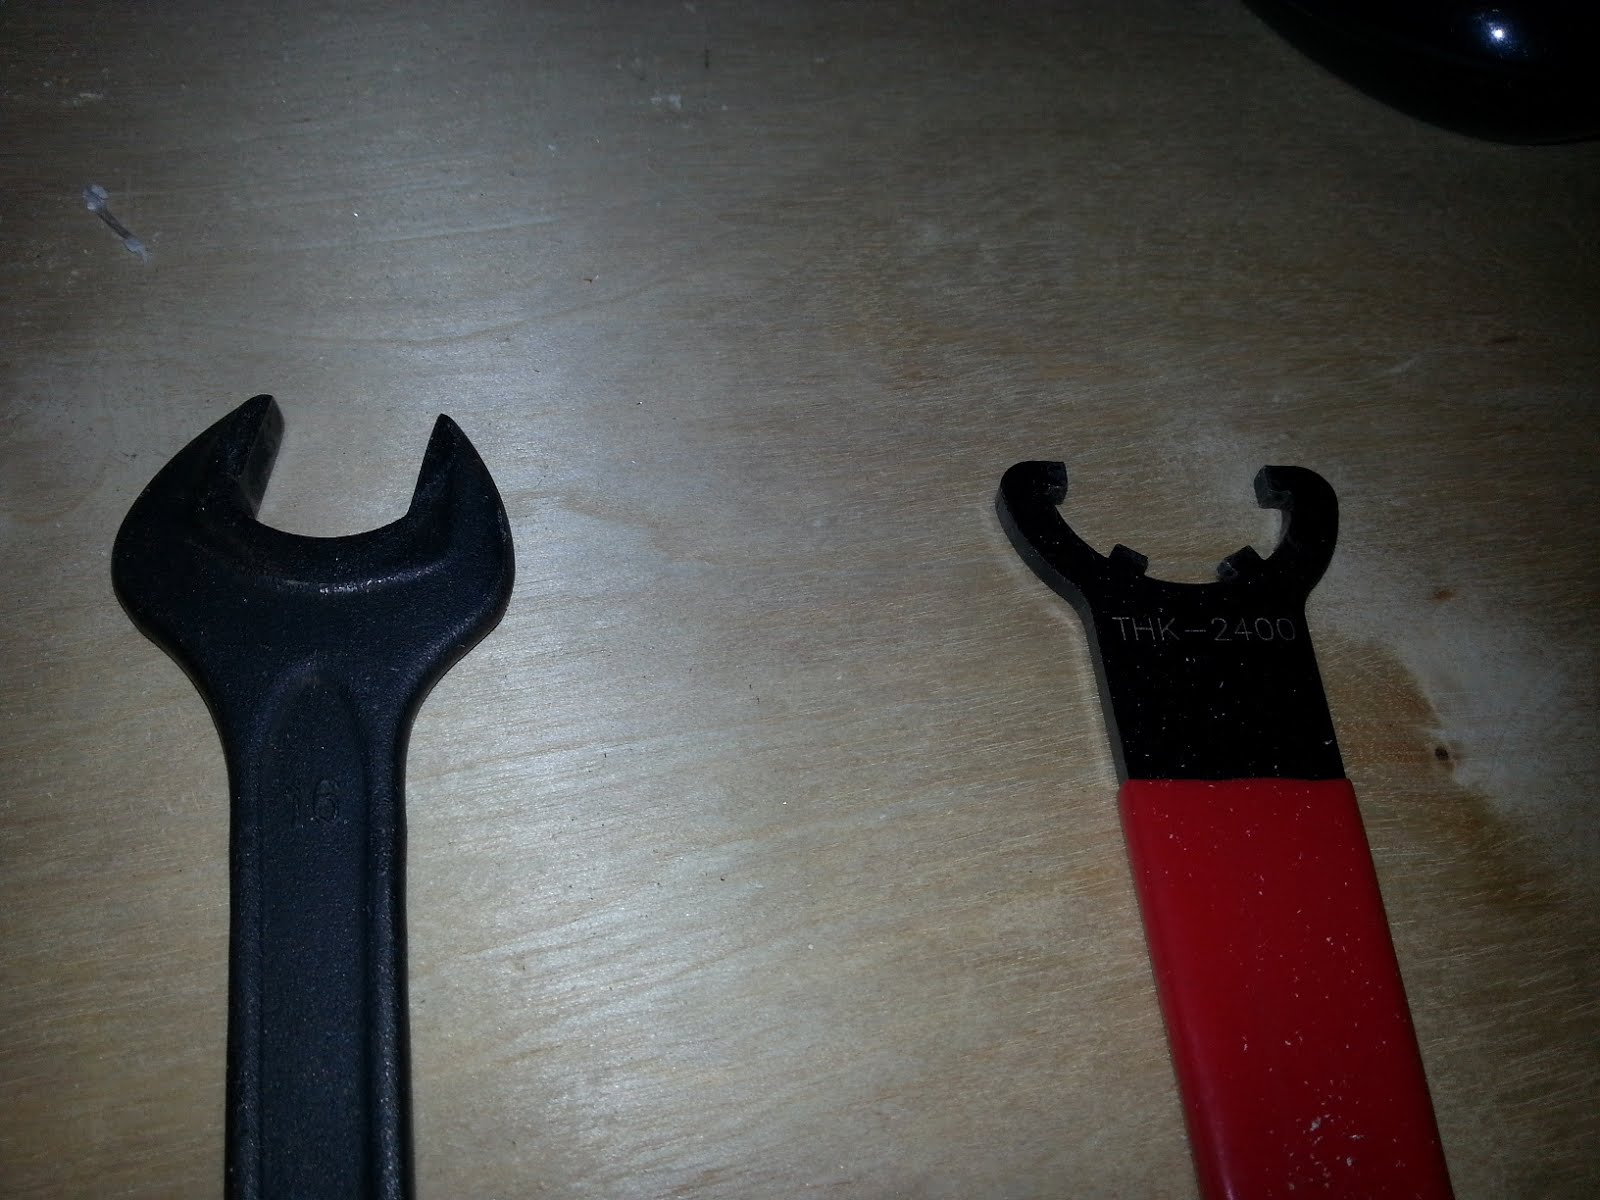
35) Select/change the bit based on the planned width of your cut. Use the crescent wrench on top of the bit assembly and the specialty wrench on bottom (fit into slots from bottom) to remove bit, turning them in opposite directions to loosen the bit and then removing the bit by hand. These tools can be found in the tray underneath the keyboard stand.
36) Replace the collet (center piece that holds the bit) based on your bit size. The collet can be a bit tricky to get out, try rotating or rocking it while pushing to get it out. Those are also good motions to get the replacement collet back in.
37) Put collet back into router.
38) Replace the bit in the collet/center piece.
39) Screw down and tighten the bit.
40) Plug in the CNC router. (Black cable, labeled “CNC”.)
41) Toggle off estop and press power.
42) Using the arrow keys and pgup/pgdown, move the router to the back left to the spot marked with a black line (the arrows keys move the x and y, pg up/down moves z; pressing shift in combination with the arrows or pgup/pgdown will make the router move faster).
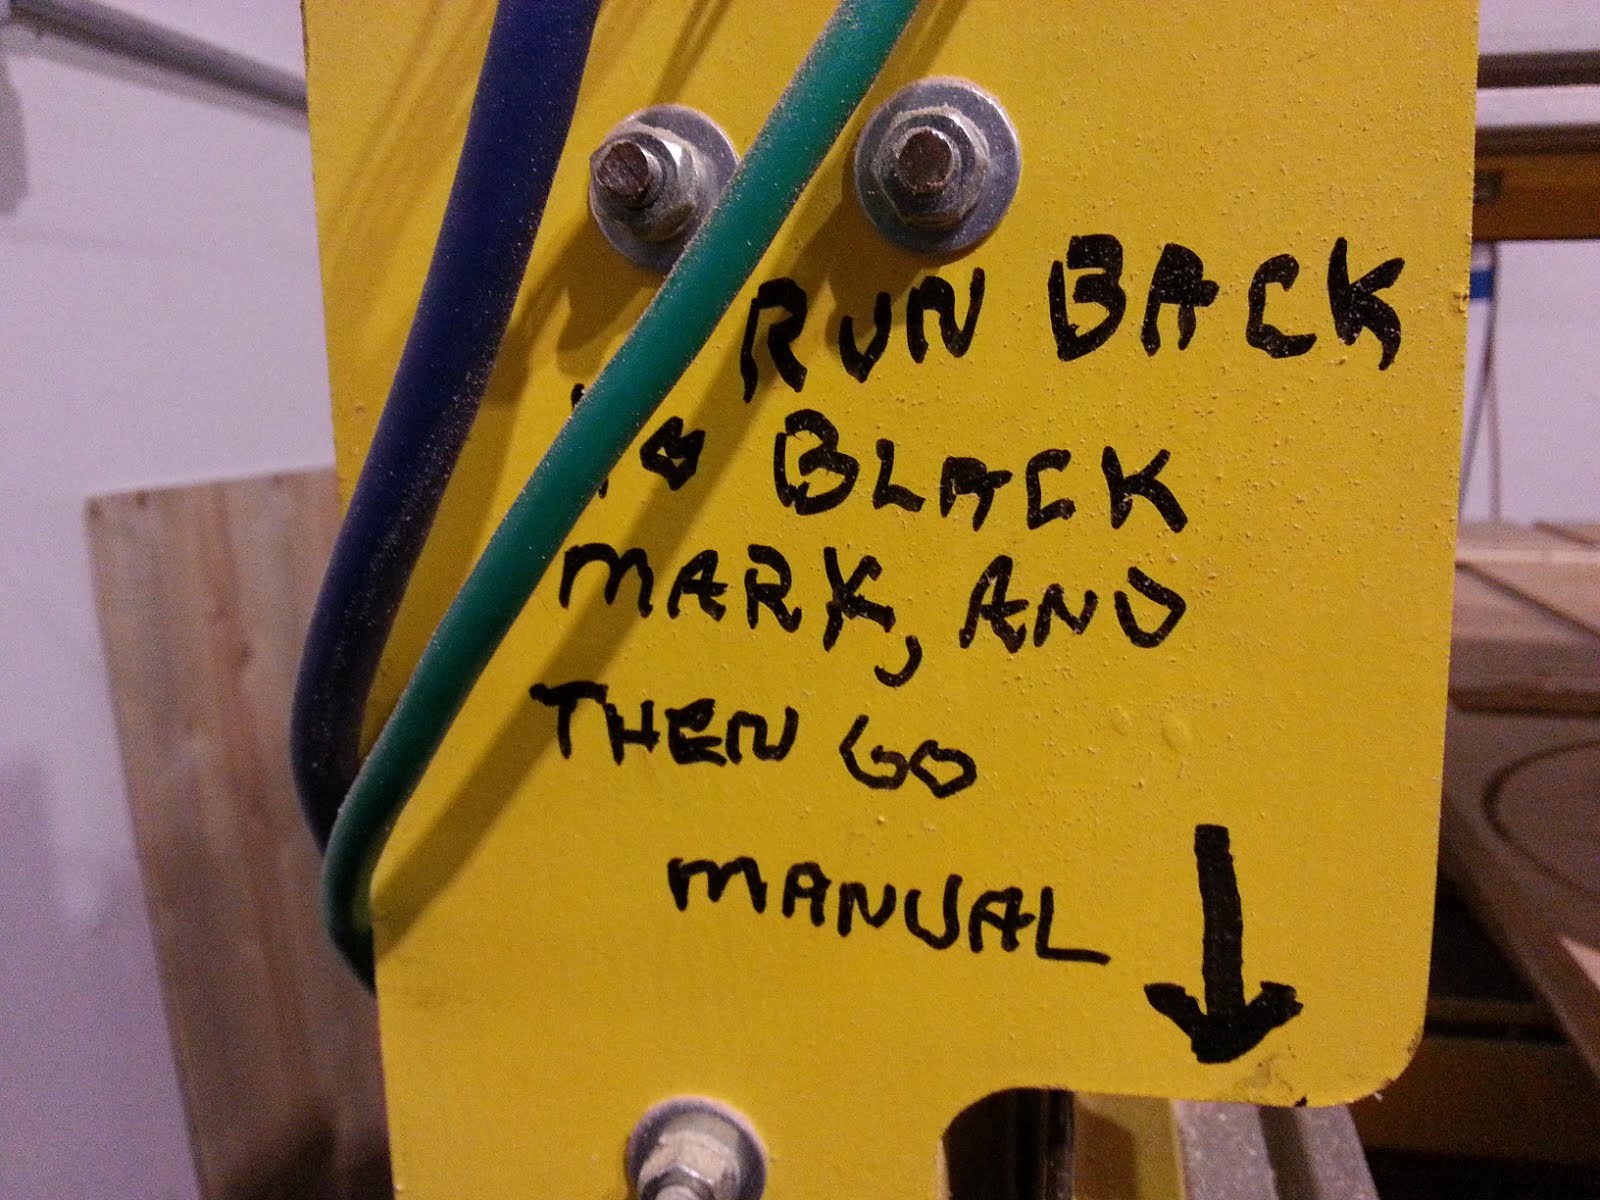
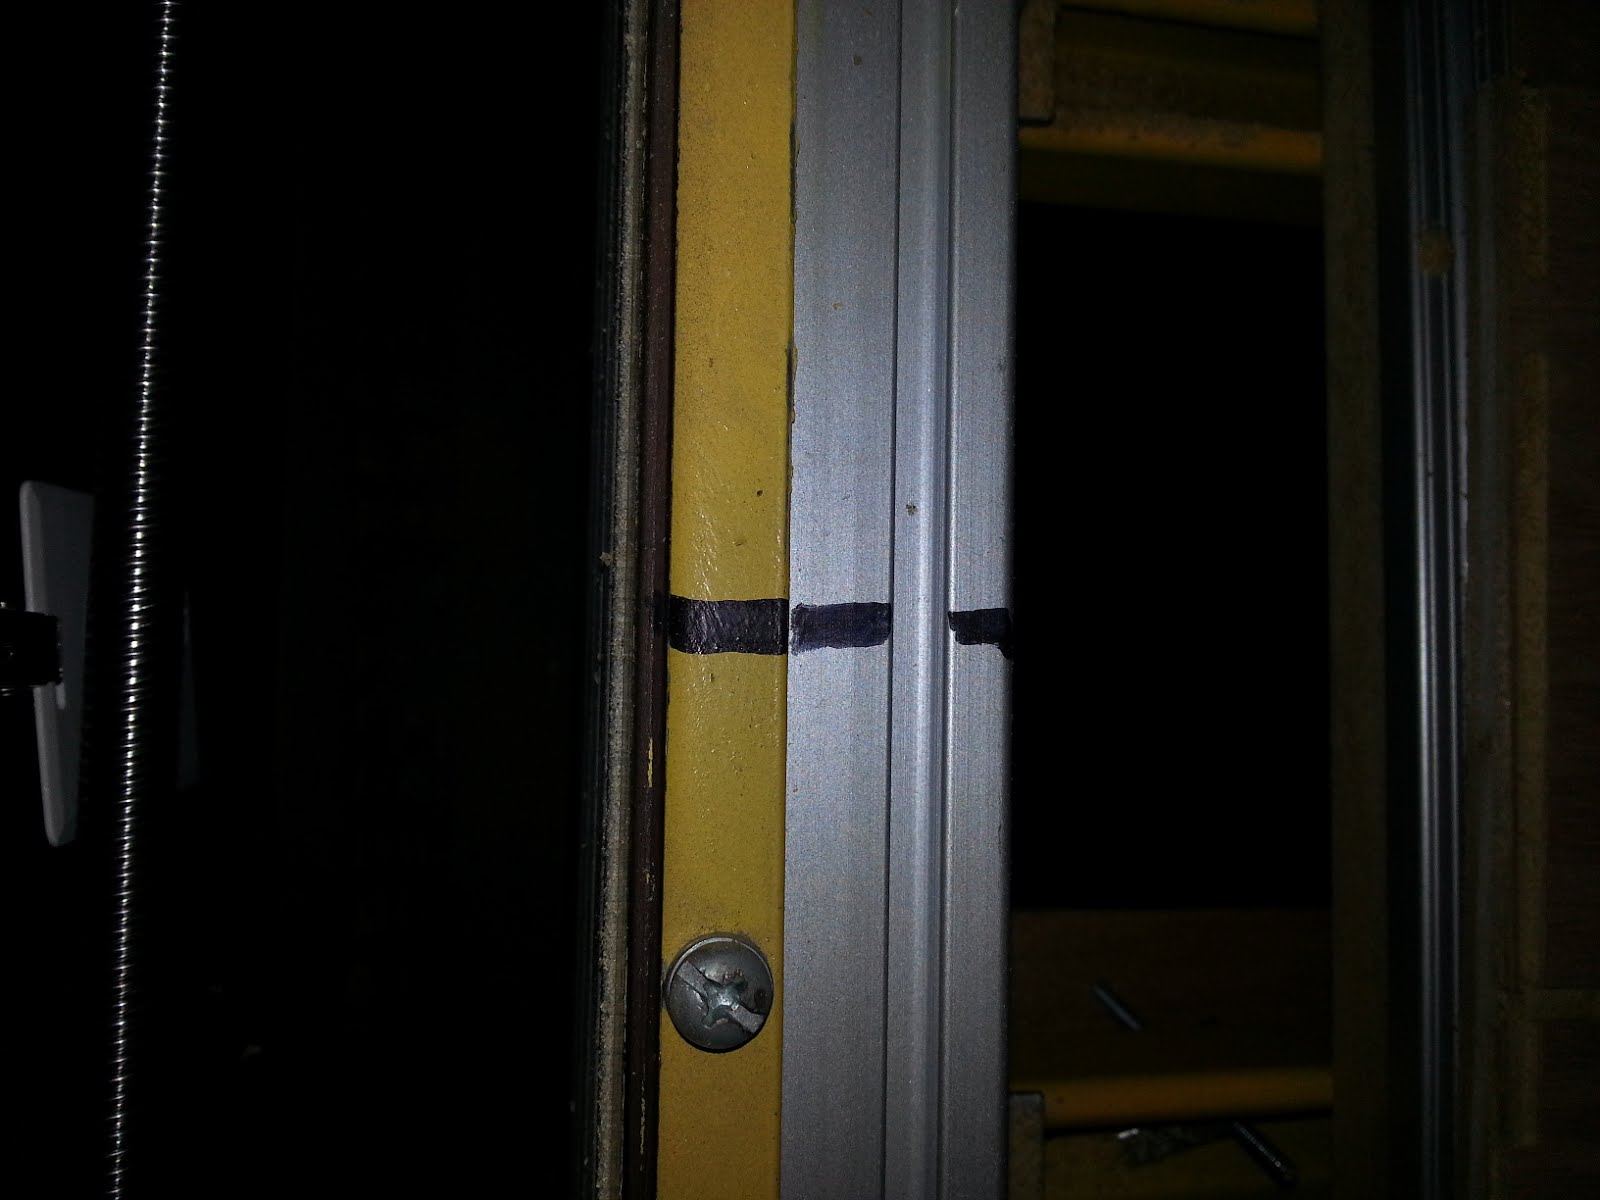
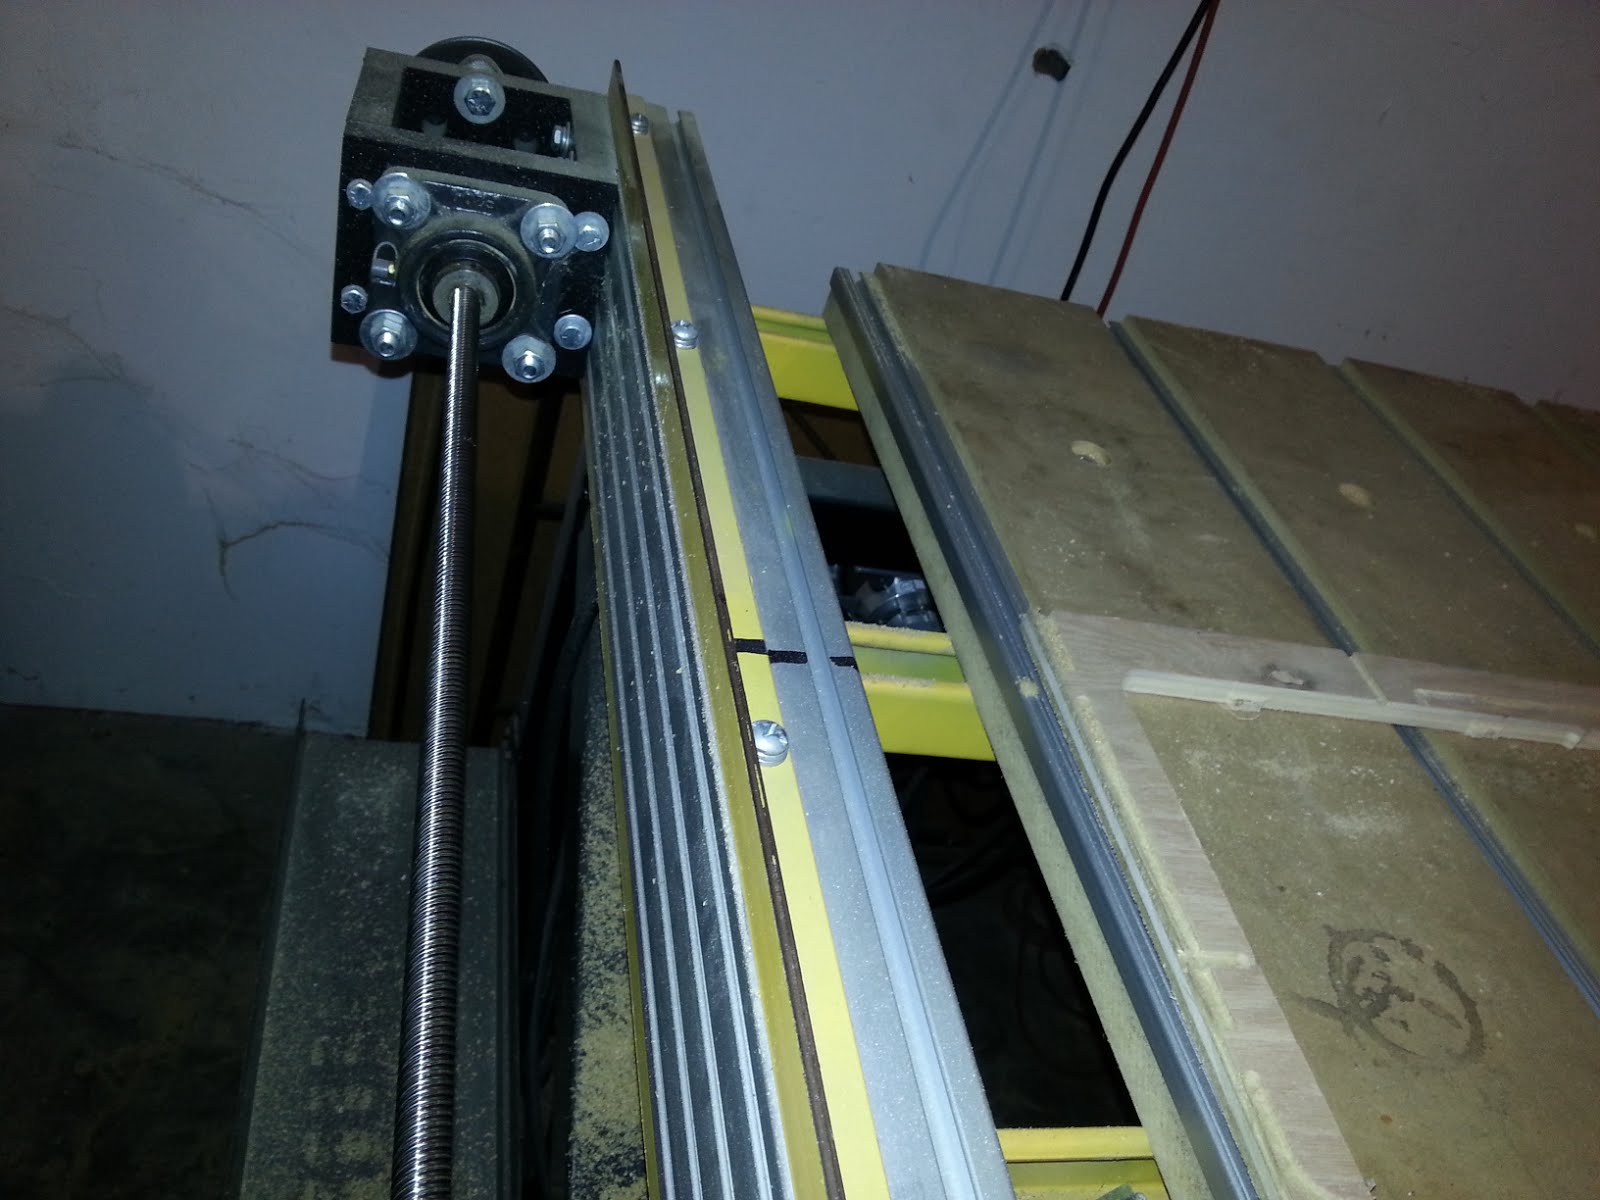
43) Unplug the router from the wall.
44) Move behind the machine and finish moving the router to the back corner manually with the belts (move both cables clockwise until the y axis carriage hits the stops).
45) Plug the router back in, toggle off the estop, and press power.
46) Move the router to the beginning of the cutting area/where you would like “home”/origin to be. Take into account where the clamps are when selecting the origin! Note that, unlike the laser, (0, 0) is considered to be the bottom left corner of your cut. All of the job will take place up and to the right of that point.
47) Select the x radio button and click “Home Axis”, then select the y radio button and click “Home Axis”.
48) Place the green reference cylinder underneath the drill bit and move the bit down until it touches the cylinder to the table. “Touch off” by moving the bit up just barely enough that you can easily remove the cylinder. (The cylinder can be found in the tray underneath the keyboard stand.)
49) Select the z radio button and click “Home Axis”.
50) If desired, and optionally, click the “clean up paths” button (left side of the top toolbar; it looks like a broom).
51) Sight along the drillhead to be sure that the head won’t run into clamps.
52) If you are cutting acrylic, set the feed rate higher than the default. (Otherwise it might melt!)
53) Acquire and put on safety goggles. (This is always important, but especially so when cutting acrylic, which will throw pieces of material everywhere while being cut.)
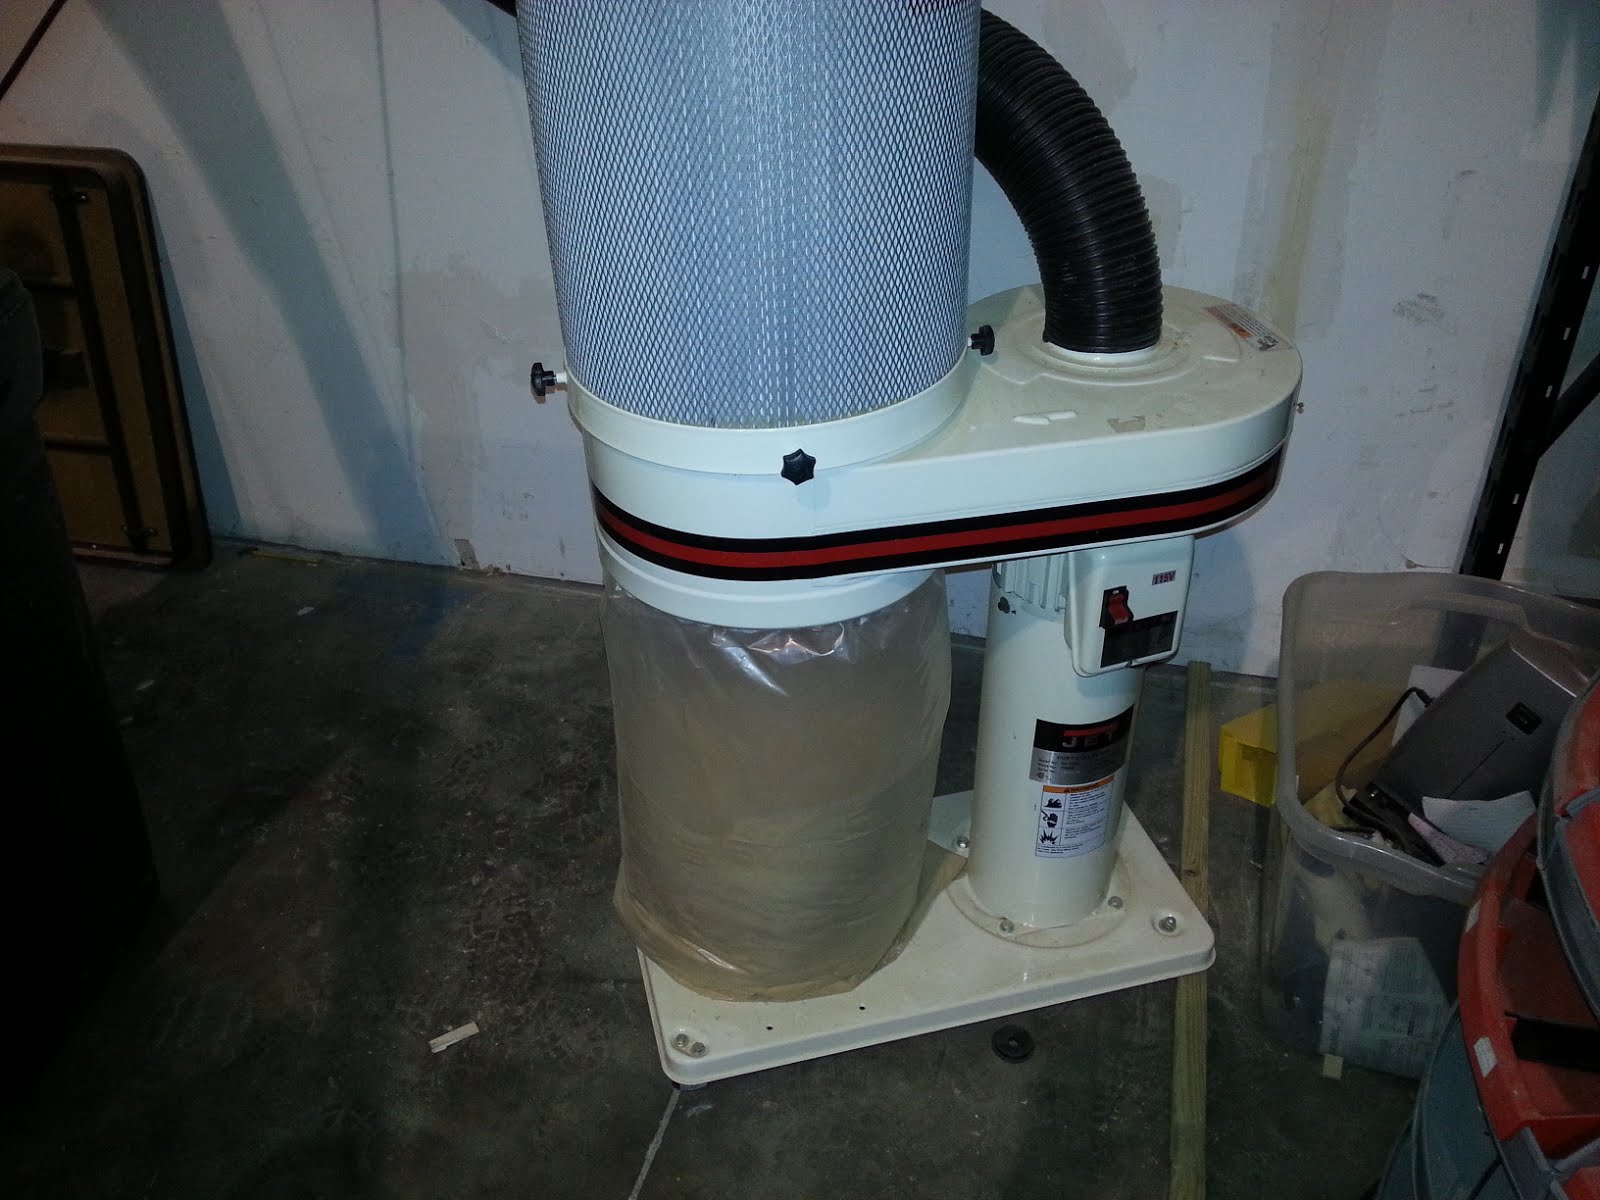
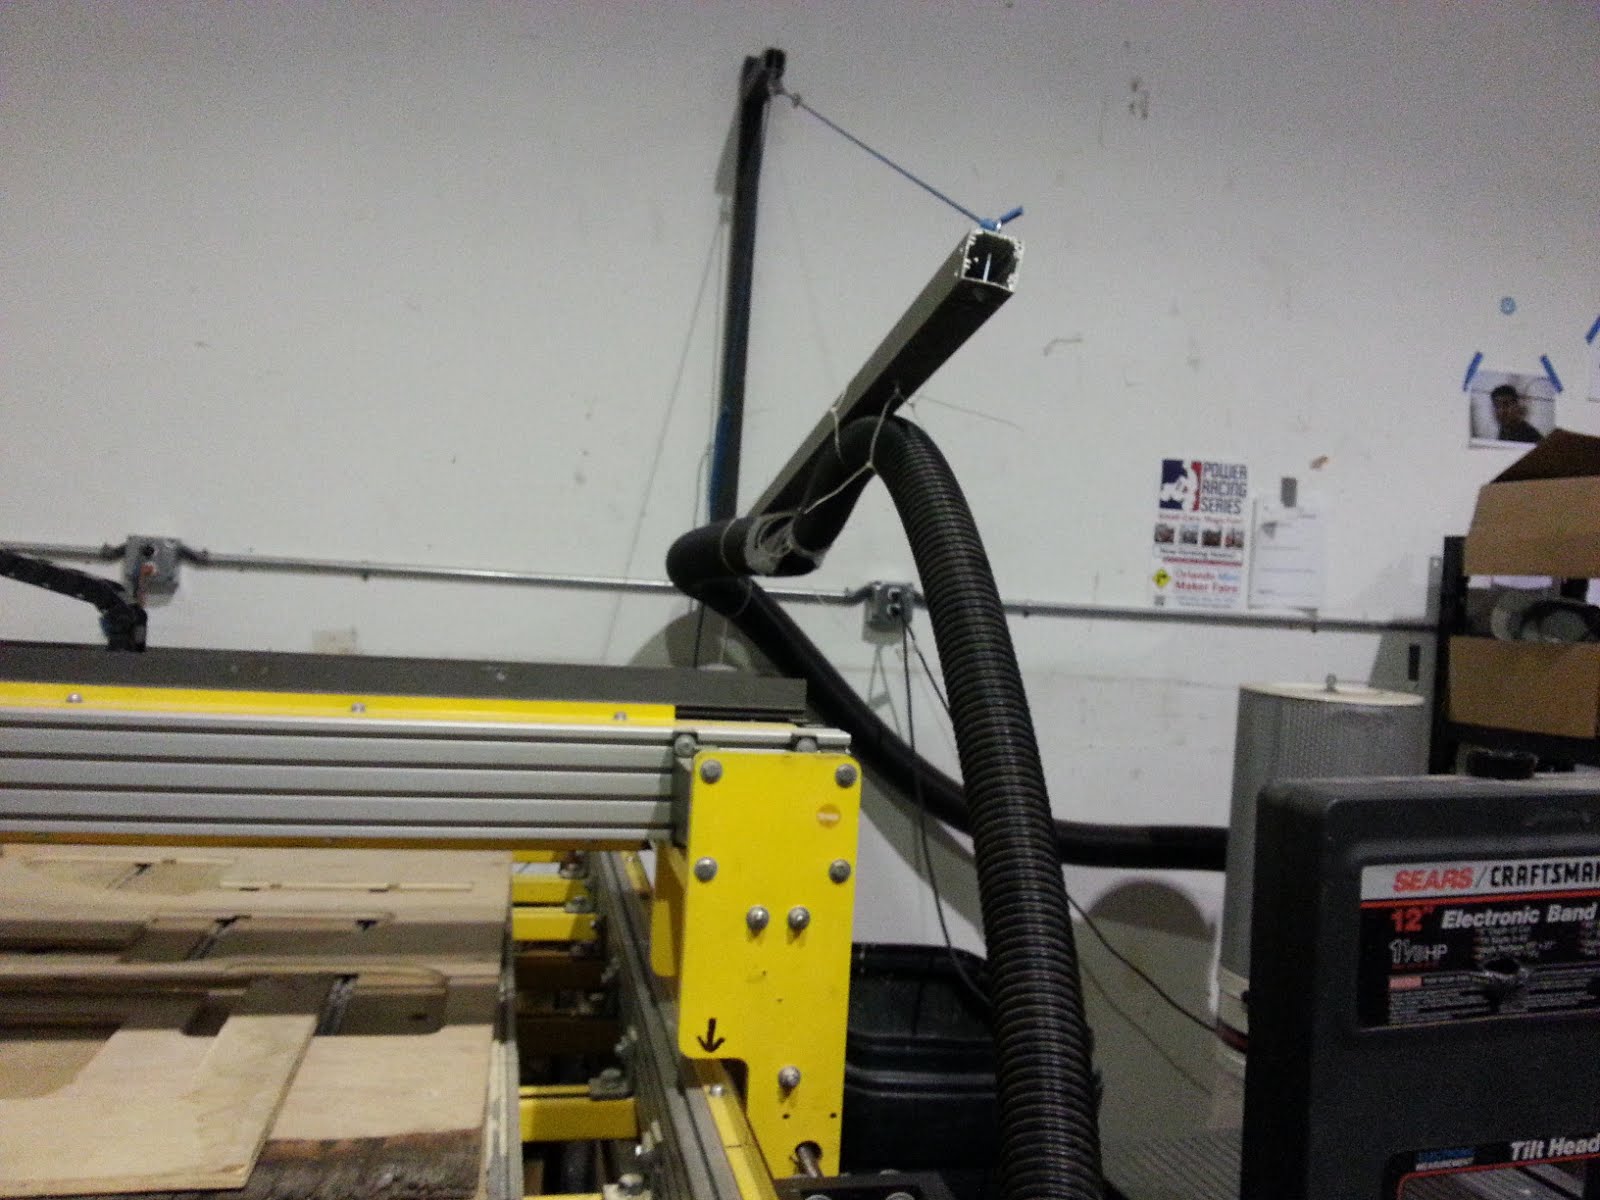
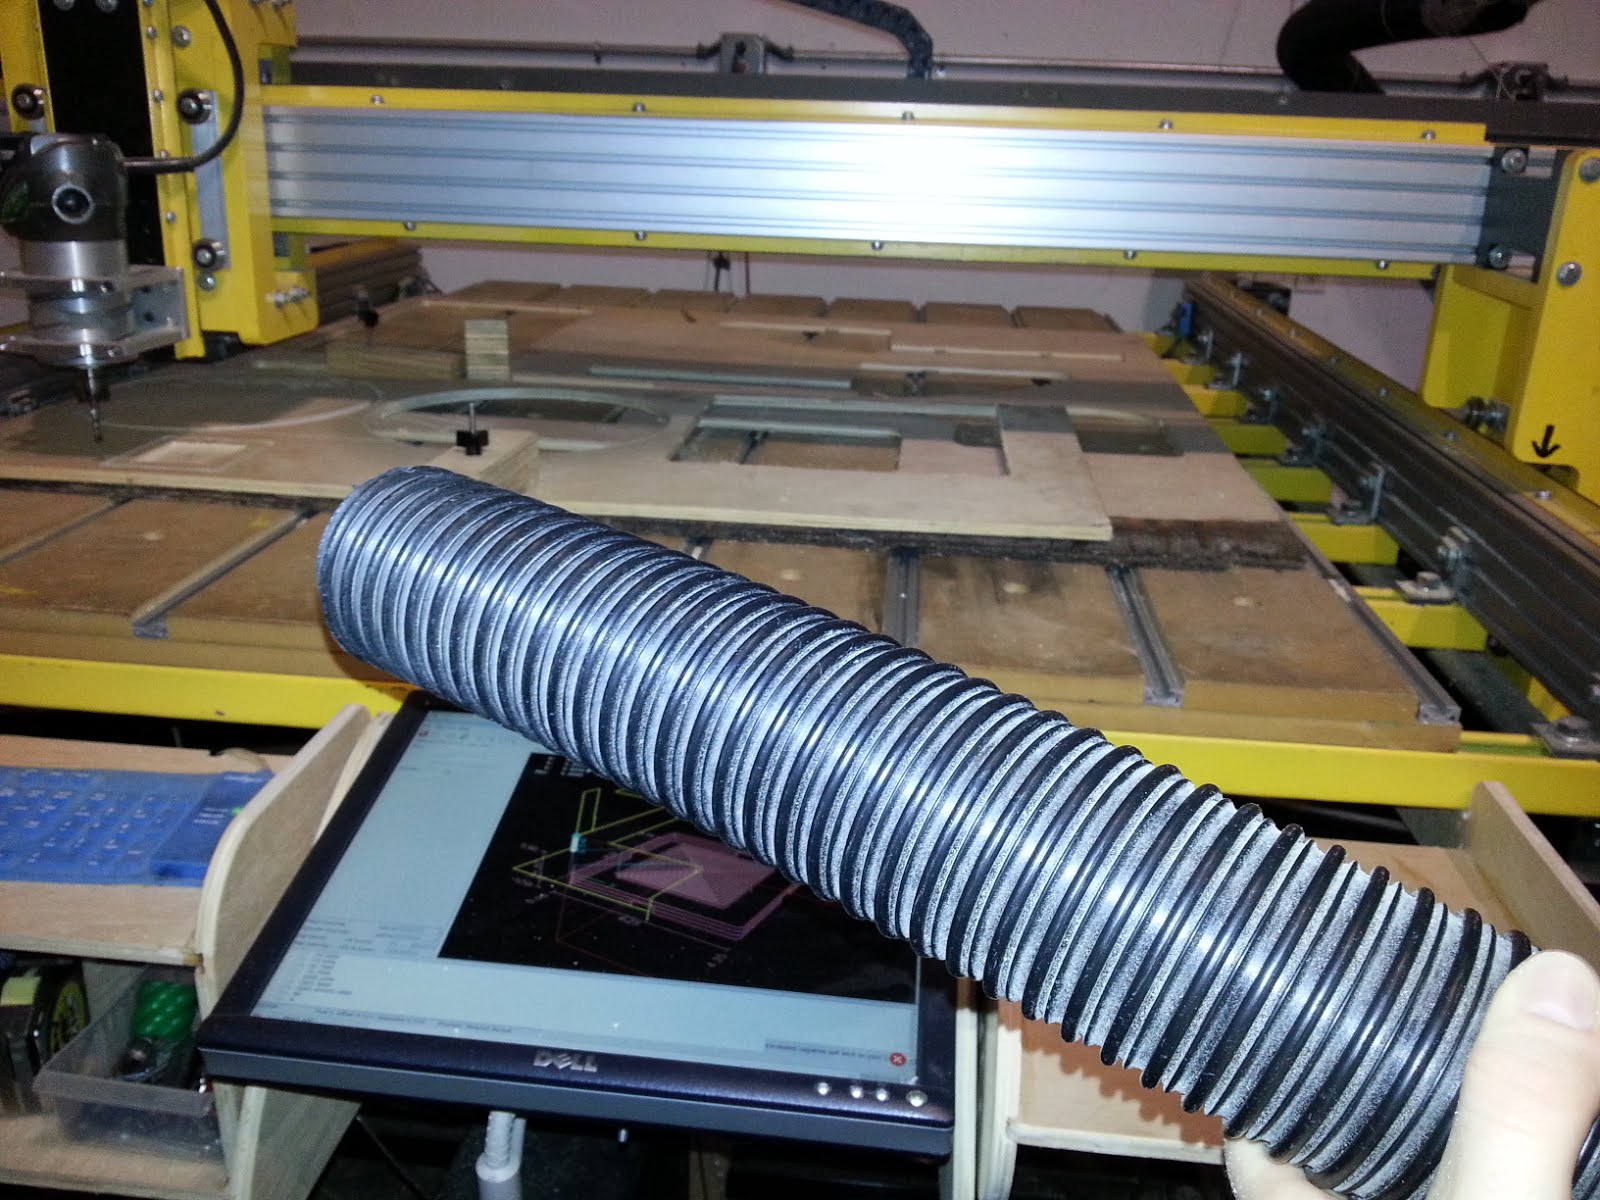
54) Power on the vacuum next to the router and hold the hose near the drill to vacuum up sawdust as the router cuts.
55) Turn on the power to the bit (black switch on the top of the drillhead).
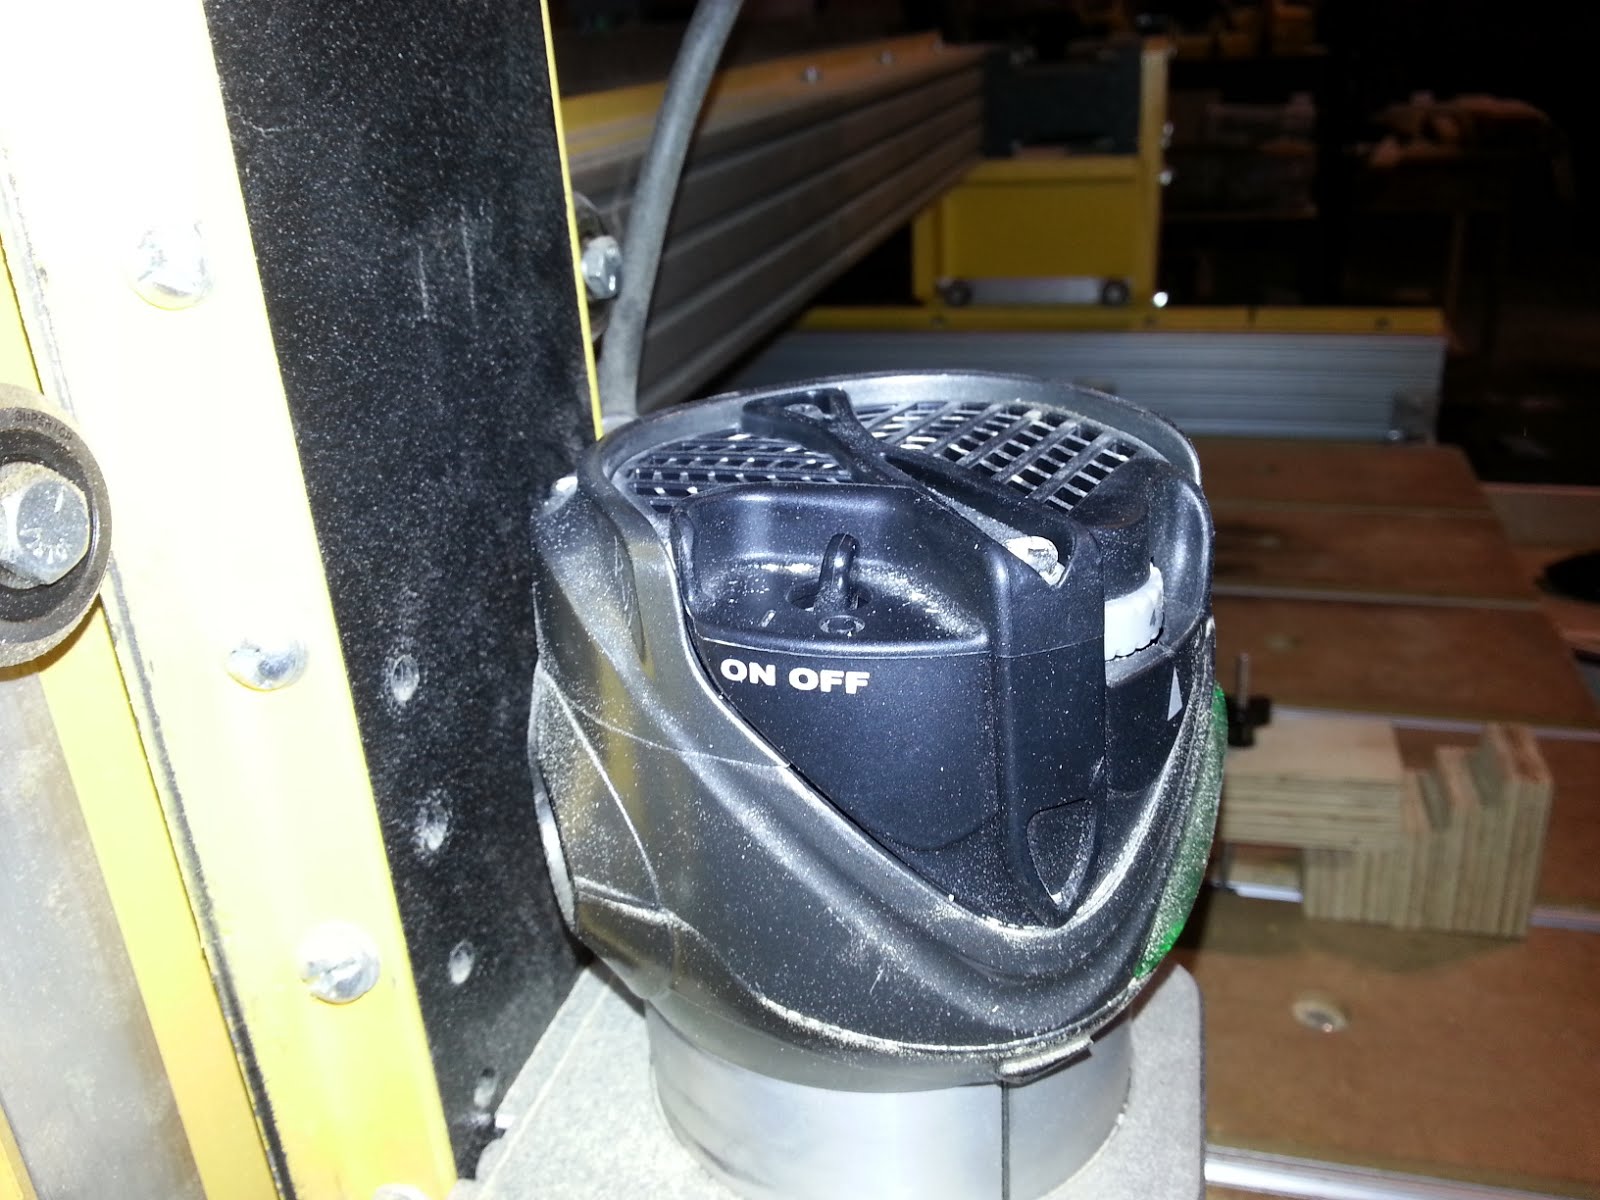
56) Change the feed rate in linux CNC to about 20%.
57) KEEPING YOUR HAND OVER THE ESTOP BUTTON (F1), click “run” (the play icon).
58) Once you’re happy that everything is cutting like you want it and that the clamps are secure, try moving the feed rate up to 50% or 70%. With practice, you’ll get a feel for how high you can go when cutting. If things don’t sound right, or you’re the least little bit concerned you might be cutting too fast, just back it off 10% or so.
59) Vacuum as you go. If you vacuum over the keyboard, be careful not to suck the keyboard into the vacuum (and thus possibly hit estop…).
60) When your cut has completed, power off the bit.
61) If needed, use the arrow keys and pgup/pgdown to move the router out of the way of removing the material.
62) Unclamp your material and remove from the machine.
63) Press estop.
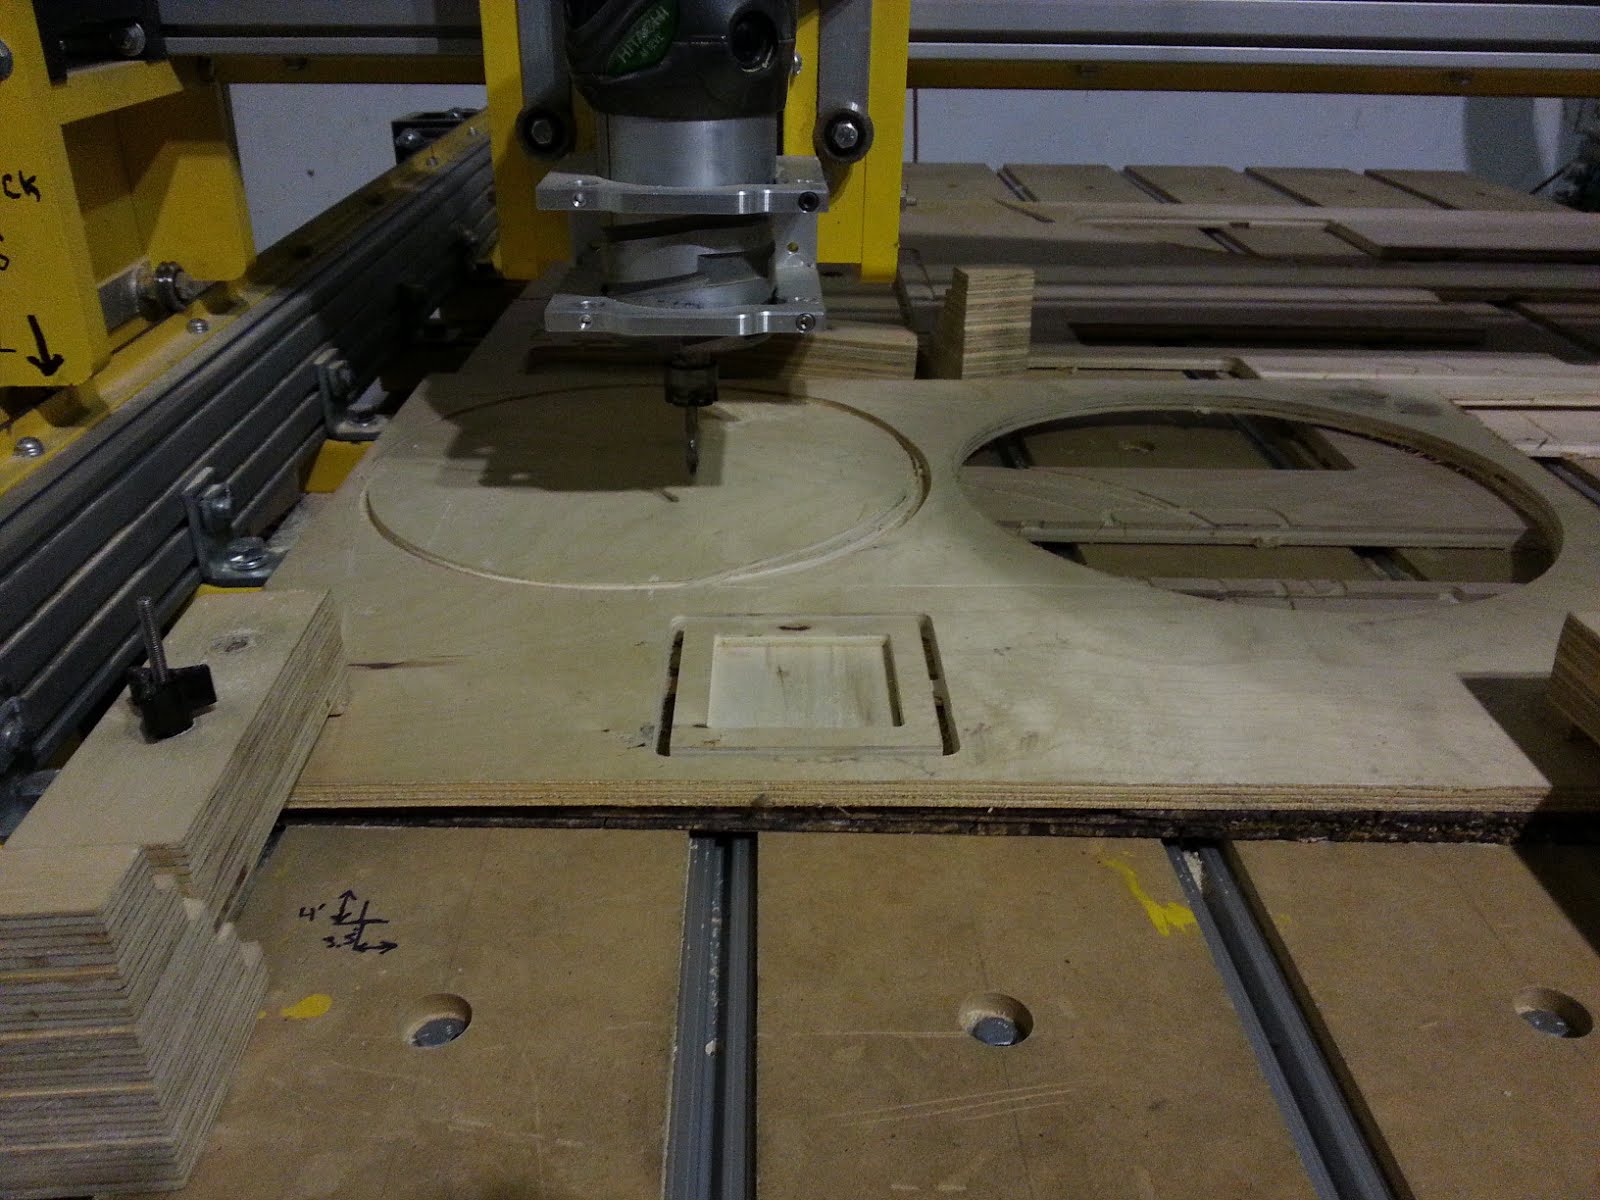
64) Pop your cut piece out from its tabs with chisel/screwdriver (found in the tray underneath the keyboard stand).
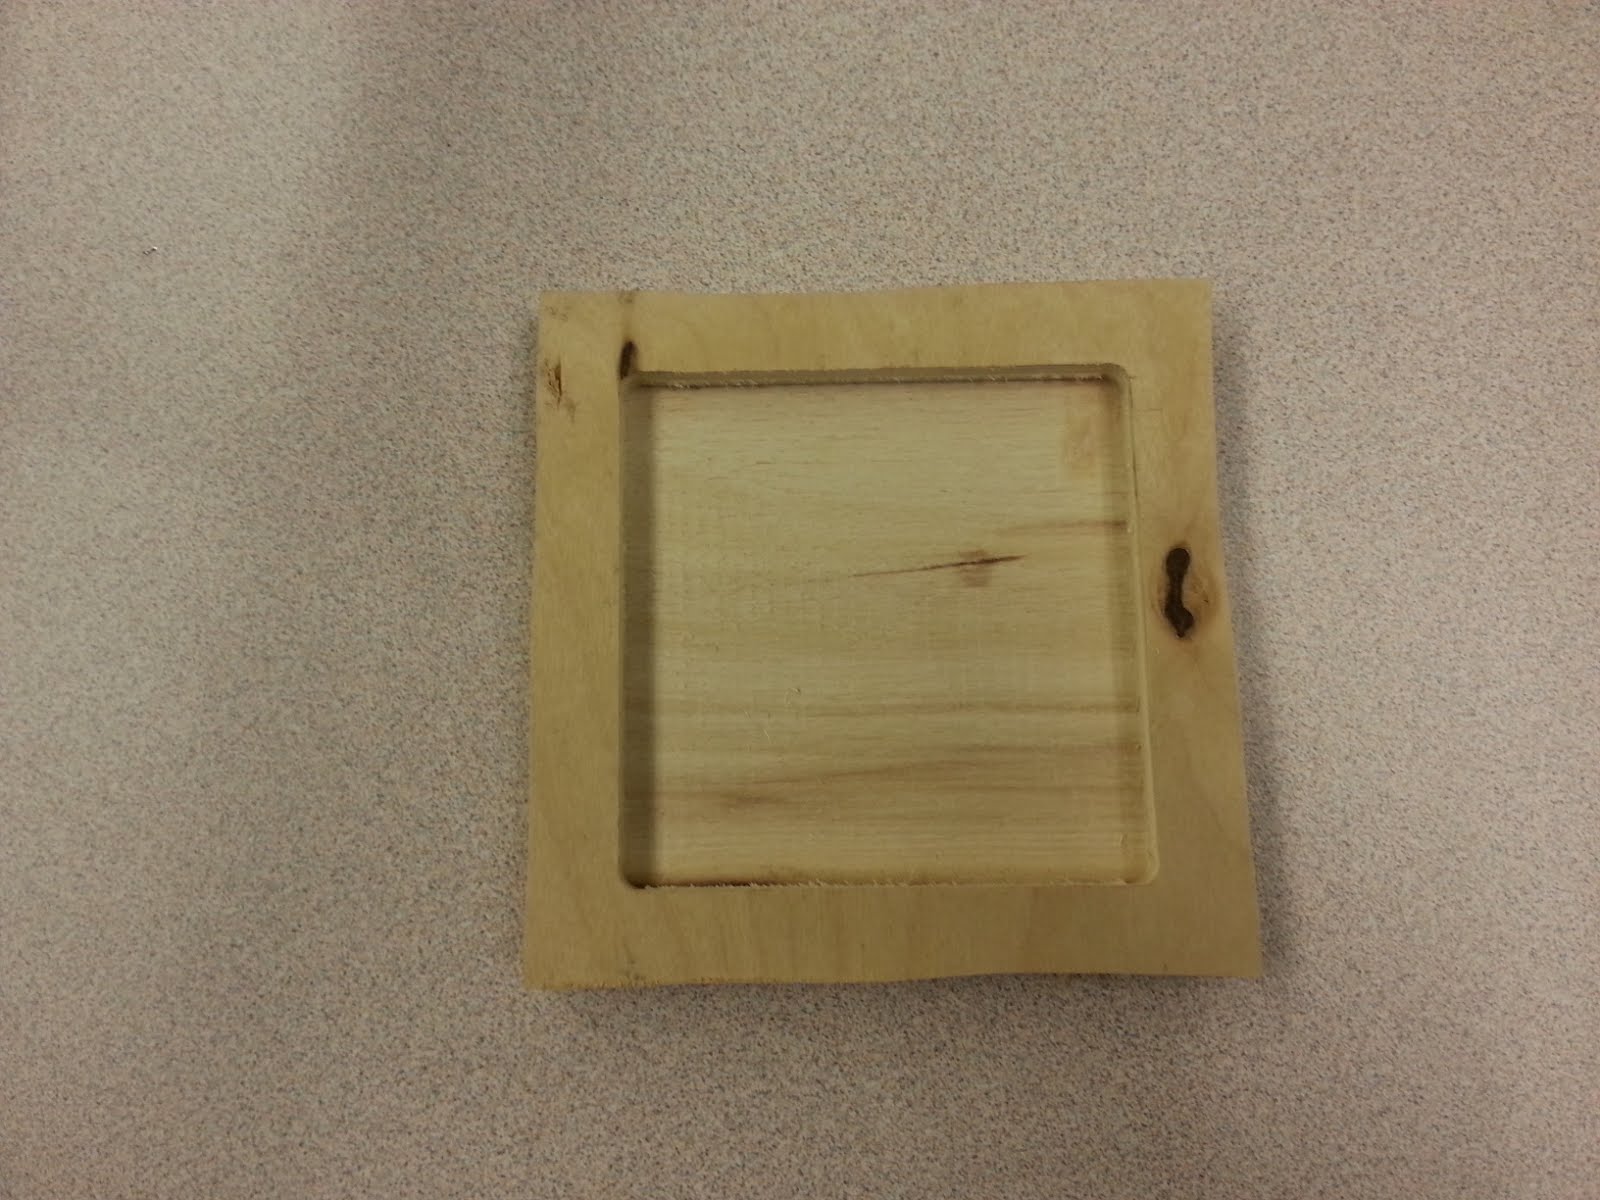
65) Vacuum up the general area then power off the vacuum and place the hose back next to it.
66) Power off the router computer and unplug the router.
-Darkmoonsinger -(-*
Thanks go to PockyBum522, AtomicProf, and Simply7 for their input and assistance.