Name of Tutorial (Heading 1)
Authors: Joe Bloggs (Normal Paragraph Text)
Affiliation (Normal Paragraph Text)
Aim (Heading 2)
To turn a Heading Style on for a piece of text, highlight the text you want to turn into a Heading and then click on 'Styles' in the editor bar and choose the Heading you want.
If you rename or add new headings, you can automatically update the Table of Contents by clicking anywhere on the Table of Contents, and then clicking 'Update Now'. You do not need to retype the heading name in the Table of Contents.
If this is a new document, then you will need to publish it. Click the drop-down arrow to the right of the Share button at the top-right of the page, and then click 'Publish as web page...'. When the dialog box comes up make sure 'Automatically republish when changes are made' is ticked ON. Once this is done, you can copy and paste the webpage URL.
Background (Heading 2)
There should be a warning about the inability to run this tutorial without the OpenGL functionality on the computer which essentially boils down to being unable to run this tutorial without a graphics card installed - it is possible to run OpenGL without a graphics card (it creates it’s own software emulation of what a graphics card would do or something like that) but this is apparently ridiculously slow and probably what should be considered to be beyond the scope of this tutorial
Files Included in this Tutorial:
Probably the ones originating from Sabin’s work - need to check if that’s alright or whether i should look for alternate data sets to use
Exercise 1 - Opening GPlates in Beta Mode
To be able to use the volume visualisation tools it is necessary to boot GPlates in very specific way. This will allow the normally hidden features of the beta volume visualisation to become visible.
For WINDOWS Users:
1) Open the command prompt (type 'command prompt' into the start menu on Windows 7 or the search function in Windows 8) (Figure 1).
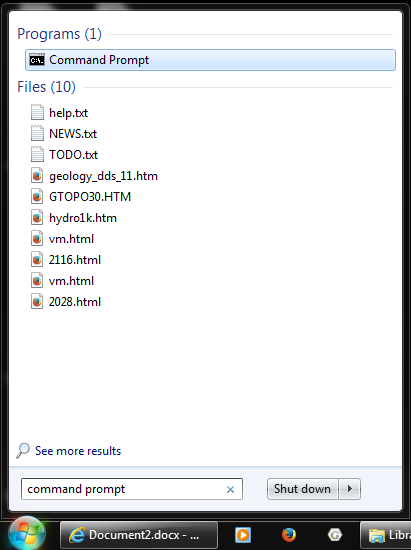
Figure 1. The command prompt should appear under programs when ‘command prompt’ is typed into the search on a windows computer
2) The current directory of the command prompt is currently shown (in most cases it will be something like 'C:\Users\login name> (Figure 2). This will need to be changed to the folder where GPlates has been installed - this is usually on C drive within the programs folder (Figure 3).
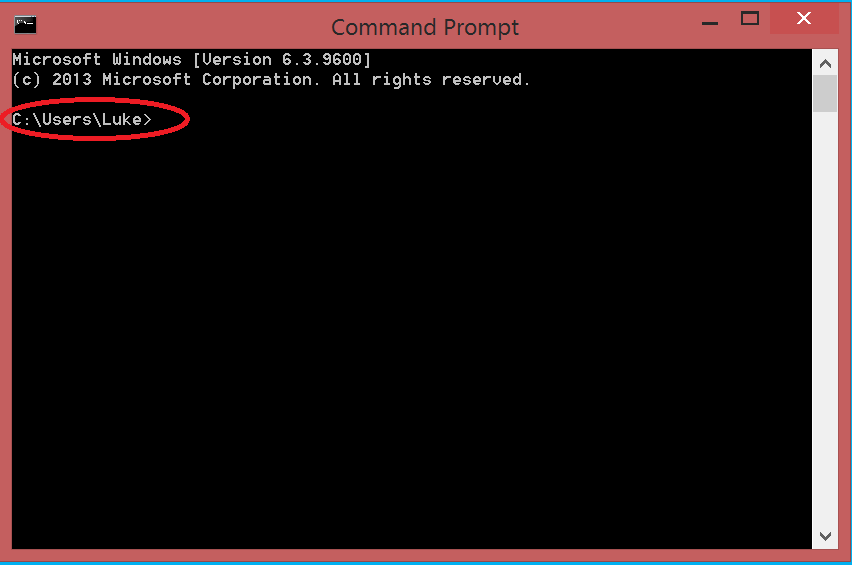
Figure 2. The default directory for the command prompt (circled) is normally the location shown in the image (note: ‘Luke’ in the image will be replaced with whatever the name of the login you are using on the computer is) and will have to be changed
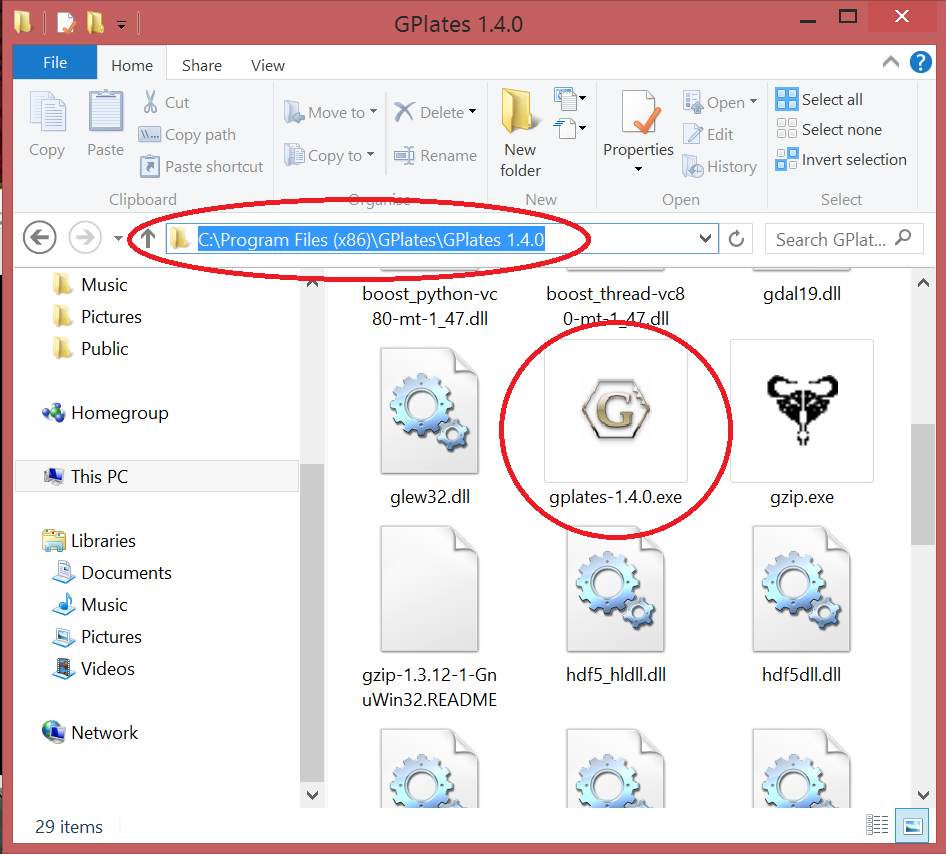
Figure 3. The folder that needs to be located is the one that contains the gplates-1.4.0.exe (or gplates-1.3.0.exe) application (circled). This is the location that will be copied into the command prompt
3) To change the directory in the command prompt ‘cd’ must be typed in with the new directory location following that, for example:
cd C:\Program Files (x86)\GPlates\GPlates 1.4.0
Press enter and the directory on the left of the ‘>’ should match what was typed in. Make sure to match the case and spacing of the new directory as command prompt will not change the directory unless it matches exactly (Figure 4)
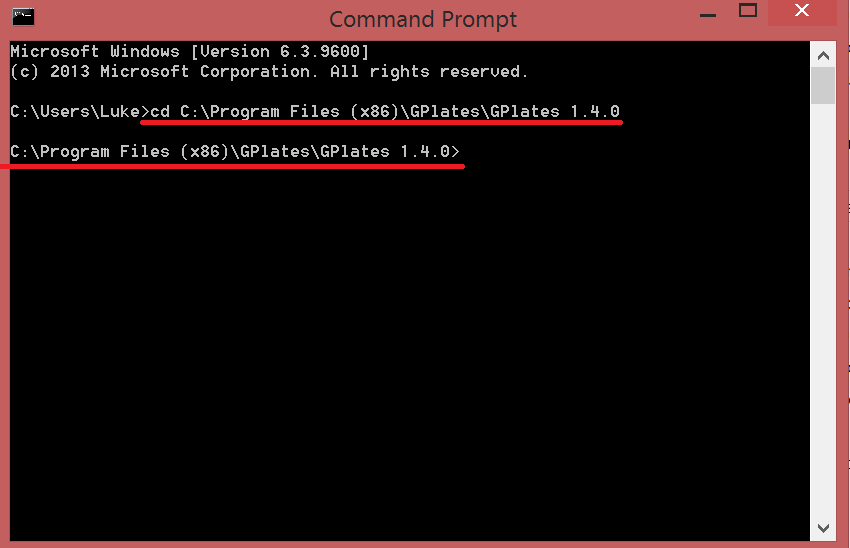
Figure 4. The first underlined line shows the necessary command to change the directory, you will know if this step worked because it will appear as the directory to the left of the ‘>’ as the second underlined line shows
4) Now that the directory has been changed to the folder with the .exe file for GPlates in it the next step is to load GPlates itself. To do this the ‘start’ command is used:
start gplates-1.4.0.exe --enable-scalar-field-import
GPlates 1.3 can also be opened in this way, merely change the name of the ‘.exe’ file to match that of the GPlates 1.3 file. In both cases make sure the space and double dash are placed between the end of the ‘.exe’ and the ‘enable’ (Figure 5). This will open GPlates, to check whether the beta functionality has be enabled go to File->Import and there should now be an option to ‘Import 3D Scalar Field...’ (Figure 6)
Please see the appendix for alternate methods of opening GPlates into beta mode
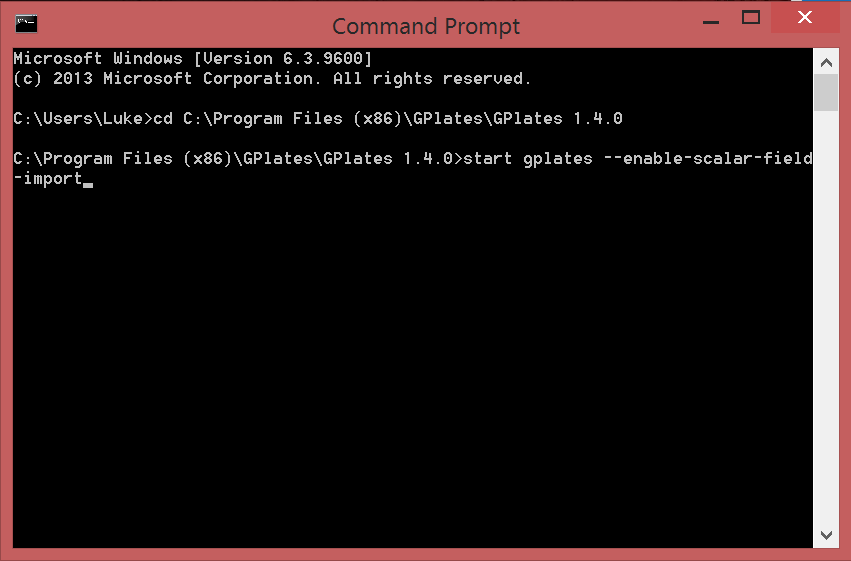
Figure 5. An example of the necessary change to the command prompt directory and the ‘start’ command to open GPlates 1.4. The process would be similar for opening GPlates 1.3 in this way, the only changes would be the folder locationand the .exe file would be GPlates 1.3 not 1.4
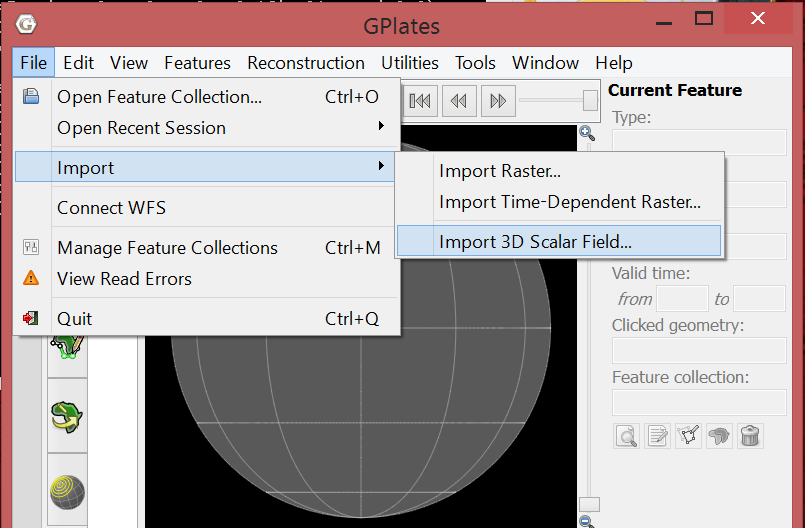
Figure 6. As can be seen the previously hidden ‘Import 3D Scalar Field...’ option is now available in the import menu. If this doesn’t appear make sure the previous steps were followed correctly or see the appendix for alternate ways of opening GPlates
For MAC Users:
This is taken straight from Sabin’s work - I have had no chance to test this process (i do not own a mac) - will need to test and see if there are alternate ways of opening GPlates before finalising the tutorial
Also since I’m not currently working on a Mac and do not own one there are currently no figures for this part of the tutorial
1) Open the terminal. If Gplates is installed in the Applications folder then type in:
/Applications/GPlates-1.4.0/gplates.app/Contents/MacOS/gplates --enable-scalar-field-import
press enter and a Gplates window should appear while the terminal displays any errors GPlates may encounter
Currently if GPlates is not installed to the Applications Folder then i have no idea how to open it - will need to find out
Exercise 2 - Importing 3D Scalar Field Data
Now that GPlates has started in Beta mode it is now possible to import 3D Scalar Field data
1) Go to File->Import->Import 3D Scalar Field… select Add Directory and select the ‘MITP_3D’ folder from the tutorial folder. Depending on the computer it may take some time to load in the data, once the data appears in the table click next

Figure 7. The ‘Add directory...’ button (top left corner) allows for the entire folder of data to be loaded into GPlates in one go - this can take time depending on the computer. When the data appears in the table then it has been successfully loaded.
The next window sets the global extent of the 3D scalar field. In this case leave the settings as the data has a global extent (if the extent shown in this window are not global press the ‘Use Global Extents’ button to fix it) and press next. The final window is the Feature Collection Window. As there are no features currently loaded into GPlates the only option there should be the ‘Create a new feature collection’ option. Click that and then click ‘Finish’
2) GPlates will appear unresponsive for around 10-30 seconds, again it is very dependent on how powerful the computer being used is and if there are any other programs running.
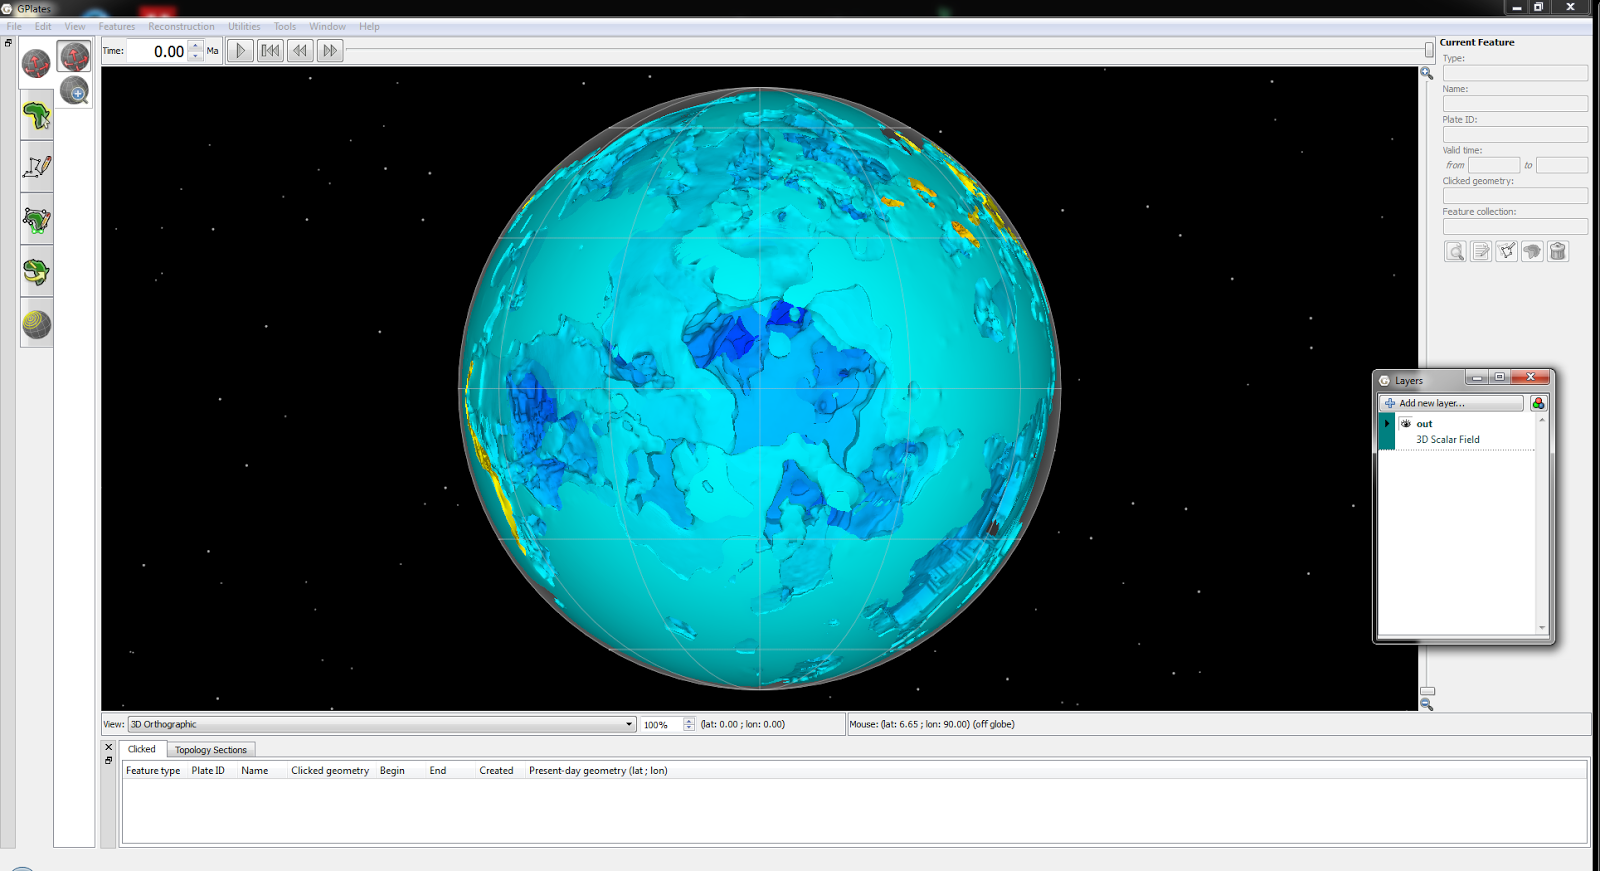
Currently the visualisation’s render mode is isosurface with the colours set to depth. To move down through the layers of the model go to the layers window (found in Window->Show Layers or Ctrl+L) there should be one layer called ‘out’. Click on the arrow to the left of the eye symbol to show the options within the layer and scroll down to ‘Depth Restriction (Radius)’
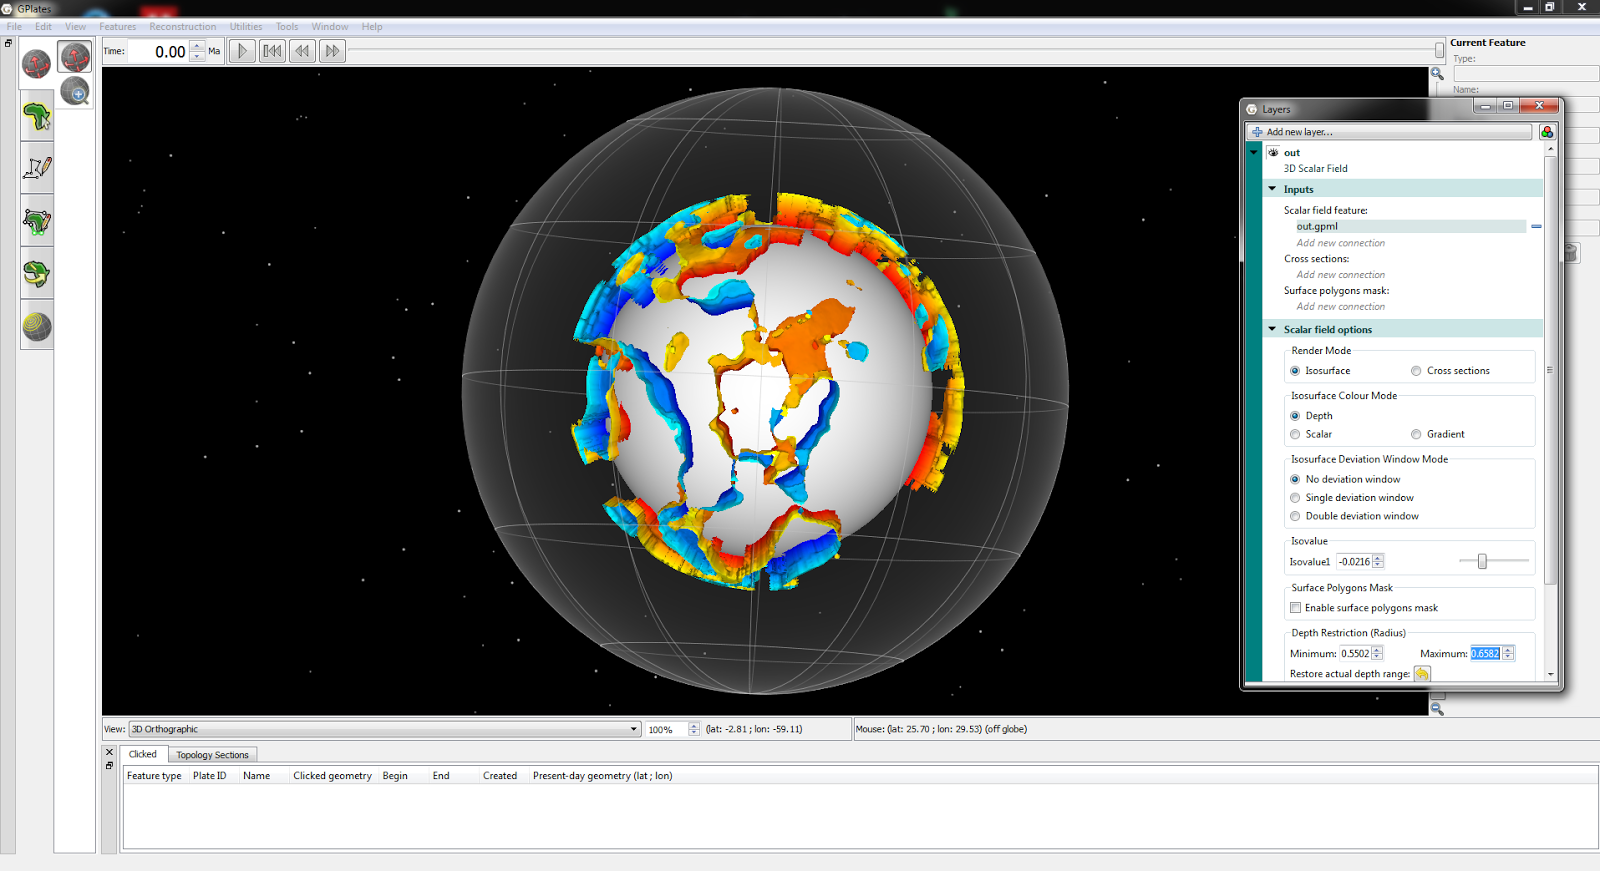
At any point the depth can be reset by clicking the ‘Restore actual depth range’ button below the ‘Depth Restrcition (Radius)’
Appendix - Alternate Ways to Open GPlates
If the steps outlined in Exercise 1 did not successfully open GPlates into beta mode there are alternative ways to opening the program.
For WINDOWS Users:
In some cases the change directory command (cd) will not work. This can occur for a number of reasons such as if GPlates is not installed to the C drive of the computer or GPlates is being run from an external hard drive. The alternative in those cases is to go straight to the start command of part 4 in Exercise 1 and include the entire directory location:
start C:\Program Files (x86)\GPlates\GPlates 1.4.0\gplates-1.4.0.exe --enable-scalar-field-import
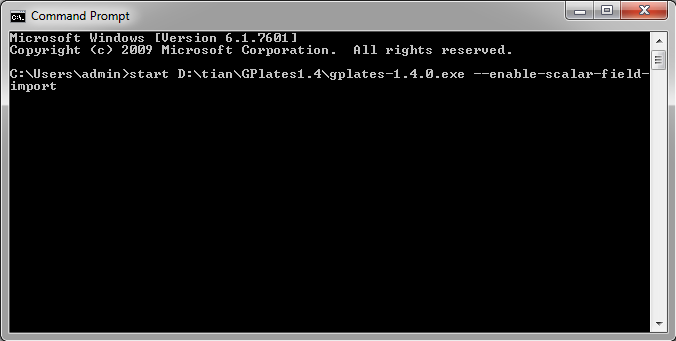
Figure 1x. An alternate method for opening GPlates when the ‘cd’ command does not work
This should open GPlates with the ‘Import 3D scalar field’ option enabled. This technique for opening GPlates does not work if the ‘.exe’ is saved to the C drive.