Dragon Ball FighterZ Character Guide

This Guide is meant to be an introductory level look at each of the playable characters in the upcoming fighting game Dragon Ball FighterZ. Use this to help you get a basic understanding of each of the characters to see which one fits your personal playing style!
This guide will be updated as more information is discovered.
THIS GUIDE IS NO LONGER BEING UPDATED, AS IT IS NOW ON IGN, WITH EVEN MORE DETAIL!
GO CHECK IT OUT!
Send questions and comments to:
TLF.Staphf@gmail.com
Unique Mechanics
Super Dash
The Super Dash is a mechanic that is performed by pressing the SP+Heavy Buttons or the SD button. Upon doing so, your character will fly across the screen with a high speed chase attack that will track the opponent! This attack is safe on block, so you don’t need to worry about being punished for it getting blocked. However, the priority on this attack is low and can be beaten pretty easily, so be careful using it from full screen, or being predictable with this move. This is an excellent move to use after a wall bounce, as it easily allows you to continue your combo, even from a very long distance.
Ki Blast
The Ki Blast is a move that is performed by pressing the SP (X or A) button. This move varies a little from character to character, but for the majority of the cast, pressing the Ki Blast button will cause a small fireball to fly across the screen. This can also be mashed to fire multiple Ki Blasts. The Ki blast has an extremely low priority and can be beaten by almost everything in the game, including the super dash. As I said, this will vary a little from character to character, so experiment with your characters to figure out what the best way to use their Ki Blast move is!
Dragon Rush
The Dragon Rush is Dragon Ball FighterZ’s version of the grab. Dragon Rush is performed by pressing the Light+Medium buttons or the DR Button. Once pressed, your character will flash and then move forward slightly while performing an unblockable attack. After a Dragon Rush connects, the opponent will fly upwards, allowing for an air combo follow-up. Dragon Rush can be countered by doing your own dragon rush, by performing certain attacks, or by jumping out of the way.
Teleport (Vanish)
The Teleport is an extremely interesting mechanic that allows characters to warp to the other side of the opponent and perform an attack. This attack is performed by pressing the medium and heavy attacks at the same time. This attack is safe on block and can be used as a combo extender to land massive damage combos. This moves costs 1 bar of meter, so you can’t just constantly spam teleports.
Deflect
Deflects function in a similar manner to Parries in Street Fighter 3: Second Impact. This is a defensive option that can be used to nullify certain projectiles and attacks. It is performed by pressing back on the control stick and the SP button (X or A). The timing on this move depends on the attack that is being deflected, so experiment around to figure out the timing to beat those pesky moves.
Smash Attacks
Smash attacks are very powerful attacks that can either cause a wall bounce, or a launch. The wall bounce is performed by simply pressing the heavy attack button, and the launch is performed by pressing down and the heavy attack button. Both of these attacks allow for easy combo extensions and have pretty high priority.
Sparking Blast
Sparking Blast is Dragon Ball FighterZ’s “comeback mechanic”. It functions extremely similarly to X-Factor from Marvel vs Capcom 3. The reason it is called a comeback mechanic, is due to its effectiveness increasing the more of your characters are dead. During Sparking Blast, your active character will recover their blue health over time, and their attacks will become stronger. The length of time that Sparking Blast lasts depends on how many characters you have alive. So if you only have one character left, sparking blast will be much more effective than if you used in early on with all of your characters left alive. Another unique aspect of Sparking Blast to keep in mind is its effect on your teleport (vanish) attack. When Sparking Blast is active, if you hold down the input for vanish, instead of doing the attack after the teleport, you will instead simply teleport to the other side without attacking, allowing for much higher mixup potential.
Controls
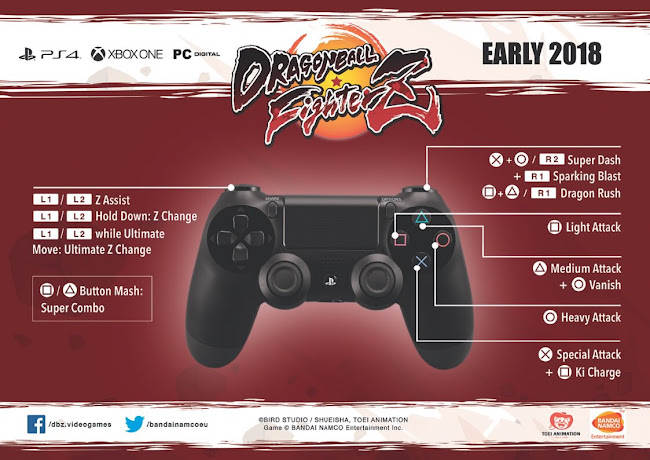
This is the default control scheme, however, I will be using the following move abbreviations to avoid confusion
DR = Dragon Rush = R1 = RB = Light+Medium
SD = Super Dash = R2 = RT = SP+Heavy
SP = Special Attack = X = A
ATK = Any Attack = ■, ▲, ● = X, Y, B
EX = Heavy Version of a Special (Costs 1 Bar to use)
For a more in depth look at the game’s mechanics, check out this amazing guide put together by @tcthundertc
https://docs.google.com/document/d/1rrh_EWca6MB1WUZfjIZ97LYhYspshivHjM352KmZ4g4/edit?usp=sharing
Team Composition
This section is meant for people who are newer to team based fighting games and are having an issue finding characters that compliment each other or are not understanding which characters to put in what place on their team. I will start this section by explaining the different positions and roles that a character can play on any given team.
Point - This is the character that will come out to fight first. This should be a character who you are very comfortable fighting with alone and without the use of stored up meter. For this reason a lot of players will put something called a “battery” character on their point position. A Battery character is a character who does well without meter and is extremely good at building meter for the rest of his team to use.
Middle - This is the 2nd character that will come out and fight, as long as you don’t tag out or anything of that nature. This is typically 1 of 2 things. Another strong character that you can exchange for your point character at will. Or a character with a strong assist that either helps cover the weaknesses of your point character or helps extend combos for your point character. For example, if you are playing a character like Teen Gohan, who has a hard time getting close to the opponent due to his small limbs, you may want to put a character with an assist that can help him get in closer like Goku with his Kamehameha assist. Another example would be if you are playing a character who does really well in long range, like Frieza, but doesn’t do well up close, you might put Adult Gohan on your assist to help get your opponents off of you with his invincible Dragon Flight assist.
Anchor - This is the final character on your team and will be the last to come out and fight, as long as you don’t tag out or anything of that nature. This should be 1 of 3 things, either a character who does a really good job of using the meter that you built up with your other characters, a character with a lot of comeback potential, or another character to assist your point. A prime example of this would be Adult Gohan with his Awakened levels. Adult Gohan becomes a LOT stronger after he has awakened, so putting him as an anchor gives him a better chance to use that meter and unlock his full potential.
Keep in mind that you will need to be competent with all of the characters on your team, regardless of their position due to the fast paced tagging and the fact that regardless of skill level, some of your characters will inevitably die, forcing you to use your middle or anchor character as your main fighter.
Now that we understand the basics of character positions, let’s look at some example teams and their general game plan, so that we can get a better understanding of how the characters work together.
Keep in mind these are general examples and should not be considered ideal team compositions for any intents or purposes
Cell/Frieza/Adult Gohan
Cell on point playing a solid neutral, Frieza supporting him with his long range assist, and covering his command grab, Adult Gohan to capitalize on meter with awakening
Yamcha/Beerus/Tien
Yamcha on point play a rushdown style neutral, Beerus adding to this with his overhead assist, Tien finishing off the opponent with his level 3
Android 16/Android 18/Goku Black
Android 16 on point playing a grappling based hard hitting neutral, Android 18 using her barrier to help negate some of the ranged play and build meter, Goku Black using this meter for his many mixups
SSJ Goku/Krillin/Kid Buu
Goku on point playing a solid neutral, Krillin healing with his assist, and Kid Buu rushing down and finishing off the opponent with his strong EX moves and damaging supers
Hit/Kid Buu/Goku Black
Hit on point playing a solid in your face ground game, Kid Buu adding to that with his assist, and Goku Black helping with zoning AND using meter for his many mixups
Trunks/Piccolo/Android 16
Trunks on point playing a mid range poking game, Piccolo trying to make the opponent mess up and cover Trunks’ movement options, Android 16 to finish off combos and use his damaging supers
Again, keep in mind that these characters will be changing places rapidly, so remember where your characters are located to ensure that you call the right assists for the situation at hand.
Another huge aspect of Team Composition in Dragon Ball FighterZ is health management. This means switching your characters actively (and safely) to ensure that they are healing as much of their recoverable (blue) health as possible.
Now to the Characters
SSJ Goku
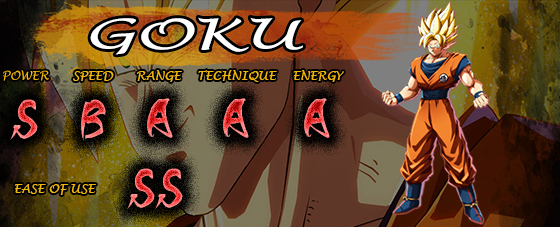
Goku serves as this game’s starter character. He is extremely well rounded and can do well in any situation. He doesn’t however, excel in any one area, being outclassed by specialists in every area. He has a number of different specials that can be used in various situations and a super that can hit finish off almost any possible combo with a good chunk of damage. Players who will do well with SSJ Goku are players who can rely on their solid fundamentals to outplay the opponent.
Assist: Grounded Kamehameha
SSJ Goku’s Special Moves
Dragon Flash Fist
QCF+ATK
Goku flies forward and strikes the opponent with an overhead punch. The medium version goes a little further than the light version, but does the same amount of damage. The EX version teleports to the opponent before performing the punch. This move can be thrown into your block strings to try to mix up the opponent with an unexpected overhead! It’s not safe on block though, so be careful throwing it out randomly, because if it gets blocked, you’re gonna be eating a chunk of damage.
Rapid Kick Rush
QCB+ATK
Goku’s equivalent of Ryu’s Tastu. Goku moves forward and upward with a flurry of kicks that easily combo into either version of Goku’s Super Kamehameha. In similar function to Goku’s Dragon Flash Fist, the medium version goes further and higher than the light version, however, this DOES do more damage than the light version. The EX version causes a wall bounce for a simple combo extension. This does put you into the air, so you can’t combo into his level 3, so keep that in mind when using this special.
Kamehameha
QCF+SP
Goku’s signature attack. Goku fires a large beam that crosses the entire screen almost instantly. This special can be angled upwards while on the ground by simply pressing up on the control stick. It can also be angled down while in the air by pressing down on the control stick. This move does pretty good damage and can be used to keep opponents in check from full screen
SSJ Goku’s Super Moves
Super Kamehameha (1 Bar)
QCF+Light+Medium(DR)
Goku’s level 1 super which can be fired on the ground or in the air. It is a stronger version of his regular Kamehameha, being larger and doing more damage. This is a very solid super and this and the Instant Transmission should be your go to combo enders due to their ease of comboing into, and their good amount of damage. This super can be angled in the same way the regular Kamehameha can, by pressing the stick up on the ground, or down in the air.
Instant Transmission Kamehameha (1 Bar)
QCF+SP+Heavy(SD)
Goku’s other level 1, which is a modified version of the Super Kamehameha. It does the same amount of damage, however, before the beam fires, Goku will teleport behind the opponent and fire the beam upwards at a 45° angle. If this super is done in the air, then Goku will teleport to the ground behind the opponent. This, is also a very solid super and can compliment the few holes that Goku’s other level 1 has. If you are having difficulties reacting to this super, look at the way the camera moves before the super activates. If it moves in front of Goku to show his entire face, then a Super Kamehameha is going to come out. If it moves further around to the back of Goku and you can only see part of his face, then the Instant Transmission Kamehameha is going to come out.
Meteor Smash (3 Bars)
QCB+Light+Medium(DR) or SP+Heavy(SD)
Goku’s Level 3 is a super that can only be performed on the ground, which slightly limits its usability. But don’t let that fool you, this is still an amazing super. The startup of the super has invincibility frames leads to a massive amount of damage. After activating the super, Goku teleports behind the opponent and attacks him with his elbow. If that connects, then the rest of the cinematic super will play out with automatically. This super is very easily comboed into from a wall bounce smash attack. Be careful using this super, as if the opponent is moving too much vertically, then it will miss entirely!
SSJ Vegeta
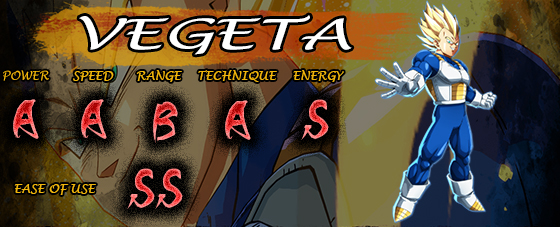
Vegeta is the slightly faster, and seemingly more aggressive version of Goku. He is still a very balanced character, for better and for worse, but he trades his increased speed for slightly lower damage output. Vegeta’s special moves are also less universal than Goku’s, so they need to be used at more specific times, but in exchange, they are stronger than Goku’s specials. Players who will do well with SSJ Vegeta are players who can rely on their solid fundamentals to outplay the opponent while mixing them up with a few quirky specials.
Assist: Aerial Ki Blast Rush
SSJ Vegeta’s Special Moves
Super Dash Kick
QCF+ATK

Vegeta flies forward performing a kick attack. The medium version travels further, but takes longer to do so, due to Vegeta performing 2 kicks before flying forward. The medium version does more damage only if the starting kicks also make contact with the opponent. The EX version is a combination of the 2, flying full screen with little startup. The EX will go full screen regardless of where you are in relation to your opponent, so if you are too close to the opponent, it will be harder to combo off of the EX, than just the light version. If any version of this special gets blocked, vegeta will go past the opponent and land on the other side. So be careful to block the correct way if that is what you are looking to do after it gets blocked.
Crusher Knee Kick
QCB+ATK

The Crusher Knee is Vegeta’s absurdly powerful Anti-Air. Once performed, Vegeta will fly upwards at a 45° angle, knee first. The medium version of this special goes further and performs a follow-up kick at the end of the attack. The EX version of this attack hits multiple times and goes even further than the medium version. This is Vegeta’s go to reversal, having incredible priority and very fast startup. This move has a decent amount of recovery though, so be careful throwing it out randomly.
Intercent Kick
Down+Light Attack [Air Only]

The Intercept Kick is Vegeta’s Divekick. It is a kick that can only be performed in the air. Once activated, Vegeta moves quickly back down to the ground, striking the opponent on the way. This can be a useful jump in option since it comes down quicker than most jumping attacks and can be used to disrupt your opponent’s anti-air attempt. This move is relatively safe on block, but is very difficult to combo after it. For this reason I don’t recommend using this in combos, unless you have some gimmicks set up for afterwards.
Ki Blast Rush
QCF+SP

Vegeta fires a volley of Ki Blasts forward at the opponent. This move functions almost identically to simply mashing the regular Ki Blast, except it is slightly faster. This move seems to have very limited usage in neutral outside of mind games involving situations where you are baiting the opponent to approach you. However, this move is great to use as the opponent is getting up, as it will force them to sit there and block.
SSJ Vegeta’s Super Moves
Big Bang Attack (1 Bar)
QCF+Light+Medium(DR) or SP+Heavy(SD)
Vegeta fires a large fireball forward that deals good damage is a great combo ender. This is slightly harder to combo into compared to Goku’s Kamehameha due to the smaller size and the lack of being able to shoot it upwards from the ground. You can angle it downwards in the air, however, depending on the button that you press to activate the super. Overall this is a decent use of meter, and should be your go to when you don’t want to spend three bars for Vegeta’s level 3.
Final Flash (3 Bars)
QCB+Light+Medium(DR) or SP+Heavy(SD)

Vegeta’s level 3 super. Vegeta fires a massive energy beam across the whole screen which deals a huge amount of damage. This super is fairly easy to combo into due to its huge size and the fact that you can use it both in the air and on the ground. This should be your go to combo ender when you want to deal the most amount of damage.
Trunks
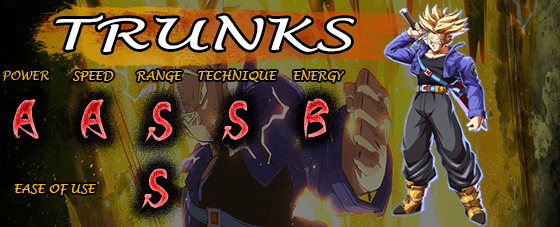
Trunks is a very well rounded fighter who excels on the ground due to his high mobility and his lack of aerial supers. Despite his lack of aerial supers, Trunks is a very solid character. Trunks has amazing reach due to his sword, and has some of the best movement options in the game currently. These specials, (Change the World, and Cyclone Buster) allow Trunks to move about the screen in ways that most characters can’t, and can be amazing for mixing up your opponents. Players who will do well with Trunks are players who have a solid ground game, and know how to use movement options to their highest potential.
Assist: Change The Future

Trunks’s Special Moves
Masenko
QCF+SP
Very similar to Goku’s Kamehameha, except it covers slightly less screen space, and comes out a little faster. In standard affair, the priority of this move is higher than your standard Ki Blast and is a solid special to use for spacing and maintaining screen control. This special can only be used on the ground though, so it has slightly less usability than your standard Kamehameha. If this connects, you can combo into his Level 1 for additional damage!
Change The Future
QCB+SP

Change the Future is one of Trunks’s most unique specials. When this move is activated, Trunks runs forward and then unleashed a massive Ki explosion that covers a large portion of the screen. This special can be used to keep your opponents in check and to stop their unsafe approaches. The thing that makes this move unique, is if you hold down the SP button, the explosion won’t come out. This makes the move function more like a command dash to help you close the gap between you and your opponents quickly. Use this after a block string to mix up your opponents!
Shining Slash
QCF+ATK
Trunks leaps forward and slashes down with his sword. This move is an overhead so it is great for mixing up opponents! The medium version goes further than the light version. The EX version goes the furthest comes out the fastest, and deals more damage. This is the only special move that Trunks can do in the air so keep that in mind when building your combos!
Cyclone Buster
QCB+ATK
This in another unique move that Trunks has in his arsenal, and this one is purely for movement! Depending on which button you press, you will either move forward or backward. This move can be canceled after a set period of time into any of his aerials, including his downward Ki Blast. Experiment with this move to find out its best usage for you!
Trunks’s Super Moves
Burning Attack (1 Bar)
QCF+Light+Medium(DR) or SP+Heavy(SD)

Trunks’s only level 1 super. Trunks does a long animation and then fires a large ki blast that covers the whole screen very rapidly! Despite the animation length, the super comes out relatively quickly since time is frozen while Trunks is waving his arms around. This super can only be done from the ground so it definitely lacks the versatility of other level 1’s, but it still does a chuck of damage, so remember to end your ground combos with this in order to tack on a bit of extra damage!
Head Dome Attack (3 Bars)
QCB+Light+Medium(DR) or SP+Heavy(SD)

Trunks’s Level 3. This super is actually a command grab, meaning it will go through the opponent’s block, but has an extremely small range. This super is great to use once you have conditioned the opponents into blocking all of your mixups, as a single grab with this super will lead to around half of the opponent’s life being gone before they know it! Keep in mind this super is invincible on startup, so you can also use is as a punish if people are pushing buttons in an unsafe manner.
Piccolo

Piccolo is Dragon Ball FighterZ most prominent mixup character. Piccolo doesn’t have very high damage output from his combos without spending a LOT of meter. On top of that, Piccolo doesn’t have any aerial supers so he is forced to get his opponents back down to the ground if he wants to get solid damage from his combos. Most of his specials are relatively hard to combo from, outside of just doing a super right after it. For this reason I would use Piccolo as a battery character, getting light damage off of his mix ups and then switching to your other characters to finish off your opponents! Players who will do well with Piccolo are players who are confident in their abilities to mix up their opponents and who can never become predictable.
Assist: Uncharged Homing Energy Blast
Piccolo’s Special Moves
Stretchy Arm
SP

Upon pressing the SP button, Piccolo will, instead of firing a Ki Blast, stretch his arm out and grab the opponent. This can be a great way to catch the opponent off guard. Keep in mind that this move isn’t actually a grab and can in fact, be blocked. However, once the move connects, the opponent will be pulled in close to Piccolo kind of like Scorpion’s spear from Mortal Kombat.
Demon Shocker
Forward/Down Forward+SP

Demon Shocker is a beam projectile that travels about half screen and can be comboed off of with a few different things including his Stretchy Arm. This is a pretty standard projectile that can be angled upwards by pressing Down plus Forward and SP.
Homing Energy Blast
QCF+SP

The Homing Energy Blast is a large, slow moving Ki Blast that is excellent for set ups and for making your opponent make a mistake. This special has the same priority as a regular Ki Blast, so Super Dashes and more high priority specials will completely negate this move. However, if you can predict how your opponent will react to this special, you can counter their attempt to counter you! Keep in mind that if you charge this move, the Ki Blast will become larger and slower, so be sure to change things up and keep your opponent on their toes!
Demon Elbow
QCF+ATK

The demon elbow is a special that sends Piccolo flying forward, and then after a set distance, turning around and striking the opponent from behind. The medium version goes further than the light version, but otherwise, is exactly the same. The EX version is actually very unique. It looks the same as the light version at first, but before striking the opponent, Piccolo will teleport back to the front of his opponent and strike him. This move also has decent tracking so if it is done as a jump in, Piccolo will fly downwards towards the opponent before striking them.
Demon Slicer
QCB+ATK
A counter special that will start with Piccolo blocking an incoming attack and then teleporting to attack the opponent. Depending on which button was pressed, the teleport location will be different. The light version teleports the shortest distance and hits from the front. The medium version teleports a little further and strikes from behind. And the EX goes the furthest and strikes from the front as well. Keep in mind, this move doesn’t counter any move that hits low. Despite that, this move can be a great way to get out of pressure, or to mix up the opponent.
Piccolo’s Super Moves
Special Beam Cannon (1 Bar)
QCF+Light+Medium(DR)
Piccolo’s signature attack, the Special Beam Cannon, is a, for the most part, standard beam super that goes across the whole screen. However, if you hold the Light+Medium(DR) button down, you can actually teleport a short distance left or right, up to 3 times, before releasing the attack. This is mainly a mind game technique as before the beam comes out, an animation plays that gives the opponent plenty of time to block, so plan your offense accordingly.
Hellzone Grenade (1 Bar)
QCF+SP+Heavy(SD)
Piccolo throws up a swarm of Ki Blasts that will float in the air for a short time before homing in on the enemy. These Ki Blasts have the same priority as a standard Ki Blast, so they can be super dashed through. However, depending on the spacing, they could hit the opponent if they tried to throw out their own higher priority move or special. This super is mainly used as a set up tool, or to cause the opponent to make a mistake.
Light Grenade (3 Bars)
QCB+Light+Medium(DR) or SP+Heavy(SD)
Piccolo’s level 3. This is a standard level 3, generating a large Ki Blast that moves across the screen at a fast pace. This is going to be Piccolo’s main way of dealing solid damage off of his loose specials that are harder to combo after. Like Piccolo’s other Supers, this can only be done on the ground which limits its usefulness a little bit, but it is still good for tacking on damage.
Krillin
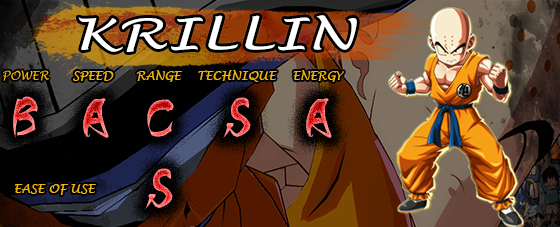
Krillin is a close ranged fighter who is very good at support, and using meter. For this reason Krillin excels at being played as an anchor, healing his teammates with his senzu bean assist, and finishing off the opponent with his devastating Destructo Disc super. Like some other characters, Krillin can only use his supers on the ground, which makes them a little harder to combo into, but if you finish a combo on the ground, or catch the opponent off guard, they are going to be hurting! Players who will do well with Krillin are players who are good at planning for the long run and are good at saving meter for when it really counts.
Assist: Senzu Bean, and then Angled Ki Blasts once his Senzu beans run out
Krillin’s Special Moves
Angled Ki Blasts
Down+SP/Up+SP
Krillin has a fairly unique Ki blast in that it can be angled in different ways. There are 2 different ways to change the angle of the Ki Blast. If Krillin just presses down and SP, he will fire a Ki Blast downwards, causing Krillin to propell off of the ground if he does it while standing.
The second way is after
firing a normal Ki Blast, Krillin can press up or down+SP to change the direction of the blast and really confuse the opponent.
Kamehameha
QCF+SP
A fairly standard beam special that has multiple uses. The biggest difference between this and Goku’s Kamehameha is the fact that Krillin can charge his. While this doesn’t affect the damage done by the special, it does allow Krillin to delay the attack, or jump before firing the move. This move has standard priority so it will beat Ki Blasts and super dashes, but will lose to supers and other high priority moves.
Solar flare
QCB+SP

Krillin surrounds himself with a glow of light that will briefly stun the opponent. This will allow for Krillin to follow up with a combo if the opponent is close enough, or just a super if they are too far away. This move is an extremely potent counter that can stop your opponent dead in their tracks if they are rushing in doing anything unsafe. This is one of the best ways of confirming into Krillin’s Destructo Disc Super, leading to massive damage!
Afterimage Strike
QCF+ATK

Afterimage strike is a move that sends Krillin forward performing an aerial flip kick while a clone of Krillin remains on the ground. The medium version goes further than the light version and will go over the opponent if they are too close to you. The EX version will actually track the opponent. All three of these do the same damage, so just use the appropriate one based on the spacing. The unique thing about this special is that all three of the versions can be faked by holding down the attack button. Doing so will cause the clone of Krillin to fly forward but disappear before striking the opponent. This fake can be a great way of messing with the opponent, and making them think you are going to attack, when you are really just forcing them to make a mistake.
Senzu Bean
QCB+ATK
This is Krillin’s most unique ability. The first time you perform this move, Krillin will simply throw a senzu bean backwards, healing the assist character of your choice (light will heal the first assist, medium will heal the second). However, after the first bean is thrown, Krillin will throw a rock for the next 3 times this move is performed. While he is throwing these rocks, the strength of the attack will determine how far the rock is thrown. The medium version will throw the rock further than the light and the EX version will track the opponent. Keep in mind that these rocks do very little damage and are by far the worst special in the game. After the three rocks are thrown, Krillin will throw another Senzu bean, and the pattern will repeat. After Krillin has thrown his 3rd Senzu bean, he has officially run out and will only throw rocks. This is also Krillin’s Assist, and the pattern of rocks vs beans remains constant regardless if he is the active character or the assist. However, once Krillin is out of Senzu beans, he will start using his upward angled Ki Blast as as assist, which is way better than the rock.
Krillin’s Super Moves
Destructo Disc (1-5 Bars)
QCF+Light+Medium(DR) or SP+Heavy(SD)
Krillin’s only level 1 super. This move at first seems pretty standard, if not a little underwhelming as a super, as the damage and the screen coverage are both slightly sub par. However, this super can be chained together multiple times by pressing the A button multiple times. The amount of times the A button is pressed, determines how many discs are actually thrown, with a max of 5 discs. If all 5 discs are thrown, Krillin will end up dealing out about half of the opponent’s health in damage. This super can only be done on the ground, so keep that in mind when building combos.
Split Energy Wave (3 Bars)
QCB+Light+Medium(DR) or SP+Heavy(SD)
Krillin’s level 3 is also fairly unique and operates in 2 phases. At first, Krillin just fires a large Ki beam at the opponent. However, regardless of whether the attack was blocked or actually hit, Krillin will shoot up the beam into the air and send a lobby of Ki blasts raining from the sky. This means that even if the first blast is blocked, the opponent can still get caught by the follow up rain of Ki Blasts. This super can also only be used on the ground, so keep that in mind.
Gohan

Gohan is an all around character with an emphasis on speed and power. He doesn’t have much in the way of mix ups or range, but he is very fast and if he gets in and lands a hit, he will make it count. He doesn’t have any aerial supers, but he does have a meterless aerial special that causes a wall bounce that can be followed up with either of his very damaging supers. Players who will do well with Gohan are players who are good utilizing each of a character’s moves when they are needed and players who are good at converting loose hits into full combos.
Assist: Light Dragon Flight

Gohan’s Special Moves
Five Strike Combo
QCF+ATK (On the Ground Only)

Gohan flies horizontally across the stage and strikes the opponent with a kick. This move has a follow up that only can be done if the initial kick actually hits. After connecting with the kick, you can press the attack button that you used up to 4 more times for additional attacks. The medium version goes further than the light, but does the same amount of damage. The EX version does the same amount of damage as both the light and medium version, but it ends in a wallbounce allowing for follow up combos.
Dragon Flight
QCB+ATK

This is Gohan’s go to anti air option. This move vaguely resembles a dragon punch from the street fighter series. After executing, Gohan does a rising punch motion striking the opponent once for a normal version, and multiple times for an EX. The medium version goes further and does more damage than the light version. This move has an extremely fast startup, and has very good priority, making it Gohan’s go to counter attack for punishing unsafe approach options.
Aerial Kick
QCF+ATK (In the Air Only)
Gohan’s Aerial Kick special has Gohan unleashing a flurry of kicks in the air. The medium version does more damage and goes further than the light version, and it also causes a wall bounce on hit. The EX version lasts longer than the medium version, comes out as fast as the light version, and causes a wall bounce. This should be your go to special attack for ending aerial strings, as the medium version will allow you to extend your combos or combo into either of your supers.
Gohan’s Super Moves
No Motion Kamehameha (1 Bar)
QCF+Light+Medium(DR) or SP+Heavy(SD)

Gohan fires a giant Ki beam upwards at a 45° angle. This is one of the more damaging level 1 supers in the game. Keep in mind that you can only do this super on the ground. Given the ground requirement and the slightly unorthodox angle, it can be tricky at first to combo into this, but once you realize how good the medium version of the ariel kick is, you will be comboing into this move in no time.
Father Son Kamehameha (3-5 Bars)
QCB+Light+Medium(DR) or SP+Heavy(SD)

Gohan fires a massive Ki beam straight ahead that covers most of the screen. This is a very damaging super on its own, however, it can be powered up by using 2 additional bars (total of 5) by holding down the button you used for the super. This can only be done on hit, but deals a tremendous amount of damage and is great for finishing off your opponents!
Frieza

Frieza is the most straight forward zoning character in Dragon Ball FighterZ. He has many different specials that can be used for pushing your opponent back, and keeping them there once you get them there. Even Frieza’s standing heavy attack, summons a large group of rocks and throws them across the screen. Frieza doesn’t deal a massive amount of damage with his normals, he instead relies on his damaging specials and supers for his damage output. Players who will do well with Frieza are patient players who like controlling the screen and who are comfortable fighting from across the screen.
Assist: Medium Earth Breaker

Frieza’s Special Moves
Earth Breaker
QCF+ATK
Starting off strong in the zoning department, Frieza causes a massive ground explosion dealing decent damage, and pushing the opponent back. The light version causes the explosion to appear relatively close to you, the medium version is almost full screen, and the EX version fills the entire screen with this explosion. This is a great special that is very reminiscent of C. Viper’s seismic blast, only a LOT larger, and isn’t cancelable in the way that hers are.
Next Time, You’ll Die
QCF+SP

Frieza fires a large Ki ball downwards, and then across the screen. If this moves hits from far away, it will only do modest damage. However, if the initial animation of the move makes contact, then it will deal pretty solid damage and push the opponent all the way across the screen. This can be a great way to push the opponent back to a range where a lot of characters movesets are more limited, or to keep them in check once they’re out there.
Death Saucer
QCB+SP
Frieza fires 2 Ki discs out that will strike the opponent twice. Once on the way out, and then again as it comes back. Any combination of these strikes can be blocked, meaning, if you block the first attack, the follow up could still come back and catch you, and vice versa, if you get hit by the first attack, you can still recover and block the second attack. You can also get hit by both attacks, or block them both. Keep in mind that the second attack will come back and can hit Frieza as it flies back off the screen.
Warp Smash
Down Down+SP
Frieza teleports a set distance, leaps into the air, and then fires a small Ki Blast back at the ground. This is a completely meterless teleport that allows Frieza to get out of pressure, or mix up the opponent. Just keep in mind that the Ki blast that is sent down, has standard Ki Blast priority, so if the opponent knows you are going to do this move, they can just super dash, and punish you fairly easily.
Frieza’s Super Moves
Death Ball (1 Bar)
QCF+Light+Medium(DR) or SP+Heavy(SD)
Frieza’s only Level 1. Frieza will move into the air slightly and throw down a large Ki Ball that deals solid damage. The unique thing about this special is that the damage is actually dependent on how far from the ground the opponent is when this move hits. So if you do it from the ground, it will do less damage than if you do it in the air, as the move will continuously hit the opponent as it pulls them to the ground. This should be Frieza’s go to combo ender if you don’t want to spend the bar on his Nova Strike Level 3.
Nova Strike (3 Bars)
QCB+Light+Medium(DR)
Frieza’s most damaging combo ender. This has Frieza floating off the ground and after a short animation, come crashing back to the ground, dealing massive damage. Unlike the Death Ball, this super is not dependant on the opponent’s distance from the ground, and always does a set amount of damage. This super has invincibility on startup (like all level 3s), and can be used as a very damaging reversal option.
You Should Be Killed By Me (3 Bars)
Hold SP+Heavy(SD) after a hard knock down

Probably the most unique super in the game as it can only be done after Frieza gets knocked down by his opponent. This will have Frieza looking up and firing a Ki beam upwards at a 45° angle, this super’s very existence will cause the opponent to think twice before applying pressure after their combos, because if they do anything risky, they could end up eating quite a solid chunk of damage.
Golden Frieza (3 Bars)
QCB+SP+Heavy(SD)

This Super is awful, don’t use it...
Seriously though, after activation Frieza will transform into his golden form and will become slightly buffed for a slight period of time, increasing his damage and his walk speed by a small amount. This is slightly reminiscent of Dragon Install from Guilty Gear, but the damage and movement buffs aren’t enough to really justify the use of meter. After the transformation is done Frieza will crumple to the ground and will be helpless for a short period of time. That is unless you spend 1 more bar of meter to call in Sorbet to fire a small Ki Blast across the screen, dealing a standard special’s amount of damage. All in all, you will have much better things to spend your meter on, than this super.
Cell

Cell is probably the most straight forward villain in Dragon Ball FighterZ. He has long limbs, great damage, decent mix ups, and great ranged options. This makes Cell one of the best starter characters in the game. Cell has very versatile aerial and ground specials that can lead to huge combos that deal massive damage. Cell’s biggest downside is how unsafe some of his moves are on block and on whiff, so be careful when you are throwing out moves in neutral. Players who will do well with Cell are people who like a catch all character who can do a little of everything well, but does nothing perfectly, and players who are able to fill their character’s weakness with the correct assist attacks.
Assist: Aerial Downward Kamehameha

Cell’s Special Moves
Perfect Attack
QCB+ATK

Cell performs a backflip kick that leads into 2 additional attacks, with the final attack dependent on which version of the move was used. The light version goes the least distance and leads into a slide, the medium version goes a little further and leads into a kick that send the opponent into the air, and the EX version ends in a wall bounce. This special also has a 4th version if it is done in the air that ends with cell moving the opponent back to the ground and performing a back breaker hug that can be easily comboed after. This is Cell’s primary combo starter/extender and is something you should be very familiar with.
Rolling Crush
QCF+ATK
Cell Rolls forward and ends with an overhead elbow attack. This special is not as useful as it could be, as the only part of it that is an overhead, is the final strike. This special can be comboed into either of Cells supers and can be an interesting mix up option if used correctly. Keep in mind that this move isn’t very safe on block, so if you are throwing it out against opponents who are ready to block the overhead, be prepared to get punished if it gets blocked.
Hell Strike
Down+Medium (in the Air)

This move is a meterless, overhead teleport that puts Cell behind the opponent. While that is absolutely insane on its own, this move can be canceled into Cell’s normal teleport on the chance that it gets blocked. The reason I mention that is because this move is insanely unsafe on block and if you do it randomly and don’t have a plan for if it gets blocked, you’re going to be leaving yourself very open for the opponent’s attack. This is a phenomenal mixup tool that can be comboed off of using assists and/or a real teleport and can lead to some solid damage.
Kamehameha
QCF+SP

A standard Kamehameha blast that can only be done on the ground. Like Goku’s the attack can be angled up at a 45° angle by holding up on the control stick. This move has standard priority and can be used to keep unsafe approach options in check.
Telekinesis Crush
QCB+SP
A Full screen command grab that tracks the opponent wherever they are. While this move will only hit opponents who are on the ground, and has a really long startup, it can be useful for catching opponents trying to play an unsafe zoning game. If the opponent is close enough to you, it can be comboed off of, but if they are that close to you, it’s probably not a good option to be using this move in the first place unless you are covering it with something.
Cell’s Super Moves
Energy Field (1 Bar)
QCF+Light+Medium(DR) or SP+Heavy(SD)
Cell’s Only Level 1 Super, and a pretty solid combo finisher/reversal option. Cell creates a large field around him, damaging anything inside of it. This can be used to tack on additional damage when you don’t want to spend the meter for his more powerful level 3. It also has great utility as a “get off me” option, as it comes out pretty fast, and covers a huge area around Cell.
Solar Kamehameha (3 Bars)
QCB+Light+Medium(DR) or SP+Heavy(SD)

Cell’s only level 3 Super. This is a standard beam level 3. You can only fire it forward and you can only use it while on the ground. Even so, it covers most of the screen and does some massive damage. Use this as a get off of me attack, or as a combo ender to deal massive damage and finish off your opponent!
Majin Buu
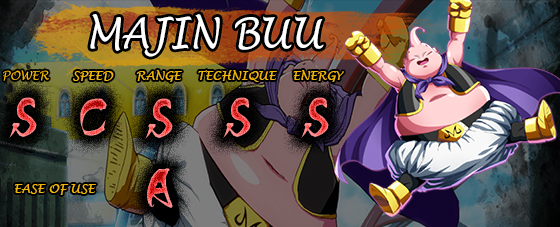
Majin buu is a very unique character who has long limbs and a huge body. This comes with a pretty obvious drawback, being his speed. Majin Buu isn’t the fastest character in the game, so he needs to plan out his attacks and approaches very carefully, because if he doesn’t the faster characters will run all over him. Majin Buu does his best work in the mid range where his jumping heavy attack will just barely hit the opponent. This way he can safely keep the opponent in check with a few different attacks that really excel in this range. Players who would do the best with Majin Buu are players who can be patient and wait for their openings, and then once they get that hit, making the opponent pay for their mistakes!
Assist: Sweeping Breath
Majin Buu’s Specials
Mount Dive
QCF+ATK

Majin Buu does a front flip and lands, butt first on the opponent. This move has 2 active hits, the first during the rising animation, and the second during the butt slam. The medium version goes further than the light version, and the EX version will track the opponent. This move is relatively safe on block, but on whiff it is very punishable. In order to combat this, if the move whiffs, but the opponent is on the ground near Majin Buu when this attack ends, then they will be stunned and unable to punish you. This stun isn’t enough to combo off of normally, but it can make you safe in an event where you wouldn’t otherwise be safe. This can very easily combo into either of his supers, making it Buu’s go to combo ender.
Cartwheel
QCB+ATK

A very simple retreating cartwheel that can be used to get out of pressure. If this move connects you can very easily combo into Majin Buu’s level 3. The medium version goes further back than the light version, and the EX jumps into the air as he is doing the cartwheel. This move can be used as an anti air, but you won’t get a lot off of it unless you want to spend 3 bars to combo into super.
Sweeping Breath
QCF+SP

Majin Buu’s most straight forward attack. This is a mid range projectile that covers about half of the screen. Use this to establish spacing and keep your opponent in check. On hit, you can cancel into a teleport and continue with a combo. Despite the animation looking like there is a hole in the hitbox right next to Buu, the attack actually covers that range as well.
Potbelly Attack
QCB+SP

Majin Buu throws a piece of himself at the opponent in an arc that tracks onto the opponent. If this attack hits, then the opponent will be stuck for a short period of time, allowing for a free follow up from Buu. This attack has decent tracking, but don’t expect it to catch somebody sprinting in at you at full speed. This can be great to force the opponent to either block, or blindly charge in and get punished for it. This can also be used as a reset option to keep pressure on the opponent and force him to respect your options.
Majin Buu’s Super Moves
You Know What...I Hate You (1 Bar)
QCF+Light+Medium(DR) or SP+Heavy(SD)

Majin Buu lets out a massive yell which causes an explosion that hits the entire screen. This makes it a fantastic multi-use super. It is a great combo ender out of Buu’s Mount Dive, It’s great for punishing unsafe approaches, and it’s great for keeping your opponents in check. The only downside to this super is its need to be on the ground in order to activate. However, given the massive range on this move, as long as you can get yourself back to the ground in time, you shouldn’t have an issue landing this super.
You’re My Snack Now (3 Bars)
QCB+Light+Medium(DR) or SP+Heavy(SD)
This is one of the more thematic supers in the game. Majin Buu shoots out a small horizontal beam that travels across the screen at a decently fast rate. If the move hits, the opponent will be turned into a cookie and eaten by Buu. This will in turn restore a small amount of health to Buu as well as deal pretty decent damage to the opponent. This is going to be your highest damage combo ender, with the obvious benefit of restoring health as well. This super also has to be performed on the ground, and as such is a little harder to combo into than it otherwise would be, but it’s still a solid level 3.
Android 18
Android 18 is definitely one of the more unique characters in Dragon Ball Fighterz. Not only does she have some very useful specials that have unique uses, she also has her twin brother Android 17, to help her fight. This allows for a lot of interesting situations, setups, and combos for Android 18 that other characters just wouldn’t have. She doesn’t have a lot of huge damage combos, but she is great at opening up the opponents, so plan your offense accordingly. Players who would do well with Android 18 are players who can think far in advance and who can effectively overwhelm the opponent with pressure and mixups.
Assist: Barrier

Android 18’s Special Moves
Android 17’s Ki Blast
QCB+SP
Android 18 flips her hair (her universal tell that she is summoning Android 17) and 17 comes out and fires 3 standard priority Ki Blasts. This allows 18 more or less complete freedom to do whatever she wants, whether that is apply more pressure, try to bait out a super dash, or combo off of the Ki Blasts. Keep in mind that there is a start up to this move that leaves you vulnerable to an attack, so if the opponent can predict that you are going to throw this move out, they can super dash in and punish you for it.
Back Grab
QCF+ATK

18 reaches forward and grabs the opponent. What she does after the grab depends on the version of the move that you used. The light version has the least startup, but can’t be comboed off of, the medium version takes a little longer to come out, but can be followed up with a super dash for a full combo, and the EX version is a combination of the two, having a fast startup and being able to be comboed off of. This move is amazing to use during pressure after you have conditioned the opponent to sit and block your offense.
Support Attack
QCB+ATK

18 Calls 17 out to perform a specific attack that is depended on the button pressed to activate the move, and your position. The light version on the ground has 17 doing a quick knee strike, the medium version on the ground has 17 doing a 3 hit combo that takes a little longer to come out, the light version in the air has 17 coming out and actually performing 18’s barrier special, the medium version in the air has 17 fall into the opponent with a couple attacks, and the heavy version in the air has 17 doing a rising kick that resembles 18’s Launcher smash attack. The most unique version of this move is actually the EX version on the ground. Once this is activated, 17 comes out and starts talking for quite a while (~5 seconds). If the opponent calls ANY assist while 17 is talking, 17 will teleport above the asist and blast them with a ki beam that resembles 18’s level 1. All of these are amazing at different things, whether that is continuing a block string, applying pressure after a reset situation, or nullifying your opponent’s assists. Try all of these and find out how this unique move works for you!
Destructo Disc
QCF+SP
18’s most normal move. She fires a Ki Disc that travels the screen at a relatively fast pace. This doesn’t have any unique properties like Krillin’s or Frieza’s, and instead is just a normal Ki Attack. This move does have standard priority, so it beats regular Ki Blasts and super dashes. The main use for this move in 18’s arsenal is allowing 18 to get in and start her pressure game.
Barrier
Down Down+SP
18 summons an energy barrier that completely nullifies a set amount of attacks, and turns them into meter. This is amazing to use again zoners who are just randomly throwing out fullscreen attacks, as you can absorb them and gain a tremendous amount of meter from their mistakes. The Barrier will also absorb physical attacks, just be careful because after the move is done, there is a gap before 18 can block or jump, so smart opponents will be able to recognize that gap and punish you for recklessly throwing out your barrier.
Android 18’s Super Moves
Energy Wave (1 Bar)
QCF+Light+Medium(DR) or SP+Heavy(SD)
Android 18 teleports above the opponent and fires an energy beam straight down. This super can be comboed into from basically every one of Android 18’s specials except for her light Back Grab. However, this super isn’t good for catching the opponent because the tracking isn’t great. More than likely, if you are trying to do it raw while the opponent is approaching, they will run right under the super and probably punish you for throwing out your super like that.
Accell Dance (3 Bars)
QCB+Light+Medium(DR) or SP+Heavy(SD)
Android 18 summons Android 17 to her side and they both lunge forward a decent distance and perform a series of strikes before blasting the opponent with a Ki Beam. This is a pretty good level 3 considering the rest of 18’s moveset. You can use it to end a combo for some good damage, or you can pressure the opponent into making a mistake and then use this invincible super to punish them for pushing a button.
Android 16
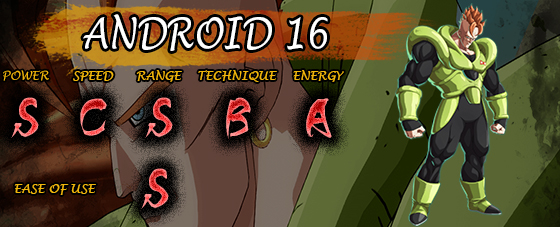
Android 16 is the token grappler in Dragon Ball FighterZ. However, unlike most grapplers, he isn’t outlandishly slow or lacking movement options like grapplers in other fighting games. This makes Android 16 a force to be reckoned with. He is a very strong character with a lot of range, and some fast moving command grabs that can scare the opponent into falling for whatever you want. Android 16 obviously struggles against zoning characters, so in order to play him effectively, you have to be able to counter zoning option effectively. Players who will do well with Android 16 are players who are patient enough to work their way into close range, or players who are patient enough to wait for the opponent to make a mistake and then capitalize on that mistake, and punish them with some really big damage.
Assist: Forward Hell Heat

Android 16’s Special Moves
Dynamite Driver
QCF+ATK
This is Android 16’s most standard command grab. The light version just grabs right in front of him, and ends in a ground slam that can be super canceled, the medium version dashes forward before performing the command grab, and ends in a throw that causes a wall bounce, and the EX version goes a little further than the medium version and has a slight delay before coming out, which can be great for mind games. This should be your most used special on the ground, since the medium version leads to some massive damage, and the light version can punish opponents for blocking too much.
Flying Slide Powerbomb
QCF+ATK (In the Air)

This is essentially the Dynamite Driver, except it is performed in the air. Every version of the Flying Slide Powerbomb ends in a ground pound that can be super cancelled into either version of his Hell Flash. This move is amazing for ending air combos since it brings the opponent back down to the ground where they can be finished off with a super.
Flying Powerbomb
QCB+ATK

This is an anti-air grab that sends Android 16 launching into the air. The unique thing about this special is it can actually be used after the medium or EX version of the Dynamite Driver, which can in turn, be cancelled into either version of the Hell Flash. The light version of this move jumps almost straight up, the medium version goes at about a 45° angle, and the EX version flies almost horizontally across the entire screen.
Hell Heat
QCB/QCF+SP
This is a fireball that is shot either straight down with QCB or down forward with QCF. This move can be used in the air as a unique jump in option that can disrupt your opponent’s anti air options. However, on the ground its options are limited due to its extremely limited range and upper body vulnerability.
Android 16’s Super Moves
Hell Flash (1 Bar)
QCF+Light+Medium(DR) or SP+Heavy(SD)
Android 16 fires a massive version of Hell Heat with both arms into the ground. This is going to be your go to super for ending your combos after landing the flying slide powerbomb if you don’t want to spend money on his level 3 version of Hell Flash. This still gives you good damage without needing to spend a lot of meter. This isn’t a good super to use outside of combos since it has very limited priority and limited range.
Hell Flash: Full Power (3 Bars)
QCB+Light+Medium(DR)
This is just a more powerful version of Hell Flash that costs 3 bars and deals massive damage. This has more priority than the regular version, so it’s a little better to throw out than the level 1, but still not something I would recommend doing regularly. However, this move is a great combo ender and will combo off of Android 16’s Aerial command grabs!
The Final Power That Shouldn’t Be Used (3 Bars)
QCB+SP+Heavy(SD)
Android 16 performs an extremely long animation before jumping forward a fairly large distance and grabbing the opponent. If this move connects, the opponent will die, regardless of their remaining health. This will also leave Android 16 with 1 health left. However, all of the health that Android 16 lost is going to be blue health and is therefore recoverable by tagging out or activating sparking blast. This move takes too long to be useful under normal situations, as it can just be jumped out of, or teleported around. However, the move itself is completely invincible and will go through basically every attack in the game, including other level 3s. The only way to really guarantee this landing is by completely mind gaming your opponent into either standing still, or doing a raw super dash. If this does land, it cannot be used again in the same game.
Yamcha

Yamcha is an absolute rushdown monster. He is the king of getting in the opponent’s face and opening up their defenses. His main tool for doing this is his wolf fang fist series of attacks. This is very unique mix up tool that has different enders and is a really solid option, even on block. All of Yamcha’s supers are only usable on the ground, but they go a very long distance and are easily comboed off of Yamcha’s Gale Fist Special which sends the opponent crashing into the ground. Players who will do well with Yamcha are players who excel at rushing down the opponent and cracking their defenses.
Assist: Light Wolf Fang Fist

Yamcha’s Special Moves
Wolf Fang Fist
QCF+ATK
TBA
Gale Claws
QCB+ATK
TBA

Kamehameha
QCF+SP
A standard Kamehameha wave that functions identically to Goku’s. This move has decent priority and comes out relatively fast. This is a good special for Yamcha to use at full screen to keep his opponents in check, and to allow him an opening to get in close, where Yamcha really shines.
Yamcha’s Super Moves
Spirit Ball (1 Bar)
QCF+Light+Medium(DR) or QCF+SP+Heavy(SD)

Yamcha summons a small Ki ball and throws it at the opponent. Upon contact, the ball will fly through the opponent multiple times, doing decent damage. This super goes full screen relatively fast, so it can be used to combo off of things that Yamcha ordinarily would have difficulty doing so.
Ultimate Wolf Fang Fist (3 Bars)
QCB+Light+Medium(DR) or QCF+SP+Heavy(SD)
An extremely high priority, high damage version of Yamcha’s wolf fang fist special. This move is great for ending combos when you want to deal out the most amount of damage. This is also an amazing reversal super due to its speed, size, and priority,
Tien

Tien is a very balanced character, who is solid in a lot of areas, but doesn’t necessarily excel in any one specific area. Tien has a very strong overhead/low mixup from a decent distance which can be great for getting in and getting past your opponent’s guard. On top of this, Tien also employs the help of Chiaotzu to help during the fight. Tien also has 2 very unique supers that can be done anywhere and are very strong for a level 1/level 3, but they actually do a small amount of damage to Tien, so they have a little bit of a tradeoff for them. Tien can do massive damage, but if the player messes up, he will very likely end up losing a lot of health for it. Players who will do well with Tien are players who enjoy a high risk high reward style of gameplay.
Assist: Dodon Ray
Tien’s Special Moves
Crane Strike
QCB+ATK
Rapid series of punches. More info TBA
Volleyball Fist
QCF+ATK

Sliding low special, starts a 3 hit series that can be stopped at any point. More info TBA
Dodon Ray
QCF+SP

Standard Ki Beam special, slightly fast. This can be great to throw out at full screen to keep your opponents in check and to allow Tien the opportunity to advance and start mixing up the opponent.
Telekenesis
QCB+SP
NOT A REAL GRAB. More info TBA
Tien’s Super Moves
Tri Beam (1 Bar)
QC
Tien floats upwards slightly and fires a relatively large beam downwards at a 45° angle. This move does pretty solid damage for a level 1. It does so solid of damage in fact, that Tien has to drain some of his life force in order to use this super. It doesn’t take that much of your health so you shouldn’t necessarily be AFRAID of using this super, just be sure to keep it in mind when using Tien. This super can be used in the air and on the ground which makes it incredibly useful for ending combos, and you can connect it after pretty much any string or combo. This should be your go to use for meter with Tien, unless of course you are saving up meter for...
Neo Tri Beam (3-7 Bars)
QC
This is perhaps the strongest super in the game (outside of 16’s Hidden Power That Shouldn’t Be Used), and for good reason. This is essentially a powered up version of the Tri Beam. This means that all of the benefits and drawbacks of the super remain intact. This super does nearly half of the opponent’s life bar on hit. This alone would make it a really good super, however, like Gohan, Beerus, and a few others, Tien can actually power this super up by continuing to press the button you used to activate the super. This will cause additional tri beams to come out. This can be done anywhere from once, to 4 additional times. Each additional blast costing 1 additional bar of meter. This means that if Tien has full meter and catches the opponent doing something unsafe, he can potentially take 80% of their health from that one mistake. As an extra bonus, remember that your assists are not susceptible to combo scaling, which means that if your opponent calls out both of their assists and you catch them with the level 7 version of this super, you can cleanly take out both characters from the game, regardless of their health, AND bring their point character down to near death. This super alone makes Tien worth considering for your team, as it makes him one of the strongest comeback characters in the game!
Nappa
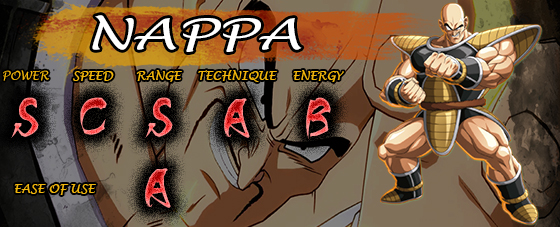
Nappa is a large hard hitting character who utilizes the Saibamen in order to attack the opponent, apply pressure, and disrupt offense. Nappa is a relatively slow character who’s supers can only be used on the ground. This means that Nappa is going to have to work a little harder than other characters to open up his opponents and get huge damage off of his aerial combos. Regardless, Nappa is a very fun character who has to have a unique approach to combat in order to succeed. Players who will do well with Nappa are players who enjoy spending time setting up for later in the match, and who can keep track of multiple things at once.
Assist: Blazing Storm

Nappa’s Special Moves
Saibamen Plant
QCB+ATK
Nappa plant a Saibamen in the ground, which then sprouts up after a short period of time and begins attacking the opponent with a series of attacks. The light and medium version do a different series of attacks. The EX version however, is a major improvement, as Nappa plants the Saibamen faster, and once sprouted, will perform a combination of the light and medium versions of the special, that lasts longer. Keep in mind that you can only have 1 Saibamen in either of the 2 states at once. Meaning one can be attacking the opponent (or just sprouting), and you can plant another one, which will come out as soon as the other Saibamen has left the screen. This is a very good special for applying pressure and allowing your characters to get in. You can KIND OF think of this as Jack-O’s minions from Guilty Gear. More info TBA
Arm Break
QCF+ATK
Nappa swings down his arms on the opponents and leaves them in a hard knockdown state. The light version strikes the opponent once right in front of him, the medium version runs forward before striking the opponent twice, and the EX version is a faster, stronger version of the medium version. This move can’t be comboed into by Nappa himself, he would need an assist in order to combo into this move, however, this move seems to have armor (testing needed) so it would be great to throw out and catch the opponent’s reckless offense. The only thing that can follow this move is a super, so keep that in mind when attempting to follow this up.
Blazing Storm
QCF+SP
TBA
Too Bad
QCB+SP
TBA
Nappa’s Super Moves
Giant Storm (1 Bar)
QCF+Light+Medium(DR) or QCF+SP+Heavy(SD)
TBA
Break Cannon (3 Bars)
QCB+Light+Medium(DR) or QCB+SP+Heavy(SD)
TBA
Captain Ginyu

Captain Ginyu is a larger character who utilizes the help of his Ginyu force in much the same way that Android 18 utilizes the help of Android 17 to help fight. However, each of the different members of the Ginyu force have a unique ability that they can do. They can even team up to unleash some truly devastating attacks! The most unique thing about Captain Ginyu is his Level 3 Super, the Body Swap. This can be used to completely disrupt your opponent’s game plan and force him to play with a heavily neutered version of Captain Ginyu. Players who will do well with Captain Ginyu are players who like disrupting the opponent’s gameplan and like forcing them to deal with your antics.
Assist: Dynamite Punch
Captain Ginyu’s Special Moves
Dynamite Punch
QCF+ATK
Captain Ginyu dashes forward with his elbow and delivers a blow to the opponent. This attack covers a decent amount of space and can be done both in the air and on the ground, making it your go to combo filler for comboing into your level 1 super.
Ginyu Summon
QCF+SP OR SP
This is how Captain Ginyu commands the Ginyu force. There are 2 separate inputs for this because there are actually 2 separate ways that the Ginyu force can come out and assist. Before I get into what each character does, let’s look more at the actual mechanic and how it works. Captain Ginyu has a 2 hidden counters that are keeping track which member of the Ginyu force is next to come out. These are in a set order and as far as we know so far, cannot be modified in any way. The order is Guldo, Recoome, Burter, and finally, Jeice. Simply use one of the characters, and the counter will advance, causing the next member to come out, the next time you use this move. The reason it’s important to note that there are 2 counters, is because each one advances individually of the other. If you use neutral SP twice, the next character who will come out when you press SP, will be Burther. However, When you input QCF+SP, Guldo will come out first, since the QCF counter is still set to the first character. Now that we have a better idea of the mechanic itself, let’s look at what each move actually does.
SP
Guldo - summons a large spike, and hurls it at the opponent
Recoome - lunges forward and attacks with a knee strike
Burter - lunges forward and performs a multi kick attack
Jeice - throws a Ki Blast downwards from the air at a 45° angle.
QCF+SP
Guldo - Performs a stun attack that is slightly similar to Krillin’s Solar Flare
Recoome - Fires a Ki Beam that lasts slightly longer than a standard Kamehameha wave
Burter - Flies around the upper part of the screen back and forth horizontally damaging anything in his path.
Jeice - Teams up with Burter to throw out a massive amount of Ki Blasts that will help control the screen for quite a long time.
More information on the specifics of these moves TBA
Captain Ginyu’s Super Moves
Milky Cannon (1-? Bars)
QC
A Fairly standard Bi Blast super. This does solid damage and is your go to combo ender on the ground. This move can be charged up for an unknown length of time. The longer you charge this move, the more meter it costs, and the more damage it does. Keep in mind that time is frozen while you are charging this move, so if you can combo into this super at level 1, then you can combo into it at any level. This seems to be a great way for Ginyu to use meter if he doesn’t want to commit to the Body Swap Super for whatever reason.
Body Swap (3 Bars)
QC
Captain Ginyu goes through a decently long animation and then crosses his arms and unleashes this attack. If it hits, Ginyu and his opponent will be completely swapped. Meaning that while you may have started the game playing as Ginyu, you could hit Beerus with this super and just like that, you’re playing with Beerus for the rest of the round, and your opponent is playing with a highly neutered version of Captain Ginyu. I say that he is neutered because while your opponent is playing as Ginyu, they lose access to the Body Swap super, so they can’t change back, and they lose access to the Ginyu Force, which is a major proponent of his gameplan.
Gotenks
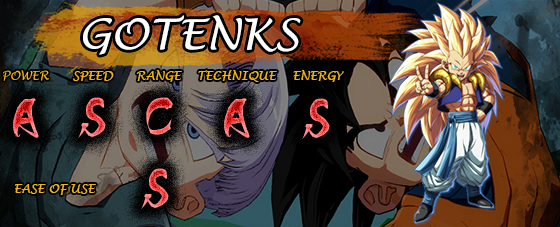
Gotenks is a high speed character with a lot of mixup potential and a lot of different ways to mess with your opponent. His limbs are very small, so be sure to use his many different Ki attacks to deal damage, and close to gap so you can start a combo. More info TBA
Assist: Galactic Donut
Gotenks’s Special Moves
Revenge Cannon
QCF+SP
A standard Kamehameha style ki beam that can be used both in the air and on the ground. There are a couple of things that make this move unique. The first is that the beam comes out of his mouth. The second is more useful than something simply aesthetic. If Gotenks holds the SP button he will jump up to do the move, but instead of the beam coming out, he will instead cancel the animation. This is great for mind games and for confusing your opponent.
Galactic Donut
QC

Gotenks forms a ring over a short time that also forms around the opponent. If this move hits, the opponent will be tied up which allows for a follow up combo.
High Speed Rush
QC

An extremely high speed flurry of attacks.
Tornado Kick
QC

Gotenks spins around rapidly and then kicks the opponent into the air. This is a great combo tool in the corner as the ending kick allows for a follow up combo.
Gotenks’s Super Moves
Super Ghost Kamikaze Attack (1 Bar)
QC

Gotenks breathes out 6 ghost versions of himself that home in on the opponent and explode, causing damage to the opponent upon contact. These ghosts have decent tracking but don’t attack instantly. This means that if you throw out the move at the wrong time, you can be punished with a full combo, so be careful!
Charging Ultra Buu Buu Volleyball (3 Bars)
QC

TBA
Adult Gohan

Adult Gohan is easily one of the more unique characters in Dragon Ball FighterZ. A large part of his gameplay revolves around his awakened form, which powers him up and modifies some of his moves. The way these moves are modified depends on his level of awakening. Other than that, Adult Gohan functions in much the same way as his younger counterpart, having good normals, fast movement, and good damage output. Players who will do well with Adult Gohan are players who are good at switching from defense to offense when the time calls for it and players who are able to save meter to power up Gohan for late game.
Assist: Light Dragon Flight
Adult Gohan’s Special Moves
Dragon Flight
QCB+ATK

This is almost exactly the same as Young Gohan’s dragon flight, with the exception that it has slightly more range than the former due to Adult Gohan’s longer limbs. This is standard uppercut with some amount of startup invincibility and a pretty fast startup. This is your go to reversal to get out of pressure and is a great assist to have on your team.
Aerial Kick
QCF+ATK (air only)
This is the same as Young Gohan’s special. Adult Gohan’s Aerial Kick special has Gohan unleashing a flurry of kicks in the air. The medium version does more damage and goes further than the light version, and it also causes a wall bounce on hit. The EX version lasts longer than the medium version, comes out as fast as the light version, and causes a wall bounce. This should be your go to special attack for ending aerial strings, as the medium version will allow you to extend your combos or combo into either of your supers.
Ultimate BackHand
QCF

This is a special that has Adult Gohan jumping forward and performing an overhead strike with his fist. The medium version goes further than the light version and the EX tracks onto the opponent and is easier to combo off of. This is a great mixup tool to throw into your block strings to confuse the opponent and get past their guard. This is also a move that gets buffed as his Awakening level increased (will be discussed later). This will increase the move’s usability even further.
Masenko
QCF+SP

This is exactly like Trunks’s Masenko special. In standard affair, the priority of this move is higher than your standard Ki Blast and is a solid special to use for spacing and maintaining screen control. This special can only be used on the ground though, so it has slightly less usability than your standard Kamehameha.
Adult Gohan’s Super Moves
Awaken (1 Bar)
QC

This is what makes Adult Gohan so unique. The exact details of this super have yet to be discovered. However, I will discuss the details that are known so far. Each level of awakening grants Gohan a buff of some sort, and leveling up each level costs 1 bar of meter. You can spend as much meter as you want/have to level up Gohan with this super (up to a cap of level 7). Meaning if you have 7 bars and no levels of awakening, you can level up straight to level 7 in 1 activation by spending 7 bars. In terms of what each level of awakening does, level 1 will allow access to a buff to your Ultimate BackHand special move. Upon reaching at least level 1, this special will teleport right to the opponent, instead of its usual distance. Not much is known about levels 2-6 at the moment. Level 7 allows Gohan to actually break the standard combo chain. Meaning Gohan gets access to combo strings that are typically not possible for other characters in the game. The usefulness of this has yet to be truly discovered, but more information will be posted here upon the game’s launch.
Family Kamehameha
QC

This is functionally similar to Young Gohan’s Father Son Kamehameha. Gohan fires a massive Ki beam straight ahead that covers most of the screen. This is a very damaging super on its own, however, it can be powered up by using 2 additional bars (total of 5) by holding down the button you used for the super. This can only be done on hit, but deals a tremendous amount of damage and is great for finishing off your opponents!
Kid Buu

Kid Buu is a character who relies on his overwhelming special attacks and his long limbs to get in and deal damage. He has a phenomenal medium button that stretches out, much in the way that Dhalsim’s limbs stretch out in the Street Fighter series. The difference is that Kid Buu will actually move forward, following the limb after it goes out, allowing for follow up combos or mixups. Players who will do well with Kid Buu are players who excel at using using a lot of different special attacks at the right time and players who know exactly when to use certain normals so that they don’t get punished
Assist: Arm Ball
Kid Buu’s Special Moves
Arm Ball
QCB+SP
This is the special that you will be seeing a LOT of when playing against/playing as Kid Buu. And for good reason. This move brings out a pink ball and hurls it forward. Upon contact, regardless of whether it is on block or on hit, the ball will fly through the opponent multiple times, locking them in place, allowing for either free mix ups, or combos depending on if the ball hit or not. This move alone makes Kid Buu a solid choice for having on your team, as this assist will compliment pretty much any character in the game.
Mystic Ball
QCF+ATK
Kid Bull curls up into a ball, slams into the ground, and then bounces back up. The medium version goes more horizontally than the light version. The EX version will bounce the opponent back up into the air with you and will allow for a combo extension. This move can be used in both the air and on the ground, which makes it especially useful for continuing combos.
Mystic Arm Swing
QCB+ATK
Kid Buu flings his arm into the air and grabs (hit grab?) the opponent, slamming them down into the ground. The EX version bounces the opponent slightly higher, allowing for a combo afterwards. It is currently unknown if this is a hit grab or a real grab, so more research will have to be done to obtain that information. If it is a hit grab, this move will mostly be used at the end of ground combo strings, and either EX’d to get more damage, or left as is for an Arm Ball setup.
Candy Beam
QCF+SP (Ground Only)
A standard beam like special. If the move hits, the opponent will be turned into a ball of candy and Buu will teleport toward them and eat the candy. It is unknown if this special has any unique properties, but that information will be updated in the near future.
Kamehameha
QCF+SP (Air Only)
This is your standard Kamehameha wave that is only performable in the air.
Kid Buu’s Super Moves
Human Extinction (1 Bar)
QC
This is essentially War Machine’s War Destroyer super from the Marvel Vs Capcom series. Kid Buu holds him arm straight up and fires a bunch of ki blasts upwards into the sky, then after a short time, they will come down all around Kid Buu. If only the fall hits the opponent, this super won’t do that much damage, but if both directions hit, then this is one of the more damaging level 1 supers in the game. Keep in mind that if this super is done in neutral and the upward beams don’t make contact, then you will almost assuredly get punished for throwing this out.
Pearl Flash (1 Bar)
QC
Kid Buu pounds his chest a few times and then flies downward at the opponent in a downward parabola. This super covers a decent amount of the screen but doesn’t deal much damage. Hopefully this super has some other attributes that let it go through other moves or something like that, which would increase its usability. But we will see soon. This super can be used on the ground and in the air, so it make it easier to combo into than his other level 1.
Planet Burst (3 Bars)
QC
Kid Buu lets out a yell that covers about half of the screen. If this yell hits the opponent, Kid Buu will summon a massive ki ball and and hurl it at the opponent, dealing pretty standard level 3 damage. This super can be done both on the ground and in the air, so this should be your go to combo ender for getting the most damage possible. This, like most other level 3 supers, does work as a reversal, since it has has a decent amount of invincibility on startup.
Beerus

TBA
Assist: Summoned Orb Kick
Beerus’s Special Moves
Summoned Orb Kick
QCF+ATK
Beerus summons 1 or 2 orbs and then kicks them forward. More info TBA
6 Orb Summon
QCF+SP
Beerus summons 6 orbs which surround his body. More info TBA
Overhead Punch
QCB+ATK
Beerus jumps into the air and then slams down onto the opponent. More info TBA
Beerus’s Super Moves
TBA
Hit

Hit is a physical monster in Dragon Ball FighterZ. On the ground his movement speed is absolutely incredible and he does a lot of damage with his combos. Hit also replaces his ki blast with a counter, which, upon connecting the counter, has Hit teleporting in to punch the opponent from anywhere on the screen. The tradeoff to Hit’s in your face, ground based dominance is his weakness in the air and from a distance. Hit’s long range moves are lacking, and his air combos leave a lot to be desired. This overall leads to a very powerful character who can dominate an entire team if the opponent lets him play the way he wants, but can crumple with the correct counter play. Players who will do will with Hit are players who can accurately judge and punish their opponent’s mistakes and players who are good at knowing what their opponent is going to do in advance.
Assist: Medium Dash Kick

Hit’s Special Moves
TBA
Hit’s Super Moves
TBA
Goku Black

Goku Black is a moderately well rounded character with a little more tricks up his sleeve compared to somebody like Goku or Vegeta. If Goku was the Ryu of this game, then Goku Black would be the Evil Ryu. And yes, while Ryu and Evil Ryu do share a lot of the same traits, much like Goku and Goku Black do, they are still extremely different in terms of gameplay. Goku Black excels more at a longer range, whereas Goku wants to be in a little closer for his neutral. However, Black does still have ways to deal with his opponent if they get in to close, just as Goku has ways of dealing with his opponent if they get too far away from his range. Players who will do well with Goku Black are players who have a very strong combination of neutral game and mixups.
Assist: Black Kamehameha
Goku Black’s Special Moves
God Slicer
QCF+ATK
Goku Black dives forward shooting out a number of ki blasts from one hand before stabbing forward with the other hand. This is a great move for advancing and for ending your aerial strings. The light version shoots out 1 Ki blast and comes out faster, and the medium version shoots out 4 and comes out slower. The EX version is a combination of the 2, coming out faster, and shooting a higher number of Ki Blasts. If you are close enough to the wall, this move will cause a wall bounce after an aerial string, so use this to extend your combos.
Instant Transmission
QCB+ATK
Goku Black’s main mix up tool. This is a teleport that is typically going to be better in neutral than his natural teleport for a couple of reasons. The light and medium versions are completely free and put you in front of the opponent, and the EX version puts you behind the opponent, just as a natural teleport would. However, unlike a natural teleport, you can do whatever you want out of this, and it puts you in the air, allowing for VERY fast overheads that are safe on block. Experiment with this move to find out how it works best for you.
Fierce God Kick
QCB+ATK (While in the Air)
A standard high priority dive kick. You can use this for approaching, as it will mix up your opponent’s anti air timing, and will be harder to anti air in general. This move is very hard to combo off of naturally (without meter or assists), so just keep that in mind. The medium version goes more horizontally than the light, and the EX version will slide the opponent along the ground, allowing for an easier time comboing afterwards.
Black Kamehameha
QCF+SP
A standard Kamehameha wave that functions exactly like Goku’s. This is useful for keeping your opponent in check and for conditioning your opponent for your Binding Black Kamehameha.
Binding Black Kamehameha
QCB+SP
This is a phenomenally dirty move. The startup for this move looks exactly like the Black Kamehameha, however, instead of firing the move, Zamasu appears behind the opponent and grabs them. Afterwards Black fires the kamehameha, and this time it can’t be blocked since you are being held by Zamasu. This move is amazing for forcing your opponents to take a more active approach to fighting, which can make them make mistakes. Throw this into your neutral game once you have conditioned them to block your Kamehameha, and they will think twice about just sitting around blocking.
Goku Black’s Super Moves
God Slicer Dance (1 Bar)
QCF+Light+Medium(DR)
Goku Black’s most usable level 1. This super is usable both in the air and on the ground, which makes it very easy to use and to combo into. Black conjures up a ki sword and swings it forward, sending 18 tiny ki needles forward at the opponent, before making them explode. This super does decent damage, but is very easy to combo into, so if you are just going for a little extra damage at the end of your combos, then this is your go to combo ender.
Holy Light Grenade (1 Bar)
QCF+SP+Heavy(SD)
Goku Black’s other level 1 super. This super does a little more damage than the God Slicer Dance, but it is slightly harder to combo into, so the decision as to what super to use, comes down to your confidence in the ability for the super to connect, and how much damage you want to give up for security. Goku Black and Zamasu come together and throw a spirit bomb like ki ball down onto the opponent.
The Work of a God (3 Bars)
QCB+Light+Medium(DR) or SP+Heavy(SD)
Goku Black’s only level 3. This is a pretty standard level 3 that is going to be your go to damage ender after combos. Black summons a Ki Scythe and swings it at the opponent, upcon connecting with the move, multiple copies of Black will appear and will perform a very over the top series of strikes, before slamming then back down to the original black, who will perform a final scythe slash, sending the opponent flying into the wall. This super can also be used in the air, like all of his supers, which makes building combos extremely easy as you don’t have to worry about which of your supers is usable at what state. Like all level 3s, this has some invincibility on startup, so you CAN use it to get out of pressure if needed.
SSGSS Goku

TBA
Assist: DiveKick

SSGSS Goku’s Special Moves
TBA
SSGSS Goku’s Super Moves
TBA
SSGSS Vegeta
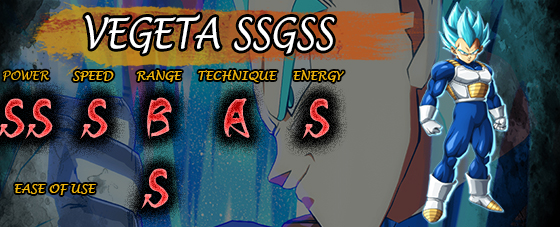
TBA
Assist: Big Bang Attack
SSGSS Vegeta’s Special Moves
TBA
SSGSS Vegeta’s Super Moves
TBA
Change Log
12/18/17 - Guide Started
12/20/17 - Post Beta Characters Initial Information Added
12/23/17 - Assists Added (Thanks AlzarathEX!)
12/29/17 - Kid Buu details added
01/02/18 - Captain Ginyu details added
01/04/18 - Gifs started (Thanks T3nyo!)
Video footage for research courtesy of: TGN Anime, Maximilian Dood, Game Informer
Images courtesy of: http://dba.bn-ent.net