RoR Guide: Lad to Chad series
RoR Guide: Lad to Chad series

Greetings! This document is meant to be a guideline for how to understand Return of Reckoning Combat and build a class starting from level 1 all the way up to 40/80+ BiS, and how to utilize the class in every environment, whether it be warband, scenarios, 6v6, PvE, etc.
My name is Uchoo and I have played Warhammer Online from 2009 to its close, and I have been playing RoR on and off from its inception. I participate in all content including PvE, RvR & warband play, competitive 6v6 Ranked, competitive Cities and Guild vs Guild content. I have a lot of experience in all above mentioned content and also Solo Ranked.
*Archmage & Knight (as well as their Destro mirrors) needs a rewrite. A lot of BiS setups need to be expanded upon with the inclusion of Darkpromise gear. This affects Warrior Priest/DoK, all Tanks and all MDPS mainly. What’s presented here is still good information but I’ll be updating those guides in the future.
Table of Contents
Defensive / Utility BiS options
Defensive / Utility BiS options
Basics
Resources
My armor spreadsheet: RoR Armor
Addon Website: https://tools.idrinth.de/
Immunities
There are 2 types of Crowd Control Immunities in Return of Reckoning.
Immovable: Any effect that roots or displaces a character will grant Immovable, 30 seconds of immunity from any such effects. This includes Roots, Pulls and Knockbacks (sometimes referred to as Punts or Kicks).

Unstoppable: Any effect that removes control of a character will grant Unstoppable, preventing any other form of hard control. The duration varies based on the effect. For Hard CC such as Stun, Knockdown or Silence, the duration is typically 10 times the effect. A 3 second knockdown grants 30 seconds of immunity while a 4 second silence will grant 40 seconds of Immunity. A Stagger (Hard CC that is broken upon any damage) has a longer duration with a shorter Immunity. A 6 second Stagger will grant 30 seconds of Immunity.

Understanding these 2 immunities and tracking them on yourself, your enemies and your allies will easily separate you from others. People commonly use Buffhead or DAOCBuff to track these.
Action Points
In RoR, every class has the same basic resource, called Action Points. Some classes have a secondary resource or pseudo-resource. Players begin with 250 Action Points and receive 2 increases of 25 at RR50 and RR60 so long as your Career Rank is 40, totalling in 300 Action Points. Renown can be invested into a larger pool with Expanded Capacity but it’s never worth it.
AP regeneration is a base of 25 AP/Second and begins shortly after you use an ability. As of January 25, 2024 AP operates as such:
“The AP regen system has changed to work like it did on live servers, but with the exception that you regenerate AP during the last 0.5s of the GCD.
So the AP regen stat on gear once again adds to your natural AP regen of 25. The hidden soft cap of 6 AP/s from items is removed.
Each second you generate AP according to your AP regen stat, except when channeling, casting abilities with a cast time, or during the first second of the global cooldown.”
*OUTDATED*:This means that if you are spamming your buttons, you will never receive your Base AP regen. RoR introduced a system that allows a portion of your “AP/Second” on gear to always regenerate, even while spamming abilities: This Soft Caps at 6/Second (Soft Cap meaning that any further stat increase is reduced by 50%) with no Hard Cap. If you have 16 AP/Second in total on your character, you will regenerate 11 AP/second while spamming and 41 AP/Second when you let your full AP ticks occur.
If you are spamming an ability that costs 30-35 AP, you are going to go dry very quickly and will need to stand around for 5-10 seconds before you can act again. AP Synergies (commonly referred to as “AP Pumps”) are therefore very powerful and a staple to many builds, such as Kobs/Chosen, RP/Zealot, WP/DoK, Engineer/Magus. As of the latest AP changes, AP is generally in a better state but AP synergies are still important.
There are also AP drains in the game, which can be brutal to play against, commonly seen from AM/Shaman, Marauder, DoK. It is important to know how much AP you have, how much you will need in the near future, and use AP pots to ensure that you can get your abilities off when needed.
Mastery Points
Your character gains a Mastery point starting at 11, every odd level until 21, and then every level until 40. You gain an extra point at RRs 40, 50, 60 & 70. You can spend these points to advance one of your three Mastery Trees, increasing the power of every ability in that Path.

Once you have enough points in a tree, you can buy one of the abilities or Tactics at that tier.

Targeting
RoR is a Tab-target MMO. Unfortunately, Tab is awful in RoR, unlike WoW. Experienced players use a combination of Tab, “Target Nearest” and click targeting. My honest opinion is just get really, really good at click targeting. In RoR, you can have 2 targets at any time, a friendly and an enemy and there are some skills that require you to manage both.

Avoidance and Mitigation
Avoidance is the chance to completely ignore an attack, including any effects and debuffs associated with it. As of January 25th, Avoidance works as such:
The secondary effects of base stats, like disrupt from willpower or chance to be critically hit from initiative have been changed. They now scale linearly with the stat value, which means there's no longer any specific thresholds where a stat becomes almost useless, or a debuff becomes extremely strong.
For each 100 stat points they now give the following:
- Strength: 1% parry strikethrough & 0.5% block strikethrough
- Intelligence: 1% disrupt strikethrough & 0.5% block strikethrough
- Ballistic skill: 1% dodge strikethrough & 0.5% block strikethrough
- Willpower: 3% disrupt
- Weapon Skill: 3% parry
- Initiative: 3% dodge & 3% reduced chance to be critically hit
- Toughness: 0.5% block
- Block rating: 3% block
10 Willpower gives 0.3% disrupt etc, you don't have to hit even 100 point marks.
In game character sheet stat tooltips have been updated to display the new effects. The defense stats in the character sheet will now also reflect reality better. Previously they displayed very high numbers that were based on an attacker with low offensive stats.
As a result of this change, Characters who achieve a high amount of stat that gives Avoidance tend to have a fair amount more vs the old system, you can predict the scaling difference as the defensive benefits at 3% are 300% more impactful than Strikethrough at 1%, but generally won’t reach much higher than the 30% area, but can still be supplemented by additional sources of avoidance from Gear, Renown, Abilities, etc.
OUTDATED: Avoidance uses a formula to check a stat of yours vs your attacker’s stat to give you a base chance to defend, then adds any further flat bonuses such as “+x% Block” on gear and subtracts strikethrough from your attacker’s flat bonuses, such as “% Reduced Chance to be Blocked”.

Do not reference your Paper Doll (character sheet) for your avoidance values. It is not correct. Use .getstats and then simulate your additional avoidance from Stat Contention using the above formula or reference this Graph:

This formula is different from Age of Reckoning (the live version of the game), it is impossible to receive a negative value on avoidance from Stat Contention, therefore Avoidance is quite good! It’s worth noting that most cases of stat contention result in the less than 5% range from stat contention, except for something like a Healer trying to use a Spell on another Healer, such as a CC, as healers typically have low Intelligence but very high Willpower.
There are 4 types of attacks and 5 types of damage in Return of Reckoning. Attack types are Melee, Ranged, Magical, Morale. Damage types are Physical, Elemental, Corporeal, Spiritual and Morale. Morale attacks cannot be defended against and Morale damage cannot be mitigated, though there are diminishing returns on the amount of Morale damage a character can suffer in a short period of time, that fades after a few seconds, more details in the Morale section.
Block: If you have a shield equipped, you have a chance to block any attack from your frontal 180 degree cone. You can Block damage from Guard. Block checks Attacker’s relevant offensive stat (Strength for a melee attack or Intelligence for a Spell) vs Defender’s Block Rating and Block bonus from Toughness.
Parry: You can parry a melee attack made from your frontal 180 degree cone. You can Parry damage from Guard. Parry checks Attacker’s Strength vs Defender’s Weapon Skill.
Disrupt: Any magical attack can be disrupted, this does not include melee attacks that deal magical damage, those are blocked or parried. Disrupt can occur from any direction. Disrupt checks Attacker’s Intelligence vs Defender’s Willpower.
Dodge: Any ranged attack can be dodged. Dodge can occur from any direction. Dodge checks Attacker’s Ballistic Skill vs Defender’s Initiative.
Armour: Armour mitigates Physical damage received. There is no softcap, but it hardcaps at 75%.
Resistance: All magical damage (Spiritual, Corporeal, Elemental) is mitigated by the associated Resistance, which you can see in the Defense Tab of your Paper Doll.

These resistances softcap at 40% and hardcap at 75%.
Softcap means that gaining further stats beyond that point are reduced by 50%, whereas Hardcap means that the stat cannot go higher. In the case of Armour, you can stack it as high as you want and receive no diminishing returns. While your Character Sheet may say that you have Hardcap mitigation, that’s before we factor in Armour Debuffs (which can stack up to -3000 or higher in extreme circumstances), Armour Penetration and Armour-ignoring Abilities.
As an example, here’s how well 6000 Armour holds up against double Armour Debuff and a Witch Elf with their 50% Armour Penetration Tactic.

*Most of the Armor Penetration from Tactics and Abilities have been homogenized into additive with Weapon Skill. Some of these were previously multiplicative and caused confusion. They were also reduced in power across the board.
Finally, there is a stat called Toughness that is worded very strangely.

Whereas Strength gives you +DPS to your auto attacks and Abilities, Toughness reduces the value of your Attacker’s Offensive Stat on a 1:1 scale. So one way to view Toughness is “I have 800 Toughness and my Attacker has 1000 Strength, my Attacker has 200 effective Strength for their damage bonus against me.” However, it is more complicated than this. Most Physical-damaging abilities and nearly every Melee ability has scaling with Weapon DPS as well. So the entire Formula for Damage on a Physical Melee ability looks like this: BaseDamage + Mastery + (WeaponDPS + OffhandDPS * .45) * WeaponScaling + (Strength + Melee Power) - (Toughness + Fortitude) * StatScaling * ArmourMitigation. It’s important to understand this functionality because the effect of Toughness is also hard capped at 75%. Toughness and Armor/Resists layer multiplicatively. If you reduce the damage of an attack by 75% through your Toughness, you can then reduce the remaining amount by up to 75% through Armour or Resistances. Toughness also applies on Magical Damage, so you would replace Armour above with Resistance. Most sources of Magical Damage do not have Weapon DPS scaling.
Absorbs
There are a multitude of absorb effects in the game. Every Healer has at least 1 in their build, some tanks and even some DPS have access to them. Absorbs occur post-Toughness but pre-Armor/Resist in the mitigation formula, meaning that they get just a little bit of buffer from Toughness. Absorbs are interesting in that only damage that exceeds an absorb can deal critical value. So if a Witch Hunter was to Pistol Whip you for 700 and you absorb 300, only the remaining 400 damage can critically strike. This is an important thing to know as absorbs can counter some classes which are highly reliant on critical damage.
Weapon Types and Bonuses
There are a variety of weapons that can be equipped in RoR, some of which have hidden or, at least, less visible bonuses.
Shield: Allows you to block.
Dual-wield: Provides 10% flat bonus to Parry. (Only counts weapons, not a Zealot Focus or a Shield or a Book).
Any 2-handed Weapon: Provides 10% Block and Parry Strikethrough.
Book(Warrior Priest) / Chalice (DoK): Provides passive special resource regeneration, often noted on the item.
Auto Attacks
Every class has the ability to auto attack with their Main-hand and if eligible, Off-hand Weapons. For any class that uses a melee weapon, this is considered a melee attack and scales with Strength. An Archmage can auto-attack with their staff but it will typically not do much damage as they do not have the Strength or Weapon Skill to scale its damage and will be parried/blocked far more frequently.
The damage of an auto-attack is WeaponDPS + DamageBonus (OffensiveStat+OffensivePower/10) * WeaponSpeed. IE, (Strength + Melee Power / 10). For a ranged weapon capable of Auto Attack, it would be (Ballistic Skill + Ranged Power/10). Slow weapons hit harder and less frequently, and fast weapons vice-versa, hitting faster and for smaller amounts of damage, but with the same average DPS. Why /10 instead of /5 such as what abilities use? Abilities also use a speed coefficient in their formula and for most melee abilities, it’s intended to relate to the time that the attack takes, which in RoR is the GCD, so 1.5. Auto Attack’s speed coefficient is instead that of the weapon, which can be as slow as 4.2. This means that Primary Stat has even stronger scaling with weapons slower than 3.0 Speed as a baseline than with abilities (this isn’t always true, some abilities have an extra coefficient for DmgBonus value, but don’t worry about that).
Off-hand Weapons do not have their own Swing Timer but instead have a chance to trigger an auto-attack whenever a Main Hand attack occurs. Large statistical analysis puts this somewhere between 45 and 48% (46 is a commonly used number) proc chance. Off-hand speed is proportional to Main-hand speed for the sake of determining damage. Off-hand weapon damage is (WeaponDPS * .45) + (OffensiveStat + OffensivePower)/10. The result of this is that your off-hand damage will be roughly 60-65% of your Main-hand damage. This scaling is also applied to abilities, which means that using 2 1-handers or a 2-hander of the same grade and quality would result in the same damage on abilities, IE the RR45 weapons.
Source: https://www.returnofreckoning.com/forum/viewtopic.php?f=8&t=879
He states that the Offhand damage formula is
(StrBon*OHSPen/10)*OHWSpeed
+ (MHWSpeed-OHWSpeed)*OHWdps
+ OHWdps*OHWSpeed*OHWPen)
With
OHWPen = 0.9
OHSPen = 0.5
However, I think mine is correct, I’ll retest when I have time and update this.
Attack Speed
RoR uses the same idea and formula for Attack Speed as most other games.
Attack_speed = "current attack speed" / (("Percent increase or decrease" / 100) + 1 )
This means that if you have 10% increased attack speed, you will see 10% more auto-attacks in a given time frame than without; with 100%, you will see 100% more; etc.
Critical Strikes
In Return of Reckoning, any ability can result in a critical value. The base Critical Value varies from 135% to 155% at random, averaging at 145%. There are ways to increase and decrease Critical Value, such as the Witch Hunter Tactic

Which will result in an average of 195% Critical Value or the Renown Ability Trivial Blows which reduces the “added value of Criticals by x%”. It means that if you have 45% Reduced Critical Damage Received and your Attacker hits you with a 195% Critical, you would only take 55% of the bonus 95% damage, resulting in 1+ (.55 * .95) = 152.25% damage.
Thanks to Maxonian for the correction.
Heals (non-lifetap) have a base chance to crit of 10%. Damaging abilities do not have a base chance to crit (though a few have bonus chance to crit) but instead rely on a target’s “%Chance to be critically hit” which is another somewhat complicated function of the Initiative stat and further enhanced by “Reduced chance to be Critically Hit” which is acquired in various ways, mostly through Gear and Renown Points.
Initiative has exponential scaling and works like this as of January 25, 2024:
Base chance to be critically hit is 10 + <level> / 4, so at level 40 it is 20% chance.
For each 100 stat points, Initiative will now give the following:
- Initiative: 3% dodge & 3% reduced chance to be critically hit
You don’t have to hit 100 stat breakpoints to gain value, 10 Initiative will grant .3% Reduced Chance to be Critically Hit.
The result is this:

This does still have exponential scaling as Initiative grows more powerful as you get more of it, but as you can’t realistically get much further past the 30% mark, and there aren’t any meta builds that run Initiative this high, it is limited and won’t get ridiculous. Another note is that low values of Initiative aren’t nearly as punished. Previously 0 Initiative resulted in 100% Chance to be Crit with a much steeper scale up to around 300.
What does this mean for builds?
Probably nothing, people will likely still run the same amount of Initiative but dropping it slightly is far less punishing and pushing it further is higher value than before. Initiative debuffs are now much lower value as well, at least in terms of the crit chance gained from it.
Outdated:

Which results in this:

What does it mean? It means that it’s generally good to get to around 300 Initiative, after which the stat declines more and more steeply in value.
There aren’t a lot of ways to scale output through stats on RoR, just your Damage Bonus and in some cases, Weapon Skill. Due to this, Crit is usually heavily invested in as a way to increase damage output and it can also create a lot of burst damage, which leads to kills. Investing in anticrit (reducing your chance to be crit) on the other hand is one of the most effective ways to stay alive in both PvE and PvP. PvE mobs, even bosses, rarely have abilities that exceed a 5% chance to crit, so getting to 0 when you hover over your Initiative is considered good enough.

However, you can go far below 0%, well into the negatives, for RvR content. This drastically reduces an enemy Player’s chance to critically strike you and in some cases makes it altogether impossible. The “Chance to be critically hit” on your Character Sheet is accurate until 0%.
How do I find out my chance to be crit? Use .getstats and you will see this line:

Find out your chance to be crit with your Initiative stat from the formula/graph above and subtract the CriticalHitRateReduction.
Update: Character Sheet should now correctly show chance to be crit into the negatives.
Morale
Morale is the major cooldown mechanic of RoR, shared across all classes. Unlike other games such as WoW, you do not start with these abilities ready to use, but instead you gain meter as you are in combat which gradually increases your morale bar, giving you access to these strong abilities. There are 4 levels of morale, increasing in power with each step. There are multiple morales that can be slotted into each level, varied by class and archetype.


Using any Morale Ability will place all of your Morales on cooldown for 60 seconds.
Morale damage, while undefendable and unmitigable, does have a Softcap. Upon taking 2400 morale damage, players gain a buff called Resolute, which reduces further Morale Damage by 50%, This decays by 500 each second and if it falls below 2400, you lose Resolute.
Note that there are Morale Drains in the game, such as from Skirmish Shadow Warrior, Marauder, Solar Flare from KobS and Warlord set on Tanks. Be mindful of losing your morale at a critical time.
Buffs & Debuffs
There are 4 types of buffs in the game: Blessing, Enchantment, Morale and Buff(does not have one of the other tags). Blessings and Enchantments can be severed or shattered by abilities designed to do so such as the Witch Hunter’s

Morale and Buff-type buffs can not be removed. Blessings and Enchantments are removed in the order in which they were applied, so a wise player will know how to protect their important buff(s) by layering on top of less important ones.
Buff stacking is based on the source of the buff. For any particular stat, a person can have 1 ability buff, 1 morale buff (the strongest available buff is used) and unlimited Tactic buffs. For example, the Slayer class can use 2 tactics that give Strength, these will stack. These will also stack with a potion that grants Strength. If you also receive a Strength buff from an Ironbreaker, the highest value between that buff and the potion will be granted. If you receive a Strength buff from 2 different Morale abilities, the highest of those 2 will be granted. There are some Tactics which grant an ability buff, such as

This will not stack with other ability buffs, such as an armor potion.
There are 5 types of debuffs in the game: Curse, Hex, Ailment, Morale and Debuff (same as above, does not have a specific tag). Curses, Hexes and Ailments can be cleansed, whereas Morale and Debuff cannot be. Each Healer has a cleanse ability that can remove 2 of the 3 named types, assigned arbitrarily to each class, and there are certain morales and items that can cleanse as well. Like buffs, debuffs are cleansed in the order in which they were applied.
Stealth
Currently there are only 2 Classes that can use Stealth, Witch Hunter and Witch Elf. While stealthed, their AP slowly drains and when it reaches 0, Stealth fades. You have a chance to be spotted by an enemy while in Stealth, which is a function of your Initiative vs theirs and factored by range. While spotted, an enemy can hit you and those hits have a chance to break your Stealth, which is a function of the same stats. Rydiak made a calculator for this which I assume is accurate as he had access to the game’s code.
Rydiak's RoR Calculator 030222
Look in the “Extra Calculations” Tab
Consumables
A player can have 2 consumable buffs (with special exceptions), a Defensive potion, which can be Armour or a Resistance, and an Offensive potion, which can be a stat boosting potion or a Liniment. The most effective combination of these effects is an Armour Potion and a Liniment and these are the buffs you will see on almost every person in-game. There are also Renown Potions which can be stacked on top of the other 2 consumables.

Here are a few of the most popular consumable buffs used:


Healing Potions: Players can have 2 healing potions normally (with a few unique and very rare exceptions) one being a standard Potion crafted by Apothecaries:

And an additional RvR healing potion that you can buy for War Crests in your capital city:

You can also buy RvR potions using the LOTD currencies, saving War Crests.
You can also carry 2 AP pots of the same variety, one crafted and one RvR:


And finally, you can carry an Absorb potion, which does share a cooldown with other defensive potions such as Armour, but will not override the buff.

There are also snare potions, which can be useful, and a Thorns Ointment that makes your character deal very low backlash damage when hit, and is rarely useful.
Renown
Renown is effectively your RvR (Realm vs Realm i.e. Player vs Player) level, and you can only gain Renown through RvR activities. As you gain Renown, you gain Renown Ranks, which go up to 255, but only increases player power up to RR80. A lot of the best gear in the game is gated behind Renown Rank, you gain bonus AP at certain RR’s for a max of 300, and every RR gives you a point to spend at the Renown Trainer, for 80 points in total. Characters gain an extra Mastery Point at RR’s 40, 50, 60, and 70. You also get cool Renown Titles, and special appearance perks that unlock at RR85, as well as access to special dyes. My recommendations for how to spend your Renown Points will be listed in the individual Class Guides.
UI
A good UI is key to a good experience in any MMO.
If you enjoy UI packs, similar to ELVUI from WoW, there is FiskUI, which you can find on the forums or in NGE Discord, where you can even speak to the creator himself, Fisk.
https://www.returnofreckoning.com/forum/viewtopic.php?t=53906
Viny is an option but it is outdated so you will likely have FPS issues with the factory loadout, you will have to go through and update or trim things.
VinyUI available here: https://www.returnofreckoning.com/forum/viewtopic.php?t=6371
If you prefer to build from the ground-up, the basics that I would recommend are the following, which are all available here: https://tools.idrinth.de/addons/
Enemy: Group/Warband frames and other functionality such as built in In/Out Damage meters, Player Marks, Kill Counts, Group Icons, etc.
Assist or SwiftAssist: These allow you easily assist your allies, ensuring that you are hitting the same target.
Aura: Similar to PowerAuras or WeakAuras from WoW, allows for some custom icons and trackers.
Buffhead: Allows you to see buffs on top of the heads of in-game character models including yourself, your target, your allies, and your enemies.
DAOCBuff: Similar to Buffhead, some players use both to track different things.
GES (Guard Enhancement System): This includes Tether, which is the most popular way to track the range of the ally you are Guarding or being Guarded by, this is a critical mechanic for tanks and for anyone who is interacting with a friendly tank.
Motion: better interface for Talisman Making
MGRemix // one of the MG addons: better interface for Cultivating.
Pure: Replacement for all health bars
Effigy: Allows you to replace portions of the UI with custom elements. Hard to learn and use.
TidyRoll: Replaces the standard Loot Roll interface with something compact and simple to use.
Saving your Build
At every Career and Renown Trainer in the game, there is a second dialogue option called “Mastery Build Switch”.

Clicking this will open another window, allowing you to save or load builds.

Each build will save your Mastery, Renown points and even your key binding settings!
If you Shift+Left-Click on one of your builds, you can rename it.

When you Load a build, you sometimes have to hit the “Load” button 2 or 3 times to load the entire build.
Currency Items
RoR uses a few different currencies to acquire most of the gear in the game, and a few other goodies.
Gold/Silver/Copper:

Viewable at the top of your Backpack, this is your in-game currency used to purchase all sorts of things such as trips from a Flight Master, items from the Auction House and to heal your wounds after death at a Healer NPC.
War Crest:

This is the most important Currency in the game and is used to buy most of the gear you will wear. It can be acquired through all RvR activities including Scenarios, City Sieges and Ranked as well as players dropping them on death. They are also needed to purchase RvR Potions.
War Token:

These are acquired from any PvE Public Quest and are used to buy the Public Quest gear, up to Ruin, as well as having some other commodities available for trade. Ruin is really only a useful set for SnB Tanks, and is outgrown very quickly at level 40.
Guild Coin:

These are acquired from the 4 weekly repeatable guild quests and can be spent at the Quartermaster in the Guild Hall (Sigmar’s Hammer for Order and The Viper’s Pit for Destruction). They are pretty much free as long as you pick up and turn in the quests and have some powerful uses, such as top tier crafting consumables and Guild Mounts.
Soulstones:

These are acquired from the RvR Weekly, a repeatable Quest for the Sentinel dungeons or Bastion Stairs, and from the Dungeon Weekly. They are used to purchase the powerful Soul Talismans, of which you can only have 1 equipped at a time, in either a Sentinel, Triumphant or Victorious ring, and last for 7 days.
Genesis Crests:

These are acquired from the Scenario Live Event each week and from loot bags in RvR and are used to purchase the Genesis Jewelry sets, as well as Subjugator weapons. Some of the Genesis Jewelry remain BiS for some builds and all are fantastic starter items. Your Genesis items are the first you should go for and you should take Genesis Crests when offered until no longer needed.
Bestial Token:

These are acquired from certain Tome Unlocks and occasionally from Twitch Drops. They are used for Trophies and Appearance Items.
Expedition Resources:

These drop from player kills and are used to gain entry to the Land of the Dead event which occurs every few days.
Triumphant Insignia:

These are obtained from winning Solo Ranked games if you are 700+ MMR and from any Group Ranked win during an active season. They are used for buying the Ranked Gear (Triumphant & Victorious) at discounted prices as well as some other powerful items, such as a unique mount, Soulstones and a powerful Event Slot Item.
Land of the Dead:


These are acquired from the Land of the Dead event and are used to buy the 2 piece Cloak and Jewelry set, which is not used in any BiS setup, but can be a fun alternative to experiment with. These can also be used to buy RvR potions. You can also buy a Soulstone using these currencies. The currencies are not bound and tradable between your characters through the mail.
Sentinel Soul Vendors
To trade your Soulstones for Soul Talismans, speak to the following vendors.
Destruction:


Kris’la is found in the NE corner of The Apex at 32.7, 36.2
Order:


Tim is found in the SE corner of Market Square at 26.4, 35.4
Flee

Every character gets this ability at level 1 and it is a very powerful mobility tool. However, upon using it, you will lose all AP, Morale and Class Resources.
Death
Death in RoR is not punished by XP or Renown loss like in some games, instead, you will be given an option to Respawn, or can wait to be resurrected by a healer. If you respawn, you will gain a debuff that reduces your Wounds by 10% and stacks up to 5 times. Dying in PvP results in a 3 minute debuff while a PvE death is 15 minutes. If you are resurrected by a healer, you instead receive a debuff called Resurrection Illness which reduces all of your stats except Wounds by 25% for a period of time. Dying is not recommended between the debuff and losing all of your Morale, but it’s not the end of the world if you do.


Live Events
There are a multitude of Live Events which offer you extra rewards for participating in specific activities, and reset weekly. You can view them in the Live Event tab of your Tome of Knowledge.


Every week, there is a Ranked, RvR and Dungeon Event, and every weekend, Friday through Sunday, there is a scenario event. Make sure to check your progress and collect the rewards from the Herald NPCs in the capital city.
Group Composition
A group consists of up to 6 players, and a Warband consists of 4 groups of 6, totalling 24 people. A good composition is one of the most important factors in having success in any content.

The most common composition is 2 tanks, 2 dps and 2 healers. This allows the versatility of having 2 sets of tank and healer tools in case one is crowd-controlled, or extra support is needed. 3DPS (1 melee and 2 ranged or 3 ranged), 2 Healers, 1 Tank is common as well, as ranged classes can simply kite and do not need the extra Tank to survive. In PvE, you might see experienced players run 1 tank, 1 healer, 4 dps to clear Dungeons as fast as possible.
Gear and Wards
You will notice on a lot of the end-game gear pieces a line of text such as this:

The game’s gear progression system is called Wards, which advance from Tier 1 (Recruit’s) all the way to end-game. You can view these and your Ward progress in your Tome of Knowledge, under the Armoury Tab:

Up until Officer’s Ward, you should progress naturally, but after, you will need to consider if you want to invest War Crests or skip sets through PvE. BiS Gear can cost upwards of 20,000 War Crests so every crest saved is one less that you need to grind.
You can obtain the Conqueror Ward through Gunbad, the first dungeon available at 40, which is quite easy. It is located in Badlands but with a high enough level of Guild, you can teleport there with a scroll from the Quartermaster. Even with bad luck, you will need no more than 3 total runs to get your full set due to the quests you get inside the dungeon. A full run takes between 20 minutes and 2 hours depending on the group. It is worth noting that you can also get this Ward from the Onslaught set, which is acquired from doing Chapter 22 Hard PQ’s which require a full warband, a lot of coordination, passing loot bags to the correct people, and some luck. Chapter 22 is typically coordinated through Discord and people are often willing to go because even if you pass the gear to others, you can get boxes which have the best talismans in the game that you can use or sell.
Vanquisher Ward can be skipped with Sentinel, which everyone will be doing anyways to get their Soul rings as well as BiS weapons for some characters. Sentinel Dungeons are Crypts & Tunnels for Order and Bilerot Burrow & Bloodwrought Enclave for Destruction, these are all located in the capital cities and sometimes referred to as “city dungeons”. These dungeons are slightly more difficult but with a veteran guide, are quite easy. There are bad luck protection quests here as well, meaning you will have the full set in 4 runs, which is how many runs you need to cap influence and get your ring. A full run takes between 20 minutes and 2 hours depending on the group.
Invader Ward can be skipped with the Bloodlord set, coming from Bastion Stair, the final PvE dungeon in the game currently. It is located in Chaos Wastes but by being in a high-level Guild, you can teleport there with the use of a Scroll from the Quartermaster. Again we have bad luck protection quests, 4 total runs for the full set. You also acquire Bloodlord Weapons here, which are BiS for every DPS in the game. Expect a run to be between 30 minutes for experts and 2-3 hours for a less experienced group.
Tank Basics
Thanks to Tazdingo for your contributions to this section.
Tanking is arguably the hardest role in the game as it has some of the highest potential to impact a fight at the right time. I find it best to start simple with the basics and work up from there.
Guard: Every Tank in the game has an ability called Guard (for Black Orcs it’s called Save Da Runts).

This ability can be applied to any person in your party (Scenario Party if you are in a Scenario or City Siege). 50% of the damage they receive is redirected to you. As the tooltip implies, you can Parry this damage, or Block, as long as you have a Shield equipped. There is no other way to mitigate damage from Guard besides effects that reduce damage you take by a %. Therefore, the only stats that are helpful with Guard damage are Avoidance (Block & Parry) and Wounds. Moving your Guard around to the person in your party who needs it most and staying in range of your Guardee is your number one priority as a tank in 99% of situations. Guard is learned at level 10 for all tanks and it requires one Global Cooldown to move.
Guard is typically used on DPS classes to help them survive while they focus on dealing damage. However, do not hesitate to guard a Healer or even another Tank to help keep them alive as the situation calls for it. In fact, in the worst case scenarios, the priority of whom you want to save is Healer > Tank > DPS. Healers can heal and revive dead people so they are most necessary to be kept alive to recover the group from a bad situation. Tanks offer a lot of control and damage reduction, further allowing the group to recover. DPS usually provide very little to help the group stabilize and are in fact a detriment as they have trouble functioning if the Supports (Tanks and Healers) in the group are unable to do their jobs due to heavy pressure or CC. DPS can also detaunt and typically kite well to avoid taking damage if needed.
Taunt:

Taunt is a 65 foot ranged interrupt, learning how to use it to interrupt certain casts and channels such as AoE Damage Channels from Choppas/Slayers or a Resurrection from a Healer is important. It also provides a 30% damage increase until the target hits you 3 times, which is a lot of free damage so using it for damage is a good choice at times.
Challenge:

Challenge is a frontal cone that reduces the damage of any enemy, be it Player or NPC to 70%, or a 30% Damage Reduction. This stacks multiplicatively with Guard, resulting in a 65% Damage Reduction. Knowing that you are cutting the damage of your enemies down to 35%, roughly 1/3rd, you can start to understand the power of a tank’s toolkit.
Hold The Line:

This Channeled Ability provides a 15% ranged avoidance buff (Dodge and Disrupt) and 5% ranged damage reduction to those in a wide cone behind you up to 50 feet away, which can be stacked up to 3 times, resulting in 45% total free ranged avoidance and 15% ranged damage reduction. This ability is incredibly powerful against ranged and liberal usage by tanks can shut down the effectiveness of dozens of players. Notably, it also grants the Tank using the ability 45% ranged avoidance.
Basic Tank Abilities/CC:
Slow:

Every Tank, before level 10, learns an Ability that slows a Single Target greatly for 10 seconds, with a 5 second cooldown. Slows have no diminishing returns and few good counters in Warhammer, so slowing a target is usually one of your highest priorities.
Knockdown:

Every Tank gets a 3 to 5 second knockdown, some of them need to be learned from your Mastery Path, some tanks have a knockdown specific to using a shield or a 2-handed weapon, but almost every viable Tank Build has a knockdown.
Knockback/Punt/Kick:

Every Tank has a knockback that they receive as part of their core kit. Swordmasters and Black Orcs receive an AoE Knockback. Single Target Punts are very important as you can disrupt Guard Range by kicking a tank, disrupt damage output by kicking a DPS, or even kick someone into lava and watch them burn to death!
Note about AoE Knockbacks and AoE Roots: These abilities should be used very frugally and carefully, everyone that you hit is given 30 seconds of Immunity, meaning that they can no longer be pulled/punted/rooted so giving 10 players immunity for what is essentially a 1 to 2 second setback is not worth it in many cases. This is also why I haven’t mentioned that every Tank also receives an AoE Root. They do, and be careful how you use it.
Buff Removal:

Every tank has an ability to remove either Enchantments or Blessings and in most cases is a very important thing to do.
CC Removal:

Every Tank has this ability. As stated, it removes slows, roots, silences and disarms from your character. Juggernaut also grants the user 5 seconds of Immunity to these effects; use it wisely. There is a Tactic that all Tanks share which reduces its cooldown:

UJ is an incredibly powerful flex pick at times as one of your primary jobs as a Tank is to literally stand close to one of your party members, so the extra mobility is helpful.
This covers Tank Basics, anything more specific will be covered in the Class Guides.
Healer Basics
Healers in Return of Reckoning are very powerful compared to most other MMOs. They are not cooldown reliant but instead have very high sustained output as long as they can cast safely. Every Healer Archetype (WP/DoK, Zealot/RP, AM/Shaman) varies slightly in how they play so here we will just cover the basics.
Healing generally follows a simple priority system: Triage, and fill. Triage is typically casting direct heals to ensure that an ally does not die. If you do not need to be performing Triage then you can fill with things such as HoTs, CC, Buffs, Debuffs.
Positioning and movement are usually what define a great healer. Rotating around the battlefield so you can continue to heal unthreatened is key. Attempting to tank enemies while healing is usually not a good decision. You will suffer a large spell setback and a slew of debuffs that may prevent your healing anyways. Be greedy and take care of yourself first. Use your Morale for CC Immunity if needed, use Flee and AP pot as needed.
Heal over Time:

Every healer receives an instant cast, heal over time spell that lasts for 15 seconds and ticks every 3 seconds. This ability has the highest efficacy of anything in a healer’s kit for its cost and time investment, provided it can heal for its full duration without the target dying. Try to pre-hot opportune targets, such as tanks or dps, before combat and re-hot as the situation allows. RoR does have Pandemic (a term from WoW). You can refresh a hot before it falls off to give it 1 extra tick of duration, and it will keep the same tick intervals so you don’t lose any efficacy by refreshing.
5s HoT:

Every healer has this same ability with a different name. It is expensive but worth maintaining on a single target if Triage on that Single Target is your highest priority. It isn’t always used due to cost or other reasons, which will be mentioned below.
Single Target Heal:

Every healer has a variant of this, with the WP/DoK being an especially unique case. This is your highest output spell and highest priority behind 5s HoT for Single Target Triage except in cases where you have increased cast speed (Morale 2 Focused Mind, Gear/Weapon procs) then it is your highest priority.
Group Heal:

Every healer has a variant of this, with again the WP/DoK being unique. This will be one of your most used abilities as it provides a large amount of direct healing to your entire group, so you can Triage up to 6 people at once.
Resurrection:

Every healer receives an ability almost identical to this. You can resurrect any player within Line of Sight and Range except for 2 situations: Some PvE encounters which do not allow it (most dungeon boss fights) or if they are Staked (Witch Elf Ability named Shadow of Death or Witch Hunter Ability named Purgatory that prevents a player from being Resurrected for 30 seconds).
Detaunt:

Every Healer (and also every DPS) receives a variant of Detaunt. The 15s Single Target variant is the same for every Healer and Ranged DPS. So long as you do not attack your target, you will receive only half damage from them. This ability is the bread and butter of your survival, and does not stack with Guard, but instead supersedes it. Every Healer also has additional forms of Active Defense that will be covered in the individual Class Guides.
Cleansing:

Every Healer has an ability that allows them to cleanse 2 out of the 3 debuff types in the game. It will remove one debuff, the first applied, so having UI elements telling you which debuff you are cleansing is very important.

The major consideration when cleansing is that you are not healing, so it’s important to consider if it is worth cleansing and which debuff you are removing. The Shaman/Archmage base cleanse also provides an Absorb effect to the target, so it has extra value. There are ways to augment your cleanse. Zealot/RP can tactic their cleanse into having no cooldown. WP/DoK can tactic to cleanse their entire group, Archmage/Shaman can do the same and can also tactic their cleanse into granting a HoT effect that stacks.
Absorb:

Every Healer receives at least 1 absorb effect, the WP/DoK Absorb is not Core and must be unlocked through Mastery Training. A well-used Absorb is one of the best preventive measures that a Healer has access to, especially to guard against certain abilities such as Word of Pain or Boiling Blood.
AoE Knockback:

Every Healer has a variant of this, all which have a 60 second cooldown. Some are PBAoE, some are a frontal cone. Some can be Disrupted, some can be Parried. It’s a short knockback and you are giving all targets an Immunity timer of 30 seconds so do your best to use sparingly and only in case of emergency, allowing your party members to make much better use of the Immunity.
This covers the basics of playing a Healer; beyond this information, every Healer Class differs and will be covered individually.
Melee DPS Basics
The job of a DPS in Warhammer is to kill things and not die in the process. There are a few basics to know which will aid you in this task.
Heal Debuff: Many DPS Builds have a heal debuff, and having access to at least 1 in your group will greatly improve your chance of killing your enemies.

Most heal debuffs are 50%, with some proc effects from gear/weapons or AoE effects being 25% such as the Chosen Aura:

There are also Outgoing Heal Debuffs in the game, which reduce the Healing Output of your target by 50%, which stacks multiplicatively with an Incoming Heal Debuff, resulting in a 75% heal reduction if that target tries to heal itself.

Mitigation Debuff: Armour/Resistance and to a lesser extent, Toughness Debuffs can all massively multiply your damage on a target, allowing you to deal from 20% to 100% more damage to your target, depending on circumstance!


Damage Reductions: As described above, abilities such as Guard, Detaunt and Challenge can massively reduce the damage that someone takes, so if you recognize that your Target is benefitting from any of these effects, it might be wise to counter it or choose someone else to attack.
Assisting: Hitting the same target as your teammate is often tantamount to success, there are addons to help with this described above.
CC Removal:

Every Melee DPS has this exact ability with a different name that not only removes roots and slows from yourself, it will make you immune to them for 10 seconds.
Mobility:

Choppas, Slayers, Marauders, and White Lions all have this ability.

Witch Hunters and Witch Elves can get their own version of this Ability through Mastery Training.
Survival: DPS often rely on party cohesion to cover their survivability but each non-Tank class has a Detaunt ability which you should not hesitate to use. All Melee DPS have a PBAoE Detaunt which varies in cooldown, duration, and AP cost from class to class.

It’s important as a DPS to pay attention to your group. If your tank is slowed down or punted away from you, it’s a good time to detaunt as you won’t benefit from their Guard. If your Healers are CC’d or being chased off, you should probably go help them or you will die without their support.
That covers the basics of Melee DPS, which is one of the simplest roles in Return of Reckoning. Every different Melee DPS is very unique and will be covered in individual class guides.
Ranged DPS Basics
Ranged DPS in Return of Reckoning are often very squishy and typically specialize in dealing high Single Target Burst or sustained AoE damage. In most cases, Ranged characters are not built to sustain much damage and succeed much more by keeping distance from their foes. Ranged all share a few things in common which will be described here.
Detaunt:

All Ranged characters have the same Detaunt as healers, a long range, single-target variant.
Root: All Ranged characters, excluding Shadow Warrior and Squig Herder share an aoe root

Much like tank roots and aoe knockbacks, this is a CC that tends to not stick or get much value, so use sparingly.
Position: As alluded to earlier, ranged characters are not typically good at tanking damage and often don’t have the greatest kit to deal with attackers on top of them, so positioning well so you don’t have to suffer these weaknesses is strongly advised. Move before your foe reaches you, not after.
This covers the basics of Ranged DPS gameplay and each class will be broken down more thoroughly in Class Guides.

Knight
Knight of the Blazing Sun is the Empire Tank class on the Order side. In almost every PvP comp, is it the staple tank due to its extremely high utility and ease of use. KoBS is very simple to play so it’s a great place to start if you want to learn to play Tank. There are 2 major builds: Sword & Board (SnB) and 2-Handed (2H).
Thanks to Artek, Rixz and Verey for your contributions to this section.
Battle Commands
The major mechanic of the Knight is its ability to shout Battle Commands, providing area effects that affect both allies in their group and all enemies in range.
A Knight may have 3 Battle Commands (or Auras as they are commonly referred) active at one time. Each has a 4.5s cooldown once deactivated and all can be activated instantly and swapped on the fly as needed.
The power values of many of the buff/debuff Auras have changed. I’m waiting for an update to the Website’s Career Builder for a full rewrite including visuals. However, the Gameplay sections do reflect the current Auras I recommend using. In addition, certain abilities have increased power while certain Auras are active - this does not change the Auras which I recommend nor do I think that “twisting” a different Aura temporarily is worth doing for any of those abilities.
Core Battle Commands

Increases the Strength of groupmates within 100 feet and reduces the Strength of enemies within 25 feet by an amount tied to Career level and Mastery Points invested in Conquest.

Deals a small amount of Elemental damage to all enemies within 25 feet every 3 seconds. While this damage may be small, it is undefendable and can be stacked by multiple Knights for a respectable amount of passive damage.

Increases the Toughness of groupmates within 100 feet and reduces the Toughness of enemies within 25 feet by an amount tied to Career level and Mastery Points invested in Vigilance.

Deals a small amount of Physical damage to any enemy that hits the Knight or a groupmate. Any target can only take damage from this ability once every 2 seconds, so it is not stackable like All Out Assault is.

The Knight or any groupmate within 100 feet will be healed by a small amount scaling with Mastery points invested in Glory over 3 seconds whenever they defend themselves from an attack. This includes all types of Avoidance: Block, Parry, Dodge, Disrupt. This healing does not scale with Healing Bonus and cannot crit.

Increases all 3 resistances for the Knight and all groupmates by a large amount, scaling with Mastery points invested in Glory, within 100 feet. It also debuffs all resistances of enemies within 25 feet by half of the amount that it buffs. This is an incredibly strong aura as it is both a permanent resistance buff that cannot be shattered and scales much higher than most other buffs, it also debuffs all 3 resist types passively which can be quite powerful to increase the damage of certain classes. Considerably nerfed - awaiting website update.
Mastery Battle Commands
Every Mastery tree has an additional Battle Command with 5 points of investment.

Restores 20 AP every 5 seconds to the Knight and all groupmates within 100 feet, while also draining 20 AP from all enemies within 25 feet every 5 seconds. This does not scale with Mastery investment. This Aura is considered a staple of almost every Knight build as AP synergy is so strong and this is the most passive and one of the strongest.

Now provides Armor to the entire group that will stack with Potions. Awaiting website update for tooltip correction.

All enemies within 25 feet heal for only 75% as much as normal. This only affects standard heals, the kind that scale with Heal Bonus & Crit, and will have no effect on lifetaps, pilfers, or something like To Glory! This Aura can be useful if a Knight can stand within 25 feet of enemy healers for a prolonged period of time, but the Knight staying within Guard range and doing standard Tank duties are usually more important than doing so.
Important Core Abilities

Deals a small amount of damage and slows your target by 40% for 10 seconds.

Deals a medium amount of Physical damage and causes the next hit by everyone in the group, including the Knight, to deal an extra amount of Elemental damage, scaling with Mastery points in Conquest. This is one of the most important single target damage skills for a Knight, especially while in a group.

Deals a medium amount of Physical damage and ignores 15% Armour.

Deals a small amount of damage in a 25 foot cone in front of you and reduces the Wounds of all enemies hit by an amount scaling with Mastery points in Conquest.

Deals a small amount of damage and sends your target flying away from you a short distance, or knocking down a PvE mob for a short time.

Increases Armour by an amount based on Mastery points in Vigilance for 10 seconds and grants 10 AP whenever the Knight is attacked. This ability is quite helpful for helping to maintain AP but the Armour does not stack with other buffs such as a potion.

Deals a small amount of damage but with double threat generation. This ability can be important in PvE to help maintain threat on enemies.

Deals a small amount of damage and increases your Block Chance by 10% for 20 seconds. Requires a shield. This effect does not stack with the avoidance buff you gain from Vanq or Sov so it’s mostly useful early on.

Deals a small amount of flat elemental damage back to attackers, scaling with Mastery Points in Glory. This does not benefit from any stat and cannot crit. While the damage is small and doesn’t have any meaningful scaling, the ability is worth using while being attacked by multiple enemies for the extra small damage it deals and it can be stacked by multiple Knights.

Deals a medium amount of damage and removes 1 Enchantment from your enemy. Buff removal is very important and is always worth doing.

Deals a small amount of damage, then an additional amount over 5 seconds, scaling with Mastery points in Glory. More importantly, this ability interrupts any channel or casted ability.

Deals a small amount of damage and then an additional amount of Elemental damage over 9 seconds, scaling with Mastery points in Glory. Can be stacked up to 3 times. Behind Shining Blade, this is the highest portion of a Knight’s DPS, as long as at least 2 of the ticks will go off before a target dies. Notably, you can refresh the entire stack with 1 use of Blazing Blade once stacked.
SnB
SnB KoBS is designed to be very defensive and stay alive through a very large amount of damage, while protecting their group members from damage and provide a large amount of utility. This is the preferable Build for large-scale RvR.
Builds
+2 Full Build:

Before 70 and +2, just drop AP aura from the build. You can drop AP aura if you wish for Heaven’s Fury, Laurels, Coordination.
Laurels of Victory was reworked to provide group utility rather than a pretty pointless self damage increase.
This Tactic allows your Vigilance skill to also reduce group critical damage taken by 20% for its duration. This is a.. Meager tool at best. Sources of Critical Damage Reduction are multiplicative, refer to the Critical section in Basics to learn more. You are forced to use your strongest self damage reduction to provide a very small and variable damage reduction to your group. However, it’s still group utility so it’s an option, albeit a weak one.
Tactics

Always Use

Always Use

With the recent patch, this is no longer a mandatory Tactic. However, it does reduce the cooldown on your punt from 20 seconds to 10 (It’s actually 100% faster cooldown reduction or 50% reduced cooldown).
3rd & 4th Tactics are flexible as you see fit. Laurels, Coordination, Slice Through, Rugged, Unstoppable Juggernaught, Banish Darkness and Gilded Shield are all good options.

Always use in PvE, doubles your aggro generation.
Gear
Buy the relevant War Crest sets while you level, they are quite cheap.
Decimator > Obliterator > Devastator > Ruin/Annihilator.
Your general stat priority is Avoidance (Block > Parry) > Wounds (until softcap) > Anticrit > Toughness/Armor
Anni/Ruin is where we stop as sets are expensive and we want to save War Crests. I recommend using either 3 Vanquisher + 3 Redeye or 4 Vanquisher + 2 Redeye or 4 Vanquisher + 3 Redeye (if you want to spend extra War Crests) and use a Block Ravack’s cloak from the Auction House for your backpiece. This is the gear setup you will use until Sovereign in order to save War Crests. Vanquisher Gloves and Boots are Bind on Equip so you can get them from the Auction House or have a friend buy them for you with their extra War Crests. The other gear sets such as Conqueror and Invader are interesting but are simply not worth the amount of extra time you will spend grinding for crests.
Vanq Gloves, Boots, Belt + the rest Redeye or buy Vanq Shoulders for the extra block if you choose to go 4/2 or 4/3. The difference between 4/2 and 4/3 is Redeye Belt, which requires farming a dangerous side-boss up to 3 times or a different belt for its own benefits.
Your final BiS will be full Defensive Sovereign as it by far has the most advantages of any combination of gear.
Weapons/Shields
Use the RvR weapons you can buy from the vendor as you reach the appropriate level. Shields with the “Shieldbearer’s” prefix and One-Handed Swords with the “Sentry’s” prefix. The RR 45 set is the last you will buy before BiS.
BiS Shield:

Upgraded from RR45 Shield.
BiS Weapon:

RR45 Sentry’s Weapon
OR

Upgraded from the RR45 weapon for higher stats in exchange for the passive HP Regen.
OR

Upgraded from Subjugator weapon if you prefer more anticrit.
Talismans
Initiative Talismans until you have 250-300 are an option, Wounds Talismans until 1050 Wounds, then either Toughness or Armour, either is fine. You can also choose to simply stack Toughness or Armour talismans and play at lower Wounds. Toughness has the perk of also granting some Block chance, which is very strong right now.
For your Sentinel Soul, use

Jewelry
Fresh 40, you will want all the Gunbad avoidance jewelry.


These can all be bought from the Auction House for incredibly cheap, or you will likely see them if you run Gunbad. Use whatever you like for your 4th, such as a ring from a Renown Vendor.
You will want to transition into all of the Avoidance Genesis pieces:


And possibly a 4th (which won’t have Block or Parry) if you want to pick up a 2 set bonus

Or simply keep your Gunbad Diamond for more Block chance.
BiS jewelry will be your Genesis Block jewelry, Gunbad Block jewelry, Soul ring (Sentinel/Triumphant/Victorious, minor stat difference between them, Sentinel is fine),

In your Soul Ring, you’ll want to use the +Block talisman.
and your Sovereign Jewelry.

Renown Points
Defender 4: 10% Block, 20 points.
Quick Escape 1: movement speed proc, 10 points.
Futile Strikes 3: 15% anticrit, 30 points.
20 points left to do with as you please. You can go Hardy Concessions, Toughness, Reflexes for Parry or Deft Defender for Dodge and Disrupt.
OR
Go Futile Strikes 4 and do whatever you like with the last 5 points.
OR
Futile Strikes 3
Defender 4
Hardy Concessions 4
Quick Escape 1
This is the setup I have been using more and more on Sword and Board tanks in the proc meta. You lose some potential avoidance as the major drawback, as we won’t have the points to also spec into Parry, but the extra damage reduction can help keep you alive against a massive onslaught of damage.
Gameplay
Following the latest few patches, Resistance and Stat Auras are general low priorities. Most KoBS should be using Stay Focused!, To Victory! & To Glory! I’m awaiting the Website’s Career Builder to update for a full visual rework in this guide.
The 2 Standard Auras are:


The most preferable 3rd Aura is

Following my SnB guide, you will not have this Aura until late end-game so use Toughness Aura instead

The Outgoing Heal Debuff Aura might be requested by your Warband Leader at times (which does require a Mastery Point):

In PvE, KoBS typically run one or both damage Auras to help generate more threat, as well as Stay Focused! For the group healing bonus.
Maintain Shield Rush

Use your 2 self buffs Shield of the Sun

And Perseverance

As needed;
Use Vigilance for massive damage reduction as needed

Interrupt with Vicious Slash

A note about Heaven’s Fury:

I don’t recommend this ability in any build but it does have its uses, such as a Kite Group. The 5 second stagger is broken upon any damage, so more often than not, you are handing out a 30s Immunity to a lot of people and gaining no advantage from it. Don’t be afraid to use it in circumstances such as a kite group, though, or test it however you see fit.
Beyond this, use the abilities described in the Tank Basics section as requested by your leader or upon your own intuition.
Morales
1: Champion’s Challenge or Demolishing Strike

Champs is one of the best CC’s in the game, There’s probably humor to be found in that it shares the acronym. You and your target are both locked in place for 10 seconds, and neither of you can even turn. As important as mobility and positioning are in this game, being unable to move for 10 seconds is terrifying. Coordinate this with your DPS friends to lock down the kill on your favorite enemy player.

Demolishing Strike is a big armor debuff that will stack on top of ability armor debuffs. Combined with an Ironbreaker or a White Lion, a target with -2500 armor is going to get hit very, very hard.
I would not recommend using Guardian of Light because you sacrifice the incredible power of the other 2 morales mentioned above.
2: Shield Wall or Emperor’s Champion.

The wording is deceiving but basically you will block any attack that isn’t undefendable. The same applies to your Guard damage unless your Guardee is hit with an undefendable attack, the Guard damage in that case is also undefendable. It seems like a No-Brainer as a Shield Kobs but there are points of consideration. First of all, your block is a frontal 180 cone so if you are running away or pulled into a blob, the Block probably won’t help you as much as Emperor’s Champion. However, great morale if you need to use it.

Boosts 3 stats by a lot for 15 seconds. The Strength we don’t care too much about but the big boost to Toughness and Wounds will substantially increase your Effective Hit Points.
I don’t recommend using Raze. It does very low damage that is rarely threatening and you risk handing out the Resolute buff, effectively nerfing the more-powerful Morales of your allies.
3: Distracting Bellow or No Escape

AoE 50% Damage Reduction that stacks with Detaunt, Guard and Challenge. This ability can turn a fight on its own.

No Escape no longer breaks on damage, so it is almost as good as a stun on up to 24 targets within 25 feet, so has become quite popular.
4: Immaculate Defense or Solar Flare (in special cases)

Your entire party becomes nearly immune to damage for 10 seconds. This stacks with Detaunt, Guard, and Challenge. One of the most powerful morales in the game and a lot of encounters in pvp revolve around this ability.

So the interesting thing about Solar Flare is that it drains morale, so its major purpose is to deny other tanks from using Immaculate Defense and Distracting Bellow. In situations that have a long stand-off like a Keep or Fortress defense, a Solar Flare can stop an enemy force from succeeding nearly by itself.
2-Handed
Wearing a 2 handed weapon, every Tank that has a Single Target Punt can use it every 10 seconds instead of every 20, and 2-handed builds usually provide a lot more utility (usually offensive) and more damage at the cost of being less survivable. The Kobs gains 1 extra ability by wearing a 2-handed weapon, which is a very powerful offensive utility in every situation, so they are commonly used in scenario, city, 6v6 groups and sometimes used in Warbands as well.

A Wounds Debuff, as described, reduces the HP of targets hit. BiS characters have between 7000 and 11,000 hit points, so removing 1000+ HP with a debuff makes people a lot easier to kill. This is bolstered by the tactic

Giving anyone who hits those debuffed a free 10% critical chance.
Build

This build requires RR70. Before 70, trim out whatever you don’t think you’ll need until later. I recommend dropping AP Aura and Armor Aura until 60 and 70. This build is focused on maximum group utility and does not bring a lot of damage. Even a full damage KoBS build doesn’t offer that much more damage and requires significant investment and loss of survivability and Parry.
Destroy Confidence 70+ Build:

This is an interesting new variant since Destroy Confidence was re-introduced at 11 points in Glory. The build drops the knockdown to gain the double shatter and Staggering Impact, which can add a lot of damage to groups that deal AoE damage. This works best in a 6 man group that has at least 1 DPS with a knockdown so the group has at least 2 reliable knockdowns for efficient setups. There are other variants you can use with this and Staggering Impact can be highly useful in large-scale as well but you might find it difficult to survive.
PvE 2H:

Staggering Impact provides a significant boost to AoE threat and will make PvE a lot easier. Just drop Banish (the punt tactic) for Menace. Throw in one or both damage auras for even more threat.
Tactics

With the patch, this tactic is no longer mandatory but it does reduce the cooldown of your punt to 10 seconds and also causes it to snare by 40% for 5 seconds, which is one of the best utility picks to take as a Tactic.


Coordination is the new staple 4th Tactic for the large Parry buff.

15% increased healing for your entire group is some of the strongest utility that any Tank in the game can provide.

More buff removal, more damage.

Use in PvE.
Gear
Buy the relevant War Crest sets while you level, they are quite cheap.
Braggart > Challenger > Duelist > Annihilator
Your general stat priority is Avoidance (Parry) > Wounds (until softcap) > anticrit > Toughness/Armor. There are other sidestats worth considering on gear such as Reduced Armor Penetration and Reduced Chance to be Parried/Blocked.
After Annihilator, if you want to do the Beastlord Hunt quests, running 5pc Beastlord (Helm, Shoulders, Chest, Ring, Pocket) + 2pc Redeye (Boots, Gloves) + Ravack’s cloak with Parry + whatever belt is a great starter setup for 2H with a good amount of Parry.

PvE then becomes your best friend as Bloodlord Gear is the next best set to obtain easily, with decent stats and even more Parry. A mix of PvE gear is quite good: 3 Bloodlord (Chest, Shoulders, Belt) with 4 piece Sentinel (Helm, Boots, Gloves, Ring) is a large amount of Parry and Stats. 5x Bloodlord and 2x Sentinel (Boots + Ring) is even more Parry, but less stats. Keep your Ravack’s Cloak and your 3 best Parry Rings on top of your Sentinel Ring, which should be 2x Genesis and a Gunbad Ruby.
There are a couple of options for what would be BiS:
Warlord: This set has a built-in proc Detaunt which is unique for a tank and quite powerful, as the most defensive classes gaining a stacking 50% damage reduction is quite strong. The full set grants you a Morale Drain with a small area of effect, which is useful for some situations like 6v6 or even in RvR.
Max Parry Set: 2pc Victorious (Helm, Cloak), 3pc Triumphant (Chest, Gloves, Ring), 2pc Bloodlord (Shoulders, Belt) & Warlord Boots. 2x Genesis Parry Rings and another 2% parry ring such Gunbad Ruby or an Amethyst Annulus of your preference (probably Iron for the extra Armour).
Large-Scale Toughness: 3pc Defensive Sov (Helm, Chest, Ring), 2pc Bloodlord (Shoulders, Belt), 2pc Warlord (Back, Boots), 2pc Triumphant (Gloves, Ring). Playing a 2H tank in RvR is very possible but you will typically be very squishy, Parry and Wounds are not enough to keep you alive. One of the best ways to make 2H RvR viable is getting a lot more Toughness to help counter the Ranged and Magical damage. This gear setup is a good place to start with that goal in mind so we can bring the powerful Arcing Swing debuff to RvR. It compromises just a bit on Parry and other minor stats to gain a lot of Toughness.
Weapons
Use the 2H Swords from the War Crest Vendors with the “Sentry’s” Prefix until you can get Nightless from running Sentinel Dungeons.

The Reactionary proc gives a ton of useful avoidance and by itself determines this weapon as BiS. You can also get a Reactionary Great Sword from the Tier 4 Epic Quests which you can learn more about here:
https://www.returnofreckoning.com/forum/viewtopic.php?t=37356
Talismans
Initiative Talismans until you have 250-300 is an option, Wounds talismans until 1050 Wounds, then Toughness or Armour, either is fine.
“Why not Strength talismans?” KobS doesn’t do much damage and it’s Physical, so you’ll need to get Pen as well as Damage Bonus, not even counting the lack of damage Tactics that Kobs has access to compared to most other tanks; there isn’t a way to build the class through Mastery to have good damage without losing the majority of your utility. Besides, KobS is probably the squishiest 2H Tank with no form of active mitigation. More Strength does also benefit your strikethrough, but it’s a slight gain. *However* If you want to play DPS KoBS, be the brightest star in the sky.
For your Sentinel Soul, use

Jewelry
I went over all the Jewelry above but I’ll list the best pieces here specifically.


The Annulus is from a time-limited event, and there are variants with different prefixes such as “Iron” which has bonus Armour. These may be available through trade with other players or the Auction House, but expect them to be very expensive.
Soul rings:


Use the +6% Parry Soul Talisman
Renown Points
Reflexes 4: 18% Parry, 20 points.
Quick Escape 1: movement speed proc, 10 points.
Futile Strikes 3: 15% anticrit, 30 points.
20 points left to do with as you please. You can purchase Deft Defender for some ranged avoidance or Hardy Concessions for Damage Reduction.
OR
Just go FS4 and spend the last 5 points however you like.
Gameplay
Following the latest few patches, Resistance and Stat Auras are general low priorities. Most KoBS should be using Stay Focused!, To Victory! & To Glory! I’m awaiting the Website’s Career Builder to update for a full visual rework in this guide.
Assist your DPS allies and maintain Arcing Swing on their targets:

Use Shining Blade to supplement their Damage:

Beyond this, use the abilities described in the Tank Basics section as requested by your leader or upon your own intuition, though if needed, you can fill with some Precision Strike to add a little bit of extra damage on the target if you don’t need to do anything else or stack Blazing Blade.

Morales
1: Champion’s Challenge or Demolishing Strike
Champs is one of the best CC’s in the game, There’s probably humor to be found in that it shares the acronym. You and your target are both locked in place for 10 seconds, and neither of you can even turn. As important as mobility and positioning are in this game, being unable to move for 10 seconds is terrifying. Coordinate this with your DPS friends to lock down the kill on your favorite enemy player.
Demolishing Strike is a big armor debuff that will stack on top of ability armor debuffs. Combined with an Ironbreaker or a White Lion, a target with -2500 armor is going to get hit very, very hard.
I would not recommend using Guardian of Light because you sacrifice the incredible power of the other 2 morales mentioned above.
2: Emperor’s Champion.
Boosts 3 stats by a lot for 15 seconds. The Strength we don’t care too much about but the big boost to Toughness and Wounds will substantially increase your Effective Hit Points.
I don’t recommend using Raze. It does very low damage that is rarely threatening and you risk handing out the Resolute buff, effectively nerfing the more-powerful Morales of your allies.
3: Distracting Bellow or No Escape
AoE 50% Damage Reduction that stacks with Detaunt, Guard and Challenge. This ability can turn a fight on its own.
No Escape no longer breaks on damage, so it is almost as good as a stun on up to 24 targets within 25 feet, so has become quite popular.
4: Immaculate Defense or Solar Flare (in special cases)
Your entire party becomes nearly immune to damage for 10 seconds. This stacks with Detaunt, Guard, and Challenge. One of the most powerful morales in the game and a lot of encounters in pvp revolve around this ability.
So the interesting thing about Solar Flare is that it drains morale, so its major purpose is to deny other tanks from using Immaculate Defense and Distracting Bellow. In situations that have a long stand-off like a Keep or Fortress defense, a Solar Flare can stop an enemy force from succeeding nearly by itself.
Warrior Priest

The Warrior Priest is the Empire Healing class. It uses Medium Armour rather than Light and a large portion of its utility and kit require you to play around melee range, even as a cast healer. There are 3 possible builds with some variations for Warrior Priest: Cast Healer, Melee (Shield) Healer and Melee DPS.
Righteous Fury
The mechanic of the Warrior Priest is called Righteous Fury and is represented by this Globe of Light on your UI.

Righteous Fury functions as a 2nd Resource, fueling most of your strongest abilities and you will typically use your AP abilities to replenish your Righteous Fury. There are some downsides to this mechanic, such as when you Flee, there aren’t a lot of options to instantly get this resource back, whereas other healers can use an AP potion.
The other Mechanic of Warrior Priests is their Prayers, of which you can have 1 active at any time out of the 3 available, and each offers a different effect to your entire party passively.
Prayers


Which Prayer to use?
Generally, Righteousness for damage is the highest value in general and should be your default. If you prefer to use a more defensive option, Absolution is the hands down winner. Not only are small Absorb procs generally far superior to small healing procs due to the power of Absorbs to prevent critical damage and extremely level out incoming damage, but it also procs “when taking damage” versus Devotion, which is “on attack.” A defensive mechanic that does its work while taking damage is probably going to outperform on hit as you aren’t always able to be hitting things while taking damage. However, Devotion has a 2s Internal Cooldown versus the 3s of Absolution, meaning that Devotion has the potential to occur 33% more frequently, but this does not change my opinion.
Cast Warrior Priest
The Cast Warrior Priest is focused on operating as a standard Healer while staying at a safe distance and casting heals. They use a 1-Handed Hammer and a Tome, which provides passive Righteous Fury recovery every second. They function well in all content and have a versatile slew of Tactics to choose from to fit most situations.
Builds
40/70 Full Build

With the change allowing buffs from abilities to stack with consumables, this is the only build that I can recommend for a Cast Warrior Priest as the Wounds buff stacking with Liniments is far more powerful than anything else you can really do. Martyr’s Blessing can be exchanged for Sigmar’s Shield where it gets more value such as small-scale. Before 70, just drop the M4 and work towards it as you get renown ranks.
Tactics
Loadout:
- Sacrificial Renewal
- Discipline
- Exalted Defenses
- Shield of Faith/United in Prayer

This tactic allows your Direct Heals (heals that are not heal-over-time) to have a chance to provide AP to those that they heal. “AP Pumps”, as they are commonly referred to, are very powerful and allow your allies to continue pressing their buttons. You should almost always use this.

This tactic allows you to have an almost permanent absorb shield on yourself. Absorbs in this game are quite powerful as discussed in the Absorbs section above, and this tactic offers a lot of safety to the build. This tactic is flexible but strongly consider using it.

The “Group Cleanse” tactic. It is situational but strong, such as against a Magus stacking DoTs on your party. You would have to drop Divine Warding in your build to pick this up. This tactic is flexible so consider the situation.

This tactic is incredibly powerful, giving you 20% free output for 10 seconds whenever you Defend (Block, Parry, Dodge, Disrupt). As a cast Warrior Priest, you can expect to have very high Disrupt, so if you are playing against an AoE Magus, you can easily maintain this permanently by standing in their Dissolving Mist, or against an AoE Sorc, this will almost certainly be up permanently as well. Against melee, it is less reliable as you won’t be Parrying nearly as much as you would be Disrupting, though you can get a fair chance to Parry in some situations as a Warrior Priest. This tactic is flexible but incredibly powerful when it can be maintained so consider the situation.

Provides a flat healing bonus that is always a strong and passive option. This tactic is flexible so consider the situation.

If you are in a situation where you cannot Smite but you can still get hit such as sitting on a Fort Wall, this will provide you a bit more RF.

Provides a lot of free healing at the cost of taking more damage. This is a very powerful Tactic that I use in almost all cases.

With the obscene power of Avoidance right now, this is a very nice Tactic. Coupled with Exalted Defenses and some Avoidance stacking, you can both be nearly immune to ranged damage and healing for 20% more almost all the time!

Warrior Priests can now provide the most powerful Healing utility alongside Rune Priests! They do not stack. You always want to run this if you don’t have a Rune Priest (or Warrior Priest) already providing the Tactic. Notably, it will have less uptime than a Rune Priest’s as your groupmates need to be actively hitting things to proc it as well as 5 seconds uptime versus 10; therefore, it is better to have the Rune Priest run it.
Gear
Buy the relevant War Crest sets while you level, they are quite cheap.
Decimator > Obliterator > Devastator > Annihilator
Your general stat priority is enough Defense to be comfortable (Wounds, Anticrit, Armour, Disrupt, Dodge, Parry) > Heal Crit > Willpower. Enough Defense to be comfortable is esoteric, so I’ll say that being able to survive a melee train turning on you, or a ranged assist squad, or 4 Witch Elves opening from Stealth is far more valuable than doing 5% more healing. A dead Healer cannot heal and your group will suffer for it. A lot of Warrior Priests will invest heavily into Armour or Wounds, but it can be worthwhile to invest into some Willpower Talismans on end-game gear.
After Annihilator, the best set by far until BiS will be Onslaught, obtained from Chapter 22 Hard PQs:

This set not only has fantastic stats, but the 4 piece bonus provides a chance to passively regenerate Righteous Fury, which is your biggest bottleneck as a Cast Warrior Priest. This set has the best possible version of this proc, the same one that BiS gear has.
My BiS Recommendation is one of 3 options, each has benefits.
8pc Sov is interesting because the ability recharges 150 RF instantly. This is useful if you need to flee to reposition or whatever other purpose 150 instant RF has.
7pc Sov & 2 Piece Triumphant(Boots and Ring). This setup has the strong RF regen proc from Sov and an extra Willpower bonus and some free crit on boots.
5pc Sov & 4 Piece Triumphant(Boots, Belt, Ring, Chest). This setup has double Willpower and double Wounds bonuses, as well as having the weak RF proc from Triumphant and all the goodies from the listed gear pieces such as anticrit on Chest. This setup is better for situations where you can Smite to maintain your RF since your regen will be weaker but the stats make up for it.
Credit to Iyvan and Zuna for your gear setups.
Weapons
Buy 1-handed Hammers and Tomes with the “Apostle’s” prefix up through RR39. At RR45, you should use the Apostle’s Tome but you have a choice between the Apostle Hammer and the Subjugator Weapon.

This weapon trades the anticrit for the Aid Proc, which is a free HoT that procs quite frequently.
For BiS you should choose a combination of the RR45 Hammer and Tome, which provide anticrit, your favorite defensive stat; or upgrade your Subjugator weapons into Fortress Weapons for maximum Heal Crit.


I personally recommend using Fortress Hammer for the Aid proc and RR45 Apostle Tome for the anticrit, but it’s really up to you and depends on the situation. The most important stat on a tome is the Righteous Fury regen, but everything suggested has 8.

Talismans
I would recommend using a combination that suits you of Armour/Wounds/Willpower. Just remember that your goal is to stay alive so you can continue to heal, and that outweighs the slight healing output gain from Willpower talismans.
For your Sentinel Soul, use

Or

Or

Depending on what fits the situation best, leaning mostly on the heal crit.
Jewelry
Use the best stuff you find leveling, a combination of the green rings/belt/cloaks from the renown vendors is the most common. Once 40, 2pc Genesis is fantastic.


Other good options are all going to be expensive, such as the Annuli, which are from a time limited event:

Diamond Annulus has great defensive stats and strong dodge/disrupt, which you can leverage for your Exalted Defenses and to help you defend against ranged CC’s.

Emerald Annulus has great stats and heal crit.

This is the most sought after ring for every Healer and also the most expensive. It has a very powerful combination of stats that are very good for healers. It is a very rare drop from mini-bosses in Gunbad. Expect to pay anywhere from 2,000 to 10,000 gold to acquire one.
Your Soul Ring options are unfortunately bleak as a Cast Warrior Priest. The Sentinel Version is designed for the 2 melee specs

However, your Triumphant Ring does have great stats for you.

You should always use one of these when you have Souls available such as:

You don’t have fantastic options for Belts and Cloaks until near-bis, so you can consider using one of these options:

Tier 3 Empire vs Chaos RvR Influence. Fantastic early item.


And for cloaks you can use a Subjugator cloak for the decent stats and free self–cleanse, A Genesis Cloak for an extra-set bonus and okay stats or even a Ravack’s. These are all placeholders until you can wear the fantastic Sovereign backpiece.


Both can be purchased for Genesis Crests from the same vendor.

The “Reduced Chance to be Parried” is also somewhat useful to a Cast Warrior Priest.
Renown Points
Spiritual Refinement 3: 9% Healing Crit, 30 points
Futile Strikes 3: 15% anticrit, 30 points
Deft Defender 4: 18% Dodge & Disrupt, 20 points
OR
Spiritual Refinement 4: 14% Healing Crit, 45 points
Futile Strikes 3: 15% anticrit, 30 points
Spend the rest however you want, some combination of Deft Defender, Reflexes, Willpower, Wounds.
OR
FS4 with SR3, spend rest how you like.
OR
FS4
DD4
SR2
This option is for maximizing your anticrit to survive burst, your Disrupt to avoid CC from enemy healers as much as possible, and the rest into Heal Crit. This is the kind of setup you would see for 6v6 Ranked gameplay.
Gameplay
Warrior Priest has a 1 second cast group heal so it is very good at performing fast triage, but it requires Righteous Fury, so you have to be very careful with your resource management playing this class.

A popular strategy is to stand just behind the melee and use Smite to refill your Righteous Fury

Smite can hit up to 24 targets, so in the right situation, it can refill enough for you to cast 2-4 abilities by itself.
The class also has an excellent Single Target Heal

This ability has a very fast cast, costs AP rather than Righteous Fury and heals for a lot. It has a 5s cooldown that cannot be modified, so you can’t get a cooldown reduction buff and spam it endlessly. When this ability is off cooldown, look to utilize it as much as possible. Not only is it a fantastic heal, but it spares your precious Righteous Fury pool.
This class is also very hesitant with its 5s HoT as the Righteous Fury pool is valuable, but still use it as needed:

Notably, this can now be used while moving, so Warrior Priest has the ability to do some Single Target healing while on the move.
Skill Rotation / Priority
Detaunts
Warrior Priest now has 2 Detaunts, AoE and Single Target, which is actually a pretty stellar buff to the class overall. This adds a lot of versatility to your defense as you can Repent a Ranged DPS while using Atone for nearby Melee, etc.

Repent now serves as the single target Detaunt.

Atone is now the AoE detaunt.
Your General Priority is
- Activate your Prayer. All 3 are viable but Righteousness is usually the highest value. Cast your Wounds buff if you have it in your Mastery before combat and refresh as needed.
Your Triage Priority is
- Use Martyr’s Blessing to heal up to 24 people at once.
- Group: Cast Touch of the Divine
- Single Target: Cast Divine Mend
- Single Target: Cast Divine Aid

Your Fill Priority for HoTs is:
- Cast Pious Restoration and maintain as needed
- Cast Healing Hand and maintain as needed


Your only Absorb effect is

It affects the entire group but has a very long cooldown, so think carefully how you will use it.
Your Righteous Fury Generation priority is:
- Cast Smite if it will hit 2+ Targets

- Use Sigmar’s Vision to buff yourself or an ally if safe to do so
- Slow an Enemy with Weight of Guilt if needed and if safe to do so
- Debuff an Enemy with Castigation if needed and if safe to do so
- Channel Supplication


Cleanse as needed.

You have a Single Target Silence

Use this on enemy Healers and enemy casters such as Magus or Sorcerer when opportune and needed. It is a melee ability so opportunities can be sparse. Avoid using it on other classes as Silence does not affect them very much.
Morales
- Divine Favor or Divine Aegis

An instant, large heal that is not affected by any heal debuffs.

Makes your Ally incredibly tanky for 15 seconds.
- All 3 are useful in different situations

This is your staple as a Warrior Priest in most RvR content. You typically position near a clump of enemies and this heals more per enemy hit. It is most commonly used to instantly counter an enemy’s morale/damage drop and instantly top your group off.

One of the best morales in the game. It provides Immunity to most forms of CC for 10 seconds and also reduces cast times by 50%. Unfortunately, the latter benefit isn’t very useful for a Cast Warrior Priest as your cast times are already faster than the Global Cooldown.

Everytime your allies hit an enemy in melee, they gain 50 action points. This is the most commonly used morale in PvE as it allows your allies to spam endlessly for 10 seconds and still end up with a full AP bar.
- Both are useful.

A 4500 Melee Shield for the entire party. The implications are pretty obvious, providing a strong counter to melee enemies.

A 6 second AoE stagger can be incredibly useful if you manage to disable an entire clump of Healers or enemy Casters. It’s also a 1200 damage AoE Morale so it can be used as part of your warband’s damage drop.
- Gift of Life

This is an incredibly powerful defensive morale that adds a ton of defense to your entire group and because it is a morale, it stacks with ability buffs.
Shield Warrior Priest
The Shield Warrior Priest utilizes a Hammer and Shield, allowing them to Block. They fight in melee and use hybrid lifetap heals, which combine a base heal and a lifetap effect to damage enemies and heal allies. Lifetap heals are not subject to heal debuffs but since they are based on the damage dealt, damage reduction effects and absorbs can prevent the healing, the “non-lifetap” portion of the healing is subject to healing debuffs. This build used to be incredibly powerful, especially in small-man content providing large, fast heals to your allies while also functioning as an extra DPS in the group who happens to be incredibly tanky. The caveat is that you have to play in melee and therefore are at a much higher risk of dying or requiring support from your Tanks. After the recent rework, the healing output of this build is countered far too easily. You can heal for 3000 or for 0. As a result of this, I cannot recommend playing Shield Warrior Priest at the moment outside of PvE.
Builds
40/70 Full Build

I wouldn’t recommend playing this build until you have at least decent gear, so you’ll probably be 60 or 70 by that time. The build can’t really run Divine Fury or Fanaticism anymore as the -healing effects now also affect half of your healing as Shield. This is weird and kind of hard to understand, but it is what it is. I don’t find Benediction very valuable as you do nothing else to scale Willpower-based Healing. Combined with BoG/UiP and Exalted Defenses, you can see a healthy Group Heal or Divine Mend. This is counterintuitive to the fact that Benediction is a Melee Skill and when you are trying to cast, it’s probably because you aren’t in melee range.
Tactics

Divine Fury can be used to boost the damage of the build and therefore the lifetap healing, but the “base” healing of your lifetap skills will be significantly reduced, resulting in less healing overall. As a counterpoint to this, the “lifetap” portion of your heals are unaffected by heal debuffs so if you maximize your damage and use Divine Fury, you can build to work around heal debuffs. Your healing will still be countered by damage reduction, avoidance, absorbs, etc; I doubt that this would be good enough to justify taking a healer spot in a group.

Always Use. Notably, this works counterintuitively to a build using Divine Fury and/or Fanaticism except for the Divine Assault part.

Only use it if you are also using Divine Fury.

While negative healing effects now also work against your base healing, positive healing effects now do bolster them; that makes United in Prayer further a staple if you don’t have a Rune Priest.

The same applies to Exalted Defenses. This is fantastic for Shield Warrior Priest as will likely be blocking and parrying rather frequently. I would recommend that one always uses this.

Shield of Faith gives a flat 5% block, which is great; the ranged avoidance can be useful too. Consider this a flex pick.
Last slot is flexible. Use Divine Justice, Leading the Prayer, or whatever as needed. If you are going to be taking sustained damage or playing this build in large-scale content, you could consider using Leading the Prayer.
With the change to Internal Cooldown on proc damage to .25 seconds, Divine Justice shines more than ever and is the default I would recommend for the highest chance at success in most situations. This also reflects on Leading the Prayer as it can generate 2 to 4 times as much healing on yourself as it did before.
Gear
Buy the relevant War Crest sets while you level, they are quite cheap.
Braggart > Challenger > Duelist > Mercenary
Your general stat priority is enough Defense to be comfortable (Wounds, Anticrit, Block>Parry) > Melee Crit > Strength. “%Reduced chance to be Parried” is useful too where available because if your attacks are blocked or parried, they heal for less. Enough Defense to be comfortable is esoteric, so I’ll say that being able to survive a melee train turning on you, or a ranged assist squad, or 4 Witch Elves opening from Stealth is far more valuable than doing 5% more healing. A dead Healer cannot heal and your group will suffer for it. A lot of Warrior Priests will invest heavily into Armour or Wounds, but this build mainly uses Strength or Wounds Talismans.
At 40, PvE gear will likely be your introduction to this build.
4pc Sentinel (Shoulders, Helm, Gloves, Ring) and 4 Bloodlord (Chest, belt, boots, backpiece) is a lot of stats with double Wounds bonus to get the build started.
6pc Bloodlord & 2pc Sentinel(Shoulders/Gloves/Boots + Ring, the rest Bloodlord) is a far more offensive option, which in turn will heal more, but you’ll be squishy.
My BiS recommendation is 3pc Off-set Sovereign (Back, Chest, Gloves), 3pc Warlord (Helm, Shoulders, Ring), 3pc Victorious (Belt, Boots, Ring). This setup offers a huge amount of stats with 3 Strength, 2 Wounds and a Weapon Skill set bonus and every individual piece of gear has very strong substats.
OR
4 pc Sov (Helm, Shoulders, Chest, Ring) 4pc Victorious (Cloak, Gloves, Boots, Ring) 2pc Vale-Walker (Belt, Ring) This set grants an incredible amount of defense, mostly through reduced armor pen and reduced chance to be crit along with a healthy amount of Wounds. Only 1 ring slot is open so take your pick. You can also flex it to run Sov Cloak for the 5pc or the 2pc LotD set (Cloak and Ring) if you don’t value the Victorious 4pc proc. The proc is quite strong, but less strong than it was before the Initiative rework. Pair this with a couple of Armour Talismans and a Reduced Armour Penetration Sentinel Soul and and you will be quite hard to drop from physical damage.
OR
5Sov/4Vic. 5 Sovereign offers the extra Block Chance while the 4 piece Victorious grants a huge amount of Initiative and will have a very high uptime. Initiative is such a strong stat now it can drastically increase your survivability.
OR
5Sov/3Vic/2Vale-walker for peak armor and block, but without the OP Ini buff from Vic.
Weapons
While leveling, use the Titan’s prefix One–Handed Hammers and Shieldbearer’s Prefix Shields.
BiS:

Preferred over Fortress Weapon because it gives 3 AP/Second.

Upgraded from RR45 Sentry’s Shield. Choose this if you want to maximize anticrit.
OR

Upgraded from RR45 Shieldbearer’s Shield. Choose this if you want to maximize Block, Parry, Armour.
OR

Influence choice from Bastion Stairs. Choose this if you want to maximize both damage and Block. NOTE: While this does give you the extra 5% additive damage, it will reduce both your Armour and Toughness by 10% and is not recommended in competitive situations. You can only have 1 Bloodlord effect on your character so there is no point to wearing 2 Bloodlord Weapons.
OR

This shield has the powerful Clarity proc that helps you sustain AP and is much needed for the build at times.
Talismans
Most people who run this build just run full Strength Talismans as the build really struggles to get a high amount of the stat, but I really recommend running between 850 and 1050 Wounds for this build, so some Talismans can help push you there. Armour Talismans can go a long way with this build as well, so using some is a fine choice.
I personally run a lot of Armor on SDoK & SWP. To give a complicated explanation: As a Shield Healer, you still serve as the role of a healer in a group. Therefore, if the enemies decide to attack and CC you, you are only being healed by one other person, whereas a Tank or DPS is most of the time going to be healed by both. This creates a unique disadvantage for the build so making yourself extra hard to kill is very advisable.
For your Sentinel Talisman, use

Or

Or

Or

Depending on what fits the situation best.
Jewelry
Starting at 40, use Gunbad avoidance Jewelry mixed with a level 38 renown vendor ring.


Transition into Genesis as soon as possible


Then add on another Genesis Fragment, for either Block or Parry, or just keep your Gunbad Ruby.
BiS: You have 2 rings locked in, Victorious

And Warlord

So your last 2 rings your options are
- Keep your Genesis Remnant and Fragment for the high Strength
- Get an Annulus

And a Gunbad ring

For the stats and strikethrough
OR

For the defense. This option is expensive but powerful.
Renown Points
Opportunist 3: 9% Melee Crit, 30 points
Futile Strikes 3: 15% anticrit, 30 points
Defender 4: 10% Block, 20 points
OR
Opportunist 4: 14% Melee Crit, 45 points
Futile Strikes 3: 15% anticrit, 30 points
Spend the rest on Defender, Parry and Wounds
OR
FS4 with O3, spend rest on Defender, Parry and Wounds.
Gameplay
The Shield Warrior Priest is a Healer, thus uses the same priority system of Triage and Fill, but combines some of the mechanics of Tanks and Melee DPS such as hitting enemies while swapping between allied targets, movement and positioning. Reliant on both AP and Righteous Fury with no passive regen, we prefer some AP on gear. I’m going to review some key abilities before we move on because it’s important to understand how these abilities work.
Important Abilities

This ability is the new “main” healing ability of Shield Warrior Priest. It costs a whopping 80 Righteous Fury, so you can at max chain 3 back-to-back and it heals your groupmates for a very significant amount.

This ability damages your target, then heals your groupmates within 100 feet for a flat amount +75% of the damage dealt. Because of this base heal, this ability always heals for a fair amount, even if you don’t do a lot of damage with it, so long as you aren’t also fighting against a Heal Debuff. Using it will build 30 Righteous Fury and costs 30AP. Strength and Damage bonus have pretty ridiculous scaling with this ability as it scales both the Damage and the flat heal value.

This ability now heals a Single Target and follows the same rules of the new lifetap healing system. It generates 40 Righteous Fury and costs 30AP.

This ability also has a very low base tooltip value but deals Spiritual damage and heals your Defensive Target for a whopping 350% of the damage dealt. This ability is channeled and hits 4 times in total, you can swap your Defensive Target during the channel to change who is healed. It Costs 75 Righteous Fury in total so try to keep your pool high. Abilities with a low base tooltip but have normal stat scaling (which is often the case for single target melee abilities) generally benefit very heavily from Strength as Strength adds flat damage so it’s multiplying the damage of a low tooltip ability much more than it does for a high tooltip one. This is one of the major reasons why we want to stack so much Strength in this build.

This ability heals an ally every time they are hit for 10 seconds and spends 10 Righteous Fury when it occurs. It is incredibly effective against a blob of melee hitting a target but will very quickly delete your RF fuel tank, so spam generators while this is active.

This ability is your Root Break as a Shield Warrior Priest. It costs 45 Righteous Fury and has a 40s cooldown.
Skill Rotation / Priority
Your General Priority is
- Activate your Prayer. All 3 Prayers are useful, depending on the situation.
- Cast your Wounds buff if you have it in your Mastery before combat and refresh as needed.
Your Triage Priority is
- Use Sigmar’s Will to do a significant amount of group healing. Be very mindful of your Righteous Fury while you do this.
- Use Sigmar’s Shield if your ally is receiving a lot of direct hits, such as from a clump of melee opponents.
- Use Divine Assault to heal an ally taking significant damage.
- Use Sigmar’s Radiance to heal your entire group and generate Righteous Fury.
- Use Divine Strike to heal a Single Target and generate Righteous Fury.
- Use HoTs and/or Casted Heals as an absolute last measure, such as if you cannot melee but need to heal.
Your Righteous Fury Generation Priority is:
- Use Smite if it will hit 3+ Targets
- Use Sigmar’s Radiance if multiple people need healing.
- Use Divine Strike if you can afford to heal only 1 person at a time.
- Use Supplication if you cannot melee
Your Fill Priority is:
- Use Absence of Faith to apply a Heal Debuff to your target.
- Use Sigmar’s Vision to buff your Block and Parry, or an ally’s Parry.
- Use Castigation to debuff your target’s Initiative if needed
- Use Weight of Guilt to slow your enemy if needed
- Use Sigmar’s Fist to buff your Strength if you do not have a Strength buff


Morales
- Divine Favor or Divine Aegis
An instant, large heal that is not affected by any heal debuffs.
Makes your Ally incredibly tanky for 15 seconds.
- All 3 are useful in different situations
This is your staple as a Warrior Priest in most RvR content. You typically position near a clump of enemies and this heals more per enemy hit. It is most commonly used to instantly counter an enemy’s morale/damage drop and instantly top your group off.
One of the best morales in the game. It provides Immunity to most forms of CC for 10 seconds and also reduces cast times by 50%. Unfortunately, the latter benefit isn’t very useful for a Shield Warrior Priest as you are not casting, but the CC Immunity is always useful.
Everytime your allies hit an enemy in melee, they gain 50 action points. This is the most commonly used morale in PvE as it allows your allies to spam endlessly for 10 seconds and still end up with a full AP bar.
- Both are useful.
A 4500 Melee Shield for the entire party. The implications are pretty obvious, providing a strong counter to melee enemies.
A 6 second AoE stagger can be incredibly useful if you manage to disable an entire clump of Healers or enemy Casters. It’s also a 1200 damage AoE Morale so it can be used as part of your warband’s damage drop.
- Divine Amazement is basically half of a M2 Rampaging Siphon but every second for 4 seconds, so 4 Siphons, once per second.This is good but it may end up being a bit weak realistically: Siphon is typically hitting 4 people, healing for 2400 on the group. In the same situation, this would heal the group for 1200 a total of 4 times in 4 seconds, which may end up being a little slow to keep people alive.

Melee Warrior Priest
The Melee Warrior Priest uses a Two-Handed Hammer and they function as a DPS that has some healing it can offer to the group as well. Currently, the Melee Warrior Priest is incredibly strong, probably too strong, with access to most of the powerful debuffs that groups want to kill single targets, incredibly high damage, and incredibly strong group utility and healing. They are viable as AoE DPS, with extremely high potential, but need time to ramp to that potential.
Builds
40/40 Full Build:

This is all the build needs, extras with renown are just nice perks. The Wrath tree is one of the best trees for a DPS I have ever seen.
40/70 Full Build:

You might as well take Divine Impact, there’s a chance you’ll use it sometimes, then just 2 more dump points in Grace for higher tooltips on some important abilities like Divine Assault.
Tactics

25% additive damage at the cost of 20% healing output, staple tactic for most DPS healers.

This tactic deals an obscene amount of damage-over-time and is also one of the primary scaling methods for your hardest hitting burst skill.

10% Critical Hit Chance and 10% Parry at the cost of 20% healing output. An easy tradeoff.

A strong option damage option, it amps up your entire group’s direct damage significantly.

Removes the cooldown from Smite and limits how much Righteous Fury it can generate while also reducing its range by 10 feet. It also adds a nice AP cost reduction of 10 to the skill.

Whenever you use Bludgeon, your standard Single Target filler skill, you gain a buff which grants you 15% Armor Penetration for 15 seconds.

Vastly increases the damage of both Auto-attacks and Bludgeon.

Increases Initiative and Weapon Skill by 80, rarely worth using.
Loadouts
Single Target
Divine Fury
Guilty Soul
Fanaticism
Flex
For the flex slot, Beacon of Courage and Divine Justice provide the most damage towards Single Target burst. Blessing of Sigmar could be used for bigger Hammer hits, but it will not outperform the first 2 listed. United in Prayer could be used for group utility if needed and Empowered Smite could also be used to allow more AoE spam, thus setting up more Guilty Soul stacks on multiple targets which you can then quickly Single Target with Hammers.
AoE
Divine Fury
Guilty Soul
Fanaticism
Empowered Smite
There’s not much flexibility in this loadout so just take these 4.
Gear
Buy the relevant War Crest sets while you level, they are quite cheap.
Braggart > Challenger > Duelist > Mercenary
Your general stat priority Melee Crit > Strength. Melee DPS generally invest very heavily into offense, but a certain amount of Defense is required, depending on content, and the amount invested varies but it’s always the same high-value stats: Wounds, Anticrit and Parry or some Dodge/Disrupt depending on the situation. As a DPS, your group is usually working very hard to keep you alive but there is such a thing as too squishy.
At 40, PvE gear will likely be your introduction to this build.
The best combination to get started in my opinion is 6 Bloodlord & 2 Sentinel (Ring and Gloves). It offers a lot of stats and a bit of crit.
BiS: There are 2 options I would recommend for BiS, with a little bit of variation.
- 3 Off–Sovereign (Helm, Gloves and Cloak), 3 Warlord (Shoulder, Chest, Ring), 3 Victorious (Belt, Boots, Ring). This setup has an exuberant amount of stats, letting you achieve very high Strength, Armor Penetration and Wounds, with every piece having a very strong sub-stat such as Crit, Armor Penetration or Melee Power.
- 6 Victorious (Don’t use 2 of the following: Chest, Helm, Gloves, Back or Shoulders depending on which substats you want from your other 3 pieces)/3 Off-Sov or 3 Warlord. This Setup nets you extra crit and the 4% additive damage bonus from Victorious and lets you get 2 stat bonuses from the 3pc set: Strength & Weapon Skill or Strength & Wounds.
Weapons
While leveling, use the Titan’s prefix Two-Handed Hammers.
BiS:

The Bloodlord Weapon, while not the highest DPS weapon in the game, offers a unique bonus that gives you 5% additive damage with the drawback of -10% Armor and Toughness. This trade is certainly worth it for DPS roles. They also (usually) offer one of the slowest attack speeds in the game which results in very high auto-attacks for peak burst. The Warrior Priest weapon at 4.2 is no exception. This weapon is acquired from Bastion Stair Influence.

The Creeping Proc is one of the most powerful procs in the game, especially for classes like DPS Warrior Priest who don’t have a natural gap closer. If you play Solo, this should almost always be your weapon of choice.
“Don’t let them know about Sledge.” - Connerson (sic)

This is the highest Critical Strike chance weapon in the game for Warrior Priests, so it’s a natural consideration if you want to more consistently generate Guilty Souls or if a 25% heal debuff proc is needed, or if the Armour/Toughness loss from Bloodlord is too high a burden in the situation. However, Bloodlord will deal more damage in almost every case.
Talismans
Use Strength Talismans and optionally some Wounds or Weapon Skill as you see fit. I would really recommend testing your damage on the Training Construct with Weapon Skill vs Strength and see which is more valuable to you, especially if you aren’t hitting targets who are consistently armor debuffed. If you parse your Damage, Damage Bonus (Strength) should almost always win due to the fact that Guilty Soul and Soulfire deal Spiritual Damage for AoE; in terms of Single Target, it’s the same but you also now have access to the largest Armour Debuff in the game. As a result of this, Strength is almost always going to be optimal for a DPS Warrior Priest’s damage output.
For your Sentinel Soul, use

Jewelry
Starting at 40, use a mix of the 38 and 33 renown rings
And a Gunbad Ruby
Transition into 3pc Genesis ASAP
Keep your Gunbad Ruby for your 4th item for now
Transition into your soul ring, your first will be Sentinel, 2pc Genesis (Remnant and Aspect) and a Ruby or Onyx Annuli or just keep your Gunbad Ruby or Genesis Fragment if on a budget.
BiS: With both BiS Setups, you will have 2 rings locked in, your Victorious ring and your Royal-set ring (Warlord or Sovereign) so the last 2 slots will go to either 2pc Genesis (Remnant and Aspect) for the big Strength and Melee Power, Exquisite Gunbad Amber for the big stats and Parry Strikethrough + an Annulus, probably Ruby for Crit but Onyx for Armor Penetration is an option; or 2 Annuli.
Renown Points
Opportunist 3: 9% Melee Crit, 30 points
Futile Strikes 3: 15% anticrit, 30 points
Reflexes 4: 18% Parry, 20 points
OR
Opportunist 4: 14% Melee Crit, 45 points
Futile Strikes 3: 15% anticrit, 30 points
Spend the rest on Reflexes, Deft Defender and Wounds as you see fit.
OR
FS4 with O3, spend rest on Reflexes, Deft Defender and Wounds as you see fit.
OR
FS4 with O2, 20 points for full Reflexes, 3 with Quick Escape, DD instead, WS or Str, etc.
Gameplay
The Melee Warrior Priest has a very simple playstyle and is highly, highly reliant on Crit Chance for its damage, due to the extreme power of Guilty Soul for both AoE and Single Target damage.
Important Abilities

This is your highest damage ability but costs a LOT of Righteous Fury. The damage also scales with Guilty Soul stacks, up to a whopping 30% increased damage at 3 stacks.

A high damage PBAoE DoT that deals Spiritual Damage and also grants your Smite 10% increased Critical Strike chance. This is great as it allows you to more easily stack Guilty Souls. This ability can seem awkward to use with a 1s cast, but simply use it while walking towards your enemies, so the cast finishes as you get in range.

A medium damage ability that is also the highest armor debuff in the game, critical for maximizing Physical Damage.

A medium damage ability that also reduces healing effectiveness by 50% for 10 seconds, a standard Heal Debuff attack.

This ability does roughly the same damage as a 3 stack Hammer of Sigmar. However, is it a melee ability with a 2 second cast. It does have setback immunity but this ability can be awkward to use compared to Hammer. However, it has half of the Righteous Fury cost, it deals Spirit Damage, and provides a fairly powerful debuff. The cast time can actually be a good thing, as it will delay your auto attack for peak burst if timed correctly.

A low damage DoT that carries a very powerful debuff, -120 Initiative at 15 points. 20 Initiative provides 1% anticrit so this will provide 6% Critical Chance against the target.

Your slow; notably the duration goes up to 9 seconds against Cursed targets. With some practice, this will almost always be the case, making this one of the best MDPS slows in the game.

A frontal cone cleave that deals fairly low damage. However, it can crit, therefore it can apply Guilty Souls, which is one of the most important things to do as a DPS Warrior Priest and this one of the best ways to do it. It also generates 15 Righteous Fury per target hit, so 3+ targets makes this the most optimal way to build your resource back.

65 foot ranged spammable that deals Spirit Damage, so it can hit quite hard. It can also crit and therefore apply Guilty Souls.

Not only does this hit about as hard as your Bludgeon, your standard DPS filler, it heals your defensive target for a large amount and is the best way to build back your resource behind 3+ target Smite.

Your spammable fill, this has a reasonable AP cost at 30 and it will ignore a fairly substantial amount of Armor.
Skill Rotation / Priority
General Priority:
- Activate your Prayer. All 3 Prayers are useful, depending on the situation.
- Cast your Wounds buff if you have it in your Mastery before combat and refresh as needed.
- Maintain your stacks of Guilty Soul. This occurs passively as you hit things, but throwing a Smite right away to start stacking the buff is probably a good idea.
AoE Priority:
- Apply and maintain Soulfire on nearby enemies.
- Use Smite.
- Fill with Single Target Priority
Single Target Priority:
- Prevent important Ally deaths with Sigmar’s Shield, Divine Assault or Divine Strike if they would otherwise die.
- Use Hammer of Sigmar to burst a target who is debuffed correctly and if your Righteous Fury is high enough.
- Use Divine Impact if you are very likely to get the cast off on a Spirit Resistance debuffed target to set up a large burst with a delayed Auto Attack if your Righteous Fury is high enough.
- Use Smite to generate Righteous Fury and build Guilty Souls.
- Apply and maintain Soulfire.
- Apply relevant debuffs to your target such as Vanquish, Weight of Guilt, Absence of Faith or Castigation.
- Use Bludgeon or fill with Triage/Buff Priority.
- Use Judgment if you cannot hit your target in melee.
Triage/Buff Priority:
- Use Sigmar’s Shield on yourself or an Ally who is receiving large amounts of direct hits.
- Use Divine Assault to heal yourself or an ally for a large amount.
- Use Divine Strike to heal yourself or an Ally
- Use Sigmar’s Vision to buff the Parry of yourself or an Ally.
- Use Sigmar’s Fist to buff yourself if you need the Strength and do not already have a Strength buff.
This build can also use Divine Strike for some healing, it heals for an impressive amount, deals fairly good damage and generates a lot of Righteous Fury.
Finally, make sure that you always have an enemy target and your auto-attack is hitting every time your Swing Timer expires, even while spamming AoE. It is free damage.
Morales
- Divine Favor or Divine Aegis
An instant, large heal that is not affected by any heal debuffs.
Makes your Ally incredibly tanky for 15 seconds.
- All 3 are useful in different situations
This is your staple as a Warrior Priest in most RvR content. You typically position near a clump of enemies and this heals more per enemy hit. It is most commonly used to instantly counter an enemy’s morale/damage drop and instantly top your group off.
One of the best morales in the game. It provides Immunity to most forms of CC for 10 seconds and also reduces cast times by 50%. Unfortunately, the latter benefit isn’t very useful for a Melee Warrior Priest as you aren’t casting anything but the CC Immunity is always useful.
Everytime your allies hit an enemy in melee, they gain 50 action points. This is the most commonly used morale in PvE as it allows your allies to spam endlessly for 10 seconds and still end up with a full AP bar.
- Both are useful.
A 4500 Melee Shield for the entire party. The implications are pretty obvious, providing a strong counter to melee enemies.
A 6 second AoE stagger can be incredibly useful if you manage to disable an entire clump of Healers or enemy Casters. It’s also a 1200 damage AoE Morale so it can be used as part of your group’s damage drop.
- You can slot Alter Fate but it’s almost never used.

Bright Wizard

The Bright Wizard is the Empire Ranged DPS, a magical-based Caster class utilizing Light Armour and a Two-handed Staff. It is one of the most popular classes by far, alongside the Dark Elf Sorcerer, due to obscene damage output (thanks to what is probably the most powerful Class Mechanic in the game), extremely high crit rate, mobile playstyle and fairly diverse amount of utility in the kit. There are 2 major roles for the Bright Wizard: AoE Bomb/Nuker and Single Target Burst, with some variation in builds for each role.
Combustion
The Class Mechanic for Bright Wizards is called Combustion, which is represented by a little Skull on your UI.

When it’s maxed at 100, the eyes light up. Cool, huh?

Combustion grants bonus Critical Chance (applies to all forms of crit, you will auto attack crit pretty frequently as a Bright Wizard) and a huge amount of Critical Damage. Based on your level of Combustion, your character has a chance to damage itself with an Explosion every time you use an ability that builds Combustion. This damage is nearly negligible, even if you have bad luck and it procs constantly so long as you have a Healer keeping an eye on you. The amount of damage it deals is based on your level, dealing 750 damage to you at level 40. Between these Critical stats and the fact that you deal magical damage, the hardest type to mitigate, your threat to kill any type of enemy, including Tanks, is quite high.
It is recommended to get to maximum Combustion as soon as possible and stay there, simply ignoring the Explosion effects. Different abilities generate different amounts of Combustion. Flame Breath

and Rain of Fire

are Core Abilities that do not require a Target, can be used while moving (Rain of Fire will deal 1 tick of damage if it hits something then will be interrupted if used while moving) and do not require a target, so can be used to build Combustion before a fight.
Sear is a fast casting core ability that builds 25 Combustion.

Nova is a Mastery Ability used in almost every build that deals a large amount of damage to a Target instantly and builds the most Combustion of any ability at 40.

Some combination of these skills is typically used by Bright Wizards to get to 100 Combustion quickly, or at least close to 100. If you use Flee, you will lose all of your Combustion so a combo of AP pot, Sear, Nova will get you back to 65 very quickly.
Beyond this, the other major effect that every Bright Wizard shares is their 2
Group Buffs

This ability gives a chance for anyone in the group to deal a fair amount of extra damage each they damage an enemy directly, and can be augmented through Tactics.

This Ability gives a chance for anyone in the group to deal damage back to any target who directly hits them, and can be augmented through Tactics.
Maintaining both of these buffs on your Group is a very high priority for a Bright Wizard.
Important Core Abilities

Restores a large amount of AP at the cost of 40 Combustion. It’s not on the global cooldown so you can use this then Nova to get your Combustion back.

Fondly mispronounced as “Shield of a Squishy”, this ability grants a very large amount of Armour, more than pots and most buffs give, so it is worth using as a minor defensive cooldown. The set back reduction can be useful at times as well.

Yes, Bright Wizards have a self-cleanse that can remove any cleansable debuff. Very powerful use of a global, depending on what you cleanse.

Your Detaunt, don’t hesitate to use it.

PBAoE Root that often breaks right after you use it. Be very cautious how you use it as you are handing out 30s immunities.
Rain of Fire Bright Wizard
The Rain of Fire Bright Wizard focuses on sustained damage from a safe distance by channeling Rain of Fire on a clump of enemies trying to hold a position or push through a funnel.
ROF Build:

The RoF build is designed for putting constant damage on a funnel location but it is versatile and useful in almost all situations. It does not do as much damage as the Bomb Bright Wizard but it’s very safe. You can start this build as early as 40/x. Put the extra points into whatever you like, picking up extra abilities. The Conflagration Morale 4 is okay sustained damage, but not great, take it if you like.
Only 1 Rain of Fire can affect a target at one time, so if there are multiple Bright Wizards trying to RoF on a clump, we want to ensure that ours hits them. The highest level skill is always given priority, which is why we have 15 points into Conflagration, followed by which Bright Wizard cast first. You want to simply cast RoF until you start seeing damage numbers then as long as you are refreshing on cooldown, you should be able to keep the spot. Because of this, the build ONLY wants to use Rain of Fire so we choose our tactics to maximize this.
Tactics

Optional

Always Use

Optional

Always Use

Always Use

Optional
With the Internal Cooldown of procs changed to .25 seconds, maximizing proc damage for both your personal and group damage is the way to go at almost all times. Flashfire ICD seems to be lower as well so it goes from being a very strong pick to nearly a staple in every build.
Gear
Use the relevant War Crest sets while leveling, they are quite cheap.
Decimator > Obliterator > Devastator > Annihilator.
You can choose to buy Conqueror at this point or start saving crests right away. Both the Sentinel and Bloodlord sets are quite good and a combination can be used until you start getting your BiS pieces.
I won’t list a stat priority here but some stats to try get on your gear:
“%Reduced chance to be Disrupted” I call this strikethrough and it’s very powerful. With the amount of Hold the Line and Disrupt stacking in RvR, you need to be able to hit to deal damage.
“Magic Crit Chance” You want a lot of crit as a Bright Wizard. You get a lot for free, but you want more because your critical damage is so high that if you don’t crit, you aren’t doing very much damage.
BiS: I recommend 5 Main Sovereign and 4 Triumphant (Belt, Boots, Gloves, Ring). This combination nets a ton of powerful set bonuses and double Wounds bonuses.
OR
4 Onslaught (Everything but Shoulders) and 4 Main Sovereign

Onslaught has the rare and powerful Boost proc that gives you both critical chance and critical damage. The 4/4 setup is a little bit lower on critical chance but has huge amounts of critical damage for peak output and because you are hitting so many targets so frequently, the boost proc is up most of the time.
Weapons
While leveling, use the Nihilist’s prefix two-handed staves from the War Crest Merchants.
BiS: Bloodlord

Great stats, 5% damage.
Talismans
Use a combination of Intelligence and Wounds Talismans to fit your preference. You don’t use your Intelligence tactic so you will need a lot of help from gear to hit the softcap of 1050, however, BW does need a fair amount of Wounds to survive, especially with the fact that they damage themselves frequently.
For your Sentinel Soul, use either

Or

Jewelry
Starting at 40, use a mix of the 38 and 33 renown rings, cloak, and belt.


Transition into 2 or 3pc Genesis as soon as possible.


I would recommend not skipping Beastlord as a Bright Wizard because it offers a great Back and Jewelry for early gearing, and you do not have a lot of other good options.


The set also has a Pocket Item so you can get the 3pc bonus with just these 2 pieces and the Pocket.
The Land of the Dead 2pc set is also an option before BiS:


Great stats with a ton of bonus damage.
BiS: 2 rings locked in, Sovereign and Triumphant. You can keep 2pc Genesis for the last 2, or go for an Annulus (or even 2).

Your Gunbad Ring is good but the Initiative stat probably ends up being wasted.

Renown Points
Opportunist 3: 9% Magic Crit, 30 points
Futile Strikes 3: 15% anticrit, 30 points
Reflexes 4: 18% Parry or Deft Defender 4: 18% Dodge & Disrupt, 20 points
OR
Opportunist 4: 14% Magic Crit, 45 points
Futile Strikes 3: 15% anticrit, 30 points
Spend the rest on Reflexes, Deft Defender and Wounds as you see fit.
OR
FS4 with Opportunist 3, spend rest on Reflexes, Deft Defender and Wounds as you see fit.
The RoF BW stays at a very safe range so the FP4/FS3/x build is what I would recommend, just don’t let anyone hit you.
Gameplay
As detailed above, we want to fish to get Rain of Fire on a spot and keep it; that’s all we want to do besides hiding somewhere safely.
General Priority:
- Maintain both buffs, Flames of Rhuin and Flame Shield
- Toggle on Funnel Power
Cast Rain of Fire on cooldown.
Morale
- Mage Bolt or Misdirection

Deals a small amount of damage and is an undefendable, medium-distance knockback.

Strong safety morale against enemy casters.
- Focused Mind or Ruin and Destruction

10 seconds of Immunity from most forms of CC and reduces cast times by half, effectively doubling the damage output of your casted spells, but still limited by the 1.5 second Global Cooldown.

1200 damage PBAoE Morale, great for some instant burst damage on a clump of enemies.
- Scintillating Energy

1200 damage instant morale that Staggers a target for 9 seconds, useful in many situations.
- Unleash the Winds

1800 PBAoE Morale. Does great damage but the knockback is almost always bad, try to use it on enemies who are already immune.
Bomb Bright Wizard
The Bomb Bright Wizard focuses on dealing heavy PBAoE damage from close range while being supported by their Group.
40/70 Build:

At 40/40 just drop Spreading Flames and the points leading to it.
40/70 Burning Head Variant:

I personally like this build a lot more than the first because I think Spreading Flames is a very weak ability, so you can drop it in exchange for a powerful M4.
Tactics

Optional
This build uses Flame Breath as a filler so we need to reduce its cooldown.

Optional
Your self-explosions deal Morale damage to yourself, so this tactic causes you to deal Morale damage to nearby enemies whenever you proc this effect, which means it cannot be defended against and cannot be mitigated.

Always Use
Flashfire is incredibly powerful. When you are AoEing clumps of enemies, you are going to see at least 1 Disrupt very frequently. You can spend this for an instant cast Fiery Blast for more AoE, an instant cast Fireball for some surprise single target burst.

Always Use

Always Use
With the Internal Cooldown of procs changed to .25 seconds, maximizing proc damage for both your personal and group damage is the way to go at almost all times.
Flexible Picks:

Primary stat increase. Passive Damage boost.

Drastically speeds up your Morale Gain, typically used to get to M2 as fast as possible for a quick Morale Drop. Always use this Tactic with the Burning Head Variant listed above.

Solves any AP issues you might have nearly by itself. With a proper group composition pumping AP, this shouldn’t be needed.
Gear
Use the relevant War Crest sets while leveling, they are quite cheap.
Decimator > Obliterator > Devastator > Annihilator.
You can choose to buy Conqueror at this point or start saving crests right away. Both the Sentinel and Bloodlord sets are quite good and a combination can be used until you start getting your BiS pieces.
BiS: I recommend 5 Main Sovereign and 4 Triumphant (Belt, Boots, Gloves, Ring). This combination nets a ton of powerful set bonuses and double Wounds bonuses.
OR
4 Onslaught (Everything but Shoulders) and 4 Main Sovereign
Onslaught has the rare and powerful Boost proc that gives you both critical chance and critical damage. The 4/4 setup is a little bit lower on critical chance compared to 5/4 but has huge amounts of critical damage for peak output and because you are hitting so many targets so frequently, the boost proc is up most of the time.
Weapons
While leveling, use the Nihilist’s prefix two-handed staves from the War Crest Merchants.
BiS: Bloodlord
Great stats, 5% damage.
Talismans
Use a combination of Intelligence and Wounds Talismans to fit your preference. If you don’t use your Intelligence tactic then you will need a lot of help from gear to hit the softcap of 1050, however, BW does need a fair amount of Wounds to survive, especially with the fact that they damage themselves frequently. Armour Talismans are also an option, but an expensive one, and won’t be substantially powerful unless you stack almost all your Talisman slots with Armour.
For your Sentinel Soul, use either
Or
Jewelry
Starting at 40, use a mix of the 38 and 33 renown rings, cloak, and belt.
Transition into 2 or 3pc Genesis as soon as possible.
I would recommend not skipping Beastlord as a Bright Wizard because it offers a great Back and Jewelry for early gearing, and you do not have a lot of other good options.
The set also has a Pocket Item so you can get the 3pc bonus with just these 2 pieces and the Pocket.
The Land of the Dead 2pc set is also an option before BiS:
Great stats with a ton of bonus damage.
BiS: 2 rings locked in, Sovereign and Triumphant. You can keep 2pc Genesis for the last 2, or go for an Annulus (or even 2).
Your Gunbad Ring is good but the Initiative stat probably ends up being wasted.
Renown Points
Opportunist 3: 9% Magic Crit, 30 points
Futile Strikes 3: 15% anticrit, 30 points
Reflexes 4: 18% Parry or Deft Defender 4: 18% Dodge & Disrupt, 20 points
OR
Opportunist 4: 14% Magic Crit, 45 points
Futile Strikes 3: 15% anticrit, 30 points
Spend the rest on Reflexes, Deft Defender and Wounds as you see fit.
OR
FS4 with Opportunist 3, spend rest on Reflexes, Deft Defender and Wounds as you see fit.
The Bomb Bright Wizard plays in melee range quite often, so you can get value from Parry, especially if you get a Parry buff from an ally which will stack with your renown.
Gameplay
As mentioned previously, you are generally playing in Close Range with a Tank guarding you, dealing grave amounts of magical damage very quickly. The odd thing about Order is that no debuff for Elemental Resistance currently exists on the Blue Faction and a lot of your damage just happens to be Elemental. Fear not, as this hardly slows you down.
Important Abilities

This is one of your 2 bread and butter fillers. It places a large damage DoT on all targets in a 40’ cone in front of you. It does deal damage instantly, but is not considered a Direct Hit, therefore it will not proc any of your on-hit effects such as your buffs or Funnel Power. The debuff type is also “damaging” meaning that it can not be cleansed.

Scorched Earth does a large amount of Corporeal damage in a 30’ radius around you. That’s great because Engineers can debuff Corporeal Resistance for us. It is also a direct hit and will proc all of your buffs and on-hit effects. It spends 20 Combustion so rotating between this and Flame Breath as a filler will keep you at maximum Combustion.

Annihilate is your big burst channel, dealing a lot of damage very quickly. You can also interrupt the channel with another skill, such as a Scorched Earth to deal both sets of damage at the same time for burst.

A 3 second cast nuke that deals very high damage to your target and enemies with 20 feet of them. Normally used with Flashfire procs.

This ability places a low damage DoT on your Target. Everytime it ticks, it will apply a separate 3 second dot on enemies within 20 feet. Both effects deal low damage and I am not a fan of this ability, but it’s still a free DoT and can be used to stack burst within a timestamp.

Similar to above, you place a DoT on your target and enemies within 20 feet of them that deals low damage.

This is a channeled ability that deals high single target and fair AoE damage in a small (10’) radius around a target up to 80 feet away. You can use it as an instant nuke as well, it will just interrupt itself and only tick once.

One of the most powerful utilities of the Bomb Bright Wizard, this damages your target then silences the person and all enemies within 20 feet of them from up to 80 feet away. This is typically used to silence a clump of healers right before your warband does a damage drop on a clump of tanks and dps. Be very careful how you use this as you are handing out 30s of complete immunity to a lot of people.
Skill Rotation / Priority
General Priority:
- Maintain both buffs, Flames of Rhuin and Flame Shield
- Toggle on Funnel Power
Bomb Priority:
- Apply Spreading Flames and/or Detonate as you close distance.
- Use Flashfire procs on Fiery Blast for Aoe, or Fireball for Single Target.
- Use Annihilate to damage nearby enemies
- Rotate between Flame Breath and Scorched Earth to damage nearby enemies
- Use Fireball Barrage to damage tightly-packed, distant enemies.
- Use Sear and Nova to deal high single target damage to finish people as needed.
- Use Rain of Fire if you must be at a distance and no one else is using it.
Morale
- Mage Bolt or Misdirection
Deals a small amount of damage and is an undefendable, medium-distance knockback.
Strong safety morale against enemy casters.
- Focused Mind or Ruin and Destruction
10 seconds of Immunity from most forms of CC and reduces cast times by half, effectively doubling the damage output of your casted spells, but still limited by the 1.5 second Global Cooldown.
1200 damage PBAoE Morale, great for some instant burst damage on a clump of enemies. This ability is far more useful for the Bomb Wizard because you are often in a good position to use it.
- Scintillating Energy
1200 damage instant morale that Staggers a target for 9 seconds, useful in many situations.
- Unleash the Winds or Burning Head
1800 PBAoE Morale. Does great damage but the knockback is almost always bad, try to use it on enemies who are already immune.

This ability combines a very large single target morale hit with a very large AoE morale hit and a 600 Morale Drain. The morale drain portion is very useful during a keep or fort push or push defense as draining the enemy tanks means they cannot use their M4, which likely means that the tank's entire group will die. The radius is small at 20 feet so aim well.
Single Target Bright Wizard
The Single Target Bright Wizard is one of the most famous builds in the game for its ability to kill a target from 100-0, all while jumping and dancing as you don’t have to do much turret casting. It also has a slew of powerful instant nukes so stealing the deathblow from your friends who are about to get a kill is quite simple. This build is a well-known pub stomper and its best counters are knowledgeable and attentive tanks and healers.
40/40 Build

Do whatever you like with the last 3 points, I have them in Incineration here for tooltip values.
40/70 Build

Or drop Stop, Drop and Roll and the points leading up to it to get Fireball Barrage instead.

Tactics

Always use; a godsend AP fix for the build and also makes some of your largest nukes deal a lot more damage.

This tactic turns your Boiling Blood from a fun little delayed blast into a much faster delayed nuke and is the core of this build. The tactic is so powerful that a lot of UI packs come with a standard way to track this debuff on yourself and allies.

Use almost always. Instant cast Fireball is too good to pass up.
Always Use
With the Internal Cooldown of procs changed to .25 seconds, maximizing proc damage for both your personal and group damage is the way to go at almost all times. Run at least 1 of the 2 Tactics. They’re about even in value, I prefer Fueled From Within if you aren’t going to run both.
Gear
Use the relevant War Crest sets while leveling, they are quite cheap.
Decimator > Obliterator > Devastator > Annihilator.
You can choose to buy Conqueror at this point or start saving crests right away. Both the Sentinel and Bloodlord sets are quite good and a combination can be used until you start getting your BiS pieces.
BiS: I recommend 5 Main Sovereign and 4 Triumphant (Belt, Boots, Gloves, Ring). This combination nets a ton of powerful set bonuses and double Wounds bonuses.
I do not recommend the Onslaught setup for this build because you do far fewer direct hits and the Boost proc is not very reliable.
Weapons
While leveling, use the Nihilist’s prefix two-handed staves from the War Crest Merchants.
BiS: Bloodlord
Great stats, 5% damage.
Talismans
Use a combination of Intelligence and Wounds Talismans to fit your preference. You don’t use your Intelligence tactic so you will need a lot of help from gear to hit the softcap of 1050, however, BW does need a fair amount of Wounds to survive, especially with the fact that they damage themselves frequently.
For your Sentinel Soul, use either
Or
Jewelry
Starting at 40, use a mix of the 38 and 33 renown rings, cloak, and belt.
Transition into 2 or 3pc Genesis as soon as possible.
I would recommend not skipping Beastlord as a Bright Wizard because it offers a great Back and Jewelry for early gearing, and you do not have a lot of other good options.
The set also has a Pocket Item so you can get the 3pc bonus with just these 2 pieces and the Pocket.
The Land of the Dead 2pc set is also an option before BiS:
Great stats with a ton of bonus damage.
BiS: 2 rings locked in, Sovereign and Triumphant. You can keep 2pc Genesis for the last 2, or go for an Annulus (or even 2).
Your Gunbad Ring is good but the Initiative stat probably ends up being wasted.
Renown Points
Opportunist 3: 9% Magic Crit, 30 points
Futile Strikes 3: 15% anticrit, 30 points
Reflexes 4: 18% Parry or Deft Defender 4: 18% Dodge & Disrupt, 20 points
OR
Opportunist 4: 14% Magic Crit, 45 points
Futile Strikes 3: 15% anticrit, 30 points
Spend the rest on Reflexes, Deft Defender and Wounds as you see fit.
OR
FS4 with Opportunist 3, spend rest on Reflexes, Deft Defender and Wounds as you see fit.
The Single Target Bright Wizard can be played very safely from a fair range so running a build with only FS3 is common, but know that it’s much more likely for you to die from 100-0 in a knockdown so pick the risk level you like.
Gameplay
The Single Target Bright Wizard jumps and dances around, picks a target within a generous range, applies 1-3 instant cast debuffs on them and then does a follow-up series of fast casts or instant nukes as their time bombs go off.
Important Abilities

Deals a good amount of damage to a target over 9 seconds and with the tactic, applies a massive Corporeal Resistance debuff.

Instant cast delayed nuke on a 5 second timer.

Very big instant cast delayed nuke on a 5 second timer. It also debuffs Willpower, reducing Disrupt chance and outgoing healing if the target happens to be a healer.

PS is interesting for 2 reasons. It deals Corporeal damage so it gets a massive boost from your Ignite, and it also has a flight time of almost precisely 1 second, allowing for combos such as PS > Sear with them both hitting the target at almost the same time. The debuff associated is also kind of nice because if your target is a healer and they live your torrential burst, they’ll have to wind up even longer to get a cast off for the next couple of seconds.

50% heal debuff with a rather long cooldown. The healer backlash effect is sometimes useful.

A ranged knockdown that consumes your Ignite on a target. It’s a pain to re-ignite but having powerful ranged CC is always worth it.

A large instant and channeled nuke that deals Corporeal damage, which we like. It’s also a 40% snare, meaning you have access to an instant, 100ft range snare. While it can be channeled for its full duration, it is typically used for 1 or 2 ticks as your Ignite will be falling off by this point.
Skill Rotation / Priority
The Single Target Bright Wizard uses a specific rotation to try to hit as much damage in a timestamp as possible while also protecting their important spells from being cleansed before they detonate.
- Apply Ignite
- Apply Slow Boil
- Apply Boiling Blood
- Cast Pyroclastic Surge
- Cast Sear
- Cast Nova/Withering Heat/Fireball Barrage/Flashfire Fireball/Any Instant Nuke.
Ranged KD Rotation:
- Apply Ignite
- Apply Slow Boil
- Apply Boiling Blood
- Use Stop, Drop and Roll
- Re–apply Ignite
- Cast Sear
- Cast Nova/Withering Heat/Fireball Barrage/Flashfire Fireball/Any Instant Nuke
Boiling Blood is still on cooldown rotation:
- Apply Ignite
- Apply Slow Boil
- Cast Fireball
- Cast Sear
- Cast Nova/Withering Heat/Fireball Barrage/Flashfire Fireball/Any Instant Nuke
You still keep the same General Priorities as other BW builds
General Priority:
- Maintain both buffs, Flames of Rhuin and Flame Shield
- Toggle on Funnel Power
Morale
- Mage Bolt or Misdirection
Deals a small amount of damage and is an undefendable, medium-distance knockback.
Strong safety morale against enemy casters.
- Focused Mind or Ruin and Destruction
10 seconds of Immunity from most forms of CC and reduces cast times by half, effectively doubling the damage output of your casted spells, but still limited by the 1.5 second Global Cooldown.
1200 damage PBAoE Morale, great for some instant burst damage on a clump of enemies. This ability is far more useful for the Bomb Wizard because you are often in a good position to use it.
- Scintillating Energy
1200 damage instant morale that Staggers a target for 9 seconds, useful in many situations.
- Unleash the Winds
1800 PBAoE Morale. Does great damage but the knockback is almost always bad, try to use it on enemies who are already immune.
PvE Bright Wizard
This section will be brief as things like your gear and whatnot do not matter, only the Build, Tactics and Gameplay do. You’re probably doing the PvE to get better gear anyways.
40/70 Build

With less Mastery Points, just trim some points out of Conflagration.
Tactics

Always Use

Always Use

Always Use

This tactic doubles your cast speed if your enemy target is within 20 feet of you, effectively doubling your damage output as if you had Focused Mind active.
Renown
Opportunist 4: 14% Magic Crit, 45 points
Futile Strikes 3: 15% anticrit, 30 points
Spend the rest on whatever, Int or Wounds.
Gameplay
Stand within Close Quarters range and cast Fireball if 1 target, Fiery Blast if 2+ targets. We are close to the enemies so we can benefit from Explosive Power. You are going to deal obscene amounts of DPS so wish your Tank(s) luck holding aggro.
Witch Hunter

The Witch Hunter is the Empire Melee DPS class, specializing in Stealth, bypassing Armour, and some unique utility that some might describe as.. Unfair. They utilize a One-Handed Sword and a Pistol in their off-hand. There are 3 major roles for a Witch Hunter: Single Target DPS, AoE Burst/Support and Ganker with some variation on build for each.
Thanks to Bachata for gear recommendations.
Accusations
The major Mechanic of the Witch Hunter is called Accusations, which function like Combo Points from other games such as WoW and fuel your powerful spenders, called Executions.

Each little prong on the helmet is 1 Accusation and when you are capped at 5, the skull glows, akin to the Bright Wizard.
The 2nd major Mechanic of Witch Hunters is
Stealth

Stealth in RoR is only currently available on the 2 Stealth classes. It is a 2 second cast to enter Stealth normally, during which time your character will begin to blend into the environment. This is a tell for experienced players and an enemy Tank may Taunt you to interrupt the cast. You have no way to increase your Movement Speed during Stealth and while Stealthed, your AP slowly drains until you reach 0, at which point your Stealth will fall off. Using any ability removes Stealth and there are 3 abilities that can only be used from Stealth which I will refer to as Openers.

This ability deals some backlash damage to your target each time they activate a magical ability for the next 15 seconds. It is terrible and I wouldn’t recommend ever using it.

This is a movement barb, causing the target to take damage multiple times per second so long as they are moving. It’s fine to use an opener.

This ability deals a small amount of damage in a cone up to 10 feet in front of you and debuffs Armour on all targets hit. In most situations, this is your optimal Opener as the Armour debuff is so powerful. In a Warband, applying this debuff is one of your major duties as AoE Armour debuffs are so rare and powerful.
Regardless of choice, each Opener generates 2 Accusations and ends Stealth.
Bullets
Witch Hunters can equip different types of Bullets that cause their Executions to deal bonus damage and offer a different type of utility to the fight. Activate the Bullets you want and they will remain until you remove the buff or switch to a different Bullet. Your Bullets will deal their damage and apply the associated debuff to any and all targets hit by your Executions. All Bullets deal Spiritual damage.

This is your standard go-to. The Initiative debuff on your enemy translates into 2-6% extra crit chance on average and we want to Crit as much as possible.

These Bullets provide a 50% outgoing heal debuff for 5 seconds, great for taking down an isolated healer or at least massively nerfing their output for a short while.

These Bullets steal a small amount of AP from your Target and give them to you, which I rarely find useful.
Executions
Your spenders are called Executions. Each Mastery Tree has one at the 13pt location and they are all build-defining. The Core Executions are not nearly as powerful, but still useful.

Deals a large amount of instant damage.

A 10-second DoT that deals Physical Damage. The tooltip is high but it’s very slow and lacks any burst, I am not a fan of this ability. It deals damage 4 times in total.

This ability hits 6 times over 3 seconds, deals a fantastic amount of damage and will proc your Bullets twice, once on the first tick and again on the last tick. It can also be used entirely from a 30ft range, allowing for some pseudo-kiting. The only downside of a channel skill such as this is that you cannot auto-attack during the channel.
Important Core Abilities

Severs a Blessing and builds an Accusation, one of your highest priority builders.

A low-damage ranged attack. If you hit your enemy in the back, they will be heavily slowed for 5 seconds.

The Witch hunter Detaunt. Like other MDPS, it’s a 30’ PBAoE. It has an extremely long cooldown, low AP cost, but also lasts for 15 seconds. A Witch Hunter who hits a good Detaunt basically has Guard for a fairly long period of time.

Removes the positional requirements from your abilities for 10 seconds with a 60 second cooldown. You can Pistol Whip from the front (whoops, you might get parried), you can use Burn Away Lies from the front, your Torment ignores Armour from the front. Quite useful.

Root break, identical to every other MDPS root break.

The newest addition to the Witch Hunter (and Witch Elf) toolkit and fondly referred to as “Staking” your enemy. If you target an enemy corpse and cast this, you will plant a large stake on their corpse and they cannot be resurrected for 30 seconds. Incredibly powerful utility and adds a lot of value to the Witch Hunter’s kit which is very strong at Single Target and generally weak at dealing AoE damage.

One of your primary escape tools. Target an enemy in melee range, stagger them for 6 seconds and launch yourself backwards a good distance. Also helpful for escaping a mob of players body-blocking you. Cannot be used while rooted.
Holy Relics
Every Mastery Tree has a “holy relic” skill at 5 points that share a cooldown. I’m just going to list them and their advantages here.

By far the most used and a staple of every build, This ability gives you a large movement speed boost for 7 seconds or until you use an ability and will instantly grant you stealth for 2 seconds, during which time you can use an Opener.

For the next 7 seconds, you ignore 50% Armour (additive with other sources) allowing you to deal devastating damage to anything in more than Light Armour.

For 7 seconds you gain +100% Disrupt chance, incredibly useful for hounding down enemy healers and casters, or escaping their ire. It also has fun interactions with a certain tactic

Witch Hunters have 2 Core CC’s:
A disarm

Requires you to have parried something recently, 40s of Immunity, use wisely.
And a Silence

Only deals damage if you are behind the target. A Silenced enemy can still move, use wisely.
Burn Away Lies Witch Hunter
This build can function well as a Ganker or as a Single Target DPS in a group. It revolves around the titular ‘Burn Away Lies’.
40/70 Group Variant

This variant dips into Inquisition for the Heal debuff and the other goodies for fast target swapping and kill potential.
Blessed Blade Variant

This variant dips into Confession for the incredibly powerful Blessed Blade Tactic that opens up some powerful burst opportunities without needing to use a Holy Relic cooldown.
Ganker Variant

This variant picks up the defensive goodies in Confession and the Seeker’s Blade Tactic for a lot of free damage.
Tactics
Group Build

Huge boost to your crit damage. Always Use

15% additive damage as long as you hit in the back, Use almost always.

50% increased Auto-attack speed whenever you crit. You crit a lot and this can self-refresh so the uptime is almost permanent. Auto attacks hit incredibly hard so this is a great way to boost your damage. Use almost always.

Lets you build Accusations much faster, meaning you are using your big damage Executions more frequently. This last slot is flexible, depending on the situation.

A passive damage increase. A lot of end-game builds already have Strength near-cap so it’s common to drop this in favor of another tactic but it’s certainly fine to use.

Use this whenever you are certain you can get value from it. You won’t be disrupting much normally unless you use Shroud of Magnus, and if you do that, you can’t use your Vanish Holy Relic.

This tactic looks good on paper but it doesn’t stack with Guard or Detaunt, and you also have to constantly be hitting something to gain the benefit. I wouldn’t recommend using it ever.

This tactic makes your Outgoing Heal Debuff Bullets also make the target 5% more likely to be crit. As far as I know, it does not stack with Arcing Swing from KobS so it’s unlikely to have real utility.
Blessed Blade Variant
Fanatical Cleansing
Flanking
Inquisitor’s Fury
Blessed Blade

This tactic gives you 25% additive Armor Penetration for 3 seconds whenever you activate an Execution. It’s useless with something like Absolution because you get the buff after Abso does damage, and it gains no benefit, but for the following 3 seconds your other abilities and Auto attacks will deal devastating damage. Other notable interactions include Trial by Pain: The first tick does not benefit but the rest will and Dragon Gun: Your primary target does not receive the extra damage, but every other target hit will.
Why this in the BaL build? BaL is a 9 second DoT and the final tick does the most damage, so you can use an Execution right before BaL finishes to make the final tick deal massive damage on top of your 2nd Execution, such as Absolution, on top of a Bullet Proc, on top of whatever other damage you deal in that 3s window.
Ganker Variant
This build takes the guaranteed defense stuff in the left tree such as Shroud of Magnus and Repel Blasphemy to give you incredible power in 1v1 situations. The Tactics are pretty much the same but if you are playing with a lot of Parry investment then you might consider

Or

Riposte deals undefendable Physical damage but it does have an Internal Cooldown so it ends up being lower value than other damage Tactics in most cases.
Gear
While leveling, buy the relevant War Crest Sets.
Decimator > Obliterator > Devastator > Annihilator.
At 40, we have a few options to keep us powerful until BiS while saving War Crests.
The most powerful option in my opinion is 5 Vanquisher and 2 Sentinel(Helm and Ring). The 4pc bonus for MDPS on Vanquisher and Triumphant is exceptional.

Reducing your enemy’s Toughness is more-or-less the same as giving yourself more Primary Stat, but because it’s a debuff, it benefits everyone. The proc also gives you a large chunk of Weapon Skill, allowing you to ignore more Armour. This proc generally results in 10-20% more damage.
If you opt to skip this setup, both 6pc Sentinel and 6pc Bloodlord are viable. For 6pc Sentinel, you can use the ring and swap the boots for Conqueror which have Crit.
Onslaught is also an option, it’s actually quite powerful as it does have the Boost proc and powerful substats and some gear pieces. The problem with Witch Hunter is that their Executions really need some form of Armour Penetration to deal damage. Whether you achieve this with a team through stacking Armour Debuffs, Blessed Blade builds or your character’s passive Armour Penetration (or some combination) is up to you.
BiS: There are a few options for BiS, with 1 that I consider the standout best in most situations, which I will talk about first.
5 Sovereign, 4 Triumphant(Belt, Boots, Gloves, Ring): This setup nets you the Crit and Crit Damage bonuses from Sov and the big stat steal from Triumphant that we talked about above, as well as double Strength and Wounds bonuses.
5 Sovereign, 2 Sentinel (Helm and Ring), 2 Conqueror (Belt and Boots): This setup aims to maximize your crit chance. This setup is rather low on Wounds and can feel quite squishy and is also very reliant on your team stacking Armour Debuffs for you.
5 Sovereign/3 Triumphant (Belt, Boots, Ring)/2 Vale-Walker (Gloves, Ring). This is the newest set up we have on RoR. The VW Gloves have 2 crit. In all, this nets us an extra Wounds bonus (for a total of 3) and 1% higher crit in total vs 2 Annuli (and much cheaper) at the cost of the powerful Vicious Strikes proc from 5/4. The aim here is to maximize crit. This is most useful in a highly coordinated party that is stacking Armour and Toughness debuffs so you won’t get as much value from Vicious Strikes. The only open gear slot with this setup is 1 jewelry.
Weapons
While leveling, use the Titan’s prefix Swords (or Rapiers, they are functionally identical) and Pistols from the War Crest vendors.
BiS:

5% additive damage at the cost of -10% Armour and Toughness. Make sure you get the Longsword, which has 2.8 speed.

Highest DPS off-hand with the most crit chance available. The proc is useful too.
Talismans
Use a combination of Strength, Weapon Skill and Wounds Talismans to fit your preference. I would really recommend testing your damage on the Training Construct with Weapon Skill vs Strength and see which is more valuable to you, especially if you aren’t hitting targets who are consistently armor debuffed. If you parse your Damage, Penetration tends to outvalue Strength in most cases until roughly 20-30% or less Mitigation.
For your Sentinel Soul, use:

Jewelry
While leveling, use the best combination of Belt, Back & Rings you have from either RvR influence or the renown vendors.


At 40, A Gunbad Ruby is a great starter item with a 3pc Beastlord mix(Back, Ring, Pocket) or the LoTD set (Back + Ring).


Transition into 2pc Genesis as soon as Possible.


BiS: 2 rings locked in, Sovereign and Triumphant (or Sentinel). Either keep the 2 Genesis or get 2 Ruby Annuli with a prefix of your preference. With 5/3/2, just 1 ring slot open, so run 1 Annulus


Renown Points
Opportunist 3: 9% Melee Crit, 30 points
Futile Strikes 3: 15% anticrit, 30 points
Reflexes 4: 18% Parry, 20 points
OR
Opportunist 4: 14% Melee Crit, 45 points
Futile Strikes 3: 15% anticrit, 30 points
Spend the rest on Reflexes/Deft Defender/Wounds/Weapon Skill
OR
FS4 with O3, spend rest on Reflexes/Deft Defender/Wounds/Weapon Skill
Gameplay
Important Abilities

Burn Away Lies requires you hit the target in the back to apply, deals a tremendous amount of Physical damage over 9 seconds, dealing damage instantly, twice more, then ending in a final tick that hits incredibly hard. Try to always use it with 5 Accusations.
This build deals very high sustained damage but is lacking in instant burst. It can be hard to find value with it against good players because in the 10 seconds it takes to ramp your damage, your target is likely going to receive a lot of support. However, it is still very powerful.
The common combo is to apply BaL, build 5 Accusations and use an Absolution or Trial by Pain as the final tick explodes for peak burst.

Witch Hunters have access to a knockdown in almost all of their builds. It’s rare for DPS to have access to a knockdown without a high opportunity cost, so this is very powerful as your tanks won’t always be required to stun the target for you, allowing them to use that time to control the enemy supports. Pistol Whip requires you to be behind the target, builds an Accusation and deals a very high amount of damage.

Your bread-and-butter filler. It doesn’t have the highest tooltip but because it ignores ALL armor from behind, it will deal the most damage of all of your builders most of the time.

This ability deals low Physical damage and then applies a DoT effect that deals Spiritual damage which can be stacked up to 3 times. If you Fervor a target who already has 3 stacks, you refresh the entire stack. It’s common to use this to set up a target for burst.

Deals a high amount of Physical damage and applies a 5% debuff to each type of avoidance. Worth using in cases where you or your teammates will benefit from the effect and there isn’t a stronger effect present or if you are using the Seeker’s Blade tactic.

High damage spammable with very high AP cost and no built in Armour Penetration. Not worth using in most cases unless you have Blessed and/or Seal of Destruction active.

Medium damage builder with a 5 second cooldown. Worth using in almost every case as any buff you remove will likely make up for the damage difference.

Punish the False is a 50% heal debuff. This effect is a very powerful way to ensure that the healing your target receives is not enough to keep them alive, allowing your damage to overwhelm them and get the kill.

Repel Blasphemy deals very high damage and grants you +100% Parry chance for 5 seconds, making you nearly immune to melee damage from the front.
Skill Rotation / Priority
The build uses both Rotations and Priorities to achieve either burst or high sustained DPS.
Stealth Opener:
- Use Burn Armour or Sudden Accusation as fits the situation best.
- Pistol Whip your target to knock it down.
- Apply a 3-5 point BaL, depending on your Tactics and luck.
- DPS the target using the Builder Priority while BaL ticks.
- Try to time a 4-5 point Absolution or Trial by Pain with a BaL tick.
- Use Snap Shot if you cannot reach your target or to slow it for your team.
Builder Priority:
- Use Sever Blessing
- Use Repel Blasphemy if you need the Parry buff for the next few seconds.
- Use Punish the False to debuff the target’s healing received.
- Apply/maintain Fervors if the target will live long enough for the DoT to get value or if you are trying to time the DoT with your burst.
- Use Razor Strike if Blessed Blade and/or Seal of Destruction is active.
- Use Seeker’s Blade if the debuff is needed
- Use Torment
- Use Snap Shot if you cannot reach your target or to slow it for your team.
Already have 5 Accustions:
- Apply Burn Away Lies
- Use Pistol Whip to knock the target down.
- Use the Builder Priority listed above.
- Try to time a 4-5 point Absolution or Trial by Pain with a BaL tick.
- Use Snap Shot if you cannot reach your target or to slow it for your team.
General Priority:
- Apply your Bullets and swap to a different Bullet if its utility is needed.
- Use Detaunt to avoid damage if your Tank is unable to Guard you or be in Guard range or to prevent your Tank from taking heavy Guard damage.
- Use Sanctified Oil or Declare Anathema to escape from a dangerous situation.
- Use Purgatory on a dead enemy to keep them dead.
Morale
- Confusing Movements

You will Dodge every Ranged attack and Parry every Melee attack made against you for 7 seconds unless they are undefendable. Incredibly powerful ability that will save your life or allow you to deal free damage countless times.
- Reversal of Fortune

1200 Morale damage on every target in a 65 foot cone.
- Witchfinder’s Protection

Giving your party 50% bonus Parry for 10 seconds will make them nearly invincible against melee enemies, especially coupled with other Parry buffs such as what a Warrior Priest or Ironbreaker provides.
- Frenzied Slaughter

You won’t use this for damage very often compared to your Morale 2 but it’s there and it’s an option.
Exit Wound Witch Hunter
This build is one of the most commonly used builds for competitive situations with the Witch Hunter. The titular ability couples a powerful debuff with a large amount of burst and this build can specialize into one of the most powerful Morale 4’s for ensuring that a target dies.
70 Build with Excommunicate:

70 Build without Excommunicate:

+2 (6pc Sov) Build

The +2 build has to drop 1 thing. I recommend dropping the Tactic but you can instead drop the Heal Debuff if someone else in your group can reliably provide it or SoD.
Tactics
Group Build
Huge boost to your crit damage. Always Use
15% additive damage as long as you hit in the back, Use almost always.
50% increased Auto-attack speed whenever you crit. You crit a lot and this can self-refresh so the uptime is almost permanent. Auto attacks hit incredibly hard so this is a great way to boost your damage. Use almost always.
Lets you build Accusations much faster, meaning you are using your big damage Executions more frequently. This last slot is flexible, depending on the situation.
A passive damage increase. A lot of end-game builds already have Strength near-cap so it’s common to drop this in favor of another tactic but it’s certainly fine to use.
Use this whenever you are certain you can get value from it. You won’t be disrupting much normally unless you use Shroud of Magnus, and if you do that, you can’t use your Vanish Holy Relic.
This tactic looks good on paper but it doesn’t stack with Guard or Detaunt, and you also have to constantly be hitting something to gain the benefit. I wouldn’t recommend using it ever.
This tactic makes your Outgoing Heal Debuff Bullets also make the target 5% more likely to be crit. As far as I know, it does not stack with Arcing Swing from KobS so it’s unlikely to have real utility.
Gear
While leveling, buy the relevant War Crest Sets.
Decimator > Obliterator > Devastator > Annihilator.
At 40, we have a few options to keep us powerful until BiS while saving War Crests.
The most powerful option in my opinion is 5 Vanquisher and 2 Sentinel(Helm and Ring). The 4pc bonus for MDPS on Vanquisher and Triumphant is exceptional.
Reducing your enemy’s Toughness is more-or-less the same as giving yourself more Primary Stat, but because it’s a debuff, it benefits everyone. The proc also gives you a large chunk of Weapon Skill, allowing you to ignore more Armour. This proc generally results in 10-20% more damage.
If you opt to skip this setup, both 6pc Sentinel and 6pc Bloodlord are viable. For 6pc Sentinel, you can use the ring and swap the boots for Conqueror which have Crit.
Onslaught is also an option, it’s actually quite powerful as it does have the Boost proc and powerful substats and some gear pieces. The problem with Witch Hunter is that their Executions really need some form of Armour Penetration to deal damage. Whether you achieve this with a team through stacking Armour Debuffs, Blessed Blade builds or your character’s passive Armour Penetration (or some combination) is up to you.
BiS: There are a few options for BiS, with 1 that I consider the standout best in most situations, which I will talk about first.
5 Sovereign, 4 Triumphant(Belt, Boots, Gloves, Ring): This setup nets you the Crit and Crit Damage bonuses from Sov and the big stat steal from Triumphant that we talked about above, as well as double Strength and Wounds bonuses.
5 Sovereign, 2 Sentinel (Helm and Ring), 2 Conqueror (Belt and Boots): This setup aims to maximize your crit chance. This setup is rather low on Wounds and can feel quite squishy and is also very reliant on your team stacking Armour Debuffs for you.
6 Sovereign, 3 Triumphant (Belt, Boots, Ring): This setup gives us 2 free points into the Judgment (Right) tree and allows us to run the +2 full build listed above.
5 Sovereign/3 Triumphant (Belt, Boots, Ring)/2 Vale-Walker (Gloves, Ring). This is the newest set up we have on RoR. The VW Gloves have 2 crit. In all, this nets us an extra Wounds bonus (for a total of 3) and 1% higher crit in total vs 2 Annuli (and much cheaper) at the cost of the powerful Vicious Strikes proc from 5/4. The aim here is to maximize crit. This is most useful in a highly coordinated party that is stacking Armour and Toughness debuffs so you won’t get as much value from Vicious Strikes. The only open gear slot with this setup is 1 jewelry.
Weapons
While leveling, use the Titan’s prefix Swords (or Rapiers, they are functionally identical) and Pistols from the War Crest vendors.
BiS:
5% additive damage at the cost of -10% Armour and Toughness. Make sure you get the Longsword, which has 2.8 speed.
Highest DPS off-hand with the most crit chance available. The proc is useful too.
Talismans
Use a combination of Strength, Weapon Skill and Wounds Talismans to fit your preference. I would really recommend testing your damage on the Training Construct with Weapon Skill vs Strength and see which is more valuable to you, especially if you aren’t hitting targets who are consistently armor debuffed. If you parse your Damage, Penetration tends to outvalue Strength in most cases until roughly 20-30% or less Mitigation.
For your Sentinel Soul, use:
Jewelry
While leveling, use the best combination of Belt, Back & Rings you have from either RvR influence or the renown vendors.
At 40, A Gunbad Ruby is a great starter item with a 3pc Beastlord mix(Back, Ring, Pocket) or the LoTD set (Back + Ring).
Transition into 2pc Genesis as soon as Possible.
BiS: 2 rings locked in, Sovereign and Triumphant (or Sentinel). Either keep the 2 Genesis or get 2 Ruby Annuli with a prefix of your preference. With 5/3/2, just 1 ring slot open so run 1 Annulus.
Renown Points
Opportunist 3: 9% Melee Crit, 30 points
Futile Strikes 3: 15% anticrit, 30 points
Reflexes 4: 18% Parry, 20 points
OR
Opportunist 4: 14% Melee Crit, 45 points
Futile Strikes 3: 15% anticrit, 30 points
Spend the rest on Reflexes/Deft Defender/Wounds/Weapon Skill
OR
FS4 with O3, spend rest on Reflexes/Deft Defender/Wounds/Weapon Skill
Gameplay
Important Abilities

Exit Wound deals Similar damage to Absolution and the primary reason we use it is for the big Toughness debuff. Coupled with Armour Debuffs, an enemy is going to mitigate much less of the damage they receive, which sometimes compensates for the build’s lower DPS. This is especially true if you are running the ideal 6/3 setup as you won’t have access to the 130 Toughness debuff from wearing 4 piece Triumphant.
The more important part of running this build is that you get access to

For an entire 15 seconds, your target cannot be healed directly. Lifetap heals, potions and absorbs will still affect them, but that’s it. The damage isn’t much of a consideration as it occurs slowly over 15 seconds.
Other than these 2 differences, the build plays almost identical to the Burn Away Lies Witch Hunter.
Skill Rotation / Priority
Stealth Opener:
- Use Burn Armour or Sudden Accusation as fits the situation best.
- Build up to 4 Accusations using the Builder Priority.
- Use Pistol Whip to knock your target down.
- Use a 5 point Exit Wound.
- Continue to build using the Build Priority.
Builder Priority:
- Use Sever Blessing
- Use Punish the False to debuff the target’s healing received.
- Apply/maintain Fervors if the target will live long enough for the DoT to get value or if you are trying to time the DoT with your burst.
- Use Razor Strike if Blessed Blade and/or Seal of Destruction is active.
- Use Seeker’s Blade if the debuff is needed
- Use Torment
- Use Snap Shot if you cannot reach your target or to slow it for your team.
Already have 5 Accustions Rotation:
- Use Exit Wound
- Use Pistol Whip to knock the target down.
- Use the Builder Priority listed above.
- Use a 5 point Absolution or another Exit Wound if off cooldown.
- Use Snap Shot if you cannot reach your target or to slow it for your team.
General Priority:
- Apply your Bullets and swap to a different Bullet if its utility is needed.
- Use Detaunt to avoid damage if your Tank is unable to Guard you or be in Guard range or to prevent your Tank from taking heavy Guard damage.
- Use Sanctified Oil or Declare Anathema to escape from a dangerous situation.
- Use Purgatory on a dead enemy to keep them dead.
Morale
- Confusing Movements
You will Dodge every Ranged attack and Parry every Melee attack made against you for 7 seconds unless they are undefendable. Incredibly powerful ability that will save your life or allow you to deal free damage countless times.
- Reversal of Fortune
1200 Morale damage on every target in a 65 foot cone.
- Witchfinder’s Protection
Giving your party 50% bonus Parry for 10 seconds will make them nearly invincible against melee enemies, especially coupled with other Parry buffs such as what a Warrior Priest or Ironbreaker provides.
- Excommunicate
Always this as your Morale 4 and use it to attempt to kill a target through any amount of healing.
Dragon Gun Witch Hunter
This build allows the Witch Hunter to have some AoE damage, provide substantial AoE utility and also have access to fairly strong Single Target damage.
40/70 Build:

You can take Seeker’s Triumph instead of Sanctified Bullets if you would prefer the damage Tactic over the Self-Healing.
Tactics
Huge boost to your crit damage. Always Use
15% additive damage as long as you hit in the back, Use almost always.

Always Use.
The 4th Tactic is Flexible.
Brute Force - Passive Damage
Sanctified Bullets - Massive Self-Healing when you use Dragon Gun
Seeker’s Triumph - Combined with Blessed Blade, Seeker’s Blade will ignore all Armour.
Inquisitor’s Fury - Single Target DPS increase, great with Blessed Blade

This is the mandatory 4th Tactic for a WH trying to serve as an AoE DPS. Razor Strike hits very hard with Blessed Blade but this tactic makes it so you can hit 3 targets instead of 1. Most other DPS with a Tactic like this hit 24 targets. This is the primary reason why WH and WE do not work well as a Primary AoE DPS.
Gear
While leveling, buy the relevant War Crest Sets.
Decimator > Obliterator > Devastator > Annihilator.
At 40, we have a few options to keep us powerful until BiS while saving War Crests.
The most powerful option in my opinion is 5 Vanquisher and 2 Sentinel(Helm and Ring). The 4pc bonus for MDPS on Vanquisher and Triumphant is exceptional.
Reducing your enemy’s Toughness is more-or-less the same as giving yourself more Primary Stat, but because it’s a debuff, it benefits everyone. The proc also gives you a large chunk of Weapon Skill, allowing you to ignore more Armour. This proc generally results in 10-20% more damage.
If you opt to skip this setup, both 6pc Sentinel and 6pc Bloodlord are viable. For 6pc Sentinel, you can use the ring and swap the boots for Conqueror which have Crit.
Onslaught is also an option, it’s actually quite powerful as it does have the Boost proc and powerful substats on some gear pieces. The problem with Witch Hunter is that their Executions really need some form of Armour Penetration to deal damage. Whether you achieve this with a team through stacking Armour Debuffs, Blessed Blade builds or your character’s passive Armour Penetration (or some combination) is up to you.
BiS: There are a few options for BiS, with 1 that I consider the standout best in most situations, which I will talk about first.
5 Sovereign, 4 Triumphant(Belt, Boots, Gloves, Ring): This setup nets you the Crit and Crit Damage bonuses from Sov and the big stat steal from Triumphant that we talked about above, as well as double Strength and Wounds bonuses.
5 Sovereign, 2 Sentinel (Helm and Ring), 2 Conqueror (Belt and Boots): This setup aims to maximize your crit chance. This setup is rather low on Wounds and can feel quite squishy and is also very reliant on your team stacking Armour Debuffs for you.
5 Sovereign/3 Triumphant (Belt, Boots, Ring)/2 Vale-Walker (Gloves, Ring). This is the newest set up we have on RoR. The VW Gloves have 2 crit. In all, this nets us an extra Wounds bonus (for a total of 3) and 1% higher crit in total vs 2 Annuli (and much cheaper) at the cost of the powerful Vicious Strikes proc from 5/4. The aim here is to maximize crit. This is most useful in a highly coordinated party that is stacking Armour and Toughness debuffs so you won’t get as much value from Vicious Strikes. The only open gear slot with this setup is 1 jewelry.
Weapons
While leveling, use the Titan’s prefix Swords (or Rapiers, they are functionally identical) and Pistols from the War Crest vendors.
BiS:
5% additive damage at the cost of -10% Armour and Toughness. Make sure you get the Longsword, which has 2.8 speed.
Highest DPS off-hand with the most crit chance available. The proc is useful too.
Talismans
Use a combination of Strength, Weapon Skill and Wounds Talismans to fit your preference. I would really recommend testing your damage on the Training Construct with Weapon Skill vs Strength and see which is more valuable to you, especially if you aren’t hitting targets who are consistently armor debuffed. If you parse your Damage, Penetration tends to outvalue Strength in most cases until roughly 20-30% or less Mitigation.
For your Sentinel Soul, use:
Jewelry
While leveling, use the best combination of Belt, Back & Rings you have from either RvR influence or the renown vendors.
At 40, A Gunbad Ruby is a great starter item with a 3pc Beastlord mix(Back, Ring, Pocket) or the LoTD set (Back + Ring).
Transition into 2pc Genesis as soon as Possible.
BiS: 2 rings locked in, Sovereign and Triumphant (or Sentinel). Either keep the 2 Genesis or get 2 Ruby Annuli with a prefix of your preference. With 5/3/2, just 1 ring slot open so run 1 Annulus.
Renown Points
Opportunist 3: 9% Melee Crit, 30 points
Futile Strikes 3: 15% anticrit, 30 points
Reflexes 4: 18% Parry, 20 points
OR
Opportunist 4: 14% Melee Crit, 45 points
Futile Strikes 3: 15% anticrit, 30 points
Spend the rest on Reflexes/Deft Defender/Wounds/Weapon Skill
OR
FS4 with O3, spend rest on Reflexes/Deft Defender/Wounds/Weapon Skill
Gameplay
Important Abilities

This Execution serves as a Single-Target knockdown, a high damage AoE Burst skill and an incredible source of utility. All enemies hit will lose 125 Morale while the Witch Hunter and their entire group will gain 125. On top of this, Witch Hunter Bullets always proc on every target hit by your Executions so you can guarantee an Outgoing Heal Debuff on a clump of healers, or an Initiative debuff, which are both very useful. Furthermore, the radius of this ability scales with Accusations, up to a ridiculous 48 feet. This allows for interesting warband comps like a Swordmaster reducing your cooldowns so you can spam morale pump your group every 5 seconds, which ties into the Morale 4 from our Mastery Tree:

Reversal of Fortune but twice the damage, very powerful.
Skill Rotation / Priority
Stealth Opener:
- Use Burn Armour
- Use Dragon Gun if you are the knock down for your party.
- Build Accusations using the Builder Priority
- Use 5 point Trial by Pain for Single Target damage.
Builder Priority:
- Use Sever Blessing
- Use Seeker’s Blade with Blessed Blade if you are using the Seeker’s Triumph Tactic
- Use Repel Blasphemy if you will benefit from the Parry in the next few seconds.
- Apply/maintain Fervors if the target will live long enough for the DoT to get value or if you are trying to time the DoT with your burst.
- Use Razor Strike if Blessed Blade and/or Seal of Destruction is active.
- Use Seeker’s Blade if the debuff is needed
- Use Torment
- Use Snap Shot if you cannot reach your target or to slow it for your team.
Already have 5 Accusations Priority for Single Target:
- Use Trial by Pain with 5 Accusations
- Use Dragon Gun to knock the target down with 1-2 Accusations
- Use the Builder Priority listed above.
- Use Snap Shot if you cannot reach your target or to slow it for your team.
AoE/Warband Support Priority:
- Use Burn Armour from Stealth to debuff the enemy blob as often as possible.
- Use 5 point Dragon Gun to damage and debuff enemy blob or healers as directed by your leader.
- Use Dragon Gun on cooldown with any number of Accusations if you have a cooldown reduction buff.
- Combo with Morale 4 > Morale 2 as directed by your leader.
- Use Razor Strike with the Sweeping Razor Tactic to damage multiple targets.
- Use the Builder Priority listed above.
General Priority:
- Apply your Bullets and swap to a different Bullet if its utility is needed.
- Use Detaunt to avoid damage if your Tank is unable to Guard you or be in Guard range or to prevent your Tank from taking heavy Guard damage.
- Use Sanctified Oil or Declare Anathema to escape from a dangerous situation.
- Use Purgatory on a dead enemy to keep them dead.
Morale
- Confusing Movements
You will Dodge every Ranged attack and Parry every Melee attack made against you for 7 seconds unless they are undefendable. Incredibly powerful ability that will save your life or allow you to deal free damage countless times.
- Reversal of Fortune
1200 Morale damage on every target in a 65 foot cone.
- Witchfinder’s Protection
Giving your party 50% bonus Parry for 10 seconds will make them nearly invincible against melee enemies, especially coupled with other Parry buffs such as what a Warrior Priest or Ironbreaker provides.
- Divine Blast
With the morale pump from Dragon Gun, you can use Morale 4 far more frequently in this build and this is a powerful AoE Damage morale. Try to combo with Dragon Gun for peak burst.
PvE
For PvE, use either the Burn Away Lies build for maximum Single Target DPS to kill bosses quickly or the Dragon Gun build to have some AoE and high Single Target DPS with Trial by Pain.
Swordmaster

The Swordmaster is the High Elf Tank class and has a varied kit with a lot of strong utility and even very strong damage. Whereas the KobS is the staple in every group, the Swordmaster is a consideration for the 2nd Tank spot with Ironbreaker, depending on what the comp wants to do. They utilize either a One-Handed Sword and Shield or a Two-Handed Sword. There are 2 major builds for the Swordmaster: SnB Tank or 2H tank.
Balance
The major Mechanic of the Swordmaster is called Balance. There are 3 stages to Balance: No Balance, Improved Balance and Perfect Balance, indicated on your UI by an evolving element.


Most of your abilities can only be used from one of these 3 stance positions so it’s important to learn which abilities require which stance and some combinations to get you to the right stance to use an ability. This mechanic is quite annoying, serves no real purpose and can be hard to deal with in some cases due to latency. A lot of Swordmaster and Black Orc players (who share this mechanic) use an addon called PlanB which updates your action bars as your Balance changes, allowing you to use one keybind for 3 abilities.
Blade Enchantments
The second major mechanic of Swordmasters is Blade Enchantments. You can enchant your Blade with 1 of 3 different passive buffs that affects yourself, your enemies and your Group in different ways:

On average the most powerful utility provided by a Swordmaster’s Blade Enchantments. The amount of stats it steals scales with Mastery. At 13 points for Ether Dance, it will steal 114 stats. Not only is it reducing the enemy’s stats, it buffs your group, so that creates a 228 stat difference from what it was before, per stat. It can steal every stat besides Wounds. Notably powerful is the Initiative steal. As initiative is an exponential stat, reducing an opponent’s Initiative can increase their chance to be crit from anywhere to 2% to 100%, depending on how much of the stat they have. While buffing your group from 300 to 400 Initiative does not offer nearly as much reduced chance to be crit, it does provide a powerful buffer against Initiative debuffs.
The effect of the Blade Enchantment is a 30’ radius AoE. Single Target damage that procs the effect on your target will also proc it on all enemies within 30 feet, which will then buff yourself and all groupmates within 100’. Furthermore, AoE attacks can cascade, meaning that each target hit by the damage from the AoE skill has a chance to proc the effect, which will then create its own AoE effect with a 30’ radius. What does this mean? It means that if you AoE 8 targets, there’s a very high chance that you instantly proc all possible stat steals at once. The effects can infinitely refresh so as long as you are hitting, you are likely keeping this active.

Similar to Nature’s Blade, you hit things and this procs. The effect provides a flat Wounds bonus that scales with Mastery. This effect is typically weaker than other Wounds buffs but it will heal for the amount that it buffs, providing some free, passive healing that is sometimes useful. This effect can not refresh until it falls off, so it’s essentially a small group heal every 10 seconds.

Heaven’s Blade was reworked to be an on-hit effect that reduces all enemy Resistances by a fair amount, which can be quite useful.
Important Core Abilities

All Swordmasters get this ability at a low level and it is off the GCD. This allows you to improve your stance by 1 stage and drop from Perfect to Improved. It has a 5 second cooldown that cannot be modified. Mastery of this ability is key to being able to use the correct ability at the right time.

This ability reduces the Spiritual Resistance of enemies it hits within 30 feet by a large amount, based on Mastery. This is incredibly useful as there are a lot of sources of Spiritual damage on Order. Every High Elf class has some form of Spiritual damage, a Witch Hunter’s Bullets are Spirit, a Warrior Priest’s Damage Prayer and some of their abilities are Spirit, just to name a few. Of course, the Swordmaster itself deals majorly Spiritual damage so this is a massive buff to your own damage.

The Swordmaster’s core knockback is an AoE effect. It knocks back players a short-medium distance. Be very careful how you use this. If you knock your enemies away as your allies are doing a damage drop, you’re going to earn a lot of ire. On the other hand, if you knock 10 people off of a bridge and out of the fight, you won’t be paying your bar tab. Voila. 30s Immunity to anyone hit.

Swordmasters now have the option for a single-target knockback, adding a lot of strength to their kit.
Paired with the new Tactic

It is quite useful, but at the cost of a tactic slot.

Your target gains an effect where whenever they are crit, they receive bonus damage. This effect used to be uncapped and was incredibly broken. I think the cap now is 6 procs per second. It’s still quite good and one of the best ways that you can contribute damage to a key target.

This ability has a very short cooldown and lets you drain the morale of a single target, which can be quite powerful if you spam it on 1 person. You can also enhance this with a core tactic:

This effect is laughably strong, removing a large portion of an enemy’s crit investment at the cost of 1 GCD. Great to use on DPS, Healers, even some Tanks that rely on crits.

Your Primary Defensive ability, it unfortunately lasts for only 10 seconds so you need to be mindful of when you really need it.

This ability is a 20% Damage reduction effect that for some reason, stacks with Challenge. It only lasts for 4 seconds but it has no cooldown so you can spam it endlessly and also enhance it with this Tactic:

Dragon’s Talon becomes a 20’ Radius AoE around your target. Stacked with Challenge, this ability is disgusting and one of the core roles of a Swordmaster, specifically the SnB Swordmaster.

A no balance builder that deals Spiritual damage. Very strong and the most commonly used, can be enhanced with a Tactic to make it deal a lot more damage.


A no balance builder that deals Physical damage and applies a 5 second DoT. It builds double threat so it’s only really used in PvE.

A no balance builder that deals Physical damage but is undefendable. Great for beating down enemy MDPS who have Confusing Movements active, or otherwise high Parry, or a heavily debuffed Tank.

This ability is Core and functions as the major defensive mechanic of 2H Swordmasters. It has a 5 second cooldown and while Channeled, provides a massive boost of 50% Dodge, Parry and Disrupt, dealing small backlash damage to anyone hit. The backlash damage can proc your Blade Enchantments.
SnB Swordmaster
This build uses Sword and Shield and is built to be as tanky as possible while providing as much protection and utility to their group/warband as possible. This is the preferred role for large-scale RvR.
40/40 Build:

With the Update to Vaul. I would recommend just running this to start. It will let you run a pretty ridiculous amount of Block which will make you feel like you have a lot better gear than you actually do until later on. Crushing Advance will not stack with the Vanq or Sov procs so we will drop this ability later on.
40/70 Build:

Variant 1 with Blessing of Heaven.

Variant 2 with the knockdown and Raking Talons; You should at least have the Vanq proc at this point, so we drop Crushing Advance. Blessing of Heaven is incredibly powerful, especially in RvR, so it’s worth considering.
+2 full Build:

Vaul’s Tempering was significantly enhanced to now grant 6 seconds of both immunities, adding a ton of utility to the Swordmaster’s Kit. Skipping the Knockdown is just fine for the added group utility you are gaining. You can also drop something to add Protection of Hoeth to the build if you like.

Sans Winds but with the extra Block, group bubble and KD.
+2 full Build: (Outdated but still viable)

Swordmaster has an incredible amount of powerful tools and this is the order in which I recommend picking them up. Avoiding the Knockdown until +2 is questionable, but for warband play, it’s less needed. It also requires Perfect Balance so it’s annoying to use and better to let someone else go for the Knockdown. Change it as you see fit early on, such as dropping the knockback for the knockdown.
Tactics

Your 2 main Hoeth Abilities you use are both AoE, so this effect should be on the majority of nearby enemy targets. It provides a surprising amount of free healing and is not restricted to your group. You won’t have this tactic until +2 if you follow my build path so replace it with one of the others discussed below.

Akin to the previous Tactic, this also provides a lot of free healing, but only to your group. It cannot refresh so it must fall off completely before you can re-apply it.

One of the better Tactics in the game and a Swordmaster exclusive. This is more valuable to your personal survival than I think any other Tactic.

This Tactic makes Dragon’s Talon AoE. Always use.
Besides Raking Talons, the above tactics can all be considered situational and some come late in the build, here are some other good options:

Passive defense increase, always good.

More Juggernaut for mobility.

Great tool for Single Target shutdown as discussed above.

This tactic no longer increases punt range and is therefore no longer mandatory. However, it does reduce the cooldown from 20 to 10 seconds, even with a Shield, and is a strong tactic if you plan to punt people often.
Recommended Loadouts
- Perfect Defenses
- Bolstering Enchantments (flexible)
- Raking Talons (flexible)
- Hoeth’s Tempest (flexible)
This is the core loadout with maximum utility. HT is flexible depending on if you want to have a useful single-target punt or not, BE is your secondary healing Tactic so can also be flexible. If you are playing a build without BoH then things like Isha’s Protection, Rugged, UJ, Discerning Offense are all useful.
Gear
While leveling, use the relevant War Crest sets.
Decimator > Obliterator > Devastator > Annihilator/Ruin
After this, we’ll use our trusty combination of Redeye and Vanquisher to save War Crests. I recommend using either 3 Vanquisher + 3 Redeye or 4 Vanquisher + 2 Redeye or 4 Vanquisher + 3 Redeye if you want to spend extra War Crests and use a Block Ravack’s cloak from the Auction House for your backpiece. This is the gear setup you will use until Sovereign in order to save War Crests. Vanquisher Gloves and Boots are Bind on Equip so you can get them from the Auction House or have a friend buy them for you with their extra War Crests. The other gear sets such as Conqueror and Invader are interesting but are simply not worth the amount of extra time you will spend grinding for crests.
Vanq Gloves, Boots, Belt + the rest Redeye or buy Vanq Shoulders for the extra block if you choose to go 4/2 or 4/3. The difference between 4/2 and 4/3 is Redeye Cloak, which requires farming a dangerous side-boss up to 3 times or Ravack’s Cloak for its own benefits.
Your final BiS will be full Defensive Sovereign as it by far has the most advantages of any combination of gear.
Weapons
While leveling, use One-handed Swords with the Sentry’s prefix and shields with the Shieldbearer’s prefix from the War Crest vendors.
BiS:

Upgraded from the RR45 Shield with the same prefix.

If you want the bit of regen

If you want more stats and WeaponDPS, upgraded from RR45 Weapon with the same prefix.

If you want to maximize anticrit.
Talismans
Initiative until 250-300 > Wounds until 1050 (Can go to 990 if you plan to use a Wounds Liniment) > Toughness/Armour. Between Toughness and Armour, it’s really up to how you want to min-max your character. I generally prefer Toughness on SnB Tanks.
For your Sentinel Soul, use
Jewelry
While leveling, use the best combination of gear you find from your travels, renown jewelry is always good.


At 40, get your avoidance jewelry from Gunbad or the Auction House right away.


Transition into Genesis Avoidance pieces right away, and maybe a Remnant for the 2pc bonus.


Ravack’s Cloak if you aren’t going for 4/3.

Use whatever belt until you can wear Vanq

BiS: 2 rings locked in, Sovereign and our Soul Ring, for the other 2 we should keep our block jewels, Genesis and Gunbad.
Renown Points
Defender 4: 10% Block, 20 points.
Quick Escape 1: movement speed proc, 10 points.
Futile Strikes 3: 15% anticrit, 30 points.
20 points left to do with as you please. You can go Hardy Concessions, Toughness, Reflexes for Parry or Deft Defender for Dodge and Disrupt.
OR
Go Futile Strikes 4 and do whatever you like with the last 5 points.
OR
Futile Strikes 3
Defender 4
Hardy Concessions 4
Quick Escape 1
This is the setup I have been using more and more on Sword and Board tanks in the proc meta. You lose some potential avoidance as the major drawback, as we won’t have the points to also spec into Parry, but the extra damage reduction can help keep you alive against a massive onslaught of damage.
Gameplay
Playing a SnB Swordmaster is about hitting your high value buttons as often as possible while working around your clunky mechanic and using your important abilities at the right time.
Important Abilities

This ability grants yourself and groupmates within 30 feet both CC Immunities for 6 seconds and 10% Damage Reduction. This can be incredibly powerful in RvR to allow your group to either engage freely and use their abilities without fear of CC, or prevent the CC of enemies when they engage. It’s quite versatile but has a very short range.

Your most important utility as a Swordmaster. This ability does some damage in a cone in front of you and buffs your groupmates, causing them to have -5 seconds to their cooldowns for 10 seconds. For some abilities, this reduces the cooldown to 0, which is where the power of this skill really comes into play. This Ability lets a Slayer spam Inevitable Doom, a Shadow Warrior spam Barrage, a White Lion spam Lion’s Fury, an Archmage spam Energy of Vaul, a Tank spam Shatter/Sever, a Healer spam cleanse.. The list goes on. Using this ability at the right time and as often is possible is key to your success.

Your knockdown. Deals a heavy amount of damage and hits twice but requires Improved Balance.

Swordmasters can spec into a group bubble with an incredibly short cooldown and a good value for just a few points and is included in almost every SM build. Not only is it a powerful group utility but it allows you to advance your mechanic without having to hit or even target anything.

This combines a powerful self Block and Armour buff.

SM also gets a Single-Target Knockback. The range and angle on it is good so long as you are running the tactic.

This ability was reworked into the Interrupt for SM, which is fantastic as it has no other use, no stance requirement, and a generous radius.
Skill Rotation / Priority
General Priority:
- Apply your Blade Enchantment
- Apply and Maintain the buff from Crushing Advance
- Try to stay in Perfect Balance to benefit from Perfect Defenses.
Use the Tank abilities as described in the Tank Basics section at the discretion of your leader or upon your own intuition.
Warband Tanking Priority:
- Use Whispering Wind at the discretion of your leader or upon your own intuition as often as possible.
- Use Vaul’s Tempering at the discretion of your leader or upon your own intuition as often as possible.
- Interrupt enemy DPS > Tanks > Healers with Redirected Force.
- Apply and Maintain Dragon’s Talon on enemy DPS and Tanks.
- Apply the debuff from Wrath of Hoeth on enemies.
- Use Protection of Hoeth as often as possible.
Advancing Balance:
As a Swordmaster, your key utilities are mostly in Improved and Perfect Balance, so you will most often be using Sudden Shift to skip the No Balance phase unless you are using Protection of Hoeth to advance your Balance.
Notable Combos:
- Protection of Hoeth
- Wrath of Hoeth
- Whispering Wind/Vaul’s Tempering
Great combo to get WW/VT up without having to hit anything.
- Sudden Shift
- Crushing Advance
- Dragon’s Talon
Wrath of Hoeth has a heavy AP cost and lasts a long time, so it’s not always recommended to skip No Balance with Sudden Shift.
- Ensorcelled Blow
- Sudden Shift
- Dragon’s Talon
Alternatively, you can use a different utility from Improved Balance, such as Quick Incision to slow an enemy.
- Sudden Shift
- Quick Incision
- Blurring Shock
Note that all Perfect Balance abilities have no AP cost and this helps you maintain your pool.
Morale
1: Champion’s Challenge or Demolishing Strike
Champs is one of the best CC’s in the game, There’s probably humor to be found in that it shares the acronym. You and your target are both locked in place for 10 seconds, and neither of you can even turn. As important as mobility and positioning are in this game, being unable to move for 10 seconds is terrifying. Coordinate this with your DPS friends to lock down the kill on your favorite enemy player.
Demolishing Strike is a big armor debuff that will stack on top of ability armor debuffs. Combined with an Ironbreaker or a White Lion, a target with -2500 armor is going to get hit very, very hard.
2: Shield Wall or Wings of Heaven

Wings has been moved to Morale 2. One of the best engagement tools that Order has. You leap up to 65 feet away and snare all targets you land on by 30% for 10 seconds. It also looks really, really cool. This is the primary Morale that a Swordmaster will be using in a Warband besides their 3 or 4.
The wording is deceiving but basically you will block any attack that isn’t undefendable. The same applies to your Guard damage: unless your Guardee is hit with an undefendable attack, the Guard damage in that case is also undefendable. Shield Wall is much less needed now on Swordmaster with the rework of Perfect Defenses, you can run upwards of 80% passive Block.
I don’t recommend using Raze. It does very low damage that is rarely threatening and you risk handing out the Resolute buff, effectively nerfing the more-powerful Morales of your allies.
3: Distracting Bellow
AoE 50% Damage Reduction that stacks with Detaunt, Guard and Challenge. This ability can turn a fight on its own.
4: Immaculate Defense
Your entire party becomes nearly immune to damage for 10 seconds. This stacks with Detaunt, Guard, and Challenge. One of the most powerful morales in the game and a lot of encounters in pvp revolve around this ability.
2H Swordmaster
The 2H Swordmaster provides a lot of the same utility as SnB, sans the Single Target Kick and AoE Interrupt, but it can deal devastating amounts of Single Target DPS. This is mostly due to the fact that it deals primarily Spiritual damage.
40/40 Build:

We always want the KD for situations where we use a 2H Swordmaster such as small-man content, scenarios or City. If you are 2H tanking PvE, always take Phoenix’s Wing and just drop the knockdown.
40/70:

Pick up Protection of Hoeth and the remaining goodies from Khaine. Phoenix’s Wing is fantastic now at Stage 1 so you can choose to use an AoE or Single Target filler to get to Stage 2.
+2 Full Build:

+2 with Winds is optional now and the CD on Winds was increased and SM deals so much damage/utility with Khaine now. The primary reason for 2H Winds has always been for working with Slayers, but Slayers can reduce their own cooldowns. It’s a talking point with your group but the standard 70 build is more than fine and allows you to run stronger gear setups like max Parry or Warlord morale drain as examples.
Tactics

Always Use.

Always Use.

A powerful DoT that deals Spirit damage over a very short duration. Not mandatory but one of your most powerful options

This tactic no longer increases punt range and is therefore no longer mandatory. However, it does reduce the cooldown from 20 to 10 seconds, even with a Shield, and is a strong tactic if you plan to punt people often. Also, while wielding a 2H weapon, this will slow your target by 40% for 5 seconds as well as punting them. Due to this, the tactic remains one of the best options to use in most cases.
Last slot is Flexible:
Isha’s Protection for personal survivability
Rugged for personal survivability
UJ for more mobility
Bolstering Enchantments for the small group HoT
Lingering Intimidation for the Crit debuff

For even more damage

For even more damage

To strike through Block and Parry far more frequently.
Recommended Loadouts
- Greatweapon Mastery (flexible)
- Balanced Accuracy (flexible)
- Hoeth’s Tempest
- Potent Enchantments (flexible)
There’s no reason to ever drop HT as a 2h SM and give up the powerful CC unless you are doing PvE in which case replace with Menace, the other 3 are all more or less flexible depending on if you want to run another DoT Tactic, UJ, Strikethrough, Isha’s Protection, etc.
Gear
While leveling, buy the relevant War Crest sets from the Vendor.
Braggart > Challenger > Duelist > Mercenary
PvE then becomes your best friend as Bloodlord Gear is the next best set to obtain easily, with decent stats and even more Parry. A mix of PvE gear is quite good: 3 Bloodlord (Chest, Shoulders, Belt) with 4 piece Sentinel (Helm, Boots, Gloves, Ring) is a large amount of Parry and Stats. 5x Bloodlord and 2x Sentinel (Boots + Ring) is even more Parry, but less stats. Keep your Ravack’s Cloak and your 3 best Parry Rings on top of your Sentinel Ring, which should be 2x Genesis and a Gunbad Ruby. A Swordmaster can choose to gear more offensively, like a DPS, but it’s still our priority to be a functional Tank so the stats we don’t really want to compromise on are Parry and Wounds.
BiS: 6 Offensive Sovereign and 3 Victorious(Back, Boots, Ring). We want 6 Sov for the 2 bonus points, letting us pick up some more stuff from Mastery like Whispering Wind. We also get double Strength and double Wounds bonuses.
Weapons
While leveling, use the 2H Sword with the Titan’s prefix from the War Crest vendors.
BiS:

Reactionary does not stack with Eagle’s Flight or Wall of Darting Steel, but maintaining Eagle’s Flight sucks so having Reactionary as our passive defense is very strong.

Bloodlord is painful to run on a tank. The 5% damage is additive so we’re not gaining much from it as we have so much already between Taunt and Greatweapon Mastery. The downside of -10% Armour and Toughness is also very spooky because we rely so much on our stats as a Tank to survive. However, this is the weapon with which we will do the most damage.

The Fort weapon is the offensive choice if we don’t want the downside of Bloodlord. We won’t have Reactionary so careful use of Wall of Darting Steel is required. It also has a move speed proc which can let us drop Quick Escape from Renown, which is useful for a renown build we’ll go over in that section.
Talismans
Initiative until 250-300 > Wounds to 990+ > Strength. Our BiS liniment grants us 60 Wounds.
For your Sentinel Soul, use
Jewelry
While leveling, use the best combination of gear you find from your travels, renown jewelry is always good.

Buy your Gunbad Ruby as soon as possible.

Transition into the avoidance Genesis rings as soon as possible.


BiS: 2 rings locked in, Sovereign and Victorious, the other 2 slots go to our Genesis avoidance Jewels.
Renown Points
Opportunist 3: 9% Melee Crit, 30 points
Futile Strikes 3: 15% anticrit, 30 points
Reflexes 4: 18% Parry, 20 points
This is the build we use with the Fort Sword as we can drop Quick Escape. You can play FS4 and O2 instead for more survivability and less crit.
OR
Reflexes 4: 18% Parry, 20 points
Quick Escape 1: Movement speed Proc, 10 points
Futile Strikes 4: 24% anticrit, 45 points
Opportunist 1: 2% Melee Crit, 5 points
Gameplay
The 2H Swordmaster functions very similar to the SnB Swordmaster but you are trying to focus on assisting your DPS with knockdowns, debuffs and damage more than anything else.
Important Abilities

This ability is what essentially makes the 2H Swordmaster viable and accounts for most of your damage. Before you can get this ability, there’s not much of a point to even using a 2H weapon. The ability hits 5 times in 3 seconds, deals Spiritual damage and has a short cooldown.

A spammable AoE that deals Spirit damage. Because it is a Stage 1 skill, you can use it in Stage 2 or Stage 3 for even more crit chance; Fantastic change to the ability.

Sapping Strike deals a very high amount of Spirit damage every 3 seconds to a Single Target and gives you an ability buff for an extra 10% crit chance.
Skill Rotation / Priority
General Priority:
- Apply your Blade Enchantment
- Use Wall of Darting Steel to survive as needed.
Use the Tank abilities as described in the Tank Basics section at the discretion of your leader or upon your own intuition.
2H SM Priority:
- Use Whispering Wind at the discretion of your leader or upon your own intuition as often as possible.
- Apply the debuff from Wrath of Hoeth on enemies.
- Maintain Sapping Strike on the enemy(ies) you want to kill.
- Use Ether Dance to assist your allies in killing targets.
- Use Taunt to interrupt enemies and/or increase your damage.
- Use Ensorcelled Blow to advance Balance and apply the DoT effect.
Advancing Balance:
As a Swordmaster, your key utilities are mostly in Improved and Perfect Balance, so you will most often be using Sudden Shift to skip the No Balance phase unless you are using Protection of Hoeth to advance your Balance.
Notable Combos:
- Sudden Shift or Protection of Hoeth
- Wrath of Hoeth or Sudden Shift
- Whispering Wind
Great combo to get WW up without having to hit anything.
- Ensorcelled Blow
- Wrath of Hoeth
- Ether Dance
Your Standard DPS Combo. ES for the DoT > Spirit Debuff > Sudden Shift > Sapping Strike > ED for damage. Throw in a Taunt for more damage as needed.
Wrath of Hoeth has a heavy AP cost and lasts a long time, so it’s not always recommended to skip No Balance with Sudden Shift.
- Ensorcelled Blow
- Sudden Shift
- Ether Dance
Alternatively, you can use a different utility from Improved Balance, such as Quick Incision to slow an enemy and a Blurring Shock for damage if Ether Dance is on cooldown or to setup peak burst on your next combo. This is the far more META option now with the addition of Sapping Strike as you now have Sapping Strike, Quick Incision and Eagle’s Flight on Improved Balance.
- Sudden Shift
- Quick Incision
- Blurring Shock
Current META: We want to get out a lot more Improved Balance abilities.
- Ensorcelled Blow/Phoenix’s Wing
- Sapping Strike
- Sudden Shift
- WoH/QI/EF
- Ether Dance
Note that all Perfect Balance abilities have no AP cost and this helps you maintain your pool.
Morale
1: Champion’s Challenge or Demolishing Strike
Champs is one of the best CC’s in the game, There’s probably humor to be found in that it shares the acronym. You and your target are both locked in place for 10 seconds, and neither of you can even turn. As important as mobility and positioning are in this game, being unable to move for 10 seconds is terrifying. Coordinate this with your DPS friends to lock down the kill on your favorite enemy player.
Demolishing Strike is a big armor debuff that will stack on top of ability armor debuffs. Combined with an Ironbreaker or a White Lion, a target with -2500 armor is going to get hit very, very hard.
2: Raze or Wings of Heaven
Wings has been moved to Morale 2. One of the best engagement tools that Order has. You leap up to 65 feet away and snare all targets you land on by 30% for 10 seconds. It also looks really, really cool. This is the primary Morale that a Swordmaster will be using in a Warband besides their 3 or 4.

I really don’t recommend using Raze in most cases but our options for 2 are sparse so it can sit there and maybe get used once in a while.
3: Distracting Bellow
AoE 50% Damage Reduction that stacks with Detaunt, Guard and Challenge. This ability can turn a fight on its own.
4: Immaculate Defense
Your entire party becomes nearly immune to damage for 10 seconds. This stacks with Detaunt, Guard, and Challenge. One of the most powerful morales in the game and a lot of encounters in pvp revolve around this ability.
PvE
For PvE, you can play as either SnB or 2H. 2H is actually fantastic in PvE because your excessive Parry, Wounds and Armour let you easily tank every encounter in the game, and you deal significant damage which is great for both clearing content faster and generating threat. Just slot Menace

And go to town.
Always spec for Phoenix’s Wing while 2H tanking in PvE.
As SnB you will likely have to use your hate generating ability but as 2H it will rarely be necessary as you are dealing so much damage.
Archmage

The Archmage is the High Elf Healer class. It was intended to intersperse some Damage and Utility spells but functionally, that is rarely worth doing. They utilize a Two-Handed Staff. There are 2 Major roles for the Archmage: Healer and DPS.
Thanks to Cimba for your contributions to this section.
High Magic
The major mechanic of the Archmage is called High Magic and is represented by this element of your UI:

As you cast DPS or Healing Spells, you will build or consume points of High Magic.


High Magic will reduce the Cast Time and AP cost of a casted ability by 40% or improve the potency of an instant ability by 25%.
If you spend your time casting DPS spells, then you build Force and your High Magic can be spent to enhance your Healing Spells and vice-versa, if you spend your time Healing then you build Tranquility and your High Magic can be spent to Enhance your DPS spells. Unfortunately, there are not a lot of functional ways to do this as an Archmage and you are far better off maximizing one role, though there are typically 1 or 2 abilities that can benefit from High Magic during normal play, which we will cover in the relevant sections. You can build High Magic up to 5, meaning the next 5 spells of the opposite school will benefit from it. If you have 1 point and spend it, you will swap to 1 point of the other school, which is a sweet spot that can be powerful in some situations.
Important Core Abilities
Archmages provide 1 major buff to their party, a buff to all Resistances.

While not the highest source of Resistance buff, it’s still good and if there is no other Resistance buff, the Archmage’s is just fine.

The core instant HoT that all Healers share with different names. The Archmage (and Shaman) version is unique in that it also spreads to 2 nearby allies (not restricted to group or warband members). The potential of this spell is therefore 3x that of the other Healer variants and is an especially high priority to use.


These are 2 AoE debuffs with fairly useful effects. However, as a Healing Archmage, you will have very low Intelligence and % Reduced chance to be Disrupted therefore it’s quite hard to hit these and it can be hard to find the time to apply them. They are ideally used before a fight as once combat begins, it is likely that a different class will be debuffing these stats and you don’t have to worry about it. However, they do have a generous range of 100 feet so it’s worth the attempt if you have nothing better to do with a few globals.

The core absorb effect of the Archmage. It has a very high tooltip and is one of the best absorb effects in the game so use it generously. If you have Force, the absorb effect will be 25% stronger, which is common for a DPS Archmage.

The core cleanse of the Archmage. It applies a small absorb effect when cast and is therefore slightly higher in value than other Healers’ cleanses. Force drastically increases the cooldown recovery speed so a DPS Archmage can spam cleanse quite frequently.


The 3 core DoT effects of the Archmage. Each is an instant cast. They are not very useful for the Healing Archmage but they are of critical importance to the DPS Archmage.

Your standard DPS spam filler spell.

Your channeled spell. It deals damage instantly and then every 2 seconds over 6 seconds. Useful even as a Healing Archmage as it deals more damage than you would expect from a healing build and because it is instant, it can be enough to help secure a kill.

A high damage nuke with a 1 second cast.

A lifetap spell with a 2 second cast. This ability is unfortunately useless as a Healing Archmage because it has very little scaling in the build; it is quite powerful as a DPS Archmage, allowing you to tank and completely out-trade some enemies.
Healing Archmage
The Healing Archmage starts off weak but through Mastery, gains incredibly powerful tools for both healing and utility.
40/40 Build:

Energy of Vaul is the most powerful and diverse tool of the Healing Archmage and you should respec to get it as soon as it’s an option (level 29). With the recent nerf to EoV, you can choose to instead get all the Isha goodies first, but EoV is still fairly powerful and worth using.
40/70 Build:

More points into Isha, you can consider taking some of the utility such as Apotheosis, Law of Gold or Storm of Cronos for now.
+2 Full Build:

And finally +2 lets us pick up Funnel Essence to round out our kit.
Tactics

Huge boost to your healing when your target is low on health, also turns your Magical Infusion into a far more powerful cooldown. Always Use

This Tactic solves your AP problems and cannot be easily replaced until late game gear options and even then it is needed at times.

This Tactic pumps a small amount of Morale, but is worded strangely. The effect has no cooldown, but it has a per target cooldown. What that means is that much like Bolstering Enchantment, the effect can’t refresh until it falls off completely, so you have the potential to pump dozens of people at once with this Tactic. Order is severely lacking in Morale Pumps, especially on Tanks, so this can be a huge breadwinner. Use almost Always, even in PvE.

10% Healing Crit. ‘nuff said. Use almost always.
Other good Tactics for consideration:

Your cleanse now also cleanses your group in addition to your Defensive Target, applying the Absorb effect. It has a short radius of 50’ but will still hit key targets most of the time. You can also cleanse someone out of the group and still proc the group cleanse effect within 50’ of your Defensive Target.

Reduces the cooldown of your AoE Detaunt by 50%. Fantastic for situations where you are being pressured constantly, such as a City fight.

This turns your AP drain into a 24 cap AoE ability with a 20’ radius. Multiple Archmages can stack it, and it becomes quite broken.

You can now resurrect people instantly at the cost of stunning yourself for 3 seconds. Leaders may request for you to use this Tactic in RvR.

Your cleanse now applies a strong HoT on the target. Does not affect the group when used with Apotheosis.

Passive healing increase.
Recommended Loadouts
- Desperation
- Bolstering Boon
- Restorative Burst (flexible)
- Master of Tranquility (flexible)
Desperation is your only core Tactic, more or less, but I consider Bolstering Boon too good to not use. RB is flexible depending on how much AP you are getting from gear (6/3 should be self-sufficient without RB) and from group synergies. MoT is a fantastic output tactic but again, flexible.
- Desperation
- Bolstering Boon
- Apotheosis
- Isha’s Encouragement
This setup is absolutely disgusting in some cases, such as playing against AoE debuffers that you can cleanse like Blackguards. Denying all the Wave of Scorns and Furious Howls is incredibly high value.
Gear
Use the relevant War Crest sets while leveling.
Decimator > Obliterator > Devastator > Annihilator
PvE gear is quite good at this point. A Vanq + Redeye mix is common but we now have access to the new Vale-Walker set from Hunter’s Vale, allowing a mix of Vale-Walker and Sentinel to hold us over until BiS.
To learn more about how to acquire the Vale-Walker set, check here:
https://wiki.returnofreckoning.com/Vale-Walker_Set
5 Vale-Walker/3 Sentinel(Ring, Helm, Gloves/Chest) has a fantastic stat line for general use. The full 7 piece set of Vale-Walker has a couple of nice procs but with much lower stats and can be useful in Warband play where you can more easily let good play carry your survivability.
6 Vanquisher: This setup uses full Vanq for cast haste proc which is quite reliable to trigger with EoV, so you can EoV > Turbo Blessing of Isha / Boon of Hysh.
BiS: Full Main Sovereign. Sov has so many good things for us that we don’t want to skip it. The +2 Mastery bonus allows us to play full build; the AP Proc is fantastic and potentially lets us drop Restorative Burst; the 8pc Ability, called Absolute Preservation, prevents your entire group from being critically hit for 10 seconds on a 2 minute cooldown.


This is one of the strongest non–Morale defensive cooldowns in the game.
If you don’t use Full Sov, 6Sov/3Triumphant (Ring, Boots, Belt) is fine for the extra stat bonuses but you will lose Absolute Preservation and the AP Proc, and you will likely need to slot Resto Burst again.
6 Triumphant/3 Sov (Back, Ring, x; I like to use Shoulders or sometimes Belt for the Disrupt): This setup also has the powerful cast haste proc like Vanquisher does and has a ton of extra stats. This is a great option for Archmage as well because the cast haste is such a powerful output increase and is reliable to trigger with EoV. This setup can feel especially good when you don’t have a cooldown reduction buff from Whispering Wind because during the 5 seconds where you can’t cast EoV, there’s a high likelihood that you have the haste proc.
Weapons
Buy the Staves with the Apostle’s Prefix from the War Crest vendors.
BiS:

RR45 War Crest staff. Great statline with some anticrit. This is our preferred weapon for maximizing anticrit.

Upgraded from Subjugator Longstaff. Great stats and highest available Heal Crit. The proc is also quite useful. Heal AM plays medium range and you can often get clipped by some random AoE which will proc the effect. It also stacks with other Haste effects such as M2 or Vanq/Triumphant proc.

One of the Sentinel Influence choices, this Staff also has the Quickening Proc, as well as a nice AP Proc but no crit.
Talismans
My recommendation is a combination of Armour and Wounds Talismans. Mostly Armour with 2-4 Wounds in BiS. Armours are expensive but well worth it, they drastically increase your survivability against Physical damage. Some healers use Toughness but the only way to reasonably invest in Toughness is through Talismans, and you have no synergies on gear supporting the build. The only Healer that I think it’s okay to go Toughness on is Shaman due to their massive Toughness buff.
For your Sentinel Soul, use
Jewelry
While leveling, use the best combination of gear you find from your travels, renown jewelry is always good.


At 40, transition into 2 or 3 piece Genesis as soon as possible.


We don’t have other fantastic options that are cheap, so I recommend doing both the Beastlord Hunts and Hunter’s Vale. The Beastlord set for AM is unfortunately outfitted for DPS so we’re at a loss until Vale-Walker. Subjugator Cloak is a great filler for only 5 Genesis Crests.

You can also do LotD to get the Nehekharan set.


BiS: 2 rings locked in, Sovereign and Soul ring, for the last 2 you can keep your 2 piece genesis or spend the big bucks for the good rings.


(Vale-Walker Ring)
Renown Points
Spiritual Refinement 3: 9% Healing Crit, 30 points
Futile Strikes 3: 15% anticrit, 30 points
Deft Defender 4: 18% Dodge & Disrupt, 20 points
OR
Spiritual Refinement 4: 14% Healing Crit, 45 points
Futile Strikes 3: 15% anticrit, 30 points
Spend the rest however you want, some combination of Deft Defender, Reflexes, Willpower, Wounds.
OR
FS4 with SR3, spend rest how you like.
OR
FS4
DD4
SR2
This option is for maximizing your anticrit to survive burst, your Disrupt to avoid CC from enemy healers as much as possible, and the rest into Heal Crit. This is the kind of setup you would see for 6v6 Ranked gameplay.
Gameplay
The Healing Archmage has a fairly weak base kit but one of the strongest kits from Mastery available. They end up with one of the strongest AoE heals and a slew of tools that are some of the strongest Single-Target Healing skills, making them very versatile with a lot of room for skillful play.
Important Abilities

Probably the most important ability for the Heal Archmage. It’s 13 points in the Vaul tree and the only real reason we put points into that tree at all.
EoV was heavily nerfed on the December 9th patch and through the ability rework. It is no longer castable on the move at any time and it delves differently.

The healing is, at best, roughly 70% of what it used to be under the best circumstances but it’s still a fast cast and can still heal up to 24 targets, therefore good enough to use. The lifetap portion of the skill is now purely lifetap rather than being pooled into the healing portion of the skill.
*Outdated*It casts a damaging spell on your enemy target that cleaves to up to 4 other enemies within 25 feet of them, dealing a small amount of damage that cannot crit. This damage is added up, divided by 2, then added to a base heal value that will heal your Defensive Target and all allies (not restricted to group or warband members) within 20 feet, up to 24 people. The heal portion can crit, based on your heal crit and this is not considered a Lifetap, therefore it is subject to heal debuffs.
This skill is interesting because it scales with both Intelligence and Willpower. In the case of cleaving 5 targets who don’t block or disrupt and potentially are spirit debuffed, Intelligence is actually better scaling than Willpower. This does not change how you should build your character.
However, with the Tactic equipped

The damaging portion can Crit, the heal cannot and it is considered a Lifetap. This Tactic is only viable in a DPS build, similar to how Shield Warrior Priest works.
This Ability is especially interesting for a few reasons. It consumes the Tranquility portion of your Mechanic, like DPS skills do, therefore allowing you to interact with and spend your Mechanic as a Heal Archmage. That means the skill has a 40% increased cast speed and 40% reduced AP cost if spending Tranquility. It heals for a bit less than a group heal does, but because it can hit so many friendly targets with such a fast cast, it is incredibly powerful in all content, especially in large-scale RvR. You want to heal your Slayer? You’re also healing the 10 people fighting alongside him who aren’t even in your warband. It has a 5 second cooldown, meaning that if you have the Whispering Wind buff from a Swordmaster, you can spam this skill to your heart’s content during that window of time. An Archmage will typically have 5 Tranquility built up: spend it all with 5 EoV spams during Winds, after which your mechanic will shift to having 1 Force, which buffs your healing spells. You can use this for a 40% faster and cheaper Group Heal, a 25% stronger Lambent Aura that spreads to 2 nearby allies, etc. This feeds back and shifts your mechanic to 1 Tranquility for a powered-up EoV, and you rotate this cycle back and forth until the buff ends and your EoV has a 5 second cooldown again. Mastery of this technique, and mastery of having an Offensive Target that you can easily cast on during this time is key to being a successful Archmage Healer.

This is an instant cast ability with a 60 second cooldown that does not interact with your Mechanic. The base Ability gives an effect to an ally that lasts 30 seconds and will proc if they fall below 25% health, instantly healing them for a large amount. Because of the 25% threshold, this effect will always gain the effect of your Desperation Tactic, and is in fact further enhanced by the Tactic.

Your Magical Infusion will now make the target receive 25% more incoming Healing for 30 seconds and also dispel itself for the large heal if they reach 25% hp. This turns it from an Emergency Save button into a massive buff on a single target for 30 seconds and is one of the most powerful tools in your kit.

This is a ground-targeted spell that will create a pool at your cursor location, snaring enemies within massively. The effect will constantly refresh as long as they are within the pool and will end shortly after they leave. This ability is an incredibly powerful utility in RvR and should be used effectively whenever possible. The debuff associated, a fairly large Initiative debuff, is also incredibly useful, making enemies within 2-5% more likely to be crit on average.

This ability has a short cooldown and is channeled. It heals for a very large amount every second for 3 seconds on a Single Target.
Skill Rotation / Priority
General Priority:
- Maintain Prismatic Shield
- Pre-HoT before combat to build Tranquility
Triage Priority:
- Cast Energy of Vaul with Tranquility to triage up to 24 targets.
- Cast Blessing of Isha to triage your group.
- Cast Magical Infusion on an ally whom you predict will need the healing bonus in the next 30 seconds or to proc the large instant heal to save their life.
- Cast Funnel Essence to triage a Single Target. You can combo this with, for example, a Boon of Hysh or Healing Energy cast > Funnel Essence.
- Cast Absolute Preservation to make your group and/or yourself immune to critical hits for 10 seconds.
- Cast Shield of Saphery to prevent heavy damage on a Single Target
- Cast Boon of Hysh to triage a single target if you have a haste proc (such as Focused Mind or the proc effect from Fortress staff)
- Cast Healing Energy to maintain the HoT on a Single Target.
- Cast Boon of Hysh with no haste to triage a Single Target.
- Cast Cleansing Light to remove important debuffs from an ally.
Fill Priority:
- Apply Lambent Aura on any ally who might receive damage in the next 15 seconds.
- Cast Cleansing Light if you have Apotheosis and/or Isha’s Encouragement slotted and/or if it will remove a very important Debuff (such as Cutting Claw) and if no one will die as a result of you cleansing rather than healing.
- Use Mistress of the Marsh as directed by your leader or on your own intuition.
- Attempt to Debuff enemies with Law of Age
- Attempt to Debuff enemies with Rain Lord.
- Attempt to apply some of your DoTs to targets, such as Squig pets, to maybe kill them passively over time and push your Mechanic into Force, letting you use buffed Healing Spells.
Morale
- Divine Favor or Isha’s Ward
An instant, large heal that is not affected by any heal debuffs.

A very large self-absorb with a very long duration.
- Focused Mind or Blinding Light
One of the best morales in the game. It provides Immunity to most forms of CC for 10 seconds and also reduces cast times by 50%, up to doubling your Healing Output based on if the cast time of the spell is throttled by the GCD.

For 5 seconds, your target and all enemies within 20 feet of them will have a 1 second cast time added to all of their abilities. A 3 second cast becomes a 4 second cast. An instant cast becomes a 1 second cast. Very powerful but has a very short duration, so it’s normally only used in certain 6v6 matchups for very specific ability denial, such as Swapping Guard.
Castable on the move fixed in this patch https://www.returnofreckoning.com/forum/viewtopic.php?t=46881
Thank you Cimba for the Correction.
- Divine Protection
A 4500 Melee Shield for the entire party. The implications are pretty obvious, providing a strong counter to melee enemies.
Arcane Suppression gives multiple enemies both CC Immunities for weak CC and should almost never be used.
- Alter Fate

Allows you to instantly resurrect dead groupmates within 30 feet. This is rarely used but it's always an option.
PvE
No big changes are needed for PvE; You can opt to use a lot more Willpower/Healing Crit as you should rarely be taking much damage and Apotheosis is very useful on some encounters.
With the change or unintended bug with PvE healing threat, Subtlety is a Tactic worth considering in PvE.

DPS Archmage
The DPS Archmage feels a lot like a Bright Wizard but with a bit less damage and far more survivability, especially through self-healing. They are a notoriously powerful solo class, especially in the hands of a skilled player. They are also viable as a ranged DPS in Groups, offering high sustained damage with their DoT stacking and a powerful burst combo, as well as offering some fairly strong off-healing.
40/40 Build:

40/70 Build:

Tactics

Staple damage tactic. Always use.

Staple damage tactic. Almost always use.

This Tactic has been removed and replaced with

Losing Khaine’s Touch is a massive loss in power to Single Target DPS AM, so the build will likely use something like Dispel Magic to try to make up the difference in their burst.
The new Tactic, Increased Conductivity, is actually a pretty large power spike to AoE spamming DPS AM. You can run a fairly obscene amount of Strikethrough. 25% from Tactics, 10% passively from a 2-handed Staff, around 10% from Int and then whatever you have on gear, so if you can safely turret cast a 2s cast AoE Radiant Lance, you will probably be hitting a lot of targets, not to mention your other AoE spells which do quite a lot of damage. Even for Single Target, you are ignoring a tremendous amount of avoidance and can be enough to pick targets behind a wall of Hold the Line Tanks.
Last slot is flexible.

Use this for a large amount of extra healing generation for yourself or others.

Use this to gain a spammable AoE skill. The radius is quite small, though.

Spec for this for even more Single Target damage and powerful utility.
Besides these, many of the other Core Tactics have situational value.
Run Between Worlds: If you need your AoE Detaunt a lot more often.
Transfer Magic: If you want the AoE AP drain utility.

10% Block and Disrupt Strikethrough is well worth a Tactic slot, especially for AoE.
Or even Hurried Restore for the instant res can be situationally useful. Notably less useful for a DPS Archmage as you will typically have Force built and Gift of Life is about a 1.5 second cast in that case.
Recommended Loadouts
- Divine Fury
- Master of Force
- Arcing Power (flexible)
- Dispel Magic (flexible)
AP can be replaced with your AoE tactic or mix and match as you see fit; the first 2 are more-or-less the staples for the build to work well.
Gear
While leveling, Buy the relevant sets from the War Crest vendors.
Braggart > Challenger > Duelist > Mercenary
After this, PvE is again our best friend. Bloodlord is the set we want while building for BiS.
BiS: I recommend 3/3/3 Warlord (Gloves, Ring, Helm), Offensive Sovereign (Shoulders, Back, Boots) and Victorious (Ring, Belt, Chest). Every piece in this build has very strong substats and we get triple Int and Wounds bonuses. This setup lacks strikethrough, we can get some by using Victorious Gloves or Helm instead, or rely on a Sentinel Talisman and some jewelry, or even the strikethrough Tactic.
Weapons
While leveling, buy the Staves with the Nihilist’s prefix from the War Crest vendors.
BiS: Bloodlord

5% additive damage increase at the cost of -10% Armour and Toughness. Well worth the trade in almost all cases for DPS.

If you are playing solo or in situations where the Bloodlord debuff is too punishing, this is also a great option.
Talismans
Intelligence and Wounds to fit your needs.
For your Sentinel Soul, use either
Or
Jewelry
Starting at 40, use the best things you find during your travels, a mix of the 38 and 33 renown rings, cloak, and belt is always a good choice.
Transition into 2 or 3pc Genesis as soon as possible.
I would recommend not skipping Beastlord as a DPS Archmage because it offers a great Back and Jewelry for early gearing, and you do not have a lot of other good options.

The set also has a Pocket Item so you can get the 3pc bonus with just 2 pieces (typically Back and Jewelry) and the Pocket.
The Land of the Dead 2pc set is also an option before BiS instead of Beastlord:
Great stats with a ton of bonus damage.
BiS: Set and Soul ring locked in (Warlord and Victorious). We can keep the 2 Genesis (Remnant and Aspect) or dish out cash for the big value rings.


Use the prefix you prefer, such as Iron for Armour.
Run a 2nd Annulus instead of the Jet in cases where you don’t need the extra strikethrough.
Renown Points
Opportunist 3: 9% Magic Crit, 30 points
Futile Strikes 3: 15% anticrit, 30 points
Deft Defender 4: 18% Dodge & Disrupt, 20 points
OR
Opportunist 3: 9% Magic Crit, 30 points
Futile Strikes 3: 15% anticrit, 30 points
Deft Defender 3: 12% Dodge & Disrupt, 20 points
Quick Escape 1: Move speed Proc, 10 points
Opportunist 4: 14% Magic Crit, 45 points
Futile Strikes 3: 15% anticrit, 30 points
Spend the rest on Deft Defender and Wounds as you see fit.
OR
FS4 with Opportunist 3, spend rest on Deft Defender and Wounds as you see fit.
Gameplay
The DPS Archmage has few fast or instant nukes and no standard ability to slow targets. They instead rely on stacking a large amount of hard-hitting DoTs and executing a small burst nuke rotation to bring down targets. They do not have great AoE, but it’s enough to be viable in most cases.
Important Abilities

Causes your Defensive Target to pulse heavy AoE damage for 5 seconds. Fantastic for both AoE and Single Target, so long as your DE is hitting targets for the full duration.

Another DoT. It is fairly high in efficacy, matching tooltip value with Radiant Gaze. It also provides a much needed 50% heal debuff for your DoT to be able to bring down a supported target.

A whopping 5 second silence, this usually has the power to win you fights outright against a Healer or Caster. Note that it will grant 50 seconds of Immunity so use wisely.

A high damage instant Nuke that hits a cone in front of you up to 65 feet away. It also provides a massive debuff to Spiritual Resistance, very handy if there is no Swordmaster around to debuff for you. Expect to deal up to 50% more damage to a Spirit Resistance debuffed target.
Other Mastery Abilities/Tactics that are not in the Standard Build:

This ability is a medium distance AoE knockback, but with a 100ft range. Its only real use is knocking people off of walls or other terrain in RvR or some scenarios. Grants 30s of immunity to those affected, so be mindful.

This tactic is actually quite powerful, giving your Absorb target immunity to Stuns and Knockdowns. Can be useful at times, especially if you are playing solo.

This Tactic ramps up the lifetap healing from Balance Essence and Energy of Vaul significantly. It can be useful, especially while solo, but I do not recommend playing Archmage as a lifetap healer. Unlike the Shield Warrior Priest, it is quite clunky; You are forced to turret cast and you do not naturally interact with your mechanic while using those skills, as a Healing Archmage does.
Skill Rotation / Priority
General Priority:
- Maintain Prismatic Shield. Even if there is a stronger resistance buff in your group, it provides 1 free buffer from Shatter Enchantment for everyone.
- Try to pre-hot people with Lambent Aura to build Tranquility. It won’t heal much, but it still helps and we want to have Tranquility before fighting.
- Apply Drain Magic on a target who likely won’t be cleansed of the effect to help keep your AP up. It is typically strongest on enemy DPS who are most vulnerable to AP lockdown.
- Use a Force-empowered Shield of Saphery or Cleansing Light as needed.
- Cast Balance Essence if healing of yourself or an Ally is of critical importance and if you can do so safely.
- Shift your Defensive Target to people who are in need of the free healing you provide through effects such as Transfer Force and Arcing Power.
- Apply Storm of Cronos if the debuff is needed.
DoT Rotation:
- Apply Law of Conductivity
- Apply Radiant Gaze
- Apply Transfer Force
- Apply Scatter the Winds
We DoT in this order because we want our least valuable DoTs applied first, in case the target will be cleansed. The Healing from Transfer Force and the Heal Debuff from Scatter the Winds we want to protect.
Burst Combos: Try to always use casted ability paired with an instant nuke to create high burst damage. Here are a few examples:
- Radiant Lance > Searing Touch
- Radiant Lance > Storm of Cronos
- Dissipating Energies > Storm of Cronos
- Radiant Lance > Fury of Asuryan
AoE Priority:
- Cast Storm of Cronos
- Cast Dissipating Energies
- Cast Radiant Lance with the AoE Tactic.
Regarding your Mechanic, I wouldn’t worry about it too much when in combat. Trying to balance and utilize your Mechanic at the cost of many wasted globals and points of AP is simply not worth it currently. As you will have Force built, Shield of Saphery and Cleansing Light are notably more powerful, so use as needed. Throwing out some Lambent Auras is fine; even with the significant haste buff, your Boon of Hysh, Healing Energy and Blessing of Isha are so weak that they are more or less not worth using unless you have no alternative.
Morale
- Divine Favor or Isha’s Ward
An instant, large heal that is not affected by any heal debuffs.
A very large self-absorb with a very long duration.
- Focused Mind or Blinding Light
One of the best morales in the game. It provides Immunity to most forms of CC for 10 seconds and also reduces cast times by 50%, up to doubling your DPS output based on if the cast time of the spell is throttled by the GCD.
For 5 seconds, your target and all enemies within 20 feet of them will have a 1 second cast time added to all of their abilities. A 3 second cast becomes a 4 second cast. An instant cast becomes a 1 second cast. Very powerful but has a very short duration, so it’s normally only used in certain 6v6 matchups for very specific ability denial, such as Swapping Guard.
Castable on the move fixed in this patch https://www.returnofreckoning.com/forum/viewtopic.php?t=46881
Thank you Cimba for the Correction.
- Divine Protection
A 4500 Melee Shield for the entire party. The implications are pretty obvious, providing a strong counter to melee enemies.
Arcane Suppression gives multiple enemies both CC Immunities for weak CC and should almost never be used.
- Alter Fate
Allows you to instantly resurrect dead groupmates within 30 feet. This is rarely used but it's always an option.
We don’t have any specific morales that are much more useful as DPS, so we stick to these options.
PvE
No major changes are needed for PvE, you can consider using more Intelligence and Magic Crit. Your defensive stats are a little bit less valuable as is Strikethrough. I would recommend staying at 0% Chance to be Crit if possible and with a fair amount of Wounds. AoE is usually quite useful in dungeons so plan your build and Tactics with that in mind.
Shadow Warrior

The Shadow Warrior is the High Elf Ranged DPS class. It was designed to utilize 3 different stances to try to perform different roles (Like the Chaos Marauder), such as a Long Range Assassin, Mid Range Skirmisher and Melee DPS. This locks some of your abilities to certain stances and you will be required to “stance dance” at times while playing this class. It uses a Bow and One-Handed Sword and can perform 3 different roles: Single Target Ranged DPS, AoE medium-range DPS or Single Target Melee DPS.
Credit to Matt for your contributions to this section.
Stance
The Major Mechanic of the Shadow Warrior is their Stances. You can tell via your buffs which Stance is currently active or by looking at your Stances on your Action Bar. Each grants a specific bonus and is generally associated with the role it is tied to. The 3 Stances are:

Scout Stance increases your Primary Stat and Initiative by an amount tied to ability level. This increase can stack with other Buffs. In addition, Scout grants 10% increased Range on all Bow attacks. This stance is used for the Single Target Ranged DPS build.

Assault increases your Strength and Weapon Skill by an amount tied to ability level; converts all of your ranged stats from gear/talismans to melee (NOT Renown, potions) meaning that your Ballistic Skill also grants you Strength, Ranged Power increases Melee Power, Reduced chance to be Dodged also grants Reduced chance to be Parried; 10% Parry Bonus; 35% auto attack speed; and your Armour contribution from items is Doubled (Including Armour talismans). Because of the Parry Bonus and Armour doubling effect, Assault Stance can be swapped in order to make yourself much tankier while active. This stance is used for the Melee DPS build.

Skirmish Stance increases your Toughness by an amount tied to ability level; grants 5% ranged critical chance; and the ability to auto attack while moving. This Stance is used for the medium-range AoE build.
Buffs

This ability is a toggleable passive buff that grants +25% critical damage at the cost of higher AP costs. This affects Ranged Abilities only and is kept on in almost every situation.

Hunter’s Fervor grants your group 5 AP every second for 9 seconds, totaling 45 AP at the cost of 25 AP. This regeneration is not tied to AP regeneration and simply grants the AP every tick. It should be used right before periods of heavy AP use for the group and as often as possible.

Shadow Warriors have a DPS cooldown. VoN grants 25% additive damage increase for 10 seconds, on a 30 second cooldown. Because of this ability, Shadow Warriors become potent Burst Assassins during their VoN cycle. VoN also has interactions with certain abilities, which will be noted in their relevant sections.
Important Core Abilities

The Shadow Warrior detaunt. Besides the name and animation, it is identical to every other RDPS and Healer detaunt.

Similar to a Hunter’s Disengage in WoW, this ability sends you flying backwards and also snares all enemies within 30 feet by30% for 5 seconds. This ability will fail to fire if you do not have a Hostile Target who is within range.

Acid Arrow is usable in any stance, is a medium Armour debuff and debuffs your target’s Block by 10%. This is a very powerful ability to use on enemies with shields, assuming they don’t Block or Dodge the ability, or any enemy if a stronger Armour debuff isn’t available.

This ability is castable while moving and only usable in Assault or Skirmish Stance. It deals good damage in both stances. Great filler while kiting.
Crowd Control

The core snare of Shadow Warriors, with a 65 foot range and only usable in Scout or Skirmish Stance. With the ability rework, this skill is now your ranged knockdown as well while VoN is active.
Shadow Warriors have 2 other CC’s in their Core kit:

Only usable in Scout Stance, silences your target for 4 seconds, granting 40 seconds of immunity.

Only usable in Assault Stance, disarms your target for 4 seconds, granting 40 seconds of immunity.
Shadow Warriors have 2 AoEs in their Core kit:

A high damage ranged attack, usable only in Skirmish Stance. It hits a 65 foot line in front of your character and struggles with Z-axis, making its efficacy hit or miss. It has a short cast, short cooldown, and a very high AP cost, especially if you factor in Steady Aim.

A moderate damage melee slash that hits a wide cone up to 25 feet away. It can be used in Assault or Skirmish Stance, but only use this in Assault Stance, it does z dps in Skirmish. This ability has a very long cooldown.

This is a melee channeled ability that deals low damage.
Scout Shadow Warrior
This build performs as a Single Target Ranged DPS and is quite notorious right now. It can provide a significant burst combo that ignores most defenses and unlike most other builds of this nature, there isn’t a good warning for its combo. It can operate at a very long range.
40/40 Build:

We don’t yet have the points for Shadow Sting so we opt to maximize the Scout Tree. Guerilla Training is an option if constant movement speed is needed, but it eats a precious Tactic slot.
40/70 Build:

All the Scout goodies and Shadow Sting for our heal debuff. You can opt to drop the 1 extra point in Scout to pick up Split Arrows for the ability to swap to mid-range AoE spam, but doing so will eat a Tactic Slot and you will perform both roles worse than their maximized version.
Tactics

Festering Arrow, which deals Corporeal damage, will now completely ignore Corporeal Resistance and the only stat to reduce its damage is Toughness. Always Use.

Festering Arrow becomes a 2s cast and Eagle Eye a 1s cast. Dramatically speeds up your damage output. Always use.

Grants 240 Offensive Stats at the cost of 120 Toughness. Fantastic trade in most cases. Always use.
The last slot in Flexible:

Crit is one of our most important stats, so 20% for free is fantastic. This Tactic only procs from Direct Hits, so it can be a challenge to proc for this build, especially in lower levels of gear. One of the most common strategies to proc this is Fester > Rapid Fire. Rapid Fire should hit a few times as well as an Auto before Fester lands, giving you the highest chance of proc’ing.

Grants your group 8% Crit whenever you crit. A Fantastic support Tactic but at the cost of reducing your damage potential.

A generally fantastic Tactic that applies one of the strongest debuffs for Tanks in the game. Not incredibly useful in our build because we are Single Target and we don’t maximize the chance to proc. However, it can have niche uses in this build and is worth mentioning.

A great option if you are shooting into stacked Hold the Lines or Deft Defender stackers, or if you plan to try to kill Tanks.

Passive damage increase. Stacks with Instinctive Aim.

Very strong self-AP Pump. Scout doesn’t normally struggle that much with AP, but if you do, this can solve it. Great in PvE.

Guerilla Training if you want the constant movement speed.
Recommended Loadouts
- Bullseye (flexible)
- Instinctive Aim
- Enchanted Arrows (flexible)
- No Quarter
Unfortunately, the only things really flexible here are Bullseye and Enchanted Arrows. Both are massive damage tactics so if you want to fit in something like Guerilla Training, you’re going to have to pick what you want to sacrifice.
Gear
While leveling, buy the relevant War Crest sets, they are quite cheap.
Decimator > Obliterator > Devastator > Annihilator
After this, we can use PvE gear until BiS, 6 Bloodlord (including Back)/2 Sent (Helm and Jewelry) is fine. 5 Vanq/2 Sent is slightly more optimized but with a cost of 1000+ War Crests, the choice is yours.
For BiS I recommend 5 Sovereign/4 Triumphant(Belt, Boots, Chest, Jewelry). This setup gives us fantastic stats, double BS and Wounds bonuses, as well as the powerful 4pc from Triumphant.

This set bonus has been changed to match the Melee DPS variants, offering a large Toughness debuff and useful stat buff.
5 Invader is unique in that it grants a 10 foot range bonus, pushing us from 110 to 120 feet. This can be a very powerful bonus in open RvR and allows you to outrange enemies in hilarious ways (Core RDPS/Healer Detaunt has a 100 ft range). You can also stack this with the Event Pie

For another 10 foot range bonus, totaling 130 feet. These pies are only available from a time-limited event so don’t expect them to be cheap.
You can run 5 Invader/4 Triumphant(Ring, Back, Boots, Belt) but you will have to also buy the Invader Jewelry or 5 Invader / 2 Sovereign / 2 Triumphant(Ring, Boots) or Sentinel (Ring, Helm).
7 Sovereign / 2 Triumphant (Boots, Ring) has the powerful Boost Ability

This is a huge damage increase, granting both Critical Chance and Critical Damage. However, as Scout does not deal a lot of hits and is only Single Target, the proc is unreliable at best. Great for memes but not for consistency.
6 Triumphant / 3 Sovereign (Gloves, Ring, Helm): This option trades some Armor Penetration for AA-haste and a flat 4% damage bonus, which is quite strong.
Weapons
While leveling, buy the Bows and Swords with the Sniper’s prefix from the War Crest vendors.
BiS:

5% additive damage at the cost of -10% Toughness and Armour. Fantastic stats and a nice, slow speed of 3.7 for some CHAWNKY auto attacks.

Great stats, great Weapon DPS, highest crit, useful proc.
OR
You can choose to alternate the weapons for the fast speed of the Fortress Bow.


Fast auto attacks can feel really nice right now with how powerful procs are and because you are ranged, you aren’t typically losing a lot of auto attack uptime. Using an addon to track your Swing Timer can be beneficial to make sure that you aren’t losing too many autos, or mistiming them.
Talismans
You have a few options here between Ballistic Skill, Weapon Skill, Wounds and Armour talismans. You want great Ballistic Skill for a few reasons, some of your major abilities aren’t Physical so Weapon Skill isn’t needed for them, Festering Arrow only scales with Damage Bonus (in this case, Ballistic Skill + Ranged Power /5) and not Weapon DPS. However, much of your damage is Physical. If you skimp on Armour Penetration, then your DoTs, autos, Eagle Eyes and some of your snap nukes will be quite weak against higher Armour.
Armour Talismans are an interesting option for Shadow Warrior because while in Assault Stance, their value is doubled.
Do as you wish. Right now I think I’m using 2 Armours, 1 Wounds, 1 Ballistic, the rest WS.
For your Soul Talisman use:

Jewelry
Starting at 40, use the best things you find during your travels, a mix of the 38 and 33 renown rings, cloak, and belt is always a good choice.


Get 2-3pc Genesis and Sentinel Ring as soon as possible. If you are using 6Bloodlord/2Sent, your Back is already accounted for, so 3 Genesis is probably what you will use. If not, you can use a Back + Jewelry combo such as Beastlord


Or the Nehekharan set from Land of the Dead


BiS: 2 rings locked in, Triumphant and Sovereign. You can keep 2 piece Genesis or try to purchase some combination of Annuli and your Gunbad ring.


Renown Points
Opportunist 3: 9% Ranged Crit, 30 points
Futile Strikes 3: 15% anticrit, 30 points
Deft Defender 4: 18% Dodge & Disrupt/Reflexes 4: 18% Parry 20 points
OR
Opportunist 3: 9% Ranged Crit, 30 points
Futile Strikes 3: 15% anticrit, 30 points
Deft Defender 3: 12% Dodge & Disrupt/Reflexes 3: 12% Parry, 20 points
Quick Escape 1: Move speed Proc, 10 points
Opportunist 4: 14% Ranged Crit, 45 points
Futile Strikes 3: 15% anticrit, 30 points
Spend the rest on Deft Defender, Reflexes and Wounds as you see fit.
OR
FS4 with Opportunist 3, spend rest on Deft Defender, Reflexes and Wounds as you see fit.
As a Long Ranged DPS, you will typically get more value from DD as it’s another ranged that will be threatening you, but Parry is a good alternative when Melee will be the problem, and pairs nicely with the +10% Parry bonus when you are in Assault Stance.
Gameplay
The Scout Shadow Warrior has a series of high-damage nukes that can be dropped quickly in sequence and operates very well as an assist DPS for almost any group comp. It does not rely heavily on any group synergies or debuffs. The damage from a Scout Shadow Warrior is not typically telegraphed and can be very hard to predict, making them very dangerous.
Important Abilities

With correct Tactics, this is a 2 second cast that ignores Resistance. This ability has no Weapon DPS scaling, relying entirely on damage bonus and is therefore incredibly powerful in mid-tier but scales very well into endgame. Seeing Crits in the range of 2800-4000 (the hard damage cap in RvR from 1 ability in the game) is common, regardless of target. It has a fairly long flight time, allowing the Shadow Warrior or their allies to follow up the damage easily.

An instant cast, hard hitting nuke that deals extreme damage if the target is below 30% HP. It has a fairly fast flight time.

Eye Shot is no longer a knockdown, it is now a low damage skill with a pretty good debuff attached to it. It retains a very long range and can now be cast while moving, so it’s still useful.

An instant cast, medium damage nuke with a moderate flight time. The effect reduces the range of an opponent’s abilities by 25%, which can be a very powerful soft cc (soft cc’s do not grant an immunity or fully disable an opponent). If you are in a ranged duel, this ability can give you 3s where you out-range your opponent and can blast them freely.

Your filler nuke. It has a 1 second cast and deals Physical damage. It can deal some pretty insane damage, in the range of 1300 to over 2000 per cast, depending on target and circumstance. It costs a heavy amount of AP, especially with Steady Aim.

This ability is an instant cast channel that deals damage twice per second. The damage isn’t bad for now.., not quite competitive in DPS with Eagle Eye spam but it is instant and has a short cooldown, so it’s good for instant, fast damage to help secure a kill on a low-health target or proc Bullseye. During VoN, it deals 10% more damage.

Shadow Sting is a fairly high damage 9 second DoT that debuffs healing by 50%. During VoN, this ability is undefendable (great for bullying shield Tanks). The problem with Shadow Sting is that it has a very short range at 65 feet, so the Scout Shadow Warrior sometimes has difficulty applying it, even if Heal Debuff is a major role they are providing to their party.

Usable only from Skirmish Stance and a 65 foot range, this is a high damage instant nuke that requires the enemy to be facing away from you. Flanking Shot has lost its crit chance perks.
The build is simple to play and very powerful, especially paired with another DPS to assist with. It works incredibly well with just about anyone, providing the key utilities of heal debuff and a ranged knockdown, as well as potent burst damage that is easy to execute. Line up targets with friends and time your damage together.
Skill Rotation / Priority
General Priority:
- Apply Scout Stance
- Apply Steady Aim
- Use Hunter’s Fervor to grant your group AP at opportune times.
- Use your detaunt to help survive against single targets.
- Use Whirling Pin to reposition and/or slow clumps of enemies.
Rotation Examples:
- Use Vengeance of Nagarythe
- Cast Takedown to knock down the target as necessary.
- Cast Festering Arrow
- Cast Rapid Fire and hope that Bullseye procs at some point before Fester hits.
- Cast Eagle Eye or Eye Shot until the target is below 30% HP.
- Cast Fell the Weak.
- If the target is still alive, use Glass Arrow, Flanking Shot, Rapid Fire, Eagle Eye or another Festering Arrow to finish them.
- Use Eye Shot if you need to move.
This rotation tends to shine when working in coordination with other DPS. Its output is lower but it focuses on getting the Bullseye proc, giving your important damage a much greater chance to crit.
OR
- Cast Vengeance of Nagarythe
- Cast Takedown to knock down the target.
- Cast Festering Arrow
- Cast Eagle Eye until the target is below 30% HP.
- Cast Fell the Weak.
- If the target is still alive, do as described above.
This rotation is higher DPS and can create huge spikes of damage that are very hard for Supports to react to in time. It works better in higher gear with more passive crit chance and armour penetration and is much less reliant on other DPS assisting.
Other popular combinations are Fester > Glass Arrow. Glass Arrow will actually hit slightly before Fester does and adds a pretty substantial amount of burst. This is better in higher gear with higher crit chance where you are less reliant on 2 hits of Rapid Fire before Fester connects.
A note about Darkpromise 4 piece: The proc will be consumed by the first ability you fire but will affect the first direct damage on the target. So if you Fester into Rapid Fire or Glass Arrow as described above, you will waste the proc on the weaker skills. You instead have to do back-to-back casts such as Fester > Acid Arrow/Eagle Eye. If the proc is triggered by a hit of Rapid Fire, the next hit of Rapid Fire will consume it. It’s a fun proc but incredibly unwieldy to use.
DoTs: Because Shadow Sting requires the target to already be suffering from an ailment, it’s typical to combo it with another debuff if you are serving as the heal debuff for a team.
Broadhead Arrow > Shadow Sting or
Acid Arrow > Shadow Sting.
Keep in mind the short range of the ability.
Typically your goal in a group with a Scout Shadow Warrior is to kill a target before they have any chance to react, so using one of the Shadow Sting rotations can telegraph your intentions to kill and ruin your chances. It can be better to simply synchronize your burst rotations and if the target lives, apply Shadow Sting and burst again shortly afterwards.
Remember that you can also swap to Assault Stance to drastically increase your defense against Physical damage and Melee.
When working with a Single Target Bright Wizard, watch their Boiling Blood debuff and start your rotation with Takedown at 5 or 4 seconds or with Festering Arrow at 3 seconds. This team is particularly brutal because Scout can shred the absorbs off of a target before the BW rotation hits, and absorbs are a very common way to counter BW damage.

Observe the buffs on your targets! This Sorc has no Armour potion and no resist buff, which should result in a very easy kill for this BW + Scout team. He does have 2 HoTs active and a large shield, which the Scout can rip through quickly, allowing the BW to hit a perfect timestamp.

Target is knocked down, no Absorb, only 1 HoT left, Eye shot debuff, slowed by Withering Heat from the BW and it looks like Boiling Blood and Festering Arrow are about to hit the target at the same time, good luck healers!

Some bad Crit RNG and the Sorc managed to hit his Resistance self buff in time to prevent a lot of the BW damage, he survives the initial onslaught with 31% HP, just about in range for Fell the Weak.

A quick Fell the Weak > Rapid Fire + Auto attack combo to finish the target before his healers react. Rapid Fire > Fell the Weak would have been a more efficient combo here, guaranteeing the target to be in Execute range, but you can’t cancel RF into a Fell The Weak until the Global Cooldown finishes, which might have given his healers enough time to react.
The same general concept applies to any composition. Know how the burst window of your ally dps operates and try to match it.
Morale
- Concealment or Lileath’s Forgiveness

Guaranteed Dodges and Disrupts for 7 seconds. However, this will not make you Dodge or Disrupt abilities already applied to you, such as Word of Pain, and can fail to save you in some circumstances.

Removes every removable debuff from you and grants you 250 Action Points. I tend to use this more than Concealment because it will remove the important debuffs such as Word of Pain or heal debuffs.
- Focused Mind or Ambush

One of the best morales in the game. It provides Immunity to most forms of CC for 10 seconds and also reduces cast times by 50%, up to doubling your DPS output based on if the cast time of the spell is throtted by the GCD.

Also one of the best morales in the game, and one of the most powerful utilities that a Shadow Warrior can provide for Large Scale RvR. Your target and all enemies within 30 feet are slowed by a crippling 60% for 3 (reduced from 9) seconds. Ideal for engaging or disengaging and does not grant any immunities.
- Instill Fear

1200 AoE Morale that hits all enemies within 30 feet, staggering them for 6 seconds. The Stagger can be useful if you manage to sneak yourself into a clump of healers, or the AoE Morale drop can be useful, but try to make sure that your enemies already have immunity if that’s your intended use. Grants 30 seconds of Immunity.
- Hail of Doom

Hits a total of 10 times over 5 seconds for a total of 3000 Morale damage in a 20’ radius around where you target. It’s not a bad Morale if used on top of an AoE damage drop but this build does not specialize in AoE nor does it supplement this ability well like an Engineer or Skirmish Shadow Warrior would, so it has limited use-case scenarios.
Skirmish Shadow Warrior
This build performs mainly as a mid-range AoE/Damage Support but can also be played as a highly mobile Single Target build. Overall this is the most versatile and probably most played build. The Skirmish Shadow Warrior is capable of very high sustained DPS, fairly potent AoE burst and some powerful Utility but has some issues, such as major AP problems and poor ability design/bugs which I will detail below. One of the biggest strengths of the Skirmish Shadow Warrior is that it is a ranged AoE class that can stack most of its damage with others of the same class. Engineers cannot stack Napalm or Phosphorous Shells; Bright Wizards cannot stack Rain of Fire. Shadow Warriors can stack their dots and their direct damage via Spiral-Fletched Arrow, Lileath’s Arrow and Barrage so in that regard, they function as a pseudo-melee but are effective at 40 foot range all the way up to 85 with Invader + Range pie. Spiral-fletched is also castable on the move which makes them very powerful.. Well, Skirmishers!
40/40 Build:

You can use Eye Shot instead of Shadowstep if you like. In that case, you can also drop Powerful Draw for Guerilla Training as Powerful Draw is used rarely. It’s mobility vs a long-range debuff/burst tool. This build has no core snare break and needs to be able to play fairly close to the enemy; both are useful and depend on circumstance.
40/70 Full Build:

Pick up No Respite for the damage bonus at close range.
40/70 All the Goodies Build:

40/70 Single Target Variant with Fell the Weak
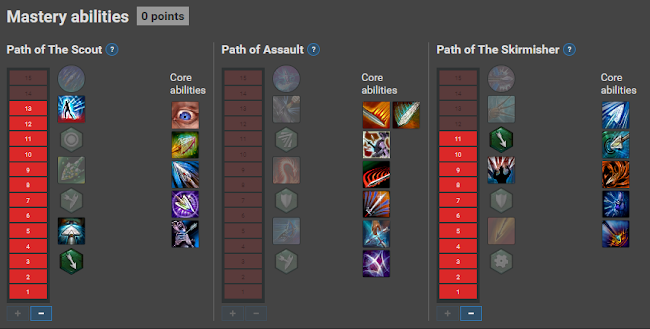
This variant grants access to your powerful Finisher from Scout, but you do have to stance swap to use it, which can be slightly annoying in addition to the long flight time of Fell the Weak. The build also takes Guerilla Training for kiting.
40/70 Max Skirmish

This build goes full Skirmish to maximize the damage you can deal from a range. Great for RvR as you can play from Maximum Range with no drawbacks.
Tactics

Big additive damage bonus at close range, use this if you are playing at close range. Note that it gives you the damage bonus if your Hostile Target is <45 feet, not every individual target. You can abuse this by targeting a nearby enemy during Barrage spam for example.

The central tactic of this build. It reduces the range of your Broadhead Arrow and Spiral-Fletched Arrow but makes them cleave up to 24 targets within 20 feet of your Hostile Target. Note that the abilities are coded strangely. As of the ability rework, these abilities will still cleave if the initial target defends, which is a massive boost for AoE Skirmish.

Additive Armour Penetration. Very powerful damage Tactic.

Incredibly powerful tactic that is Core to every Ballistic Skill user. If any enemy avoids any of your attacks, they receive a 10 second debuff that reduces their Dodge and Parry by 10% and Block by 5%. This massively multiplies the damage that Tanks in particular take because they are not only receiving more hits from enemies, they are also failing to Block or Parry damage from Guard far more frequently. At least 1 person in a warband should be running this. I find it to be ideally used on an Engineer but a Shadow Warrior can do it just fine between SFA and Barrage spam.
Recommended Loadouts
- Bullseye
- Split Arrows
- Instinctive Aim
- Powerful Draw (flexible)
You can run Replenishing for AP or even Leading Shots for a massive group synergy buff, especially late game when you have 65%+ Armour Penetration without PD.
- Bullseye
- Masterful Aim (flexible)
- Instinctive Aim
- Powerful Draw (flexible)
Pure Single-Target Skirmish. Your BHA and SFA do a lot more damage but lose the AoE; you still have good AoE with LA > Barrage Combo. This setup is the highest damage but you can drop something for Leading Shots or Discerning Offense in the Flexible slots.
Gear
While leveling, buy the relevant gear set from the War Crest Vendors.
Decimator > Obliterator > Devastator > Annihilator
After this, you can transition into PvE gear. 5 Bloodlord/2 Sentinel (Ring and Helm) is just fine until you can afford one of the BiS options. Vale-Walker is also great.
BiS: 5 Sovereign/4 Triumphant(Belt, Boots, Chest, Jewelry). This setup gives us fantastic stats, double BS and Wounds bonuses, as well as the powerful 4pc from Triumphant.
This set bonus has been changed to match the Melee DPS variants, offering a large Toughness debuff and useful stat buff.
5 Invader is unique in that it grants a 10 foot range bonus, pushing us from 65 to 75 feet. This is a very powerful bonus in open RvR and allows you to more easily play around a blob of dangerous melee abilities such as Choppa pulls or Marauder KD’s and pulls. You can also stack this with the Event Pie
For another 10 foot range bonus, totaling 85 feet. These pies are only available from a time-limited event so don’t expect them to be cheap.
You can run 5 Invader/4 Triumphant(Ring, Back, Boots, Belt) but you will have to also buy the Invader Jewelry or 5 Invader / 2 Sovereign / 2 Triumphant(Ring, Boots) or Sentinel (Ring, Helm).
7 Sovereign / 2 Triumphant (Boots, Ring) has the powerful Boost Ability
This is a huge damage increase, granting both Critical Chance and Critical Damage. Skirmish is very good at keeping this buff active and the build can do tremendous damage with this gear setup but it’s a bit squishy.
6 Triumphant / 3 Sovereign (Gloves, Ring, Helm): This option trades some Armor Penetration for AA-haste and a flat 4% damage bonus, which is quite strong.
Weapons
While leveling, buy the Bows and Swords with the Sniper’s prefix from the War Crest vendors.
BiS:
5% additive damage at the cost of -10% Toughness and Armour. Fantastic stats and a nice, slow speed of 3.7 for some CHAWNKY auto attacks.
Great stats, great Weapon DPS, highest crit, useful proc.
OR
You can choose to alternate the weapons for the fast speed of the Fortress Bow.
Fast auto attacks can feel really nice right now with how powerful procs are and because you are ranged, you aren’t typically losing a lot of auto attack uptime. Using an addon to track your Swing Timer can be beneficial to make sure that you aren’t losing too many autos, or mistiming them.
Talismans
You have a few options here between Ballistic Skill, Weapon Skill, Wounds and Armour talismans.
Armour Talismans are an interesting option for Shadow Warrior because while in Assault Stance, their value is doubled.
Do as you wish. I strongly recommend Weapon Skill stacking for this build.
For your Soul Talisman use:
Jewelry
Starting at 40, use the best things you find during your travels, a mix of the 38 and 33 renown rings, cloak, and belt is always a good choice.
Get 2-3pc Genesis and Sentinel Ring as soon as possible. If you are using 6Bloodlord/2Sent, your Back is already accounted for, so 3 Genesis is probably what you will use. If not, you can use a Back + Jewelry combo such as Beastlord
Or the Nehekharan set from Land of the Dead
BiS: 2 rings locked in, Triumphant and Sovereign. You can keep 2 piece Genesis or try to purchase some combination of Annuli and your Gunbad ring.
Renown Points
Opportunist 3: 9% Ranged Crit, 30 points
Futile Strikes 3: 15% anticrit, 30 points
Deft Defender 4: 18% Dodge & Disrupt/Reflexes 4: 18% Parry 20 points
OR
Opportunist 3: 9% Ranged Crit, 30 points
Futile Strikes 3: 15% anticrit, 30 points
Deft Defender 3: 12% Dodge & Disrupt/Reflexes 3: 12% Parry, 20 points
Quick Escape 1: Move speed Proc, 10 points
Opportunist 4: 14% Ranged Crit, 45 points
Futile Strikes 3: 15% anticrit, 30 points
Spend the rest on Deft Defender, Reflexes and Wounds as you see fit.
OR
FS4 with Opportunist 3, spend rest on Deft Defender, Reflexes and Wounds as you see fit.
As a Long Ranged DPS, you will typically get more value from DD as it’s another ranged that will be threatening you, but Parry is a good alternative when Melee will be the problem, and pairs nicely with the +10% Parry bonus when you are in Assault Stance.
Gameplay
The Skirmish Shadow Warrior stacks DoTs and then unleashes high direct damage on top of the ticking DoT for burst. They require a few globals to set up and are good at dismounting/pressuring foes who are chasing.
Important Abilities
Beyond Broadhead Arrow, we have access to

A medium damage AoE Dot that deals Elemental damage. While Vengeful, the radius is also boosted to 30’.

Barrage is a high damage instant AoE nuke that hits everything in a wide cone in front of you, up to 40 feet away. This ability does not scale with range increases but rather radius increases, of which we have access to none. Ideally a SW is paired with a Swordmaster for Whispering Wind, allowing the spam of this ability with VoN up to both deal high damage and spam drain morale on a blob of enemies. This on top of your ticking DoTs, you have quite potent DPS. With Steady Aim, Barrage has a crippling 44 AP cost so make sure that you are ready for a drop with as much AP as possible.

Lileath’s Arrow: This is your highest damage ability but it hits in a narrow line in front of you, up to 65 feet and costs a massive 50 AP.
Skill Rotation / Priority
General Priority:
- Maintain Skirmish Stance
- Maintain Steady Aim
- Use Hunter’s Fervor to grant your group AP at opportune times.
- Use your detaunt to help survive against single targets.
- Use Whirling Pin to reposition and/or slow clumps of enemies.
Long Range Priority:
- Apply Broadhead Arrows to enemies
- Apply Shadow Sting to important single targets as needed.
- Apply Flame Arrow to enemies
- Activate Vengeance of Nagarythe
- Use Lileath’s Arrow > Barrage as a combo when possible.
- Spam Spiral-Fletched Arrow
If your goal is to Barrage, maintain your dots then walk/Shadowstep close to the pack of enemies, wait until WW is active, Activate VoN, then spam Barrage.
If you are using Takedown to knock down, use it on opportune targets or as directed by your leader.
Try to always have an offensive target while AoEing so you aren’t wasting auto attacks. If you are doing Single Target damage, try to combo a cast ability with an instant for burst, similar to what we do with Lileath’s > Barrage.
Examples:
Eye Shot > Glass Arrow
Spiral-Fletched > Flanking Shot
You can also sync your dots to tick at the same time for peak burst. Simply use one global between the dots to make them line up.
Example:
BHA > SFA/FA > SS
You can then set up your biggest burst when your dots tick on every other global.
Morale
- Concealment or Lileath’s Forgiveness
Guaranteed Dodges and Disrupts for 7 seconds. However, this will not make you Dodge or Disrupt abilities already applied to you, such as Word of Pain, and can fail to save you in some circumstances.
Removes every removable debuff from you and grants you 250 Action Points. I tend to use this more than Concealment because it will remove the important debuffs such as Word of Pain or heal debuffs.
- Focused Mind or Ambush
One of the best morales in the game. It provides Immunity to most forms of CC for 10 seconds and also reduces cast times by 50%, up to doubling your DPS output based on if the cast time of the spell is throtted by the GCD.
Also one of the best morales in the game, and one of the most powerful utilities that a Shadow Warrior can provide for Large Scale RvR. Your target and all enemies within 30 feet are slowed by a crippling 60% for 3 (reduced from 9) seconds. Ideal for engaging or disengaging and does not grant any immunities.
- Instill Fear or Explosive Shots
1200 AoE Morale that hits all enemies within 30 feet, staggering them for 6 seconds. The Stagger can be useful if you manage to sneak yourself into a clump of healers, or the AoE Morale drop can be useful, but try to make sure that your enemies already have immunity if that’s your intended use. Grants 30 seconds of Immunity.

This ability causes a 300 morale damage cleave 20’ around the first target hit by your abilities with a max rate of 1/second. Realistically, you will get 6-7 maximum procs out of this while doing the AoE rotation. It’s a lot of free extra damage and it’s easy to stack it with other people using it because you aren’t pushing the morale cap very hard (refer to the Morale section).
- Hail of Doom
Hits a total of 10 times over 5 seconds for a total of 3000 Morale damage in a 20’ radius around where you target. It’s not a bad Morale if used on top of an AoE damage drop. As a Skirmish Shadow Warrior you can set up all your DoTs and drop this on top for some fairly powerful burst.
Assault Shadow Warrior
The Assault Shadow Warriors functions best as a Single Target MDPS Burst Assassin who also has access to the core SW Ranged Kit as needed. Most of your stats transfer between Assault and your ranged stances but your Renown Training does not, which will leave your ranged abilities slightly weak. Most of the gear options remain the same as the other 2 builds with some slight differences, which is nice on the wallet.
40/70 Build:

Prior to this, drop Shadow Sting and/or Flame Arrow
This is the most common variant but Sinister Assault is also a great option at the cost of a Tactic slot. You can drop Flame Arrow to pick up SA instead.
Tactics

Always Use

Always Use

Always use unless you are going far past softcap (1050) on Strength.
Last slot is Flexible. Bullseye is the best damage choice but it’s drawback (+10% to be crit) can be dangerous, so using

In its place is a relatively good option.
If you run Sinister Assault, drop Bullseye or Instinctive Aim for it.
Do not use Masterful Aim as Assault, it will not transfer into melee stats.
Recommended Loadouts
- No Respite
- Merciless Soldier
- Instinctive Aim
- Wrist Slash (flexible)
Wrist Slash / Bullseye / Sinister Assault; pick your poison.
Gear
While leveling, buy the relevant War Crest sets, they are quite cheap. We do not need specialized melee gear as Assault Shadow Warrior because the stats transfer into melee stats while you are in the stance, so just build a normal ranged set.
Decimator > Obliterator > Devastator > Annihilator
After this, we can use PvE gear until BiS, 6 Bloodlord (including Back)/2 Sent (Helm and Jewelry) is fine. 5 Vanq/2 Sent is slightly more optimized but with a cost of 1000+ War Crests, the choice is yours.
For BiS I recommend 5 Sovereign/4 Triumphant(Belt, Boots, Chest, Jewelry). This setup gives us fantastic stats, double BS and Wounds bonuses, as well as the powerful 4pc from Triumphant.
This set bonus has been changed to match the Melee DPS variants, offering a large Toughness debuff and useful stat buff.
7 Sovereign / 2 Triumphant (Boots, Ring) has the powerful Boost Ability
This is a huge damage increase, granting both Critical Chance and Critical Damage. This proc is also fairly reliable as ASW because you auto attack so much, creating a lot of hits. You can even throw a Sweeping Slash to proc it more reliably. Slightly less value because we get a Crit Damage tactic, but still fantastic although squishy.
6 Triumphant / 3 Sovereign (Gloves, Ring, Helm): This option trades some Armor Penetration for AA-haste and a flat 4% damage bonus, which is quite strong.
Weapons
While leveling, buy the Bows and Swords with the Sniper’s prefix from the War Crest vendors. Again, we don’t need melee specific gear here.
BiS:


We do have a slightly different BiS here as we want the Bloodlord Sword rather than Bow for the slow attack speed. You use the other variation if you don’t want to invest in a 2nd Fortress Weapon but you will notice a fairly large difference in auto attack damage.
OR
The difference here is the auto attack speed. Bloodlord Sword is 1.9 whereas Fortress Sword is 1.7. It doesn’t let us hit that juicy 1.5 or lower but it should be possible if you decide to use Warlord or something.
Talismans
You have a few options here between Ballistic Skill, Weapon Skill, Wounds and Armour talismans.
Armour Talismans are an interesting option for Shadow Warrior because while in Assault Stance, their value is doubled. As ASW, you can run a bunch of Armour Talis and be obscenely tanky if you so choose.
Do as you wish. Shadow Warrior has a very squishy statline, even in BiS, so consider some Wounds or Armour talismans if you aren’t comfortable with your defenses as a melee.
For your Soul Talisman use:
Jewelry
Starting at 40, use the best things you find during your travels, a mix of the 38 and 33 renown rings, cloak, and belt is always a good choice.
Get 2-3pc Genesis and Sentinel Ring as soon as possible. If you are using 6Bloodlord/2Sent, your Back is already accounted for, so 3 Genesis is probably what you will use. If not, you can use a Back + Jewelry combo such as Beastlord
Or the Nehekharan set from Land of the Dead
BiS: 2 rings locked in, Triumphant and Sovereign. You can keep 2 piece Genesis or try to purchase some combination of Annuli and your Gunbad ring.
Renown Points
Opportunist 3: 9% Melee Crit, 30 points
Futile Strikes 3: 15% anticrit, 30 points
Deft Defender 4: 18% Dodge & Disrupt/Reflexes 4: 18% Parry 20 points
OR
Opportunist 3: 9% Melee Crit, 30 points
Futile Strikes 3: 15% anticrit, 30 points
Deft Defender 3: 12% Dodge & Disrupt/Reflexes 3: 12% Parry, 20 points
Quick Escape 1: Move speed Proc, 10 points
OR
Opportunist 4: 14% Melee Crit, 45 points
Futile Strikes 3: 15% anticrit, 30 points
Spend the rest on Deft Defender, Reflexes and Wounds as you see fit.
OR
FS4 with Opportunist 3, spend rest on Deft Defender, Reflexes and Wounds as you see fit.
Both DD and Reflexes have their benefits as a MDPS, pick what suits the situations you predict to be in. Going for Reflexes is more common as you can get so much Parry as an ASW passively and your M1 covers your Dodge and Disrupt needs.
Gameplay
Assault Shadow Warrior swaps between a mid-range skirmisher and a melee burst class with ease. The playstyle is quite interactive and fun for many, and also incredibly effective.
Important Abilities

Your core big damage skill. Requires you to be behind your target unless Vengeful, then it is usable from any position. It has a 5s cooldown so if we have a Swordmaster in Group with Whispering Winds, we can spam this.

A high damage Physical DoT applied from melee range. This ability is enhanced with a lot of free Crit Chance from Merciless Soldier.

Medium damage spam filler from melee range. Use when nothing else is available or to proc the effect from Wrist Slash if you are using the Tactic.

Shadowstep is a fairly quick gap closer with a medium range of 45 feet and also grants 15% Dodge, Parry, and Disrupt for 10 seconds, which is quite powerful. Note the 45 foot range and train yourself on it, as the range indicator can help you stay within No Respite range while kiting an opponent.

Your hardest hitting attack that hits twice and also provides a 10% chance to be crit debuff on your target. While Vengeful, this will deal Spiritual damage, completely bypassing Physical mitigation.

A 3 second knockdown from melee range that also deals very high damage.
Skill Rotation / Priority
You can kite in Skirmish Stance and whittle your opponent down with Broadhead Arrow, Shadow Sting, Flame Arrow, Spiral-fletched Arrow, Flanking Shot and Takedown, then swap to Assault for the big combo:
- Use Shadowstep to close distance
- Activate Vengeance of Nagarythe
- Use Exploit Weakness to knockdown your target
- Use Crosscut
- Use Brutal Assault
- Use Grim Slash
This combo deals devastating amounts of damage for only using 3 major abilities. If your target is still alive after the knockdown ends, you can continue to spam Brutal Assault and Grim Slash if they are low, apply a Draw Blood for another DoT, or disengage with Whirling Pin or Swift Strikes to begin kiting again in Skirmish and wait for your next big combo. Alternatively, you can apply Draw Blood before you activate VoN to have 4 DoTs ticking during your burst instead of 3.
You can also use Spiral-Fletched Arrow in Assault Stance, which does very high damage because you gain the extra Weapon Skill from the stance. While you gain melee stat conversion in Assault Stance, you don’t actually lose your ranged stats.
Remember than you can interrupt abilities with

To stop a healer winding up a big heal, a DoK channeling Rend Soul or a Choppa channeling Furious Choppin’ as just a few examples.
Swift Strikes does not deal a lot of damage unless the target happens to be winding up a casted ability

This is quite rare as most casters or healers will react to you with instant casts and movement, but on the occasion where it does get value, a Channel-Cancel Combo can be quite powerful. Channel until both the GCD is over and your auto-attack timer is up, then use another melee ability to hit the target with the damage from Swift Strikes, an Auto-attack and another ability all at the same time for high burst damage.
Channel-canceling is less prevalent now on Shadow Warrior because our attack speed is so high and we don’t want to miss autos, but it’s still a viable technique for burst if used as described above.
Morale
- Concealment or Lileath’s Forgiveness
Guaranteed Dodges and Disrupts for 7 seconds. However, this will not make you Dodge or Disrupt abilities already applied to you, such as Word of Pain, and can fail to save you in some circumstances.
Removes every removable debuff from you and grants you 250 Action Points. I tend to use this more than Concealment because it will remove the important debuffs such as Word of Pain or heal debuffs.
- Focused Mind or Ambush
One of the best morales in the game. It provides Immunity to most forms of CC for 10 seconds and also reduces cast times by 50%, up to doubling your DPS output based on if the cast time of the spell is throtted by the GCD.
Also one of the best morales in the game, and one of the most powerful utilities that a Shadow Warrior can provide for Large Scale RvR. Your target and all enemies within 30 feet are slowed by a crippling 60% for 3 (reduced from 9) seconds. Ideal for engaging or disengaging and does not grant any immunities.
- Instill Fear
1200 AoE Morale that hits all enemies within 30 feet, staggering them for 6 seconds. The Stagger can be useful if you manage to sneak yourself into a clump of healers, or the AoE Morale drop can be useful, but try to make sure that your enemies already have immunity if that’s your intended use. Grants 30 seconds of Immunity.
- Hail of Doom
Hits a total of 10 times over 5 seconds for a total of 3000 Morale damage in a 20’ radius around where you target. It’s not a bad Morale if used on top of an AoE damage drop. As a Skirmish Shadow Warrior you can set up all your DoTs and drop this on top for some fairly powerful burst.
PvE
No major changes are needed for PvE as a Shadow Warrior. Any of the 3 builds are viable. I tend to play Assault as it has very high sustained DPS if you can stay in melee range. The time spent on a Boss is usually your biggest bottleneck in PvE. Regardless of build, consider if you will need Replenishing Strikes because no AP = downtime = low damage. You can also run a higher damage Renown Build as you won’t generally have much need of going below 0% chance to be crit with Futile Strikes.
White Lion

The White Lion is the High Elf Melee DPS and utilizes a Two-Handed Axe. The class not only draws inspiration from the White Lions of Chrace, but can also have one as a pet. White Lions generally serve one of 2 purposes: Extreme Single Target Burst Melee Assassin or High Sustained Damage AoE. In either role, the class is ultra mobile and has a lot of utility to set up and lock down kills.
Thanks to Matt and Evil for further inspiration for this section.
Pet
The first major mechanic of the White Lion is their pet. The animal is very powerful and will grow with you as you gain Career Ranks, evolving from a kitten into a fully-armoured alpha predator.

You can summon your pet at any time by using

Except in one case, which I’ll go over later. It has its own health and can die. If it dies, this ability will go on cooldown for 15 seconds after which you can freely summon it once again.
In addition to your Pet’s Health, you gain two other UI elements while having an active pet.
AI Stance

This is a toggle for the intended AI of your pet. The center stance, in green, is called Defensive.

The top, in red, is Aggressive.

The bottom, in blue, is Passive.

Unfortunately on RoR, Pet AI has had a.. Torrid history. Pet Pathing and its general ability to do anything you ask of it is circumspect at best. Perhaps we missed a Gym Badge somewhere. My recommendation is to leave it in Passive as a passive pet will always hug your hip.
Key Bindings
Once you are in range of your target, micro it to attack with you, which you can keybind through ESC > Keybinds > Pet.

For the sake of simplicity, Pet Attack means “go” and Pet Follow means “stop”. Pet Stay will direct your pet to stay in a specific spot which is useful for trolling in some cases. Leaving it in Defensive is fine as well.
Worth noting is that there is damage fall-off with range from Pet to Master. As your pet gets further away from you, it deals less and less damage. This was introduced as a way to control Pet classes killing people with just their pets, but I hear it might be getting removed in the future.
The other UI element that comes with pet ownership is the
Pet Action Bar

Your Pet learns new abilities as you gain Career Ranks and these are tied to the Stance you are in, which leads us to the other major mechanic of the White Lion: Stances (or what the game refers to as Training).
Training (Stances)
There are three stances you can adopt as a White Lion, which offer a passive, permanent buff to both yourself and your pet, and allow a portion of your Character’s Stats to also affect your Pet. Each stance also changes the abilities that your Pet has access to. The efficacy of the Pet’s abilities in each stance is based on the level of the stance, which can be increased by investing Mastery Points in the associated Mastery Path.

5% crit to the White Lion as long as you are at an Enemy’s sides or back and the War Lion can snare, taunt and armor debuff for you. The War Lion has a lot of HP in this stance and does not deal very much damage.

A toughness buff for the White Lion and the War Lion gains a few powerful attacks. The War Lion has low HP and hits very hard in this stance.

While active, this stance provides a proc effect for both the White Lion and the War Lion: A small chance to deal a fair amount of damage to the target over 3 seconds. This proc deals Physical damage and scales with your stats. It’s quite powerful but it has a very low chance to proc at 10%. The War Lion gains a Single Target attack, an AoE attack and an AoE debuff to auto attack speed. The War Lion has balanced stats in this stance with a fair amount of HP and good damage output.
Swapping stances has no cooldown and is off of the global cooldown. In this version of the game, changing stance will prevent your pet from using their abilities for a short time.
Important Core Abilities

Your snare, 40% for 5 seconds with a 10 second cooldown, like most MDPS snares.

Your main mobility skill. 45ft range with a 10 second cooldown. After pouncing, you gain 35% movement speed for 3 seconds or until you use another ability. There are height restrictions to this ability so in (most) cases you can’t leap up walls or into keeps, for example. It deals a small amount of damage and cannot crit.

Deals moderate damage and buffs your entire group, including yourself, to deal extra damage on their next hit. With up to 6 extra hits, it is well worth using, especially for bursting a single target.

Your primary single target filler skill. While behind your target, you will ignore a substantial amount of armour.


Your single target DoTs. They deal a fair amount of damage and are worth using if you are trying to set up a peak burst on a single target.

High tooltip damage with a mostly meaningless debuff. It used to be an important part of the rotation but the class has evolved on RoR so this is now rarely used.

Low tooltip damage and no special effect, this should never be used.

High damage and deals Spiritual damage. This a high priority filler skill, especially against a highly armoured target and/or a target that is under the effect of a Spiritual Resistance debuff, such as from a Swordmaster or Archmage. It has a 5 second cooldown so it can be spammed during Whispering Wind and can also be augmented with a tactic to make it deal far more damage.

Spammable AoE skill.

This skill is worded strangely. If you and your pet are both attacking the same target, you each hit it twice for a large amount of damage. This skill does an obscene amount of damage in 1 global and is a core part of the White Lion single target burst.

Root break. Identical to every other MDPS except that it also affects your War Lion pet.

Movement speed buff. Identical to Charge! On every other MDPS except that it also affects your pet.

Your detaunt. An AoE like every other MDPS. It only lasts 5 seconds on a 10 second cooldown and it has a significant AP cost at 50.

This ability is a meager HoT effect for your pet. It is spammable with a long range and small AP cost. It scales with Willpower, which you do not have a lot of and will seldom have a buff for.

Your War Lion will throw their target through the air towards the White Lion, as long as the War Lion is within melee range of the target and within 65 feet of the White Lion.
Giga White Lion
40/70 Build:

Before 70, trim Primal Fury, Pack Hunting and Echoing Roar.
This build is called Giga White Lion because it has all the tools for both AoE and Single Target Burst White Lion in 1 build with nothing lost. You just swap Tactics between the 2 roles.
Tactics


These 2 Tactics are interchangeable, you will always use 1 or the other depending on if you are playing with a pet or not. In Large-Scale RvR, Loner is typically used as the pet is almost impossible to keep alive. Pack Synergy is more damage overall and allows for incredible burst damage. Loner disallows use of the Summon War Lion ability.

*Outdated*This Tactic grants a massive 50% armour penetration to both Whirling Axe and Slashing Blade. This effect is multiplicative with your Armour Pen from gear and Weapon Skill. It also reduces the AP cost of Slashing Blade by 50% which is a nice perk.*Outdated*
Hack and Slash now gives 25% additive Armor Pen, which makes more sense and the AP cost reduction was reduced, leaving White Lions with a bit lower damage and slightly worse AP expenditure. However, with the proc meta, WL’s are still incredibly strong as they can hit so many times and so quickly. Some have chosen to use Weapon Skill talismans now, which is a fine option.

This is a very strong DoT tactic. The effect cannot crit and cannot refresh but does scale with offensive stats and deals Physical damage. Because it cannot refresh, make sure to throw a Slashing Blade to refresh it when it falls off.

This Tactic grants a massive damage bonus when your War Lion dies. If you are in a situation where you predict that your pet will be targeted down a lot, such as 6v6 where it is mainly used, you will find a lot of value from this Tactic. While you are basically playing 3 Tactics with this, it is so powerful that it is well worth it when it does get value.

Passive 15% additive damage increase when you hit a target in the sides or back. Very powerful and commonly used.

Gives your War Lion a huge passive boost to movement speed. This does stack with Charge and is typically used when you are trying to Fetch targets.

Passive damage increase.

Large passive increase to Autoattack speed while Trained to Hunt is active. This allows you to get 1 or 2 more autos in a Burst Rotation and is very valuable for Single Target damage.

Turns Lion’s Fury into one of your highest damage abilities. It’s a fun tactic, especially when you are working with a Swordmaster, who both removes the cooldown and debuffs Spiritual resistance, but it will rarely achieve higher value than Pack Hunting, and you are typically debating between one of the two tactics when you are building for Single Target Burst/DPS. It can be used in situations where you don’t use Trained to Hunt, such as a Loner ST build that uses Trained to Threaten for the crit, or a build that uses Trained to Kill.
Recommended Loadouts
AoE Loner:
Loner
Hack and Slash
Tearing Blade
Flanking
AoE with Pet:
Pack Synergy
Hack and Slash
Revenge!
Flanking
*Updated January 17, 2025- This is the optimal tactic loadout for AoE with Pet*
With this setup, you can use Trained to Threaten. It gives you 5 crit so long as you hit the back or sides and your pet has quite a bit more HP. This is quite useful for pulling targets into the blob. Revenge is probably the most preferable 4th Tactic here as you are not punished that severely when your pet does die. Additionally, the pet Utility in TTT can be quite useful with a single target snare, interrupt and armour debuff, as well as fetching things or having access to Coordinate Strike. AoE doesn’t have a lot of main stat scaling so even with a lower main stat value, such as 600 Strength, your AoE attacks will deal significant damage.
Single Target with Pet:
Pack Synergy
Hack and Slash
Brute Force/Flanking/Revenge
Pack Hunting/Lionheart
Single Target with Speed Training:
Pack Synergy
Speed Training
Last 2 flexible between Brute Force/Flanking/Hack and Slash/Pack Hunting/Lionheart/Revenge
Gear
While leveling, buy the relevant War Crest Sets.
Decimator > Obliterator > Devastator > Mercenary.
At 40, we have a few options to keep us powerful until BiS while saving War Crests.
The most powerful option in my opinion is 5 Vanquisher and 2 Sentinel(Helm and Ring). The 4pc bonus for MDPS on Vanquisher and Triumphant is exceptional.
Reducing your enemy’s Toughness is more-or-less the same as giving yourself more Primary Stat, but because it’s a debuff, it benefits everyone. The proc also gives you a large chunk of Weapon Skill, allowing you to ignore more Armour. This proc generally results in 10-20% more damage.
If you opt to skip this setup, both 6pc Sentinel and 6pc Bloodlord are viable. For 6pc Sentinel, you can use the ring and swap the boots for Conqueror which have Crit. 5 Bloodlord with 2 Sentinel (Helm and Ring) is a fine set up too and keeps the Back slot open for Beastlord or LotD gear.
BiS: 5 Sovereign/4 Triumphant (Gloves, Belt, Boots, Ring) In most cases, this setup will have the highest value with the huge Vicious Strikes proc and we get a great statline to go with it, double Strength and double Wounds and nearly every piece having useful substats.
5 Sovereign/3 Triumphant (Belt, Boots, Ring)/2 Vale-Walker (Gloves, Ring). This is the newest set up we have on RoR. The VW Gloves have 2 crit. In all, this nets us an extra Wounds bonus (for a total of 3) and 1% higher crit in total vs 2 Annuli (and much cheaper) at the cost of the powerful Vicious Strikes proc from 5/4. The aim here is to maximize crit. This is most useful in a highly coordinated party that is stacking Armour and Toughness debuffs so you won’t get as much value from Vicious Strikes. The only open gear slot with this setup is 1 jewelry.
Weapons
While leveling, use the weapons with the Titan’s prefix from the War Crest vendors.
BiS:

Bloodlord again, 5% additive damage at the cost of -10% Armour and Toughness. 4.2 attack speed for the Giga autos.

Upgraded from Subjugator weapon. This Axe has a unique proc with a 25% heal debuff and can be quite useful for AoE White Lion.
Talismans
Use a combination of Strength, Weapon Skill and Wounds Talismans to fit your preference.
For your Sentinel Soul, use:
Jewelry
While leveling, use the best combination of Belt, Back & Rings you have from either RvR influence or the renown vendors.
At 40, A Gunbad Ruby is a great starter item with a 3pc Beastlord mix(Back, Ring, Pocket) or the LoTD set (Back + Ring).
Transition into 2pc Genesis as soon as Possible.
BiS: 2 rings locked in, Sovereign and Triumphant (or Sentinel). Either keep the 2 Genesis or get 2 Ruby Annuli with a prefix of your preference. With 5/3/2, just 1 ring slot open so run 1 Annulus or a Gunbad Amber if you want the strikethrough for AoE.

Renown Points
Opportunist 3: 9% Melee Crit, 30 points
Futile Strikes 3: 15% anticrit, 30 points
Reflexes 4: 18% Parry, 20 points
OR
Opportunist 4: 14% Melee Crit, 45 points
Futile Strikes 3: 15% anticrit, 30 points
Spend the rest on Reflexes/Deft Defender/Wounds/Weapon Skill
OR
FS4 with O3, spend rest on Reflexes/Deft Defender/Wounds/Weapon Skill
Gameplay
Giga White Lion can serve as either AoE or ST depending on Tactics choices and utilizes both Priorities and Rotations to achieve their goals.
Important Abilities

Alongside the Marauder’s mirror, this is the strongest Ability-based Armour debuff in the game. It is your highest priority skill to get and to use if Single Target damage is your priority at the time. It massively boosts the damage that you and everyone else deals to a target. It has a short cooldown, a very low AP cost and most importantly, is undefendable.

A high damage AoE DoT that deals Spiritual damage. If your pet is active, it will also Roar when you do, applying the DoT around itself as well as you, effectively causing this to deal double damage. It also interrupts enemies within 15 feet of both you and your pet, making this incredibly powerful utility.

The 2nd highest DPS skill in the kit. It’s an AoE Channel but worth using on Single Target as well. You cannot auto while you channel so be mindful of your Swing Timer. You can Channel Cancel this for burst as well. Whirling Axe > wait until global and swing timer are ready, use another ability to hit with Whirling Axe + Auto + another ability all at the same time. Due to how fast it hits, it has some unique utility as well, such as being able to remove Challenge or Taunt stacks from yourself almost instantly.

A very high damage skill that will always Crit unless the target is completely immune, such as through the Healer Sovereign ability Absolute Preservation. Only usable if the target is <50% HP.

25% additive damage boost as long as you are hitting in the back or sides. This is essentially your DPS steroid with a 60s cooldown.
Skill Rotation / Priority
General Priority:
- Apply your preferred Training stance
- Summon your pet if not active(if not using Loner).
- Use your Detaunt to survive as needed.
AoE Priority:
- Use Echoing Roar to interrupt or to Apply the DoT.
- Use Primal Fury
- Use Slashing Blade if Tearing Blade is equipped and the DoT is not active.
- Use Whirling Axe
- Fill with Slashing Blade, Single Target Priority or Utility as needed.
- Use Pounce to close distance.
Single Target Priority:
- Cleave Limb to slow target if needed.
- Use Force Opportunity if the debuff is not already present.
- Use Echoing Roar to apply the DoT if not active.
- Use Primal Fury
- Use Coordinated Strike if your pet is also attacking the target.
- Use Cull the Weak
- Use Pack Assault
- Use Whirling Axe (can channel cancel combo)
- Use Lion’s Fury (with or without the Tactic, it goes here on priority)
- Use Sundering Chop
- Use Pounce to close distance.
Shattering Blow and Blindside can be useful, specifically Shattering Blow as it deals more damage per tick. You can use 1 or both to set up a Burst combo on a Target. The problem is that White Lion has so many powerful buttons to push already that it becomes an obscene amount of globals to use on a target. The added DoTs are useful if the extra damage will really be needed and you plan to ride the target for a long time, even through Tank and Healer support. You won’t have an open global to refresh Shattering Blow using the Priority list above.
White Lions are very demanding on AP so use an AP potion before your combo if needed.
For stance, 0 Mastery Trained to Kill and 13 Mastery Trained to Hunt are pretty close in value for pet damage. With a pet out, your chance of triggering Hunter’s Strike is quite high. The pet is quite a bit tankier in Hunt and if you are using Pack Hunting, you should always be in TTH.
Morale
- Confusing Movements or Ensnare

You will Dodge and Parry all attacks made against you for 7 seconds unless they are undefendable.

Deals a fair amount of damage and traps your target in a root that does not break on damage for 5 seconds. Fantastic for locking down a mobile target, especially while solo.
- Flying Axe or Relentless Assault

1200 instant morale damage in a generous cone up to 65 feet away. This is what you will use most of the time.

Especially useful in PvE but can be used in all content. MDPS are typically AP hungry and if the AP synergies from your group are not enough, this helps your group keep pushing buttons.
- Dominance

Like Choppa and Slayer, White Lions have an instant 1800 M3. This is a very powerful burst tool and has the added perk of healing you for 50% of the damage it deals.
- Frenzied Slaughter

You will rarely use this over your 2 or 3 for damage but it’s there and it’s an option. Core to every MDPS but notable for WL as it reduces cooldowns, potentially letting you use your most powerful skills twice in its duration.
Guardian White Lion
The Guardian White Lion specializes specifically in Single Target damage and utilization of the War Lion pet. It has access to powerful Single Target CC and a very unique pet steroid.
40/70 Build:

At RR40, just trim the extra points in Hunter and Throat Bite. We put our 2 extra points in Hunter for a larger armor debuff and higher tooltips on Echoing Roar, Coordinated Strike and Lion’s Fury, a few of our key damage abilities. You can also spend a point for Lionheart if you like. It’s not a bad idea as this build is short on damage Tactics.
Tactics
These 2 Tactics are interchangeable, you will always use 1 or the other depending on if you are playing with a pet or not. In Large-Scale RvR, Loner is typically used as the pet is almost impossible to keep alive. Pack Synergy is more damage overall and allows for incredible burst damage. Loner disallows use of the Summon War Lion ability and removes the cooldown of Pounce. As Guardian, we will always be using our War Lion so Loner should never be used.
This Tactic grants a massive damage bonus when your War Lion dies. If you are in a situation where you predict that your pet will be targeted down a lot, such as 6v6 where it is mainly used, you will find a lot of value from this Tactic. While you are basically playing 3 Tactics with this, it is so powerful that it is well worth it when it does get value. As Guardian, this can almost be considered a staple as you are so reliant on your pet and have so few damage tactics.
Passive 15% additive damage increase when you hit a target in the sides or back. Very powerful and commonly used. As Guardian, we have access to a knockdown so we utilize Flanking very easily, even while solo. This is great as Flanking is generally stronger than Brute Force.
Gives your War Lion a huge passive boost to movement speed. This does stack with Charge and is typically used when you are trying to Fetch targets.
Passive damage increase.
Large passive increase to Autoattack speed while Trained to Hunt is active. This allows you to get 1 or 2 more autos in a Burst Rotation and is very valuable for Single Target damage.
Turns Lion’s Fury into one of your highest damage abilities. It’s a fun tactic, especially when you are working with a Swordmaster, who both removes the cooldown and debuffs Spiritual resistance, but it will rarely achieve higher value than Pack Hunting, and you are typically debating between one of the two tactics when you are building for Single Target Burst/DPS. It can be used in situations where you don’t use Trained to Hunt, such as a Loner ST build that uses Trained to Threaten for the crit, or a build that uses Trained to Kill. Guardian uses Trained to Kill almost exclusively so this can be a fantastic damage Tactic for us.
Recommended Loadouts
Lionheart
Flanking
Pack Synergy
Brute Force
Brute Force and Flanking can be swapped for Revenge.
Speed Training
Flanking
Pack Synergy
Brute Force
Again, BF and Flanking are flexible with Lionheart or Revenge.
Gear
While leveling, buy the relevant War Crest Sets.
Decimator > Obliterator > Devastator > Mercenary.
At 40, we have a few options to keep us powerful until BiS while saving War Crests.
The most powerful option in my opinion is 5 Vanquisher and 2 Sentinel(Helm and Ring). The 4pc bonus for MDPS on Vanquisher and Triumphant is exceptional.
Reducing your enemy’s Toughness is more-or-less the same as giving yourself more Primary Stat, but because it’s a debuff, it benefits everyone. The proc also gives you a large chunk of Weapon Skill, allowing you to ignore more Armour. This proc generally results in 10-20% more damage.
If you opt to skip this setup, both 6pc Sentinel and 6pc Bloodlord are viable. For 6pc Sentinel, you can use the ring and swap the boots for Conqueror which have Crit. 5 Bloodlord with 2 Sentinel (Helm and Ring) is fine set up too and keeps the Back slot open for Beastlord or LotD gear.
BiS: 5 Sovereign/4 Triumphant (Gloves, Belt, Boots, Ring) In most cases, this setup will have the highest value with the huge Vicious Strikes proc and we get a great statline to go with it, double Strength and double Wounds and nearly every piece having useful substats.
5 Sovereign/3 Triumphant (Belt, Boots, Ring)/2 Vale-Walker (Gloves, Ring). This is the newest set up we have on RoR. The VW Gloves have 2 crit. In all, this nets us an extra Wounds bonus (for a total of 3) and 1% higher crit in total vs 2 Annuli (and much cheaper) at the cost of the powerful Vicious Strikes proc from 5/4. The aim here is to maximize crit. This is most useful in a highly coordinated party that is stacking Armour and Toughness debuffs so you won’t get as much value from Vicious Strikes. The only open gear slot with this setup is 1 jewelry.
Weapons
While leveling, use the weapons with the Titan’s prefix from the War Crest vendors.
BiS:
Bloodlord again, 5% additive damage at the cost of -10% Armour and Toughness. 4.2 attack speed for the Giga autos.
Upgraded from Subjugator weapon. This Axe has a unique proc with a 25% heal debuff and can be quite useful for AoE White Lion.
Talismans
Use a combination of Strength, Weapon Skill and Wounds Talismans to fit your preference.
With the change to Hack and Slash, I seriously recommend that White Lion players consider using Weapon Skill talismans, even if Strength is a bit lower.
For your Sentinel Soul, use:
Jewelry
While leveling, use the best combination of Belt, Back & Rings you have from either RvR influence or the renown vendors.
At 40, A Gunbad Ruby is a great starter item with a 3pc Beastlord mix(Back, Ring, Pocket) or the LoTD set (Back + Ring).
Transition into 2pc Genesis as soon as Possible.
BiS: 2 rings locked in, Sovereign and Triumphant (or Sentinel). Either keep the 2 Genesis or get 2 Ruby Annuli with a prefix of your preference. With 5/3/2, just 1 ring slot open so run 1 Annulus or a Gunbad Amber if you want the strikethrough.
Renown Points
Opportunist 3: 9% Melee Crit, 30 points
Futile Strikes 3: 15% anticrit, 30 points
Reflexes 4: 18% Parry, 20 points
OR
Opportunist 4: 14% Melee Crit, 45 points
Futile Strikes 3: 15% anticrit, 30 points
Spend the rest on Reflexes/Deft Defender/Wounds/Weapon Skill
OR
FS4 with O3, spend rest on Reflexes/Deft Defender/Wounds/Weapon Skill
Gameplay
Guardian White Lion is very reliant on its pet for damage and crowd control. It uses primarily Trained to Kill as the War Lion damage is so high with that stance in this build. However, the War Lion will be quite squishy and Stance Swapping may be needed, such as swapping to Trained to Threaten to make your War Lion much tankier if you want to send it in for a Fetch.
Important abilities:
We get Force Opportunity for the huge Armour debuff and Echoing Roar for the powerful double DoT and interrupt.

A pet steroid that allows it to deal bonus trigger damage on every attack, with a rate limit of every .5 seconds. This damage cannot crit but does scale with stats. Furthermore, your pet is completely immune to Root, Snare and Stun effects for 10 seconds. This is quite powerful if you are planning to Fetch a target, as knocking down or snaring the War Lion is one of the best ways to counter Fetch. If you use Leo Frenzy before going for a Fetch, your pet is immune to these effects and can almost guarantee that the pull will be successful.

Your War Lion’s next attack will knock down its target. This deals good damage as well as the CC and is a core part of the Guardian combo.

Operates in the same way as Brutal Pounce but instead silences the target for 4 seconds. This is certainly less powerful than a knockdown but it has some powerful, unique uses. For example, if you Fetch a healer but activate this ability beforehand, your pet will Silence the target and then Fetch it, so it will land at your feet already Silenced, disallowing use of Detaunt, healing or other important survival tools. This combo is very effective against smart players who detaunt you while flying through the air from Fetch.
General Priority:
- Activate Trained to Kill. Stance swap as needed for pet slow or pet tankiness but TTK is where your damage is.
- Summon your pet if not active.
- Detaunt as needed.
ST Damage Priority:
- Use Cleave Limb to slow the target if needed.
- Activate Leonine Frenzy
- Use Brutal Pounce to KD the target if needed.
- Use Force Opportunity if debuff is not present.
- Use Echoing Roar to interrupt or to apply the DoT.
- Use Coordinated Strike if your pet is also attacking the target.
- Use Pack Assault
- Use Lion’s Fury
- Use Sundering Chop
- Use Pounce to close distance.
For AoE, just spam Slashing Blade, you can swap to TTH to gain the pet AoE ability but it has a very long cooldown and is a minor gain.
Ironbreaker

The Ironbreaker is the Dwarf Tank and utilizes Axes and Hammers, either One–handed with a Shield or as a two-handed weapon. They have an interesting kit with plenty of important tools and although they deal Physical damage, which can be limiting, they have the highest damage potential as a 2H tank due to their ridiculous scaling with their major Mechanic, Grudge. Ironbreakers have 2 major builds: Shield Tank (SnB) or Two-handed, which can be built to either maximize utility with good damage or as an all-out pumper. Keep in mind that every Tank’s first job is as a Tank so don’t get carried away with the pumping. The Ironbreaker is exceptional at pairing up with 1 or 2 people and giving them very strong buffs.
Grudge
Ironbreaker’s Mechanic is called Grudge, represented by this element of your UI:

As it fills, you will see exactly how many Grudges you have:

It will begin to animate and glow past 50 Grudges and at 100 (cap), it looks like this:

Ironbreakers passively gain Grudge when hit or when their Oath Friend is hit.

Ironbreakers both benefit from having high Grudge to passively enhance some abilities, mostly for Damage, which gets pretty ridiculous as you can see here:


Or to spend Grudge to grant powerful effects to their Oath Friend, which is their other major Mechanic and tied to their Grudge mechanic.
Oath Friend

Oath Friend operates like Guard, you pick someone to give your buff to, they can feed you Grudge, and you can in-turn grant them powerful buffs as long as they aren’t too far away (typically 50 feet). As an Ironbreaker, you need to manage this as well as Guard; you can move it around to any Ally, not restricted by group or warband, to either gain Grudges or buff someone. Swapping Oath Friend is off the GCD but it doesn’t quite take effect until the animation finishes. This is useful as often you will want to swap both your Guard and Oath Friend, which you can do simultaneously.
Unlike the Blackguard’s Hatred mechanic, the Ironbreaker’s Grudge mechanic can be quite clunky, so we typically use a Tactic to help supplement our Grudge gain, which will be detailed in the Tactics section.
Important Core Abilities

Besides Witch Hunter and some odd cases, Ironbreaker is the only severer of Blessings on Order, quite important.

Spends 40 Grudge to give you 160 AP instantly; off GCD.

Your snare; deals damage over 10 seconds so be mindful of staggered targets.

An Armour debuff whose efficacy scales with Grudge. Even with 0 points in Vengeance (level 25 skill), it’s still an 800 Armour debuff at 100 Grudge.

A crit debuff whose efficacy scales with Grudge. The tooltip doesn’t state but it lasts for 10 seconds. This is very powerful and a very good use of a global on dps and healers, even some tanks.

An AoE attack that ignores Armour based on Grudge, all the way up to 100% Armour ignore at 100 Grudge. This skill can hit very hard.

Your standard DPS filler ability. Due to the extra DoT from Grudge, this ability can deal outrageous damage. You want to weave it in as every other global if you are trying to deal damage.

The IB’s punt. It isn’t very impressive in arc or distance but it gets the job done, costs 25 Grudge.

The core IB knockdown. I think it’s the first KD that anyone gets (level 6). It requires a Shield and a recent Block or Parry, which isn’t usually a problem so long as you are guarding someone, but it can be annoying. I think the window is around 4 seconds.

An AoE attack that requires a shield. It was changed in an odd way.. It spends 25 Grudge and then builds 10 Grudge per target hit, so at 3+ Targets it is Grudge positive and at peak 5 Targets (also an odd target cap), it is +25 Grudge in total.

If this attack hits, it will buff the Toughness of both you and Oath Friend, costing 10 Grudge. This isn’t typically that useful or important to use as there are a plethora of other Toughness buffs, or that buffing some Toughness for you and 1 other person isn’t typically a high-priority thing to do, but it’s useful sometimes and worth mentioning.

This ability is a movement-barb and does fairly significant damage over its duration.

For 15 Grudge on a 20s cooldown, you can buff your own Weapon Skill for 10 seconds. During this time, you pump some extra AP to your Oath Friend. Not a terrible skill to use, especially if your Oath Friend needs some extra AP but since the Weapon Skill buff doesn’t affect your Oath Friend for some reason, its effect is quite meager.

Fairly large Corp resist buff for you and your OF with a healthy duration of 20 seconds and no cooldown; it then has a strange effect where if you are hit by direct magical damage during this time, you gain 50% attack speed for 20 seconds. This effect is actually quite powerful and getting hit by magic is quite common. This is worth using for the Corp buff against Sorcs and Melee Squigs mainly if you don’t care about the AA speed. The buff is usually bigger than other resistance buffs in the party.

If this ability hits, it gives a fair chunk of Armour to both you and your Oath Friend. You get this ability at level 3 and it’s pretty overpowered in Tier 1, so spam away. In end-game, it is far less useful as everyone uses an Armour potion. While this buff will still likely be bigger than an Armour potion, you have to spend a Global to use it and it also has to hit the target (not blocked or parried). You may have noticed a trend here: Ironbreakers have a lot of buttons that they can push, but you’ll typically be using the most important ones.

If this skill hits, it buffs the Strength of you and your Oath Friend by an amount based on Mastery Level and Willpower by an amount based on both Mastery and Grudge. The Willpower buff is quite substantial, still a 300 point buff with no Mastery investment. If you are in a situation where you have to Guard a healer, try to give them this buff while you lurk near them. It lasts a healthy 20 seconds.
Shield Ironbreaker
This build uses a one-handed weapon and Shield. It focuses on being very hard to kill while providing a few key buffs to their Oath Friend and snaring clumps of enemies. It can also bring a fairly powerful AP pump for the entire group and annoy enemy Healers in incredibly frustrating ways if given the opportunity to do so.
40/40 Build:

Most of the goodies, focused on defense to help you stay alive in low gear. You can trade Punishing Knock for Avalanche depending on the situation.

Oathstone currently doesn’t stop after 4 attacks, so it’s quite powerful and worth mentioning.
40/70 Variants:

With the introduction of Blood of Grimnir, this is probably considered the new standard. There are cases where the ability yields less value, such as some cases in large-scaling fighting, in which case use a variant below. With +2, just add whichever 2 abilities/tactics from Brotherhood that you need the most.

This variant also provides the powerful crit buff for your Oath Friend.

Both of the big Oath Friend buffs and all the goodies from Brotherhood, as well as a point to spare.

Forego the crit buff to get all the other defensive and utility goodies. Again, drop something for Avalanche as needed.

Oathstone with Brotherhood goodies.
+2 Full Build Variants:

All the goodies and AP pump, no Shield Mastery.

Shield Mastery instead. You can drop Grimnir’s Shield in either build for Avalanche or Punishing Knock as needed.

Both buffs, Full Brotherhood.
Some say the IB has good build variety, others say the class is a mess and needs a rework.
Oh and don’t think I’d forget about AXE SLAM!

70+ Build. The defensive stuff to keep you alive while you build morale. No Earthshatter, RIP. We take Avalanche as well to help us get in position for that perfect AXE SLAM! Or otherwise move around and ideally not die. If you are teaming with other Ironbreakers and cross-guarding, sharing Oath Friends: You can have one IB out of each pair go for Earthshatter over Oathbound as the other IB can provide the buff for both parties.
Tactics

Tanks struggle with mobility and this is a great mobility tool. All you have to do is Disrupt something, pretty easy to do if you’re channeling Hold the Line.


The 2 Grudge building Tactics. Dwarven Riposte is the standard pick and will be in nearly every IB build to keep them throwing out buffs. You can even just Parry Guard damage. Especially easy if you are Guarding a Slayer or Bright Wizard, who both deal damage to themselves, half of which you prevent with Guard, which you can then Parry.
Rising Anger is much less efficient but it’s an option.

Those 10s snares on you become 5 seconds, the 5 second snares become 2.5 seconds. Also reduces critical damage in the same way that Trivial Blows does. However, it stacks multiplicatively with TB. Without TB, the defensive perk is a nice bonus but we stack a lot of anti-crit so it typically won’t get too much value.

Whenever you Block, you take -15% damage for 5 seconds. This stacks multiplicatively with other sources of Damage Reduction such as your Toughness/Armour/Resists and Hardy Concessions. Fantastic Tactic.

More Jugg. Use if needed.

Dwarf racial tactic. Stacks with Armour Potions/buffs so it’s quite powerful if you want to run it for more Armour.

Passive defense increase.

Dwarf Racial tactic, hilariously broken. Most Knockdowns are 3 seconds so with this Tactic, they only last for 1.5 seconds. That means the enemy has one entire GCD to do something while you are CC’d. I don’t run it often as SnB but it’s very powerful, especially against coordinated teams.

Reduces the output of traditional (non-lifetap) healers by a massive 50% and lasts for an entire 20 seconds. This tactic is incredibly powerful. It can be cleansed, but you can bury it to protect (more on that in Gameplay). DoKs cannot cleanse it.

The only Tactic you have which gives Avoidance. It also has another multiplicative DR.

As it states: Whenever you spend Grudge, groupmates within 100ft gain that much AP. You can endlessly spam to endlessly pump AP, it’s quite nice.

I’m going to mention this Tactic. Please DO NOT USE THIS TACTIC. Handing out 30s of immunity to an entire Destro blob is one of the fastest ways to lose a fight. If you want to slow and punt someone, do that. Snare them, and then punt them, with your Single Target skills.
Recommended Loadouts
- Seasoned Veteran
- Dwarven Riposte
- Stoutness of Stone (flexible)
- Shield Mastery (flexible)
Flex the last 2 slots for the situation. You don’t always need SoS and sometimes Punishing Knock is needed or UJ, etc.
Gear
While leveling, use the relevant War Crest sets.
Decimator > Obliterator > Devastator > Annihilator/Ruin
After this, we’ll use our trusty combination of Redeye and Vanquisher to save War Crests. I recommend using either 3 Vanquisher + 3 Redeye or 4 Vanquisher + 2 Redeye or 4 Vanquisher + 3 Redeye if you want to spend extra War Crests and use a Block Ravack’s cloak from the Auction House for your backpiece. This is the gear setup you will use until Sovereign in order to save War Crests. Vanquisher Gloves and Boots are Bind on Equip so you can get them from the Auction House or have a friend buy them for you with their extra War Crests. The other gear sets such as Conqueror and Invader are interesting but are simply not worth the amount of extra time you will spend grinding for crests.
Vanq Gloves, Boots, Belt + the rest Redeye or buy Vanq Shoulders for the extra block if you choose to go 4/2 or 4/3. The difference between 4/2 and 4/3 is Redeye Cloak, which requires farming a dangerous side-boss up to 3 times or Ravack’s Cloak for its own benefits.
Your final BiS will be full Defensive Sovereign as it by far has the most advantages of any combination of gear.
Weapons
While leveling, use one-handed Hammers or Axes with the Sentry’s prefix and Shields with the Shieldbearer’s prefix from the renown vendors.
BiS:

OR

Upgraded from the 45 weapon, trading the regen for more stats.
OR

Upgraded from Subjugator if you prefer the anti-crit.

Upgraded from the RR45 weapon.
Talismans
Initiative until 250-300 > Wounds until 1050 (Can go to 990 if you plan to use a Wounds Liniment) > Toughness/Armour. Between Toughness and Armour, it’s really up to how you want to min-max your character. I generally prefer Toughness on SnB Tanks.
For your Sentinel Soul, use
Jewelry
While leveling, use the best combination of gear you find from your travels, renown jewelry is always good.
At 40, get your avoidance jewelry from Gunbad or the Auction House right away.
Transition into Genesis Avoidance pieces right away, and maybe a Remnant for the 2pc bonus.
Ravack’s Cloak if you aren’t going for 4/3.
Use whatever belt until you can wear Vanq
BiS: 2 rings locked in, Sovereign and our Soul Ring, for the other 2 we should keep our block jewels, Genesis and Gunbad.
Renown Points
Defender 4: 10% Block, 20 points.
Quick Escape 1: movement speed proc, 10 points.
Futile Strikes 3: 15% anticrit, 30 points.
20 points left to do with as you please. You can go Hardy Concessions, Toughness, Reflexes for Parry or Deft Defender for Dodge and Disrupt.
OR
Go Futile Strikes 4 and do whatever you like with the last 5 points.
OR
Futile Strikes 3
Defender 4
Hardy Concessions 4
Quick Escape 1
This is the setup I have been using more and more on Sword and Board tanks in the proc meta. You lose some potential avoidance as the major drawback, as we won’t have the points to also spec into Parry, but the extra damage reduction can help keep you alive against a massive onslaught of damage.
Gameplay
The Shield IB focuses on handing out their strong buffs and debuffs and snaring enemies.
Important Abilities

At the cost of 15 Grudge, grants 25 Parry and an amount of Initiative based on Mastery to you and your Oath friend. Very strong buff, Parry can help anyone and 25 is a lot to hand out for free. The Initiative isn’t bad at times, either.

For 15 Grudge, gives you and your Oath Friend 10% Crit and 90 Strength (at 5pts). Very powerful buff for DPS, especially melee, but great for any DPS or Healer.

Serves as a 2nd snare break, but also affects your Oath Friend. Great in almost any situation but especially good for helping a healer or RDPS, who do not typically have a snare break.

Grants a large magical absorb effect to both you and your Oath Friend. Costs 30 Grudge.

A 40% snare in a 30’ radius PBAoE. This ability is fantastic and one of the best things an IB brings to large-scale combat. It doesn’t deal any damage unless you have Grudge, but it’s another strange ability that deals A LOT of damage if you have high Grudge.

The newest addition to the Ironbreaker, this adds a massive 25% auto attack damage to the entire party, which is one of the highest value buffs you can bring to a group.
If we were to study Killboard for some statistics, the value of Auto Attack is hard to ignore:

With Waaagh! As Black Orc or Blood of Grimnir as Ironbreaker, 25% of that contribution is thanks to your ability. This sample is from 6v6 and Auto Attack is not quite as apparent in large-scale, it’s still a large source of free damage and more often than not helps to secure kills.
Skill Rotation / Priority
Use the Tank abilities as described in the Tank Basics section at the discretion of your leader or upon your own intuition.
Use Earthshatter to slow nearby enemies as needed.
Ironbreakers have a lot of buttons to push, and we want to aim to fill them with the highest value use of the GCD as possible, be that buffs for allies or debuffs for enemies. All of those generally fall below the abilities discussed in the Tank Basics section.
Use Oath Friend on ally, usually a DPS and maintain buffs on them as needed in this general priority:
- Use Runic Shield to prevent large amounts of magical damage on yourself and/or your Oath Friend.
- Use Avenging the Debt to remove roots and snares from you and your Oath Friend.
- Apply and Maintain Blood of Grimnir
- Oathbound
- Ancestor’s Fury
- Stubborn as Stone
- Inspiring Attack (mainly for healers)
Vengeful Strike and Guarded Attack are optional and only use them if you have a free global to do so.
Debuff enemies with Stone Breaker and Kneecapper as needed. These are usually high value globals.
Punishing Knock:
The debuff lasts 20 seconds but the healer will likely instantly cleanse it, so we want to bury it. Beneath 1 debuff can be fine but I typically bury it beneath 2 debuffs to really ensure it’s getting that high value. If the healer is using GCDs to cleanse themself, they aren’t healing anyways so you kind of win either way. The rotation I use is
- Binding Grudge/Earthshatter (Good for multiple clumped healers)
- Kneecapper
- Inspiring Attack
This slows them, removes up to 20% heal crit and then the 50% outgoing debuff. This is very, very frustrating to deal with as a healer, even if there is another healer helping cleanse. There are situations where you can maintain this on 2-4 healers at once.
DPS Priority:
- 100 Grudge Binding Grudge if a slow is needed and to apply the dot.
- 100 Grudge Stone Breaker if there isn’t a stronger Armour debuff.
- 100 Grudge Heavy Blow every other GCD.
- Taunt
- 100 Grudge Earthshatter
- Punishing Blow
You probably won’t care too much about your dps rotation as a Shield IB, but it’s useful to know, especially for PvE.
AoE
Just use Earthshatter, Rune Etched Axe, Blood of Grimnir and Shield Sweep as they come off cooldown.
Morale
1: All 3 are viable
Champs is one of the best CC’s in the game, There’s probably humor to be found in that it shares the acronym. You and your target are both locked in place for 10 seconds, and neither of you can even turn. As important as mobility and positioning are in this game, being unable to move for 10 seconds is terrifying. Coordinate this with your DPS friends to lock down the kill on your favorite enemy player.
Demolishing Strike is a big armor debuff that will stack on top of ability armor debuffs. Combined with an Ironbreaker or a White Lion, a target with -2500 armor is going to get hit very, very hard.

A ranged root that deals a fair amount of damage. It won’t have the impact of a good Champion’s Challenge but because of its range, it is useful.
2: Shield Wall or Skin of Iron
The wording is deceiving but basically you will block any attack that isn’t undefendable. The same applies to your Guard damage: unless your Guardee is hit with an undefendable attack, the Guard damage in that case is also undefendable.

All damage you receive besides Morale is reduced to 1. This is one of the strongest Morales for personal defense in the game. It only lasts 5 seconds but it is almost guaranteed to keep you alive during that time. I use this almost exclusively.
I don’t recommend using Raze. It does very low damage that is rarely threatening and you risk handing out the Resolute buff, effectively nerfing the more-powerful Morales of your allies.
3: Distracting Bellow
AoE 50% Damage Reduction that stacks with Detaunt, Guard and Challenge. This ability can turn a fight on its own.
4: Immaculate Defense
Your entire party becomes nearly immune to damage for 10 seconds. This stacks with Detaunt, Guard, and Challenge. One of the most powerful morales in the game and a lot of encounters in pvp revolve around this ability.
Axe Slam:

Used in the Axe Slam setups to provide major damage instead of defense.
2H Ironbreaker
The 2H Ironbreaker uses a two-handed Axe or Hammer. They generally focus on bringing most of the strong group utility, as well as the powerful Ironbreaker damage output.
40/70 Build:

This build is focused on maximum utility without compromising much damage output.

This build is for more damage with less utility. You can take either Runic Shield or Avenging the Debt.
+2 New Standard:

+2 allows you to bring the powerful utility of Blood of Grimnir, both buffs and keep your knockdown with a two-handed weapon. This is probably the new standard for 2H Ironbreaker in most situations.
Axe Slam:

Used in specific situations with multiple group morale pumps, this build takes Axe Slam to add a massive morale damage ability to the group. The last 3-4 points are flexible: Grudgeborn Fury and Greataxe Mastery are not necessarily needed, so you can flex them around as you see fit, but even with +2, there’s not a lot more that you can add to the build.
Tactics
See the Shield Ironbreaker section above.
Recommended Loadouts
- Dwarven Riposte
- Sweet Revenge
- Stoutness of Stone (flexible)
- Seen It All Before (flexible)
The last 2 are flexible, swap based on the situation. Good options are:
Greataxe Mastery (if you are spec’d for it)
Stoutness of Stone
Punishing Knock
Unstoppable Juggernaut
Rugged
Gear
While leveling, buy the relevant War Crest sets from the Vendor.
Braggart > Challenger > Duelist > Mercenary
PvE then becomes your best friend as Bloodlord Gear is the next best set to obtain easily, with decent stats and even more Parry. A mix of PvE gear is quite good: 3 Bloodlord (Chest, Shoulders, Belt) with 4 piece Sentinel (Helm, Boots, Gloves, Ring) is a large amount of Parry and Stats. 5x Bloodlord and 2x Sentinel (Boots + Ring) is even more Parry, but less stats. Keep your Ravack’s Cloak and your 3 best Parry Rings on top of your Sentinel Ring, which should be 2x Genesis and a Gunbad Ruby. An Ironbreaker can choose to gear more offensively, like a DPS, but it’s still our priority to be a functional Tank so the stats we don’t really want to compromise on are Parry and Wounds.
BiS:
Full Warlord. This setup has the powerful detaunt and the morale drain, along with a lot of good stats. It’s a little lacking on crit and parry, and severely lacking on Wounds.
5 Sovereign/4 Victorious (Belt, Boots, Gloves, Ring). This setup should be the highest damage output once the 4pc Sov bonus gets fixed. It also has a lot of good stats. You can mix and match pieces as you like for more Parry, etc.
5 Victorious/2 Bloodlord (Shoulders, Belt)/2 Warlord (Boots, Ring). This setup has a great statline and attempts to compromise somewhere between offensive stats and min-max Parry.
6 Sovereign/3 Victorious (Cloak, Boots, Ring): This setup grants you 2 extra Mastery points to fit Blood of Grimnir and Cave-in into the build and is one of the most powerful options at the Ironbreaker’s disposal, albeit sacrificing some Parry.
Weapons
While leveling, use two-handed weapons from the renown vendor with either the Titan’s or Sentry’s prefix, depending on if you want the DPS stats or the powerful defensive stats.
BiS:

Our Reactionary weapon from city dungeon influence. The proc does not stack with Oathbound so it has diminished value in small-scale but it is always a good option.

Bloodlord is painful to run on a tank. The 5% damage is additive so we’re not gaining much from it as we have so much already between Taunt and Greataxe Mastery. The downside of -10% Armour and Toughness is also very spooky because we rely so much on our stats as a Tank to survive. However, this is the weapon with which we will do the most damage.

The Fort weapon is unique on IB because it has the 25% heal debuff proc, like WL does. This can be strong at times but does not stack with a regular 50% heal debuff. Regardless, this weapon has a great stat line and is a great choice if you feel that you don’t need to run reactionary.
Talismans
Initiative until 250-300 > Wounds to 990+ > Strength. Our BiS liniment grants us 60 Wounds. Weapon Skill is a consideration if you want to boost your Parry slightly, in most cases the damage difference between Strength and Weapon Skill stacking isn’t a major change for an Ironbreaker. Having lower than 250 Initiative since the change to the stat is probably okay as well.
For your Sentinel Soul, use
Jewelry
While leveling, use the best combination of gear you find from your travels, renown jewelry is always good.
Buy your Gunbad Ruby as soon as possible.
Transition into the avoidance Genesis rings as soon as possible.
BiS: 2 rings locked in, Sovereign and Victorious, the other 2 slots go to our Genesis avoidance Jewels.
Renown Points
Opportunist 3: 9% Melee Crit, 30 points
Futile Strikes 3: 15% anticrit, 30 points
Reflexes 4: 18% Parry, 20 points
You can play FS4 and O2 instead for more survivability and less crit.
OR
Reflexes 4: 18% Parry, 20 points
Quick Escape 1: Movement speed Proc, 10 points
Futile Strikes 4: 24% anticrit, 45 points
Opportunist 1: 2% Melee Crit, 5 points
We get a lot of crit for free so we don’t lose too much with only O1.
Gameplay
The 2H Ironbreaker gameplay does not differ much from Shield IB. We bring the same buffs and debuffs and have the same general priority on how to use them. However, we hit much harder.
Important Abilities

The Knockdown for the 2H IB has to be purchased in Mastery but it’s well worth it. It does not require a recent Block or Parry and deals a large amount of damage over 5 seconds.
The newest addition to the Ironbreaker, this adds a massive 25% auto attack damage to the entire party, which is one of the highest value buffs you can bring to a group.
If we were to study Killboard for some statistics, the value of Auto Attack is hard to ignore:
With Waaagh! As Black Orc or Blood of Grimnir as Ironbreaker, 25% of that contribution is thanks to your ability. This sample is from 6v6 and Auto Attack is not quite as apparent in large-scale, it’s still a large source of free damage and more often than not helps to secure kills.

The IB’s damage channel. It’s not typically used or needed but it’s a fantastic tool to supplement the IB’s burst as most of their toolkit for damage is stacking DoTs. Like other Channels, we can Channel Cancel for burst. GBF > wait until global and swing timer are available > Heavy Blow. 1-2 ticks of GBF, Auto and HB will hit at the same time.
Skill Rotation / Priority
Use the Tank abilities as described in the Tank Basics section at the discretion of your leader or upon your own intuition.
Use Earthshatter to slow nearby enemies as needed.
Ironbreakers have a lot of buttons to push, and we want to aim to fill them with the highest value use of the GCD as possible, be that buffs for allies or debuffs for enemies. All of those generally fall below the abilities discussed in the Tank Basics section.
Use Oath Friend on ally, usually a DPS and maintain buffs on them as needed in this general priority:
- Use Runic Shield to prevent large amounts of magical damage on yourself and/or your Oath Friend.
- Use Avenging the Debt to remove roots and snares from you or your Oath Friend (If purchased in Mastery)
- Apply and Maintain Blood of Grimnir
- Oathbound
- Ancestor’s Fury
- Stubborn as Stone
- Inspiring Attack (mainly for healers)
Vengeful Strike and Guarded Attack are optional and only use them if you have a free global to do so.
Debuff enemies with Stone Breaker and Kneecapper as needed. These are usually high value globals.
Punishing Knock:
The debuff lasts 20 seconds but the healer will likely instantly cleanse it, so we want to bury it. Beneath 1 debuff can be fine but I typically bury it beneath 2 debuffs to really ensure it’s getting that high value. If the healer is using GCDs to cleanse themself, they aren’t healing anyways so you kind of win either way. The rotation I use is
- Binding Grudge/Earthshatter (Good for multiple clumped healers)
- Kneecapper
- Inspiring Attack
This slows them, removes up to 20% heal crit and then the 50% outgoing debuff. This is very, very frustrating to deal with as a healer, even if there is another healer helping cleanse. There are situations where you can maintain this on 2-4 healers at once. The other great thing about the BG > KC > IA combo is that all of these skills have a 5s cooldown so with good movement from healer to healer, you aren’t losing any globals.
DPS Priority:
- 100 Grudge Binding Grudge if a slow is needed and to apply the dot.
- 100 Grudge Stone Breaker if there isn’t a stronger Armour debuff.
- 100 Grudge Heavy Blow every other GCD.
- Taunt
- 100 Grudge Earthshatter
- Punishing Blow
- Grudge-Born Fury
It’s very important to be at 100 Grudge for your DPS rotation as you will deal significantly more damage. There aren’t a lot of ways to control this as an Ironbreaker unfortunately, but at least be aware of what your Grudge level is at during your DPS rotation.
There’s a lot of buttons to push here to deal damage as a Tank, so you can opt to skip parts. You don’t need to Stone Breaker if someone else is doing a big Armour debuff (A White Lion for example), you can skip Punishing Blow to shorten your burst window and you can save Taunt for a ranged interrupt instead.
AoE
Just use Earthshatter, Blood of Grimnir and Rune Etched Axe as they come off of cooldown.
Morale
1: All 3 are viable
Champs is one of the best CC’s in the game, There’s probably humor to be found in that it shares the acronym. You and your target are both locked in place for 10 seconds, and neither of you can even turn. As important as mobility and positioning are in this game, being unable to move for 10 seconds is terrifying. Coordinate this with your DPS friends to lock down the kill on your favorite enemy player.
Demolishing Strike is a big armor debuff that will stack on top of ability armor debuffs. Combined with an Ironbreaker or a White Lion, a target with -2500 armor is going to get hit very, very hard.
A ranged root that deals a fair amount of damage. It won’t have the impact of a good Champion’s Challenge but because of its range, it is useful.
2: Skin of Iron
All damage you receive besides Morale is reduced to 1. This is one of the strongest Morales for personal defense in the game. It only lasts 5 seconds but it is almost guaranteed to keep you alive during that time. I use this almost exclusively.
I don’t recommend using Raze. It does very low damage that is rarely threatening and you risk handing out the Resolute buff, effectively nerfing the more-powerful Morales of your allies.
3: Distracting Bellow
AoE 50% Damage Reduction that stacks with Detaunt, Guard and Challenge. This ability can turn a fight on its own.
4: Immaculate Defense
Your entire party becomes nearly immune to damage for 10 seconds. This stacks with Detaunt, Guard, and Challenge. One of the most powerful morales in the game and a lot of encounters in pvp revolve around this ability.
Axe Slam:
Used in the Axe Slam setups to provide major damage instead of defense.
Rune Priest

The Runepriest is the Dwarf Healer. They utilize two-handed staves and the runic powers of the dwarf gods Grungni, Valaya and Grimnir. Runepriest has a generally weak Healing Kit but compensates for this by the passive strength and utility they can provide to those that they heal. They also function very well at keeping a group stable and single-target healing. They are versatile and can perfectly complement every other healer. I will address DPS RP builds at some point in the future.
Thanks to Fenris78 for your corrections to this section.
Oath Runes
Rune Priests have a slew of buffs that they can provide to group members. Each groupmate can have 1 of the buffs so it’s important to consider who will need what in a given situation, or simply ask your group which buff they want. Regardless of buff, each lasts for 60m and can be Severed so be mindful if you need to re-apply. It’s not a high priority thing to do, but if you have free time then you should. Additionally, each of these buffs grants your target an extra ability that they can activate. These abilities have been recently redesigned into powerful activatables and usually worth considering over the passive effect of the buff.

Increase all Primary Damage stats of the target by an amount based on Mastery. The ability deals a healthy amount of elemental damage over 5 seconds and also snares by 20%. The ability is worth using as a supplemental burst and it scales with the primary stat of the buffholder, so a White Lion would deal more damage with this ability based on its Strength & Melee Power.

Increases the Willpower and Initiative of the target by an amount based on Mastery. The ability removes one Curse, Hex and Ailment from the buffholder. This can be an incredibly powerful defensive GCD as it will likely be removing at least 2 debuffs from yourself. If it doesn’t strip the most important debuffs off of you, it will likely allow your Healers to do so in the next GCD or two.

Increases all resistances of the target by an amount based on Mastery. The buffholder can use the ability to grant themselves a very large absorb shield for 10 seconds, another very powerful defensive GCD. Those acquainted with the Absorbs section above know that Absorbs prevent critical damage and can sometimes prevent debuffs as well.

Increases the target’s Toughness by an amount based on Ability Level. This is a core ability and is therefore not associated with a Mastery Tree, so the Ability level at CR40 will be 40, and will provide 80 Toughness. However, you should not be using this ability as a passive Toughness buff. It has no active ability that a buffed groupmate can use but if they die, they can instantly resurrect themselves where they died. This is a very powerful effect and the ability has a 10 minute cooldown. We don’t want to risk it being severed and wasted, so it is best used on a target whom you think is going to die in the next few seconds and can be saved if they resurrect where they die.
Runic Conduit & Master Runes
The other major mechanic of the Runepriest is Runic Conduit, a ground-targetable beacon with infinite duration that constantly heals group mates within 50 feet of its location every 3 seconds. This does count as Direct Healing and will thus proc any effects that occur from Direct Healing such as your powerful Tactics or certain gear effects.

The Conduit can be placed up to 80 feet away from you and will automatically dispel itself if you wander more than 150 feet from its location. It is off-GCD, has a 10 second duration and needs to be moved often to be in range of your groupmates. Due to its meager 50 feet range, it will likely be unable to affect both front and backline, so keep this in mind and consider tracking it on your Group Frames so you know for certain if it is in range of a target. While active, it also reduces your passive AP regeneration by 5. In addition to all of this, the Master Runes of the Rune Priest now interact directly with the Runic Conduit, so you want your Runic Conduit to be in place before you activate a Master Rune.

You can also manually cancel your Runic Conduit with this new ability, but the only case I can think where you would want to do this is when you want to drop combat. Keep in mind that it will auto cancel itself at 150 feet from the rune placer.
There are 3 Master Runes that a Rune Priest can purchase from Mastery. Each lasts 10 seconds with a 30 second cooldown and provides a powerful, passive effect to the entire Group.

Provides an instant 50 AP to groupmates within range and for the duration, any groupmates in range of your Runic Conduit will also have AP costs reduced by 25% for 10 seconds.
This is useful but I don’t consider it mandatory as extra AP synergy isn’t needed very often.

Instantly removes all snaring effects from groupmates within range and provides a passive Toughness buff scaling with Mastery for 10 seconds.
This is an interesting Master Rune but I don’t consider it very useful. A one-time removal of snare effects on a 30 second cooldown isn’t that strong. If it also provided a few seconds of Snare Immunity, I would consider it quite good. I also don’t consider a Toughness buff very strong, even at around 200. Toughness isn’t very useful until you have a lot of it.

Instantly heals your Group for a large amount and instantly cleanses 1 Curse or Ailment, then cleanses again after 5 and 10 seconds, for 3 free cleanses in total, for groupmates in range of your Conduit at the time of the tick.
Very Good.
Important Core Abilities

Rune Priest/Zealot are the only Healers to get an instant cast, spammable Direct Heal like this. It has a long range, heals for a moderate amount and costs only 15 AP.

Increases the Wounds of a group member by an amount based on Mastery and heals them for the amount gained. This extra HP persists for 60 seconds or until shattered. This is the only major Save Ability of the class with a 3 minute cooldown.

Rune Priests get a core Silence with a 30s cooldown. This is typically used to CC enemy Healers in sync with a strong offensive play from your team.

Commonly referred to as “His 50” or “His wall” (in reference to Shield Wall from WoW), this ability reduces damage taken by 50%, AP costs by 25% and you will not suffer cast setback. It does stack with Guard but has a long cooldown of 3 minutes, so stay out of trouble when it’s not available.

This ability transforms all of your Healing Stats on gear into Damage Stats, and vice versa, toggles all of your Damage Stats into Healing Stats while toggled off. It can be turned on or off at any time but it does have a 20s cooldown. While active, your hands will glow and it is commonly referred to as “glowy hands”. We’re.. Not the most creative people. This allows Rune Priests to use DPS gear for Healing and vice versa. It’s also commonly turned on before the use of offensive spells. If you are trying to Stagger or Silence a target, or Armour debuff a clump of enemies. The Willpower converted to Intelligence will give you a fair chunk of Intelligence and drastically reduce your chance to be Disrupted.

The Rune Priest cleanse, they can remove Curse or Ailment.

The Absorb of the Rune Priest. The bubble is fairly small, especially since it’s rare to invest points into Path of Valaya as this build, but it’s still useful and also heals for a small amount when the effect fades.

Rune Priests get a Core AoE HoT. Pick a target, cast on them, and the effect will bounce to up to 5 other nearby allies (not restricted to group or warband) and heal them for a fair amount over 9 seconds.
Heal Rune Priest
The Heal Rune Priest focuses on using the Runic Conduit to help passively heal their entire Group while also providing them with strong, passive buffs that occur as a trigger from their healing, and then supplementing this with a versatile basic kit to provide a lot of healing that synergizes well with any other Healer. The Runepriest does not get a lot of powerful individual abilities like the Archmage does but this is more than compensated for with their passive buffs and versatile healing.
40/40 Build:

2 Master Runes, Rune of Battle and Rune of Burning for a lot of utility in addition to the AP Pump and Absorb tactics.
40/70 Build:

Standard 40/70 build. You can replace Rune of Battle with Rune of Burning for a ranged Slow or Master Rune of Fury for even more AP synergy.
40/70 Damage Support:

Max Grimnir for the largest possible debuffs from Concussive Runes as well as the increased duration Tactic for Rune of Battle. While you can still do this as a Healer, it’s probably better to just bring a full-fledged DPS RP to bring this utility in a warband setting.
Tactics

Increases the healing received by any target whom you critically Direct Heal by 25% for 10 seconds. This is the major utility provided by a Rune Priest and you should always use this Tactic.

Your direct heals have a 25% chance to restore 50 AP to the target. Very powerful AP synergy, especially because it can be triggered by your Master Rune of Adamant and provide free, passive AP to your group.

All of your direct heals have a 25% to also proc an absorb effect on the target. This can be triggered by your Master Rune of Adamant, GG spam, or any casted heal. This effect provides a surprising amount of buffer over time.

Core Healer AP Tactic. As a Rune Priest, you likely won’t be saying goodbye to this Tactic until near-BiS.

Each tick of your core 15s HoT has a 25% chance to increase its target’s Armour by a ridiculous amount and also provide 10% Reduced Armour Penetration. The effect lasts for 10 seconds and can refresh. This does count as an Ability buff and will not stack with other sources of Armour from Abilities, such as an Armour Potion.

Dwarf Racial Armour boost for yourself. Stacks with other forms of Armour. Incredibly useful, especially early on. Rune Priest has a lot of very good Tactics so it’s hard to fit this in.

This adds a large Armour debuff to your AoE DoT, so RP can semi-reliably Armour debuff large clumps of targets with this Tactic.

This tactic dramatically increases the duration of both Rune of Cleaving and Rune of Battle. 21 seconds of Rune of Battle is very powerful and the increased duration on Rune of Cleaving means higher uptime on Concussive Runes.
Passive healing increase. Powerful but hard to fit in.

Incredibly broken Tactic. This effect even works on Staggers so if a Zealot manages to hit a stagger on you, it will only last 5 seconds whereas your general knockdown will last only 2. Very useful if you expect to get CC’d to the point where either you die or someone else does as a result.


These 2 tactics, especially used in tandem, are quite strong. However, as the Rune Priest has so many good Tactics, it’s again hard to fit these in.
Recommended Loadouts
- Blessing of Grungni
- Restorative Burst (flexible)
- Ancestor’s Echo
- Ancestor’s Blessing
This is your core setup that is used in most situations until later on when you have enough AP feed on your gear to drop Resto Burst. There are situations where Regenerative Shielding is better than Ancestor’s Echo and there are situations where your group has a lot of AP Pump so has little need for yours, so you can use something else. If you’re in a situation where you need Stoutness or Ancestral Inheritance to live, just drop your AP Pump and let your group know.
Once you have the gear to drop Resto Burst, just add in Regenerative Shielding, Discipline, AI or SoS as best fits the situation.
- Blessing of Grungni
- Concussive Runes
- Extended Battle
- Preference
A common tactic employed currently is stacking Runes of Battle to supplement damage which is quite effective and doesn’t cost much support value from a Rune Priest. Note that players may only have 1 Rune of Battle on them now, so you will have to spread them across Tanks & Melee DPS.
Gear
Use the relevant War Crest sets while leveling.
Decimator > Obliterator > Devastator > Annihilator
PvE gear is quite good at this point. A Vanq + Redeye mix is common but we now have access to the new Vale-Walker set from Hunter’s Vale, allowing a mix of Vale-Walker and Sentinel to hold us over until BiS.
To learn more about how to acquire the Vale-Walker set, check here:
https://wiki.returnofreckoning.com/Vale-Walker_Set
5 Vale-Walker/3 Sentinel(Ring, Helm, Gloves/Chest) has a fantastic stat line for general use. The full 7 piece set of Vale-Walker has a couple of nice procs but with much lower stats and can be useful in Warband play where you can more easily let good play carry your survivability.
6 Vanquisher: This setup uses full Vanq for cast haste proc which is quite reliable to trigger with Master Rune of Adamant ticks. This is a lot of War Crests to spend to get the proc early so I would recommend waiting until you can buy Triumphant.
BiS:
6 Triumphant/3 Sov (Back, Ring, x; I like to use Shoulders or sometimes Belt for the Disrupt): This setup also has the powerful cast haste proc like Vanquisher does and has a ton of extra stats. This is a great option for Rune Priest because the cast haste is such a powerful output increase and is reliable to trigger passively with your Master Rune of Adamant ticks. This haste proc is so good on Rune Priest that I would recommend buying an extra piece of Triumphant and using 6/2 until you can afford the ring.
Warlord has Absolute Preservation for RP. The Ability prevents your group from being critically hit for 10 seconds on a 2 minute cooldown.
This is one of the strongest non–Morale defensive cooldowns in the game.
While having an extra defensive cooldown is nice, I consider this situational as the cast haste proc is so powerful and has such good uptime.
Weapons
While leveling, use the staves from the renown vendors with the “Apostle’s” prefix.
BiS:

The RR45 staff has anti-crit and this is our best option for maximizing it.

The Fortress Staff has great stats, highest available crit and a useful proc that does stack with the Triumphant proc.
Talismans
My recommendation is a combination of Armour and Wounds Talismans. Mostly Armour with 2-4 Wounds in BiS. Armours are expensive but well worth it, they drastically increase your survivability against Physical damage. Some healers use Toughness but the only way to reasonably invest in Toughness is through Talismans, and you have no synergies on gear supporting the build. The only Healer that I think it’s okay to go Toughness on is Shaman due to their massive Toughness buff.
For your Sentinel Soul, use
Jewelry
While leveling, use the best combination of gear you find from your travels, renown jewelry is always good.
At 40, transition into 2 or 3 piece Genesis as soon as possible.
We don’t have other fantastic options that are cheap, so I recommend doing both the Beastlord Hunts and Hunter’s Vale. The Beastlord set for RP is fantastic, 3pc (Back, Ring, Pocket) has fantastic stats and nets a nice 225 Armour bonus. Subjugator Cloak is a great filler for only 5 Genesis Crests.
You can also do LotD to get the Nehekharan set.
BiS: 2 rings locked in, Sovereign and Soul ring, for the last 2 you can keep your 2 piece genesis or spend the big bucks for the good rings.
(Vale-Walker Ring)
Renown Points
Spiritual Refinement 3: 9% Healing Crit, 30 points
Futile Strikes 3: 15% anticrit, 30 points
Deft Defender 4: 18% Dodge & Disrupt, 20 points
OR
Spiritual Refinement 4: 14% Healing Crit, 45 points
Futile Strikes 3: 15% anticrit, 30 points
Spend the rest however you want, some combination of Deft Defender, Reflexes, Willpower, Wounds.
OR
FS4 with SR3, spend rest how you like.
OR
FS4
DD4
SR2
This option is for maximizing your anticrit to survive burst, your Disrupt to avoid CC from enemy healers as much as possible, and the rest into Heal Crit. This is the kind of setup you would see for 6v6 Ranked gameplay.
Gameplay
The Heal Rune Priest is very simple to play and most of their power comes from passive buffs triggered by their healing. As mentioned previously, they are quite powerful and are generally the Core Healer of every group composition. As well as their strong Support Kit, they have some fairly powerful CC.
Important Abilities
Runic Conduit heals for a small amount but it counts as Direct Healing, therefore it can trigger all of your powerful Tactics such as the healing increase, the shield, Restorative Burst; It can also trigger your Triumphant cast haste and other “On Heal” procs such as the Vale Walker Cleanse or Aid. It is also the beacon for your Master Runes.

This ability places a pulsing damage aura on an ally that ticks every 3 seconds for 15 seconds. It deals a surprising amount of damage, even as Heal Rune Priest without any stats to bolster it or Glowy Hands. I like to include it in the build for some free damage that’s very easy to sync up with coordinated damage drops.

Staggers a target, preventing any action or movement for 6 seconds or until damaged. This ability is a very strong CC, you can use it to catch a foe running away, stop an angry Witch Elf from connecting with you, prevent an enemy healer from supporting their group, or pull the ultimate BM maneuver and stagger a Tank after he gets punted.
Skill Rotations / Priority
General Priority:
- Maintain Rune Priest buffs on your groupmates.
- Maintain Runic Conduit in a position within 50 feet of your groupmates who will need its healing or synergies.
- Pre-HoT before combat with Rune of Regeneration and Rune of Serenity.
Triage Priority:
- Cast Blessing of Valaya to triage your entire group as needed.
- Cast Oath Rune of Sanctuary on a groupmate who is about to die with no means of prevention and if the resurrection will be safe.
- Cast Protection of the Ancestors to heal a groupmate for a large amount and grant them a Wounds buff for 60 seconds.
- Cast Grungni’s Gift to instantly heal an ally who will die if they are not healed instantly.
- Cast Absolute Preservation to make an ally and/or yourself immune to critical hits for 10 seconds. (If wearing Warlord)
- Cast Rune of Shielding to prevent heavy damage on a Single Target
- Cast Rune of Restoration to triage a single target if you have a haste proc (such as Focused Mind or the proc effect from Fortress staff or Triumphant gear)
- Cast Rune of Mending to maintain the HoT on a Single Target.
- Cast Rune of Restoration with no haste to triage a Single Target.
Fill Priority:
- Cleanse Important debuffs with Rune of Cleansing.
- HoT a group of allies who are likely to receive damage with Rune of Serenity.
- HoT allies who are likely to receive damage with Rune of Regeneration.
- Re-apply your buffs if they were severed.
Morale
- Divine Favor or Rune of Insanity

An instant, large heal that is not affected by any heal debuffs.

Incredibly strong utility that is almost as strong as hard CC. It can prevent Healers from reacting properly, can prevent Guard Swaps from Tanks or Detaunt from a DPS.
- Focused Mind or Mountain Spirit

One of the best morales in the game. It provides Immunity to most forms of CC for 10 seconds and also reduces cast times by 50%, up to doubling your Healing Output based on if the cast time of the spell is throttled by the GCD.

This Morale massively increases the Armour and Resists of your entire group for 10 seconds. As a Morale, it will stack with other buffs such as Auras and Potions. This effect is quite strong but you can achieve similar if not better results with Focused Mind which will also provide you with strong CC Immunities.
- Divine Protection

A 4500 Melee Shield for the entire party. The implications are pretty obvious, providing a strong counter to melee enemies.
- Alter Fate

While generally not as strong as Focused Mind, this can be a good option as the 35% increased Healing also affects Healing over Time, so it can be useful in cases where you need to move, etc.
PvE
No big changes are needed for PvE; You can opt to use a lot more Willpower/Healing Crit as you should rarely be taking much damage.
Engineer

The Engineer is the Dwarf Ranged DPS class. It employs a Blunderbuss and a wrench (for both building things and hitting things). It is capable of stacking an extreme amount of damage on a location or melting away groups of enemies with powerful Damage over Time effects. With time needed to get Turret stacks, setup dots as well as some other factors, the class likes a slow fight in one area and dislikes quick and mobile skirmishes as a general rule. The engineer has 3 major roles: AoE sustained damage, AoE Support and Single Target Nuker.
Turrets
The Engineer’s Major Mechanic is the 3 Turrets it can construct, of which you can have 1 active at a time. Each Turret grants the Engineer 4 stacks of a 1% damage buff every 2 seconds, stacking up to 20% while you remain within 30 feet of the Turret.
There is a radius beyond this where you will retain but not gain or lose stacks, and any distance beyond this radius will cause you to lose stacks.

Building a new Turret will immediately reduce you to 4 stacks, Exploding your Turret or otherwise losing control of it (such as the turret dying) will cause your stacks to start to rapidly depreciate, similar to as if you had left the radius of your Turret.
There are 3 types of Turrets, which serve slightly differently from each other and have their own abilities and inherit a different portion of the Engineer’s Stats from Gear.

The Gun Turret has a long-ranged attacks and comes with 2 notable abilities:

A fair chunk of damage and an armour debuff that scales with Mastery.

A rapid fire attack that does a fair amount of damage and due to its constant hits, is good at setting back spells.

The Bombardment Turret is intended for medium range and provides some slight AoE Damage through one of its 2 abilities:

Deals a small amount of AoE damage with an 8s cooldown. The damage is corporeal, which is your favorite type of damage as an AoE Engineer.

A single target shot that deals light Corporeal damage every 5 seconds.

The Flame Turret is intended for short-range use. Notably, it receives the most Wounds of the 3 turrets and is therefore the hardest to kill, which is good at times when your turret’s only major function is to stay alive and buff you. Both of the Flame Turret’s abilities are AoE, although with short ranges, which can be quite useful at times.

Deals a light amount of AoE damage in a 40 foot cone with a 5 second cooldown.

Deals a light amount of AoE damage 360 degrees around your Turret, up to 30 feet away on an 8s cooldown.
Important Core Abilities

This does not stack with other major Resistance buffs but it lasts for 60 minutes and at a bare minimum it provides 1 free buffer for Shatter Enchantment.

Provides you with a bonus to Armour for 60 minutes. This DOES stack with an Armour Potion so Engineers can achieve a fair amount of armour at little cost.

This ability removes Stagger from an ally and up to 5 others within 25 feet of them for the cost of 1 GCD. Extremely high value as Staggers can be 5 or even 9 seconds long.

You self-destruct your Turret, as long as it is within 100 feet and instantly knock down all enemies within 30 feet of it for 3 seconds. This does destroy your turret, typically requiring you to build a new one.

Roots enemies within 30 feet for 5 seconds. Use cautiously as you are handing out a 30 second immunity to multiple targets.

For a heavy AP cost, instantly relocates your Turret to your current position.

The Engineer detaunt, 50% damage reduction against a single target until expiration or being broken by direct damage.

A melee range snare that lasts for 10 seconds with no cooldown but snares 40%, as single target snares typically do. Very powerful. MDPS Snares have a 10s cooldown while Tank snares share a 5s cooldown. For some reason, Engineer gets the spammable version.

Deals a moderate amount of Corporeal damage to the target and knocks them back a short distance. Castable on the move.

Deals a moderate amount of Corporeal damage to the target and interrupts them and all enemies within 20 feet of them. Castable on the move.
This skill is incredibly powerful as it can interrupt powerful casts, heal casts, or powerful channels, preventing a large amount of damage or causing a large gap in outgoing healing for a few seconds. It has a 1s cast and a short flight time so it requires good reaction to use well, but it’s incredibly powerful and can carry large scale fights more than most Engineer abilities can, without even causing an Immunity!

Places an object on the ground and when walked on by an enemy, it will stagger them and enemies within 30 feet of them for 3 seconds. Instant Cast so it’s very useful ranged and AoE CC.

After a short animation, deals a large amount of Physical damage to enemies in a line in front of you, up to 65 feet away, and knocks them away from you. The knockback is short so its usefulness is niche at best. The ability does a lot of damage but be careful with handing out immunities.
DoTs (Damage over Time)
The Engineer has a healthy amount of them, so let’s discuss the core ones and how to use them to maximum effect.

Deals a high amount of Corporeal damage every 3 seconds for 15 seconds to a single target.

Deals a high amount of Physical damage every 3 seconds for 21 seconds to a single target.

Deals a low amount of Corporeal damage every 3 seconds for 21 seconds to your target and enemies within 20 feet. Additionally it debuffs Corporeal Resistance heavily, which can be a massive damage multiplier for your damage and for some of your allies.

Deals a large amount of Corporeal damage every 3 seconds for 15 seconds to your target and enemies within 20 feet of them.

Deals a large amount of Corporeal damage every 3 seconds for 9 seconds to enemies in a narrow cone in front of you, up to 40 feet away.
DoT Timing
Incendiary Rounds and Signal Flare are typically used in tandem to set up Burst Damage on single targets. For bonus points, you can delay 1 global between them so they tick at the same time. For example:
GCD1: Incendiary Rounds
GCD2: Acid Bomb / Build Turret
GCD3: Signal Flare
Both DoTs will then tick together on GCD5, so we can use GCD4 for a Casted Ability of 1.5 seconds or less and GCD5 for an instant cast or Channel to create a lot of burst. Example:
GCD4: Gun Blast
GCD5: Hip Shot / Focused Fire
This theory can be applied to other cases for the Engineer and many other Classes in the game as most DoTs in the game tick every 3 seconds.
AoE Example:
GCD1: Acid Bomb
GCD2: Fragmentation Grenade
GCD3: Filler
GCD4: Friction Burn
Our 2 highest damage DoTs will tick together on GCD6.
Nukes
Or referred to as Frontloaded damage: damage that occurs shortly or instantly after its inception.

Deals a large amount of Physical damage to your target after a cast time.

Deals a moderate amount of Physical damage to your target instantly.

Deals a moderate amount of Physical damage every second to your target while channeled, up to 3 seconds. It deals damage instantly and then every second, 4 times in total.

Deals a moderate amount of Corporeal damage to your target. Castable on the move.

Deals a moderate amount of Physical damage to enemies in a wide cone in front of you, up to 40 feet away.
Your primary AoE filler if you can safely be in range to use it.

Deals a low amount of Corporeal damage to enemies all around you within a 30 foot radius.
Unfortunately, this ability has NO Weapon DPS scaling and is therefore useless in most situations. Blunderbuss will have double the base damage or maybe more in level 40 gear, so Static Discharge will only be more beneficial on heavily armored enemies, mostly Tanks, while having a smaller range relative to the player.
Grenadier Engineer
The Grenadier Engineer focuses on operating from a medium to semi-long range and provides a combination of constant AoE pressure, AoE burst and Single Target damage while being very mobile.
40/40 Build:

The 3 extra points in Tinkerer are flexible, spend them as you like. I don’t value Sticky Bomb at all, the ability needs a rework in my opinion. Dazzling Flash is quite powerful on Healers if you want to spend a Tactic slot for it. Lightning Rod does a lot of damage if enemies stay close to it.
40/70 Build:

Tracer Rounds for 15% free Crit chance.
+2 Full Build:

Like Bright Wizard, Engineers have abilities that compete for AoE locations. Specifically, Napalm Grenade and Phosphorous Shells. Only 1 of them can be active on a location at a time. I think this was changed recently to try to split damage between Engineers hitting the same location, but regardless, the highest level ability is favored, which is why this build just goes 15 points into Grenadier.
However, if you want to go +2 with this build, you have to use either Warlord or Defensive Sovereign as Normal Sov gives +2 Rifleman.
+2 Alternative:

Drop to 13 points into Grenadier but pick up the powerful Extra Ammo for AP and Bugman’s Best for healing. Either is interchangeable with Trench Fighting in situations where that is useful. Lightning Rod is also good.
Tactics

Increases the radius of Acid Bomb and Fragmentation Grenade from 20’ to 30’. This is by far the most important Tactic AoE Engineer has in large-scale PvP as it allows you to get your 2 main DoTs on roughly 50% more enemies.

Increases the range of your Grenadier abilities from 65 to 81 feet. The extra range makes the build much safer and smoother to play.

15% crit for every source of damage. Also adds 15% heal crit which can be useful if you run Bugman’s Best. One of the highest value Tactics for sheer damage output.

One of the best AP Pumps in the game. It provides a constant and large amount of AP to every group member who can stay within 30 feet of your turret.

Signal Flare causes a target to receive 15% more damage. This is the staple Tactic of any Engineer fulfilling the role of single target damage.

Increases your 2 primary Damage Stats by 120, totalling 240, at the penalty of 120 Toughness. This drawback isn’t much of a problem as Toughness is a fairly inefficient stat right now, especially for non-Tanks. The 120 Strength will only apply to melee auto-attacks but it’s still useful when you are Spanner Swiping people.

Increases your Primary damage stat by 160. This can be more efficient than Fightin’ Chance in cases where you are using primarily Corporeal damage, as Weapon Skill only Benefits Physical damage. However, the loss of the Weapon Skill will make all of your Physical damage feel much worse, even your Auto Attacks, so if you are making good use of Auto Attacks, Blunderbuss Blast, Hip Shot, Focused Fire, etc., then I would really recommend using Fightin’ Chance over Masterful Aim.

Fantastic utility Tactic. Engineers are basically required to spend a global summoning their Turret in every situation. Turrets used to be a 2s cast so this Tactic was basically mandatory, but now that they are a 1 second Cast, it’s a little easier to play without this Tactic in the high-movement fights (most RvR fights).

Incredibly powerful tactic that is Core to every Ballistic Skill user. If any enemy avoids any of your attacks, they receive a 10 second debuff that reduces their Dodge and Parry by 10% and Block by 5%. This massively multiplies the damage that Tanks in particular take because they are not only receiving more hits from enemies, they are also failing to Block or Parry damage from Guard far more frequently. At least 1 person in a warband should be running this. Engineers can use it slightly more efficiently than Shadow Warriors in my opinion because they have a larger AoE Radius on some of their abilities, increasing the chances of applying this to more people.

In effect, this will average very close to its highest potential of 25 AP / Second while spamming AoE on enough targets. This should be enough to solve your AP issues by itself if you are not being fed enough AP from group synergies. Favor Extra Ammo over this as it also provides AP to the group and is guaranteed. There are situations where you aren’t getting dodged and this won’t provide enough AP, although they are rare in high target situations.

Dwarf Racial Armour boost for yourself. Stacks with other forms of Armour. One of the best defensive Tactics in the game.

Incredibly broken Tactic. Very useful if you expect to get CC’d to the point where either you die or someone else does as a result.
Large-Scale AoE Tactics
- Extra Powder
- Throwing Arm
- Tracer Rounds (or flexible if not 70+)
- Flexible
For the Flexible slots, highest priority is an AP Tactic if you aren’t being fed enough followed by Pierce Defenses if no one else is providing the debuff, then Well-Oiled Machine if you feel it necessary, followed by the Stat Tactics and then Coordinated Fire if there are single-target subplots.
Defensive Tactic priority is Stoutness of Stone then Ancestral Inheritance typically. The CC reduction is incredibly strong.
Small-Scale / Single Target
- Throwing Arm
- Coordinated Fire
- Tracer Rounds (or flexible if not 70+)
- Flexible
With any amount of focus on a single target, we want Coordinated Fire. The Flexible priorities remain the same as above: Fix AP, PD if needed, etc.
Short Range
- Trench Fighting
- Coordinated Fire / Extra Powder
- Tracer Rounds (or flexible if not 70+)
- Flexible
Engineers can play short-ranged, almost at melee if supported by a Tank and built for it. This allows the use of Trench Fighting for the free 15% damage and the powerful short range Engineer AoEs. Use CF for small-scale and Extra Powder for large scale, then fill in flexible slots as described above.
Gear
Use the relevant War Crest sets while leveling.
Decimator > Obliterator > Devastator > Annihilator/Ruin
PvE gear is quite good at this point and will save us on War Crests.
6 Redeye / (3 Beastlord or Nehekharan 2pc): Redeye now has a belt instead of a cloak and has a nice mix of offensive and defensive stats to keep us alive and dealing decent damage as we grow into better gear. Beastlord Cloak + Ring + Pocket or Nehekharan Cloak + Ring or you can even use Genesis Cloak or Subjugator Cloak, though I would not recommend the latter two as much as the first two options.
After this, you can transition into PvE gear.
5 Bloodlord/2 Sentinel (Ring and Helm) is just fine until you can afford one of the BiS options. Vale-Walker is also great.
BiS: 5 Sovereign/4 Triumphant (Belt, Boots, Chest, Jewelry). This setup gives us fantastic stats, double BS and Wounds bonuses, as well as the powerful 4pc from Triumphant.

This set bonus has been changed to match the Melee DPS variants, offering a large Toughness debuff and useful stat buff.
5 Invader/4 Triumphant (Cloak, Belt, Boots, Jewelry) is unique in that it grants a 10 foot range bonus, pushing us from 81 to 91 feet (with Throwing Arm). This is a very powerful bonus in open RvR and allows you to more easily play around a blob of dangerous melee abilities such as Choppa pulls or Marauder KD’s and pulls. You can also stack this with the Event Pie
For another 10 foot range bonus, totaling 101 feet. These pies are only available from a time-limited event so don’t expect them to be cheap.
You can run 5 Invader/4 Triumphant(Ring, Back, Boots, Belt) but you will have to also buy the Invader Jewelry or 5 Invader / 2 Sovereign / 2 Triumphant(Ring, Boots) or Sentinel (Ring, Helm).
7 Sovereign / 2 Triumphant (Boots, Ring) has the powerful Boost Ability
This is a huge damage increase, granting both Critical Chance and Critical Damage. Engineer is very good at keeping this buff up and the build can do tremendous damage with this gear setup but it’s a bit squishy.
There are other fun things you can do such as Defensive Sov for the most useful +2 and being thikk with a slow proc, but keep in mind that you’re investing upwards of 9000 Crests to try variations.
Weapons
While leveling, buy the Guns and Spanners with the Sniper’s prefix from the War Crest vendors.
BiS:


Normally I recommend a Bloodlord primary weapon BUT Grenadier does not typically run much auto-attack haste or a lot of armor penetration to benefit from the big autos. So instead, we use the faster primary weapon for (hopefully) more procs and very slightly higher ability damage due to higher Weapon DPS.
However, you can certainly swap it around if you so choose. Both Bloodlord Ranged weapons are functionally the same, so pick the one that you like the most.


Juicy 4.0 auto speed.

Talismans
Grenadier Engi really only needs Ballistic Skill and Wounds, but stacking Armour is a good option too if you need more defense, this is a good strategy for 6v6 ranked so you can comfortably facetank quite a bit more damage rather than needing to kite.
Jewelry
Starting at 40, use the best things you find during your travels, a mix of the 38 and 33 renown rings, cloak, and belt is always a good choice.

Get started early on your PvE journey, the ring from blue bags in Gunbad is pretty fantastic and you can run up to 4 of them.

Early on with something such as full Redeye with Beastlord or Nehekharan, you will only need to fill 3 Jewelry slots.
Get 2-3pc Genesis and Sentinel Ring as soon as possible. If you are using 6Bloodlord/2Sent, your Back is already accounted for, so 3 Genesis is probably what you will use. If not, you can use a Back + Jewelry combo such as Beastlord


Or the Nehekharan set from Land of the Dead

BiS: 2 rings locked in, Triumphant and Sovereign. You can keep 2 piece Genesis or try to purchase some combination of Annuli and your Gunbad ring.
Renown Points
Opportunist 3: 9% Ranged Crit, 30 points
Futile Strikes 3: 15% anticrit, 30 points
Deft Defender 4: 18% Dodge & Disrupt/Reflexes 4: 18% Parry 20 points
OR
Opportunist 3: 9% Ranged Crit, 30 points
Futile Strikes 3: 15% anticrit, 30 points
Deft Defender 3: 12% Dodge & Disrupt/Reflexes 3: 12% Parry, 20 points
Quick Escape 1: Move speed Proc, 10 points
Opportunist 4: 14% Ranged Crit, 45 points
Futile Strikes 3: 15% anticrit, 30 points
Spend the rest on Deft Defender, Reflexes and Wounds as you see fit.
OR
FS4 with Opportunist 3, spend rest on Deft Defender, Reflexes and Wounds as you see fit.
As a Long Ranged DPS, you will typically get more value from DD as it’s another ranged that will be threatening you, but Parry is a good alternative when Melee will be the problem.
Gameplay
Grenadier Engineer focuses on setting up a string of DoTs and then layering frontloaded burst nukes on top of the dot ticks while utilizing their powerful Utility skills in between, such as AoE Staggers and interrupts.
Important Abilities
There are 2 new abilities from Mastery, Napalm Grenade and Phosphorous Shells.

You place a flaming pile of Napalm at a ground-target location that burns for 30 seconds and deals Corporeal damage to all enemies within 20 feet so long as they remain in the fire. It deals damage every 2 seconds instead of every 3, so Engineers don’t have *perfect* damage cycles. The damage starts low and ramps every 10 seconds, with the final 10 seconds dealing almost double the damage of the first 10 seconds. Enemies can only be damaged by 1 unique Napalm at a time, so different Engineers need to place their Napalms in different locations to get value with the skill. The level of the skill determines which Napalm has priority on a spot, so going for 15 points in Grenadier tree (or 17 points with the +2 trick) will give you the best chance of dealing damage with the ability.

Phosphorous Shells is a channeled skill that deals heavy Corporeal damage to all enemies within a 10 foot radius of a ground-target location and additionally snares them by 20% so long as they remain in the effect. Like Napalm, this deals damage every 2 seconds rather than every 3, so it’s important to time your PS with your Napalm ticks where possible. The skill deals damage instantly and every 2 seconds thereafter, for a total of 4 ticks and is not castable while moving. Also like Napalm, this damage will not stack with the same ability from Engineers, and uses the same rules regarding Ability Level.
Skill Rotation / Priority
General Priority:
- Apply and Maintain your buffs Flak Jacket and Burn Salve
- Build and Maintain a Turret to keep up your Improvised Upgrades stacks.
- Use your Detaunt to survive as needed.
- Use Shock Grenade to remove Stagger from Allies.
- Use Self-Destruct to knock down enemies as needed.
- Use Redeploy to reposition your Turret as needed.
- Use Flashbang Grenade to interrupt important abilities such as Git to Da Choppa! And Bring it on!
- Use Concussion Grenade for the knockback effect when it is needed.
- Use Land Mine for the short AoE Stagger effect as needed.
- Use Strafing Run for the AoE knockback effect when needed.
- Use Spanner Swipe to snare an enemy as needed.
- Use Barbed Wire to root nearby enemies only if absolutely necessary.
AoE Priority:
- Place Napalm in a location where it will deal damage as much as possible over the next 30 seconds and be mindful of the Napalm from other Engineers as they do not stack.
- Command your turret to attack.
- Apply Acid Bomb
- Apply Fragmentation Grenade *We DoT in this order because Fragmentation Grenade has a slight flight time and the 2 DoTs will almost synchronize ticks on their own.
- Cast Lightning Rod if spec’d and if enemies are close enough to be damaged by it.
- Cast Friction Burn if you are close enough to do so safely. Try to delay 1 global after Fragmentation Grenade so they tick together.
- Cast Phosphorous Shells, ideally on top of your Napalm as Napalm is about to tick (every even second). Otherwise, cast it on a clump of enemies you already have DoT’ed. Don’t worry too much about DoT Timing as you cannot perfectly sync your PS with your DoTs.
- Fill with Blunderbuss Blast if you are close enough to do so safely.
- Fill with Single Target Rotation.
With a little practice, you will start seeing timestamps such as this:

Single Target:
- Place Napalm in a location where it will deal damage as much as possible over the next 30 seconds and be mindful of the Napalm from other Engineers as they do not stack.
- Command your turret to attack.
- Apply Signal Flare
- Apply Incendiary Rounds *You can space these 1 global apart to ensure that they tick at the same time, such as with an Acid Bomb if within range.
- Apply Acid Bomb
- Apply Incendiary Grenade
- Use Focused Fire if the target has low armor and it will deal more damage than Fire Bomb. *You can channel cancel with Hip Shot as your DoTs are about to tick to also get a delayed Auto Attack in the timestamp for peak burst.
- Use Hip Shot
- Fill with Fire Bomb. *Remember that you can Fire Bomb + Hip Shot for some extra burst in a timestamp.
Morales

Provides guaranteed avoidance against all ranged attacks for 7 seconds.

Provides a Healthy amount of AP regeneration for yourself for 10 seconds. Rarely needed but always an option.

One of the best morales in the game. It provides Immunity to most forms of CC for 10 seconds and also reduces cast times by 50%, up to doubling your Damage Output based on if the cast time of the spell is throttled by the GCD.

20% Damage Reduction for your entire group that stacks with everything else. It lasts for a healthy duration of 20 seconds which is quite nice.

Deals 1200 damage over 4 seconds to your target and enemies within 20 feet of them. Drop this right before a big Phosphorous Shells.

Deals a massive 1800 damage to a target instantly and also reduces their armour by a large amount that stacks with most other armour debuffs.

Engineers can really only get 5 or maybe 6 ticks out of this efficiently while doing the AoE rotation so it doesn’t shine as much as on Shadow Warrior. Most Engineers prefer to have Mortar Round on M2 for AoE damage and Cannon Smash on M3 for Single target.

Deals damage instantly and then every .5 seconds for 5 seconds, totalling 11 ticks. This is a fairly powerful morale if layered on other damage and works well on Engineer as they have so much downtime between each cast of Phosphorous Shells.
Magnet / Support Engineer
The Magnet Engineer build offers a lot of utility and impactful AoE CC while operating from a short to medium range. You can build this spec quite tanky and not really lose that much while maintaining all of your utility and being quite hard to kill, which feels great because your main goal is to run in and pull a stack of enemies into a pile and then stun them.
40/40 Build

40/40 offers you all you really need to get started. You can choose to drop Tracer Rounds for Throwing Arm instead so you can play from a range at times.
40/70

The 70 build takes a lot of Tactics that you won’t always use, feel free to be flexible and take Bugman’s Best for the healing or Lightning Rod instead. Bugman’s isn’t strictly necessary to make the build work and I’m not the biggest fan of Lightning Rod, but it’s a button worth pushing if you spec for it.

Or just pick up Napalm instead if you like.
+2 Build

Throwing Arm and Dazzling Flash for maximum disruption. You can flex these points as needed; take Tracer Rounds instead for crit or go with Throwing Arm + Extra Powder to function as a tankier version of Grenadier Engi who can also Magnet.
Tactics
Increases the radius of Acid Bomb and Fragmentation Grenade from 20’ to 30’. Useful as Support Engi as it allows you to hit larger areas and create more damage pressure.
Increases the range of your Grenadier abilities from 65 to 81 feet. The extra range makes the build much safer and smoother to play.
15% crit for every source of damage. Also adds 15% heal crit which can be useful if you run Bugman’s Best. One of the highest value Tactics for sheer damage output.
One of the best AP Pumps in the game. It provides a constant and large amount of AP to every group member who can stay within 30 feet of your turret.
Signal Flare causes a target to receive 15% more damage. This is the staple Tactic of any Engineer fulfilling the role of single target damage.
Increases your 2 primary Damage Stats by 120, totalling 240, at the penalty of 120 Toughness. This drawback isn’t much of a problem as Toughness is a fairly inefficient stat right now, especially for non-Tanks. The 120 Strength will only apply to melee auto-attacks but it’s still useful when you are Spanner Swiping people.
Increases your Primary damage stat by 160. This can be more efficient than Fightin’ Chance in cases where you are using primarily Corporeal damage, as Weapon Skill only Benefits Physical damage. However, the loss of the Weapon Skill will make all of your Physical damage feel much worse, even your Auto Attacks, so if you are making good use of Auto Attacks, Blunderbuss Blast, Hip Shot, Focused Fire, etc., then I would really recommend using Fightin’ Chance over Masterful Aim.
Fantastic utility Tactic. Engineers are basically required to spend a global summoning their Turret in every situation. Turrets used to be a 2s cast so this Tactic was basically mandatory, but now that they are a 1 second Cast, it’s a little easier to play without this Tactic in the high-movement fights (most RvR fights).
Incredibly powerful tactic that is Core to every Ballistic Skill user. If any enemy avoids any of your attacks, they receive a 10 second debuff that reduces their Dodge and Parry by 10% and Block by 5%. This massively multiplies the damage that Tanks in particular take because they are not only receiving more hits from enemies, they are also failing to Block or Parry damage from Guard far more frequently. At least 1 person in a warband should be running this. Engineers can use it slightly more efficiently than Shadow Warriors in my opinion because they have a larger AoE Radius on some of their abilities, increasing the chances of applying this to more people.
In effect, this will average very close to its highest potential of 25 AP / Second while spamming AoE on enough targets. This should be enough to solve your AP issues by itself if you are not being fed enough AP from group synergies. Favor Extra Ammo over this as it also provides AP to the group and is guaranteed. There are situations where you aren’t getting dodged and this won’t provide enough AP, although they are rare in high target situations.
Dwarf Racial Armour boost for yourself. Stacks with other forms of Armour. One of the best defensive Tactics in the game.
Incredibly broken Tactic. Very useful if you expect to get CC’d to the point where either you die or someone else does as a result.

Powers up your interrupt to also provide a powerful 50% increased cast time on targets hit. This is especially brutal against healers who now have to spend 3.75 seconds winding up a group heal instead of the standard 2.5; a well timed flashbang on a healer line can create a window of time where are 0 group heals going off instead of 2, which can win fights by itself. Notably less effective on Warrior Priest / Disciple of Khaine as it turns their 1s cast into a 1.5s cast which isn’t even a change in output.

Additive 15% damage increase to close targets. Since this build likes to play close, this Tactic can be a fantastic choice for damage.

Halves your cast times if you are within feet of your enemy target. Useful to turn the 2 second wind-up on Magnet into a 1-second windup if you run into an enemy clump, allowing you to set up your play faster.
Support Engineer Tactics
- Pierce Defenses
- Well-Oiled Machine / Expert Skirmisher / Flexible
- Flexible
- Flexible
Pierce Defenses is more or less the staple tactic for the build. Since you are focusing on a supporting role, you might as well bring the best Support Tactic that Engi has access to.
For your Flexible picks, your 2 primary options will be Throwing Arm and Extra Powder to give you a lot more coverage and flexibility with your range, but you can also run the powerful AP Pump if your group needs it or something like Coordinated Fire to help with Single Target damage or Masterful Aim to boost your damage and reduce your chance to be dodged.
W-OM/ES are there to let you set up your combo faster and to make turret management a little easier, but if you feel you don’t need them, the slot is also flexible.
Defensive Options for Flexible Slots are Stoutness of Stone or Ancestral Inheritance, depending on if you want ridiculous armour, CC reduction or both. Even with full investment in Defense through Gear and Renown, these Tactics can make your job easier.
Short Range Damage Tactics
- Trench Fighting
- Tracer Rounds
- Fightin’ Chance / Masterful Aim
- Flexible
Playing at a Short-range, this build would like to spam a lot of Blunderbuss Blast, so you will need some Weapon Skill to really get the damage out of the skill, which is why we take Fightin’ Chance.
For the Flexible, you can run your other stat Tactic, AP pump, or whatever you see fit.
Mid-Range Damage Tactics
- Throwing Arm
- Extra Powder
- Tracer Rounds
- Masterful Aim / Flexible
Playing from mid-range, the build operates much like Grenadier Engineer, so we use the same Tactics.
Gear
Leveling
Use the relevant War Crest sets while leveling
Decimator > Obliterator > Devastator > Annihilator/Ruin
PvE gear is quite good at this point and will save us on War Crests.
6 Redeye / (3 Beastlord or Nehekharan 2pc): Redeye now has a belt instead of a cloak and has a nice mix of offensive and defensive stats to keep us alive and dealing decent damage as we grow into better gear. Beastlord Cloak + Ring + Pocket or Nehekharan Cloak + Ring or you can even use Genesis Cloak or Subjugator Cloak, though I would not recommend the latter two as much as the first two options.
After this, you can transition into PvE gear.
5 Bloodlord/2 Sentinel (Ring and Helm) is just fine until you can afford one of the BiS options. Vale-Walker is also great.
BiS
For damage output, the gear will be the same as your typical Grenadier Engineer, but I will list some defensive options as well that allow this build to do its job more comfortably and provide even more utility.
5 Sovereign/4 Triumphant (Belt, Boots, Chest, Jewelry). This setup gives us fantastic stats, double BS and Wounds bonuses, as well as the powerful 4pc from Triumphant.
This set bonus has been changed to match the Melee DPS variants, offering a large Toughness debuff and useful stat buff.
5 Invader/4 Triumphant (Cloak, Belt, Boots, Jewelry) is unique in that it grants a 10 foot range bonus, pushing us from 81 to 91 feet (with Throwing Arm). This is a very powerful bonus in open RvR and allows you to more easily play around a blob of dangerous melee abilities such as Choppa pulls or Marauder KD’s and pulls. You can also stack this with the Event Pie
For another 10 foot range bonus, totaling 101 feet. These pies are only available from a time-limited event so don’t expect them to be cheap.
You can run 5 Invader/4 Triumphant(Ring, Back, Boots, Belt) but you will have to also buy the Invader Jewelry or 5 Invader / 2 Sovereign / 2 Triumphant(Ring, Boots) or Sentinel (Ring, Helm). Note that range bonuses such as Invader increase your range but DO NOT increase the Radius of your abilities; you will not be able to Magnet from 75 feet rather than 65 as an example.
7 Sovereign / 2 Triumphant (Boots, Ring) has the powerful Boost Ability
This is a huge damage increase, granting both Critical Chance and Critical Damage. Engineer is very good at keeping this buff up and the build can do tremendous damage with this gear setup but it’s a bit squishy.
Defensive / Utility BiS options
Defensive Sovereign / Triumphant: You can run either 6Sov/3 Triumph for +2 or 7Sov/2Triumph to also gain the obnoxious snare proc. Since you are AoEing so much, you are going to be slowing a few people in the blob pretty consistently, but there are other forms of snare in large-scale so this is not strictly needed.
6 Sov / 3 Triumphant (Helm, Gloves, Ring)
7 Sov / 2 Triumphant (Ring, Gloves)
Since we aren’t focused so much on Damage in this gear setup, one of our best stats is actually Reduced Chance to be Dodged. This makes the gearing simple because the 2 pieces of Triumphant which have it would replace Sov pieces (Gloves + Helmet) that have AA haste, which isn’t very useful of a stat in this gear setup. However, Reduced Chance to be Dodged has anti-synergy with Pierce Defenses, causing you to proc it much less frequently on all targets, but you are still quite likely to have good uptime on the important targets, that being mainly Tanks and DPS. Notably, we also need to run this setup for the +2 build.
Weapons
While leveling, buy the Guns and Spanners with the Sniper’s prefix from the War Crest vendors.
BiS
Normally I recommend a Bloodlord primary weapon BUT Grenadier does not typically run much auto-attack haste or a lot of armor penetration to benefit from the big autos. So instead, we use the faster primary weapon for (hopefully) more procs and very slightly higher ability damage due to higher Weapon DPS.
However, you can certainly swap it around if you so choose. Both Bloodlord Ranged weapons are functionally the same, so pick the one that you like the most.
Juicy 4.0 auto speed.
Defensive

The 61 defensive renown weapon to make is beefier, while dropping the penalties from Bloodlord.
Talismans
Magnet Engi really only needs Ballistic Skill and Wounds, but stacking Armour is a good option too if you need more defense, which makes the build much more comfortable to play in large-scale near the frontlines.
Jewelry
Starting at 40, use the best things you find during your travels, a mix of the 38 and 33 renown rings, cloak, and belt is always a good choice.
Get started early on your PvE journey, the ring from blue bags in Gunbad is pretty fantastic and you can run up to 4 of them.
Early on with something such as full Redeye with Beastlord or Nehekharan, you will only need to fill 3 Jewelry slots.
Get 2-3pc Genesis and Sentinel Ring as soon as possible. If you are using 6Bloodlord/2Sent, your Back is already accounted for, so 3 Genesis is probably what you will use. If not, you can use a Back + Jewelry combo such as Beastlord
Or the Nehekharan set from Land of the Dead
BiS: 2 rings locked in, Triumphant and Sovereign. You can keep 2 piece Genesis or try to purchase some combination of Annuli and your Gunbad ring.
If we want to maximize Reduced Chance to be Dodged, then an Exquisite Gunbad Sapphire in addition to a Gunbad blue bag ring is ideal.
Renown Points
Opportunist 3: 9% Ranged Crit, 30 points
Futile Strikes 3: 15% anticrit, 30 points
Deft Defender 4: 18% Dodge & Disrupt/Reflexes 4: 18% Parry 20 points
OR
Opportunist 3: 9% Ranged Crit, 30 points
Futile Strikes 3: 15% anticrit, 30 points
Deft Defender 3: 12% Dodge & Disrupt/Reflexes 3: 12% Parry, 20 points
Quick Escape 1: Move speed Proc, 10 points
The movement speed proc is notably useful for this close-ranged build as Engineer does not have Charge or a tool besides Morale 2 to remove slows like melees do.
Opportunist 4: 14% Ranged Crit, 45 points
Futile Strikes 3: 15% anticrit, 30 points
Spend the rest on Deft Defender, Reflexes and Wounds as you see fit.
OR
Reflexes 4/Deft Defender 4: 18% Parry or Dodge/Disrupt, 20 points
Futile Strikes 3: 15% Anticrit, 30 points
Quick Escape 1: Move speed Proc, 10 points
Hardy Concessions 4: 10% Damage Reduction and 10% Reduced Outgoing Damage.
Beefy variant.
FS4 with Opportunist 3, spend rest on Deft Defender, Reflexes and Wounds as you see fit.
As a Long Ranged DPS, you will typically get more value from DD as it’s another ranged that will be threatening you, but Parry is a good alternative when Melee will be the problem.
Gameplay
The Magnet Engineer wants to get in close, pull a pack of enemies on top of them and cc them further with stuns/slow while also utilizing the powerful short-range attacks that the class has to offer, but can also function as a pseudo-Grenadier Engineer, pelting packs of enemies with damage from a medium range.
Important Abilities
This build centers around the aptly named Electromagnet

After a 2 second cast, you will attempt to pull up to 6 nearby enemies almost directly on top of you, from up to 65 feet away, then snaring them by 30% for 5 seconds. You can then Self-Destruct your turret to knock them all down for 3 seconds, or even throw a Land Mine at them if absolutely necessary to pseudo-stun them for around a second as the stagger will be broken almost instantly by damage.
You place a flaming pile of Napalm at a ground-target location that burns for 30 seconds and deals Corporeal damage to all enemies within 20 feet so long as they remain in the fire. It deals damage every 2 seconds instead of every 3, so Engineers don’t have *perfect* damage cycles. The damage starts low and ramps every 10 seconds, with the final 10 seconds dealing almost double the damage of the first 10 seconds. Enemies can only be damaged by 1 unique Napalm at a time, so different Engineers need to place their Napalms in different locations to get value with the skill. The level of the skill determines which Napalm has priority on a spot, so going for 15 points in Grenadier tree (or 17 points with the +2 trick) will give you the best chance of dealing damage with the ability, but the Magnet Engineer will rarely be going 15 or 17 points into Grenadier.
Phosphorous Shells is a channeled skill that deals heavy Corporeal damage to all enemies within a 10 foot radius of a ground-target location and additionally snares them by 20% so long as they remain in the effect. Like Napalm, this deals damage every 2 seconds rather than every 3, so it’s important to time your PS with your Napalm ticks where possible. The skill deals damage instantly and every 2 seconds thereafter, for a total of 4 ticks and is not castable while moving. Also like Napalm, this damage will not stack with the same ability from Engineers, and uses the same rules regarding Ability Level.
Skill Rotation / Priority
General Priority:
- Apply and Maintain your buffs Flak Jacket and Burn Salve
- Build and Maintain a Turret to keep up your Improvised Upgrades stacks.
- Use your Detaunt to survive as needed.
- Use Shock Grenade to remove Stagger from Allies.
- Use Self-Destruct to knock down enemies as needed.
- Use Redeploy to reposition your Turret as needed.
- Use Flashbang Grenade to interrupt important abilities such as Git to Da Choppa! And Bring it on!
- Use Concussion Grenade for the knockback effect when it is needed.
- Use Land Mine for the short AoE Stagger effect as needed.
- Use Strafing Run for the AoE knockback effect when needed.
- Use Spanner Swipe to snare an enemy as needed.
- Use Barbed Wire to root nearby enemies only if absolutely necessary.
Magnet Rotation:
- Redeploy or Build your Turret
- Cast Electromagnet
- Cast Self-Destruct to knockdown the people whom you have pulled.
- Use Friction Burn
- Use Blunderbuss Blast to help finish off the pulled enemies. *This rotation is assuming that the pulled enemies will die quickly. If they do not die in a few globals, return to your normal AoE Priority.
AoE Priority:
- Place Napalm in a location where it will deal damage as much as possible over the next 30 seconds and be mindful of the Napalm from other Engineers as they do not stack.
- Command your turret to attack.
- Apply Acid Bomb
- Apply Fragmentation Grenade *We DoT in this order because Fragmentation Grenade has a slight flight time and the 2 DoTs will almost synchronize ticks on their own.
- Cast Friction Burn if you are close enough to do so safely. Try to delay 1 global after Fragmentation Grenade so they tick together.
- Cast Phosphorous Shells, ideally on top of your Napalm as Napalm is about to tick (every even second). Otherwise, cast it on a clump of enemies you already have DoT’ed. Don’t worry too much about DoT Timing as you cannot perfectly sync your PS with your DoTs.
- Fill with Blunderbuss Blast if you are close enough to do so safely.
- Fill with Single Target Rotation.
With a little practice, you will start seeing timestamps such as this:
Single Target:
- Place Napalm in a location where it will deal damage as much as possible over the next 30 seconds and be mindful of the Napalm from other Engineers as they do not stack.
- Command your turret to attack.
- Apply Signal Flare
- Apply Incendiary Rounds *You can space these 1 global apart to ensure that they tick at the same time, such as with an Acid Bomb if within range.
- Apply Acid Bomb
- Apply Incendiary Grenade
- Use Focused Fire if the target has low armor and it will deal more damage than Fire Bomb. *You can channel cancel with Hip Shot as your DoTs are about to tick to also get a delayed Auto Attack in the timestamp for peak burst.
- Use Hip Shot
- Fill with Fire Bomb. *Remember that you can Fire Bomb + Hip Shot for some extra burst in a timestamp.
Morales
Provides guaranteed avoidance against all ranged attacks for 7 seconds.
Provides a Healthy amount of AP regeneration for yourself for 10 seconds. Rarely needed but always an option.
One of the best morales in the game. It provides Immunity to most forms of CC for 10 seconds and also reduces cast times by 50%, up to doubling your Damage Output based on if the cast time of the spell is throttled by the GCD.
20% Damage Reduction for your entire group that stacks with everything else. It lasts for a healthy duration of 20 seconds which is quite nice.
Deals 1200 damage over 4 seconds to your target and enemies within 20 feet of them. Drop this right before a big Phosphorous Shells.
Deals a massive 1800 damage to a target instantly and also reduces their armour by a large amount that stacks with most other armour debuffs.
Engineers can really only get 5 or maybe 6 ticks out of this efficiently while doing the AoE rotation so it doesn’t shine as much as on Shadow Warrior. Most Engineers prefer to have Mortar Round on M2 for AoE damage and Cannon Smash on M3 for Single target.
Deals damage instantly and then every .5 seconds for 5 seconds, totalling 11 ticks. This is a fairly powerful morale if layered on other damage and works well on Engineer as they have so much downtime between each cast of Phosphorous Shells.
Rifleman Engineer
The Rifleman Engineer specializes in long-range, single-target damage utilizing dwarven longbore rifles and hand-cannons. It has some of the longest range abilities in the game while offering great burst, fair group utility and of course, big guns.
40/40:

15 point for maximum tooltips and turret armour debuff; the rest into Tinkerer for the AP Tactic for PvE or whenever needed. Flex to whichever Tactic from Rifleman you want to run.
40/70 Tracer Rounds:

Again, swap to whichever Tactic you want to run from Rifleman.
40/70 Grenadier Shenanigans:

Most of the important goodies from Grenadier in case you want to have strong AoE options in the build.
Tactics

Incredibly strong damage tactic. It deals damage every second which makes it very easy to create large waves of burst with. It deals Physical damage so things like Armour Penetration and debuffs will help the damage a lot but it cannot crit. The tactic does refresh and does have Pandemic rules, so there is no dps loss by spamming Gun Blast or Snipe and refreshing the DoT.

Reduces the Cast Time of your 2 major casted Nukes, Gun Blast and Snipe by a fair amount. Gun Blast goes from a 2 second to a 1.5 second cast, which is the duration of the GCD; Snipe goes from a 3 second to a 2.25 second cast. Generally speed on your casts is very strong and this tactic will make the build feel comfortable to play with the cast times.

10% Penetration to all rifle attacks is a good amount of damage to get from a tactic slot, and it also allows auto attacks while moving. This is somewhat awkward for this build because none of the casted rifle attacks are usable while moving and you also want to stay close to your turret to keep stacks. However, the effect is powerful and quite useful, you can spam your DoTs, instant attacks and castable while moving skills and not lose any autos to movement. Great Tactic for both flat damage and damage while moving.

Auto-attack haste is very powerful and this is a build that is going to make the most of your auto-attack with high Armour Penetration.
Increases the radius of Acid Bomb and Fragmentation Grenade from 20’ to 30’. Useful as it allows you to hit larger areas and create more damage pressure.
Increases the range of your Grenadier abilities from 65 to 81 feet. The extra range makes the build much safer and smoother to play.
15% crit for every source of damage. Also adds 15% heal crit which can be useful if you run Bugman’s Best. One of the highest value Tactics for sheer damage output.
One of the best AP Pumps in the game. It provides a constant and large amount of AP to every group member who can stay within 30 feet of your turret.
Signal Flare causes a target to receive 15% more damage. This is the staple Tactic of any Engineer fulfilling the role of single target damage.
Increases your 2 primary Damage Stats by 120, totalling 240, at the penalty of 120 Toughness. This drawback isn’t much of a problem as Toughness is a fairly inefficient stat right now, especially for non-Tanks. The 120 Strength will only apply to melee auto-attacks but it’s still useful when you are Spanner Swiping people.
Increases your Primary damage stat by 160. This can be more efficient than Fightin’ Chance in cases where you are using primarily Corporeal damage, as Weapon Skill only Benefits Physical damage. However, the loss of the Weapon Skill will make all of your Physical damage feel much worse, even your Auto Attacks, so if you are making good use of Auto Attacks, Blunderbuss Blast, Hip Shot, Focused Fire, etc., then I would really recommend using Fightin’ Chance over Masterful Aim.
Fantastic utility Tactic. Engineers are basically required to spend a global summoning their Turret in every situation. Turrets used to be a 2s cast so this Tactic was basically mandatory, but now that they are a 1 second Cast, it’s a little easier to play without this Tactic in the high-movement fights (most RvR fights).
Incredibly powerful tactic that is Core to every Ballistic Skill user. If any enemy avoids any of your attacks, they receive a 10 second debuff that reduces their Dodge and Parry by 10% and Block by 5%. This massively multiplies the damage that Tanks in particular take because they are not only receiving more hits from enemies, they are also failing to Block or Parry damage from Guard far more frequently. At least 1 person in a warband should be running this. Engineers can use it slightly more efficiently than Shadow Warriors in my opinion because they have a larger AoE Radius on some of their abilities, increasing the chances of applying this to more people.
Dwarf Racial Armour boost for yourself. Stacks with other forms of Armour. One of the best defensive Tactics in the game.
Incredibly broken Tactic. Very useful if you expect to get CC’d to the point where either you die or someone else does as a result.
Halves your cast times if you are within feet of your enemy target. Can be very powerful as Rifleman, reducing Snipe to a 1.5s cast and Gun Blast to a 1s on a very close target. Great in PvE.
Recommended Loadouts
- Coordinated Fire
- Fightin’ Chance
- Hand-Crafted Scope (Flexible)
- Flexible
Coordinated Fire and Fightin’ Chance are what I would consider the 2 core Tactics for the build. Hand-Crafted Scope is the next strongest damage tactic but both final slots are flexible. You can run Hollow Points with Quick Reloader; HCS with Thunderer; Expert Skirmisher with HCS for PvE; Tracer Rounds at 60+; etc.
Gear
Leveling
Use the relevant War Crest sets while leveling
Decimator > Obliterator > Devastator > Annihilator/Ruin
You can do Altdorf Sewers for the Keeper Set, which has the powerful 25% AA haste.
PvE gear is quite good at this point and will save us on War Crests.
6 Redeye / (3 Beastlord or Nehekharan 2pc): Redeye now has a belt instead of a cloak and has a nice mix of offensive and defensive stats to keep us alive and dealing decent damage as we grow into better gear. Beastlord Cloak + Ring + Pocket or Nehekharan Cloak + Ring or you can even use Genesis Cloak or Subjugator Cloak, though I would not recommend the latter two as much as the first two options. Redeye also has 25% AA haste, which is very powerful with this build.
After this, you can transition into PvE gear.
5 Bloodlord/2 Sentinel (Ring and Helm) is just fine until you can afford one of the BiS options. Vale-Walker is also great.
5 Vanquisher/2 Sentinel (Ring and Helm) is a large War Crest investment but the stats are quite powerful.
BiS
For damage output, the gear will be the same as your typical Grenadier Engineer, but I will list some defensive options as well that allow this build to do its job more comfortably and provide even more utility.
5 Sovereign/4 Triumphant (Belt, Boots, Chest, Jewelry). This setup gives us fantastic stats, double BS and Wounds bonuses, as well as the powerful 4pc from Triumphant.
This set bonus has been changed to match the Melee DPS variants, offering a large Toughness debuff and useful stat buff.
5 Invader/4 Triumphant (Cloak, Belt, Boots, Jewelry) is unique in that it grants a 10 foot range bonus, pushing us from 81 to 91 feet (with Throwing Arm), 110 foot range on most Rifleman abilities and 160 feet range on Snipe. This is a very powerful bonus in open RvR and allows you to more easily play around a blob of dangerous melee abilities such as Choppa pulls or Marauder KD’s and pulls. You can also stack this with the Event Pie
For another 10 foot range bonus, totaling 101 feet, or 120 feet with Rifleman abilities or 170 feet with Snipe. These pies are only available from a time-limited event so don’t expect them to be cheap.
You can run 5 Invader/4 Triumphant(Ring, Back, Boots, Belt) but you will have to also buy the Invader Jewelry or 5 Invader / 2 Sovereign / 2 Triumphant(Ring, Boots) or Sentinel (Ring, Helm). Note that range bonuses such as Invader increase your range but DO NOT increase the Radius of your abilities; you will not be able to Magnet from 75 feet rather than 65 as an example.
7 Sovereign / 2 Triumphant (Boots, Ring) has the powerful Boost Ability
This is a huge damage increase, granting both Critical Chance and Critical Damage. Engineer is very good at keeping this buff up and the build can do tremendous damage with this gear setup but it’s a bit squishy.
8 Warlord This setup lacks on crit and Wounds but it has very high flat damage, a lot of AA haste and the full-set ability is a ranged root, which is very strong CC for this build.
Defensive / Utility BiS options
It’s very unlikely that a Rifleman Engineer would consider running a defensive setup but if you do, try to get as much Weapon Skill & Armour Penetration on the pieces as you can.
Defensive Sovereign / Triumphant: You can run either 6Sov/3 Triumph for +2 or 7Sov/2Triumph to also gain the obnoxious snare proc. Since you are AoEing so much, you are going to be slowing a few people in the blob pretty consistently, but there are other forms of snare in large-scale so this is not strictly needed.
6 Sov / 3 Triumphant (Helm, Gloves, Ring)
7 Sov / 2 Triumphant (Ring, Gloves)
Since we aren’t focused so much on Damage in this gear setup, one of our best stats is actually Reduced Chance to be Dodged. This makes the gearing simple because the 2 pieces of Triumphant which have it would replace Sov pieces (Gloves + Helmet) that have AA haste, which isn’t very useful of a stat in this gear setup. However, Reduced Chance to be Dodged has anti-synergy with Pierce Defenses, causing you to proc it much less frequently on all targets, but you are still quite likely to have good uptime on the important targets, that being mainly Tanks and DPS. Notably, we also need to run this setup for the +2 build.
Weapons
While leveling, buy the Guns and Spanners with the Sniper’s prefix from the War Crest vendors.
BiS
Fort Rifle for extremely fast autos, Bloodlord for slower and bigger autos. With a Thunderer + HCS build, I would probably recommend Fort Rifle, otherwise it’s more preference; You can achieve pretty insane burst with Bloodlord Rifle because you can delay your auto until the end of a cast so something like Gun Blast > Auto attack > Hip Shot with DoTs ticking at the same time is a lot of potential damage in 1 timestamp.
However, you can certainly swap it around if you so choose. Both Bloodlord Ranged weapons are functionally the same, so pick the one that you like the most.
Juicy 4.0 auto speed.
Defensive
The 61 defensive renown weapon to make us beefier, while dropping the penalties from Bloodlord.
Talismans
Rifleman does Physical damage, therefore needs Weapon Skill. Every Offensive Talisman slotted should probably be Weapon Skill. The Triumphant proc for Engi gives Ballistic Skill rather than Weapon Skill, which further compounds the need to stack Weapon Skill. Defensive Talismans would be Wounds or Armour.
Jewelry
Starting at 40, use the best things you find during your travels, a mix of the 38 and 33 renown rings, cloak, and belt is always a good choice.
Get started early on your PvE journey, the ring from blue bags in Gunbad is pretty fantastic and you can run up to 4 of them.
Early on with something such as full Redeye with Beastlord or Nehekharan, you will only need to fill 3 Jewelry slots.
Get 2-3pc Genesis and Sentinel Ring as soon as possible. If you are using 6Bloodlord/2Sent, your Back is already accounted for, so 3 Genesis is probably what you will use. If not, you can use a Back + Jewelry combo such as Beastlord
Or the Nehekharan set from Land of the Dead
BiS: 2 rings locked in, Triumphant and Sovereign. You can keep 2 piece Genesis or try to purchase some combination of Annuli and your Gunbad ring.
If we want to maximize Reduced Chance to be Dodged, then an Exquisite Gunbad Sapphire in addition to a Gunbad blue bag ring is ideal.
Renown Points
Opportunist 3: 9% Ranged Crit, 30 points
Futile Strikes 3: 15% anticrit, 30 points
Deft Defender 4: 18% Dodge & Disrupt/Reflexes 4: 18% Parry 20 points
OR
Opportunist 3: 9% Ranged Crit, 30 points
Futile Strikes 3: 15% anticrit, 30 points
Deft Defender 3: 12% Dodge & Disrupt/Reflexes 3: 12% Parry, 20 points
Quick Escape 1: Move speed Proc, 10 points
OR
Opportunist 4: 14% Ranged Crit, 45 points
Futile Strikes 3: 15% anticrit, 30 points
Spend the rest on Deft Defender, Reflexes and Wounds as you see fit.
OR
FS4 with Opportunist 3, spend rest on Deft Defender, Reflexes and Wounds as you see fit.
As a Long Ranged DPS, you will typically get more value from DD as it’s another ranged that will be threatening you, but Parry is a good alternative when Melee will be the problem.
Gameplay
The Rifleman is focused on long ranged (100 ft+) physical attacks, single-target damage and burst. Like the other Ballistic Skill classes, this build does Physical damage and therefore has to stack a lot of Penetration but on the upside, gains a powerful ranged auto attack.
Important Abilities

Deals a large amount of Physical damage and disarms your enemy for 4 seconds. This is a very powerful skill as the damage and CC are both quite strong, the only drawback is the slight cast time.

Deals a very large amount of Physical damage after a long cast of 3 seconds and with a ridiculous range starting at 150 feet that can be further enhanced with Invader or consumables. Most notably, this skill is also undefendable. A squad of 3+ Engineers all Sniping 1 target can kill almost anything in the game, even the most defensive shield tanks. Combine with the Hollow Points Tactic for maximum keks. Due to its obscene range, Snipe doesn’t have a lot of counterplay. Your target likely won’t be in range to detaunt or their tank won’t be able to challenge you, etc. Also due to this range, Sniper Engineer Squads tend to find.. Creative locations in RvR to set up and gank passing enemies.

Grants 25% additive armour penetration for the next 12 seconds. Powerful steroid and is off-GCD.
Phosphorous Shells is a channeled skill that deals heavy Corporeal damage to all enemies within a 10 foot radius of a ground-target location and additionally snares them by 20% so long as they remain in the effect. Like Napalm, this deals damage every 2 seconds rather than every 3, so it’s important to time your PS with your Napalm ticks where possible. The skill deals damage instantly and every 2 seconds thereafter, for a total of 4 ticks and is not castable while moving. Also like Napalm, this damage will not stack with the same ability from Engineers, and uses the same rules regarding Ability Level.
Skill Rotation / Priority
General Priority:
- Apply and Maintain your buffs Flak Jacket and Burn Salve
- Build and Maintain a Turret to keep up your Improvised Upgrades stacks.
- Use your Detaunt to survive as needed.
- Use Shock Grenade to remove Stagger from Allies.
- Use Self-Destruct to knock down enemies as needed.
- Use Redeploy to reposition your Turret as needed.
- Use Flashbang Grenade to interrupt important abilities such as Git to Da Choppa! And Bring it on!
- Use Concussion Grenade for the knockback effect when it is needed.
- Use Land Mine for the short AoE Stagger effect as needed.
- Use Strafing Run for the AoE knockback effect when needed.
- Use Spanner Swipe to snare an enemy as needed.
- Use Barbed Wire to root nearby enemies only if absolutely necessary.
AoE Priority:
- Command your turret to attack.
- Apply Acid Bomb
- Apply Fragmentation Grenade *We DoT in this order because Fragmentation Grenade has a slight flight time and the 2 DoTs will almost synchronize ticks on their own.
- Cast Friction Burn if you are close enough to do so safely. Try to delay 1 global after Fragmentation Grenade so they tick together.
- Cast Phosphorous Shells
- Fill with Blunderbuss Blast if you are close enough to do so safely.
- Fill with Single Target Rotation.
Rifle Single Target Rotation
- Build Gun Turret
- Apply Incendiary Rounds
- Apply Signal Flare
- Command your turret to Attack
- Use Armor-Piercing Rounds
- Use Gun Blast
- Use Focused Fire
- Use Hip Shot
- Cast Snipe if not within Gun Blast range.
Try to combo Casted skills with Autos and Instants:
Gun Blast > Auto Attack > Hip Shot
Snipe > Auto Attack > Focused Fire
Gun Blast > Auto Attack > Focused Fire > Auto Attack > Hip Shot
These are just examples, Hip Shot and FF are interchangeable.
Morales
Provides guaranteed avoidance against all ranged attacks for 7 seconds.
Provides a Healthy amount of AP regeneration for yourself for 10 seconds. Rarely needed but always an option.
One of the best morales in the game. It provides Immunity to most forms of CC for 10 seconds and also reduces cast times by 50%, up to doubling your Damage Output based on if the cast time of the spell is throttled by the GCD.
20% Damage Reduction for your entire group that stacks with everything else. It lasts for a healthy duration of 20 seconds which is quite nice.
Deals 1200 damage over 4 seconds to your target and enemies within 20 feet of them. Drop this right before a big Phosphorous Shells.
Deals a massive 1800 damage to a target instantly and also reduces their armour by a large amount that stacks with most other armour debuffs.
Rifleman Engi can use this with something like Focused Fire for example, but Cannon Smash synergizes much better with Rifleman.
Deals damage instantly and then every .5 seconds for 5 seconds, totalling 11 ticks. This is a fairly powerful morale if layered on other damage and works well on Engineer as they have so much downtime between each cast of Phosphorous Shells.
Slayer

Slayer is the Dwarf Melee DPS, utilizing One and Two-Handed Melee Weapons along with the desperate ingenuity of a Dwarf attempting to overcome great shame through adventure and battle. Slayers are well known for breaking the typical rules of combat in Age of Reckoning, allotting them ample win conditions against almost all enemies. However, they are careless with their defense and rely on heavy input from their allies to stay alive.
Rage
The Slayer’s mechanic is called Rage and is represented by this UI element.

And operates thusly:

At green, the Slayer has very low damage and after 5 seconds of combat they enter into Furious! (or Yellow as commonly referred) to gain a flat 25% damage bonus. After 15 seconds of combat, they enter Berserk! (commonly referred to as Red). In this state, the Slayer peaks at a 50% flat damage bonus but gains a large penalty to both Armour and Resistances of -50%, calculated after all buffs.
Generally the strategy is to stay in Red as much as feasibly possible to deal high amounts of damage but the extreme defense penalty can make some amounts of damage basically unhealable so Slayers will drop their rage back to the Green state in a few different ways.
Exhaustive Blows
Exhaustive Blows are powerful attacks or effects that require the Slayer to consume their rage and start again at Green. This provides the advantage of losing the defense penalty but also the disadvantage of losing the damage buff.

Notably, the Slayer’s detaunt also drops Rage, which is overall a good thing as you are losing the defense penalty while also gaining the damage reduction from detaunt.

Important Core Abilities


Root Break & Charge: The MDPS standards.

Numbing Strike is an incredibly powerful ability that reduces both Block & Parry by 50%. Used against a Dual-Wield DPS stacking Parry, this will likely drop them to 0%. Used against any Tanky, their major avoidance stats will be dropped to between 0 and 25% in most cases, causing them to take tremendously high amounts of damage, even from just Guard. This ability is one of the most effective tools in the game to kill Tanks or anything with high avoidance (Melee/Shield Doks are good examples).

As far as AP synergies go, Gudrun’s is one of the better ones that requires no investment. A 25% cost reduction to the entire group for 20 seconds is very strong.

For 10 seconds, everytime you hit someone directly, you provide a buff to yourself and your group that increases Weapon Skill which stacks up to 3 times, while also affecting yourself with a severe Initiative debuff. Offensively, this buff is quite potent as it grants one of the stronger stats to your entire group. However, the drawback is severe as the Initiative penalty reduces two of your strongest defensive stats in Chance to be Crit and Parry. It will reduce your Dodge too, of course, but consideration for that is much more rare as Slayers don’t typically run enough Dodge for a penalty to matter. Notably, this will not stack with other Weapon Skill buffs such as those provided by Swordmaster, Ironbreakers, or set effects from Vanquisher and Triumphant, thus it is rarely used once the relevant gear is acquired.

Provides a Toughness buff based on the number of enemies nearby. While a Toughness buff isn’t exactly exciting for a defensive cooldown on GCD, this can provide nearly 400 Toughness if it hits 9 targets, which can feel pretty good, especially against Single Target damage which typically scales better with Toughness. In cases where it hits only a few targets, it’s much lower priority for a defensive GCD for a Slayer who could instead drop Rage, Shatter Limbs, Enervating Blow, use Morale 1, etc, but it can be useful and it lasts a healthy 10 seconds.

This ability provides a permanent, passive effect while active. It causes you to deal extra damage on every direct hit aside from auto attacks and roughly half that damage to yourself. There is no ICD so it can be proc’ed as fast as you can directly hit, even on multiple targets. It should be used in almost every case, with the notable exception of some aspects of solo play, where every point of HP is more valuable than a bit of extra damage. This ability is also halved by Guard, which can be very good for tanks as they benefit from having blocked or parried recently, and this achieves that for them at almost no cost. It’s worth noting that Slayers do benefit from having low HP in some cases, turning this effect into a positive, such as the Tactic Fierce Might which grants increased Critical Damage as the Slayer’s HP drops.

An undefendable knockdown which exhausts Rage.

An Exhaustive Blow that reduces your target’s chance to critically hit by 100% for 10 seconds. This is an incredibly powerful defensive tool as almost every DPS is reliant on crits to deal effective kill damage. It also has a benefit against classes that benefit heavily from crits such as some Tanks or Healers but dropping rage & expending a 30s cooldown in those cases is much more niche.

An Exhaustive Blow that deals anywhere from medium to very-high AoE damage in a 25’ Radius.

Technically the Slayer’s hardest hitting direct attack, it requires a 2H Weapon and exhausts Rage.

An Exhaustive Blow that has no cooldown, useful for Power Through builds.

A spammable attack that applies a stacking Toughness debuff. The debuff doesn’t stack with other Toughness debuffs, but this is one of the highest damage attacks that Slayers can spam on a single target while not having a positional requirement.

Deals medium damage and slows your target by 40% for 5 seconds on a 10 second cooldown.

Deals heavy damage but requires you to hit the target in the back.

Deals a low amount of damage and applies a DoT that ticks every 1 second for 3 seconds, dealing medium damage. The point of this ability is that you can layer a bit of extra damage on top of your next GCD while the dot ticks. This isn’t done often on Slayer as they have so many powerful GCDs but it does have its uses, especially in PvE for maximum sustained damage on a single target.

Deals a medium amount of damage instantly and every 3 seconds for 9 seconds to targets in a wide cone in front of you, up to 40 feet away.

Deals a medium amount of damage to up to 3 enemies in a wide cone in front of you, up to 25 feet away.

A channeled attack that deals a heavy amount of damage to all targets in a wide cone in front of you, up to 25 feet away every second for up to 5 seconds, with a 30 second cooldown. This is an AoE Slayer’s primary frontloaded damage tool and is often synchronized with similar tools from teammates for maximum burst.
AoE Slayer
AoE Slayer uses dual wield weapons to supply an extraordinarily powerful Area of Effect kit. The build needs a bit of time to ramp up and a lot of help from supports to stay alive but if it is spoonfed ideal situations, it has obscenely high AoE damage and utility.
40/40 Build:

All the basics, Inevitable Doom and Accuracy for damage, Deep Wound and Shatter Limbs for Utility.
40/70 ID Spam:

Short Temper included so Inevitable Doom has no cooldown in Red.
40/70 no Short Temper:

Forgoes Short Temper for Rampage and No Escape. Fierce Might is flexible, all 4 of the Tactics that you could spend the point on are very good, depending on what you want to do.
40/70 Doom Seeker:

Includes Doom Seeker, a Morale 4 with extremely high damage and also knocks down all opponents hit. This can be useful in cases where getting to M4 is a reasonable consideration, such as competitive 24v24 fights, city sieges, 6v6, etc.
Tactics

Increases the target cap on Flurry to 24 while reducing its damage by 20%. Furthermore, Retribution deals extra damage to enemies within its range who directly attack you, dealing backlash damage to them which cannot crit, functioning similar to Riposte. Additionally, the cooldown of Inevitable Doom is reduced by 10 seconds, putting it at a 5s cooldown by default. Finally, it also reduces Auto Attack damage by 20%.
This tactic is intended to be “the” AoE tactic for Slayers, but it is also heavily used in small scale builds due to the power of Inevitable Doom. The loss of Flurry damage is negligible in this content and while the AA damage drawback is meaningful, AA damage is often not as meaningful as the huge damage potential of overlapping IDs and the extra damage from Retribution can be quite powerful as well.

You can no longer drop rage. Often referred to as “perma-red”, this is obviously a very dangerous playstyle as you are permanently playing with 50% reduced Armor & Resistances. You can technically still drop Rage with Flee, but that’s the only way. This isn’t often used in Dual Wield builds but it is a powerful option as you can spam your highest damage Exhaustive Strikes instead of your normal rotation.

Your critical damage increases by 10% for every 10% HP you are missing, capping at 90% critical damage at 0-9% HP (I haven’t actually tested the ranges, I gathered this information from Bachata, whom I trust enough to cite without testing, but the range could be 1-10%). At best value, this offers a staggering damage increase for a tactic slot and even at 50% HP, you can have roughly 40% increased Critical Damage, which is a huge amount provided that you crit enough. All that said, this Tactic is either a dead slot or on average, a pretty good damage Tactic. It can be ridiculous for solo builds or to get huge self healing out of Rune of Absorption.

While Red, your cooldowns are reduced by 5 seconds. The most powerful application of this is Inevitable Doom paired with Accuracy as it then has no cooldown, but Slayer has a slew of powerful skills on a 10 second cooldown which can then be used every 3 globals instead. Paired with Winds from a Swordmaster, these skills will have no cooldown and can be spammed.

+240 stats at the cost of 120 Toughness, which is typically not a very strong defensive stat in most cases, especially at low values, so this tactic is run in almost every build.

Simple +160 stat tactic. For Slayers, it’s almost interchangeable with Flanking as Flanking loses a lot of its potency for a Red Slayer, and BF doesn’t have positional requirements.

15% additive damage increase that all melee have access to for hitting sides or rear. Slayers already get 50% additive increase from Rage so a jump from 50 to 65 isn’t as large as it is for most other DPS, making it functionally very close to Brute Force in value.

Melee DPS tactic that deals backlash damage to opponents every time that you Parry their attacks. The damage cannot crit but does scale with Strength and is Physical, so scales with Weapon Skill as well. This is commonly used in solo or farming builds as it provides a lot of free damage against enemies who are attacking you.

Heavily reduces AP costs by a flat amount while Yellow, and further while Red. This tactic is one of the better AP tactics in the game and is necessary sometimes as Slayer has very high AP costs on some abilities such as Inevitable Doom.

Autoattack haste, 25% in Yellow and 50% in Red. One of the best Single Target DPS tactics in the game.

Incredibly broken Tactic. Very useful if you expect to get CC’d to the point where either you die or someone else does as a result.
Dwarf Racial Armour boost for yourself. Stacks with other forms of Armour. One of the best defensive Tactics in the game.
Recommended Loadouts
Accuracy
Short Temper
Stoutness
Wild Gambit or Push for More
This tactic setup is designed for Small Scale, allowing you spread ID’s around and potentially have strong Single Target with Push For More if anything gets low. Stoutness is usually taken as a reduced CC timer drastically reduces enemy potential to kill you as you stand back up in 2 seconds instead of 3 and can then react defensively.
Accuracy
Wild Gambit
Jagged Edge
Stoutness or Short Temper or Flanking or Brute Force
Setup designed for Large Scale, your build may or may not have Short Temper and it also may not be needed if you have a Swordmaster providing you with Winds. Spreading around a lot of IDs is very good in Large Scale as well, as long as the enemies aren’t going to die before it has time to ramp. With shorter Time to Kill, it’s usually Onslaught, 1 ID then Retribution channel.
Wild Gambit
Push for More
Stoutness
Brute Force or Flanking
A Small Scale variant designed around using less ID, which is a viable option as well.
With all of these Tactic Setups, Ancestral Inheritance is a good defensive option as needed, depending on the situation. Keep in mind that the value is halved while Red but even then, it’s a lot of free armour.
Gear
Leveling
Use the relevant War Crest sets while leveling.
For Slayer, I would strongly recommend playing 2H at the early levels as Dual Wield isn’t very powerful until you unlock some of the later abilities such as Inevitable Doom and Retribution. 2H builds are strong from a very early level with strong burst potential through large auto attacks and core tools like Deathblow. Exhaustive Strikes can also help you manage how squishy you are in combat rather than playing Red all the time and putting too much stress on your Supports.
Decimator > Obliterator > Devastator > Annihilator/Ruin.
Notably, the Defensive sets are a valid option for Slayer as well with things like extra Parry & Wounds. You can turn Parry into Offensive with Riposte and generally speaking, a Slayer doesn’t have to scale Offense very much to do its job, so long as it is in situations where you can spread around ID, which you can start doing at 29+.
You can do Altdorf Sewers for the Keeper Set, which has the powerful 25% AA haste.
PvE gear is quite good at this point and will save us on War Crests.
6 Sentinel/3 Beastlord (Cloak, Ring, Pocket). Great starting statline from Sentinel and some extra Weapon Skill from Beastlord. You can also run 4 Beastlord for the extra Strength bonus.
5 Bloodlord/2 Sentinel (Helm, Ring) Bloodlord has a lot of crit and pretty good stats overall. Cloak is open here for Beastlord or LoTD sets early.
5 Vanquisher/2 Sentinel (Helm, Ring) The powerful Vanq stat steal if you want to spend crests for it or take it from Gold Bags. Cloak open again.
5 Vale Walker/2 Sent (Helm, Ring) Very powerful offensive stats but a little on the squishier side. Cloak open again.
5 Vale Walker/3 Sent (Helm, Ring, Boots) More Wounds. Eats an extra ring slot if you use Beastlord or LoTD so 2pc Genesis can’t fit anymore, but works great if you have an Annulus or Exquisite Gunbad ring.
BiS
There are a few options for BiS, with 1 that I consider the standout best in most situations, which I will talk about first.
5 Sovereign, 4 Triumphant(Belt, Boots, Gloves, Ring): This setup nets you the Crit and Armour Penetration bonuses from Sov and the big stat steal from Triumphant, as well as double Strength and Wounds bonuses. Slayers scale incredibly well with stats as they have an innate 50% additive damage bonus from their Mechanic so this setup is the most commonly used for endgame Slayers.
5 Sovereign, 2 Sentinel (Helm and Ring), 2 Conqueror (Belt and Boots): This setup aims to maximize your crit chance. This setup is rather low on Wounds and can feel quite squishy and is also very reliant on your team stacking Armour Debuffs for you.
5 Sovereign/3 Triumphant (Belt, Boots, Ring)/2 Vale-Walker (Gloves, Ring). This is the newest set up we have on RoR. The VW Gloves have 2 crit. In all, this nets us an extra Wounds bonus (for a total of 3) and 1% higher crit in total vs 2 Annuli (and much cheaper) at the cost of the powerful Vicious Strikes proc from 5/4. The aim here is to maximize crit. This is most useful in a highly coordinated party that is stacking Armour and Toughness debuffs so you won’t get as much value from Vicious Strikes. The only open gear slot with this setup is 1 jewelry.
Slayers don’t usually go a crit route but it’s certainly an option, especially paired with Fierce Might, so the possibility is there. Slayer can also buff its own Weapon Skill when needed via Fierceness, but at the cost of Initiative.
Weapons
Use the “Titan’s” prefix weapons bought from War Crest Vendors while leveling. At 40, get Madcap weapons from Gunbad until Subjugator, Bloodlord and Fortress Weapons.

Again, I recommend playing 2H until you gain access to some Dual Wield specific skills later on, such as Inevitable Doom.


Some of the City Dungeon Influence weapons have niche use such as

Which provides a healthy amount of free AP from getting hit.
BiS

Slow for the meaty autos and the powerful Bloodlord proc.