Echo's PCVR Performance & Tracking Ultimate Guide
Echo's PCVR Performance & Tracking Ultimate Guide
(Updated November 2024)
Socials
Hey im Echo, I make Face Tracking Prefabs :)
➡️Booth.pm for Face Tracking! ⬅️


Table of Contents
Perfect Tracking Setup + Fixes
Best Possible PC & VR Hardware
PC & SteamVR Optimizations
Pics and Info Via @LiindyVR, @FlameSoulis, @shugy0, @xNanochip, @BlueberryWolfi and me!
General Optimization / Good Practice
- Keep your BIOS updated!
- Keep your Chipset drivers updated!
- Keep your GPU drivers updated!
- Run as few programs as possible!
- Close excessive browser tabs!
- Clear out bloat from your PC!
SteamVR Optimizations
- In SteamVR settings, turn on Advanced Settings in the bottom left
- Set your refresh rate to the Highest Possible. This lowers latency even if
you do not reach those frames.
- Turn off Motion Smoothing
- Set Render Resolution to Custom between 100-150%
- Turn off Advanced Supersample Filtering
- Set Overlay Render Quality to Low
- Click General and set SteamVR Home to Off

Windows Optimizations
- For NVIDIA GPUs, open the NVIDIA control panel and click Manage 3D Settings, click Program Settings, Select VRChat in the dropdown, and change these 4 settings

–

–

–

- Enable High Performance mode
(Don't do this if you are on Windows 11 and have a 9950X3D, 9900X3D, 7950X3D, or 7900X3D)
- Search “Power Plan” In Windows Search
- Click power options at the top

- Check “High Performance”
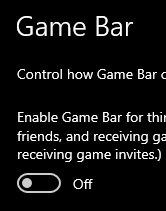
- Turn off Xbox game bar
(Unless u have a 9950X3D, 9900X3D, 7950X3D, or 7900X3D)
- Search “Game Bar Settings” in Windows Search
- Turn it off
VRChat Optimizations
- Set VRChat Priority to High!
- In Steam, right click VRChat and click Properties
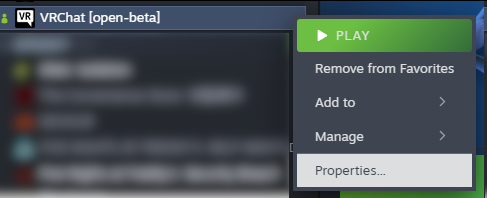
- In the launch options, put
--process-priority=2
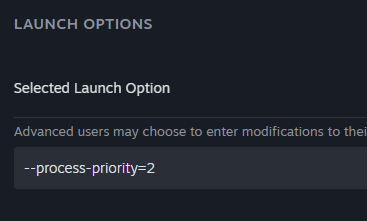
- This step is up to personal preference. You will get more frames, but it may increase jitter/latency. Do what’s best for you!
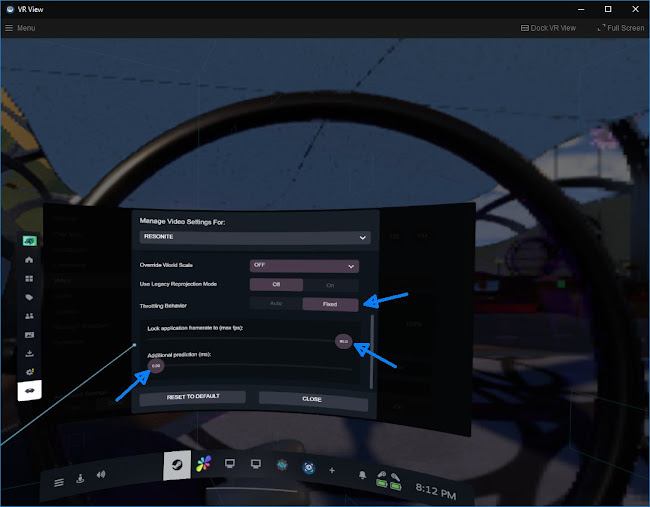
- Launch VRChat in VR mode, open the SteamVR Dashboard, click the VRChat Icon, and click Video Settings
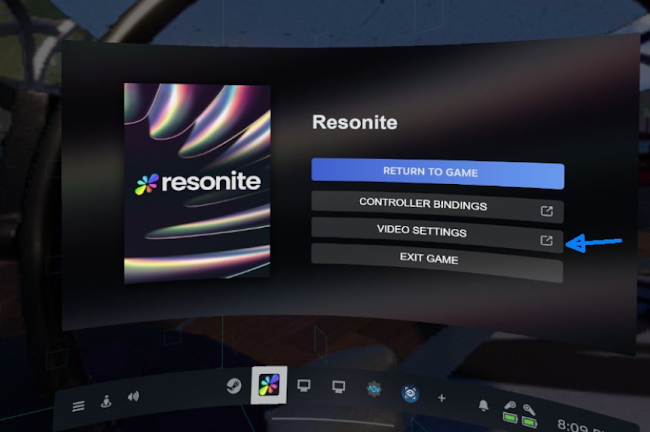
- Set Throttling Behavior to Fixed
- Lock application framerate to Max
- Set Additional Prediction to 0.00
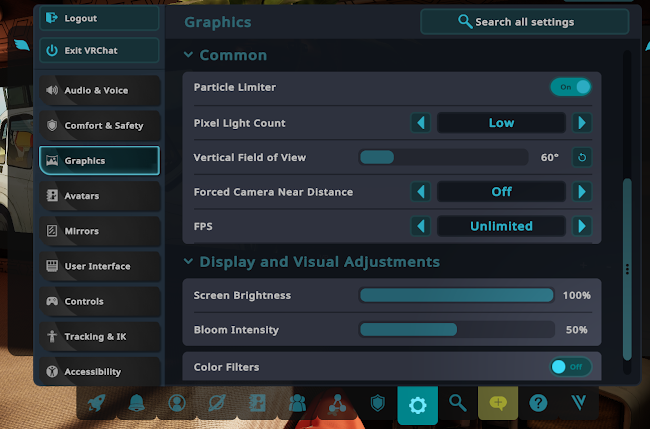
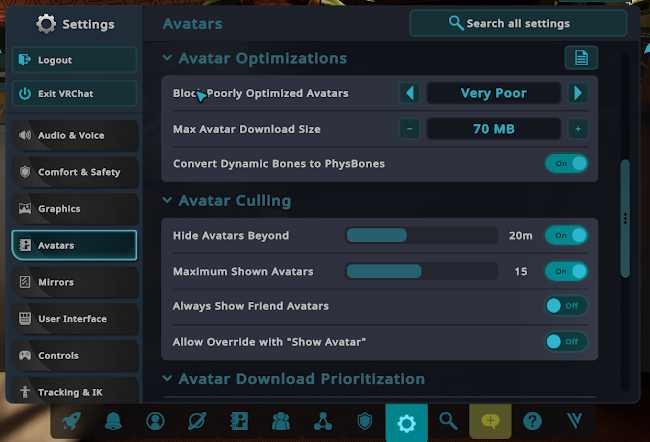
- Now that you have VRChat launched, copy these graphics settings.
This is for max FPS, I personally keep Mirror Resolution at full and LOD quality at medium.
Change the settings to your liking! These are NOT must-have settings.
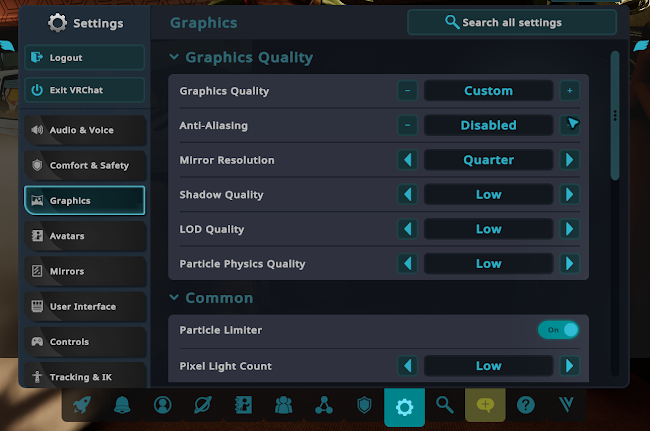
The FPS option won't show in VR.
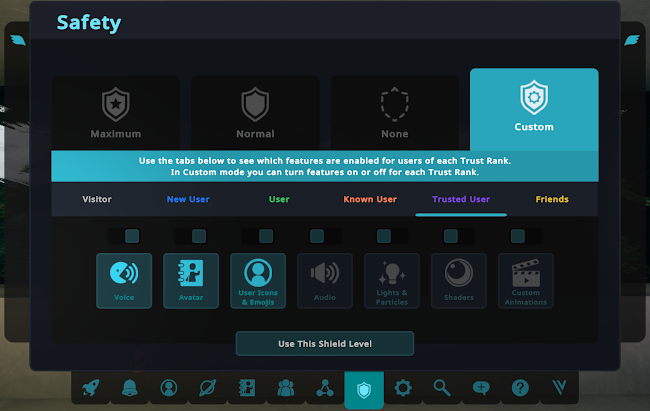
- Set your safety settings pretty high, and turn off nameplates
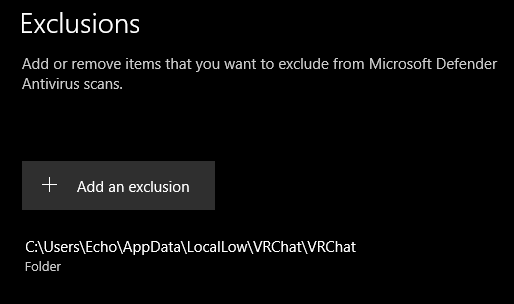
- This one is very optional and can be skipped, and is understandable if you don't feel like doing so. It just excludes the VRC Cache from windows antivirus and can help improve performance.
- In Windows, search “Virus”

- Click “Manage Settings”, then “”Add or remove exclusions”

- And add the VRChat Cache Folder.
%userprofile%\AppData\LocalLow\VRChat\VRChat
- This fixes loading into worlds slowly.
Search for command prompt > right click > run it as Administrator.
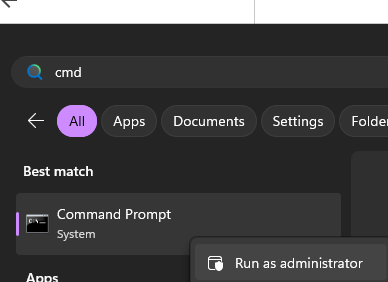
Enter:
netsh int tcp set global autotuninglevel=normal

- Optimize your avatar.
Please 🥺 Please 🥺 Please 🥺 Please 🥺 Please 🥺 Please 🥺 Please 🥺 Please 🥺 Please 🥺 Please 🥺 Please 🥺 Please 🥺 Please 🥺 Please 🥺 Please 🥺 Please 🥺 Please 🥺 Please 🥺 Please 🥺 Please 🥺 Please 🥺
Ur stealing my fps
It's not perfect, but at bare minimum use this: d4rkAvatarOptimizer
That's all for now, lmk what else I should add! :3
Perfect Tracking Setup + Fixes
Via me :)
The “Ideal” Lighthouse Setup
Birds Eye View
4 Base Stations 2 Base Stations
The Black Squares Are Base Stations
The Blue Triangles are their FOV (~160 degrees)
- Your room probably isn't a perfect square or rectangle.
You just want to get as close to the above images as possible, covering the most amount of floor space. Your base stations should be able to see each other.
- A 2 Base station setup NEEDS to be in opposite corners.
For 3 Base stations, put the last one in the corner you face most often.
- Your base stations NEED to be as high up to the ceiling as possible, and angled down.
The line and red circle indicate where your base station should intersect if you draw a straight line out of the center of the base station and intersect that line with the floor. This should help you figure out the correct angle of the base station downwards. This does not need to be exact, just an estimate.
The “Perfect” Lighthouse Setup
Birds Eye View
4 Base Stations
The Black Squares Are Base Stations
The Blue Triangles are their FOV (~160 degrees)
This setup is much less feasible, but this is the perfect lighthouse setup. Same info as above, just adjust angles and positions!
This is better than the “Ideal” setup because it takes better advantage of the base station's massive FOV of 160 degrees. More tracking per base station!
How to get PERFECT tracking
When you have a good base station setup, you can work on Perfect Tracking™
You must follow Every Step.
- Cover or move reflective surfaces. These surfaces will reflect base station light and severely degrade tracking quality.
- This can include Mirrors, TV Screens, ANY Glass, PC Tempered Glass, Aluminum Foil, etc
- Clean your base stations’ glossy surface with a microfiber cloth as well!
- Disable USB Selective Suspend
This stops windows from disabling or limiting your dongles when it thinks they are not in use.
- Search “Power Plan” In Windows Search again like earlier
- Click “Change advanced power settings”
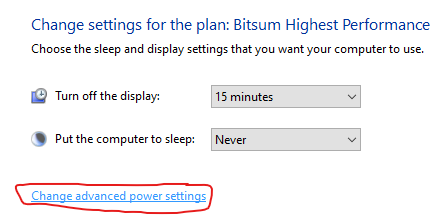
- Disable USB selective suspend under USB settings, and click Apply, then OK

- Keep your Tracker Dongles on their own USB header if possible, and distance your dongles from your PC.
- To keep my dongles on their own separate USB header, I used a PCIE USB card. The one linked is the one that worked best for me after trying a few. If you do get that card specifically, here's the drivers!
- I have 1 dongle for each of my Trackers. You will only have 1 big dongle if you bought Tundra Trackers. Plug each dongle into its own USB slot (Not a USB Hub), Preferably in the USB Card linked above.
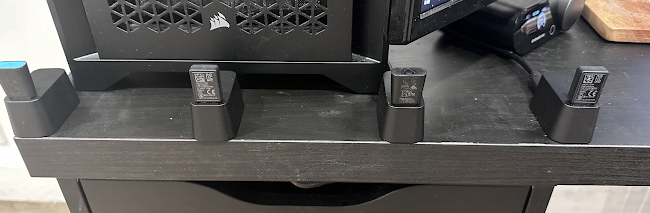
To do this, I used these cables (because it came in a pack of 3), each plugged into their own USB slot, connected to Vive Dongle Cradles (Pictured below)
NEW: Tundra dongle cradles, should work just as well!
Basically, have your dongles each on their own USB slot, away from your pc with a cable, pointed TOWARDS your playspace, spaced out as much as possible, try for 2+ inches from each other. The spacing is VERY IMPORTANT. Make sure they are lined up in a straight line, as this eliminates a lot of interference between them.
- Unpair and Repair Controllers and Trackers in SteamVR
The following makes sure each controller and tracker is connected to the correct dongle, and not mixed up! This causes issues often with controller tracking.
- Open SteamVR, and turn all trackers and controllers on
- Open the lighthouse console located at:
C:\Program Files (x86)\Steam\steamapps\common\SteamVR\tools\lighthouse\bin\win64

- Type “unpairall” into the console, and close the console
- Unplug all your tracker dongles and restart SteamVR
- When SteamVR is back open, pair both of your controllers
- Unplug your VR Headset’s USB connection and Restart SteamVR
(Steamvr will show a headset error, this is fine, just continue!)
- Plug ONE of your Tracker dongles in
(If you have a single big Tundra dongle, just plug it in here and pair as normal)
- Pair ONE tracker in SteamVR
- Unplug the dongle, and plug the next dongle in.
- Pair your next tracker.
- Unplug the second dongle, and plug the last dongle in
- Pair your last tracker
- Restart SteamVR, then plug your headset and all your dongles back in
Small thing to note, after doing this, SteamVR will sometimes show an update icon for the Valve Index. Don't update, it should go away after restarting. For some reason doing this update can mess with some stuff in my experience.
- After the above steps, redo your SteamVR room setup
- Turn off your routers’ 2.4ghz band if you can, as this interferes with the tracker dongles’ 2.4ghz band
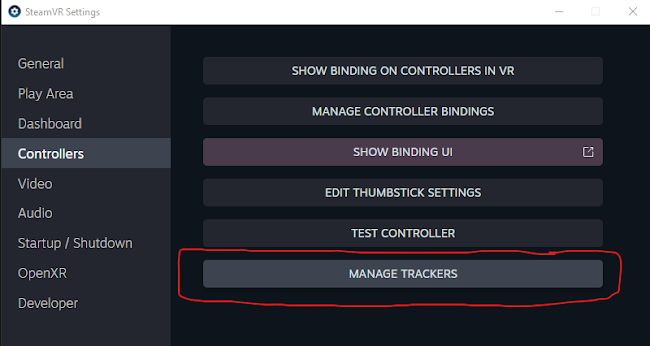
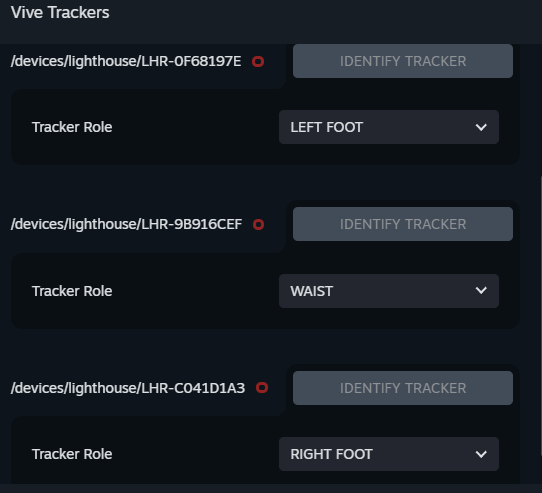
- Make sure all your trackers are properly assigned to the correct body part (Waist, Left foot, Right Foot)
SteamVR > Devices > Manage Trackers > Manage Trackers
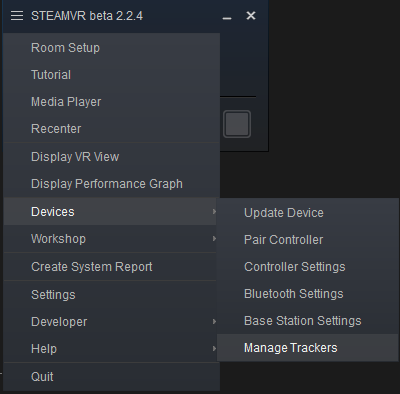
You can see which is which by turning one tracker on at a time.
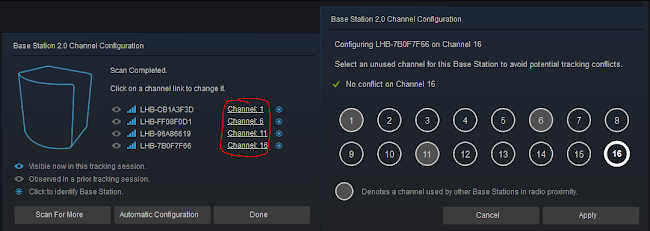
- Separate your base stations channels.
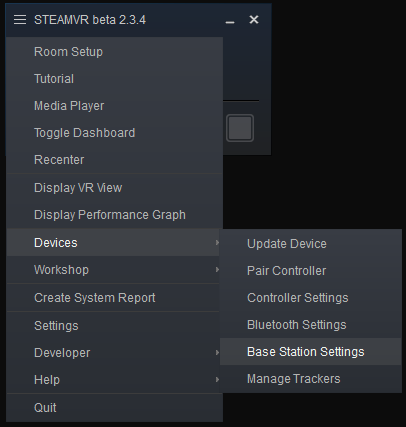
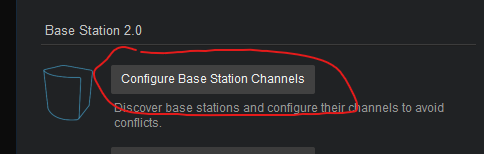
Click one of the channel numbers, and separate them as much as possible. Below I have an example for 4 base stations.
- Some really random things I did that for some reason completely fixed my tracking issues in the past, you can try these if ur still having issues:
- Changing which USB slot my Headset is on
- Stopping certain programs from auto launching with VRChat/SteamVR
- Re-pairing my trackers and redoing my SteamVR room setup
Spider dongle
Note: a new dongle has popped up, known in the community as the “Spider Dongle”. You can get it from > here <. It is the same one that was being sold via aliexpress, just from the original seller at a cheaper price.
It can connect 7 trackers, and is an all in 1 dongle!
It takes up 1 USB port for data, and another for power.
Connecting controllers to this seems to cause minor drifting issues with some users! Keep them connected to your headset.
I am NOT sponsored and do NOT endorse them
This dongle ignores FCC and other regulations and blasts its signal beyond what is normally allowed.
HOWEVER… this means that tracking interference is essentially eliminated, and you can experience much better tracking for FBT trackers!
This dongle will negatively affect 2.4GHZ wifi!
But if you’re ok with that, you can get better tracking with this.
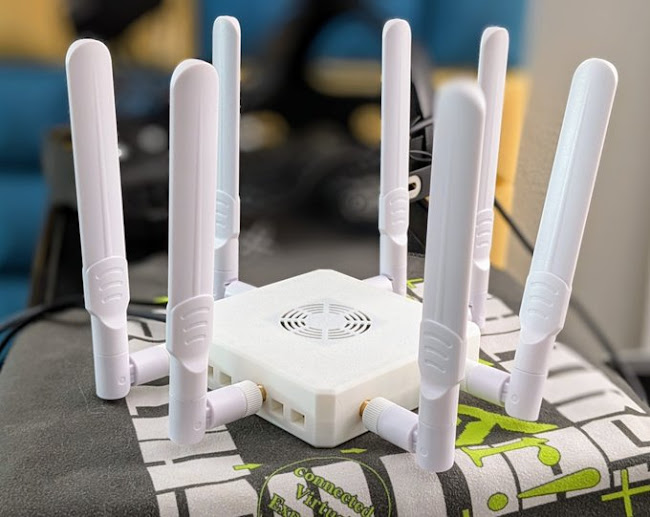
The ✨Spider Dongle✨
Image via Tupper
Best Possible PC & VR Hardware
Via @dtupper’s “The Current Best PC for VRChat”
Obviously this is a bit much for most people, It's just here for completionist sake! Any PC hardware will work with the general tracking and performance optimizations above!
THESE ARE JUST THE BEST POSSIBLE SPECS FOR VRCHAT.
PLEASE SCROLL UP FOR GENERAL OPTIMIZATIONS FOR ANY BUILD, INCLUDING YOURS!
PC Hardware
PC | Best Spec | Notes |
CPU | From Tupper: 🥇 Top Tier: 9950X3D/7950X3D
Too long to explain here, but the 9800X3D/7800X3D are just better than them. | THESE PROCESSORS WILL GIVE YOU THE MOST BENEFIT OUT OF ANYTHING! 7950X3D & 9950X3D ONLY:
Here is my massive config file that I use. And every other program to the second CCD (16-31) 7900X3D & 9900X3D ONLY:
9800X3D, 7800X3D, 5800X3D & 5700X3D
|
GPU | 3090, 4090, 5090, & 7900XTX | Big VRAM = Good Literally just get a card with high VRAM |
RAM | 32GB+ DDR5 6000 CL30 | Fast Ram + Low Timings = Good |
SSD | Sabrent or WD_BLACK | Install VRC and Windows on this drive. |
VR Hardware
VR | Recommended (in no order) |
Headset | Bigscreen Beyond Quest 3 Index Honorable mention: Quest pro (face tracking :3) |
Base Stations | 2x - 4x 2.0 Lighthouses |
Controllers | Valve Index Controllers |
Body Trackers | 3x Tundra Trackers or 3x Vive 3.0 Tracker |
Socials
Hey im Echo, I make Face Tracking Prefabs :)
➡️Booth.pm for Face Tracking! ⬅️