VPN - SETUP AND CONNECT USING THE CISCO ANYCONNECT FOR WINDOWS
- From a web browser (preferably Google Chrome) type in https://access.kentlaw.edu
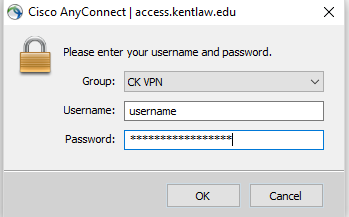
- You will see a username and password screen,
- Group: CK VPN
- Username: your myIIT user ID (without @kentlaw.iit.edu)
- Password: your myIIT ID password
- Once your credentials are entered the anyyconnect-win-4.7.04056-core-vpn-webdeploy-k9.exe

- Double click on this file to run the application, Click Run

- Click Next

- Agree to the agreement, click Next

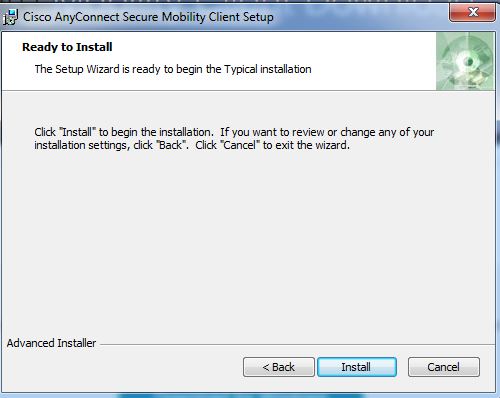
- Click Install
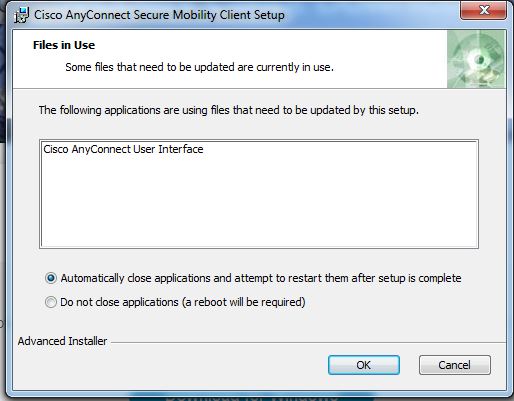
- Click the OK (Make sure “Automatically close application and attempt to restart them after setup is complete” is selected)
- Click Finish

- Your device is now ready to connect to VPN
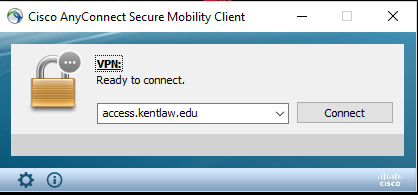
- Launch the Cisco AnyConnect Secure Mobility Client.
- If you do not see this in the list of available programs, navigate to Programs -> Cisco -> Cisco AnyConnect Secure Mobility Client
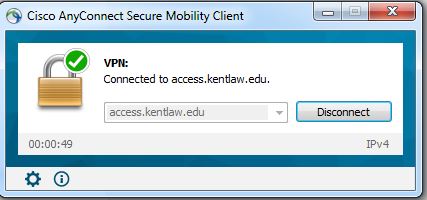
- When prompted for a VPN, enter access.kentlaw.edu and then click Connect.
- Enter the following information and then click OK:
- Group: CK VPN
- Username: your myIIT user ID (without @kentlaw.iit.edu)
- Password: your myIIT ID password
Disconnect from the IIT VPN
- In the notification area of your taskbar, click the Cisco AnyConnect icon if it is displayed. If it is not, navigate to your list of programs and click Cisco AnyConnect Secure Mobility Client. Click Disconnect.